
Category: Learn About Tea
Organic Certification Standards a Guide for AU Brands

You're probably here because you've seen an organic logo on a tea tin, kombucha label, or wholesale product sheet and thought, “We should understand this properly before we make any claims ourselves.”
That's a smart instinct.
For Australian business owners, organic certification can look simple from the outside and surprisingly technical once you get into the details. That's especially true if you're buying imported ingredients like Japanese matcha, blending multiple ingredients into a finished product, or brewing something processed like kombucha. At that point, the question isn't just “Is this ingredient organic?” It's “Can we prove the whole chain is compliant?”
That distinction matters. A lot.
Why Organic Certification Is More Than Just a Logo
A café owner starts stocking premium matcha. A small beverage brand begins trialling a kombucha line. A retailer compares two tea suppliers and notices one carries a recognised organic certification mark while the other just says “organic” on the pack. The product may look similar on the shelf, but the business risk behind those labels is very different.
That's where many owners feel torn. They want the trust that comes with certification, but they also worry it means paperwork, audits, and rules that seem built for farms rather than finished drinks.
In practice, organic certification is less about bureaucracy and more about credibility you can demonstrate.
Health-conscious customers don't just want attractive packaging or wellness language. They want to know how a product was grown, handled, packed, and transported. Certification gives you a structured way to answer those questions. Instead of asking buyers to accept your claims, you're showing that an independent system has checked them.
Why the logo carries weight
The organic logo matters because it acts like a shortcut for trust. It tells the customer that the product isn't relying on vague words like “clean”, “natural”, or “pure”. It's tied to documented standards, supplier controls, and auditing.
That's particularly useful in categories like tea and kombucha, where buyers often care about origin, processing, and ingredient integrity. Someone choosing ceremonial matcha or a low-sugar fermented drink usually reads labels closely. They want more than a nice story.
Organic certification works best when you treat it as part of your operations, not just your marketing.
For Australian brands, that can become a real commercial advantage. It helps with wholesale conversations, supports retailer confidence, and makes your internal systems sharper. Teams usually become more organised because certification forces clarity around sourcing, storage, and records.
Why it feels harder than it first appears
Organic certification sounds simple until your business has to manage real-world details.
For example:
- Imported ingredients: Your tea may come from Japan, but your finished pack is sold in Australia.
- Shared facilities: You may handle both certified and non-certified products in the same site.
- Processed products: A kombucha recipe includes tea, sugar, cultures, flavourings, cleaning controls, and batch records.
- Customer expectations: Buyers often assume “organic” is a single government-run label, when it isn't.
That's why educational content matters. If you want a useful starting point on certified tea and what buyers often look for, Pep Tea's guide to organic green tea online is a practical example of how certification connects to product quality, not just branding.
What Organic Certification Really Guarantees
Many people assume organic certification means someone tests the finished product and confirms it's “clean”. That's not really how organic certification standards work.
A better way to think about it is a verified cookbook. The certifier doesn't only inspect the final cake sitting on the bench. They check the recipe, the ingredients, the kitchen procedures, the storage, and whether the baker kept the organic flour separate from everything else. The guarantee is about the system being followed from start to finish.
It's a process guarantee
The most important idea to understand is this: certification verifies process integrity.
The operational implication of organic certification is that a brand must maintain a documented organic system, approved inputs, and traceability across farming, processing, and handling to satisfy audits. The system is designed to verify process control, including field history, input approval, segregation, and records, so any break in the chain of custody can invalidate status, as explained in this overview of organic certification process control.
That's why a finished product can lose organic status even if it still looks identical to the customer. If a non-approved cleaning input was used, if records don't match, or if organic and non-organic stock were mixed without proper controls, the issue is procedural and still serious.
What that looks like in plain language
Organic certification standards generally ask a business to prove that it can control the full path of the product.
That usually means:
- Knowing your inputs: Every ingredient, processing aid, and relevant material needs to be assessed for compliance.
- Maintaining separation: Organic goods can't just sit anywhere and hope for the best. They need clear segregation in receiving, storage, production, and packing.
- Keeping records: Purchase records, batch sheets, labels, cleaning logs, and dispatch documents all help prove what happened.
- Protecting traceability: You should be able to follow a product backward to suppliers and forward to customers.
If you're also reviewing packaging choices alongside certification, it can help to look at broader operational resources like these sustainable food packaging options UK, especially if your team is trying to align environmental decisions across product, pack, and presentation.
A certified organic product isn't simply “made from good ingredients”. It comes from a controlled, documented system.
That's why the difference between “organic” and “natural” is so important. “Natural” can mean almost anything in consumer marketing. Certified organic means a certifier can inspect the process behind the claim.
For a consumer-friendly explanation of what this means in tea, Pep Tea's article on what organic green tea is gives a useful product-level example.
The Core Requirements for Australian Businesses
In Australia, organic certification is governed by a private standards-and-audit system. A 2023 Senate inquiry noted that the sector operates through multiple approved certifiers, 11 at the time, with standards such as the National Standard for Organic and Bio-Dynamic Produce forming the core compliance framework, especially for exports, as noted in this summary of the Australian organic certification framework.
That surprises a lot of business owners. They expect a single government logo and a single public agency. Instead, you're usually working with a private certifier that audits your operation against recognised standards.
Approved inputs
The first pillar is simple in theory and detailed in practice. You need to know what comes into your business and whether it's permitted.
For a tea or kombucha operation, that may include ingredients such as tea, matcha, sugar, fruit components, flavourings, and processing aids. It can also extend to cleaning and sanitation products, depending on how they're used in the operation.
Questions certifiers usually want answered include:
- What is it? Ingredient, aid, additive, or other material.
- Who supplied it? Supplier identity and supporting documentation.
- Is it approved? Evidence that it fits your certifier's requirements.
- Where is it used? Receiving, blending, brewing, bottling, or packing.
A common mistake is assuming a supplier's marketing statement is enough. It usually isn't. You need documentation that fits the certifier's expectations.
Organic management practices
This pillar is about how your site runs.
A business may have compliant ingredients and still fail if the day-to-day handling isn't controlled. Organic management practices usually focus on physical separation, prevention of contamination, handling procedures, and clear staff routines.
A processor often needs workable rules such as:
- Segregated storage: Organic stock is clearly identified and separated.
- Controlled production runs: Staff know when and how organic products are made.
- Cleaning verification: The team can show how equipment is cleaned before an organic run.
- Label control: Packaging and finished labels are checked so the wrong claim isn't applied.
Audits and recordkeeping
Organic certification standards become very real at this point. If the first two pillars are what you do, this third one is how you prove it.
Many owners worry about “paperwork”, but it helps to think of records as your protection. Good records let you show that your claim matches your operation.
A useful basic set includes:
| Record type | Why it matters |
|---|---|
| Supplier certificates | Shows the origin and status of ingredients |
| Invoices and goods received | Connects what you bought to what you used |
| Batch sheets | Links ingredients to finished product |
| Cleaning logs | Supports process control before production |
| Label approvals | Helps prevent incorrect organic claims |
| Dispatch records | Maintains traceability to customers |
If an auditor can't follow your product from supplier to finished batch, your organic claim becomes hard to defend.
The practical takeaway is reassuring. You don't need a perfect enterprise system from day one. You do need a clear, repeatable one.
Navigating Global Organic Certification Schemes
Australian tea and beverage businesses rarely operate in a purely local bubble. You might buy matcha from Japan, import packaged ingredients from another region, pack in Australia, and sell to cafés, retailers, or export customers. That's why it helps to recognise the major certification schemes your suppliers may hold.
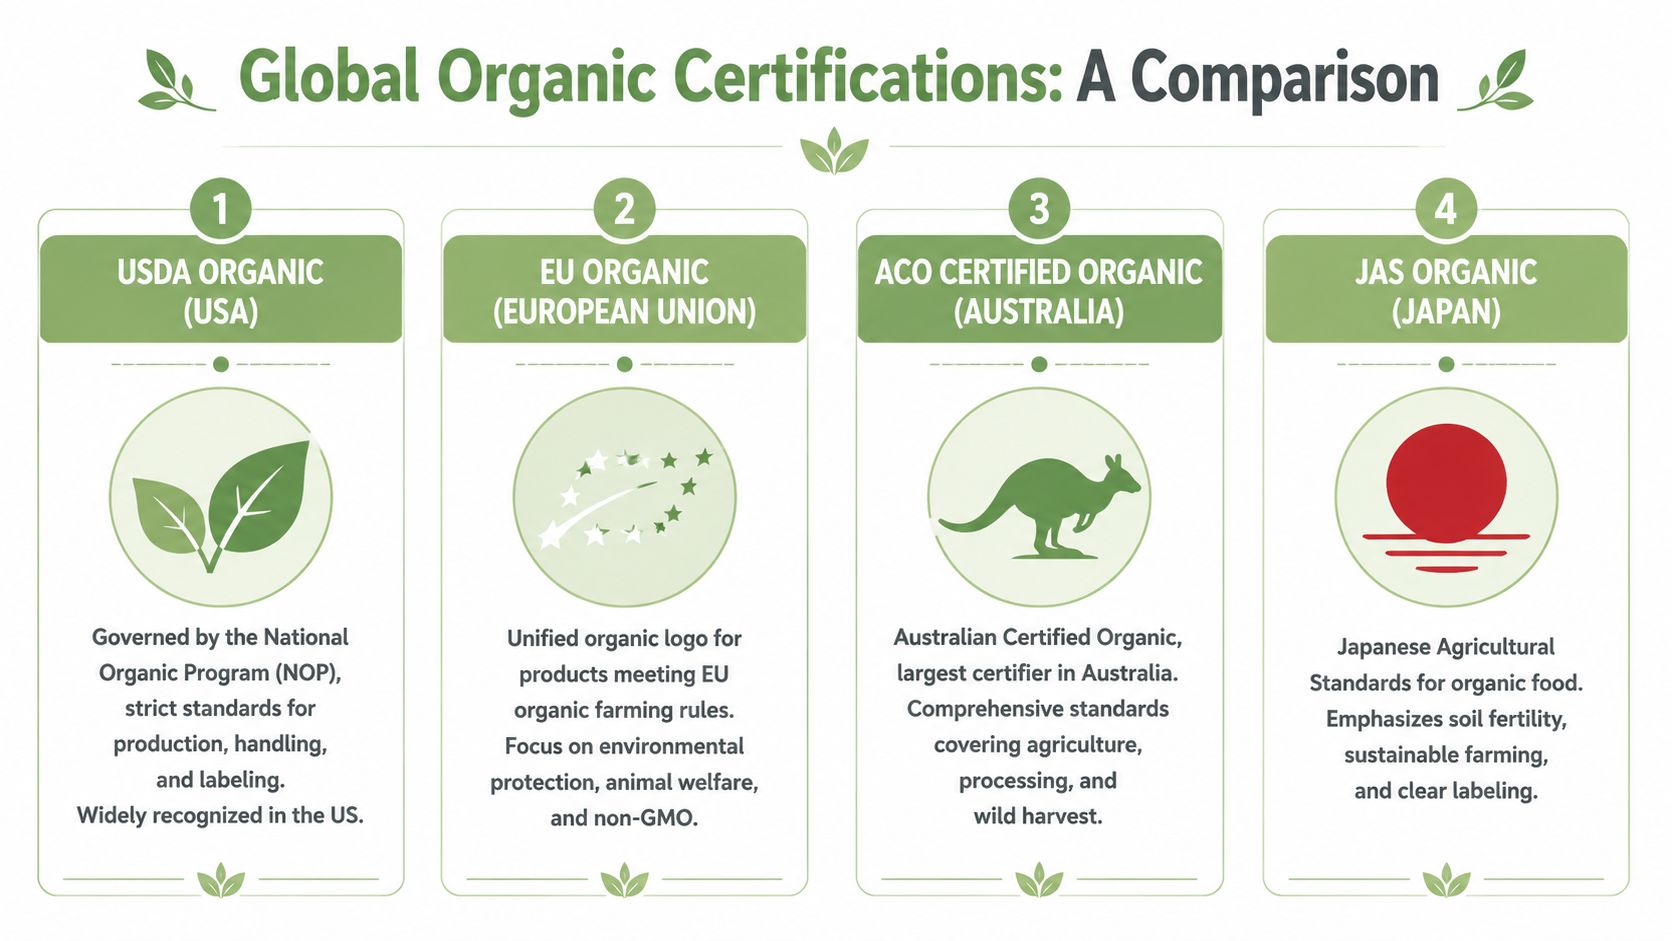
Four schemes you'll see often
Here's a plain-English comparison of the logos and systems many Australian buyers encounter.
| Scheme | Region | What it usually signals |
|---|---|---|
| USDA Organic | United States | Organic compliance for production, handling, and labelling under the US system |
| EU Organic | European Union | A unified EU organic framework with its own rules for eligible products |
| ACO Certified Organic | Australia | Certification through an Australian private certifier operating within the local framework |
| JAS Organic | Japan | Organic certification under Japanese Agricultural Standards |
The important point isn't memorising every rule difference. It's knowing that each scheme belongs to a regulatory context, and your Australian business can't assume one certificate automatically answers every local compliance question.
Why imported products create confusion
Readers often get stuck at this point.
A supplier may send you a perfectly legitimate overseas organic certificate. That's helpful, but it doesn't automatically settle how your certifier will view the ingredient inside your own certified system. You still need to confirm whether the documentation, chain of custody, and product description line up with your certifier's requirements.
That matters even more for processed ingredients. Whole leaf tea is one thing. A flavoured blend, extract, premix, or finished beverage has more moving parts.
Imported organic ingredients should be treated as verified inputs to assess, not assumptions to accept.
Where equivalency comes in
Business owners often hear about “equivalency” and assume it means easy acceptance across borders. In practice, equivalency is best understood as a pathway that may reduce duplication, not a licence to stop checking.
If you source globally or sell internationally, your team still needs to ask practical questions:
- Which scheme certified the ingredient?
- Does the certificate match the exact product?
- Who held certification during packing and export?
- Will your Australian certifier accept that evidence as sufficient?
- Will your destination market require anything additional?
For teams building a wider compliance framework beyond organic alone, this guide to a universal key for international operations can be a useful companion resource because it highlights how cross-border compliance often depends on documentation discipline, not assumptions.
A sensible sourcing mindset
The safest approach is to compare schemes with curiosity, not suspicion. Overseas certification isn't a red flag. It just needs interpretation in the context of your Australian operation.
For businesses importing Japanese matcha, that means reviewing the supplier certificate, product scope, packing details, and traceability documents before the ingredient enters your certified production stream. The same mindset applies if you're sourcing botanicals, flavourings, or bulk tea from overseas.
Your Roadmap to Becoming Certified Organic
The first certification application usually feels bigger in your head than it is on paper. Once you break it into stages, it becomes a project you can manage.
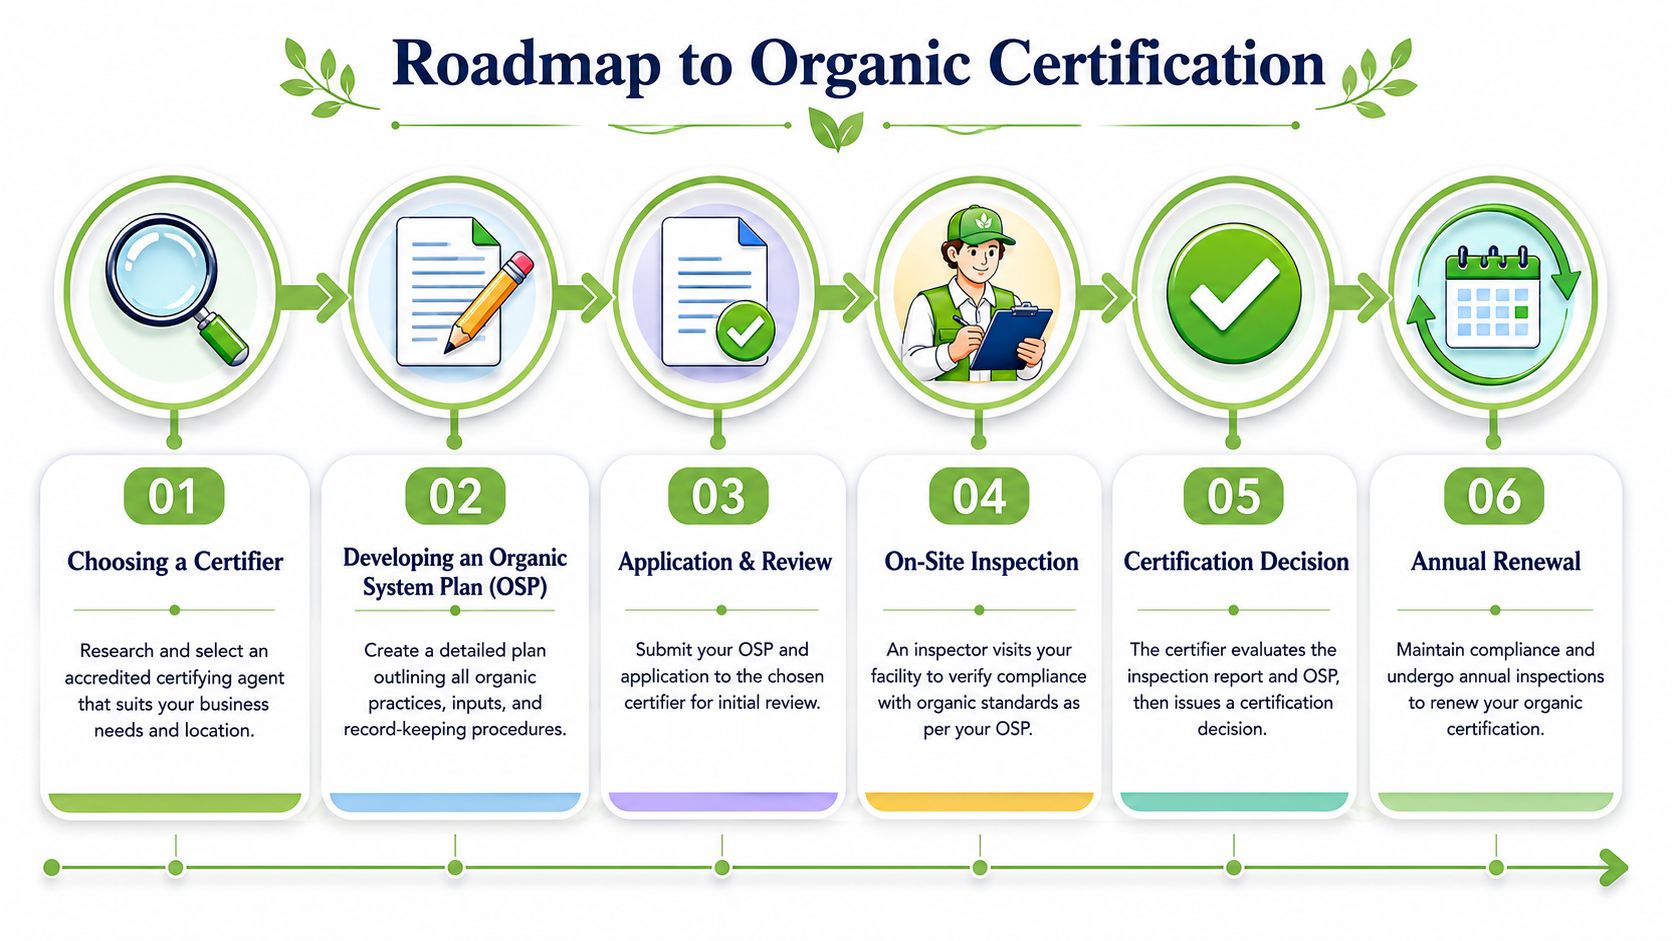
Step 1 and Step 2
Start by choosing a certifier whose scope matches your business. A farm, a tea importer, and a kombucha manufacturer won't all ask the same operational questions, so industry fit matters.
Then build your Organic System Plan or equivalent documented system. In it, you explain how ingredients are approved, how organic stock is handled, how records are maintained, and how labels are controlled.
Good plans are practical. They describe what your team does.
Step 3 and Step 4
Next comes application review and the on-site audit.
The certifier reviews your documents, then an inspector visits to compare paperwork with reality. They want to see that your documented system matches your premises, equipment flow, storage, production steps, and records.
Before the audit, it helps to run your own mini-check:
- Walk the site: Can staff clearly identify organic stock and materials?
- Trace one batch: Can you follow it from supplier invoice to finished label?
- Review inputs: Are all ingredients and relevant materials approved and current?
- Check your labels: Do your claims match what certification allows?
- Train the team: Can staff explain the process consistently?
A visual summary often makes the path feel more manageable:
Step 5 and Step 6
After inspection, the certifier makes a certification decision. If corrective actions are required, you address them. If approved, certification doesn't end the process. It becomes part of your annual operating rhythm through renewals, inspections, updates, and ongoing compliance.
Common pitfalls are usually ordinary operational mistakes, not dramatic failures:
- Unapproved substitutions: Someone buys a replacement ingredient or cleaner without checking.
- Weak traceability: Records exist, but they don't connect cleanly.
- Shared storage confusion: Organic and non-organic stock are present without clear separation.
- Label drift: Marketing wording changes before compliance review catches it.
The easiest time to fix an organic compliance issue is before the product is made, labelled, and sold.
One note on timing and cost: these vary by certifier, business type, product scope, and complexity. It's better to ask directly for a specific quote and document checklist than rely on broad online guesses.
Organic Standards for Tea and Kombucha Producers
Tea and kombucha businesses face a version of organic certification that's more layered than many farm-based examples suggest. You're often dealing with imported ingredients, processing steps, multi-ingredient recipes, sanitation controls, and final labels that need to hold up under audit.
A major blind spot in Australian content is how organic rules apply to imported and processed products, not just farms. That matters because the Australian organic sector was estimated at A$2.6 billion in 2021, and import-heavy supply chains make certification, traceability, and equivalency especially relevant for products like tea and fermented beverages, as noted in this discussion of organic requirements for imported and processed products.
For tea importers and packers
If you source Japanese matcha or other imported teas, the main challenge is proving that the ingredient's organic status survives the trip from origin to your finished Australian product.
That usually means checking:
- Supplier certification documents
- Product-level identification
- Packing and export traceability
- Handling records once stock arrives in Australia
The key question isn't just whether the tea garden was organic. It's whether the chain of custody is clear enough for your certifier to accept.
For kombucha brewers
Kombucha brings another layer because it's a processed product. You're managing tea, sugar, cultures, flavour inputs, brewing, cleaning, filling, and labelling.
That creates three practical pressure points:
Input compliance
Your tea base, sugar, flavourings, and any other relevant ingredients need to fit the standard.Process control
Organic handling needs to sit neatly beside your existing food safety systems. If you already work with HACCP discipline, that mindset helps because both systems value consistency, records, and controlled procedures.Labelling accuracy
Multi-ingredient products need careful claim review. It's not enough for one input to be organic if the final label suggests more than the certified composition allows.
What this looks like in a real Australian product category
For a business selling both imported organic matcha and locally brewed kombucha, the operational challenge is to connect two very different supply stories into one compliant system. One ingredient may begin overseas under another scheme. The finished fermented product may be produced domestically with its own controls and records.
That's why tea and kombucha brands need practical product pages and education, not just broad farm-level explanations. Pep Tea's organic kombucha range is one example of a product category where buyers often want to understand both certification and processing, especially when low sugar, live cultures, and ingredient integrity all matter at once.
Your Business Checklist and Frequently Asked Questions
If you're preparing for certification, the fastest way to reduce stress is to get organised before you contact a certifier. You don't need every answer on day one, but you do need a workable foundation.
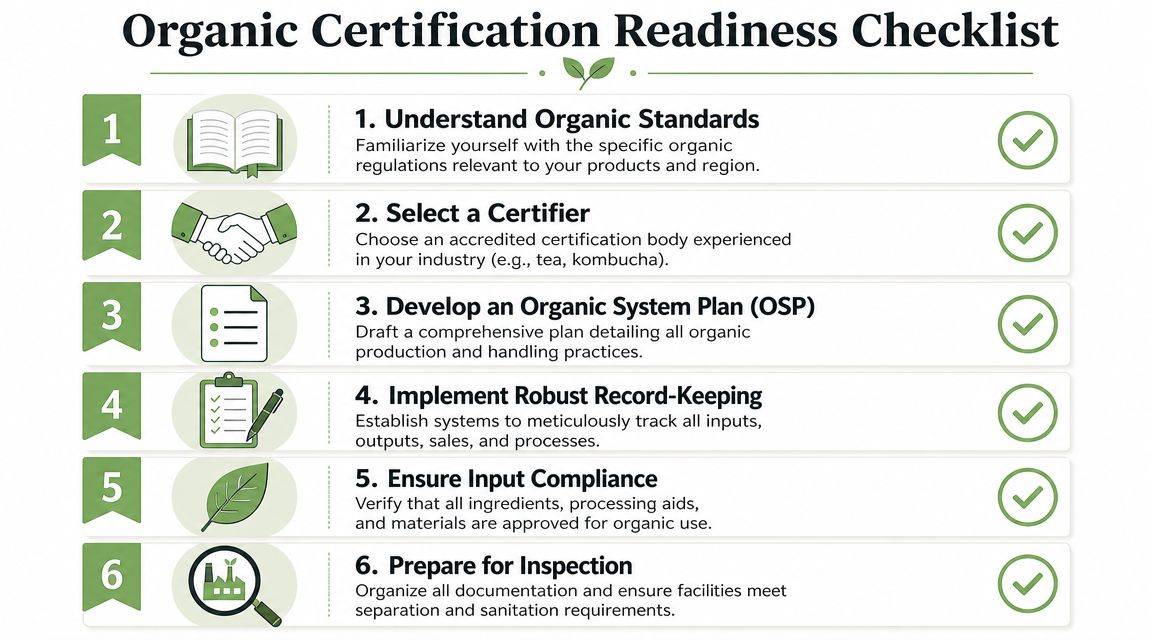
A practical readiness checklist
- Map your products: List each product, ingredient, and supplier clearly.
- Identify your risk points: Note where mixing, relabelling, repacking, or substitutions could happen.
- Gather supplier documents: Keep certificates, specifications, and invoices in one system.
- Write your operating rules: Storage, cleaning, production flow, and label approval should be documented.
- Train staff early: The team handling receiving, production, and dispatch should know the basics.
- Check imported ingredients carefully: Don't assume overseas certification will answer every local question.
Frequently asked questions
How can a café owner verify that a supplier's organic claim is legitimate
Ask for current certification details and product documentation that matches what you're buying. The key is consistency between the supplier, the product, and the claim on the pack or menu material.
What's the difference between “100% organic”, “organic”, and “made with organic ingredients”
These phrases are governed by certification and labelling rules, not just marketing preference. The exact threshold and permitted wording depend on the applicable standard and certifier. If you're selling or repacking a product, don't guess. Confirm the permitted claim before printing menus or labels.
Do imported ingredients need extra checking
Yes. Imported ingredients often create the biggest confusion because certification, traceability, and equivalency need to be reviewed together. The overseas certificate is part of the answer, not always the whole answer.
Is certification only relevant for farmers
No. It also matters for processors, packers, importers, wholesalers, retailers, and hospitality businesses that want confidence in the claims attached to what they buy or sell.
The businesses that handle certification well usually make it part of procurement and operations, not a last-minute label exercise.
If you'd like a practical product-level view of certified organic tea and kombucha in Australia, explore Pep Tea for organic matcha, Australian-brewed kombucha, and educational guides that make the standards easier to understand before you buy, stock, or develop your own range.
Organic Green Tea Face Wash: Your Complete 2026 Guide
You're probably here because you've stood in front of a bathroom shelf, or scrolled through a page of cleansers, wondering why so many products promise to “purify”, “balance”, and “calm” your skin, yet still leave it feeling tight or fussy.
That's exactly why organic green tea face wash has become such a talking point. It sounds clean, plant-based, and gentle. But there's a big difference between a cleanser that uses green tea as a functional ingredient and one that only borrows the idea for the label.
As tea people, we love when wellness ingredients make sense beyond trend cycles. Green tea is one of those rare examples. It has a long cultural history, clear cosmetic appeal, and substantive skincare research behind it. The skill lies in learning how to tell the good formulas from the pretty marketing.
Why Green Tea Is Taking Over Your Skincare Shelf
You buy a face wash because your skin feels oily by dinner, a bit tight after cleansing, or touchy whenever the weather swings. Then you notice how many bottles now spotlight green tea. The appeal is easy to understand. It suggests a cleanser that can do the practical job of washing away the day without leaving your skin feeling over-scrubbed or unsettled.
That matters because plenty of cleansers are good at removal and poor at restraint. They clear away sunscreen, sweat, and excess oil, then also take too much from the skin's surface. Green tea entered this category as part of a gentler philosophy. Clean the skin, yes, but support it at the same time.
Why this ingredient feels different
Green tea already carries meaning before it ever reaches a skincare label. People associate it with plant compounds, daily rituals, and a calmer kind of wellness. In skincare, that existing trust gives it a head start.
There is also a practical reason it keeps showing up in cleansers. A face wash is on your skin for a short time, so every ingredient has to earn its place. Green tea suits formulas designed for regular use because shoppers often want the same few things from a cleanser:
- Daily cleansing that feels comfortable, not harsh
- Support for skin that looks shiny or congested without aggressive stripping
- A calmer cleanse for skin that easily looks red or feels fussy
- A plant-based ingredient story that still sounds credible
For Australian routines, that balance makes sense. Heat, sun, wind, indoor cooling, and active days can leave skin wanting a proper cleanse and a bit more kindness at the same time.
One reason green tea stands out is that it sits neatly between tradition and formulation logic. It does not only sound wholesome. It also fits the modern expectation that an ingredient should have a clear role in the product, not just a pretty name on the front.
Ancient ingredient, modern label reading
That shift in consumer habits is a big part of why green tea is taking over skincare shelves. Shoppers are reading beyond the packaging now. They want to know whether "organic green tea face wash" means the formula contains a meaningful green tea ingredient, or whether the brand is borrowing the language of tea to make a standard cleanser sound more natural.
A good comparison is cooking. If a soup is labelled pumpkin, you expect pumpkin to be one of the main ingredients, not a dusting of powder added at the end. Skincare works the same way. If green tea is meant to be a working ingredient, the ingredient list should support that claim.
Why shoppers still get confused
The confusion starts with words that sound reassuring. "Organic", "botanical", and "green tea infused" can all appear on the front of the bottle, even if the formula is still built around harsh surfactants, strong fragrance, or only a trace amount of tea extract.
That is why the key skill is not spotting green tea on the label. It is learning how to read the INCI list and judge its role in the formula. Is green tea high enough on the list to matter? Is it listed as leaf extract, powder, or Matcha? Is the cleanser built to support sensitive skin, or does the tea sit inside a formula that is likely to overwhelm it?
Those are the questions that separate a thoughtful organic green tea face wash from marketing fluff.
The Science of Green Tea Skin Benefits
Green tea earns its skincare reputation because of its polyphenols, especially catechins such as EGCg. If that sounds technical, think of these compounds as part of the plant's protective toolkit. In skincare, they're valued because they help defend skin from everyday environmental stress and support a calmer-looking complexion.
That matters in Australia, where skin often juggles UV exposure, heat, wind, and dry indoor environments. A cleanser won't solve everything on its own, but ingredients that support the skin while cleansing are far more useful than formulas that strip and rinse.
What green tea is actually doing on skin
A good way to think about antioxidants is as bodyguards. They don't make your skin invincible, but they help reduce the pressure created by environmental wear and tear.
Green tea also has a strong reputation for being soothing. For people whose skin flares up easily, gets red after cleansing, or reacts badly to aggressive products, that's a big reason it keeps showing up in face washes, masks, and serums.

If you'd like a broader primer on ingredient types and how green tea is used in beauty products, Skin Perfection has a useful resource on understanding green tea for natural skincare.
What the clinical research suggests
The most helpful studies are the ones that move beyond vague “radiance” language and measure real skin outcomes. A 2025 scoping review reported that topical green tea extract studies included a human clinical trial showing 36.3% wrinkle improvement with normal green tea extract and 63.6% wrinkle improvement with tannase-converted green tea extract. The same review also discussed another randomised trial in which topical green tea polyphenol use reduced transepidermal water loss from 9 g/m²/hr to 7 g/m²/hr, pointing to improved moisture barrier function (clinical review of green tea in skincare).
Those results don't mean every organic green tea face wash will deliver the same effect. A rinse-off cleanser behaves differently from a leave-on treatment. But the research does show why green tea is more than a fashionable plant extract. It has measurable relevance to wrinkle appearance and barrier support when formulated well.
Practical rule: An ingredient becomes more trustworthy when you can explain what it does, not just how it sounds.
Why oily and acne-prone skin often responds well
Green tea is especially interesting for people who battle shine, congestion, or frequent breakouts. Topical green tea polyphenols are described as helping reduce sebum secretion and disrupting bacterial membranes, which gives them a logical role in routines for oily or acne-prone skin (green tea and acne-prone skin overview).
That doesn't mean harsher is better. In fact, the opposite is usually true. If a cleanser strips too much oil, the skin can end up irritated and harder to manage.
Here's the sweet spot many people miss:
- Green tea works best in a gentle cleanser
- A calm barrier usually handles breakouts better than an angry one
- Daily cleansing should remove excess oil without leaving skin tight
For tea lovers, there's an extra layer of interest here. The same green tea family prized in drinks for antioxidant content also shapes skincare conversations. If you're curious about why catechins like EGCg are so valued in tea itself, this guide to matcha tea powder and antioxidants gives useful context from the tea side.
How to Choose an Effective Organic Green Tea Face Wash
Here's how to shop smartly. A beautiful bottle, leafy branding, and the word “organic” don't tell you whether a cleanser is worth paying for.
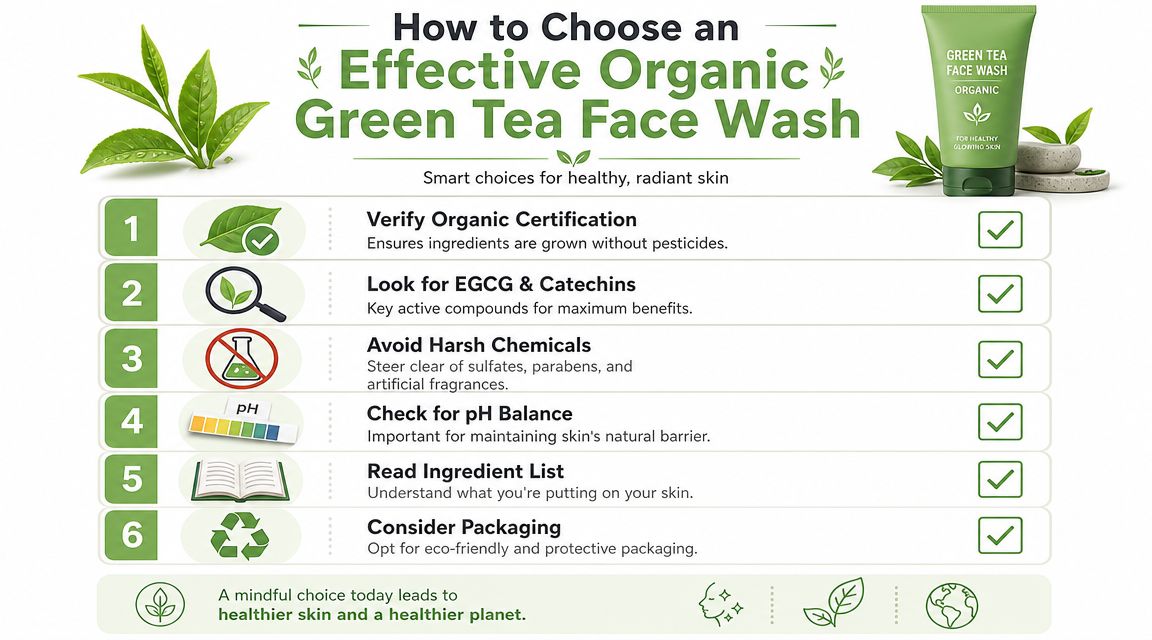
The answer sits on the ingredient list. Many guides skip this part, but it's the most important one. The key is to check the INCI list to see whether green tea extract is acting as a primary functional ingredient or whether it's just there for label appeal, especially in a market crowded with natural claims (why the INCI list matters in green tea face wash shopping).
Start with the INCI list
If you turn the bottle around and see Camellia Sinensis Leaf Extract or a similar green tea listing, that's your first clue. The next question is placement.
Ingredients are generally listed in descending order by concentration, at least for the larger components of the formula. So if green tea appears near the top, it's more likely to be there in a meaningful amount. If it's buried near the end after fragrance, colourants, and a long list of fillers, it may be doing very little.
A useful way to assess a cleanser is to think in layers:
| What to check | Why it matters |
|---|---|
| Green tea placement | Higher placement usually suggests a more central role |
| Surfactant system | A gentle cleanse supports the barrier better |
| Fragrance load | Heavy scent can be a problem for reactive skin |
| Organic claim | Look for clarity, not just green packaging |
| Packaging | Better packaging can help protect botanical ingredients |
Red flags that cancel out the green tea story
A cleanser can feature organic green tea and still be poorly suited to sensitive skin. The biggest issue is often the base formula, not the hero ingredient.
Watch for these warning signs:
- Harsh sulphates: If the cleanser leaves your face feeling squeaky, that's not a badge of honour. It can be a sign the surfactant system is too aggressive.
- Strong synthetic fragrance: This often matters more than people realise, especially if your skin stings, flushes, or becomes patchy after washing.
- Confusing organic language: “Made with organic ingredients” isn't the same as a fully organic formulation.
- Tea as an afterthought: If green tea appears to be a token addition, don't pay a premium just for the label.
A simple buyer's checklist
You don't need to become a cosmetic chemist. You just need a repeatable way to compare products.
Check the exact green tea name
Look for Camellia Sinensis on the label rather than vague “tea complex” wording.Read the first chunk of ingredients
This tells you more than the front of the pack ever will.Think about your skin type
Oily skin still needs gentleness. Dry skin usually needs even more.Look at the whole formula, not one star ingredient
A lovely botanical can't rescue a poorly balanced cleanser.Consider what else your skin already likes
If your skin does well with soothing ingredients such as aloe, comparing formulas can help. For example, this guide to a farm-fresh aloe vera face wash is handy for understanding how calming cleanser ingredients are often paired.
If a product asks for premium pricing, it should show premium formulation choices on the label.
One more tea-world lesson applies here too. Quality matters at the source. That's true for skincare ingredients and it's true for tea itself. If you want a simple explanation of how grade and sourcing affect tea quality, this overview of matcha grade and quality is a helpful parallel.
Your Daily Green Tea Cleansing Ritual
A good cleanser does more than remove the day. It sets the tone for everything that follows. Used well, an organic green tea face wash can feel less like a rushed step and more like a reset for your skin.

How to wash without overdoing it
Start with lukewarm water. Hot water can feel satisfying, but it often leaves skin drier and more reactive.
Massage the cleanser in with your fingertips using light circular motions. You don't need to scrub. A face wash isn't more effective because it feels harsher.
Then rinse thoroughly and pat dry with a clean towel. Patting matters. Rubbing creates unnecessary friction, especially if your skin is already sensitive.
Where it fits in a routine
The best routine depends on what your skin is dealing with that day.
- Morning cleanse: Great if you wake up oily or sweaty
- Evening cleanse: Essential for removing sunscreen, city grime, and makeup residue
- Second cleanse: Useful after an oil cleanser or balm if you wear makeup or heavy SPF
If your skin tends to feel tight after washing, apply the next step while your face is still slightly damp. That usually helps everything feel more comfortable.
Less force, less heat, less friction. Skin often responds well when you stop trying to overpower it.
A small ritual that's worth keeping
One of the underrated pleasures of tea-based skincare is the sensory side. Green tea has an earthy, clean profile that feels grounded rather than perfumed. That can make your cleansing step feel calmer and more intentional.
For many people, that emotional side matters. You're more likely to stay consistent with a routine that feels good, not just one that sounds impressive on paper.
A Simple DIY Matcha Face Wash for a Natural Glow
You open the pantry, reach for a tin of matcha, and realise something useful. A DIY wash lets you feel exactly what the tea is doing on your skin, without a long ingredient list getting in the way. That makes it a helpful experiment if you want to understand whether green tea is acting like a real ingredient or just sounding good on the label.

A fresh matcha cleanser also teaches an important skincare lesson. Ingredient quality changes the experience. Matcha is finely milled whole green tea leaf, so you are not just getting green tea water. You are using the leaf itself in powder form, which is one reason it feels richer and more present than a token splash of tea tucked low on an ingredient label.
A gentle matcha and honey version
Use this as a small-batch cleansing mask for one application:
- 1 teaspoon organic culinary matcha
- 1 teaspoon raw honey
- A small splash of lukewarm water, enough to loosen it into a spreadable paste
Mix in a clean bowl until smooth. Apply to damp skin with clean fingertips, massage lightly, then rinse well. If your skin feels comfortable, you can leave it on for a minute first.
The texture is different from a standard foaming cleanser. It behaves more like a soft paste that lifts away residue while keeping the routine gentle. Honey gives slip, and matcha brings that earthy, tea-rich feel people often look for in green tea skincare.
If you want another easy at-home option, this matcha tea face mask guide shows a similar way to use matcha as a fresh treatment.
How to adjust it without turning it into a science project
Small changes are enough.
- For skin that feels dry: add a tiny drop of jojoba oil
- For a thinner paste: add a little more water
- For a quicker cleanse: rinse straight after massaging it in
DIY skincare works best when you make only what you need and use it straight away. Once water enters the mix, freshness matters. Without preservatives, a homemade cleanser is more like cut fruit than a bottled product. It does best when used promptly, not stored on the bathroom shelf.
This short video is a good visual companion if you enjoy seeing the texture and mixing process in action.
Why quality matters even in DIY
DIY transforms beyond a mere weekend ritual. It helps train your eye.
If a simple bowl of matcha, honey, and water feels distinctly green, smooth, and tea-forward, you start to notice how little some commercial products deliver by comparison. A face wash can say "green tea" on the front and still rely on fragrance, colour, or tiny amounts of extract for the effect. By using matcha on its own, you get a clearer sense of what a meaningful tea ingredient contributes.
Better-quality matcha usually mixes more smoothly, smells fresher, and feels nicer on the skin. Ceremonial grade is not necessary for this job. A clean, well-sourced organic culinary matcha is usually the practical choice. The same rule applies when reading a cleanser label. The closer the formula stays to a genuine, well-sourced tea ingredient, the more likely the green tea is there for a reason, not just for marketing.
Common Questions About Green Tea Skincare
Is an organic green tea face wash suitable for sensitive or dry skin
It can be, but the full formula matters more than the name on the front. Green tea is often chosen for its soothing profile, yet a cleanser can still irritate if it contains harsh surfactants or strong fragrance. If your skin is sensitive or dry, look for a gentle base and patch test first.
How often should I use it
Users typically apply a green tea cleanser once or twice daily, depending on skin type and what else they use in their routine. If your skin feels tight, flaky, or stings after cleansing, scale back and reassess the formula rather than pushing through.
Can green tea help oily or acne-prone skin
It may suit oily or breakout-prone skin particularly well when paired with a non-stripping cleanser base. As covered earlier, green tea is often valued in skincare for helping support calmer, more balanced skin. The key is daily consistency and a formula that doesn't leave the barrier irritated.
Can you react to green tea skincare
Yes, it's possible to react to any skincare product, even one with gentle or natural ingredients. Sometimes the issue isn't the green tea itself, but fragrance, essential oils, or other supporting ingredients in the formula. Patch testing is always sensible.
If your skin is persistently inflamed, painful, or breaking out in a way that doesn't settle, it's worth speaking with a GP or dermatologist rather than relying on cleanser changes alone.
Is DIY matcha face wash safe to store
Fresh DIY mixtures are best used immediately. Once water is involved, shelf life becomes the weak point. If you want a product to keep in the bathroom, choose a properly preserved cleanser instead.
If you love the idea of bringing tea-based wellness into more of your daily routine, explore Pep Tea for premium organic matcha and educational guides that help you understand what quality really looks like, from the source ingredient right through to how you use it.
Organic Green Tea Price: An Australian Guide for 2026
You're in the tea aisle, or staring at an online store, and two products seem to promise the same thing. Both say organic. Both say green tea. One looks fairly affordable. The other feels surprisingly expensive.
That's a common challenge.
The organic green tea price in Australia can feel inconsistent until you stop looking only at the shelf tag and start asking better questions. What format is it in. Where was it grown. How was it processed. Is it meant for an everyday mug, a café menu, or a more premium wellness ritual?
For Australian shoppers and hospitality buyers, that difference matters. Organic tea doesn't usually sit in the same pricing world as bulk commodity tea. It moves through a more premium import and retail chain, and that pushes up the final shelf price. For context, Selina Wamucii notes projected U.S. wholesale green tea prices in 2026 at US$2.69 to US$4.71 per kg, while the average declared value for all imported organic teas was already US$10.18 per kilo in 2014. That gap helps explain why organic green tea often lands in the premium beverage category rather than the bargain pantry staple category.
If you're new to the category, it helps to start with the basics of what organic green tea means. Once you understand that, the price starts to make more sense.
Decoding the Organic Green Tea Price Tag
A lot of price confusion starts because shoppers compare unlike products as if they're identical.
A box of tea bags, a pouch of loose leaf, and a tin of matcha can all be sold as organic green tea. But they're built for different jobs. One is about convenience. One is about flavour and brewing control. One is a concentrated powdered tea used for whisking, lattes, or recipes.
Why two organic teas can cost very different amounts
The price tag isn't random. It usually reflects a mix of things happening before the tea ever reaches an Australian shelf:
- Certification requirements that add cost to farming, auditing, and handling
- Import and freight realities that matter more in Australia than in larger production markets
- Processing differences such as whole-leaf handling versus fine powder production
- Retail positioning where some teas are sold as everyday staples and others as premium wellness products
That's why a higher price doesn't always mean “overpriced”. Sometimes it means the tea sits in a more demanding supply chain.
Simple rule: Don't compare tea by package price alone. Compare it by format, purpose, and cost per cup.
What most buyers actually want to know
Home drinkers usually want to know, “Is this good value for my daily routine?”
Café owners ask a different question. “Can I serve this confidently, price it properly, and make the quality obvious to customers?”
Both questions are smart. Both depend on moving past the headline price and into the value of the serve.
Australian Price Ranges A Quick Benchmark
You are standing in an Australian supermarket or reviewing a supplier catalogue for your café. One organic green tea is under $10. Another is over $30. A matcha tin costs more again. The fast conclusion is often “one is cheap and one is expensive.” A better question is, “What does each serve cost, and what do I get from that serve?”
That shift matters because shelf price works like the sticker price on a car. It tells you the upfront number, but not how far it will take you.
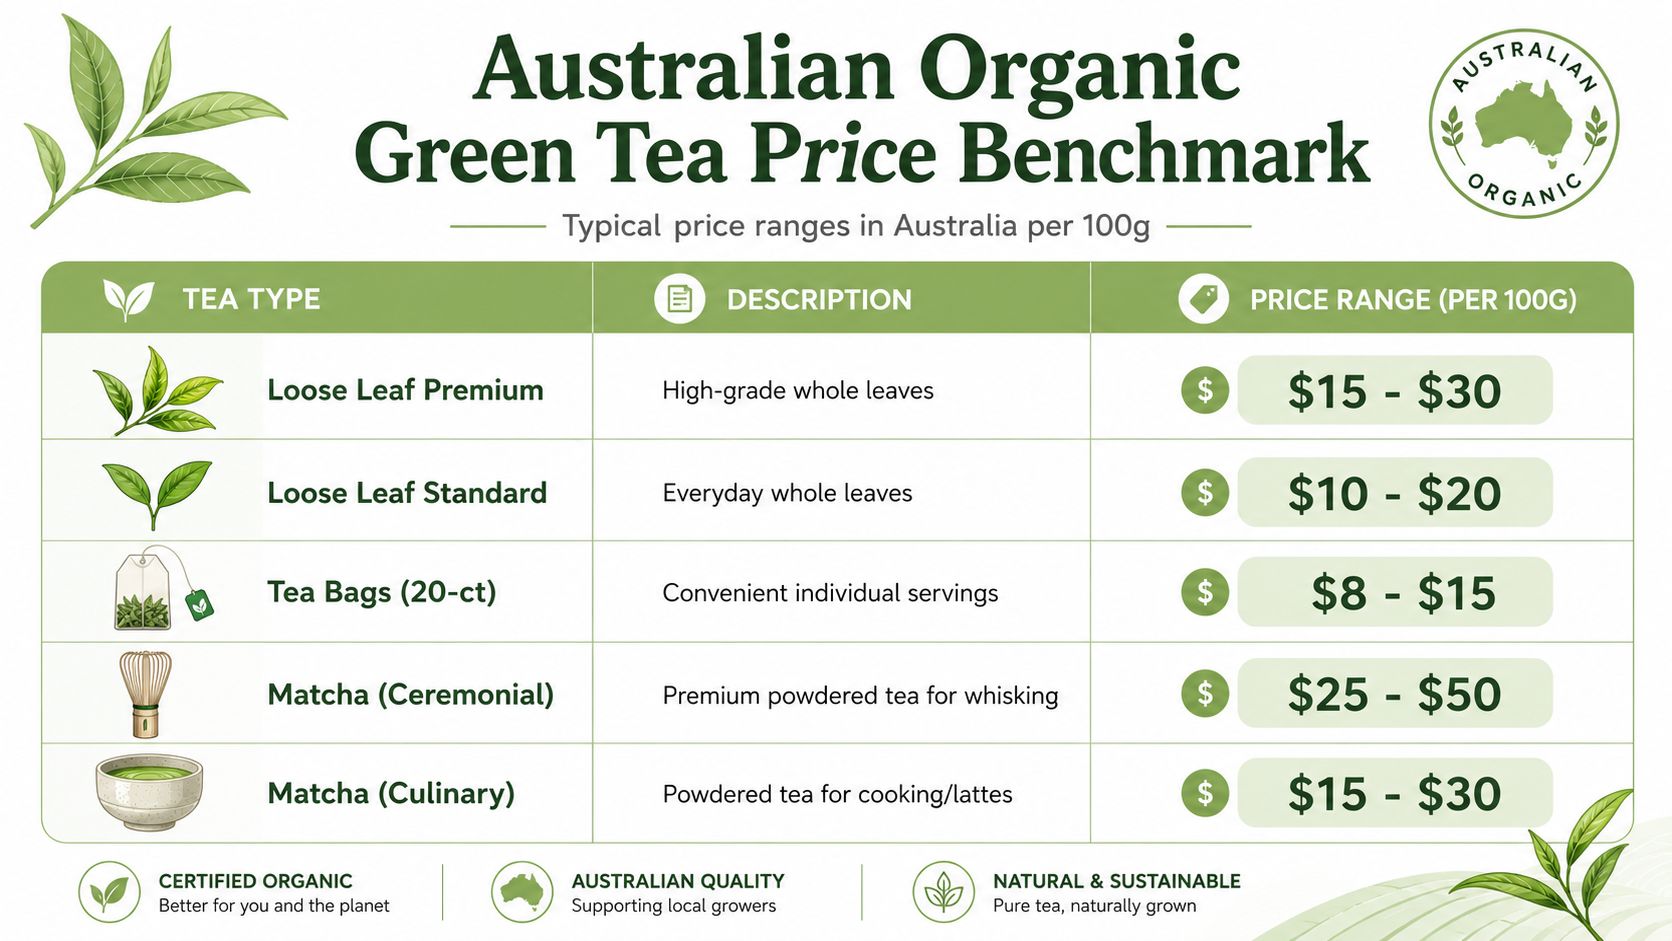
Typical Organic Green Tea Price in Australia 2026
| Tea Format | Typical Price Range (AUD) | Estimated Cost Per Serve (AUD) |
|---|---|---|
| Tea Bags (20-ct) | $8 to $15 | About $0.40 to $0.75 per bag |
| Loose Leaf Standard | $10 to $20 per 100 g | Depends on scoop size and whether you re-steep |
| Loose Leaf Premium | $15 to $30 per 100 g | Depends on scoop size and whether you re-steep |
| Matcha Culinary | $15 to $30 per 100 g | Depends on recipe and serving size |
| Matcha Ceremonial | $25 to $50 per 100 g | Depends on whisking portion |
These ranges give you a rough Australian benchmark. They are most useful as a sorting tool, not a verdict on quality. Supermarket tea, specialty tea, hospitality supply packs, and imported premium products can all sit in different parts of the range.
Why this benchmark can still confuse buyers
Two products can share a similar pack price and deliver very different value per cup.
A 20-bag box gives you a clear serve count, which makes it easy for home drinkers. Loose leaf is less obvious because one person uses 2 grams, another uses 3 grams, and some teas handle a second infusion well. Matcha complicates it again. A small tin may look expensive, but the serve cost can make sense if you are using measured portions for straight tea, lattes, or desserts.
For café owners, this is the same logic used in any sensible menu costing exercise. If you already know how to price products for profit, tea should be treated the same way. You price the serve, not just the bag or tin.
A better benchmark asks two questions at once. What does one serve cost, and what quality, consistency, and experience does that serve create?
How to read the table like a smart buyer
Start with the format that fits the job.
Tea bags usually offer the clearest labour-saving value. They suit fast home routines, office kitchens, and some casual service settings where speed matters more than brewing control.
Loose leaf often gives stronger value for flavour-focused drinkers and cafés that want more control over strength, aroma, and presentation. The upfront pack price may sit above tea bags, but the cost per serve can be competitive.
Matcha usually asks for the highest upfront spend. That does not automatically make it poor value. In Australia, it can make good sense for buyers who want a concentrated product for whisked servings, premium lattes, or menu versatility.
A quick rule of thumb
Use package price to place the product in a rough bracket. Use cost per serve to judge affordability. Use value per serve to decide whether it deserves a place in your kitchen or on your menu.
Key Factors Driving the Cost of Organic Tea
Price becomes much easier to understand once you look at what sits behind it.
In Australia, shelf pricing is heavily shaped by costs that pass through the supply chain. Fortune Business Insights notes that food and non-alcoholic beverage inflation is a key retail driver, which helps explain why freight, certification, and smaller-batch sourcing can lift the final organic tea price. So when a premium organic tea costs more, it isn't automatically a branding trick. There are often real cost layers underneath it.
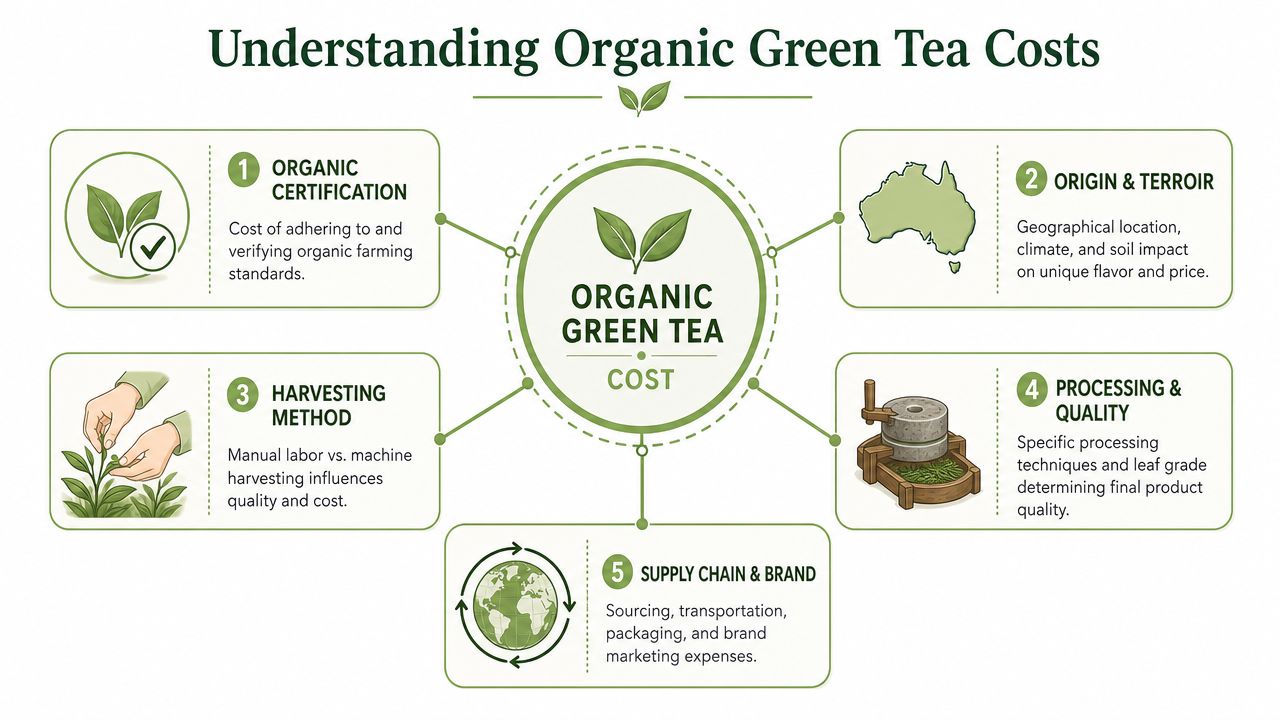
Certification adds more than a logo
Organic certification is one of the first things buyers notice, but often the least understood.
That certification usually means documented production standards, handling controls, and verification processes. Those steps take time, admin, and oversight. By the time the tea reaches Australia, that work is already part of the cost base.
Origin changes both flavour and price
Tea from a recognised tea-growing region can command a stronger price because buyers expect a particular flavour profile, processing style, and consistency.
That doesn't mean only one country can make good tea. It means provenance matters. In premium tea, origin functions a bit like it does in olive oil or coffee. People aren't only buying the ingredient. They're buying a particular result in the cup.
Harvest and processing matter more than most people realise
A tea that's carefully handled will usually cost more than a tea produced for volume.
Some green teas are made for straightforward daily drinking. Others involve more selective harvesting, more controlled processing, or extra labour after picking. Matcha is a strong example. Powdered tea isn't just “green tea ground up” in the casual sense. The path from leaf to fine powder is part of why it occupies a different pricing tier.
Grade and intended use shape value
Not every green tea is trying to do the same job.
- Tea bags suit speed and consistency
- Loose leaf suits flavour, aroma, and brewing flexibility
- Culinary matcha is better suited to lattes, smoothies, and cooking
- Ceremonial matcha is usually chosen for straight preparation and a cleaner tasting experience
If you're a retailer or café operator, it helps to think about the same pricing logic used in other product categories. This practical guide on how to price products for profit is useful because it frames cost, positioning, and margin in a way that fits specialty beverage ranges too.
The fairest way to judge tea price is to ask whether the product is well priced for its purpose, not whether it's the cheapest option on the page.
How to Calculate Your True Cost Per Serve
Buyers often look at the total price first. Smart buyers look at the cost per serve.
That small shift changes everything. A pack that seems expensive can be reasonable once you divide it by the number of useful cups it produces. On the other hand, a cheap-looking product can be poor value if it makes weak tea or disappears quickly.
The simple formula
Use this:
Total price ÷ number of servings = cost per serve
That's it.
If the number of servings isn't listed clearly, estimate it from the pack format and how you prepare your tea. A tea bag is usually one serve. Loose leaf depends on how much you scoop. Matcha depends on whether you're whisking a bowl, making a latte, or adding it to a recipe.
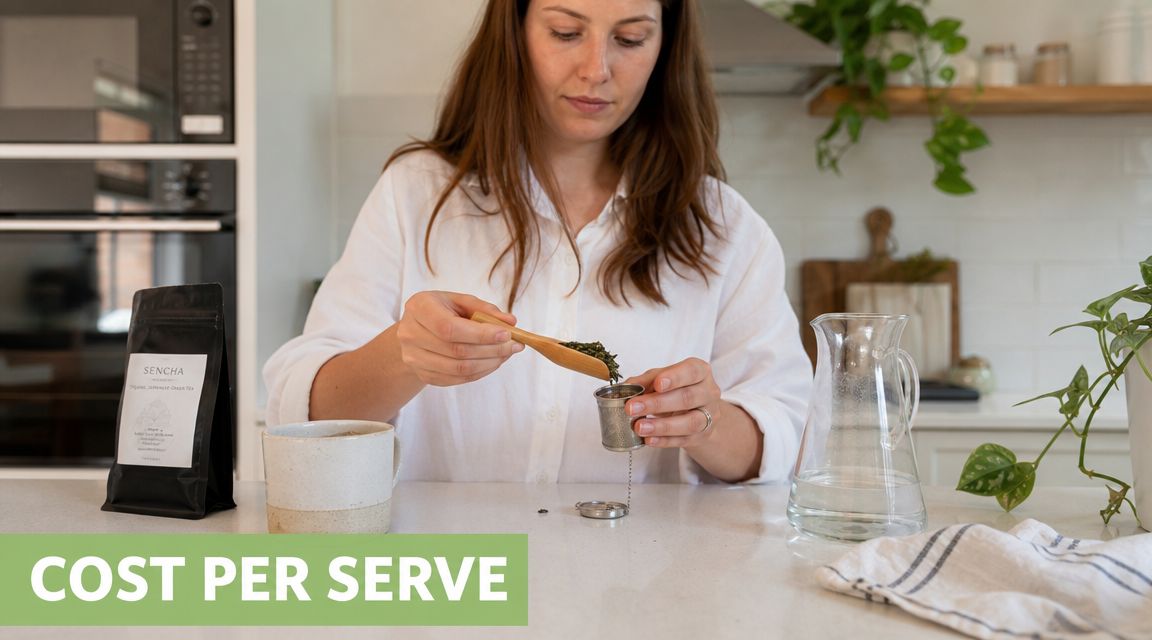
What this looks like in practice
Take a tea bag product first. If a pack costs $10 and gives you 50 cups, your cost per serve is $0.20.
Now compare that with a premium powdered tea. The upfront spend may feel much higher, but it's also serving a different purpose. A matcha bought for focused morning use, café lattes, or recipe work shouldn't be judged like a basic teabag for the office kitchen.
Here's the question: What are you asking that serve to do?
- Daily hydration drink. You'll probably prioritise lower cost and convenience.
- Flavour-focused tea break. You may prefer loose leaf and accept a moderate lift in cost.
- Functional or premium drink. You may decide a higher per-serve cost is worthwhile.
Why businesses should care too
Cafés already know ingredient cost isn't the whole story. They track menu pricing, waste, and customer value over time.
That's why it's useful to borrow thinking from adjacent parts of business. Even though it's about marketing, this guide on how to measure customer acquisition is a good reminder that one headline number rarely tells the full story. Tea buying works similarly. Shelf cost matters, but the better metric is what each serve contributes to value, experience, and repeat purchase.
Comparing Value Matcha vs Loose Leaf vs Tea Bags
A $12 box of tea bags and a $30 tin of matcha can sit on the same shelf, yet they are not competing in the same job.
That is the mistake many buyers make. They compare pack price first, then assume the cheaper product is the better deal. Tea works more like kitchen equipment than stationery. A paring knife, chef's knife, and blender all help you prepare food, but you would not judge them by asking which one is cheapest per item. Green tea formats work the same way. Each one creates value in a different way, and the smart comparison is cost per serve matched to purpose per serve.
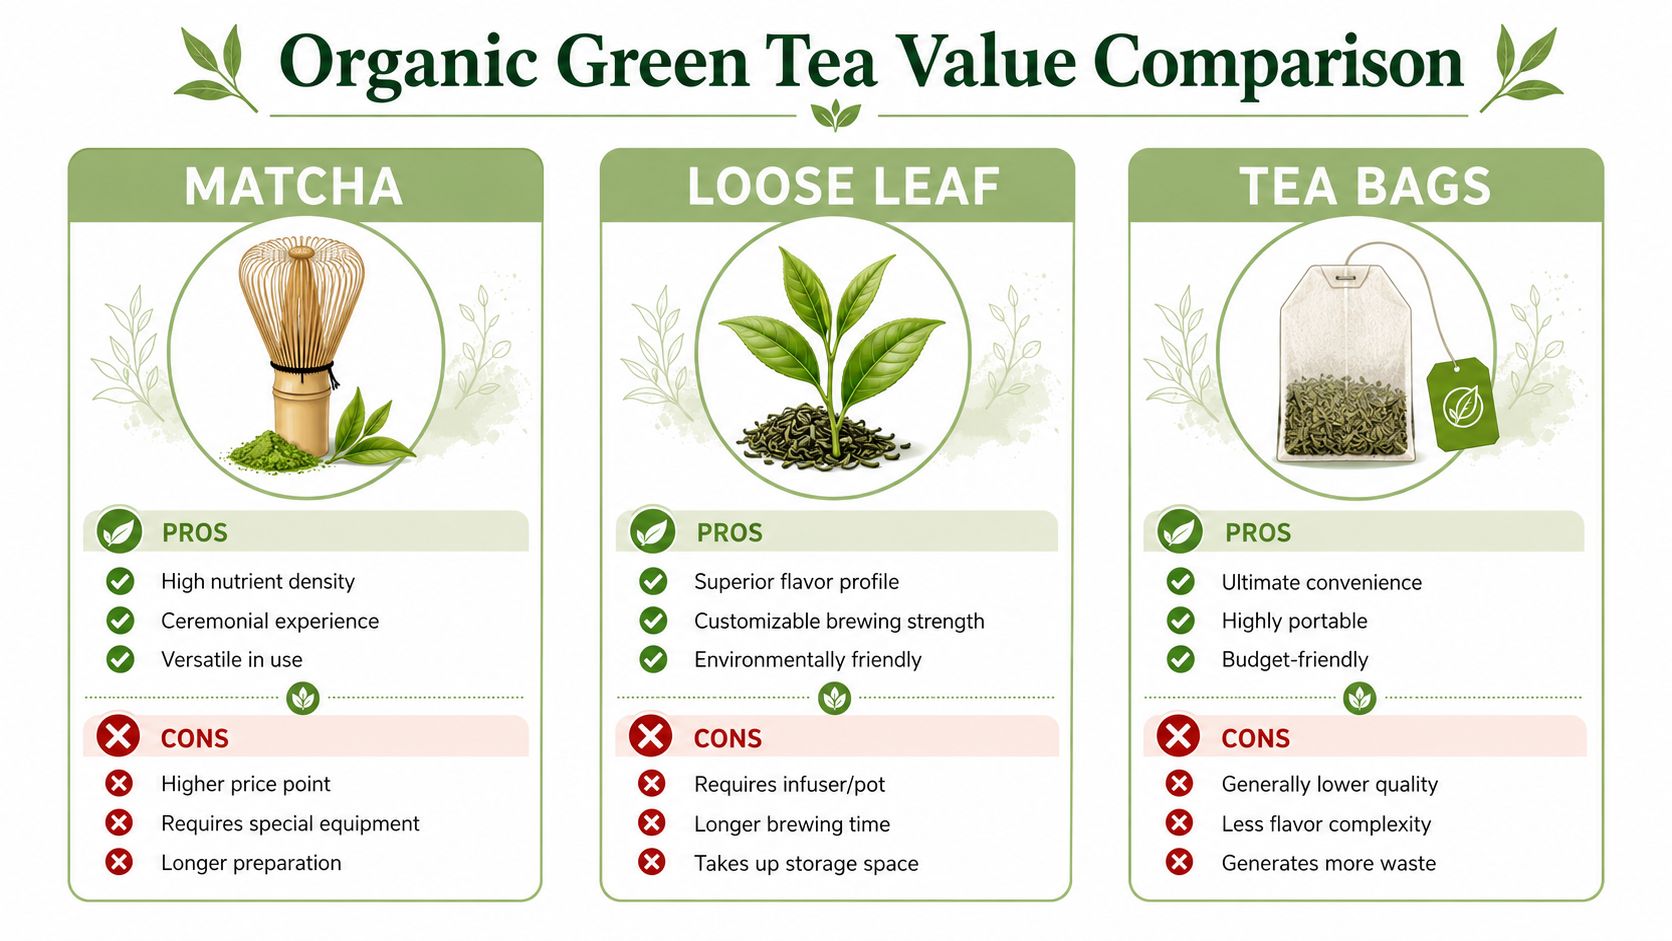
Tea bags for convenience
Tea bags usually win on routine.
If you want a fast, tidy cup before work, for staff rooms, hotel breakfast stations, or self-serve café setups, tea bags often deliver the lowest friction. The flavour may be simpler and your brewing control is limited, but the value is in reliability. Little mess. Little training. Little guesswork.
For many Australian households and venues, that matters more than nuance in the cup.
Loose leaf for flavour and brewing control
Loose leaf often gives the strongest middle ground.
You pay more attention, but you usually get more say in the final result. Water temperature, steep time, and leaf quantity all shape the cup. That flexibility suits home drinkers who care about aroma and texture, and it suits cafés that want a more premium pot or cup without stepping into matcha preparation.
The key value question is simple. Will the person making it use that extra control well? If yes, loose leaf can feel far better value than tea bags, even if the shelf price is higher.
Matcha for intensity, versatility, and premium positioning
Matcha sits in its own lane because you consume the whole leaf in powdered form rather than infusing and discarding it. That changes both use and perceived value.
A serve of matcha may cost more, but it can also do more. It can be whisked as a straight tea, built into a latte, blended into smoothies, or used in baking. For a café owner, that opens menu possibilities. For a home buyer, it may replace a café-bought drink habit rather than a basic green tea habit. If you want a clearer breakdown of format and use, this guide on the difference between matcha green tea and green tea explains the distinction well.
That is why matcha should not be judged against tea bags alone. It is often closer to a specialty ingredient than an everyday pantry staple.
A better way to compare value
Use a three-part test.
Ask what one serve costs, what one serve requires, and what one serve gives back.
- Tea bags usually offer the lowest effort per cup and the most predictable routine value.
- Loose leaf usually offers better flavour per cup when the drinker is willing to brew with care.
- Matcha usually offers the highest versatility and premium potential, especially for lattes, wellness menus, and intentional daily rituals.
For home drinkers, the best-value format is the one you will enjoy and use consistently.
For cafés, the best-value format is the one that fits your service model, staff skill, and menu pricing. A tea bag can be profitable because it is fast. A loose leaf tea can be profitable because it improves the customer experience. A matcha can be profitable because customers accept a higher menu price for it.
Good value comes from fit. Tea bags suit speed, loose leaf suits flavour, and matcha suits a more purposeful, premium serve.
Where ready-to-drink value fits
Ready-to-drink products belong to a separate value category.
Organic kombucha, for example, removes the brewing step completely. Its appeal comes from convenience, refrigeration, and a different drinking occasion. That does not make it better than green tea. It means the buyer is paying for immediate service and a different customer expectation, which can be useful in hospitality settings.
Smart Buying Tips for Home and Hospitality
Paying more only makes sense when you know what you're paying for.
Australian buyers are balancing two instincts at once. They're careful with everyday spend, but they'll still pay a premium for products that feel better, cleaner, or more purposeful. That tension is especially clear in premium wellness beverages, where buyers want proof of value, not just a nice story.
For home drinkers
A smart purchase starts before checkout.
- Read the format properly. Don't compare tea bags, loose leaf, and matcha as if they're equivalent.
- Check the origin and grade. A premium tea should tell you enough about what it is and how to use it.
- Buy for your real habit. If you drink tea absent-mindedly at your desk, convenience may matter more than prestige.
- Think in servings. A more expensive tea can still be sensible if each cup delivers what you want.
If you shop online, browsing a specialist range of organic green tea in Australia can make comparison easier because format and purpose are usually clearer than they are on crowded marketplace pages.
For cafés and hospitality venues
Hospitality buyers need a slightly different lens. You're not just buying tea. You're building a menu.
A premium green tea or matcha offer can work well when it gives customers a distinct reason to choose your venue. That might be a more refined hot tea option, a stronger matcha latte program, or a non-alcoholic drinks list that feels current and health aware.
Consider these checkpoints:
Match product to menu role
Culinary matcha may suit lattes and kitchen use. Loose leaf may suit pot service. Tea bags may suit speed-led operations.Make the value visible
If customers are paying more, provenance and preparation should be clear on the menu and in service.Watch wastage
A premium ingredient only works commercially when staff use it consistently.Offer contrast
A café menu is stronger when it includes both accessible options and one or two more distinctive premium choices.
For hospitality, “worth the price” usually means the product helps the menu feel sharper, not simply cheaper to pour.
A practical mindset for both groups
The best buyer isn't the one who always spends least. It's the one who spends in the right place.
If you want a quick office tea, don't overbuy. If you care about flavour, ritual, or a premium café drink at home, don't underbuy and then wonder why the experience feels flat.
Finding Quality That Fits Your Budget
There isn't one correct organic green tea price.
There's only the right price for the job you need the tea to do. Tea bags can be good value when convenience matters. Loose leaf can be the better buy when flavour and brewing control matter more. Matcha can justify a higher upfront spend when you want a more premium or functional serve.
That's the key shift. Don't ask only, “Why is this tea so expensive?” Ask, “What am I getting in each cup?”
When you judge organic tea by format, purpose, and cost per serve, the market becomes far easier to understand. You stop comparing everything against the cheapest box on the shelf and start choosing with more confidence.
Frequently Asked Questions
Is organic green tea always more expensive than regular green tea
Often, yes. Organic tea usually carries extra certification, sourcing, and supply-chain costs. But “more expensive” doesn't always mean poor value. If the tea is better suited to your needs, the higher price can still make sense.
What's the difference between organic and certified organic
In practical buying terms, certified organic gives you more confidence because it points to a verified standard rather than a vague marketing phrase. If the label isn't clear, it's worth reading more closely before you compare price.
Why does matcha cost more than tea bags
Because it's a different format with a different use case. Matcha is a powdered tea used for whisking, lattes, and recipes, and buyers often treat it as a premium ingredient rather than a basic pantry tea.
Is loose leaf better value than tea bags
Sometimes. Loose leaf can offer better flavour and more flexibility, but only if you enjoy brewing it. If convenience wins every morning, the tea bag may be the better value for your lifestyle.
How should cafés choose between matcha, loose leaf, and tea bags
Start with the menu. Tea bags suit speed, loose leaf suits table service and flavour-led offers, and matcha suits premium drinks. Buy according to service style, staff capability, and what your customers expect.
Does expensive tea always mean better tea
No. A higher price should come with a clearer reason. Better origin information, stronger processing standards, a more suitable grade, or a format that matches how you'll use it.
If you're ready to choose more confidently, explore Pep Tea for premium organic matcha, Australian-brewed sugar-free organic kombucha, and practical guidance that helps you understand what you're buying, not just what you're paying.
Buy Organic Green Tea Online: Quality Guide 2026
You're probably doing what a lot of Australians do when they start shopping for tea online. You type in a simple search, open six tabs, and suddenly every packet looks “premium”, “pure”, “ceremonial”, “clean”, or “organic”. The photos are lovely. The claims sound reassuring. But it's not always obvious what matters once that tea lands in your kitchen.
That confusion is normal. Tea is one of those products where the label can look clear while the buying decision still feels murky. You can't smell the leaves through a screen. You can't inspect colour, freshness, or texture in person. And if you care about wellness, taste, and clean sourcing, you want more than a pretty pouch and a vague promise.
Your Guide to Buying Organic Green Tea Online
A common scene goes like this. Someone wants a better afternoon drink than another coffee or a sugary option. They start looking for organic green tea online, hoping for something cleaner, lighter, and easier to build into a daily routine. Then the questions hit. Is loose leaf better than matcha? Does organic mean residue-free? Will it taste fresh after shipping? Is the higher price justified?
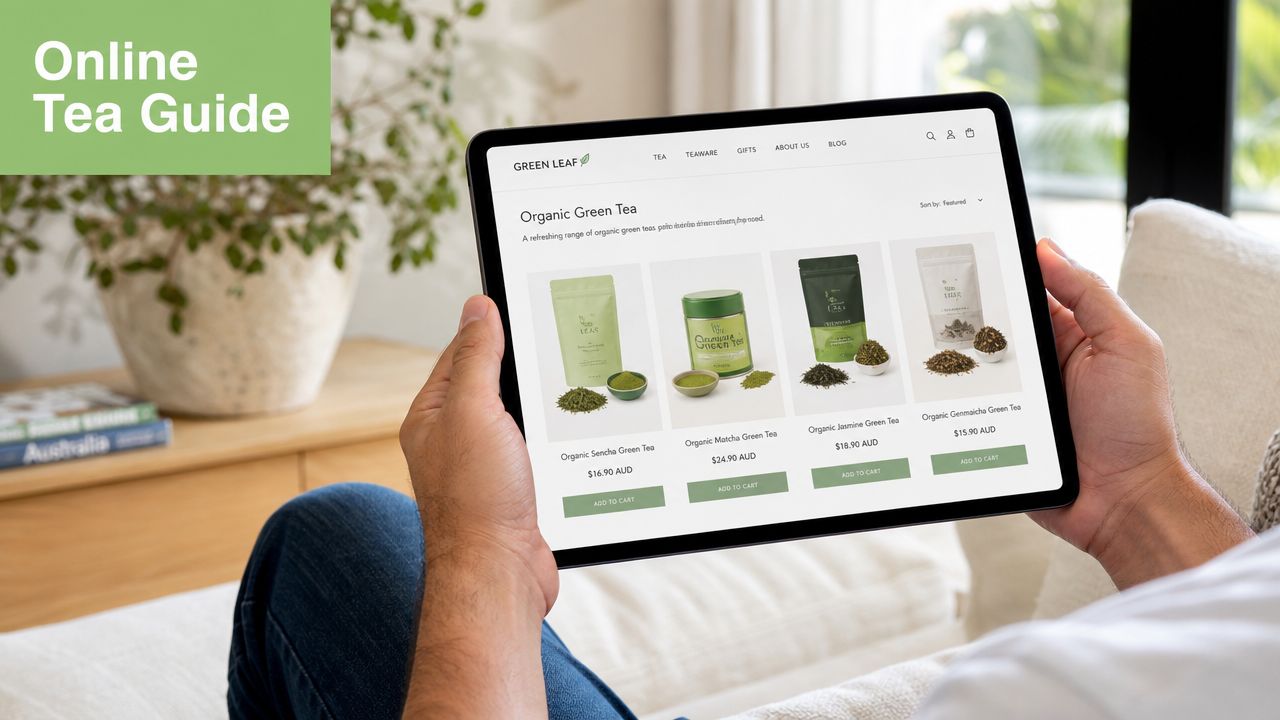
Those questions sit inside a much bigger shift in how people buy tea. The global organic tea market was valued at USD 2.12 billion in 2025 and is projected to reach nearly USD 4.26 billion by 2032, growing at a 10.5% CAGR, according to the Teeverband 2025 tea report. For Australian shoppers, that matters because it reflects a clear move toward higher-quality, certified-organic tea sold through practical online channels.
Why this matters in Australia
Australia sits in a region where tea demand is strong, but many premium green teas are sourced from overseas. That means online buying isn't a niche habit. It's often the most practical way to access the kind of tea people want, especially if they're looking for certified-organic Japanese green tea, matcha, or premium loose leaf.
If you're curious about the supply side, it also helps to understand how products move into Australia. This guide on how to navigate importing from Japan through AUSFF gives useful context on the logistics behind imported goods, including the sort of care and compliance buyers often assume happens automatically.
Buying tea online gets much easier once you stop asking “Which pack looks healthiest?” and start asking “What proof does this brand give me?”
What a good online tea guide should actually do
You don't need a lecture on tea culture. You need a practical filter.
A useful buying guide should help you:
- Read past marketing words so “organic” means something specific
- Check quality signals like origin, testing, and packaging
- Choose the right format for your routine, whether that's matcha or loose leaf
- Brew it properly so good tea doesn't taste bitter by accident
That's where most shoppers get stuck, and it's exactly where a little clarity makes a big difference.
What Makes Green Tea Genuinely Organic
A lot of Australian shoppers click on a tea listing, see the word “organic”, and assume the hard checking is done. Online, that assumption can trip you up. The label matters, but the true question is what sits behind it.
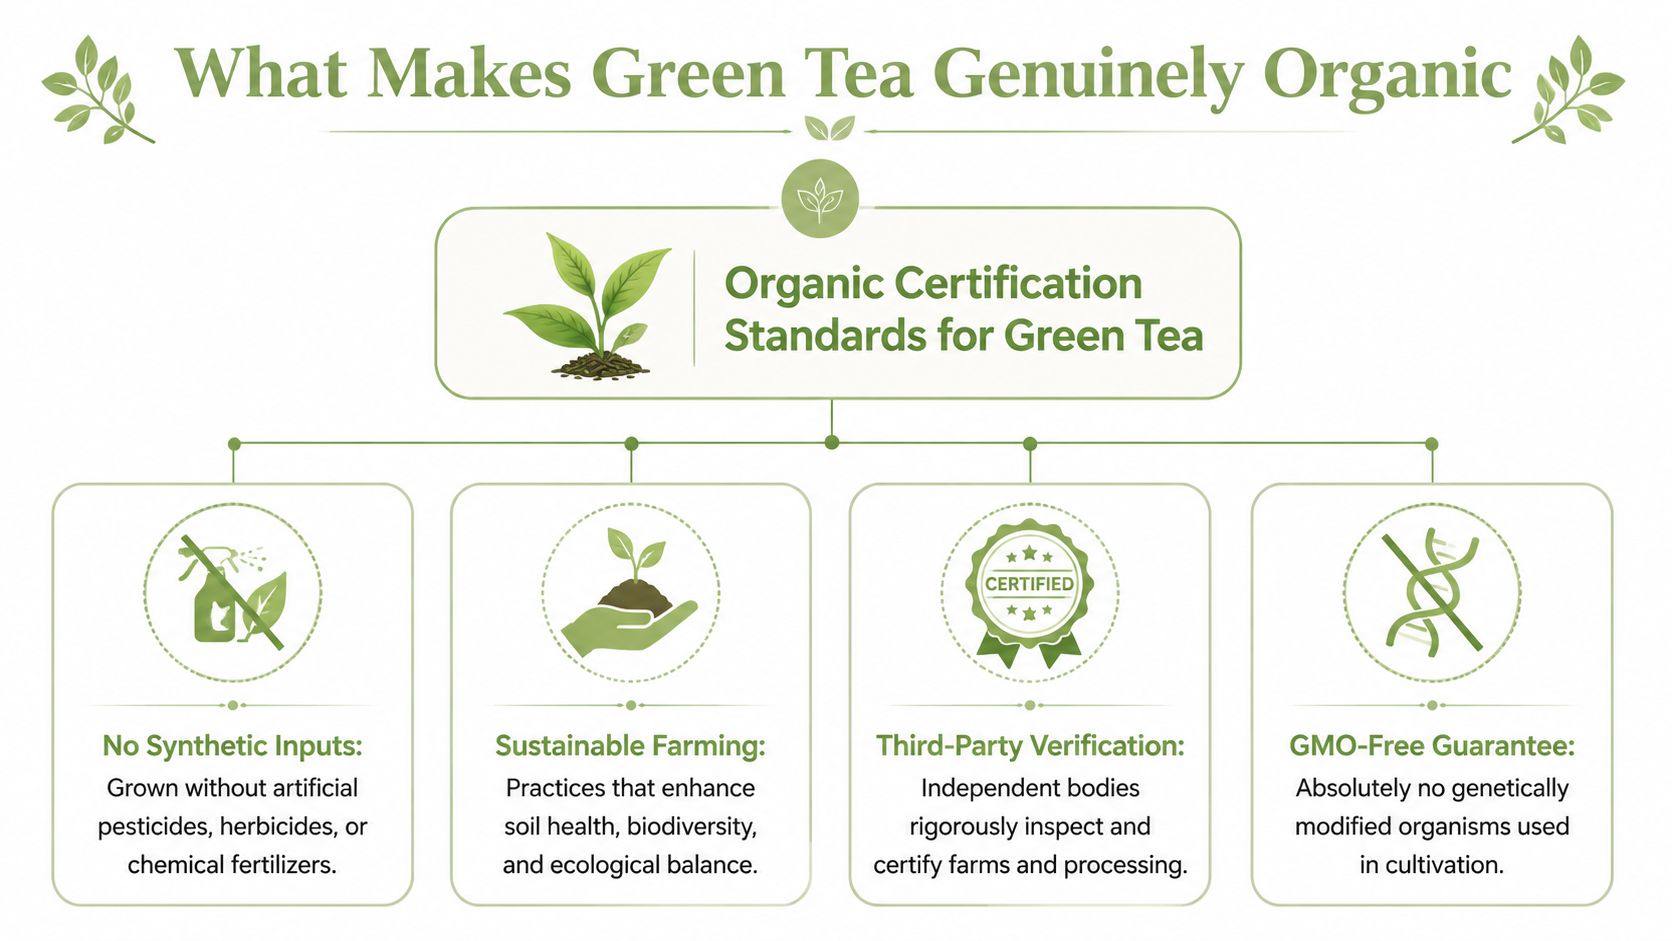
Organic green tea is tea grown and processed under certified standards, not just described with clean-sounding marketing. Those standards usually restrict synthetic pesticides, herbicides, chemical fertilisers, and genetically modified organisms. In plain terms, the farm has to follow rules, and an independent certifier has to verify that those rules are being followed.
What the organic label should point to
For online buyers, “organic” works like a receipt trail. If a brand uses the word properly, you should be able to trace it back to something concrete.
A reliable product page should help you understand:
- How the tea was grown. Organic farming avoids synthetic chemical inputs and follows stricter cultivation standards.
- Who verified the farm or producer. Certification should come from an independent body, not the seller marking their own homework.
- How the tea was handled after harvest. Processing, packing, and storage still shape purity, aroma, and shelf life.
- How clearly the source is explained. “From Japan” is a start. A named region, producer, or style tells you far more.
If you want a simple breakdown before comparing listings, Pep Tea has a clear guide on what organic green tea means.
Why drinkers care about it
People choose organic tea for practical reasons. Some want to limit exposure to synthetic agricultural inputs. Others care about farming systems that support healthier soil and a cleaner growing environment.
There is also a trust factor, especially when you are buying through a screen. A well-documented organic tea often appeals to the same buyer who cares about harvest date, careful packing, and whether the tea will arrive tasting lively rather than tired. It does not guarantee beautiful flavour on its own, but it often sits in the same conversation as freshness and careful sourcing.
That matters with green tea because it is a delicate product. Poor handling shows up quickly in the cup. Flat aroma, dull colour, or rough bitterness can come from age, weak storage, or careless processing, even if the tea was grown under organic standards.
Practical rule: Organic means more when it comes with traceable sourcing and clear certification detail.
Where online buyers get mixed up
The biggest confusion is treating organic as a complete quality guarantee.
It is not.
Organic certification answers a farming question. It tells you the tea met a defined production standard. It does not automatically tell you whether the leaves are fresh, whether the powder has been protected from heat and light, or whether the seller is transparent enough for an Australian buyer to trust the product before ordering.
That distinction is worth keeping in your head. Organic is one filter. Purity, authenticity, and freshness still need their own proof. Brands that explain those points clearly set a much stronger benchmark, and that is the standard careful tea buyers should expect.
Decoding Quality and Purity When Buying Online
Buying tea online asks you to trust information before you trust taste. That's why a careful buyer should judge the product page like they'd judge the tea itself. If a seller can't explain origin, testing, and handling clearly, the problem usually isn't your caution. The problem is the missing detail.
The most important shift is this. Don't treat “organic” as the finish line. Treat it as the starting point. Independent coverage of contamination concerns points out that while organic certification is valuable, it doesn't automatically guarantee freedom from environmental contaminants like heavy metals. That's why buyers should look for origin transparency and batch testing results, especially for products imported into Australia, as discussed in this review of organic and lead-free green tea concerns.
What to check on a product page
A strong listing usually answers your practical questions before you email support.
Look for these signals:
- Named origin. Not just the country, but ideally the producing region or style.
- Certification detail. A clear statement of certified-organic status is more useful than wellness language.
- Testing transparency. Brands that mention batch testing, residue checks, or quality controls give you something concrete to assess.
- Packaging photos. Good images help you see whether the product is likely to stay fresh after opening.
- Preparation guidance. Sellers who know their tea usually explain how to brew it properly.
Purity means more than a logo
Many shoppers often get tripped up. They see “organic”, assume “clean”, and stop reading. But tea is an agricultural product. It comes from soil, weather, transport, processing, and storage. Each step matters.
If you're buying matcha, this becomes even more important because you consume the powdered leaf itself rather than steeping and discarding it. That's one reason grading, origin, and transparency matter so much in this category. If you'd like a simple breakdown of how quality tiers differ, this guide to different grades of matcha is a useful reference.
Ask a plain question when you shop: “What evidence does this seller provide beyond the word organic?”
A quick credibility filter
When a store page feels polished but vague, use this short test.
| Check | What you want to see |
|---|---|
| Origin | Specific sourcing information |
| Purity | Mention of testing or quality control |
| Certification | Clear certified-organic wording |
| Freshness | Packaging designed to protect tea from air and light |
| Education | Brewing advice that matches the tea type |
If a brand gives you three or more of those clearly, you're usually dealing with a seller that understands tea properly. If everything leans on mood, lifestyle imagery, and broad claims, keep browsing.
What good transparency feels like
A trustworthy tea brand doesn't make you work hard to feel informed. It explains what the tea is, where it comes from, how to use it, and why the product is packed the way it is. That kind of clarity is especially valuable for Australians ordering premium green tea online, where quality has to survive shipping as well as scrutiny.
Choosing Your Perfect Form Matcha vs Loose Leaf
Once you've narrowed quality down, the next question is personal. Do you want a tea you whisk, or a tea you steep?
This choice shapes everything. Flavour, routine, equipment, mouthfeel, convenience, and how often you'll reach for it on a busy morning all depend on the format. There isn't one right answer. There's only the one that fits your day.
Green tea holds about 39.6% of the organic tea market, and matcha is described as the fastest-growing format, with 68% of global consumers associating green tea with high antioxidant levels and choosing it for long-term health benefits, according to Maximize Market Research's organic tea market report. That helps explain why so many Australian shoppers land on matcha first when searching for organic green tea online.
Organic Matcha vs Loose Leaf Green Tea at a Glance
| Feature | Organic Matcha | Organic Loose Leaf Green Tea |
|---|---|---|
| Preparation | Whisked into water or milk | Steeped in hot water |
| Drinking style | Full-leaf powder consumed in the cup | Infused liquor, leaves removed after brewing |
| Flavour | Richer, fuller, often creamy or savoury | Lighter, cleaner, more delicate |
| Best for | Ritual drinking, lattes, smoothies, recipes | Daily cups, teapots, simple brewing |
| Equipment | Bowl or cup, whisk or frother, sieve helpful | Infuser, teapot, or basket |
| Texture | Smooth, suspended tea body | Clearer, lighter mouthfeel |
Choose matcha if your routine is hands-on
Matcha suits people who like ritual and versatility. You can drink it straight, whisk it into a latte, blend it into smoothies, or use it in baking. It feels more immersive because preparation is part of the experience.
That's also why grade matters. Ceremonial-style matcha is usually the pick for straight drinking, while culinary-style matcha works better in lattes, desserts, and recipes where the tea shares the stage with other ingredients.
Choose loose leaf if you want a simpler cup
Loose leaf green tea suits people who want ease without sacrificing quality. You measure the leaf, add water, wait a few minutes, and drink. No whisking. No frothing. No powder settling at the bottom of the cup.
For many Australians, that makes loose leaf the easiest daily entry point into better tea. If that sounds closer to your style, Pep Tea's best organic green tea loose leaf page shows the sort of product category to look for when you want quality without the ceremony.
Some people love matcha for focus and routine. Others want a clean, grassy cup they can brew half-awake before work. Both are good choices.
A quick self-check
If you're still torn, use these prompts:
- Go for matcha if you enjoy café-style drinks, want one tea for drinking and recipes, or like a more concentrated green tea experience.
- Go for loose leaf if you value speed, lighter flavour, and a more traditional brew.
- Try both if your weekday and weekend habits are different. Many tea drinkers keep loose leaf for everyday use and matcha for mornings, lattes, or baking.
The best organic green tea online isn't the one with the most dramatic description. It's the one you'll prepare properly and drink often.
Brewing and Using Your Organic Green Tea
A lot of “bad” green tea is good tea brewed poorly. That's encouraging news, because it means one small adjustment can improve the cup immediately.
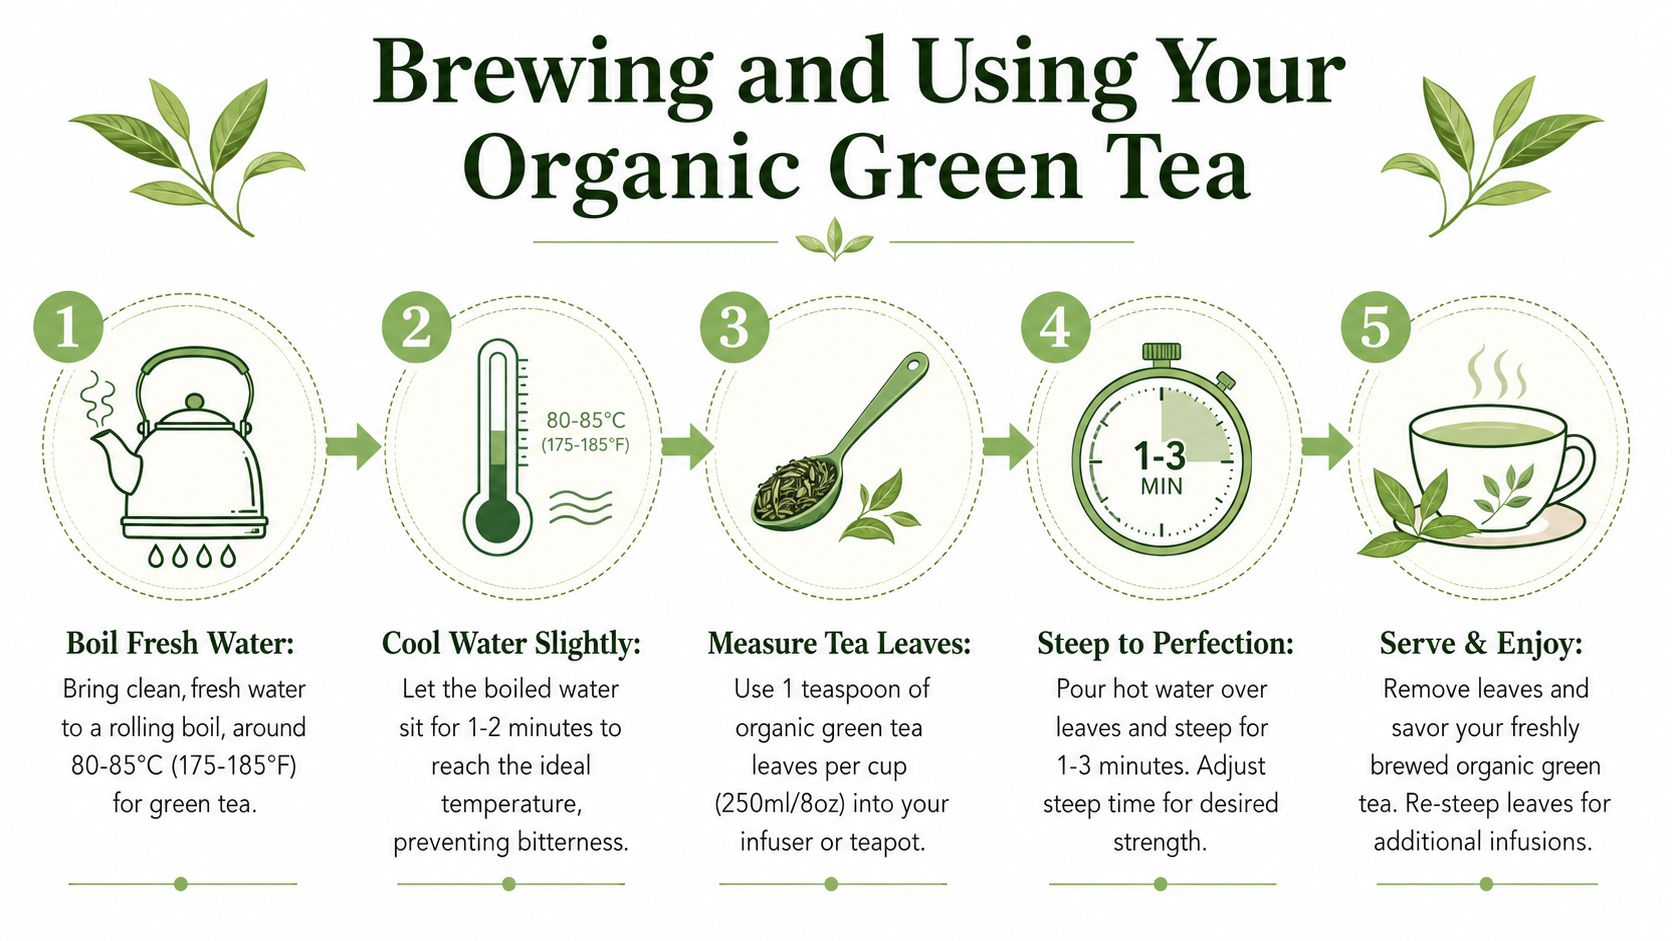
Peer-reviewed review data show that green tea is typically brewed at 80 to 90 °C for 3 to 4 minutes, and that most EGCG and caffeine extraction occurs around 80 °C, according to this review of green tea extraction and bioactive compounds. In simple terms, water that's too hot can push bitterness hard. Water in the right range gives you a better balance.
How to brew loose leaf well
You don't need specialist gear to get this right. You need a kettle, an infuser, and a timer.
Try this simple method:
- Boil fresh water, then let it cool slightly so it sits in the green tea range rather than straight off a hard boil.
- Add your leaf to an infuser or teapot.
- Pour and steep for a short, controlled time rather than guessing.
- Taste and adjust the next cup if needed. A shorter steep usually softens bitterness.
If your tea tastes harsh, don't blame the leaf first. Check temperature and time.
How to prepare matcha without lumps
Matcha is less about steeping and more about suspension. You're mixing powdered tea directly into liquid, so texture matters.
A reliable home method:
- Sift the matcha first if you can. This helps prevent clumping.
- Add a small amount of warm water and whisk into a smooth paste.
- Whisk briskly with more water until the surface looks evenly mixed and lightly frothy.
- For a latte, add your milk after the matcha is smooth.
For readers who like a visual guide, this short video is handy:
Easy ways to use it beyond a plain cup
Good organic green tea online should earn its place in your pantry. Matcha and loose leaf can both do more than one job.
A few practical uses:
- Morning latte. Matcha whisked with warm milk for a smoother start to the day.
- Iced drink. Chill brewed green tea and pour over ice.
- Smoothie add-in. Matcha works well when you want a green tea note in blended drinks.
- Baking and desserts. Culinary matcha suits slices, muffins, yoghurt bowls, and more.
- Food pairing. Loose leaf green tea can be a clean match for light lunches or sushi-style meals.
At Pep Tea, products like ceremonial-grade and culinary-grade organic matcha are examples of how different green tea formats suit different uses rather than one replacing the other.
Storage Freshness and Shipping Considerations
Fresh tea can lose its spark faster than many people expect. Light, air, moisture, and heat all work against flavour. If you've ever bought green tea that smelled flat or tasted dull within days, storage was probably part of the problem.
That's why packaging matters so much when you buy organic green tea online. User behaviour shows growing interest in how price, freshness, and packaging waste trade off when ordering online, along with a shift from conventional tea bags toward premium matcha and functional tea beverages, as noted in this retail-focused organic green tea collection page.
What to do once your tea arrives
Keep it simple and consistent:
- Store it airtight so the tea isn't repeatedly exposed to oxygen.
- Keep it out of direct light because light can flatten flavour over time.
- Avoid warm spots like windowsills, above kettles, or near the stove.
- Use the original pouch if it's well designed. Resealable, opaque packaging is usually there for a reason.
What to look for before you order
A product page can tell you a lot about freshness protection before you buy.
Check for:
- Opaque packaging rather than clear windows that expose the tea
- Resealable closures that make daily use easier
- Pack size that fits your habits so you're not opening the same bag for too long
- Clear shipping information that suggests the seller has thought about safe transit
If you're buying matcha, freshness protection matters even more because powder exposes a lot of surface area. Once opened, it deserves a bit of care.
Your Wellness Journey with Organic Tea
Buying organic green tea online doesn't need to feel like decoding a secret club. Once you know what to look for, the decision gets much calmer. You're checking for real certification, clear origin, sensible transparency, the format that suits your routine, and packaging that protects freshness.
That combination does more than help you choose a product. It helps you build a habit. A good green tea can become the quiet part of your day that feels organised, steady, and genuinely enjoyable. For some people that's a whisked matcha in the morning. For others it's a loose leaf pot in the afternoon instead of another coffee or a sugary drink.
The best tea choice is the one that fits your life closely enough that you'll keep reaching for it.
If you've been overwhelmed by choice, take that as a sign to simplify rather than give up. Look for proof over promises. Buy from sellers who educate as well as sell. And trust your own preferences once the basics are covered.
If you're ready to put that into practice, Pep Tea is a good place to explore organic matcha and green tea options with an Australian focus, clear education, and products designed for everyday use at home or in a café.
Your Perfect Matcha Cheesecake Recipe No Bake

You're probably here because you want a dessert that looks polished, tastes grown-up, and doesn't ask you to heat the kitchen. That's exactly where a good matcha cheesecake recipe no bake shines.
This is the kind of dessert that feels right in an Australian summer, on a dinner-party table, or tucked into the fridge the night before guests arrive. It has the cool creaminess of cheesecake, the gentle depth of green tea, and that striking green colour that makes everyone think you've gone to far more effort than you did.
An Elegant Dessert Without the Oven
You get home to a warm kitchen, want a dessert that looks polished, and have no interest in baking a cheesecake in summer. A no-bake matcha version solves that beautifully. You press in a biscuit base, whisk and fold the filling, chill it, and let the fridge do the setting.
That simplicity is part of its appeal, but the magic resides in its texture. A good no-bake matcha cheesecake should land somewhere between classic cheesecake and mousse. It needs enough body to slice neatly, yet enough air to feel soft and light on the spoon. That is why technique matters so much here. If you beat everything together too aggressively, the filling can turn heavy. If you fold with a gentle hand, you keep the whipped cream airy and the final texture far more delicate.
In practical terms, it is also an easy dessert for Australian home cooks. You can make it ahead, keep the kitchen cool, and pull out a cake that feels calm and considered rather than last-minute.
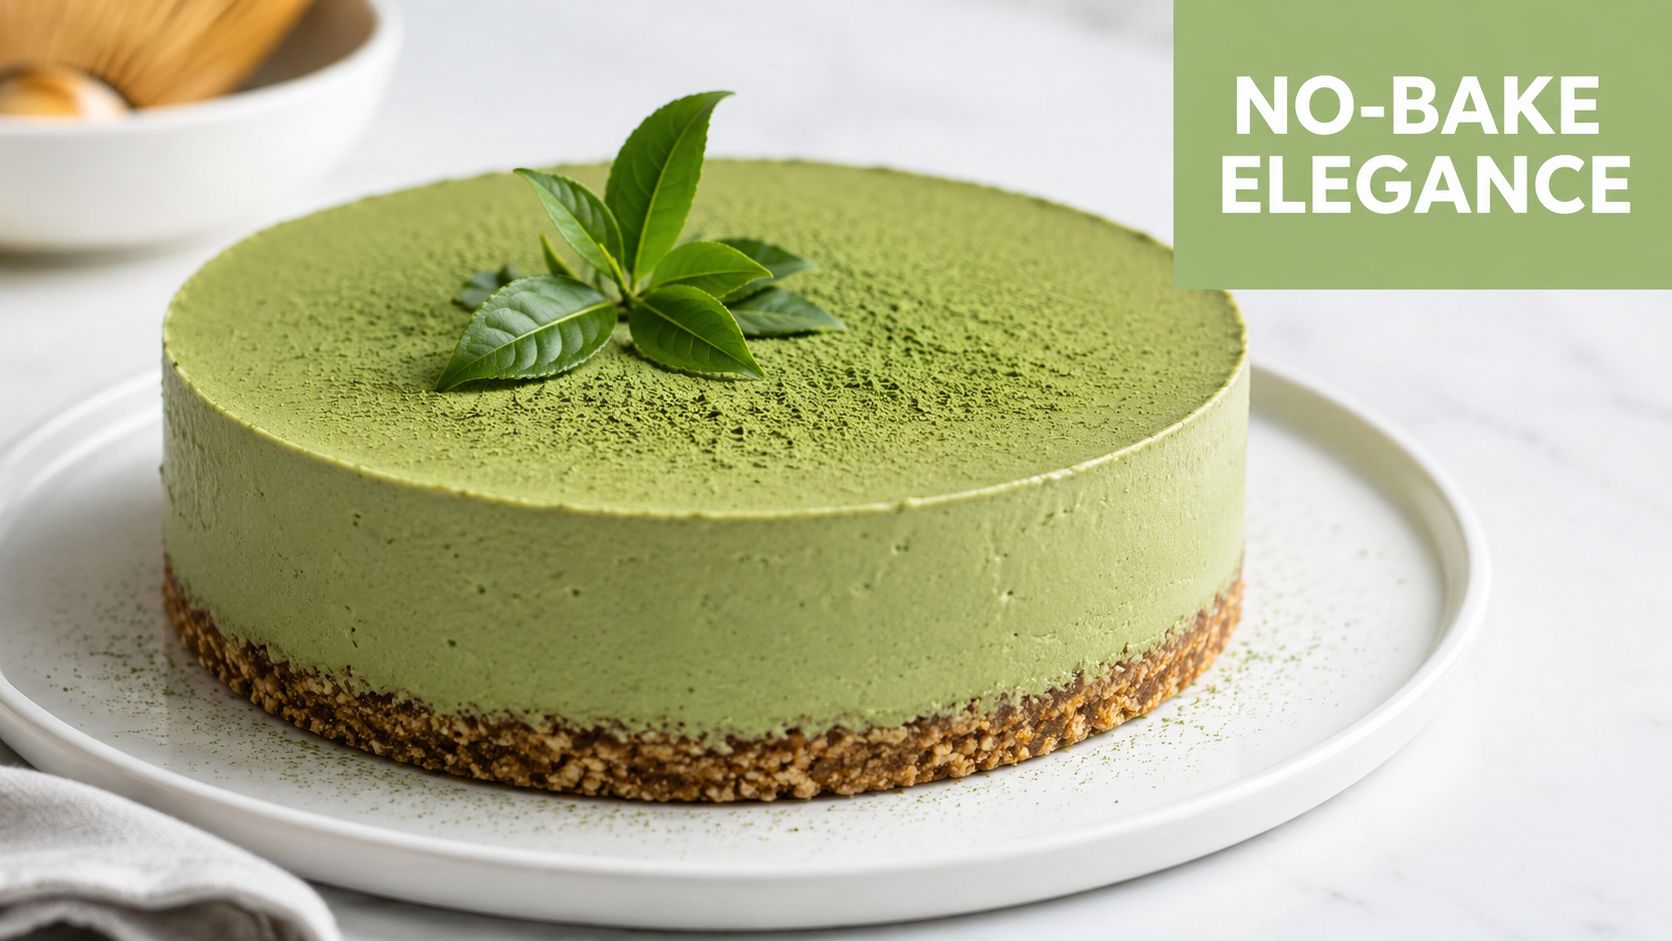
Why this dessert feels so special
Matcha does much more than tint the filling green. Good matcha brings gentle bitterness, fresh grassy notes, a little sweetness, and that clean tea finish that keeps cream cheese from feeling too rich. The result tastes poised and balanced, with richness held in check by the tea.
The choice of matcha makes a bigger difference than many recipes admit. Low-quality powder can taste flat, muddy, or sharply bitter, which is often why homemade matcha desserts disappoint. For baking and desserts, I like using organic culinary matcha powder chosen for cooking because it gives you stronger flavour and better colour without forcing you to use an excessive amount. If you want to find unique matcha from local makers, look for a powder with a fresh aroma and a vibrant green tone rather than an olive or brown cast.
The pan style is flexible too. Many home bakers use a springform tin for clean edges, but the same filling can work in a smaller pan or sliced bars if you want a different presentation.
A good no-bake cheesecake should feel cool, creamy and light on the palate, not dense and stodgy.
What success looks like
When this cheesecake is made well, each layer has a clear role. The base is firm enough to hold together, the filling is smooth and airy, and the matcha comes through clearly without any harsh, dry finish.
You should get creaminess first, then the green tea notes, then a clean finish that invites the next bite. That is what gives the dessert its elegant feel. It is refined, yes, but still very achievable at home when you use good ingredients and treat the filling gently.
Your Ingredients and Equipment Checklist
The ingredient list is short, but each item has a job. In a no-bake cheesecake, you don't have heat doing the setting for you, so texture comes from fat, temperature and technique. That's why this recipe works best when you use the proper ingredients, not lighter substitutes.
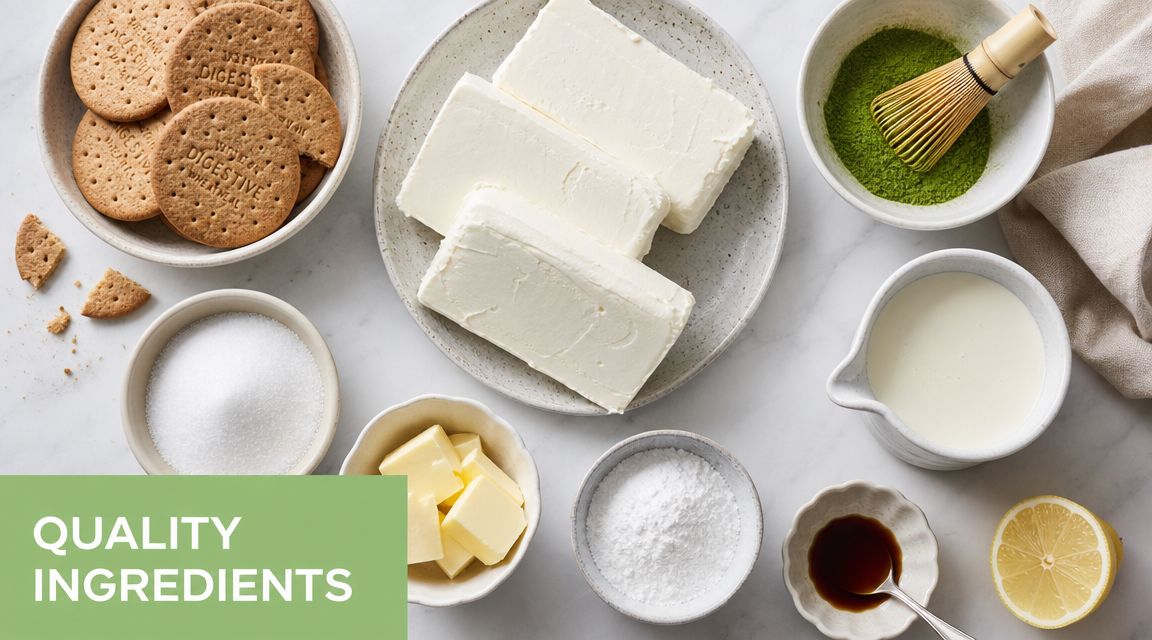
The core ingredients
For the base and filling, keep your shopping list simple:
- Plain sweet biscuits such as digestives or similar. These crush evenly and make a tidy, buttery base.
- Melted butter to bind the crumbs so the crust slices cleanly.
- Full-fat cream cheese for body, richness and structure.
- Caster sugar or icing sugar, depending on your preferred texture.
- Thickened cream or heavy cream to create the light finish.
- A little acid such as lemon juice. It brightens the filling and helps balance richness.
- Pure matcha powder for flavour and colour.
A lot of confusion starts with the cream cheese. Use block-style, full-fat cream cheese if you can. Spreadable tub versions are often softer and can leave the filling looser than you want.
Choosing the right matcha
Often, recipes become vague. One of the biggest gaps in no-bake matcha cheesecake recipes is that they often tell readers to add “matcha” without explaining how culinary grade versus ceremonial grade affects flavour, colour or bitterness, as discussed in this matcha cheesecake guide.
That matters because cheesecake is rich. The dairy can mute delicate tea notes, so your matcha needs enough presence to come through clearly.
Here's the practical rule:
- Use high-quality culinary matcha for baking and desserts. It has the strength to stand up to cream cheese, cream and sugar.
- Don't reach straight for ceremonial matcha unless you know the flavour profile you want. Ceremonial matcha is lovely whisked as tea, but in a cheesecake it can be an expensive ingredient whose subtle notes get lost.
- Sift the matcha first so you don't end up with little dark green lumps in the filling.
If you enjoy comparing tea styles before choosing one for baking, it can help to find unique matcha from local makers and notice how colour, aroma and bitterness differ from one powder to another.
For dessert use, a dedicated organic culinary matcha powder for cooking is the easiest starting point because it's designed to perform well in recipes, not just in a tea bowl.
The best matcha for cheesecake gives you a fresh green colour and a rounded tea flavour, not an aggressive grassy finish.
Equipment that makes life easier
You don't need a professional kitchen. You do need a few reliable tools:
| Tool | Why it helps |
|---|---|
| Springform pan | Releases the cheesecake neatly without damaging the sides |
| Electric mixer | Smooths the cream cheese properly |
| Mixing bowls | One for the cream cheese base, one for the whipped cream |
| Spatula | Essential for folding without knocking out air |
| Fine sieve or sifter | Breaks up clumps in the matcha |
| Food processor or rolling pin | Crushes the biscuits evenly |
A 20 cm springform pan is the usual home-baker choice in Australia and sits comfortably within the common 9-inch recipe style found in published no-bake versions.
The Step-by-Step No-Bake Method
The secret to a mousse-like cheesecake isn't luck. It comes from handling the filling in two distinct stages. Recipe sources consistently warn that the main failure point is overmixing, and that the best texture comes when you beat the cream cheese and flavourings until smooth, whip the cream separately to stiff peaks, then gently fold it in according to this technique-focused recipe.
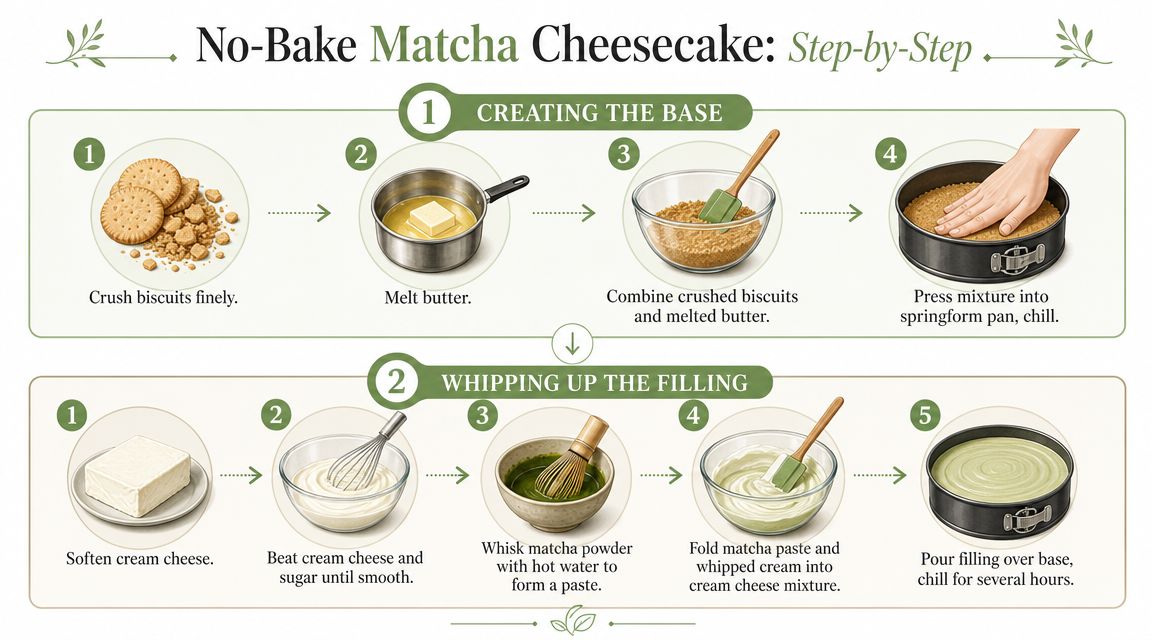
Stage one for the biscuit base
Crush the biscuits finely.
You want an even crumb, almost like damp sand once the butter is added. Large chunks make the base harder to slice neatly.Stir through melted butter.
Mix until every crumb looks coated. If some crumbs stay dry, the base won't hold together well.Press the mixture into your springform pan.
Use the back of a spoon or the base of a glass. Press firmly across the bottom and slightly up the sides if you like a taller edge.Chill the base while you make the filling.
This helps it firm up early so it doesn't shift when the filling goes in.
Stage two for the filling
Here, the texture is won or lost.
Beat the cream cheese until smooth.
It should be soft enough to mix without lumps. Cold cream cheese fights back and leaves grainy bits through the filling.Add sugar, matcha and any flavourings.
Sift the matcha before adding it. If you like, whisk the matcha with a small amount of liquid first to make a smooth paste before it goes into the bowl. That helps the colour distribute evenly.Mix until fully homogenous.
You're aiming for one smooth, green mixture with no streaks and no pockets of unmixed cream cheese.Whip the cream separately to stiff peaks.
This matters more than many readers realise. Stiff peaks mean the cream holds shape when you lift the beaters. That whipped air is what gives the cheesecake its lighter body.
For a smoother, lump-free finish in the tea itself, a matcha tea sifter is useful before the powder ever reaches the mixing bowl.
Practical rule: Stop the mixer once the cream reaches stiff peaks. Keep going and you risk turning silky cream into a grainier mixture that won't fold as cleanly.
The folding step that changes everything
Fold the whipped cream into the matcha cream cheese mixture gently.
Use a spatula, not the mixer. Scoop from the bottom of the bowl and lift over the top in broad, slow motions.Work in batches if that feels easier.
Fold in a small amount first to loosen the base, then add the rest. This makes it easier to keep the air you've whipped in.Stop once combined.
The mixture should look smooth and airy. If you keep stirring after that point, you'll deflate the whipped cream and lose the mousse-like texture.
This is the step many home bakers rush. Mixing feels faster, but folding is what protects the tiny air bubbles in the cream. Those bubbles help the filling feel soft and elegant instead of compact and heavy.
Finish the cheesecake properly
Spoon the filling over the chilled base.
Spread it gently to the edges with a spatula.Smooth the top.
A small offset spatula works well, but the back of a spoon is fine too.Cover and refrigerate.
Let the cold do the setting.
A simple workflow helps:
- Room-temperature dairy for mixing makes the filling smoother.
- Cold cream for whipping gives better volume.
- Gentle folding at the end protects the final texture.
If you keep those three ideas straight, this dessert becomes very reliable.
Achieving the Perfect Set and Finish
You lift the springform tin, slide in the knife for the first slice, and hope the centre holds. This is the stage where a no-bake matcha cheesecake becomes either beautifully mousse-like or a little too loose. The difference usually comes down to time, temperature, and restraint.
This cheesecake sets in the fridge as the fats in the cream and cream cheese firm up and the airy filling settles into a stable structure. Cold does the work slowly, which is why a rushed chill often gives you soft, untidy slices. An overnight rest gives the cleanest result, but a longer daytime chill can still work well if the filling was folded gently and whipped to the right stage earlier.
Texture matters here just as much as appearance. A good no-bake matcha cheesecake should hold a neat edge on the plate, then soften quickly on the fork. That is the sweet spot. You want a dessert that feels light, almost like a set cream, not dense or rubbery.
What a proper set looks like
The outer edge should look smooth and hold its shape when the ring is removed. The centre may have a slight wobble, but it should not ripple like liquid. If you press the top very lightly with a clean fingertip, it should feel softly springy.
That gentle wobble can confuse home bakers. It does not mean failure. It means the filling is chilled yet still delicate, which is exactly what gives this cheesecake its mousse-like character.
How to finish it neatly
Keep the decoration simple so the matcha can stay the star, both in flavour and colour. High-quality organic culinary matcha earns that spotlight. It gives you a fresher green hue and a fuller tea flavour, without the dull colour or harsh bitterness that can make other versions taste flat.
A few finishing options work especially well:
- A fine dusting of matcha just before serving for a clean, classic look
- Fresh raspberries for brightness and contrast
- White chocolate shavings for a softer, sweeter finish
- Black sesame seeds for a nutty accent and a striking dark detail
Use a light hand. Too many toppings can hide the clean flavour of the tea and make the dessert look busy.
Small finishing habits that make a big difference
For the cleanest slices, warm your knife in hot water, wipe it dry, and clean it between cuts. Chill the cheesecake fully before dusting with matcha, or the powder can darken in patches on the damp surface. If you are making this for guests, topping it shortly before serving keeps the finish sharp and fresh.
If you enjoy learning how fine powders behave in desserts, instant coffee baking techniques offer useful ideas about dissolving flavour evenly without creating gritty pockets. The principle is similar with matcha. A smooth, even finish starts with careful handling from the beginning and pays off at the end.
Patience gives you the final polish here. Let the chill do its job, keep the finish elegant, and your cheesecake will slice with confidence and taste as lovely as it looks.
Troubleshooting and Recipe Variations
Even when the recipe is straightforward, small things can throw the texture off. The good news is that most problems come from one of a few easy-to-fix causes.
If something went wrong
The filling seems too soft
The cream may not have been whipped firmly enough, or the cheesecake may need more time in the fridge.The cheesecake tastes bitter
The matcha may be too strong for the amount of dairy and sugar, or the powder itself may be lower quality and more astringent.The base crumbles when sliced
It usually needs a little firmer pressing next time. Very uneven biscuit crumbs can also make the crust less stable.The filling looks lumpy
Cream cheese that was too cold is often the culprit. Beat it until smooth before adding anything else.
Easy ways to adapt it
This recipe is flexible enough to suit different dietary needs:
- Gluten-free version uses gluten-free biscuits for the base.
- Lower-sugar option works best with a powdered sweetener so the filling stays smooth rather than gritty.
- Vegan version can be made with vegan cream cheese and coconut cream or a whipped plant-based alternative, though the final texture may differ.
If you enjoy flavour layering in desserts, it's worth studying methods from other baking niches too. For example, instant coffee baking techniques offer useful ideas about dissolving bold powders smoothly into creamy mixtures, and that same thinking can help when you're trying to avoid matcha clumps or harsh pockets of flavour.
Most no-bake cheesecake problems aren't disasters. They're texture clues. Once you know what caused them, the next one is usually excellent.
How to Serve and Pair Your Creation
You have chilled the cheesecake, lifted out a clean slice, and that soft green centre looks almost like a set matcha mousse. This is the moment to keep everything else simple, so the texture stays the star and the flavour of the matcha stays clear.
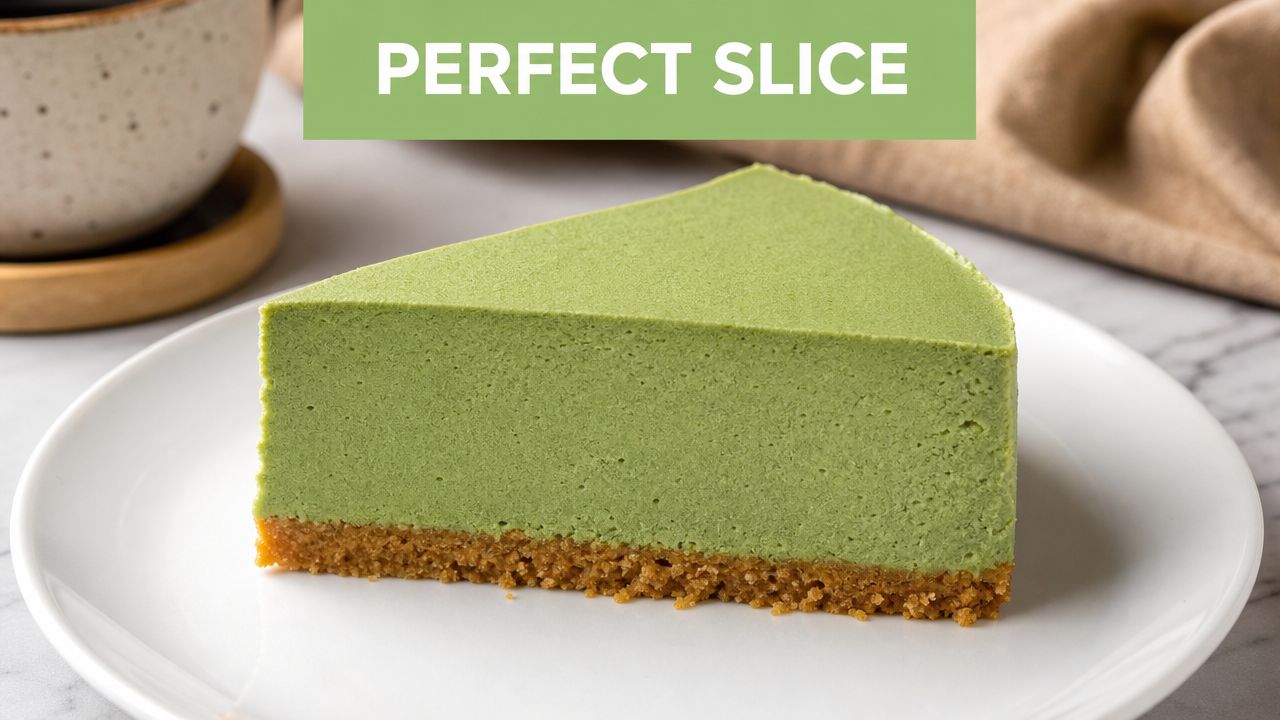
For the neatest slices, use a sharp knife dipped in hot water, then wipe it dry before cutting. Clean the blade between each slice too. It works like cutting custard with a warm spoon. You glide through the filling instead of dragging it, which keeps those layers distinct and protects that light, airy structure you worked so carefully to build.
Serve each slice well chilled, but not ice-cold straight from the back of the fridge. A few minutes at room temperature lets the creaminess soften slightly, and the matcha becomes easier to taste. This matters even more if you used a good organic culinary matcha, because its grassy sweetness and vivid colour deserve room to show themselves. Lower-quality matcha can taste flat or bitter, so keep garnishes and drinks restrained rather than piling on extra sweetness to cover it.
Pairings that make the dessert feel complete
The best pairing refreshes your palate between bites. Sparkling water with lemon, a cold yuzu drink, or lightly sweetened iced tea all do that job beautifully because they cut through the richness without fighting the tea notes.
An iced matcha drink can work well too, as long as it is lighter and less creamy than the cheesecake itself. If you enjoy matching dessert with a tea-based drink, this guide on how to make an iced matcha latte is a lovely companion read.
For garnish, less is usually more. A small dusting of matcha, a few white chocolate curls, or a couple of fresh raspberries give contrast without distracting from the filling. White chocolate is especially good with matcha because its sweetness rounds out any faint astringency and lets the green tea flavour feel softer and fuller. If you want to add coloured chocolate details or a decorative drizzle, DBakerAid™'s expert chocolate coloring advice is a helpful resource.
A quick visual guide can help before you plate your own.
A thoughtful plate is enough. One clean slice, one restrained garnish, one fresh drink on the side. That balance lets the mousse-like texture and the clean flavour of quality matcha come through clearly.
If you'd like to make this with premium organic matcha chosen for both drinking and kitchen use, explore Pep Tea for Australian matcha and tea inspiration, including recipe ideas, iced matcha guides and pantry staples for your next bake.
Qi Organic Green Tea Detox Coles: Benefits, Price &
You're probably standing in the tea aisle, phone in hand, typing Qi Organic Green Tea Detox Coles because the box sounds promising but the wording is a bit slippery. “Detox” can mean anything from a simple herbal tea to a product that implies far more than it can reasonably deliver.
That confusion is fair. A tea can be pleasant, useful, and worth buying without being a miracle reset for your body. The trick is knowing what you're getting, what the ingredients are there for, and how it compares with other wellness drinks Australians reach for when they want something functional and low-fuss.
Your Guide to Qi Organic Green Tea Detox
You are in the supermarket tea aisle after work, looking for something that feels a bit kinder than another coffee and more purposeful than plain tea. A box labelled organic, green tea, and detox naturally catches your eye because it suggests a simple health habit, not a full lifestyle overhaul.
That appeal makes sense. Australian shoppers often use teas like this as a small daily ritual. The organic label can signal cleaner sourcing, while the word detox hints at support for a lighter, fresher routine. The catch is that those two ideas are not the same thing, and many people blur them together.
Why this tea gets attention
Qi Organic Green Tea Detox sits in a familiar wellness category. It offers a convenient tea-bag format, an organic positioning, and a name that suggests more function than a standard green tea. For plenty of shoppers, that is enough to earn a place in the trolley.
The better question is what kind of function you are buying.
A detox-style tea usually works best as a supportive beverage category. It can be part of a routine that feels calm, warm, and a little more intentional. It does not replace sleep, hydration, balanced meals, movement, or the normal work your liver and kidneys already do.
That distinction matters because it helps you shop more clearly. If you want a pleasant organic green tea blend, Qi may suit that role well. If you want stronger functional value, it helps to compare it with other wellness options Australians are choosing, especially high-quality Matcha for concentrated antioxidants and Kombucha for live probiotics.
If you want a clearer foundation before judging any product in this category, this guide to organic green tea basics explains what the label does, and does not, tell you.
What to expect from the product
Keep the product in the right mental category and it becomes easier to assess.
- An easy daily habit. Tea bags are convenient, familiar, and low effort.
- A flavoured green tea experience. You are choosing a wellness blend, not a pure ceremonial tea.
- A gentle sense of support. The benefit is usually about routine, taste, and light functional ingredients rather than a dramatic result.
That is also where this article takes a wider view. Qi is a useful case study because it shows how many wellness teas are marketed in Australia. Some are built around comfort and broad wellness language. Others, such as Matcha and Kombucha, tend to offer a more defined functional profile. Understanding that spectrum helps you choose a tea for what it does, not just what the front of the box suggests.
What Is Inside a Bag of Qi Detox Tea
The Australian version of Qi Detox Green Tea is sold as an organic blend with ingredients such as green tea, dandelion root, milk thistle, ginger, and peppermint, according to the Qi Tea Australia product listing. Read that list as a clue to the product's real identity. It's a herbal green tea blend first, and a “detox” tea second.
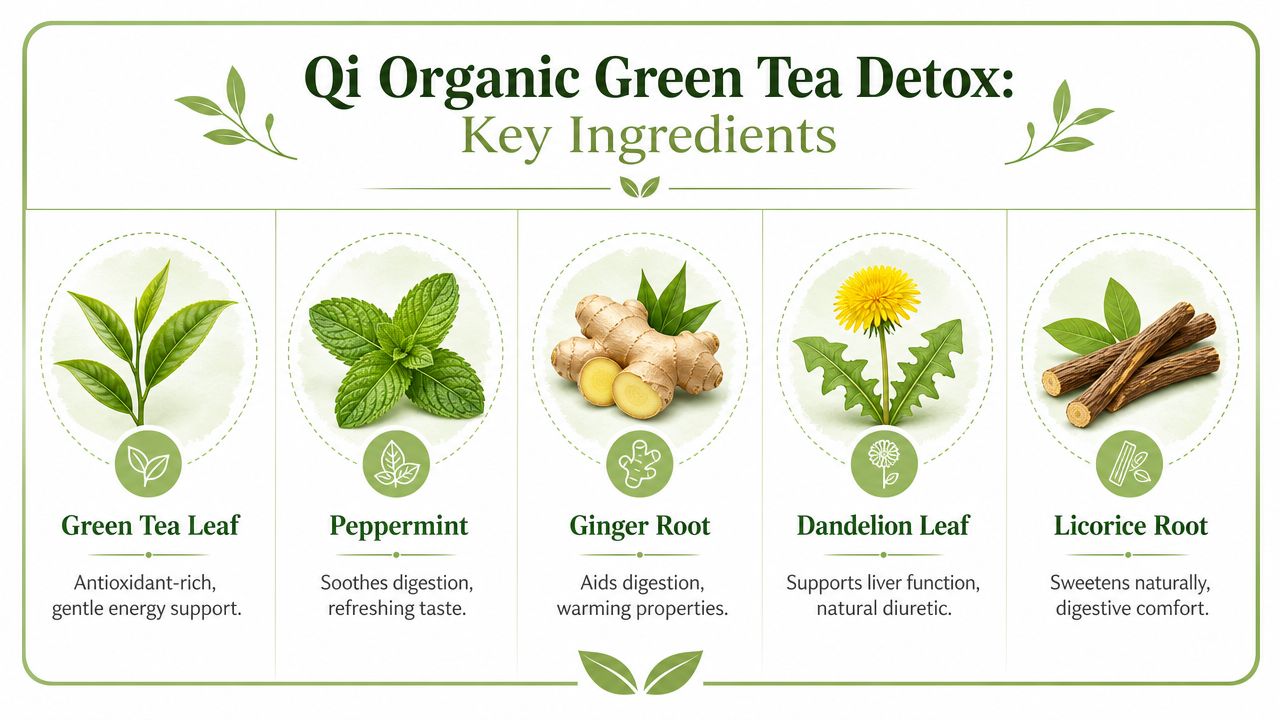
The ingredient lineup in plain English
Each ingredient contributes something different to the cup.
- Green tea: This is the caffeinated base. It gives the blend its tea character and a lighter lift than coffee.
- Peppermint: Often what makes a blend feel fresh and easier to drink, especially if plain green tea tastes grassy to you.
- Ginger: Adds warmth and a bit of spice. Many people choose ginger-forward teas when they want something settling after meals.
- Dandelion root: Frequently included in detox-style products because it has a long wellness tradition in herbal blends.
- Milk thistle: Another herb commonly associated with liver-support language in wellness marketing.
Where readers often get confused
The ingredients sound impressive, so it's easy to assume the tea must “detox” the body in a direct, measurable way. That leap is where marketing often outruns clarity.
Australian dietary guidance takes a more grounded view. The Australian Dietary Guidelines emphasise eating patterns built around whole foods and water rather than “detox” products as a health reset, which is why it's more accurate to see this tea as part of a wellness routine, not a physiological clean-out.
Practical rule: If a tea says “detox”, ask what you can clearly point to in the cup. Flavour? A bit of caffeine? Herbs traditionally used in wellness blends? Those are fair answers. Grand body-reset promises aren't.
What the tea can realistically offer
A fair way to think about Qi Detox Tea is this:
| What it likely does | What it doesn't automatically mean |
|---|---|
| Gives you a warm, low-sugar drink option | That your body needs a special tea to detox |
| Adds herbal flavour beyond plain green tea | That the herbs create a dramatic measurable result |
| May suit a mindful daily routine | That it replaces healthy food, water, or rest |
That's not a criticism. It's just a clearer framing. For plenty of people, a pleasant organic herbal green tea is exactly what they want.
Finding Qi Tea at Coles A Shoppers Checklist
You are in Coles, trying to spot a wellness tea before the trolley keeps moving. The easiest mistake is looking in the wrong place. Qi Organic Green Tea Detox is usually stocked with standard tea products, not with refrigerated health drinks or vitamin-style supplements.
What to check on the shelf
Start with the green tea and herbal blend area. Qi is generally sold in a boxed tea-bag format, so you are looking for a pantry tea, not a ready-to-drink product.
A practical shelf check helps:
- Pack format: Look for a 25 tea bag, 40 g box.
- Aisle placement: Check beside green tea, peppermint, and other wellness blends.
- Price benchmark: Expect a mid-range supermarket tea price rather than a premium speciality-tea price.
- Label wording: Scan for “detox”, “organic”, and the Qi brand name on the front of the box.
That price position matters because it tells you what kind of product you are buying. A grocery-shelf detox tea is usually built for convenience and everyday sipping. More concentrated wellness formats, such as quality matcha powder or live kombucha, often aim for a different functional role. Matcha gives you the whole tea leaf in powdered form, which changes the antioxidant story. Kombucha brings fermentation into the picture, which is a different category again.
If you are trying to trim the grocery budget, Cashback Australia's Coles gift card tips can be handy for routine pantry buys.
How to brew it so it tastes better
A harsh cup can make any tea seem worse than it is. Green tea works a bit like spinach in a frypan. Too much heat for too long, and the pleasant notes get lost.
Use a gentler method:
- Boil the kettle, then let the water cool slightly before pouring.
- Steep for a shorter time first and taste early.
- Remove the bag once the flavour is clean and light, rather than pushing for maximum strength.
- Add lemon or mint if you want a fresher finish.
That approach gives you a fairer read on the tea itself.
If you end up enjoying lighter tea flavours, it can also help to use them in food and cold drinks rather than forcing a very strong hot brew every time. Something simple like these easy matcha muffins for a tea-time snack shows how wellness teas can fit into everyday routines in a more useful way than detox marketing alone.
If the first cup tastes bitter, adjust the water temperature and steep time before you judge the blend.
Creative Recipes Beyond the Hot Cup
Qi Detox Tea works best for many people when it stops feeling like a “health task” and starts acting like a flexible base for drinks you enjoy. A box in the pantry goes further when you use it cold as well as hot.
Qi detox iced tea
Brew a strong cup, let it cool, then pour it over ice with lemon and mint. The peppermint and ginger notes usually come forward more clearly when it's chilled.
A simple method:
- Brew stronger than usual: Use less water so the flavour doesn't disappear over ice.
- Cool fully: Warm tea melts the ice and waters itself down.
- Finish fresh: Add lemon slices and a few mint leaves.
This is a nice afternoon option if you want something cleaner-tasting than cordial or juice.
Easy wellness spritzer
For a lighter mocktail feel, use cooled tea as the base and top it with sparkling water. Add cucumber for a crisp finish or a slice of ginger if you want more bite.
You can also pair a tea-based drink with something simple from the kitchen if you enjoy wellness-style recipes. For example, these matcha muffins make an easy snack alongside an iced tea or spritzer.
Cold tea drinks work well because they shift the experience from “herbal remedy” to “refreshing everyday beverage”.
Qi Detox Tea vs Matcha and Kombucha
The best way to judge Qi Detox Tea is to place it on a broader wellness spectrum. It isn't trying to be everything. It's a gentle herbal green tea blend. The more useful question is whether that matches your goal.
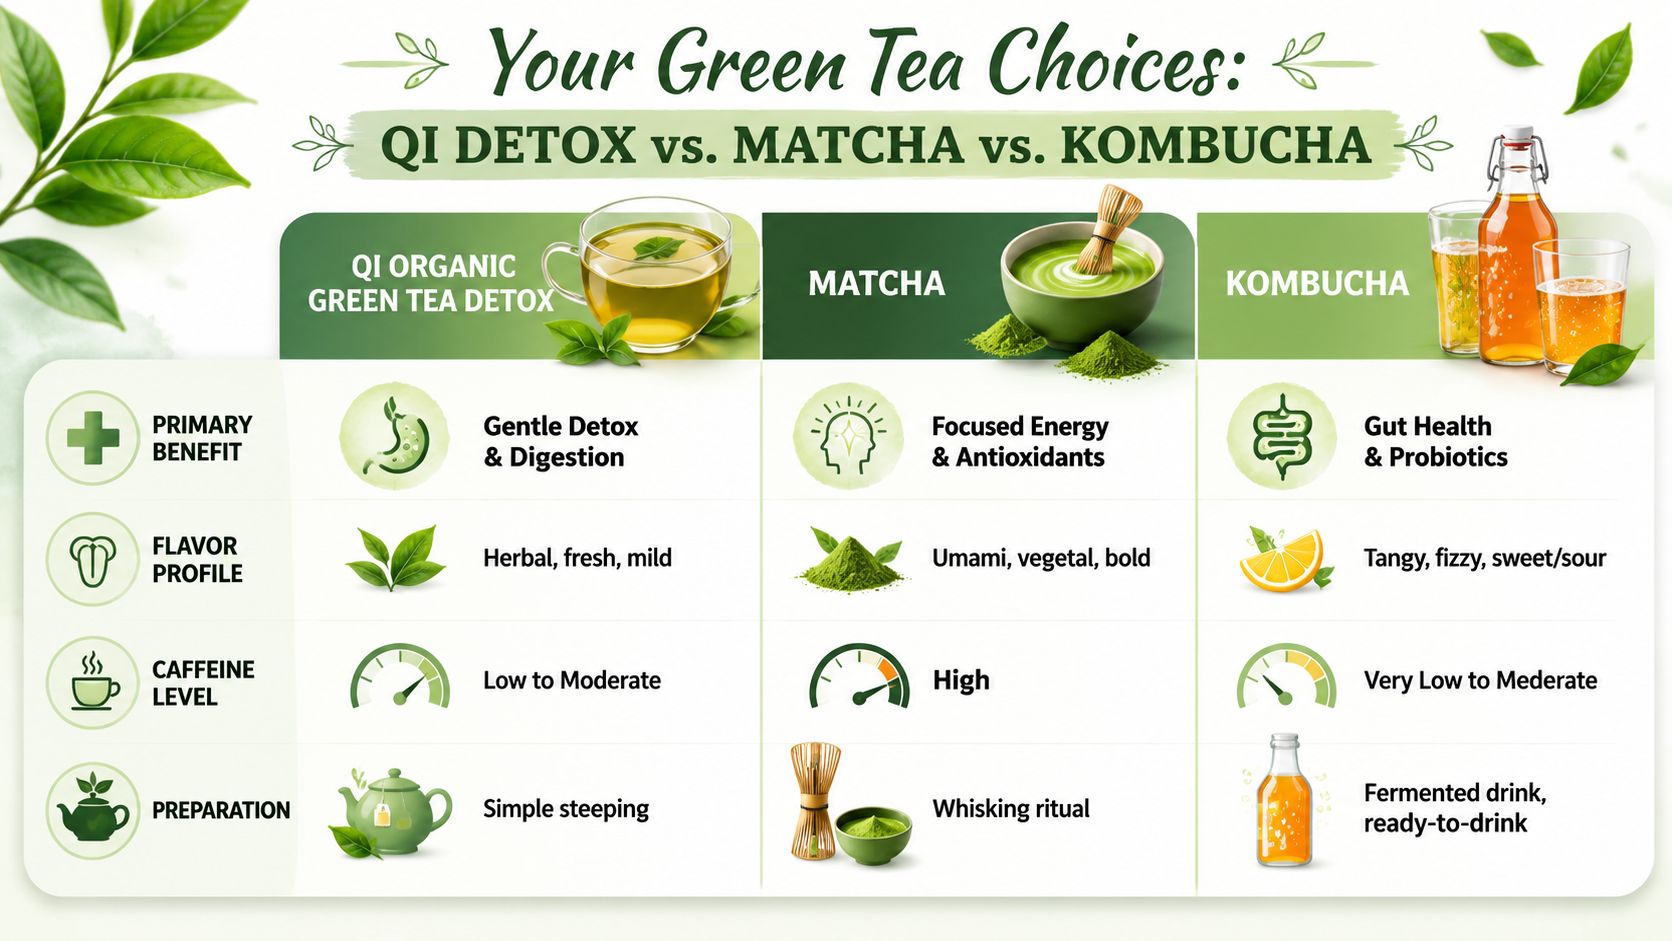
Qi Detox Tea as the entry point
Qi sits in the category of approachable supermarket wellness teas. It's easy to brew, easy to understand, and easy to fit into a routine. If you want a warm cup with herbal character and a lighter tea feel, it makes sense.
Its limitation is also clear. The “detox” part is more marketing language than precise functional language.
The product discussion around Qi Detox Tea raises this exact issue. The measurable outcome of detox claims is less clear, while high-quality organic matcha delivers a verifiable high dose of EGCg antioxidants, and properly brewed kombucha provides live probiotics for gut health, as noted in the Qi product comparison discussion from Qi Teas UK.
Where matcha differs
Matcha is still green tea, but it's a very different experience from a tea bag blend. You whisk the powder into water, so you consume the tea rather than just steeping leaves and removing them.
That matters because people who choose matcha are usually after something more specific:
- A fuller green tea profile
- A more focused ritual
- A clear antioxidant story
If you want a sharper explanation of how these green tea formats differ, this guide on the difference between matcha, green tea and green tea blends is worth reading.
Here's a helpful visual explainer on matcha preparation and use:
Where kombucha differs
Kombucha isn't a tea bag at all. It's a ready-to-drink fermented tea. People usually choose it for a different reason entirely. They want a cold, refreshing drink with a more distinct functional identity than a “detox” blend offers.
That makes kombucha appealing if your main aim is:
| Beverage | Best fit for |
|---|---|
| Qi Detox Tea | A warm herbal green tea routine |
| Matcha | A stronger antioxidant-focused tea ritual |
| Kombucha | A fizzy, probiotic-oriented alternative to soft drinks |
A useful way to choose is to ask what benefit feels most concrete to you. Gentle herbal tea enjoyment, antioxidant-rich green tea, or a probiotic drink for gut-focused routines.
None of these is automatically “better” in every situation. They solve different beverage needs.
The Final Sip Which Wellness Tea Is Right for You
You came here for a practical answer about Qi Organic Green Tea Detox Coles. Here it is.
The best choice depends on the job you want the drink to do. A tea can be pleasant without offering a sharply defined functional benefit, and that distinction helps cut through a lot of wellness marketing.
Qi Organic Green Tea Detox suits people who want an easy supermarket option for a warm daily cup. The appeal is convenience and flavour balance. You get a familiar tea ritual with a mix of green tea and herbs, without needing special preparation or a bigger budget.
Matcha makes more sense if you want your green tea to feel purposeful, not just comforting. Because you consume the whole tea leaf in powdered form, the experience is usually chosen for its stronger antioxidant story and more intentional ritual. It is a bit like the difference between adding herbs to a meal and eating the main ingredient itself. Both have a place, but they do not do the same job.
Kombucha is often the better fit for people who are not really after a hot tea at all. They want a cold, refreshing option with a clearer gut-health identity, especially if they are trying to swap out soft drinks for something with a probiotic angle.
So the question is not, “Which tea is best?” It is, “Which benefit do I want every day?” If the answer is a simple herbal green tea habit, Qi is a fair pick. If the answer is antioxidants with more intensity, or probiotics in a ready-to-drink format, high-quality matcha and kombucha usually offer a more defined functional direction.
If you'd like to explore wellness drinks with a more defined functional focus, have a look at Pep Tea for organic matcha and Australian-brewed organic kombucha.
Your Guide: What Does Matcha Latte Taste Like in 2026?

A matcha latte usually tastes creamy, smooth, and subtly sweet, with a distinctive green flavour that balances vegetal notes, umami, and mild bitterness. A common starting method is 1 teaspoon of matcha powder mixed with 2 tablespoons of water before adding milk, which helps keep the flavour full instead of washed out.
If you're staring at a bright green latte on a café menu and wondering whether it'll taste like grass, spinach, dessert, or some strange health drink, you're not alone. Matcha can be confusing at first because people often describe it with one vague word, usually “earthy”, and stop there.
That doesn't help much when you're deciding whether to order one.
Its taste is more interesting. A good matcha latte tastes layered. It has a fresh green character, a savoury depth, and a creamy finish from the milk. The exact balance changes with the matcha grade, the milk you choose, and how the drink is prepared. Once you understand those levers, the flavour stops feeling mysterious and starts feeling easy to control.
Your First Sip What to Expect from a Matcha Latte
You've probably seen matcha lattes everywhere in Australia. They show up in minimalist cafés, on brunch tables, and all over social feeds with that unmistakable jade-green colour. The look alone suggests something fresh and energising, but the taste often surprises first-time drinkers.
A well-made matcha latte doesn't taste like a standard cup of green tea with milk poured into it. It tastes fuller, softer, and more rounded. The first sip usually brings creaminess from the milk, then a fresh green flavour, followed by a gentle savoury note that lingers in a pleasing way.
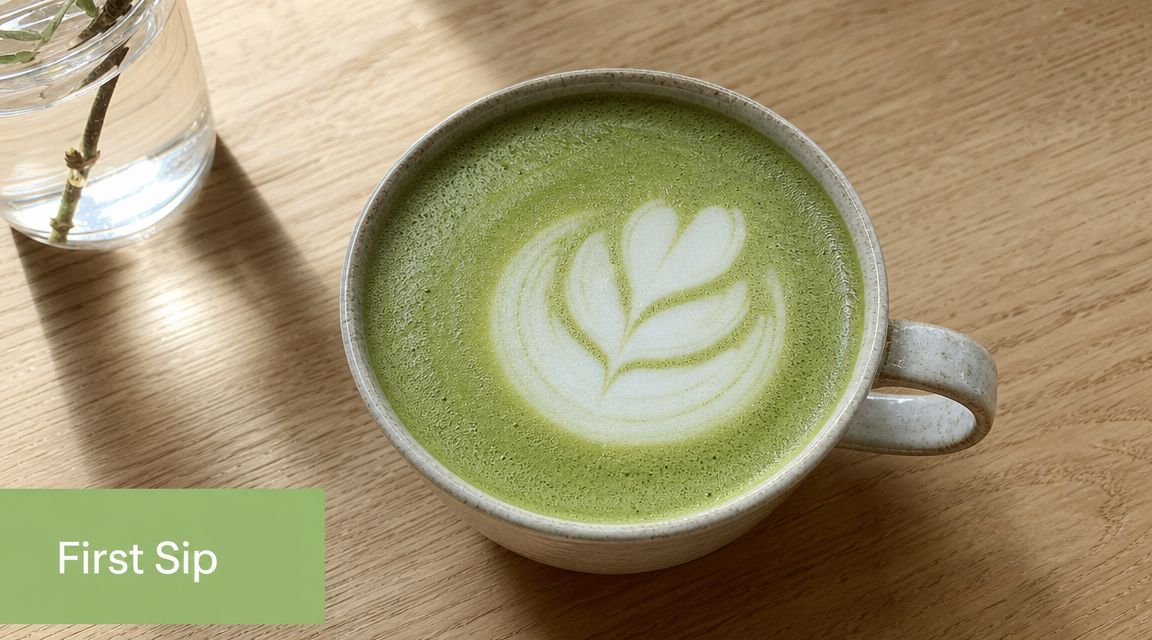
The easiest way to picture the flavour
If you've never had one before, think of it like this:
- Green and fresh. Not in a harsh salad way, but more like young greens or steamed edamame.
- Creamy and mellow. Milk smooths out the sharper edges.
- Lightly sweet. Even before extra sweetener, a good matcha latte can come across as naturally soft.
- A little savoury. This is the part people often don't expect, and it's what makes the drink interesting.
That savoury character is why matcha latte fans often describe the drink as comforting rather than sugary. It can feel café-worthy and soothing at the same time.
A matcha latte should taste green in a pleasant way, not like watered-down lawn clippings.
Why first impressions vary so much
Two people can order a matcha latte from different cafés and come away with completely different opinions. One gets a smooth, balanced drink and loves it. The other gets something thin, overly sweet, or bitter and decides matcha isn't for them.
Usually, the difference comes down to three things:
- The powder quality
- The milk and sweetener choices
- The mixing ratio
Those three choices shape almost everything you taste. That's why one matcha latte can feel silky and dessert-like, while another feels sharper and more brothy.
The Core Flavour Profile of a Matcha Latte
The clearest way to answer what does Matcha latte taste like is this: it's a balance of vegetal or grassy notes, umami, and milk-led creaminess with sweetness. That description is strongly supported by this matcha latte flavour guide from Nio Teas, which also notes a useful preparation method of 1 teaspoon of matcha powder with 2 tablespoons of water before milk is added.
Vegetal doesn't mean unpleasant
“Vegetal” can sound off-putting if you haven't tasted matcha before. People hear it and assume the drink must taste raw, bitter, or aggressively healthy.
In practice, that green note is often closer to:
- Steamed spinach
- Edamame
- Fresh-cut herbs
- Young spring greens
The key is softness. Good matcha tastes green, but not rough. It has a living, leafy quality that feels fresh rather than harsh.
Umami is the secret people struggle to name
If you've ever taken a sip and thought, “This tastes rich, but not sugary,” you were probably noticing umami.
Umami is the savoury taste that adds depth. In a matcha latte, it can feel lightly brothy, rounded, and almost creamy in its own right, even before the milk comes in. This is one reason matcha feels more complex than many other tea drinks.
Practical rule: If your matcha latte tastes only sweet, something is off. A good one still lets the tea taste like tea.
Milk changes the shape of the flavour
Milk doesn't erase matcha's taste. It reshapes it.
Instead of letting bitterness sit on top of your tongue, milk cushions it. Instead of making the drink taste sharp, it creates a smoother texture and brings forward any natural sweetness in the matcha. That's why the same powder can taste very different as a straight bowl of whisked matcha compared with a latte.
Here's a simple way to think about the three main flavour elements:
| Flavour note | What it feels like in the cup | What it adds |
|---|---|---|
| Vegetal or grassy | Fresh, green, leafy | Brightness and identity |
| Umami | Savoury, rounded, lightly brothy | Depth and richness |
| Milk sweetness | Creamy, soft, mellow | Balance and comfort |
Why the paste method matters
If you dump matcha straight into a large amount of milk, the flavour can seem weak and flat. Starting with a small amount of water creates a concentrated base first. That helps the tea stay present after milk is added.
That 1 teaspoon to 2 tablespoons starting ratio helps. It isn't just about texture. It protects flavour intensity, so your latte still tastes like matcha instead of vaguely green milk.
How Matcha Quality Shapes the Flavour
If you've ever wondered why one matcha latte tastes smooth and elegant while another tastes coarse or bitter, quality is usually the answer.
The core flavour of a matcha latte includes vegetal notes, umami, and mild bitterness. According to First Agri's matcha flavour explanation, high-quality ceremonial matcha can contain 3–4% L-theanine by weight, which contributes to the savoury umami character that makes premium matcha feel softer and more refined.
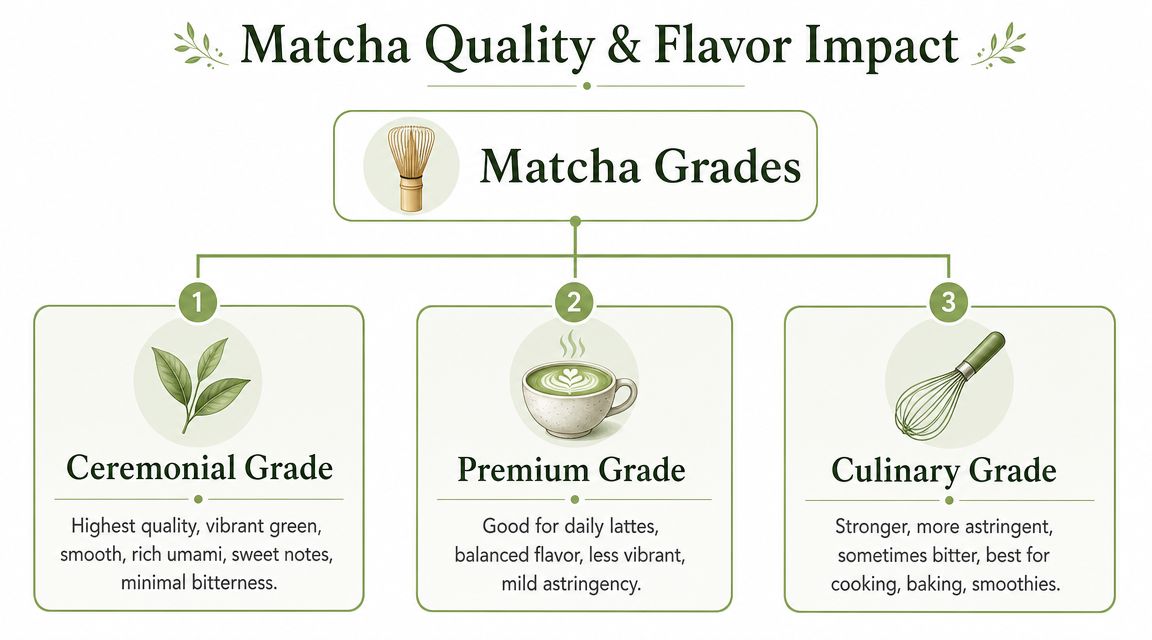
What higher quality tastes like
Higher-quality matcha usually tastes:
- Smoother
- Less bitter
- More naturally sweet
- More savoury and rounded
That doesn't mean it tastes sugary. It means the flavour arrives in a more polished way. You notice green freshness and umami first, not a rough astringent edge.
Texture matters too. Finer powder disperses more evenly, so the drink feels silkier in the mouth. That changes your perception of flavour just as much as the taste compounds do.
What lower quality tastes like
Lower-grade matcha can still work in recipes, smoothies, and baking, but in a latte it often comes across as:
- More assertive
- More astringent
- More bitter
- Less nuanced
This can be useful if you want matcha to punch through lots of other ingredients. But if your goal is a café-style latte with a soft finish, lower quality powder often makes that harder.
Ceremonial and culinary in practical terms
The labels can get a bit messy in the market, but for everyday drinkers the practical distinction is simple:
Ceremonial-style matcha is usually chosen when the matcha itself is meant to shine. It tends to be brighter, gentler, and richer in umami.
Culinary-style matcha is usually chosen when the powder needs to stand up to other strong ingredients like chocolate, banana, syrups, or baking fats.
If you're comparing products and want a grounded buying framework, this guide to explore Jade Leaf Matcha pros and cons can help you think through how different matcha options perform in real use.
For a broader look at styles and uses, Pep Tea also has a helpful guide on different grades of matcha.
Better matcha doesn't just taste “nicer”. It changes which notes dominate. You get more umami and softness, and less blunt bitterness.
The Art of Customisation Milk Sweeteners and Ratios
Matcha can be quite fun. Once you understand the base flavour, you can tune the drink to suit your palate instead of taking whatever the café gives you.
A matcha latte isn't fixed. It's adjustable. Milk choice changes body and sweetness. Sweetener changes emphasis. Ratio changes intensity. Small tweaks make a surprisingly big difference to the final cup.
How different milks change the drink
Some milks pull matcha toward dessert. Others keep it lighter and greener. None is universally “best”. The right one depends on whether you want more creaminess, more tea character, or more restraint.
| Milk Type | Flavour Impact | Texture | Best For |
|---|---|---|---|
| Dairy milk | Softens the green notes and adds a classic mellow sweetness | Rich and rounded | A traditional café-style latte |
| Oat milk | Brings out natural sweetness and can make matcha feel softer | Creamy and plush | People who like a smooth, comforting cup |
| Almond milk | Adds a subtle nutty edge and keeps the drink lighter | Thinner to medium | Drinkers who want matcha to stay more noticeable |
| Soy milk | Can add body without too much heaviness | Creamy and stable | A balanced plant-based option |
| Coconut milk | Adds a distinct tropical note that can compete with matcha | Fuller and sometimes heavy | Flavoured variations rather than a pure matcha profile |
The easiest way to choose your milk
If you're unsure where to begin, use this quick guide:
- Want the matcha to stand out? Choose almond or soy.
- Want a softer, sweeter-feeling latte? Choose oat.
- Want a classic café finish? Choose dairy.
- Want the cleanest expression of the tea? Avoid highly flavoured milks.
A strongly flavoured milk can blur the point of matcha. Vanilla-heavy or very sweet blends often cover the savoury depth that makes the drink special.
Sweeteners can help or hijack
A little sweetener can make matcha feel welcoming, especially if you're new to it. Too much, and you flatten the flavour into generic sweetness.
Common choices each push the drink in a slightly different direction:
- Honey adds floral warmth and a rounded finish.
- Maple syrup adds deeper sweetness and a cosy note.
- Plain sugar sweetens without much added flavour.
- Stevia can work well if you want sweetness without sugar, though the aftertaste depends on the product.
If you're trying a sugar-free option, products like Afida stevia stick wraps can be useful for testing very small adjustments without overcommitting.
Add sweetener slowly. It's easier to build sweetness than to rescue a latte that no longer tastes like matcha.
Ratios decide whether the drink feels bold or vague
This is the part many home brewers underestimate. Even good powder can taste underwhelming if you use too much milk for the amount of matcha.
A few practical cues help:
- If it tastes weak, there's too much milk for the amount of matcha.
- If it tastes muddy, the powder may not have been mixed properly before the milk went in.
- If it tastes intense but pleasant, you've likely hit a good balance.
- If it tastes aggressive, reduce the matcha slightly or switch to a softer milk.
The concentrated paste method helps here too. It gives the tea a head start, so it doesn't disappear into the milk.
If you want a home method you can tweak and repeat, this guide on how to create your Matcha green tea latte recipe at home is a practical place to start.
Three flavour styles you can build on purpose
Rather than guessing, decide what kind of latte you want:
Soft and creamy
Choose oat or dairy milk, use only a light touch of sweetener, and keep the matcha smooth rather than forceful.
Fresh and green
Use a lighter milk, little to no sweetener, and let the vegetal side stay clear.
Rich and café-like
Use a high-quality matcha, enough milk for body, and just enough sweetness to round the edges without hiding the tea.
That's the answer to what a Matcha latte tastes like. It can taste different on purpose, depending on the choices you make.
Matcha Latte vs Coffee Chai and Green Tea
A matcha latte makes more sense when you compare it to drinks you already know.
For many Australians, the taste is shaped by how it feels alongside coffee. Matcha is often described as giving a gentler energy effect because its caffeine is paired with L-theanine, and one guide notes that a typical serving contains about half the caffeine of a coffee. That pairing helps explain why many people experience matcha as smoother and less sharp than coffee, as noted in this matcha taste guide from Aki Matcha.
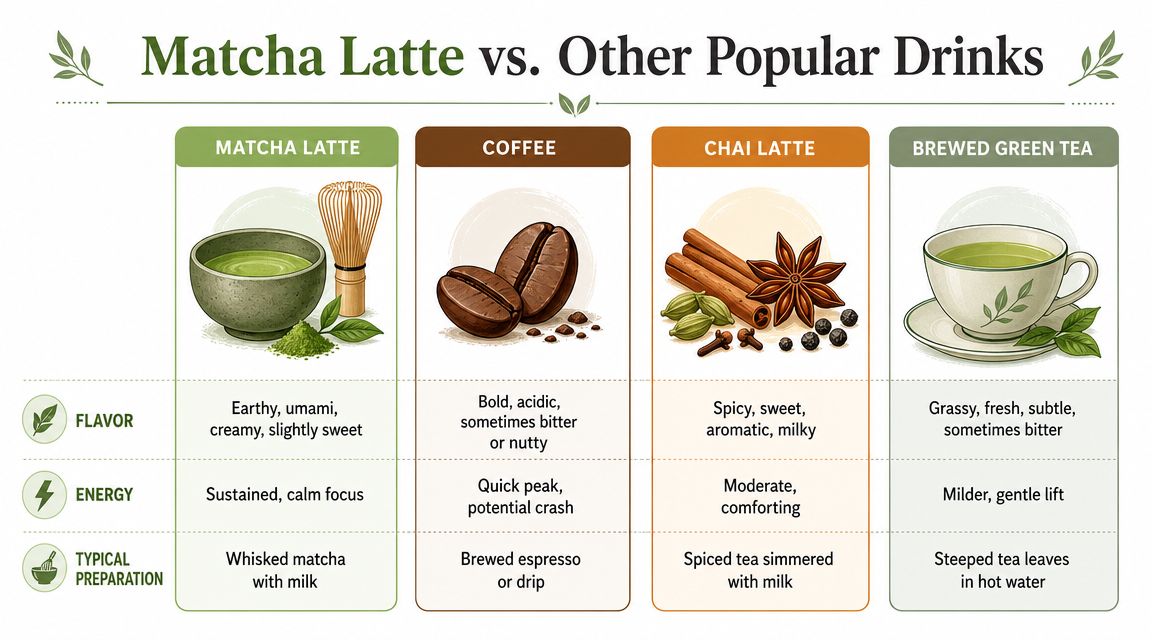
Matcha latte versus coffee
Coffee usually leads with roast, bitterness, and sometimes acidity. Matcha leads with green freshness, savoury depth, and creaminess.
If coffee hits your palate with a sharper edge, matcha tends to spread more gently. Even when it's strong, it rarely tastes like espresso. It has presence, but of a different kind.
Matcha latte versus chai latte
These two drinks can look similar on a menu because both are often served milky and warm. Flavour-wise, they live in completely different worlds.
Chai tastes spiced, aromatic, and warming. You expect cinnamon, cardamom, ginger, and sweetness. Matcha isn't spicy at all. It's cleaner, greener, and more savoury.
If you enjoy both drinks and want to see how they meet in one cup, this article on mastering your matcha chai latte offers a useful crossover approach.
Matcha latte versus brewed green tea
This comparison catches people out most often. A matcha latte does not taste like standard green tea with milk.
Brewed green tea is usually lighter, more delicate, and more transparent in flavour. A matcha latte feels thicker, fuller, and more concentrated because the tea itself is present as fine powder in the drink rather than steeped and removed.
Here's a quick snapshot:
- Coffee feels bolder and sharper
- Chai latte feels spicier and sweeter
- Brewed green tea feels lighter and more delicate
- Matcha latte feels creamier, greener, and more savoury
If you want a milky café drink without coffee's roasted bitterness or chai's spice, matcha sits in a very appealing middle ground.
Perfecting Your Latte Troubleshooting Common Issues
Making matcha at home is simple once you know what tends to go wrong. Most disappointing cups come down to a few repeat mistakes, and each one has a straightforward fix.
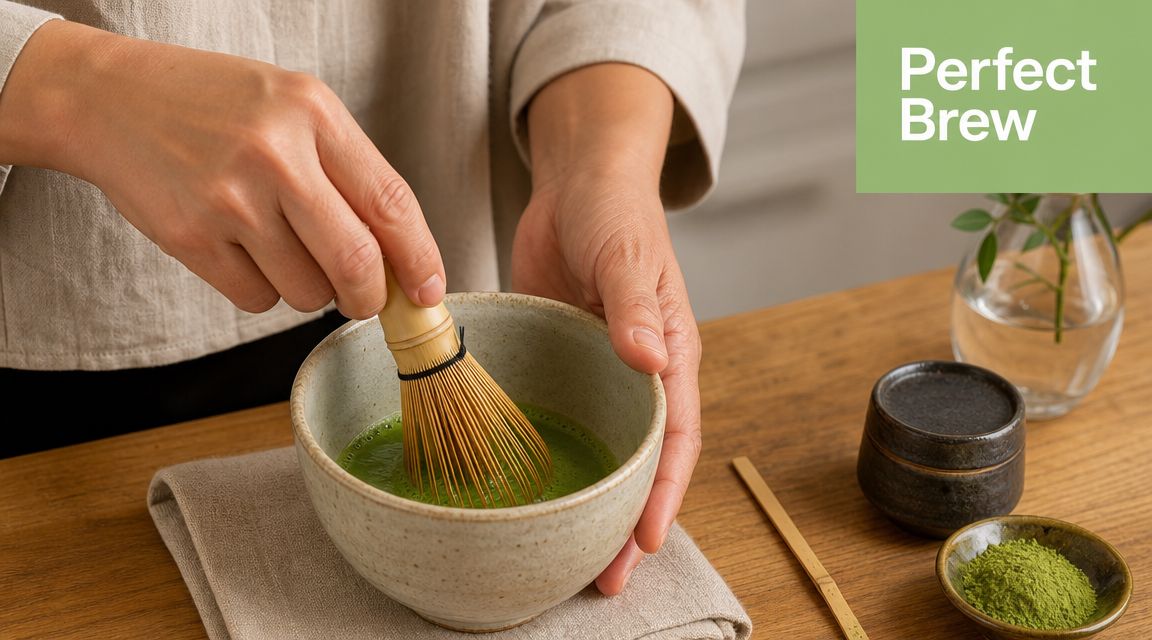
If your latte is lumpy
Lumps usually mean the powder wasn't broken up before mixing. Matcha is very fine, so it clings together easily.
Try this:
- Sift first if you can
- Make a paste with a small amount of water before adding milk
- Whisk thoroughly so the powder disperses evenly
If you want to improve your technique, Pep Tea's guide on how to whisk matcha is worth bookmarking.
If it tastes bitter
Bitterness can come from powder quality, but preparation often plays a role too. If the tea tastes rough, check whether you've made the drink too concentrated for your preference, or whether your matcha has a more assertive profile.
The easiest fixes are:
- Use a smoother-quality matcha
- Pair it with a creamier milk
- Add only a small amount of sweetener if needed
A little bitterness is normal. Harsh bitterness that overwhelms everything else usually means the balance is off.
If it tastes weak
Weak matcha latte almost always means too much milk or too little matcha presence in the base.
Check these points:
- Build the concentrate first instead of stirring powder straight into a full mug of milk
- Reduce the milk slightly if the tea flavour is disappearing
- Choose a less dominant milk if your current one is covering the matcha
This walkthrough shows the process in action:
If it tastes too sweet or too flat
This often happens when people try to “fix” matcha by adding more and more sweetener. Instead of improving the drink, that can bury the savoury and green notes that give it character.
Keep the sweetness low enough that you can still recognise the tea.
When your latte is working, you should taste creaminess and sweetness first, then notice the green and umami character underneath. That layered effect is what makes a good matcha latte feel satisfying rather than one-note.
If you're ready to taste the difference for yourself, Pep Tea offers premium organic matcha and practical guides to help you make a smoother, better-balanced cup at home. Explore the range, experiment with your preferred milk and ratio, and find the matcha latte style that tastes right for you.
Japanese Tea Sets: Find Your Perfect Ritual
Somewhere between the morning rush and the evening wind-down, a lot of us start wanting more from tea than a mug and a teabag. Maybe you've been whisking matcha in a cereal bowl. Maybe you've bought a lovely green tea, then realised your everyday teapot doesn't quite suit it. Or maybe you've seen beautiful Japanese tea sets online and wondered whether they belong in a real Australian home or only in a formal tea room.
They absolutely can belong at home.
The trick is to stop thinking of Japanese teaware as something distant or intimidating. It helps to think of it as a set of tools for a better daily ritual. A bowl that makes whisking easier. A teapot that pours cleanly. Cups that slow you down just enough to notice aroma, warmth, and flavour. That's where the beauty lives.
If you've ever felt drawn to tea because it brings a pocket of calm to the day, you're already close to the heart of it. The history is rich, but the experience can be very simple. A thoughtful matcha in the morning. A small pot of sencha in the afternoon. A quiet cup before bed instead of reaching for something sugary or overstimulating.
For many readers, the journey starts with curiosity and a few basic questions. What counts as a Japanese tea set. Which pieces matter. What's ceremonial, what's practical, and what's just nice to have. If you'd like a broader look at tea's long cultural journey, The Story of Tea is a lovely companion read.
An Invitation to the Japanese Tea Ritual
A Japanese tea ritual doesn't have to mean strict rules, formal clothing, or memorising a sequence of movements. In a modern home, it can be as simple as choosing one cup, one bowl, or one teapot that makes the act of preparing tea feel intentional.
That matters more than people realise. When your tools fit the tea, the process gets easier. You whisk more smoothly. You pour more accurately. You pay attention without forcing yourself to “be mindful”.
A good tea set doesn't add complexity. It removes friction from a ritual you want to keep.
For Australians, that often means blending tradition with everyday life. You might prepare matcha before work, brew green tea after lunch, or serve tea to a friend on the verandah rather than in a formal tea room. Japanese tea sets work beautifully in that setting because they were shaped by use, not just display.
Ritual is different from ceremony
A common sticking point for many people is the assumption that Japanese teaware only makes sense if they're trying to recreate a traditional tea ceremony. That's not necessary.
A personal ritual can look like this:
- Morning focus: whisking matcha in a chawan instead of shaking it in a bottle
- Afternoon reset: brewing leaf tea in a small kyusu rather than a large western pot
- Shared pause: pouring two small cups for a partner or guest instead of making tea as an afterthought
Each one is practical. Each one also carries a quiet sense of care.
Why the set matters
A tea set isn't just decoration. It shapes movement, temperature, and feel. A wide bowl invites whisking. A side-handled teapot changes the way your wrist pours. A cup without a handle encourages slower sipping because you notice the warmth in your hands.
That's why Japanese tea sets continue to appeal far beyond formal tradition. They make ordinary tea feel considered. Not fussy. Considered.
Understanding the Two Worlds of Japanese Tea
The easiest way to understand Japanese tea sets is to separate them into two worlds. Once you see that split, the pieces stop feeling random.
The first world is matcha, which is powdered tea whisked directly into water. The second is leaf tea, where whole leaves are steeped and then poured. Those are very different actions, so they need different tools.
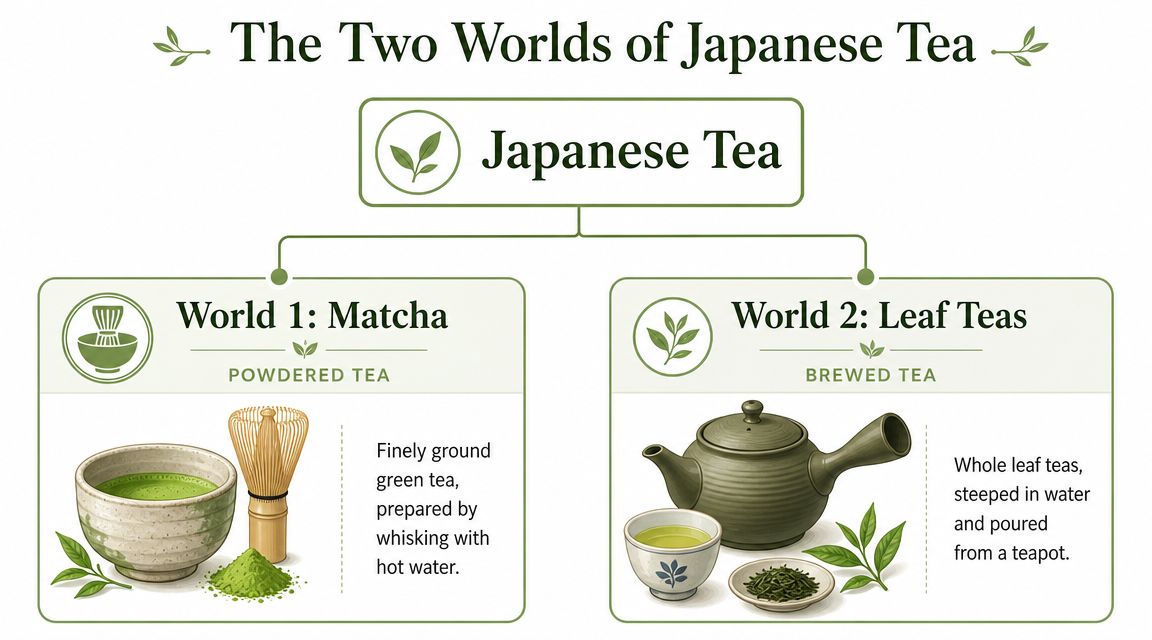
The historical background helps this make sense. The Japanese tea tradition can be traced to the 9th century, when Buddhist monk Eichū brought tea from China. By the 16th century, Sen no Rikyū had codified the art form and defined utensils and procedures that shaped later tea sets, including the distinction between formal and casual tea use still recognised today, as outlined in the history of the Japanese tea ceremony.
World one is matcha
Matcha is finely ground green tea powder. You don't infuse it and remove leaves. You whisk the powder into water and drink the whole preparation.
That's why a matcha set usually centres on tools like these:
- Chawan: a bowl wide enough for whisking
- Chasen: a bamboo whisk that helps create a smooth texture
- Chashaku: a scoop used to portion powder
If you've tried to make matcha in a narrow mug, you've probably felt the problem straight away. There isn't enough room to whisk properly, and clumps stick around.
World two is leaf tea
Leaf teas include styles such as sencha, gyokuro, hojicha, and bancha. Here, the leaves need space to open in water, and the liquor needs to be poured out cleanly.
That's where pieces like these come in:
- Kyusu: a teapot, often with a side handle
- Yunomi: everyday drinking cups
- Houhin or shiboridashi: specialised vessels for delicate teas
The cups and pot work together because brewing isn't only about holding hot liquid. It's about controlling extraction, temperature, and the pace of serving.
If you remember one thing, remember this. Matcha is whisked. Leaf tea is steeped and poured.
Why this confuses so many buyers
A lot of product listings lump everything together under “Japanese tea set”. That can make it sound as though one bundle will suit every tea. Usually, it won't.
If you mainly drink matcha, a teapot set won't solve your real need. If you mostly brew loose leaf sencha, a bowl and whisk won't be the right starting point. The best choice begins with the tea you drink on a normal week, not the tea you imagine yourself serving on special occasions.
The Essentials for the Perfect Bowl of Matcha
When people first buy matcha tools, they often focus on appearance. The bowl's glaze is beautiful, the whisk looks traditional, the scoop seems optional. In practice, each piece has a very clear job.
The heart of a matcha setup is function. If the tools work well, the tea tastes better and the process feels calm instead of messy.
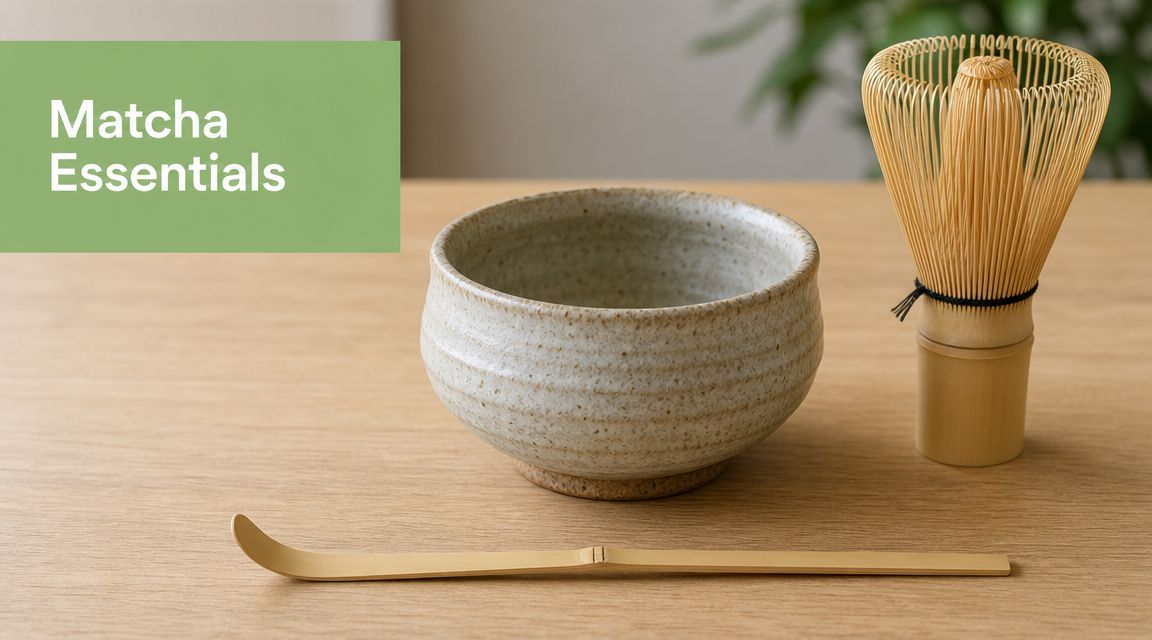
If you want to see the classic preparation tools together, a matcha whisk and bowl set gives you a useful visual reference for what a simple starter kit includes.
The chawan does more than hold tea
A chawan is a matcha bowl, but that definition is too basic to be useful. What matters is the shape. A good bowl gives your whisk room to move, which makes it easier to blend powder and water into a smooth, frothy drink.
A bowl that's too narrow causes common problems:
- Clumping happens faster: the whisk can't move freely
- Spills become more likely: your hand has less room to work
- Texture stays uneven: you end up stirring rather than whisking
This is one reason ceremonial-style matcha feels so different in the right vessel. The bowl supports the method.
The chasen creates the texture
A chasen is the bamboo whisk. New matcha drinkers sometimes wonder if a small kitchen whisk or milk frother can do the same job. You can improvise, but the result is different.
The bamboo tines are designed to break up powder gently and aerate the liquid. That gives matcha its light foam and smoother mouthfeel. It's one of those tools that looks delicate but changes the whole experience.
Practical rule: if you want matcha that feels silky rather than grainy, the whisk matters as much as the tea.
The chashaku keeps the ritual simple
A chashaku is a bamboo scoop used for measuring matcha. It doesn't look dramatic, but it helps create consistency. That's valuable when you're trying to learn what strength and balance you enjoy.
Could you use a teaspoon instead? Of course. But the chashaku makes the act more precise and more pleasant. It also encourages a slower rhythm, which is part of why people fall in love with matcha in the first place.
A simple flow that works
Once you have the tools, the routine becomes straightforward:
- Warm the bowl with hot water, then empty it.
- Add matcha with the scoop.
- Pour in hot water suited to your tea.
- Whisk briskly until smooth and lightly frothy.
- Drink from the bowl while the aroma is still lifted.
For a visual guide to hand movement and bowl angle, this short demonstration is helpful.
What beginners often get wrong
The biggest mistake isn't buying the “wrong” bowl. It's assuming the ritual has to be perfect from day one. It doesn't.
Start with tools that invite use. A bowl you enjoy holding. A whisk you rinse and dry properly. A scoop that turns preparation into a small pause rather than a rush job. That's how matcha becomes part of life rather than a weekend novelty.
Exploring Teapots for Brewing Leaf Teas
Leaf tea asks a different question from matcha. It isn't “How do I whisk this well?” It's “How do I extract flavour cleanly and pour at the right pace?”
That's why Japanese leaf-tea brewing centres so strongly on the pot. Shape, material, handle style, and filter design all affect the experience.
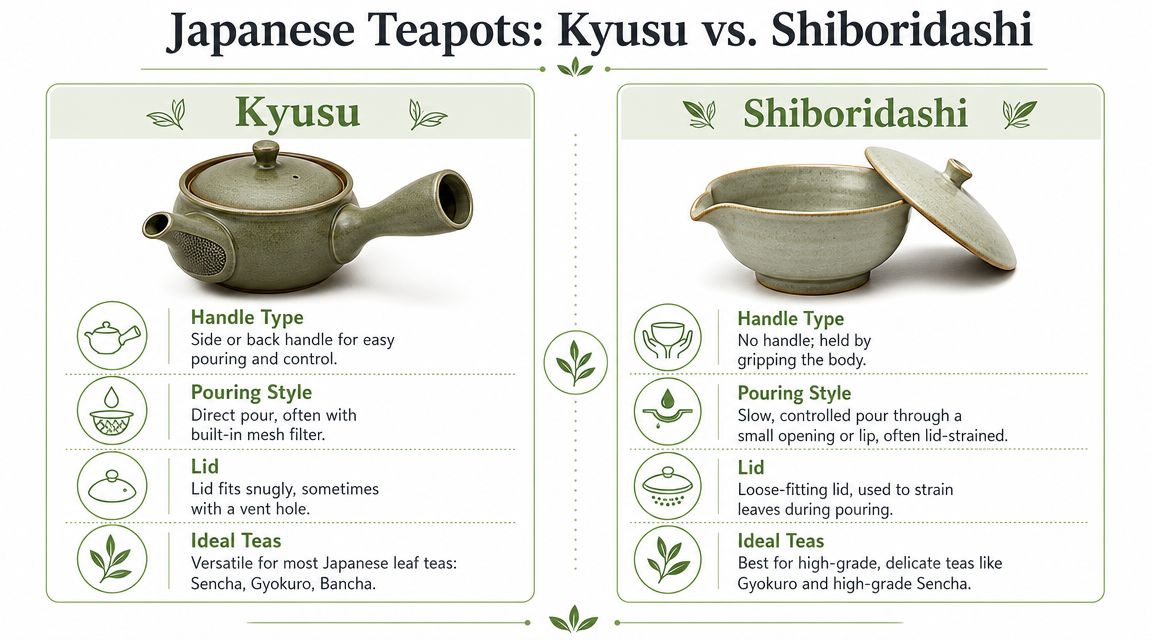
Kyusu for everyday green tea
The kyusu is the classic Japanese teapot many people picture first. It's often ceramic and often side-handled, which gives excellent control when pouring.
A useful practical detail is size. Japanese ceramic teapots are commonly in the 150–266 mL (5–9 oz) range, and unglazed clay is mildly porous. Over time, that clay can absorb aromas, which is why a dedicated pot can develop a tea-specific seasoning and reduce flavour carryover between different teas, as explained in this guide to Japanese teapots and clay seasoning.
That leads to a very sensible home-brewing habit. If you use one unglazed kyusu mainly for sencha, and a different vessel for roasted teas, you're less likely to muddy the flavour.
You can also pair a kyusu with a modern setup. An electric tea kettle with temperature control makes everyday brewing easier because Japanese green teas often reward more careful water handling than a full rolling boil.
Shiboridashi and houhin for delicate teas
Some Japanese teapots are flatter and more specialised. The houhin and shiboridashi are designed for high-grade teas such as gyokuro and competition sencha. Their flatter, handleless forms increase surface area, which helps hot water cool faster. That matters for low-temperature extraction, and the geometry also supports short infusions and precise decanting, as described in this overview of Japanese teapot types and brewing geometry.
For many home drinkers, the practical takeaway is simple:
- Choose kyusu if you want an easy, versatile daily pot
- Choose shiboridashi or houhin if you love delicate, premium green teas and enjoy slower brewing
- Choose porcelain or glazed ceramic if you switch between tea styles often
Where tetsubin fits in
People often mix up a tetsubin with a standard brewing teapot. Historically, the cast iron vessel is strongly associated with heating or holding hot water, and in modern homes it's also appreciated for warmth retention and presence on the table.
That doesn't make it the default choice for every Japanese green tea. For many leaf teas, a ceramic pot gives more nuance and easier pouring. A tetsubin can still be beautiful and practical, but it serves a different style of tea moment.
| Vessel | Best suited to | Why people choose it |
|---|---|---|
| Kyusu | Everyday Japanese leaf teas | Easy control, clean pour, compact size |
| Shiboridashi | Delicate high-grade teas | Low-temperature brewing and precision |
| Tetsubin | Water preparation or heat retention | Strong presence and steady warmth |
How to Choose the Right Japanese Tea Set for You
The best Japanese tea set usually isn't the most formal one. It's the one that fits your real habits.
That might sound obvious, but shoppers often get pulled toward whatever looks most traditional. Then the set ends up on a shelf because it doesn't suit weekday life. In an Australian household, usefulness matters. You want teaware that works on a busy morning, a quiet weekend, or a catch-up with friends.
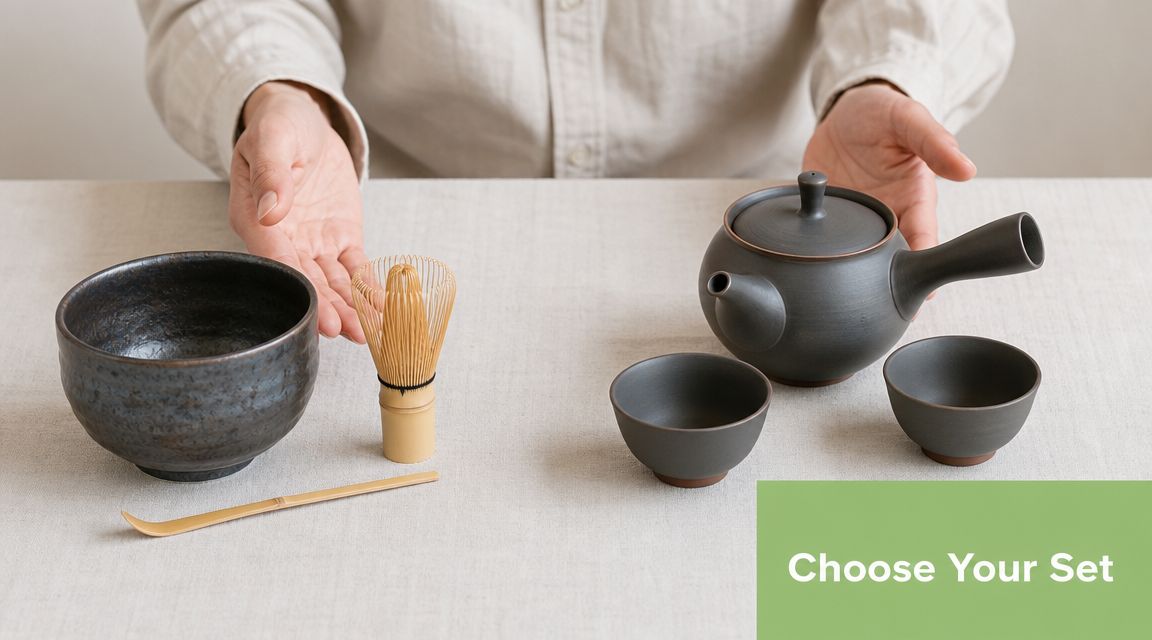
Start with the tea you actually drink
If you only remember one buying principle, make it this one. Buy for your tea first, and your aesthetic second.
From a practical perspective, here's how to approach it:
- If you drink matcha most days, build around a chawan, chasen, and chashaku
- If you brew loose leaf green tea, prioritise a kyusu and comfortable cups
- If you enjoy both, don't force one hybrid set to do everything. Build two small rituals instead
This sounds less romantic than buying a boxed “ceremony set”, but it's far more satisfying in daily use.
Choose by lifestyle, not fantasy
A set for one person looks different from a set for regular entertaining. So does a set for a small apartment kitchen versus a café service area.
Ask yourself:
How many people am I usually serving
A compact setup often feels better than a large one. Small vessels encourage fresh brewing and more attention to each pour.
Do I want a daily workhorse or a special-occasion piece
Some handmade ceramics invite frequent use. Others feel precious. There's no wrong answer, but it's better to know which camp you're in.
How much care am I willing to give
Porcelain and glazed ceramics are usually easier for mixed use. Unglazed clay rewards dedication. Bamboo tools need gentle drying and storage.
The right set should make you want to use it on an ordinary Tuesday.
Understand the beauty of wabi
Part of the charm of Japanese tea sets comes from the wabi aesthetic. This style became influential in the mid-1500s and favours rustic, simple, imperfect vessels over ornate luxury. That shift helped shape ceramic traditions such as Raku, Shino, and Oribe, and those forms still influence authentic teaware from places like Arita, Kyoto, and Tokoname, as noted by the Metropolitan Museum of Art's essay on the Japanese tea ceremony.
While many first-time buyers think a “good” tea set should look flawless and symmetrical, in Japanese teaware, slight irregularity is often part of the appeal. A soft rim. An uneven glaze. A bowl that feels handmade rather than factory-perfect.
Material choices for real homes
Different materials suit different personalities and routines.
Porcelain
Porcelain is a strong choice for beginners. It feels clean, neutral, and versatile. If your household drinks different teas, porcelain keeps things simple because it doesn't push you toward one dedicated tea style.
Stoneware and clay
Stoneware can feel warmer and more grounded in the hand. Unglazed clay has a devoted following because of the way it interacts with tea over time. It's especially appealing if you're the kind of person who likes one favourite tea and a vessel that becomes part of that habit.
Cast iron
Cast iron has presence. It can suit homes where keeping warmth at the table matters, or where the tea set is part of the room's atmosphere as much as the brew itself. It also tends to appeal to gift buyers because it feels substantial.
A quick buyer guide
| You value most | A smart direction |
|---|---|
| Easy everyday use | Porcelain or glazed ceramic set |
| Traditional feel | Handmade clay kyusu or matcha bowl |
| Matcha ritual | Bowl, whisk, scoop rather than a teapot bundle |
| Serving guests | Coordinated cups with a compact teapot |
| Visual texture and craft | Wabi-inspired stoneware, Raku-like or Shino-like forms |
For cafés and gifting
Café owners and hospitality teams usually need a different balance from home buyers. Durability, stackability, and pouring ease matter more than owning the most ceremonial-looking pieces. A clean, practical set can still feel Japanese without creating stress during service.
For gifts, think about how the recipient drinks tea now. A dedicated matcha lover will appreciate proper matcha tools more than a decorative teapot. A green-tea drinker may get more use from a kyusu and two yunomi than from a large assorted set.
In other words, the “best” Japanese tea set is often the simplest one that matches the person's real rhythm.
Caring For Your Teaware to Ensure It Lasts
Beautiful teaware lasts longer when you treat it according to material, not just appearance. Ignoring material care often causes people to accidentally shorten the life of a favourite piece. They wash everything the same way, stack it too tightly, or put damp tools away too quickly.
The good news is that care is usually straightforward.
Caring for matcha tools
A bamboo chasen needs gentle handling. Rinse it with water after use, shake off excess moisture, and let it dry fully in an airy spot. Don't leave it sitting wet in a closed cupboard.
For the chawan and chashaku:
- Rinse the bowl promptly: matcha residue is easier to remove before it dries
- Avoid harsh scrubbing on delicate glazes: a soft cloth or sponge is usually enough
- Keep the scoop dry: bamboo stays happier when it isn't left in standing water
Caring for clay and ceramic teapots
Unglazed clay teapots deserve a simpler approach than many people expect. Rinse with water and let them dry thoroughly. Soap can linger in porous material and interfere with flavour over time.
For everyday maintenance:
- Empty leaves soon after brewing: don't let damp leaves sit in the pot for hours
- Dry with the lid off at first: air circulation helps prevent stale odours
- Store carefully: avoid knocking lids against rims, since that's where chips often happen
Let the pot dry completely before you tuck it away. Most musty teaware problems begin with trapped moisture.
Caring for cast iron and storage pieces
If you use cast iron, dry it well after contact with water. Moisture left behind is what causes trouble. With any tea set, thoughtful storage matters as much as washing.
A few habits make a real difference:
- Give delicate items space: crowded shelves lead to chips
- Use shelves or trays with grip: slipping is more common than people think
- Store by routine: keep the pieces you use often where they're easy to reach
When care becomes part of the ritual, the set feels less fragile and more like a trusted part of daily life.
Making Every Cup a Mindful Moment
The true appeal of Japanese tea sets isn't perfection. It's attention.
A bowl asks you to whisk with care. A kyusu asks you to pour deliberately. Even a small cup changes the pace of drinking because you stop gulping and start noticing. That's why these pieces remain so compelling in modern homes. They turn tea from a background habit into a small act of presence.
That doesn't mean every cup needs to feel ceremonial. Some days it's a quick matcha before work. Some days it's a quiet pot of green tea while the house settles down. The value is in the repeatable ritual, not the performance of expertise.
If you enjoy pairing tea with other calming habits, these Aroma Warehouse meditation insights offer a thoughtful read on how sensory cues can support a more grounded routine at home.
The nicest part is that you don't need a large collection to begin. One good bowl, one useful teapot, or one set of cups can be enough to change how tea feels in your day. Start with the tea you love. Choose tools that invite you back. Let the ritual grow naturally from there.
If you're ready to bring that ritual into your own kitchen, explore Pep Tea for premium organic matcha and wellness-focused tea options that pair beautifully with thoughtful Japanese teaware.
What Is Organic Green Tea: Benefits & How It’s Grown

You've probably seen a tea packet labelled organic and thought, “Great, that means no pesticides.” That's part of the story, but it's not the whole story. If you've ever wondered what is organic green tea, the answer starts much earlier than the cup in your hand. It starts with how the tea plant is grown, how the soil is treated, how the product is certified, and how accurately it's presented to you.
That matters because green tea already carries a strong wellness reputation. Organic green tea adds another layer. It connects farming practice, product integrity, and the daily ritual of choosing something clean and considered. In Australia, that question is especially useful because many teas are imported, and shoppers are often left to sort through a mix of genuine certification, vague “natural” language, and premium-looking packaging.
Green tea itself comes from Camellia sinensis leaves that are minimally processed. That lighter processing helps preserve more of the tea's catechins than black tea, and EGCG is the best-known catechin linked to green tea's antioxidant reputation, as outlined in this organic green tea market overview. The same source notes that Australia's tea market was valued at about USD 650.3 million in 2024 and is projected to reach about USD 913.8 million by 2030, which helps explain why wellness-led tea formats continue to attract attention in cafés, retail, and home routines.
An Introduction to Organic Green Tea
Organic green tea is green tea grown according to organic farming standards. In simple terms, that means growers use methods designed to work with natural systems rather than relying on synthetic agricultural inputs. The tea is still green tea. It still comes from the same plant. What changes is the farming approach behind it.
That distinction clears up a common confusion. Some people assume “organic” describes a different species of tea or a stronger health effect on its own. It doesn't. Organic tells you about how the tea was produced. Green tea tells you what the tea is.
A farm-first way of thinking
Organic tea production is rooted in a bigger idea than just avoiding certain sprays. It treats the tea garden as an ecosystem. Healthy soil, balanced plant life, careful cultivation, and traceable handling all matter.
Organic is best understood as a farming standard, not a flavour note and not a magic health shortcut.
For tea drinkers, that makes the label more meaningful. It points to production choices that many people prefer for environmental, ethical, and personal reasons. It also helps explain why two teas that both say “green tea” on the front can represent very different growing systems.
Why Australians often get stuck on the label
Australian shoppers often face an extra layer of uncertainty because many premium green teas, including Japanese styles, are imported. That's why it helps to understand both the tea itself and the certification around it. If you'd like a broader grounding in tea before getting into organic specifics, this guide on the story of tea is a helpful place to start.
By the end of this guide, you'll know what organic really means in practice, how it compares with conventional green tea, which compounds make green tea so valued, and how to brew it in a way that does the leaf justice.
What Organic Really Means for Your Tea
When people say organic tea is “pesticide-free”, they usually mean well. But that shorthand is too narrow. Organic is a full production system. It covers how the land is managed, how crops are supported, how inputs are controlled, and how the final product earns the right to carry an organic claim.
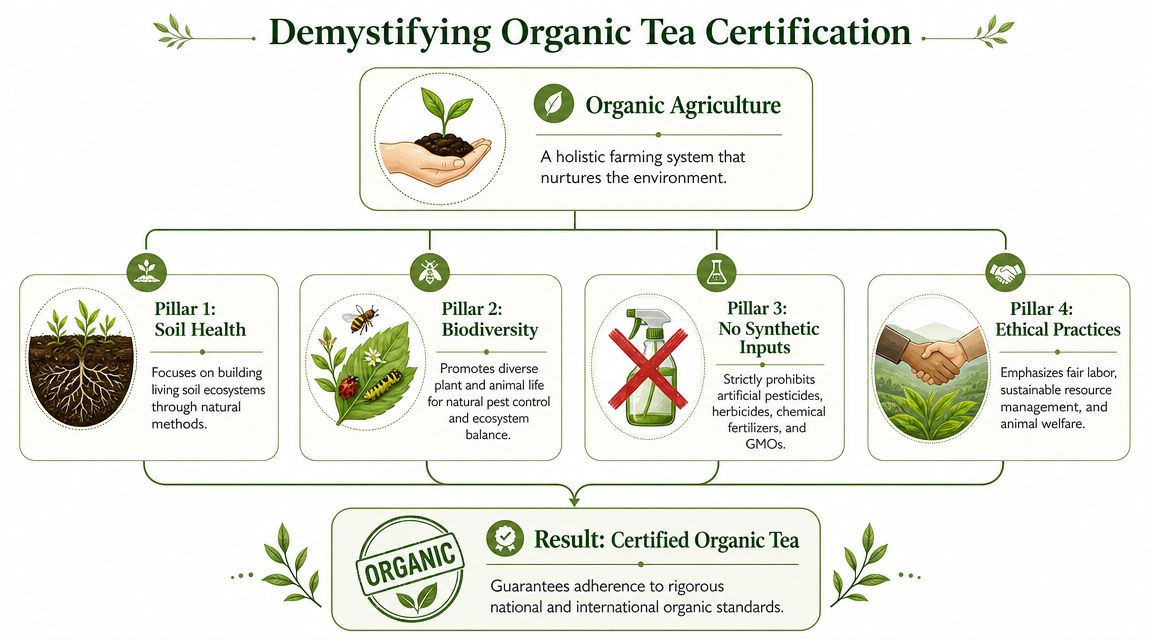
The four ideas behind organic farming
Organic tea farming usually rests on a few core principles:
- Living soil matters. Growers focus on building fertile, active soil rather than treating soil as a neutral base that holds the plant upright.
- Biodiversity helps. A healthier farm environment can support balance between plants, insects, and surrounding ecology.
- Synthetic inputs are restricted. The system is built around avoiding artificial pesticides, herbicides, and chemical fertilisers.
- The process must be verified. A tea isn't organic because the packaging looks earthy or the brand uses words like pure, natural, or clean.
That last point is the one many shoppers miss.
What verification looks like in Australia
In Australia, practical trust comes from certification and compliance, not marketing language. That's why this matters so much for tea buyers. The article discussing organic green tea and certification in the Australian context notes that the Australian organic market was valued at about A$2.59 billion in 2023, while consumer understanding of certification remains uneven, which is exactly why shoppers need to know how to confirm a tea is organic in this Australia-focused discussion of organic verification.
Here's what to look for when you pick up a tea:
- A recognised certification mark on the pack, rather than vague wellness wording.
- Clear origin information, especially if the tea is imported.
- Specific organic language that suggests formal certification rather than loose branding.
- Retail transparency, where the seller explains what standard the tea meets.
Practical rule: If a tea says “natural” but doesn't clearly show how its organic claim is verified, treat it as unproven until you can confirm more.
Imported tea can absolutely be organic. That includes Japanese green tea and matcha. What matters is whether the product has been certified to an accepted standard and marketed in line with Australian requirements. If you want a tea-specific breakdown, this article on the difference between regular and organic matcha adds useful context.
Organic as part of a wider lifestyle choice
For many people, choosing organic tea also fits into a broader low-waste, lower-impact way of living. If that's part of your thinking, this guide on how to start your zero waste journey is a practical companion read.
Organic Versus Conventional Green Tea
Organic and conventional green tea can both taste good. Both come from the same tea plant. The difference lies in how the crop is grown and managed, and that can shape how people think about quality, environmental impact, and value.
A balanced comparison helps here. This isn't about turning conventional tea into a villain. It's about understanding trade-offs clearly enough to make your own call.
Organic vs. Conventional Green Tea at a Glance
| Attribute | Organic Green Tea | Conventional Green Tea |
|---|---|---|
| Farming approach | Grown under organic standards with a focus on ecological balance | Grown using conventional agricultural methods |
| Soil management | Emphasises soil health and natural fertility practices | May rely more heavily on synthetic fertilisers |
| Pest and weed control | Uses organic-compliant methods | May use synthetic pesticides or herbicides |
| Certification | Requires formal certification to support the claim | Not sold as organic unless certified |
| Shopper confidence | Easier to assess when certification marks are clear | Depends more on brand transparency and sourcing detail |
| Environmental approach | Often chosen by people seeking lower-impact farming systems | Can vary widely by producer |
| Flavour experience | Often described as clean, bright, and expressive of origin | Can also be enjoyable, though farming style varies |
| Price | Often priced at a premium because of production and certification requirements | Often available at a wider range of price points |
Where the difference is most practical
The decision often comes down to priorities.
If you care most about certification-backed farming standards, organic will usually appeal more. If your priority is finding a tea you enjoy at an accessible price, conventional tea may still suit you. Plenty of tea drinkers move between both categories depending on the style, source, and budget.
One useful way to think about it is this. Organic tea asks you to pay attention to the system behind the leaf, not just the final beverage. That often resonates with people who already care about ingredients, traceability, and farming methods in the rest of their food.
Why growing method can affect perceived quality
Tea is sensitive. Soil condition, water, climate, leaf handling, and processing all influence what ends up in your cup. The growing method is only one part of that picture, but it does shape how many people evaluate quality.
If you're interested in the broader farming conversation, this piece on how to compare organic vs chemical fertilizers gives useful background on why growers and consumers view these systems differently.
A higher price doesn't automatically mean a better tea. But a certified organic tea gives you a clearer explanation of what you're paying for.
The Wellness Compounds in Every Sip
Green tea's wellness reputation starts with what is inside the leaf. Organic certification matters for how the tea is grown, handled, and verified, especially under Australian organic standards, but the compounds people care about come from the tea plant itself. What organic can do is give you more confidence in the growing system behind those compounds, which matters if you want a cleaner, more traceable daily habit.
Polyphenols and catechins
Green tea is rich in polyphenols, a broad group of plant compounds linked to its antioxidant profile. A review of green tea bioactives and brewing conditions explains that these compounds make up a large share of the leaf and notes that green tea contains thousands of naturally occurring bioactive substances.
Within that group, catechins are the stars. EGCG gets the most attention because it is one of the best-studied catechins in green tea. If the tea leaf were a small orchestra, catechins would be the instruments you hear most clearly in the final performance. They shape much of what people mean when they talk about green tea as a wellness drink.
That does not mean every cup feels the same. Leaf quality, freshness, and preparation all affect what reaches your mug.
L-theanine and calm alertness
Green tea also contains L-theanine, an amino acid that helps explain why tea feels different from coffee for many drinkers. The combination of L-theanine and caffeine often creates a gentler sense of alertness, more like a steady tide than a sudden wave.
This is one reason green tea fits so well into everyday routines. A morning cup can help you settle into work. An afternoon brew can feel refreshing without the sharp edge some people notice from stronger caffeinated drinks.
Organic farming does not create L-theanine or catechins. The plant does that naturally. In practical terms, organic certification in Australia gives you a checked and documented production system, which can make it easier to choose tea with the level of traceability and ingredient confidence many wellness-focused drinkers want.
Brewing changes what you get from the cup
Brewing is where leaf chemistry becomes a real-life experience. Water that is too hot can push green tea toward bitterness, while a gentler temperature usually gives you a smoother cup with better balance. As noted earlier in that same preparation review, moderate brewing temperatures and a short steep help extract beneficial compounds without making the tea harsh.
A simple way to picture it is cooking vegetables. Too little heat and you do not get the best texture or flavour. Too much heat and the result turns dull or unpleasant. Green tea works in a similar way.
If you want to put that into practice, starting with a quality loose-leaf option makes a noticeable difference. PepTea's guide to the best organic green tea loose leaf is a useful place to compare styles that suit everyday brewing.
Here's a short visual explainer if you want to see green tea compounds discussed in a more accessible format.
Green tea works best as a daily ritual, not as a miracle product. Its value comes from consistent enjoyment, good brewing, and leaves from a source you trust.
Your Guide to Popular Organic Green Teas
Walk into a good tea shop and you'll quickly learn that green tea isn't one thing. It's a family of styles. Two of the most useful examples are Sencha and Matcha. They show how processing changes not just flavour, but the whole drinking experience.
Sencha for a fresh everyday cup
Sencha is the classic daily green tea for many drinkers. You brew the leaves in water, let them steep, and then remove them. The result is usually light to medium-bodied, grassy, fresh, and gently savoury.
It suits the kind of moment where you want a clean, uncomplicated cup. Mid-morning at your desk. A quiet reset after lunch. A teapot shared with someone who's curious about green tea but not ready for anything too intense.
Matcha for the whole-leaf experience
Matcha is different from almost every other tea because you don't steep and strain it. You whisk the powdered tea directly into water, so you consume the whole leaf.
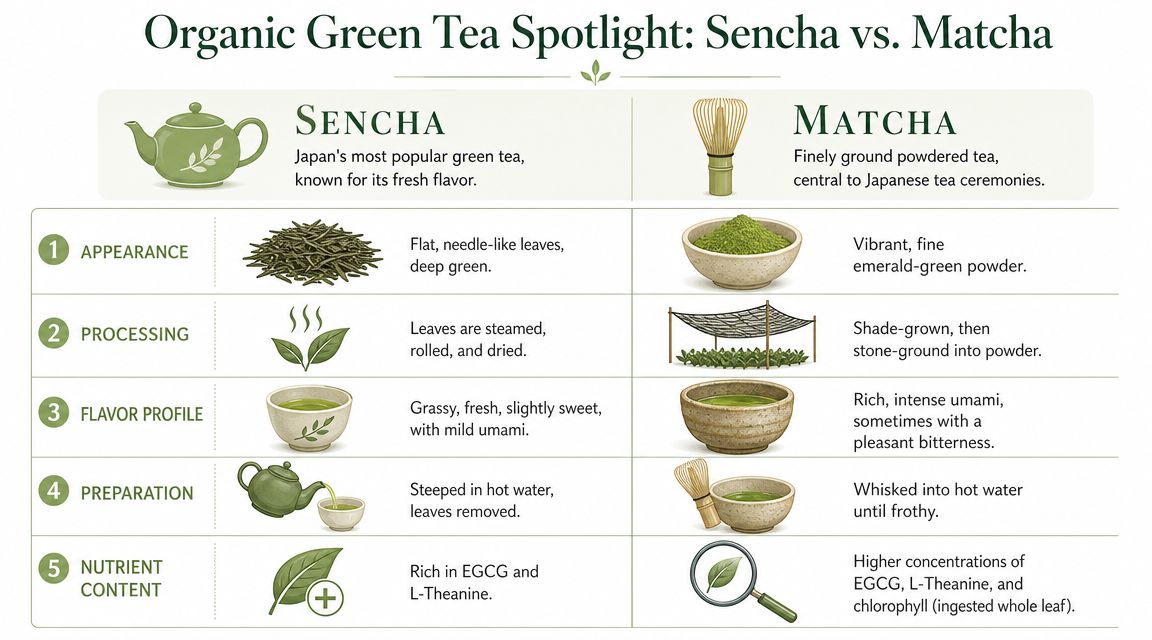
That changes texture, flavour, and intensity. Matcha tends to feel richer, creamier, and more concentrated than a standard leaf brew. The source used in this article notes that a standard cup of brewed green tea can provide 178 to 823 mg of catechins, while products like Matcha that use the entire leaf offer a more concentrated source of those compounds in this green tea overview.
If Sencha feels like a clear, bright conversation, Matcha feels like the full orchestra.
Choosing by mood and use
A simple way to choose:
- Pick Sencha when you want a classic steeped tea with lift and freshness.
- Choose Matcha when you want a fuller texture, a more immersive tea ritual, or a tea that works beautifully in lattes and recipes.
- Use high-quality green tea in other formats if you enjoy wellness drinks beyond the teacup. Green tea is also the traditional base for kombucha, which is one reason it appears so often in functional beverage spaces.
If you want to keep exploring styles beyond these two, this guide to the best organic green tea loose leaf is a useful next read.
Bringing Green Tea Into Your Daily Routine
Knowing what organic green tea is helps. Knowing how to buy, brew, and store it makes the difference between a tea you admire on the shelf and one you enjoy every day.
How to buy with confidence
Look for three things first:
- Certification you can identify. Don't rely on soft words like pure or natural.
- Clear origin details. Tea that tells you where it comes from usually gives you more confidence than tea with a vague back label.
- Fresh-looking leaf or powder. Matcha should look vividly green rather than dull or khaki. Loose green tea should look lively, not tired and dusty.
The one golden brewing rule
Don't pour boiling water straight onto green tea.
Green tea is delicate. If the water is too hot, bitterness can jump forward and flatten the sweeter, softer notes in the cup. Use water that's hot but not aggressively boiling, and give the tea enough time to open without overdoing it.
A simple routine works well:
- Heat your water.
- Let it cool slightly if it has just boiled.
- Brew gently rather than aggressively.
- Taste and adjust next time.
How to store it so it stays good
Tea hates three things: air, heat, and light.
Store green tea in an airtight, opaque container somewhere cool and dry. Keep it away from the stove, sunny windows, and constantly opened pantry spots. Matcha is especially sensitive, so freshness matters even more.
Buy the best tea you can, then protect it properly. Poor storage can undo the care taken in growing and processing it.
Your Organic Green Tea Questions Answered
Can I drink organic green tea every day
For many people, yes. Organic green tea can sit comfortably in a daily routine, much like a regular walk or a bowl of oats. The practical question is not only whether it is organic, but whether the tea suits your body, your caffeine tolerance, and the way you drink it.
With green tea, the key is paying attention to how your body responds. A lighter sencha in the morning may feel very different from a strong matcha in the afternoon. If you are pregnant, managing a health condition, or taking medication, check with a qualified health professional before making it an everyday habit.
Does organic green tea have less caffeine than coffee
Usually, green tea contains less caffeine per cup than coffee, but the experience is often different for another reason too. Green tea also contains L-theanine, an amino acid that can soften the sharper edge people sometimes feel from coffee.
That is why one cup of green tea may feel steadier, while coffee can feel more abrupt. Brewing style matters here. A longer steep, more leaf, or a bowl of matcha can all change the caffeine level in your cup.
Is organic green tea better for the environment
In Australia, organic means more than a nice label on the front of the pack. It points to a certified farming system with rules around synthetic chemicals, soil care, and production methods. For a tea drinker, that matters because the standard connects what happens on the farm to what ends up in your cup.
A healthier farming system can support better soil structure, more balanced growing conditions, and cleaner handling practices. Organic certification does not guarantee that every tea will taste the same or that every farm operates identically. It does give you clearer proof that the grower has met a recognised standard rather than relying on vague claims like natural or clean.
That clarity is a big part of quality.
Organic green tea is best understood through four parts: plant, place, processing, and certification. The leaf is still green tea, but the organic standard asks more of the producer and gives the buyer more confidence in return.
If you're ready to turn that knowledge into a daily ritual, explore Pep Tea for premium organic Matcha and Australian-brewed organic kombucha made for clean flavour, steady energy, and everyday wellness.
Best Electric Kettle Australia: 2026 Buyer’s Guide

You buy a beautiful Japanese green tea or a fresh ceremonial matcha. You heat the water, pour it in, whisk or steep carefully, then take a sip and wonder why it tastes flat, bitter, or oddly harsh.
That disappointment often gets blamed on the tea. In many kitchens, the actual problem is the kettle.
For tea lovers in Australia, the kettle isn't just a fast way to boil water. It's a brewing tool that shapes flavour, aroma, texture, and balance. If you love matcha, sencha, hojicha, oolong, or even a good breakfast tea, the right kettle can make the difference between a rushed cup and a memorable one. That matters at home, in a café, and anywhere hospitality is part of the experience.
Your Guide to the Perfect Brew Starts Here
A common tea mistake is simple. People treat all hot water as the same.
You might boil a standard kettle to its hottest setting, pour that water straight over delicate leaves, and accidentally cook away the sweetness you paid for. With matcha, the result can be even more obvious. Instead of a soft, creamy bowl with gentle umami, you get bitterness and a slightly aggressive finish. The tea hasn't failed you. The water has.
That's why electric kettle Australia searches have become more meaningful than they first appear. Many buyers aren't just replacing an old appliance. They're looking for better control, better flavour, and a better daily ritual.
Australia's electric kettle market was estimated at USD 57.3 million in 2025 and is forecast to reach USD 115.0 million by 2034, with growth linked to convenience, energy efficiency, and features such as temperature control, according to IMARC's Australia electric kettle market overview. That tells us something important. More Australians are starting to see the kettle as a smarter kitchen tool, not just a basic necessity.
Why this matters for real tea drinkers
If you mostly drink black tea, a simple kettle may still do the job well.
But if your cupboard includes green tea, white tea, oolong, or premium matcha, precision matters. Water that's too hot can overwhelm delicate flavours. Water that's too cool can leave the cup tasting dull and under-extracted. The sweet spot changes with the tea.
Practical rule: Better tea starts before the leaf ever touches the cup.
At Pep Tea, we care about this because quality ingredients deserve respectful preparation. A good kettle helps you get more from the tea you already love. It protects subtle notes, supports consistency, and makes daily brewing feel less random.
The shift from boiling to brewing
A kettle with thoughtful features changes your routine in small but powerful ways:
- Temperature selection helps you brew green tea and matcha more gently.
- Steady pouring gives you better control for bowls, teapots, and café service.
- Reliable shut-off makes everyday use safer and less stressful.
- Good materials help keep the water tasting clean and neutral.
For tea drinkers, that isn't fussiness. It's care.
Why Temperature Control Changes Everything for Tea Lovers
Boiling water is useful. It just isn't right for every tea.
Tea leaves and powdered tea react differently depending on heat. When the water is too hot, delicate flavours can disappear fast. What should taste smooth and layered can turn sharp, bitter, or hollow. If you've ever wondered why café matcha can taste rounded and sweet while yours tastes rough at home, temperature is one of the first places to look.
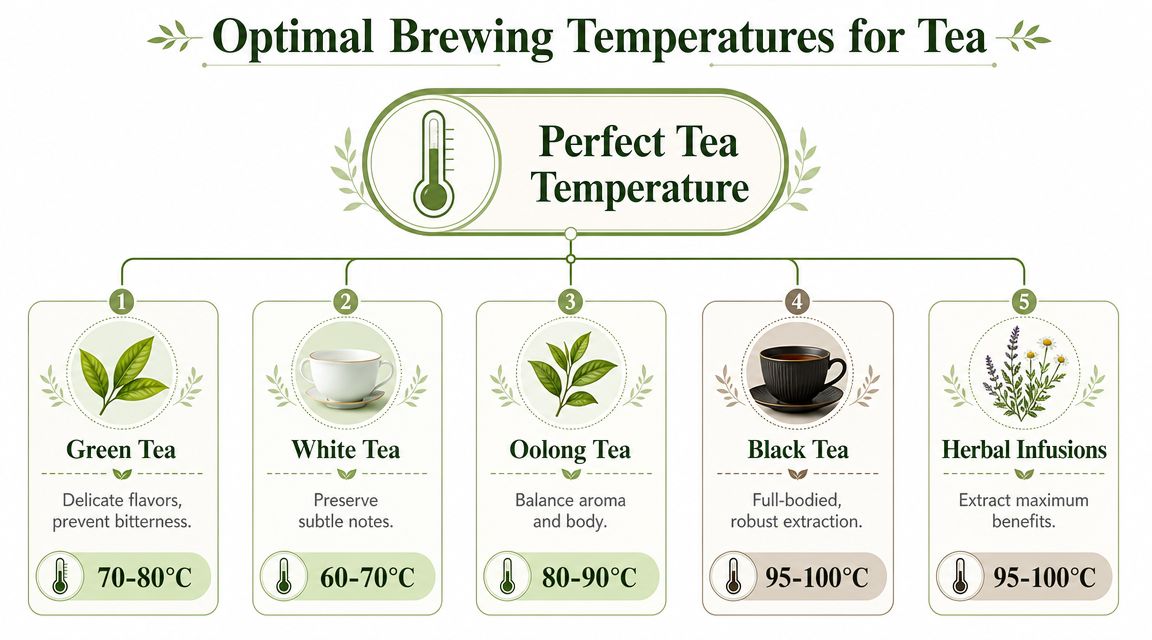
Think of tea like gentle cooking
The easiest way to understand this is through food.
You wouldn't cook every ingredient at the same heat. A slow simmer suits one dish. A hot sear suits another. Tea works in a similar way. Stronger teas can handle hotter water because you want a fuller, stronger extraction. More delicate teas need restraint.
With matcha, this is especially important. Matcha is suspended in the water, not strained out. That means the flavour impact is immediate. If the water is too hot, bitterness can dominate the bowl and cover the creamy, savoury character that makes good matcha special.
Ideal brewing temperatures for different teas
| Tea Type | Ideal Temperature (Celsius) |
|---|---|
| Green Tea | 70-80°C |
| White Tea | 60-70°C |
| Oolong Tea | 80-90°C |
| Black Tea | 95-100°C |
| Herbal Infusions | 95-100°C |
For tea lovers, a variable temperature kettle takes the guesswork out of this. Instead of waiting for boiled water to cool and hoping you've timed it right, you choose the temperature you want and brew with more confidence.
Why matcha lovers notice this first
Premium matcha rewards care. It's one of the clearest examples of why the kettle matters.
Water that sits around the gentler range often preserves a softer mouthfeel and lets the grassy, marine, sweet notes come through more clearly. When you overshoot the temperature, the bowl can taste stern rather than soothing.
That's why many tea drinkers move beyond basic on-off kettles and choose a model with finer control, such as an electric tea kettle with temperature control, especially if matcha is part of the daily routine.
Too much heat can make premium tea taste cheaper than it is.
Stability matters as much as the target temperature
There's another layer here. It isn't just about reaching the right heat once. It's about holding it steadily while you brew.
Coffee people talk about this often, and the lesson applies neatly to tea as well. This explanation of why temperature stability affects coffee is useful because it highlights a broader truth. Consistent heat supports consistent extraction. In tea, that means fewer surprise cups and more repeatable flavour.
If you serve guests, run a café, or want your morning matcha to taste the way it tasted yesterday, this consistency becomes part of the experience. It turns brewing from luck into method.
Choosing Your Kettle Material and Design
The kettle's body changes more than its look on the bench. Material influences taste, durability, weight, and how pleasant the kettle is to use every day.
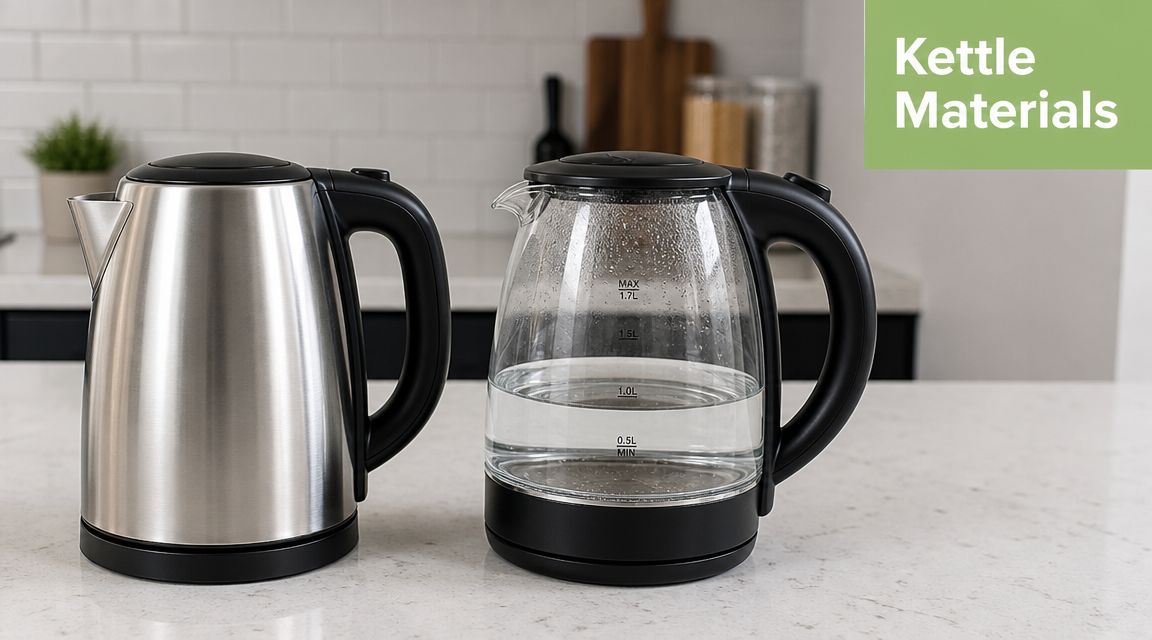
Stainless steel, glass, or plastic
Each material has trade-offs. The right choice depends on what you value most.
| Material | What it does well | What to watch for |
|---|---|---|
| Stainless steel | Durable, practical, often neutral for water taste | Exterior can feel more utilitarian than decorative |
| Glass | Lets you see the water, looks clean and refined | Can feel less forgiving in busy kitchens |
| Plastic | Lightweight and often budget-friendly | Some drinkers dislike the feel or worry about taste transfer |
For tea lovers, taste neutrality matters. If you're brewing delicate Japanese greens, white tea, or matcha water for whisking, you want the water to stay as clean and unobtrusive as possible. A kettle should help the tea speak, not add distractions.
What tea drinkers usually care about most
If your goal is pure flavour, focus on these questions:
- How does the water taste? Neutral water helps subtle tea notes come through.
- How easy is it to clean? A kettle that's awkward to clean can build up scale and affect flavour over time.
- How sturdy is it in daily use? Home kitchens, cafés, and office settings all create different kinds of wear.
- How does it feel to pour? Pour control matters more than many buyers expect.
A lot of buyers start by comparing appearance. Tea drinkers often end up caring more about pour behaviour.
Why spout design matters
A wide, fast pour is fine when you want hot water in a mug.
A gooseneck spout is different. It slows the flow and gives you control. That matters when you want to fill a small teapot gently, pour into a matcha bowl without splashing, or serve with more grace in front of guests. It also suits people who enjoy the ritual side of tea making, where the pour itself becomes part of the experience.
If you want to see that style in action, this Fellow Stagg EKG Electric Kettle guide is a useful example of how design and precision can work together for tea preparation.
A closer look at kettle form can help here:
Worth remembering: The best-looking kettle isn't always the best-brewing kettle.
Matching design to your routine
A tea drinker who prepares one careful matcha each morning may prefer elegance and precision.
A family kitchen may prioritise sturdiness and simple handling. A front-of-house café setup may need both visual appeal and repeatable performance. Good design isn't only about style. It's about fit. The right kettle feels natural in your hand and disappears into the ritual, which is exactly what a well-designed tea tool should do.
Understanding Australian Kettle Features and Standards
Australian buyers should pay attention to local power and everyday practicality, not just aesthetics. A kettle can look perfect online and still be annoying in a real kitchen if the features don't match local use.
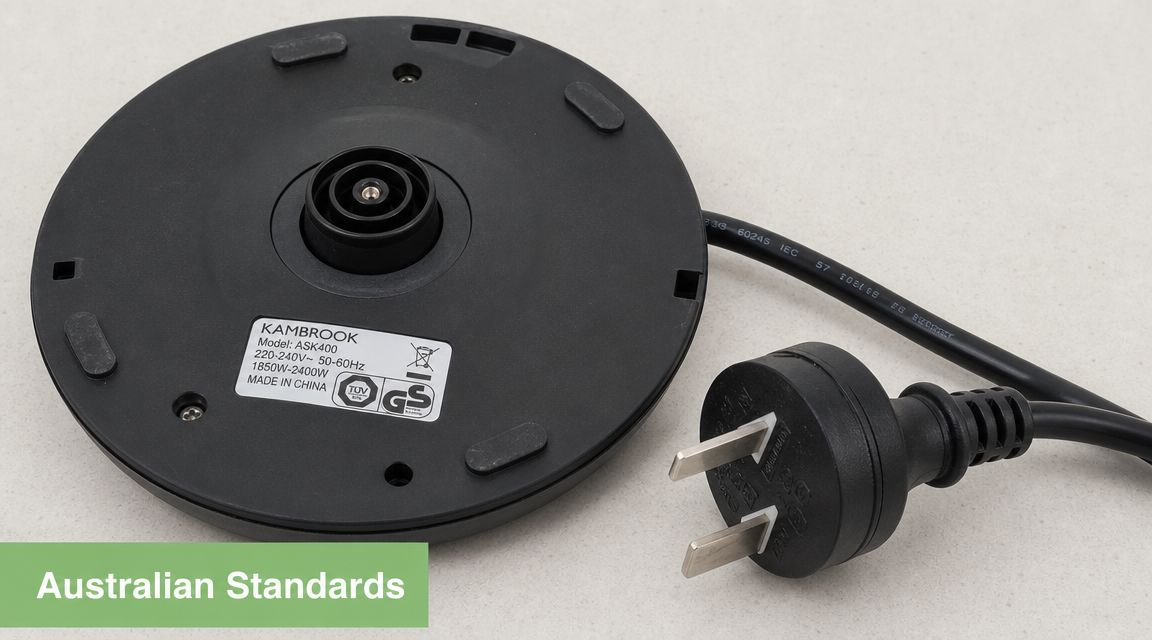
What wattage means in Australia
In Australia, a typical electric kettle is designed for 220-240V at 50Hz, with common power ratings around 1,850W to 2,400W, as shown in this Australian-market kettle example from Cuckoo Australia. In simple terms, that wattage range supports the quick boil many Australians expect during a busy morning.
Higher wattage usually means the kettle can heat water faster, but speed still depends on how much water you're heating and how the kettle is built. If you're only warming a small amount for one bowl of matcha, the experience may feel very different from filling a large household kettle to the top.
Safety features that matter in daily life
For most homes, two features matter immediately:
- Auto-shutoff keeps the kettle from continuing once the boil or selected cycle is complete.
- Boil-dry protection helps protect the unit if it's switched on without enough water.
These aren't flashy features, but they make the kettle easier to trust. In a home kitchen, that means less stress when the morning gets hectic. In hospitality, it helps staff move confidently between tasks.
Running costs are often less of a worry than people think
A lot of people hesitate over a powerful kettle because they assume it will be expensive to run.
According to CHOICE's kettle buying guide, boiling a full kettle a couple of times a day for a year costs about $32 at 40 cents per kWh, and CHOICE says most electric kettles are “not expensive to run”. The same guide notes kettle prices can range from around $15 for basic models to more than $200 for premium units, and measured boil noise can range from 47 dB to 65 dB.
That gives buyers useful perspective. A better kettle may cost more upfront, but running it day to day is still relatively modest.
A kettle's value often comes from flavour control and ease of use, not just boil speed.
Small details that improve the experience
When comparing kettles for the Australian market, look beyond the headline features and check the little things:
- Clear controls make temperature selection easier when you're half-awake.
- Comfortable handles matter if you pour often or serve guests.
- A stable base makes repeated use feel safer and smoother.
- Manageable noise can be a genuine quality-of-life feature in open-plan homes.
These are the details that separate a kettle you tolerate from one you enjoy using.
Finding the Right Electric Kettle for Your Needs
The right kettle depends on how you brew, who you're serving, and how much precision you want in daily life. One person wants a calm morning matcha ritual. Another wants fast, dependable hot water for a full household.
The matcha and tea purist
If tea quality is the main event, choose variable temperature control first and design second.
A gooseneck kettle usually suits this buyer well because the slower, more controlled pour feels deliberate. That's useful for matcha bowls, smaller teapots, and anyone who enjoys the ceremony of tea. If you're building a proper setup, a collection of matcha tea accessories can sit naturally alongside a precision kettle.
This is also the one place where a tea-focused retailer can make sense as part of your research. Pep Tea publishes tea and kettle resources for Australian users, which may help if you're trying to match brewing tools to premium matcha rather than buying a generic kitchen appliance blindly.
The busy Australian household
This buyer usually needs reliability more than ritual.
A practical household kettle should feel sturdy, easy to fill, simple to read, and safe to leave on the bench for everyone to use. Fast heating is helpful, but clear controls and easy handling often matter more over time. If several people use the kettle for different drinks, a temperature function can still be valuable even if only one person in the house is serious about tea.
Look for a model that doesn't make daily use feel fiddly.
The modern café owner
Cafés and hospitality venues need consistency. Staff need to move quickly, but the drinks still have to taste intentional.
For tea service, matcha lattes, and premium loose-leaf menus, control helps create a more repeatable result. Durability matters too. A kettle that feels elegant in a home may not hold up the same way under constant commercial rhythm. In front-of-house spaces, visual design also matters because guests notice the details.
Good hospitality often lives in the small tools guests rarely name but always feel.
The traveller, office worker, or small-space buyer
There's another category that doesn't get enough neutral guidance in Australia. Compact and portable kettles.
Search interest exists around smaller kettles and travel-friendly models, as noted in this discussion of small kettle Australia search demand and content gaps. The primary question isn't just whether a kettle is small. It's whether it makes sense for your use case.
A compact kettle can be practical for:
- Office use when you want your own tea setup
- Small apartments where bench space is limited
- Domestic travel when convenience matters
- Some overseas travel if voltage compatibility is appropriate
For many Australians, a travel kettle is a second kettle, not a main one. That distinction helps buyers avoid disappointment.
Keeping Your Kettle Clean and Limescale-Free
Even a brilliant kettle won't brew at its best if it's coated in scale.
Limescale is the chalky mineral build-up that forms inside kettles over time. In some parts of Australia, it appears faster than people expect. You may first notice it as cloudy marks, flakes, or a slightly dull taste in the water. For tea, that matters. Clean water is part of clean flavour.
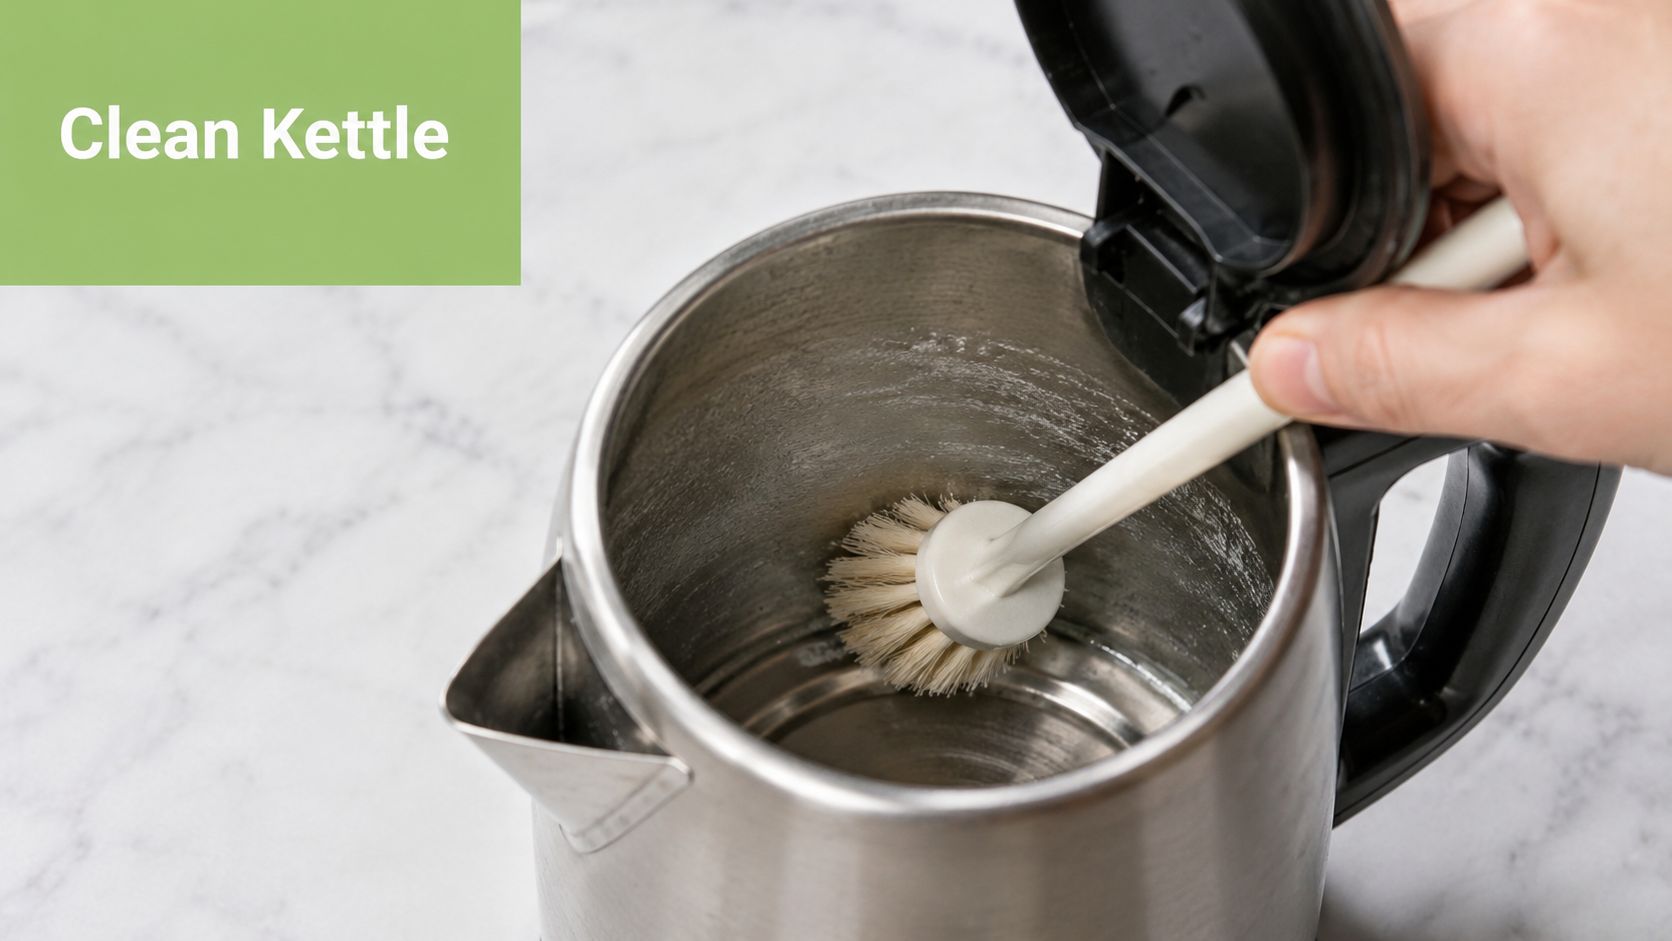
A simple natural cleaning routine
You don't need anything fancy. A gentle home method is often enough.
- Fill the kettle partway with a mix of water and white vinegar, or use lemon juice if you prefer.
- Let it sit long enough for the mineral build-up to loosen.
- Boil if your kettle instructions allow it, then leave it to settle briefly.
- Empty and rinse well so no cleaning taste remains.
- Boil fresh water once more and discard it before making tea.
Always check the manufacturer's care advice first, especially for premium finishes or specialised interiors.
Why this matters for flavour
Scale doesn't just look untidy. It can interfere with the clean taste you want from the water.
If you drink black tea with milk, you might notice this less. If you drink green tea, white tea, or matcha, stale or mineral-heavy water tends to show itself more clearly. The cleaner the kettle, the easier it is to taste the tea itself.
For a broader home-care walkthrough, this limescale removal guide offers practical context on removing build-up around the home.
Easy habits that help
A little regular care goes a long way:
- Empty standing water instead of leaving it in the kettle overnight.
- Rinse occasionally even when the kettle looks clean.
- Descale before build-up gets heavy because light maintenance is easier than deep cleaning.
- Wipe the outside and lid area so the whole kettle stays pleasant to use.
A clean kettle protects flavour and keeps the ritual feeling fresh.
Your Next Great Cup of Tea Awaits
The right kettle changes more than your bench setup. It changes what ends up in the cup.
For Australian tea drinkers, the best electric kettle Australia choice often comes down to one idea. Precision brings out quality. When you control temperature, choose suitable materials, and keep the kettle clean, you give your tea a fair chance to shine. That matters for a quiet bowl of matcha before work, a pot of green tea in the afternoon, or a polished tea service in a café.
A kettle can be fast and convenient. It can also be thoughtful.
That's the difference many people notice once they move from basic boiling to intentional brewing. You stop asking why your tea tastes inconsistent. You start enjoying the kind of flavour that made you buy good tea in the first place.
If you've invested in premium leaves or matcha, your water tool should respect that choice. Better brewing doesn't have to be complicated. It just has to be considered.
If you're refining your tea setup, Pep Tea is a useful place to explore organic matcha, brewing education, and tea tools that support a more precise daily ritual.