
Tag: matcha recipe
How to Make Matcha Not Taste Like Grass: Fix It Today

An overly grassy bowl is almost always fixable by lowering the water temperature to 70–80°C and adding a creamy base, rather than just using stronger matcha. Start with about 2 g of powder, whisk it properly, then dilute it with milk or chilled water until the flavour suits you.
You've probably had the experience: the colour looks beautiful, the whisk is ready, and then the first sip tastes like freshly cut lawn with a bitter finish. That doesn't necessarily mean your matcha is bad. More often, boiling water, clumps, too much powder, or the wrong serving style has pushed its natural vegetal character too far.
For many Australians, matcha is a big sensory jump from regular black tea. Australian tea-buying data found that 35% of people aged 14 and over purchased regular tea in an average four-week period, compared with 11% for green tea, in the 12 months to March 2015, based on 15,913 respondents. Roy Morgan's tea data helps explain why a strong powdered green-tea flavour can feel unfamiliar.
The good news is that learning how to make matcha not taste like grass is less about hiding the drink and more about controlling heat, texture, concentration and dilution.
Why Your Matcha Tastes Grassy
You whisk up a bright green bowl, take a sip, and get hit with raw lawn, bitterness, or a strange stale edge. That usually points to a specific problem, not a lost cause. Matcha is more concentrated than brewed green tea because you drink the leaf itself, so heat, texture, and dose all show up clearly in the cup.
Start with temperature, because it changes flavour fast. Freshly boiled water pulls out more bitterness and leaves the finish dry, especially in a small, concentrated mix. A lower range gives you a softer, sweeter result and makes it easier to judge the powder fairly. PepTea's matcha brewing temperature guide lays out why gentler water gives you better control.
Then read the flavour before you change everything at once.
Read the flavour before changing the recipe
Your first sip usually tells you what to fix:
- Freshly cut grass or raw greens: the powder itself may lean strongly vegetal. This often shows up more in culinary matcha.
- Drying, puckering bitterness: the water was likely too hot, or the drink is too concentrated.
- Grainy, uneven flavour: the matcha was not sifted or whisked into a smooth suspension.
- Flat, stale green flavour: storage, age, or air exposure may be dulling the powder.
Each fix does a different job. Sugar can soften bitterness, but it will not solve scorched powder. Milk can round off aggressive notes, but it will not remove clumps. If you want a better cup, diagnose the problem first, then change one variable at a time. Keep the amount of matcha steady while you test water temperature or dilution, otherwise it gets hard to tell what improved the flavour.
Off-notes can also come from the vessel itself. If your bottle or shaker carries residue from previous drinks, effective bottle cleaning tablets remove that variable before you blame the matcha. A clean bottle will not rescue overheated powder, but it does stop old protein, sweetener, or tea residue from muddying the aroma.
That diagnostic mindset matters in Australia, where plenty of tea drinkers still find matcha stronger and greener than what they usually reach for. IndexBox's Australian tea market overview shows the category has a solid local base. Matcha usually lands better when the format matches the drinker, whether that is a latte, an iced drink, a smoothie, or a straight bowl made with more care.
Mastering the Basic Preparation Method
A smooth cup starts with a small, controlled preparation. Use a bowl or wide mug, a fine sifter, a bamboo whisk or electric milk frother, a digital scale if you have one, and water that has cooled below boiling.
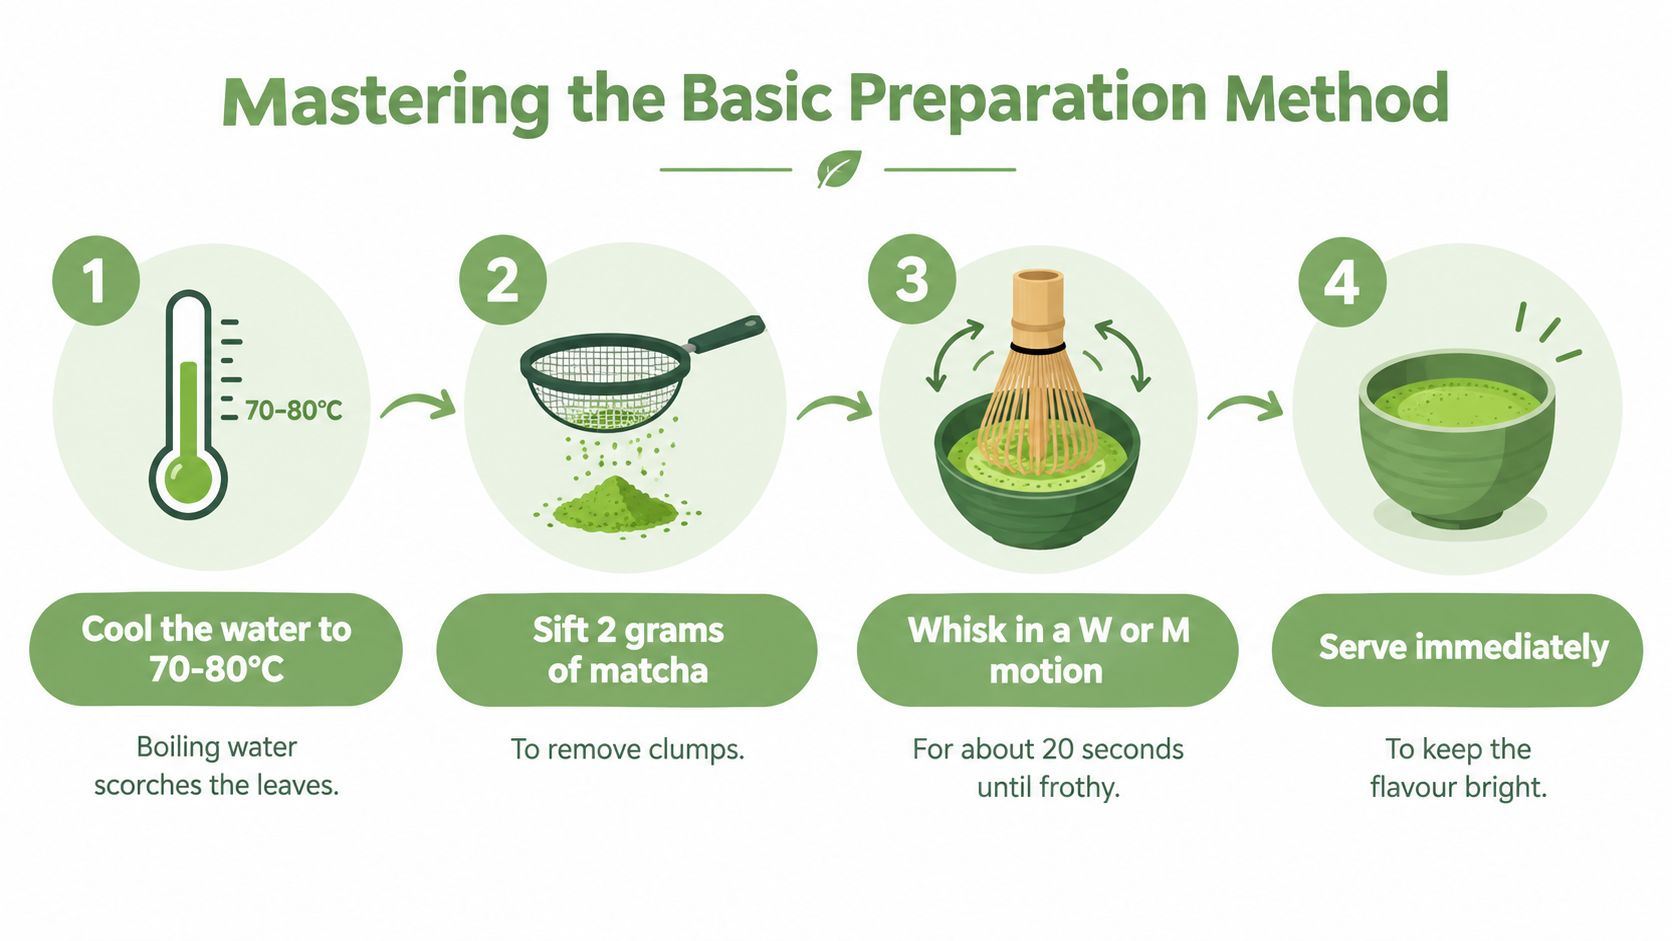
Use less heat and better dispersion
Cool the water. Heat water, then let it cool to 70–80°C. For a particularly grassy powder, begin around 70–75°C. If you don't have a thermometer, leave freshly boiled water to cool for several minutes instead of pouring it directly onto the matcha.
Sift approximately 2 g of matcha. Push the powder through a fine sieve into your bowl. This breaks up compacted particles before they become bitter clumps in the finished drink.
Make a paste first. Add 10–15 mL of the warm water and work it into a smooth slurry. Don't rush this step. A paste gives the powder an even starting point and prevents dry pockets from surviving into the final cup.
Whisk in the remaining water. Add enough water to reach approximately 50–60 mL in total, then whisk rapidly in a W or M motion until the surface looks lightly foamy.
Serve immediately. Matcha begins to settle as it stands. The final sips can taste stronger and more bitter because the powder has collected at the bottom.
This controlled method follows Australian preparation guidance that recommends approximately 2 g of matcha with 50–60 mL of water at 70–80°C. SBS Food's matcha recipe also uses a paste before gradually adding the remaining water, which is a simple way to improve texture.
Troubleshoot with a café-style test
If the drink still tastes sharp, keep the dose and water volume unchanged and compare cooler water. A useful sensory trial is 65°C, 70°C and 75°C, tasted immediately after whisking. Australian brewing guidance recommends cooler water when bitterness develops, and explains that warmer water can increase tannin-driven astringency. You can read the broader comparison in this Australian green-tea brewing guide.
For café service, consistency matters more than guesswork. Weigh the powder, measure the water and check the temperature. If you change all three at once, you won't know what improved the flavour.
You'll find a fuller walkthrough of the drink itself in PepTea's guide to making matcha tea from powder, but the essential principle is simple: cooler water, a smooth slurry and immediate service.
Transforming the Taste with Milk and Sweeteners
If plain matcha still feels too intense, a latte is usually the most reliable next step. Milk changes the drink's texture and spreads the powder through a larger volume, so the concentrated green flavour feels rounder rather than so direct.
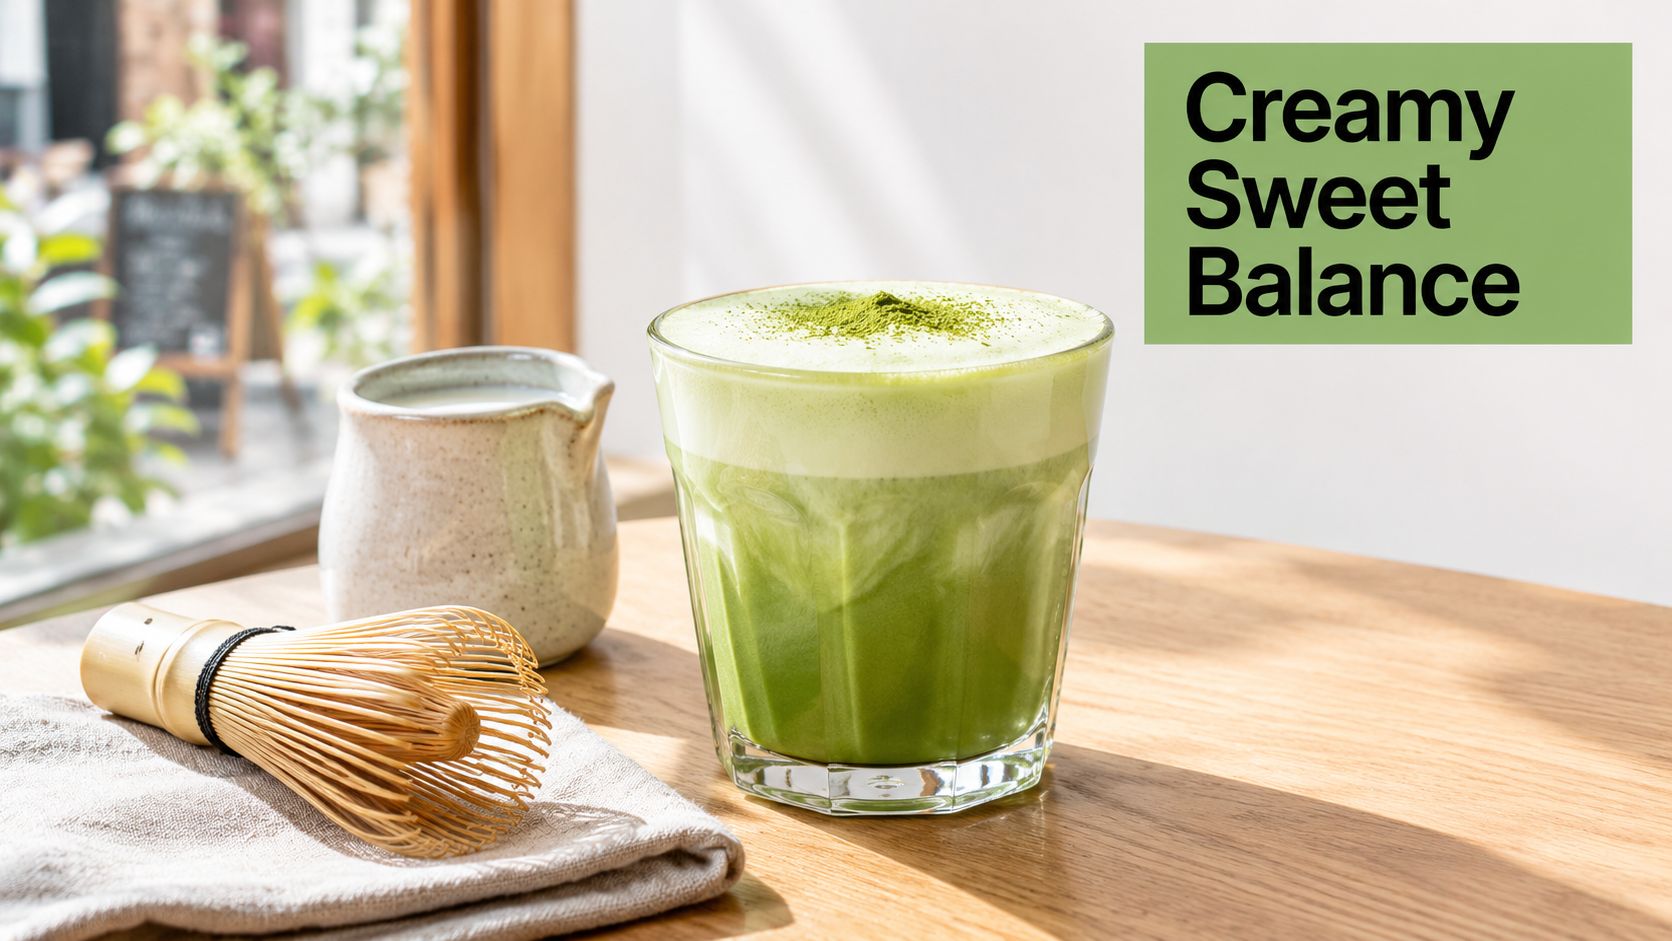
Dairy milk brings creaminess and a familiar café profile. Oat milk adds body and gentle sweetness, while macadamia milk gives a lighter, nutty finish. Unsweetened plant-based milk is a sensible choice if you want to keep the drink aligned with a low-sugar routine. The best option depends on the matcha and your palate, so taste the base before adding a sweetener.
Compare the serving formats
| Format | What it does to the flavour | Best use |
|---|---|---|
| Straight bowl | Keeps the umami and vegetal notes prominent | Fresh, balanced matcha |
| Hot latte | Adds body and softens sharp edges | First-time drinkers and cosy café drinks |
| Iced latte | Makes the flavour feel lighter and more refreshing | Warm Australian days |
| Smoothie or baking | Shares the matcha with other ingredients | Stronger culinary powder |
For a practical latte, whisk the matcha with a small amount of warm water first, then add approximately 150–200 mL of steamed or chilled milk. An iced version works particularly well when you pour the whisked matcha over ice and add milk afterwards. The cold dilution reduces the immediate impact of the vegetal notes without requiring extra sugar.
A smoother drink isn't a caffeine-free drink. Milk, vanilla and sweetener change perceived bitterness and grassiness, but they don't remove the naturally occurring caffeine in matcha.
Sweetness should support the tea, not bury it. A small amount of honey, maple syrup or an approved sugar-free syrup can balance bitterness. Too much sweetness creates a different problem, especially if you're trying to keep a clean-label or sugar-free drink on the menu.
Australian and New Zealand food guidance says naturally occurring caffeine in tea isn't subject to the same maximum limits as caffeine added to beverages, although a standard serving of these foods will normally not exceed 100 mg. FSANZ's caffeine safety information is useful for explaining why matcha can feel stronger than an ordinary brewed green tea.
This video shows the latte process in a visual format:
For a measured home version with milk and optional sweetener, follow PepTea's matcha green tea latte recipe. If you're caffeine-sensitive, pregnant or breastfeeding, or preparing a drink for a child, consider total daily caffeine intake rather than judging the drink by its sweetness.
Understanding Matcha Grades and Flavours
Preparation can only take you so far. If your matcha is naturally forceful, cooler water may reduce bitterness, but it won't turn the powder into a delicate, sweet tea. The grade, cultivation, harvest and processing all contribute to the flavour you're working with.
Ceremonial-grade matcha is intended for drinking with water. It usually offers a finer texture and a more balanced combination of umami, sweetness and gentle vegetal flavour. That doesn't mean it has no grassiness. Authentic matcha can still taste green, savoury and seaweed-like, but the finish should feel more integrated rather than aggressively drying.
Culinary-grade matcha is designed to hold its character alongside other ingredients. Its stronger profile can be useful in cookies, cakes, smoothies, ice cream and savoury recipes, where milk, fruit, flour or fat changes the overall balance. Used as a plain bowl, it may taste more assertively vegetal.
Match the powder to the drink
Choose ceremonial grade when you want to drink matcha mostly with water. Choose culinary grade when you're mixing it into a recipe where a green-tea flavour needs to remain noticeable.
Colour can provide a clue, but it isn't a complete quality test. A vivid green powder may still taste harsh if it has been overheated, while a well-prepared matcha with some vegetal character can be enjoyable. Aroma, texture, freshness and the aftertaste matter as much as appearance.
Organic sourcing is another part of the purchasing decision, but it shouldn't be treated as a guarantee that every cup will taste mild. PepTea offers Japanese organic matcha in ceremonial and culinary styles, so the useful question is not “Is it organic?” It's “Is this grade suited to the way I plan to drink or cook with it?”
Storage affects the result too. Keep the powder sealed, away from heat, light and moisture, and avoid leaving it open beside the kettle. If a powder has lost its fresh aroma and tastes dull or flat, changing technique may not be enough.
When Grassy Notes Are Actually a Good Thing
Not every green flavour is a fault. Matcha is made from powdered tea leaves, so a pleasant vegetal note is part of its identity. The aim isn't to remove every trace of grassiness. It's to separate fresh, savoury character from the harsh bitterness caused by poor extraction or an unsuitable powder.
A well-balanced cup can taste like fresh greens, toasted seaweed, soft umami and gentle sweetness at the same time. Those flavours give matcha its personality. If you force the drink to taste completely neutral with heavy dilution and lots of sweetener, you may lose the reason to drink matcha in the first place.
Tell freshness from over-extraction
Pleasant grassiness usually arrives with aroma and a clean finish. Over-extraction feels more aggressive. It can leave your mouth dry, make the bitterness dominate, or create a burnt impression that lingers after the sip.
This distinction helps you decide whether to keep experimenting with the recipe or replace the powder. If the flavour improves when you cool the water and dilute the drink, technique was the main issue. If it remains blunt, stale or drying even after careful preparation, the grade, freshness or source may not suit a water-based cup.
Matcha is also part of a changing Australian beverage scene. Among surveyed Australians aged 18–24, 40% reported ordering matcha in the previous six months, while 36% ordered flavoured iced matcha, according to Ujiha's Australian matcha flavour guide. Those figures point to a practical lesson for cafés and home drinkers: matcha doesn't need to be introduced only as a strong traditional bowl. Iced and flavoured formats can preserve its character while making the first experience more approachable.
Your Quick Checklist for a Smooth Cup
When the next bowl tastes like grass, don't reach for more powder. Work through the variables in order:
- Start with temperature: Use water at 70–80°C, beginning nearer the lower end if the flavour is harsh.
- Sift before mixing: Break up clumps so the powder disperses evenly.
- Build a paste: Combine the powder with a small splash of water before adding the rest.
- Whisk thoroughly: Use a W or M motion until the drink is smooth and lightly foamy.
- Dilute deliberately: Add chilled water, ice or 150–200 mL of milk if a straight bowl feels too concentrated.
- Sweeten lightly: Use a small amount of honey, maple syrup or sugar-free syrup only after correcting heat and texture.
- Choose the right grade: Use ceremonial matcha for water-based drinking and culinary matcha for recipes.
- Serve promptly: Don't let the powder settle into a bitter final mouthful.
- Check the powder: If careful preparation doesn't soften the flavour, reassess freshness and grade.
The most useful habit is to diagnose before disguising. Cooler water fixes over-extraction, sifting fixes clumps, and milk fixes concentration. Sweetener has a place, but it should be the finishing adjustment, not the rescue plan.
The best matcha routine is the one you'll repeat. A balanced iced latte can be a better introduction than a perfect but intimidating straight bowl.
If your drink contains matcha, remember that a smoother flavour doesn't change its caffeine content. Australian guidance also states that highly concentrated caffeine products, including products with caffeine concentrations of 5% or more in solid or semisolid form, or 1% or more in liquid form, are banned from retail sale to the public. FSANZ's guidance on caffeine powders distinguishes those products from ordinary tea ingredients.
Pep Tea offers organic Japanese matcha in drinking and culinary formats, along with Australian-brewed sugar-free organic kombucha from the Hunter Valley, NSW. Try the temperature and latte methods above, then visit Pep Tea to explore matcha for your next smooth home drink or café menu.
Best Matcha Latte Recipe for Café-Style Flavour at Home

You've picked up a vivid green matcha latte on the way to work, taken two sips, and realised it tastes more like sweetened milk than tea. At home, the same drink can be smoother, fresher, and much easier to adjust. The difference usually isn't an expensive coffee machine. It's fresh matcha, controlled water temperature, proper sifting, and milk that can hold its texture.
Australia's matcha habit has moved well beyond a niche tea order. The market generated more than AUD 54 million in 2024 and one industry forecast expects it to exceed AUD 81 million by 2030, a projection covered by SBS News. That growth has brought better access, more café experimentation, and higher expectations for the cup.
This is the best matcha latte recipe I use as a practical starting point. It works hot or iced, with dairy or plant milk, and gives you enough control to make a café-style drink without hiding the tea under syrup.
Why Your Morning Matcha Latte Costs Too Much
A Sydney or Melbourne takeaway can cost close to A$8, while cafés in major Australian cities commonly charge AUD 6 to AUD 8 per serve, according to Australian tea market coverage. One occasional purchase is easy to justify. Five weekday drinks, however, can put roughly A$40 a week toward takeaway matcha.
Home preparation changes the calculation without requiring bargain-basement powder. A carefully portioned latte costs around A$2 a serve with ceremonial matcha, or roughly A$1.20 with culinary matcha, depending on the matcha, milk, and sweetener. At five drinks a week, that is about A$10 for ceremonial matcha or A$6 for culinary matcha, compared with roughly A$40 from a café.
The lower cost also gives you control over the cup:
- Matcha grade: Ceremonial matcha offers a cleaner, more delicate flavour, while culinary matcha can bring stronger bitterness at a lower serving cost. Neither replaces good technique.
- Sweetness: Use honey, maple, a sugar-free option, or nothing, rather than accepting a café's preset balance.
- Milk: Dairy, oat, almond, soy, and coconut milk change the texture and how clearly the tea comes through.
- Tea flavour: With enough matcha and restrained sweetness, umami and gentle vegetal notes remain noticeable instead of disappearing under syrup.
Supply can affect the choice. If ceremonial matcha is difficult to find or too expensive, fresh culinary matcha is a practical substitute for a daily latte. Sifting it carefully, controlling the water temperature, and choosing milk that froths well will matter more than paying for a premium label alone.
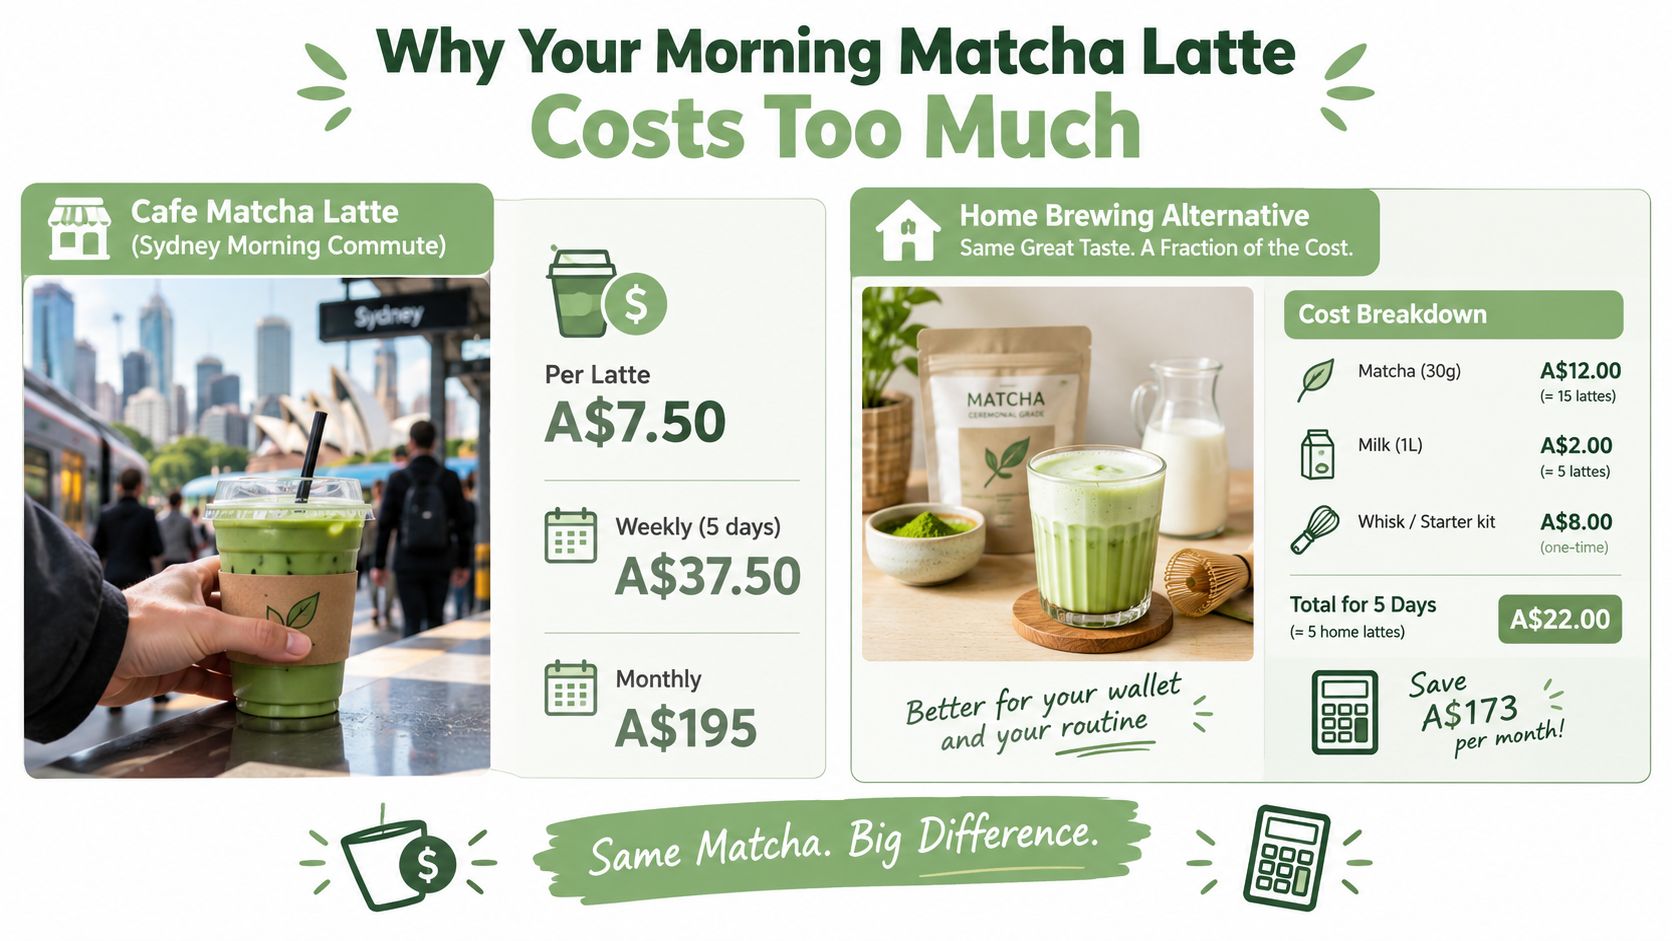
The home method costs about the same as one takeaway drink once the basic ingredients are in your kitchen. The return is a fresher, more adjustable cup, with attention and technique doing more work than expensive equipment.
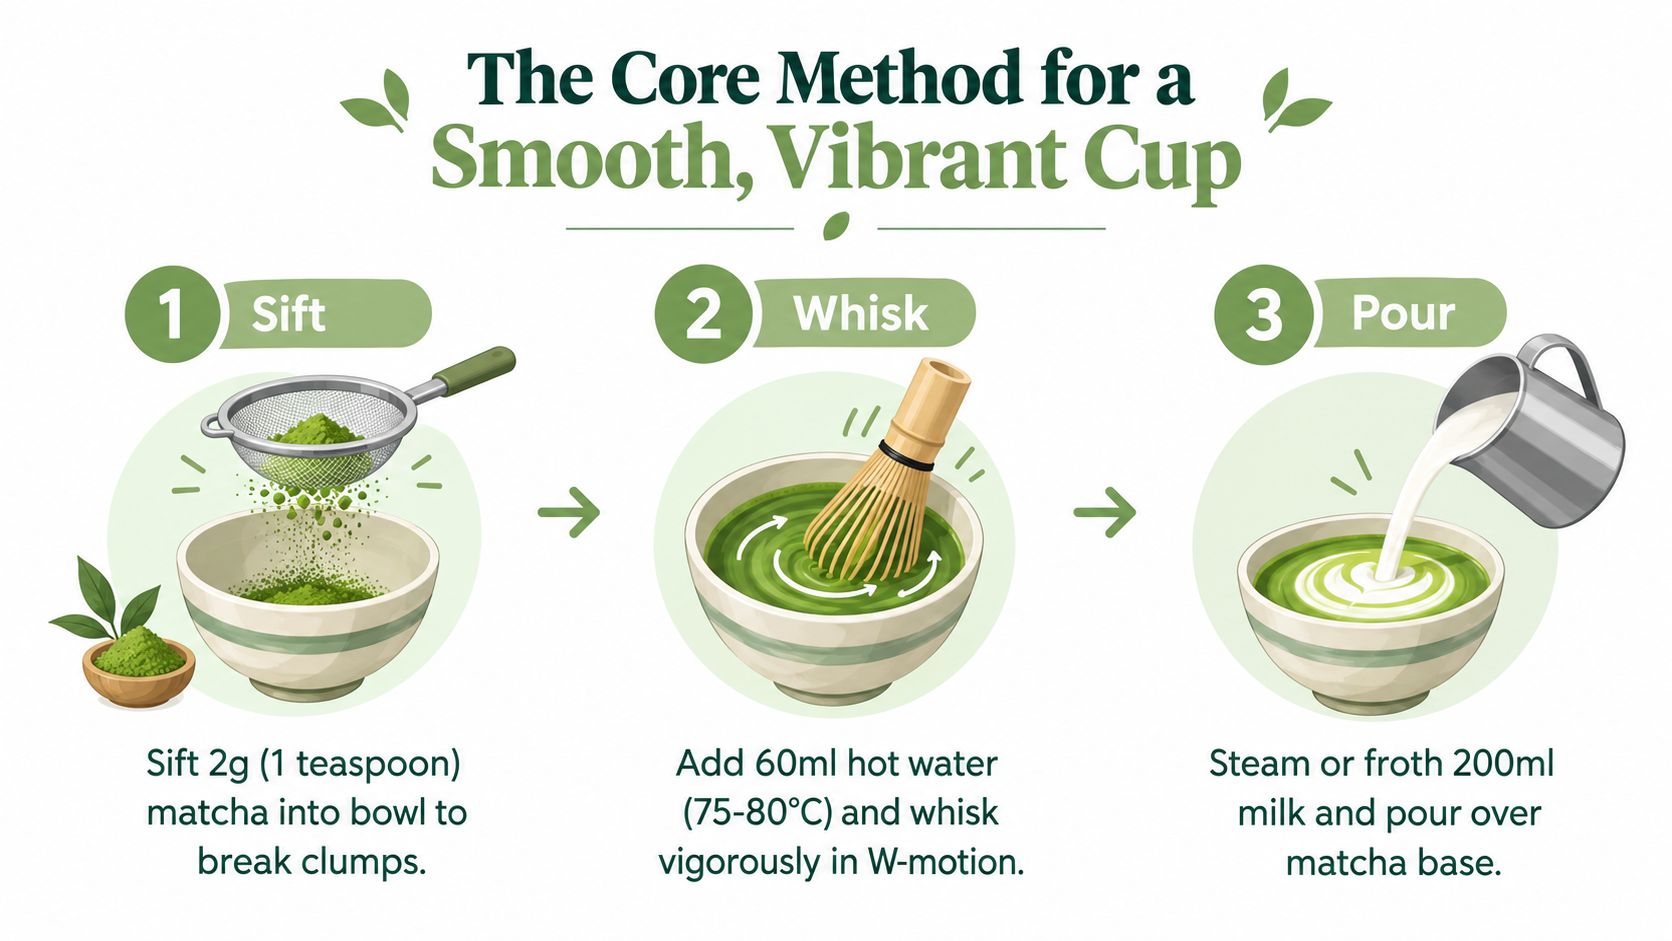
The Core Method for a Smooth, Vibrant Cup
The smoothest latte starts with a small matcha concentrate, not powder dumped directly into a full glass of milk. Matcha is finely ground tea leaf, so it won't dissolve like sugar. Sifting and emulsifying suspend the particles evenly and prevent dry pockets from floating through the drink.
Start with a fine matcha base
Measure 2 g, about 1 teaspoon, of matcha into a small bowl, wide mug, or matcha bowl. Pass it through a fine sieve before adding water. This takes a few seconds and removes the compacted pieces that a spoon tends to leave behind.
Add 60 ml of water at 70–80°C. This temperature range is the most important control in the recipe. Australian matcha preparation guidance recommends this window because it helps preserve flavour, reduces bitterness, and supports a more stable foam, as described in this Australian matcha latte method.
Build a paste, then whisk
First, work the water into the powder to make a thick paste. Use a bamboo chasen or small whisk and press any remaining lumps against the side of the bowl. Don't rush straight to a large volume of water. The paste stage gives every particle a chance to hydrate evenly.
Add a second small splash of the remaining water if the paste feels tight, then whisk rapidly for 15–20 seconds in a W or M motion. A circular stir moves liquid around the bowl but doesn't incorporate air as effectively. The target is a glossy, fully suspended base with fine pale-green bubbles across the surface.
Practical rule: If your water has just boiled, let it cool before it touches the matcha. Water above the recommended range is the fastest route to a harsh cup.
Warm 150–200 ml of milk and pour it into the matcha base. For an iced latte, use cold milk and pour the whisked matcha over ice. Keep the milk volume toward the lower end when you want a stronger tea flavour, and use the higher end for a softer, milkier drink.
For a visual demonstration of the whisking technique, see PepTea's guide to whisking matcha.
A bamboo chasen is traditional, but a handheld electric frother or small wire whisk works perfectly well for a home latte. The method matters more than the tool.
Choosing the Right Matcha Grade for Your Budget
Ceremonial and culinary matcha aren't interchangeable in every drink, but the more expensive option isn't automatically the better latte powder. Ceremonial matcha is generally selected for drinking with water, where its colour, aroma, texture, and finish have nowhere to hide. Culinary matcha is made for recipes in which milk, sweetener, fruit, chocolate, or flour share the stage.
| Attribute | Ceremonial Grade | Culinary Grade |
|---|---|---|
| Flavour | Smooth, umami-rich, vegetal, gently sweet | Deeper, toastier, and more astringent |
| Colour | Brighter, vivid green | Often darker or duller green |
| Price guide | Typically A$35–A$60 per 30 g tin | Typically A$15–A$25 per 100 g pouch |
| Best use | Straight matcha, lightly milky drinks | Everyday lattes, iced drinks, baking |
| Main advantage | Clean finish and refined aroma | Strong value and enough flavour to stand up to milk |
Those price ranges reflect the product examples described in the brief, not a universal retail rule. Matcha availability and pricing vary as Australian demand expands across cafés, supermarkets, and specialty tea suppliers. PepTea's explanation of matcha grades is useful when you're comparing a drinking powder with one intended for cooking.
My rule is simple: choose ceremonial grade when the tea itself is the focus, and save with culinary grade for regular lattes, smoothies, iced drinks, and baking. Ceremonial grade matters less than many people think when you're adding a substantial amount of oat milk, sweetener, vanilla, or ice. In that situation, a fresh culinary matcha can taste more balanced than an older, expensive tin.
Storage also affects the result. Keep opened matcha sealed, away from heat and strong light, and use clean, dry utensils so the powder retains its colour and aroma.
Milk Options and How to Froth Each One
Milk changes the latte more than most expect. It affects sweetness, body, foam, and how strongly the matcha comes through, so the right choice depends on whether you want a traditional creamy drink, a plant-based café texture, or a refreshing iced version.
| Milk | Flavour Impact | Foam Quality | Best Temperature |
|---|---|---|---|
| Full-cream dairy | Rich, rounded, naturally sweet | Stable, fine microfoam | Around 65°C |
| Oat milk | Creamy, lightly sweet, cereal-like | Usually the most stable plant foam | Around 60–65°C |
| Almond milk | Nutty and lighter-bodied | Light foam, stronger with barista blends | Warm gently |
| Soy milk | Creamy with a mild bean note | Holds foam well, but can split if overheated | Keep below boiling |
| Coconut milk | Tropical and aromatic | Thin foam, better for iced drinks | Froth cold or warm gently |
Full-cream dairy gives the most forgiving hot latte. Warm 150 ml gently to around 65°C, then froth until the surface looks glossy rather than bubbly. Overheated milk loses sweetness and can make the tea taste flatter.
Oat milk is usually the easiest plant-based substitute for a café-style texture. Barista versions often contain ingredients that improve body and emulsification, which helps them produce a more persistent foam. Soy can also foam well, but high heat may cause it to split, so stop before the milk simmers.
Almond milk heats quickly and tends to create a lighter drink. Choose a barista blend if foam matters. Coconut milk adds an appealing tropical note but usually stays thinner, so I prefer it cold over ice rather than trying to force it into a dense hot foam. PepTea's matcha coconut milk recipe is a useful format for that combination.
Two reliable cold versions
For a shaken iced latte, combine the sifted matcha with the hot water paste first, then add 200 ml cold milk and ice to a jar. Seal it firmly and shake until the drink looks evenly green and lightly foamy.
For a cold-foam finish, froth a small amount of cold milk separately with a handheld frother or French press, then spoon it over an iced matcha latte. If you're preparing drinks for a household or café, a larger piece of equipment such as this Chef Inox Elite jug milk frother from Simply Hospitality can make repeated batches easier.
Rice milk and very low-fat dairy are less reliable when you want stable foam. They can still make a pleasant latte, but expect a thinner surface and let the matcha carry more of the texture.
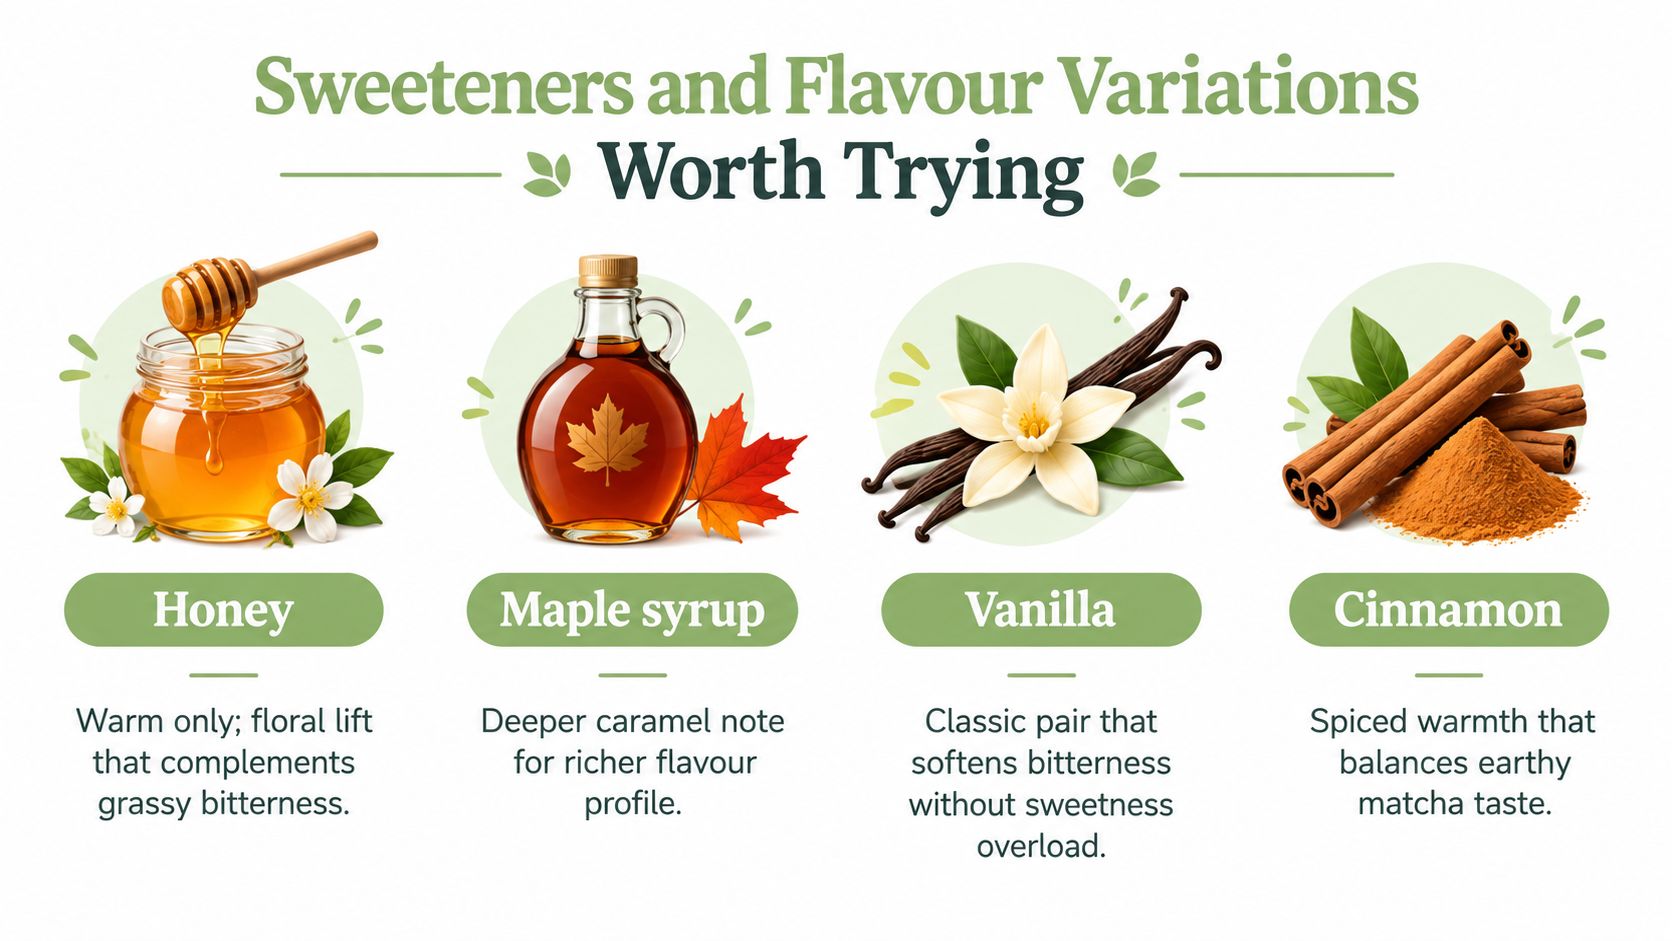
Sweeteners and Flavour Variations Worth Trying
Sweetener should support matcha's flavour, not bury it. Start with a small amount, taste after the milk is added, and remember that oat milk already brings its own sweetness.
- Honey: Begin with 1 teaspoon in the warm matcha paste. Its floral character can lift grassy notes, but don't add it to a cold drink if it won't dissolve properly.
- Maple syrup: Use 1 teaspoon for a deeper caramel note, especially with oat milk.
- Caster sugar: Add 1 teaspoon to the hot paste if you want a neutral sweetness that disappears cleanly into the drink.
- Monk fruit or stevia: Follow the product's serving guidance, because concentrations vary. These options suit a low-sugar routine, but some products leave a lingering aftertaste.
- No sweetener: Use this with a good ceremonial matcha when you want to notice its umami, aroma, and gentle vegetal sweetness.
Vanilla is one of the most useful additions. A few drops round out bitterness without turning the latte into a dessert. A pinch of fine sea salt can make sweetness feel more pronounced, while 1 teaspoon cocoa creates a matcha-mocha profile with a darker finish. For an iced tropical version, add a splash of coconut cream and reduce the milk slightly so the drink doesn't become heavy.
These small adjustments fit neatly into everyday low-sugar cooking. For broader ideas on balancing sweetness and flavour in family drinks, see these balanced cooking tips for Melbourne families.
Cinnamon works best as a finishing dusting rather than a large dose whisked into the base. It adds warmth, but too much spice can cover the tea's more delicate notes.
Fixing the Most Common Home Matcha Problems
A bitter latte isn't proof that you dislike matcha. In most home kitchens, it points to a process problem, usually water that's too hot or powder that hasn't been emulsified properly.
Bitter taste
Boiling water extracts a harsher flavour and overwhelms matcha's softer notes. Cool freshly boiled water for about 60 seconds before adding it, then stay within the 70–80°C range.
Clumps
A spoon can mix matcha into milk, but it won't break up compacted powder as reliably as a sieve and rapid whisk. Sift the dry matcha before adding any liquid, then make a paste before increasing the water volume.
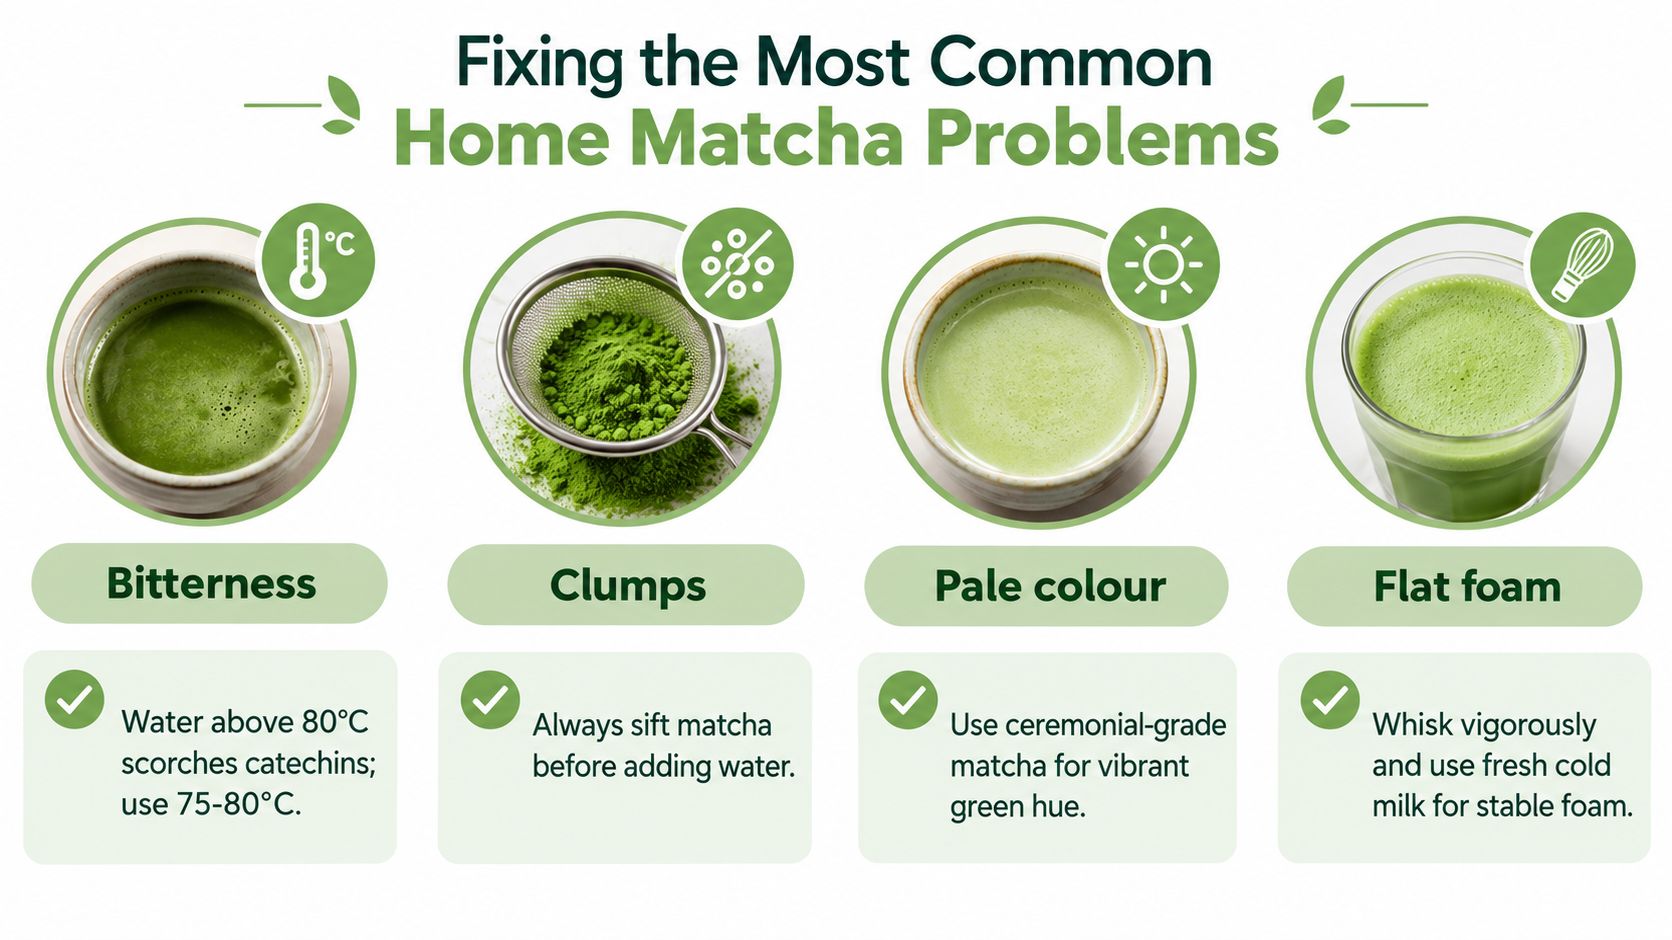
Pale colour
A weak green colour usually comes from too much milk, older oxidised powder, or using a small amount of culinary matcha in a large drink. Reduce the milk to 150 ml and use 2 g matcha before reaching for more sweetener.
Flat or disappearing foam
Overheated milk and low-protein plant milks produce large bubbles that collapse quickly. Warm dairy or barista plant milk gently toward 65°C and whisk the matcha vigorously until it has fine surface bubbles.
The most useful diagnostic is to change one variable at a time. If you alter the powder, milk, sweetener, water, and whisking method together, you won't know what fixed the cup.
Matcha can settle after standing, even when you've prepared it correctly. Serve it soon after mixing, and give an iced version another shake if it sits while you're getting ready.
Quick Answers and What to Brew Next
The recipe is easy to remember once the proportions become familiar:
- Sift: Use 1–2 teaspoons of ceremonial or culinary matcha.
- Whisk: Add 60–80 ml water at 70–80°C and whisk with a chasen or frother until smooth and foamy.
- Pour: Add 150–200 ml of steamed, warmed, or cold milk.
How hot should the water be?
Keep it between 70 and 80°C. Water that's too hot can create bitterness, while cooler water may leave the paste less expressive and harder to blend.
Does matcha contain caffeine?
Matcha contains caffeine, and the Australian Good Food recipe notes that it can contain up to three times as much caffeine as steeped tea, as reported by Good Food. The amount in your cup depends on the powder dose and preparation, so treat matcha as a caffeinated drink rather than assuming it's automatically gentle.
Can I use pre-mixed matcha latte powder?
You can, but check the ingredient list. Pre-mixed powders may include sweeteners or milk ingredients, which limits your control over flavour and sugar. Plain matcha gives you more flexibility with milk, sweetness, and strength.
How should I store an opened tin?
Seal it tightly and keep it away from heat, moisture, and direct light. Matcha's colour and aroma are strongest when the powder is protected from air and used while fresh.
Is a matcha latte different from matcha with milk?
A matcha latte is built around a whisked matcha base combined with a larger volume of warm or cold milk, often with foam and optional sweetener. Matcha with milk can be simpler, with less milk and little or no frothing, so the tea remains more prominent.
For readers ready to upgrade their everyday tin, PepTea offers organic Japanese matcha in ceremonial and culinary formats. The brand also makes sugar-free organic kombucha in the Hunter Valley, NSW, including Ginger, Lime & Ginger, and Mango, which works well as a palate-cleansing afternoon drink alongside a morning matcha ritual.
Explore the Pep Tea range for organic Japanese matcha suited to both straight preparation and lattes, then compare it with sugar-free kombucha for a refreshing, low-sugar drink later in the day. Choose the grade and milk that match your routine, and make your next café-style cup at home.
How to Make an Organic Matcha Latte at Home

You're standing in the kitchen with a steaming kettle, a tin of vivid green powder and one important question: will this organic matcha latte taste smooth and gently sweet, or grassy and bitter? A good latte should have a silky texture, a light umami savouriness and a calm lift that doesn't overwhelm the delicate tea.
The recipe matters, but it isn't the whole story. Grade, leaf shading, powder freshness and whisking technique decide whether milk brings out matcha's character or hides a poor-quality powder. Here's how to choose your ingredients, set up your tools and build a repeatable ritual at home.
Setting Up for Your Best Organic Matcha Latte
Before measuring anything, choose a matcha that's suitable for drinking. Ceremonial-grade organic matcha is generally the better starting point for a latte where the tea should remain noticeable through the milk. Culinary-grade powder can work well when you're adding stronger flavours, using matcha in baking or blending it into smoothies, but it may taste more assertive or less rounded in a simple drink.
Three decisions shape the result.
Start with grade and leaf quality
Ceremonial matcha is made for whisking with water, so it should taste balanced before milk or sweetener enters the bowl. Look for a bright jade colour, a powder with an almost silk-like fineness and an aroma that suggests fresh grass, sweetness and gentle savouriness rather than stale hay.
Culinary matcha has a useful role, too. Its more robust flavour can stand up to oat milk, vanilla, fruit, chocolate and baking, where a subtle ceremonial powder might disappear.
Understand shading
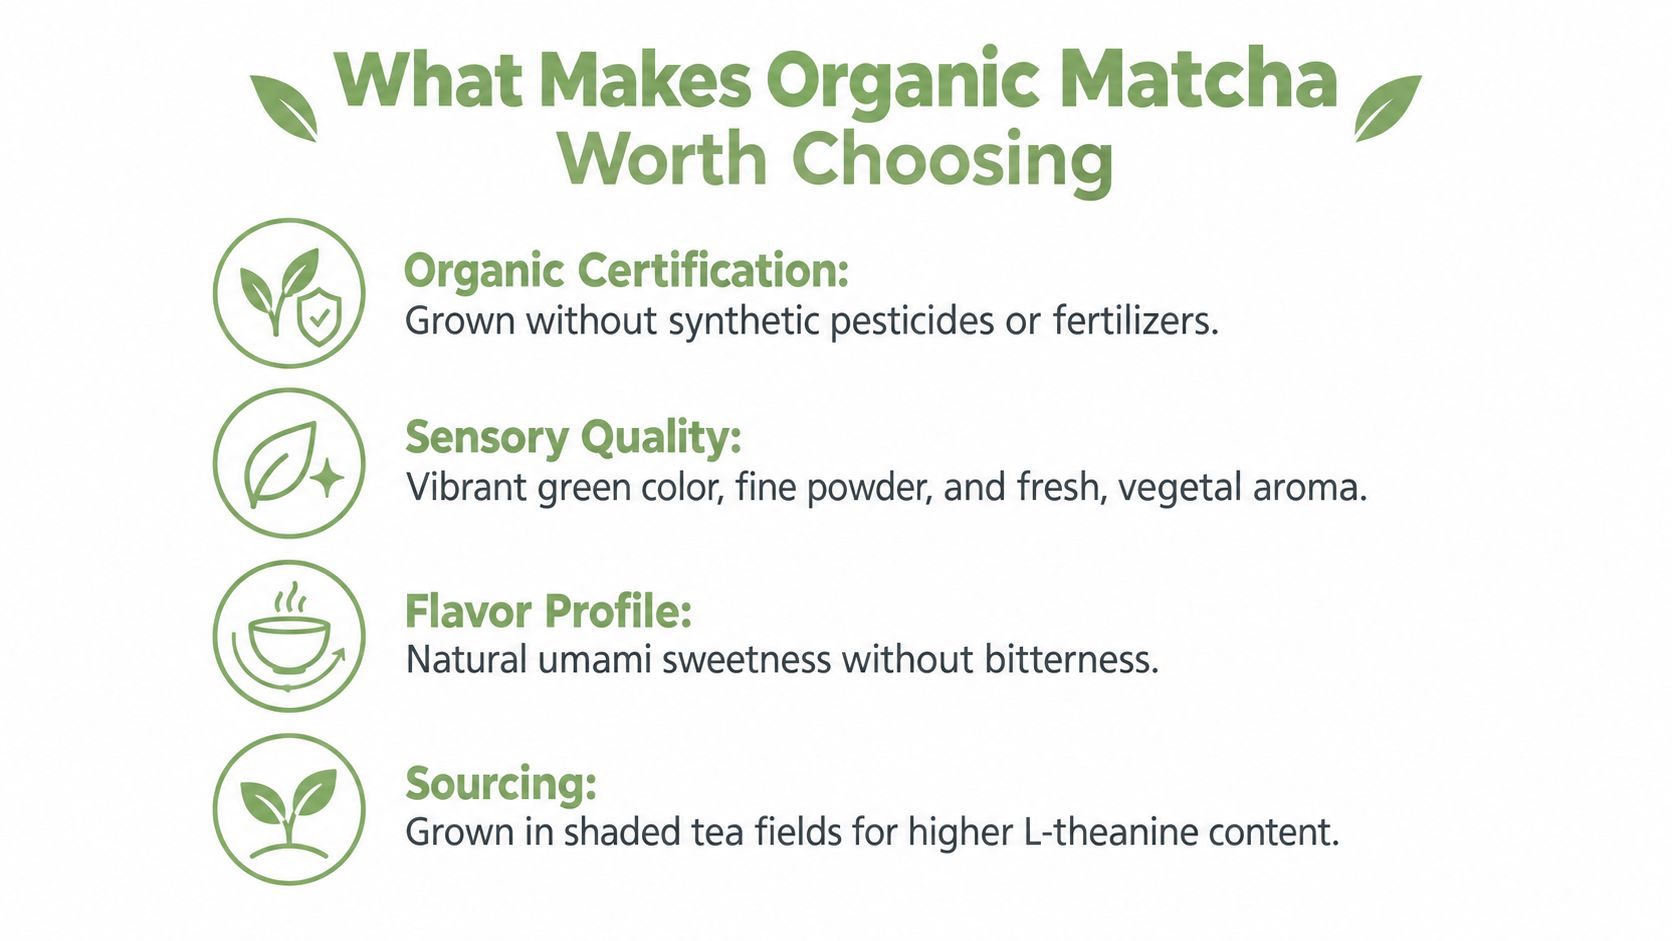
Matcha comes from tea leaves that are shaded before harvest and then processed into tencha, the leaf material that is stone-ground into powder. Shading encourages a deeper green appearance and supports the development of compounds associated with matcha's savoury taste and smoothness, including L-theanine.
A New South Wales study of tea leaves grown on the Central Coast identified L-theanine, caffeine and five catechins, EGC, EC, EGCG, GCG and ECG, as important markers when assessing matcha-relevant leaf quality. The research also found that shading materially altered these constituents, making controlled shading an important production decision for a smoother, less harsh cup. Read the NSW matcha-quality research summary.
Gather a simple setup
You don't need a picture-perfect tea station. You need a bowl with enough room to whisk, water at the right temperature and a powder that dissolves cleanly. A small scale and a proper bamboo whisk make the ritual much easier to repeat, while the PepTea matcha tea accessories can help you assemble the essentials without cluttering the bench.
What Makes Organic Matcha Worth Choosing
The word organic describes how the tea is grown and handled, not a guarantee that every cup will taste delicious. Organic certification gives you useful information about farming standards and restricted inputs, while the powder's origin, grade, harvest and storage still affect flavour.
Matcha differs from ordinary infused green tea because you consume the powdered leaf rather than steeping leaves and discarding them. That makes sourcing especially relevant to many drinkers who want to know how the tea was cultivated. Certification should be viewed as one part of the buying decision, alongside a clear ingredient list and transparent origin information.
Read the powder with your senses
A beginner can learn a great deal before taking a sip.
- Colour: A lively green usually looks more promising than a dull olive or brownish powder.
- Aroma: Fresh vegetal notes, marine umami and a soft sweetness suggest a more appealing drinking profile than a flat, dusty smell.
- Texture: Fine stone-milled matcha should feel soft and light. Gritty particles can signal poor milling or clumping caused by exposure to moisture.
- Taste: A quality drinking matcha should offer savouriness and sweetness before bitterness takes over.
Ceremonial-grade matcha is commonly selected for its refined flavour, fine texture and ability to taste good with water. Culinary-grade matcha is built to contribute colour and flavour alongside other ingredients. Neither label removes the need to taste critically.
Keep health language grounded
Matcha naturally contains caffeine, L-theanine and catechins. Shading and leaf selection can influence the balance of these compounds, but a latte shouldn't be treated as a medical treatment or a guaranteed source of calm focus. The most honest description is that matcha may provide a distinctive combination of stimulant energy and tea-derived savoury flavour.
An Australian green-tea quality study found significant variation in L-theanine across tested products, with three samples showing undetectable levels and the highest concentrations appearing in only a subset. That finding supports checking batch quality and supplier information rather than trusting a grade label alone. Explore the difference between regular and organic matcha.
Label check: Look for organic certification, a named origin, a clear grade, a short ingredient list and packaging that protects the powder from air, light and moisture.
Tools and Ingredients You Actually Need
Lay everything out before you start. The core setup is pleasantly small:
- A chasen: This bamboo whisk disperses matcha through water and creates the fine foam that makes a latte feel creamy rather than powdery.
- A chashaku: The traditional scoop is useful for portioning, although a scale is more consistent when you're learning.
- A wide bowl or chawan: A cereal bowl can work if it gives your wrist room to move. A narrow mug makes whisking awkward and encourages clumps.
- A fine mesh sieve: Sifting breaks apart compacted powder before water reaches it.
- A small kitchen scale: Consistent dosing helps you adjust strength deliberately rather than guessing.
- A thermometer: Water between 70 and 80°C is hot enough to dissolve matcha while reducing the risk of a harsh, scalded flavour.
A standard kitchen whisk is a poor substitute for a chasen. Its wires are rigid and widely spaced, so it tends to move powder around rather than distribute it evenly through a small volume of water. A handheld frother can make a serviceable base, but use short bursts and avoid whipping air into a large, bubbly head.
For ingredients, buy ceremonial-grade organic matcha, filtered water and the milk and sweetener that suit your taste. Pep Tea offers organic matcha products for drinkers who want an Australian supplier and a powder-focused approach to home preparation. Keep the tin sealed and away from heat, light and moisture.
Optional tools can wait. An electric milk frother is convenient for thick, consistent foam, and a milk pitcher helps with pouring. You don't need either to make a balanced latte. If Japanese food and tea interest you more broadly, Just Cook It's Japanese cooking guide is a useful companion for learning how ingredients, texture and restraint shape Japanese-style preparation.
For the whisking movement itself, use this guide to whisking matcha before experimenting with latte variations.
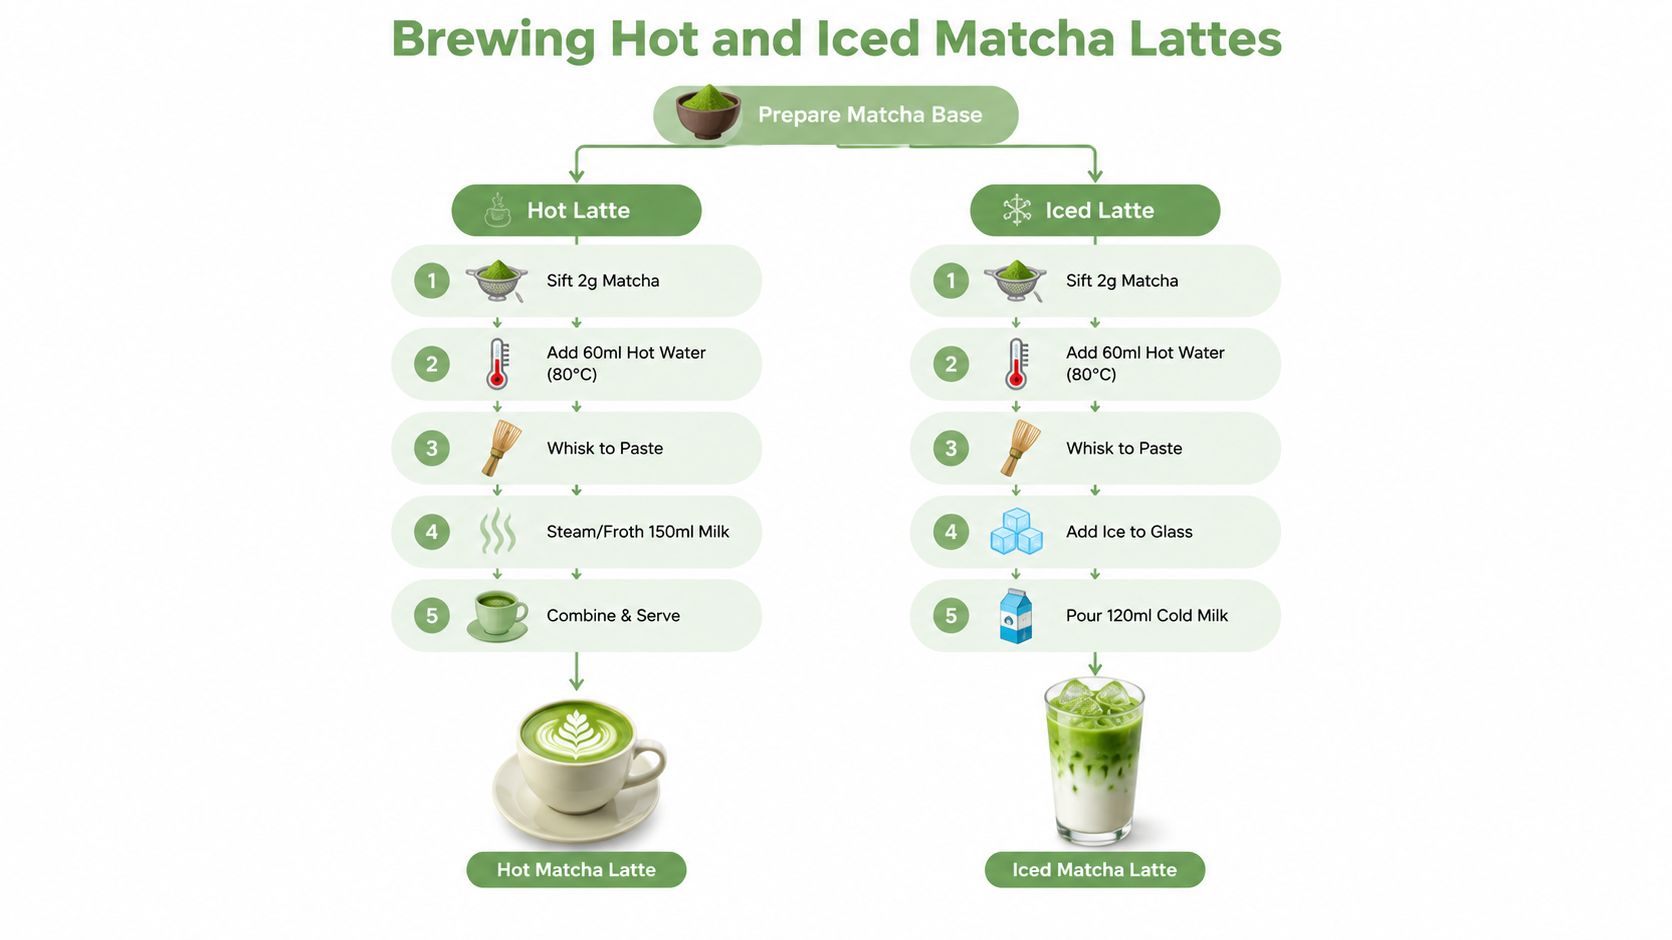
Brewing Hot and Iced Lattes Step by Step
The hot and iced versions begin with the same concentrated matcha base. The difference comes after whisking, when you choose warm frothed milk or chilled milk and ice.
Build the matcha base
- Sift 2 grams of organic matcha into a wide bowl or chawan.
- Add 60 ml of hot water at 80°C, or 175°F. It must not be boiling.
- Use the chasen in a fast W or M motion for 15 to 20 seconds, keeping the whisk close to the base of the bowl.
- Stop when the powder has formed a smooth liquid with a fine, even foam and no visible clumps.
The water temperature controls more than comfort. Boiling water can pull out an aggressive bitterness and make the catechin profile taste harsh. Cooler water gives you more room to preserve matcha's sweetness and umami, although very cold water makes direct whisking more difficult.
Make the hot version
Warm 200 to 240 ml of milk to about 140°F. Don't let it boil. Heat changes the milk's sweetness and texture, while excessive heat can make the final drink taste flat beside the tea.
Froth the milk until it has a fine, pourable texture. Add the matcha base to your cup first, then pour in the milk gradually. A 1:3 to 1:4 matcha-to-milk ratio gives you a balanced starting point, with enough milk for body without turning the tea invisible.
Make the iced version
For iced preparation, use chilled milk and a glass filled with ice. Sift the matcha into a bowl, add the 60 ml of hot water and whisk as usual. The small amount of warm water dissolves the powder more reliably than tipping it directly into cold milk.
Pour the matcha over the ice, add your chilled milk and stir. If you prefer a stronger drink, reduce the milk slightly or increase the matcha gradually. If it tastes too intense, add milk rather than extra sweetener first.
Froth according to your equipment
- French press: Add warm milk, plunge repeatedly until the surface looks smooth and lightly aerated, then pour promptly.
- Handheld frother: Froth in a tall jug with the whisk head below the surface to avoid large bubbles.
- Electric steamer: Stretch the milk briefly, then create a fine whirlpool for a glossy finish.
The best ratio is the one that lets you taste both ingredients. More matcha creates a greener, firmer drink, while more milk produces a softer café-style latte.
Choosing Milks and Sweeteners That Work
Matcha behaves differently from coffee. The milk should soften bitterness without covering the tea's fresh, vegetal character.
Whole dairy milk gives the fullest body and tends to round off grassy notes. Oat milk is often the easiest plant-based pairing because its natural sweetness and creamy texture support matcha without demanding much added sugar. Almond milk keeps the drink relatively clean and light, although some brands can taste thin beside a concentrated matcha base.
Soy milk can soften bitterness effectively, but very hot liquid may cause some varieties to split. Choose a barista-style soy milk and avoid pouring freshly boiled water or overheated milk into the cup. Barista formulations are designed to handle heat and foam more predictably, partly because their protein and fat balance supports a stable texture.
Sweeteners change the flavour as much as the sweetness. Monk fruit and stevia can keep the cup light, honey adds floral warmth, and maple syrup deepens matcha's earthy side. Refined sugar dissolves easily, but it can flatten the contrast between umami, sweetness and bitterness.
| Latent Goal | Best Milk | Best Sweetener | Why It Works |
|---|---|---|---|
| Creamiest hot latte | Whole dairy | Honey | Rich body carries floral sweetness |
| Sweet plant-based latte | Oat milk | Maple syrup | Natural sweetness supports earthy notes |
| Light, clean iced drink | Almond milk | Monk fruit | Keeps the finish relatively delicate |
| Gentle bitterness | Barista soy milk | Stevia | Extra creaminess rounds the tea |
| Minimal added sugar | Oat or almond milk | None | Lets the matcha's own flavour lead |
Taste the latte before sweetening it. A powder that needs heavy sweetening may be poorly matched to the milk, too bitter from overheated water, or not suited to a delicate drink.
Is an Organic Matcha Latte Really Worth the Premium
The premium can be justified, but not every expensive tin offers meaningful value. Australia's organic green-tea category relies heavily on imports, with imports estimated to cover 95 to 98 per cent of domestic consumption by volume, while domestic organic tea production is described as negligible and limited to a few small farms in Queensland and New South Wales. The category is estimated at 12 to 18 per cent of the overall tea market by volume and 25 to 35 per cent by value, which reflects strong premium positioning. See the Australian organic green-tea market analysis.
Matcha sits at the upper end of that market. The same analysis places ceremonial-grade matcha at AUD 30 to 80 per 100 g, while culinary-grade matcha is listed at AUD 18 to 35 per 100 g. That helps explain why an organic matcha latte is usually treated as a premium functional beverage rather than an everyday commodity drink.
Paying more makes sense in two situations:
- You drink matcha regularly and want a powder with a clear grade, credible origin and clean, balanced flavour.
- You drink the tea with minimal milk or sweetener, so the powder's quality remains obvious.
The premium is less convincing when a mid-grade culinary powder has a bright colour but no named origin, harvest information or meaningful supply-chain detail. In that case, the label may be doing more work than the leaf.
Practical rule: Pay extra when the listing identifies the grade and origin clearly. Be cautious when neither appears.
Fixes, Variations, and Where to Go Next
A disappointing latte usually gives you a useful clue.
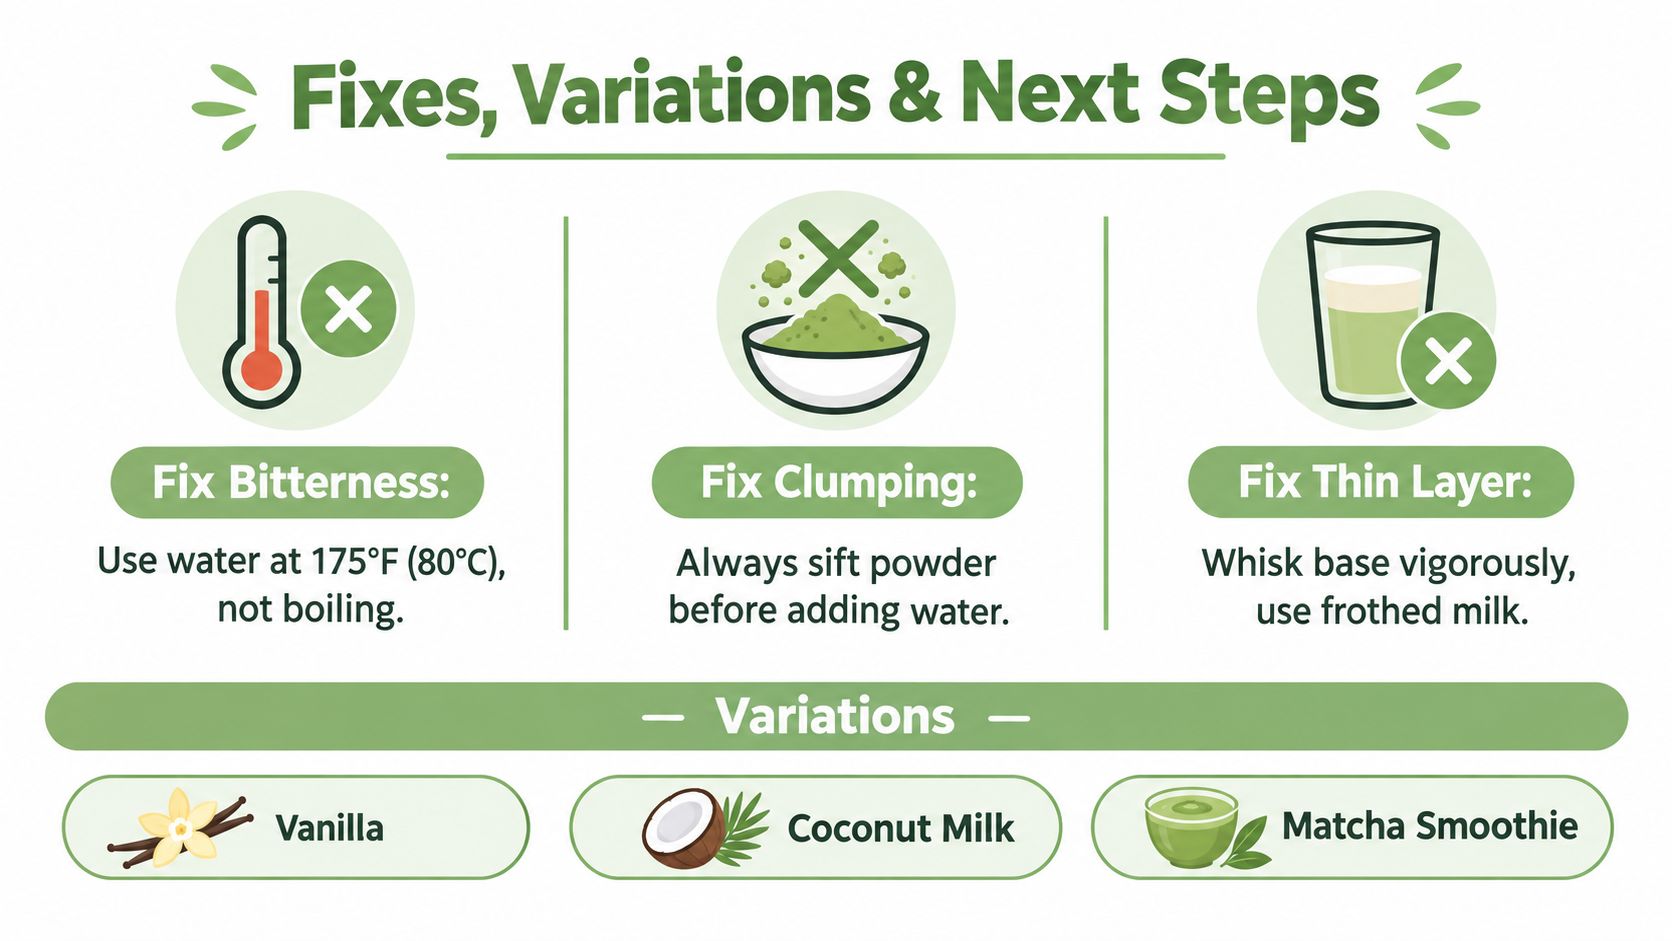
- Bitterness: Water that's too hot is the common culprit. Use water at 80°C, or 175°F, rather than boiling water.
- Clumping: Powder added straight to milk tends to gather into stubborn pockets. Sift it first, then whisk it with a small amount of water.
- A thin, pale layer: Under-whisked matcha often leaves a weak-looking surface. Whisk the base vigorously and use properly frothed milk.
Once the base is reliable, variations become easy:
- Vanilla bean: Add 1 ml vanilla extract or a small scrape of vanilla bean to the warm milk.
- Ginger-lemongrass: Infuse the milk with 2 thin slices of ginger and a small piece of lemongrass, then strain before frothing.
- Coconut-mint: Use coconut milk and add 2 fresh mint leaves while warming, then remove them before pouring.
- Pumpkin spice: Stir 1/4 teaspoon pumpkin spice into the matcha base before adding milk.
A latte can be the beginning of a broader tea habit. Taste ceremonial matcha with water to understand what the milk is changing, then explore roasted hojicha or nutty genmaicha when you want a different profile.
Pep Tea offers organic matcha products for home lattes, whisking and everyday tea exploration, along with Australian-brewed organic kombucha from the Hunter Valley for low-sugar beverage routines. Visit Pep Tea to explore the organic matcha range and choose the powder that suits your next hot or iced latte.
How to Make Matcha Tea from Powder at Home
You're standing at the kitchen bench with an open tin of matcha, a freshly boiled kettle and a spoon ready to go. The tempting move is to pour boiling water straight onto the powder, stir it quickly and hope for the best. The other is to skip the sieve because the powder looks fine enough. Those two shortcuts usually lead to the same disappointing bowl, harsh bitterness and pebble-sized clumps.
A well-made bowl looks different. It has a vivid jade-green colour, a fine creamy foam and a smooth texture that feels closer to warm milk than chalk. The flavour should be grassy and gently sweet, with a clean finish rather than a sharp aftertaste. Once you know how to make matcha tea from powder, the process takes only a few minutes, and each small detail has a clear purpose.
What a Good Bowl of Matcha Looks Like
Your first sip should be smooth, bright and gently sweet. The powder needs to stay evenly suspended, with no dry flecks on the surface or gritty sediment collecting at the bottom. A fine layer of microfoam shows that the matcha has dispersed well. It does not need the thick foam of a cappuccino.
Colour offers a useful clue, though it cannot judge the whole bowl. Vivid green powder usually creates a more appealing drink, while a fresh grassy aroma suggests careful storage. The flavour should be vegetal and clean, without burnt bitterness or a dusty texture.
The two rules to remember: sift the powder before it touches water, and never use boiling water.
Matcha is finely milled tea leaf, not an infusion that you strain and discard. You drink the suspended powder, so every preparation mistake remains in the bowl. A clump becomes a concentrated mouthful of bitterness, while excessively hot water can flatten sweetness and make the tea harsher.
For an Australian-style baseline, combine 2 g of matcha, roughly 1 teaspoon, with 100–120 g of water at 70–80°C. Whisk until smooth, following the preparation guidance in Tea Tonic's Australian matcha guide. A smaller, more concentrated bowl uses 60–80 ml of water at 70–80°C, as shown in the method from Zen Green Tea.
These proportions give you room to correct the two common failures. Sifting breaks apart compacted powder before water can bind it into lumps. Controlled heat preserves the tea's softer flavours, while whisking from side to side spreads the powder through the water and builds a fine foam. The result should feel creamy and lively, not cloudy, thin or aggressively bitter.
Gathering Your Equipment and Matcha
Put everything beside the bowl before heating the water. Preparation feels much easier when you're not searching for a sieve with hot water cooling on the bench.
- Matcha powder: Choose a finely milled powder with a vibrant green colour and a fresh aroma. Ceremonial or premium drinking-grade matcha is generally more suitable for a plain bowl, while culinary-grade powder works well in recipes and milk-based drinks.
- A wide bowl or cup: A small bowl gives your whisk room to move from side to side. A narrow mug can make the whisk catch against the sides, which leaves powder sitting in the corners.
- A fine mesh sieve: Matcha clumps inside its container, even when the powder looks loose. Passing it through a sieve breaks up those compacted pieces before water binds them together.
- A whisk or alternative: A bamboo chasen is traditional, but a handheld milk frother, lidded shaker or fork can also help, depending on the texture you want.
A warm bowl also makes the drink more comfortable to hold and can help maintain its temperature. Australian brewing guidance from T2 Tea includes warming the matcha bowl before adding water.
If you're building a regular home ritual, Pep Tea's matcha tea accessories can help you organise the basic tools around the way you brew. You don't need a ceremonial setup to start, though. The sieve is the most important overlooked item, and a clean wide bowl is more useful than a specialised cup that leaves no room for whisking.
Check that the matcha, bowl, sieve, spoon and whisk are within arm's reach before the kettle goes on.
The Core Preparation Method
Measure and sift before adding water
Place 1 teaspoon, about 2 g, of matcha into the dry bowl. This is a practical Australian starting point for a single serve, and the amount aligns with Zen Green Tea's Australian preparation method.
Hold the fine sieve over the bowl and press the powder through with the back of a spoon. Don't rush this part. If a compact piece remains in the mesh, gently work it through rather than tipping it into the bowl. Sifting creates a loose, even layer that water can reach more easily.
Add controlled heat
Heat fresh water to 70–80°C, keeping it well below boiling. Australian guidance from Fish River Roasters specifically warns against boiling water because excessive heat can make matcha taste bitter.
If you don't have a thermometer, allow freshly boiled water to stand for a few minutes before pouring. The water should feel hot enough to brew the tea, but it shouldn't be bubbling or aggressively steaming.
For a concentrated bowl, add 60–80 ml of water. Pour slowly, beginning with a small splash to wet the powder evenly, then add the remainder. This first contact creates a smooth slurry rather than allowing dry powder to float apart in a larger volume of water.
Whisk across the surface
Use brisk zigzag strokes, moving in a W or M pattern rather than stirring in circles. Keep the whisk close to the base at first to incorporate the slurry, then lift it slightly towards the surface as foam develops.
Whisk for roughly 15–30 seconds, a range reflected in Australian matcha instructions from Tea Tonic. Stop when the surface has a fine pale-green foam and no dry specks remain.
Sensory checkpoint: A smooth surface and clean texture mean the method has worked. Grit points to incomplete dispersal, while sharp bitterness usually points to excessive heat, old powder or overworking.
Taste the bowl while it's fresh. Matcha's flavour should be distinct, but the finish shouldn't make you want to cover it with a large amount of sweetener. If it does, adjust the water temperature and storage before changing the recipe.
Choosing How to Whisk It
The whisk changes the drink more than many first-timers expect. A tool that disperses powder efficiently can create fine foam, while an unsuitable tool may leave large bubbles or a sandy mouthfeel.
| Tool | Foam quality | Ease of use | Cleaning | Best for |
|---|---|---|---|---|
| Bamboo chasen | Fine, creamy microfoam | Requires technique | Rinse prongs and dry upright | Ceremony-style bowls |
| Electric milk frother | Quick, light foam | Very easy | Rinse immediately | Matcha lattes |
| Small lidded shaker | Thin foam, even suspension | Easy and travel-friendly | Simple rinse | Iced matcha |
| Kitchen fork | Larger bubbles, uneven texture | Available in most kitchens | Very easy | An emergency substitute |
A chasen bamboo whisk gives the most refined texture and makes the classic W or M motion feel natural. Its fine prongs need careful rinsing after use, and leaving them wet in a drawer can distort them.
A handheld electric frother is faster and more forgiving, particularly when you're making a milk-based drink. Keep the head submerged to avoid splashing, and stop as soon as the powder is dispersed. Excessive frothing can make the surface airy without improving the underlying texture.
A shaker jar suits an iced serve or a kitchen without a whisk. Add the powder and water, secure the lid and shake until combined, but expect thinner foam. A fork works when nothing else is clean, though it won't create the same fine suspension.
For a closer look at the traditional motion and care routine, use Pep Tea's guide to whisking matcha. The quick rule is straightforward: chasen for plain bowls, frother for lattes, shaker for iced drinks and fork only in a pinch.
Fixing Clumps, Bitterness, and Thin Foam
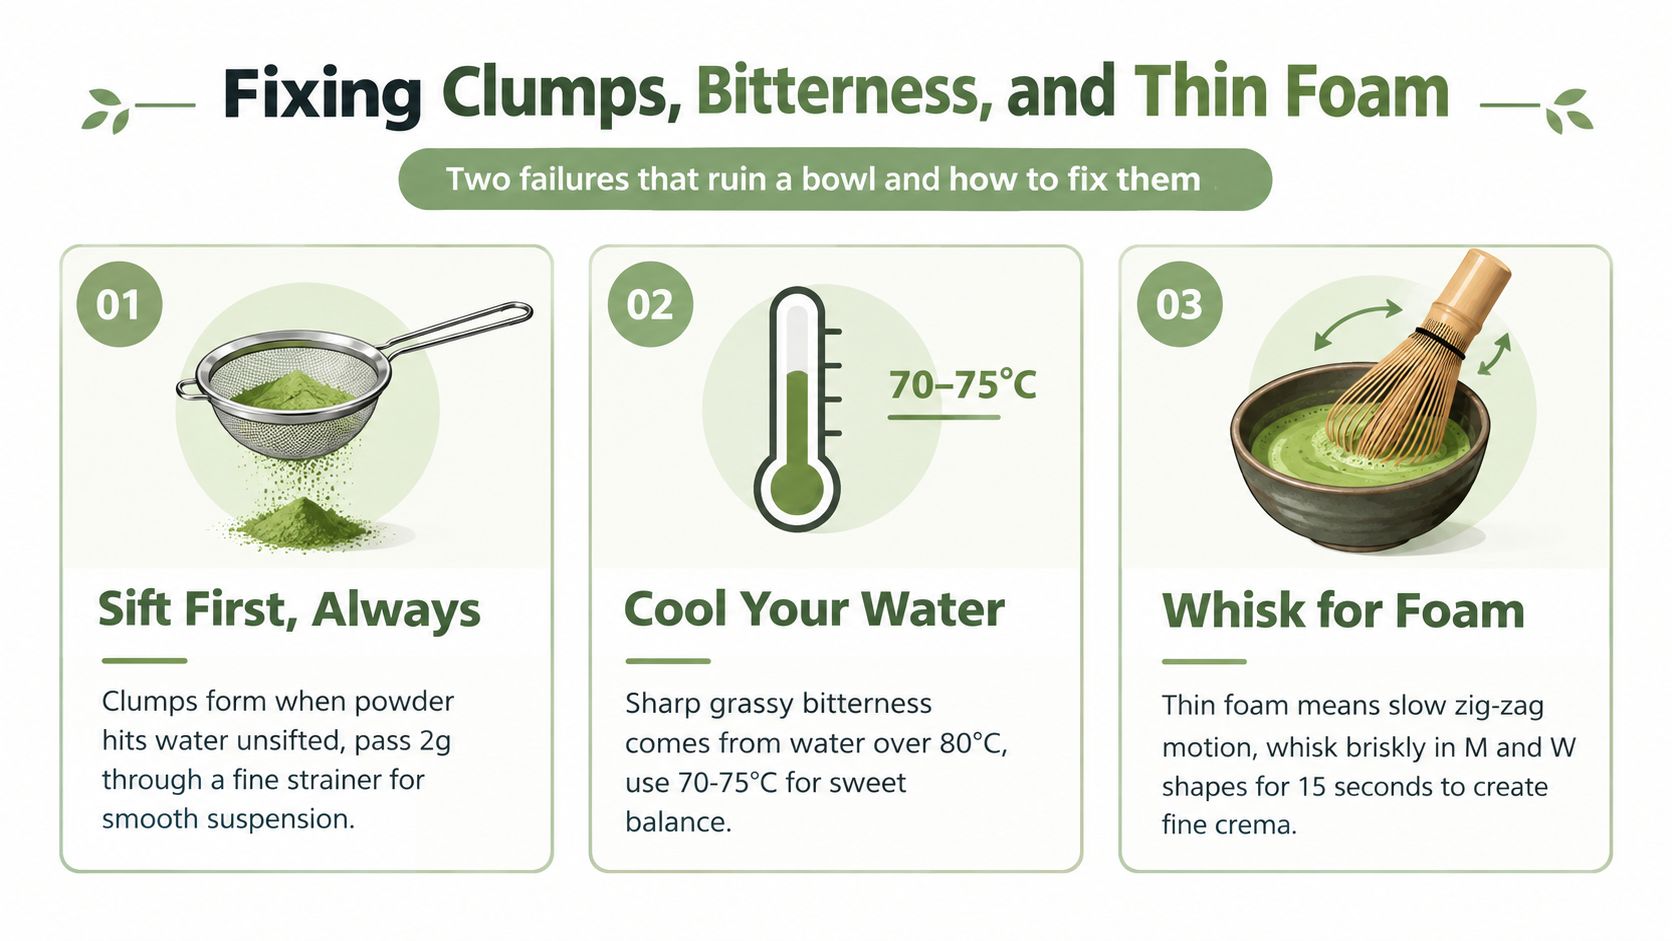
A cloudy bowl usually has two separate problems: clumps form when dry powder meets water too quickly, while bitterness often comes from overheated water or stale matcha. Treat each issue at its source, rather than trying to fix the finished bowl with extra sweetener.
When clumps float on top
Sift the full measure through a fine mesh strainer before adding liquid. Then use a small splash of water to make a smooth paste, like wetting flour before mixing a sauce. Once the paste looks even, dilute it with the remaining water and whisk.
A heavy stream can bury dry matcha in compact islands at the bottom or leave floating lumps on the surface. Pour slowly around the bowl, especially if it is small, so the powder receives moisture in stages.
When the flavour turns bitter
For an Australian-style preparation, cool the water to 75–80°C and keep whisking to around 15 seconds. As noted earlier, water that is too hot can draw out a harsher flavour, so temperature is the first adjustment to make.
Open powder also needs protection from air, light, heat and moisture. An airtight container helps preserve its character, but older matcha may still taste flat or sharp. If the bitterness remains after correcting the water, try fresher powder before adding more sweetener.
When the foam looks thin
Whisk across the surface with a quick, shallow zigzag rather than stirring slowly in circles. The motion should agitate the top layer while keeping the whisk near the water, creating smaller bubbles instead of a loose cap of air.
With a frother, use a brief 5-second pulse at the end, then stop. For readers who mix other powders into drinks, Everti's guide to protein powder with water explains the same useful principle: add liquid gradually and control the incorporation. Matcha behaves better when the powder is dispersed step by step, not forced to disappear in one pour.
Easy Variations You Can Build From the Base
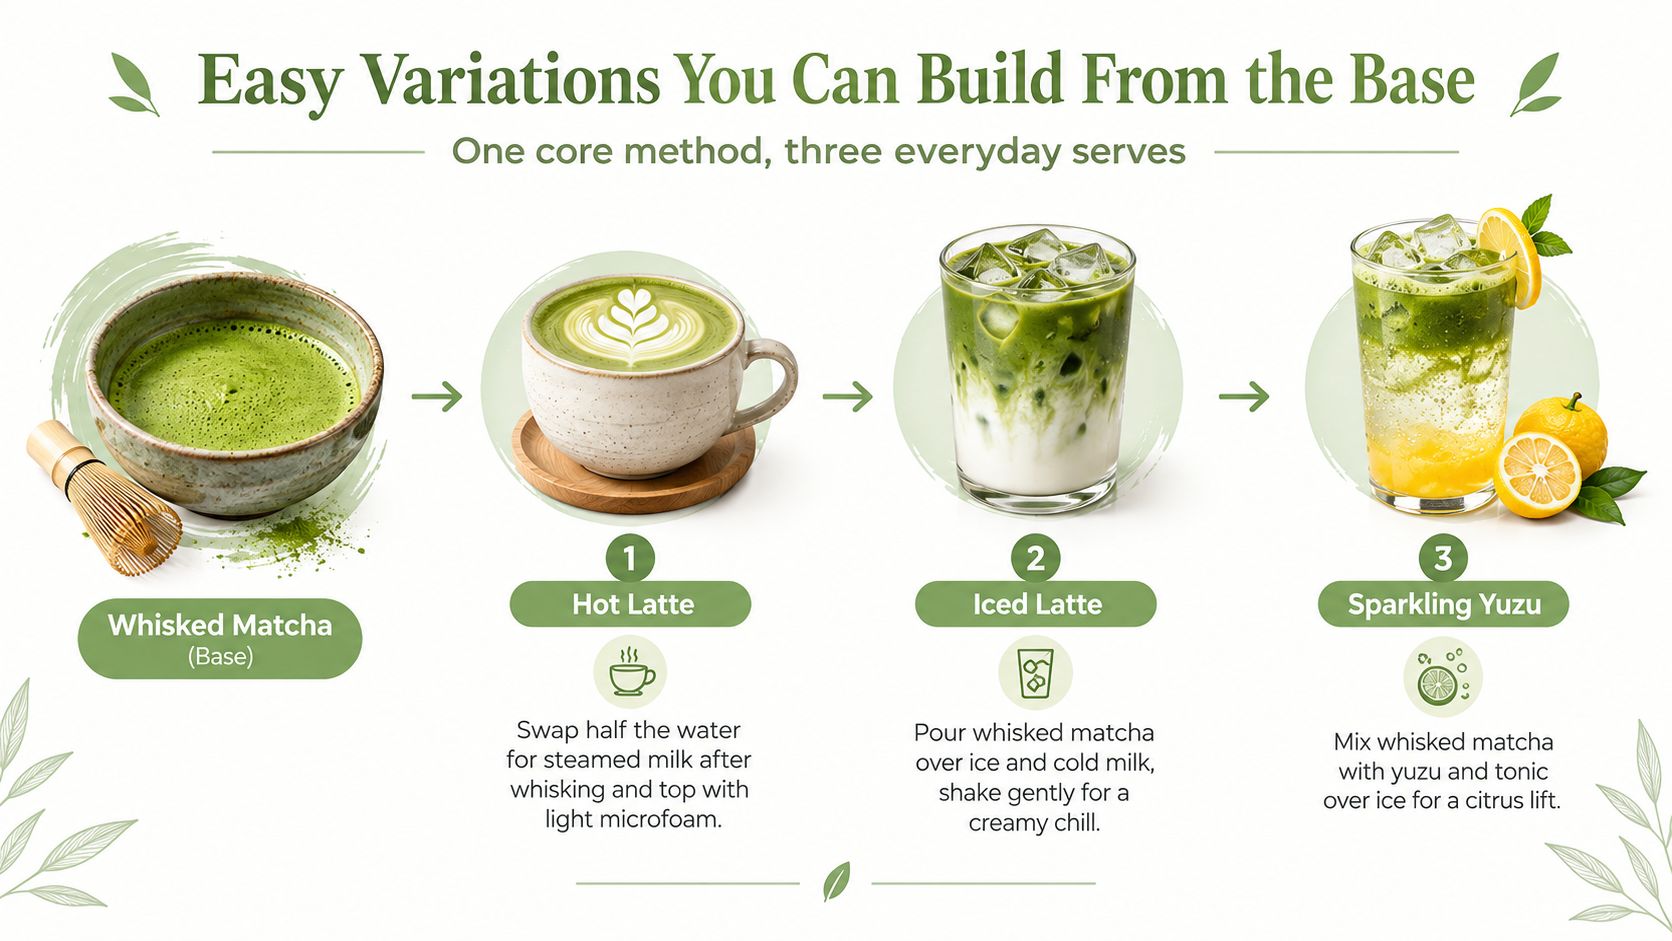
Once the plain bowl is smooth, you don't need to learn a completely new recipe for every drink. Keep the sift, slurry and whisking habits, then change the finishing liquid or temperature.
A warm matcha latte
Whisk the matcha with the concentrated water base first. Warm or steam milk separately, then replace part of the final water volume with milk and add it gently. A handheld frother can create a light topping without requiring a second complicated technique.
Choose dairy milk or a plant-based option according to taste and texture. Oat milk gives a naturally rounded impression, while a lighter milk keeps the grassy character more visible.
An iced matcha
Dissolve the sifted powder in a small splash of cool water first, forming a smooth paste before adding more liquid. Pour the whisked mixture over ice, then top with cold milk or water and stir or shake gently.
The cold serve makes clumps especially obvious because the powder doesn't have warm liquid to help it disperse. The initial slurry solves that problem without changing the core flavour.
A lightly sweetened serve
Add honey, maple syrup or sugar to the hot water before introducing the powder, so the sweetener dissolves evenly. For a café-style latte, a small amount of condensed milk can be whisked into the milk, although its sweetness will be more pronounced.
Matcha also works in smoothies, baking and chilled desserts. If you use it with another bold ingredient, such as cacao, Yuve's raw cacao powder tips can help you think about balancing strong flavours in blended recipes.
Here's a short visual demonstration of the basic process:
Drink leftover whisked matcha within an hour for the best colour and flavour. It can lose its brightness as it sits, so make only what you expect to enjoy soon.
Sourcing Better Powder and Serving It Well
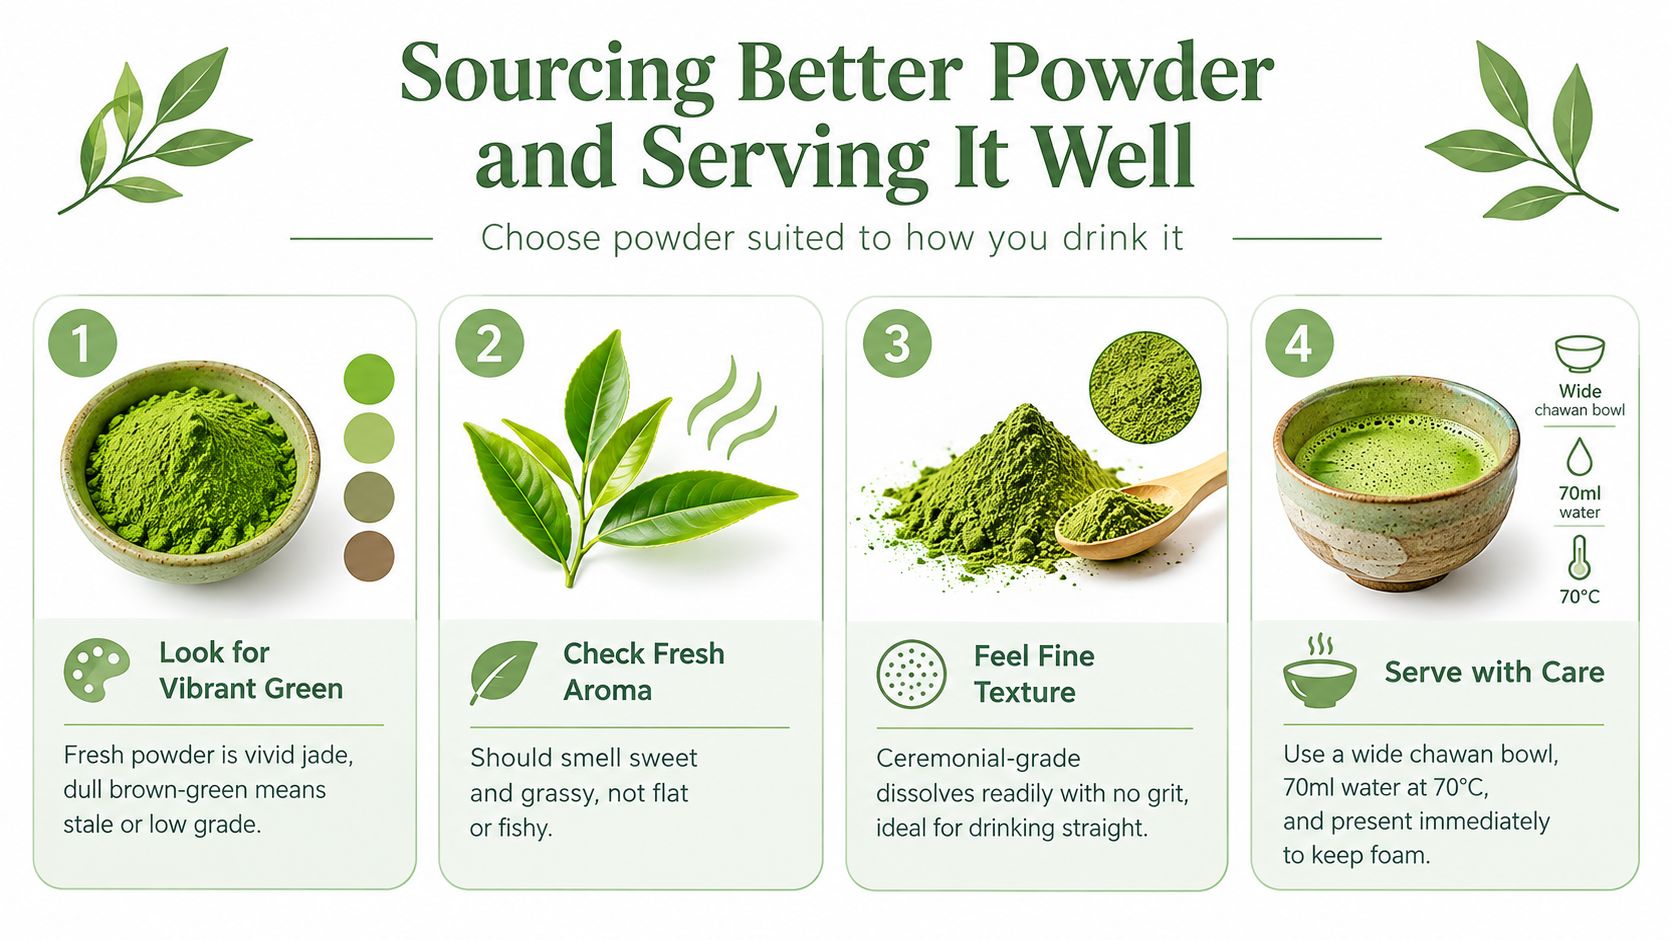
A smooth method can't fully rescue powder that has been stored poorly or chosen for the wrong purpose. Look for a vivid green colour, a fresh grassy or gently sweet aroma and a fine texture that disperses readily.
Ceremonial-grade matcha is suited to drinking plain, where its aroma and finish are easy to notice. Culinary-grade matcha has a stronger presence that can work well in lattes, smoothies and baking, where other ingredients share the bowl.
Protect the powder after opening
Keep matcha in an airtight, opaque container away from light, heat, moisture and strong odours. Refrigeration may help in a warm Australian climate, but allow the sealed container to move towards room temperature before opening so condensation doesn't reach the powder.
Serve the drink immediately after whisking, while the colour is bright and the foam remains evenly distributed. Plain matcha pairs naturally with mild sweets, fruit or light pastries, while a latte can sit comfortably alongside breakfast.
If bitterness continues, use fresher powder, slightly cooler water and a shorter whisk. Frothing milk separately and folding it in gently can create a richer latte without forcing extra air through the matcha itself. Readers wanting more detail on choosing between different powders can consult Pep Tea's guide to distinguishing ordinary and ultimate matcha tea powder.
Pep Tea offers organic Japanese matcha for plain bowls, lattes and recipes, giving Australian home brewers a way to explore different serving styles with powder selected for everyday preparation.
Visit Pep Tea to explore organic Japanese matcha and choose a powder that suits plain tea, lattes or baking. Start with a sieve, controlled water temperature and a few calm whisking strokes, then make your first bowl while the powder is fresh.
Matcha Pancakes Recipe: Fluffy & Flavourful

Saturday morning, the pan is warm, the kitchen smells faintly grassy and sweet, and the first vibrant green pancake is ready to flip. A good matcha pancakes recipe looks simple, but the decisions made before the whisk comes out matter: the matcha grade affects colour and bitterness, the flour controls tenderness, and the pan determines whether the stack cooks through without turning brown.
I've tested this style of batter in ceramic, cast-iron and non-stick pans, using ceremonial, premium and culinary matcha grades. The reliable workflow is straightforward: choose the powder with the finished dish in mind, sift carefully, mix lightly, rest the batter, and cook by surface cues rather than the clock. The same approach works for a relaxed home breakfast, a vegan or gluten-free adaptation, or a café plate designed around controlled portions and complementary toppings.

Why matcha belongs on the breakfast plate
Matcha has moved well beyond specialist tea shops in Australia. One independent report estimates the Australian category grew at a 14.94% CAGR from 2020 to 2024, while another analysis places recent annual consumption growth at 12–16% and estimates that more than 90% of domestic volume is imported. Foodservice is estimated to account for 45–50% of volume, with household use at 35–40%, which helps explain why matcha now appears in café drinks, baked goods and home breakfast recipes. (Australian matcha market analysis)
ABC News described matcha in Australia as having shifted from a niche product to a mainstream staple, with demand accelerating through café-style iced matcha drinks. The powdered tea tradition itself dates back to 12th-century Japanese monks, who popularised whisking powdered tea into hot water as part of Zen meditation. (ABC News report on matcha in Australia)
Practical rule: Decide whether you're making a subtle, fluffy breakfast stack or a bold café-style plate before choosing the matcha. The powder isn't a finishing detail. It shapes the whole result.
If you enjoy comparing pancake formats, Rip Van's stroopwafel pancake method is useful for thinking about texture, fillings and griddle timing. For this recipe, though, the goal is a soft crumb that lets the matcha taste clean rather than burying it under sugar.
Ingredients and Why Each One Matters
A dependable batter starts with ingredients chosen for their jobs, not just collected from a list. The matcha provides colour, aroma and bitterness, while flour, dairy, eggs and leavening determine whether that flavour arrives in a tender pancake or a dense green disc.
Matcha grade sets the ceiling
Ceremonial-grade matcha gives the brightest jade colour and a clean, rounded umami character. It works beautifully when the pancakes are lightly sweetened or served with restrained toppings, but its higher price makes it difficult to justify for a large breakfast batch.
Premium culinary-grade matcha is usually the practical middle ground. It has enough colour and flavour to remain recognisable after cooking without asking you to use a precious drinking-grade powder in a batter. A lower-grade blend can look dull, taste aggressively bitter and leave the stack muddy rather than fresh.
| Matcha Grade | Colour Result | Flavour Profile | Best Use | Price Band |
|---|---|---|---|---|
| Ceremonial | Bright jade | Clean, delicate umami | Refined home or café plating | Higher |
| Premium culinary | Fresh green | Balanced, slightly earthy | Everyday pancakes and baking | Mid-range |
| Lower-grade blend | Dull green | More bitter, muddy | Budget cooking where colour matters less | Lower |
Sift the matcha with the flour and raising agents. If you're comparing grades before buying, this guide to ceremonial versus culinary matcha explains why drinking and baking powders behave differently. An organic matcha green tea powder is another option to consider when you want a clearly identified powder for kitchen use.
Build tenderness without losing structure
Plain flour gives the batter enough structure to rise while keeping the centre soft. A very strong flour can make the pancake chewy if you mix aggressively, while oat flour alone tends to produce a fragile stack. Almond flour brings richness, but it can brown quickly and compete with matcha's green colour.
Whole milk gives the most rounded texture and helps the surface brown gently. Buttermilk or plain yoghurt adds acidity and a tighter crumb, which can be pleasant, although too much can make the pancake feel heavy. Eggs provide structure, emulsification and colour, while baking powder supplies the lift. Keep the raising agents balanced rather than adding extra in the hope of getting a taller stack, because excessive leavening can leave a metallic aftertaste and a coarse interior.
For sweetness, maple syrup and honey soften matcha's bitterness while adding their own flavour. White sugar keeps the colour cleaner, coconut sugar darkens the batter slightly, and monk fruit can reduce sweetness without adding much bulk. Any liquid sweetener needs to be balanced with the milk so the batter doesn't become loose.
Mixing and Cooking the Batter
Start by sifting the flour, matcha, baking powder and salt into a large bowl. A fine matcha tea sifter breaks up powder clumps and spreads the raising agent evenly, so the cooked pancakes do not contain bitter green pockets.
Whisk the eggs, milk, melted butter or oil, sweetener and vanilla separately. For a smoother green colour, whisk the matcha into a little of the milk first, then combine it with the remaining wet ingredients. Pour the wet mixture into the dry ingredients and stir until the large dry patches disappear. Small lumps are fine. Continued mixing develops more gluten and can leave the pancakes dense.
Leave the batter to rest briefly. Australian guidance for matcha pancakes recommends sifting, gentle mixing, a short rest, medium heat, a roughly 1/4-cup portion, and flipping once bubbles or dry edges appear. (Australian matcha pancake method) This workflow also gives you room to adjust consistency for different matcha grades or dairy-free milks before cooking the full batch.
Cook by surface cues, not the clock
Heat a non-stick pan, cast-iron skillet or griddle over medium-low heat. Brush it with a thin film of butter or neutral oil, then pour enough batter for a pancake roughly ten centimetres across. Non-stick cookware is the easiest option for home batches. Cast iron retains heat well but may create darker hot spots, while a heavy griddle gives more even browning when you are plating several pancakes for brunch.
The edges should look set, with small bubbles appearing and opening across the surface. Check the underside before flipping. It should be green-golden rather than dark brown. Flip once and cook until the centre springs back lightly under gentle pressure.
Transfer cooked pancakes to a warm tray. Avoid packing them tightly in the pan or stacking them while very hot, because trapped steam softens the surfaces. The sifter solves powder distribution, but careful stirring and controlled heat still determine fluffiness.
Dietary Variations That Work
A useful dietary swap replaces an ingredient's job. Vegan batter still needs acidity, structure and fat. Gluten-free batter needs enough flexibility to hold together, while lower-sugar batter needs balance so matcha remains rounded rather than harsh.
| Variation | Replace | With | Texture Impact |
|---|---|---|---|
| Vegan | Dairy milk and butter | Soy milk with apple cider vinegar, plus neutral oil | Tender, with slightly less dairy richness |
| Vegan | Egg | Aquafaba | Holds structure, though the crumb is a little lighter |
| Gluten-free | Plain flour | A 1:1 cup-for-cup blend with xanthan already included | Similar lift and shape |
| Lower-sugar | White sugar | The same weight of coconut sugar or monk fruit | Coconut sugar darkens colour, monk fruit keeps the batter lighter |
Vegan pancakes
Soy milk and apple cider vinegar create buttermilk-style acidity that supports the leavening. Aquafaba replaces the egg and helps the pancakes hold together. Neutral oil takes the place of melted butter without adding dairy flavour or noticeably dulling the green colour.
Plant milks differ in thickness, so inspect the batter after its rest. If it has tightened too much, add a small splash of milk. Stir only enough to combine, since vigorous mixing can make the cooked texture heavier.
Gluten-free pancakes
Choose a 1:1 gluten-free flour blend with xanthan gum already included. It gives the batter enough flexibility to lift and flip without breaking. Oat flour alone often crumbles, while almond flour can brown before the centre has cooked through.
Lower-sugar pancakes
Coconut sugar can replace white sugar at the same weight, producing a deeper colour and caramel note. Monk fruit keeps the batter and finished stack lighter. Erythritol may leave a cooling aftertaste that competes with earthy matcha, especially when toppings are restrained.
Matcha grade affects the final appearance after a swap. Ceremonial-grade powder generally keeps its colour better, while culinary-grade powder may look duller with plant milk or darker sweeteners. Keep the resting time consistent across versions, then adjust thickness gently before cooking the full batch. This approach keeps the recipe practical for a dairy-free home breakfast, a gluten-free table, or a café brunch menu where colour and clean flavour matter.
Serving, Toppings and Drink Pairings
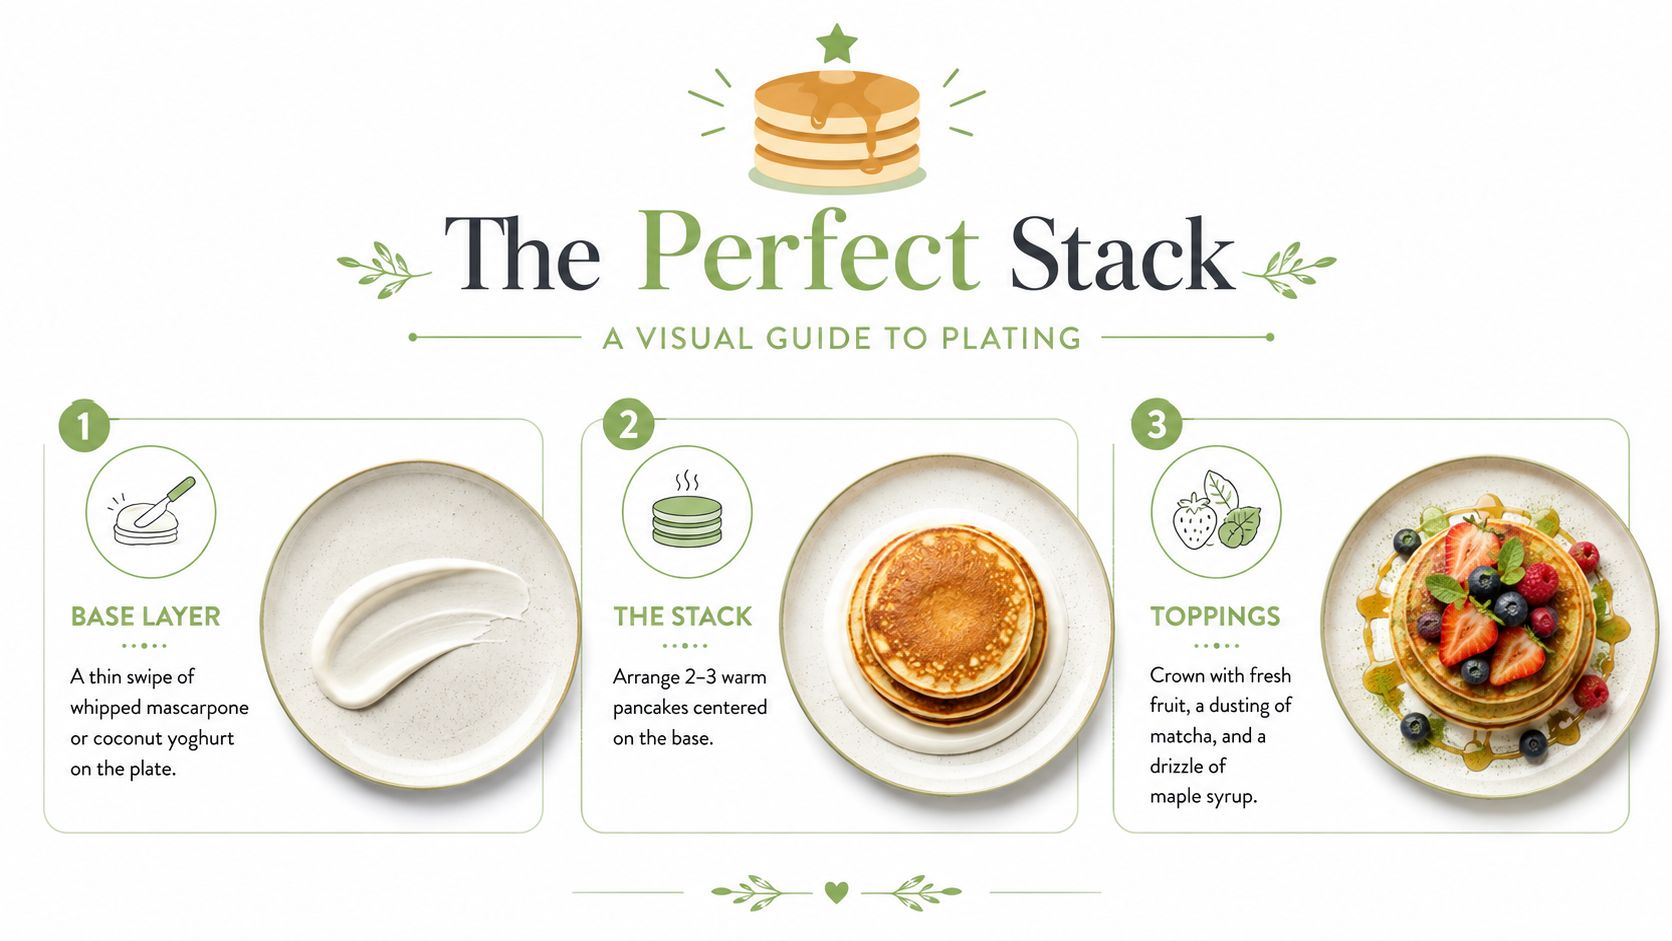
Treat the stack as the centrepiece. A thin swipe of mascarpone or coconut yoghurt anchors the plate, and toppings should sharpen the matcha rather than drown it. Arrange the warm pancakes over the yoghurt, then build the finish around contrast in colour, acidity and texture.
Fresh berries bring acidity and colour. Citrus segments add brightness, while toasted black or white sesame provides a gentle nutty edge. A light drizzle of honey or maple suits most plates, and a restrained dusting of matcha reinforces the aroma. Heavy syrup flattens the tea flavour, leaving the dish closer to a conventional sweet pancake with green colouring.
Drinks that keep the plate balanced
An iced PepTea matcha repeats the green tea character without introducing a competing flavour. A hot PepTea matcha latte fits a slower weekend breakfast, particularly with citrus or berries instead of a heavily sweet topping.
Kombucha offers a sharper contrast. Ginger, lemon or yuzu styles cut through the pancake's richness, and their acidity can make earthy matcha taste brighter. Pep Tea's Australian-brewed organic kombucha is made in the Hunter Valley, NSW. Its sugar-free range includes Ginger, Lime & Ginger and Mango. Serve it chilled in a small glass, allowing it to refresh the palate between bites.
For a café brunch menu, keep the stack visually controlled, use a warm plate and finish with a small pinch of salt. That restraint matters more with delicate ceremonial-grade matcha, while a stronger culinary-grade batch can handle bolder fruit or citrus. At home, a shorter stack with fruit and yoghurt is easier to eat and lets everyone adjust sweetness at the table.
Troubleshooting Common Pancake Problems
A disappointing stack usually points to heat or handling rather than a failed recipe. Matcha makes those mistakes easier to see, but the fixes are familiar.
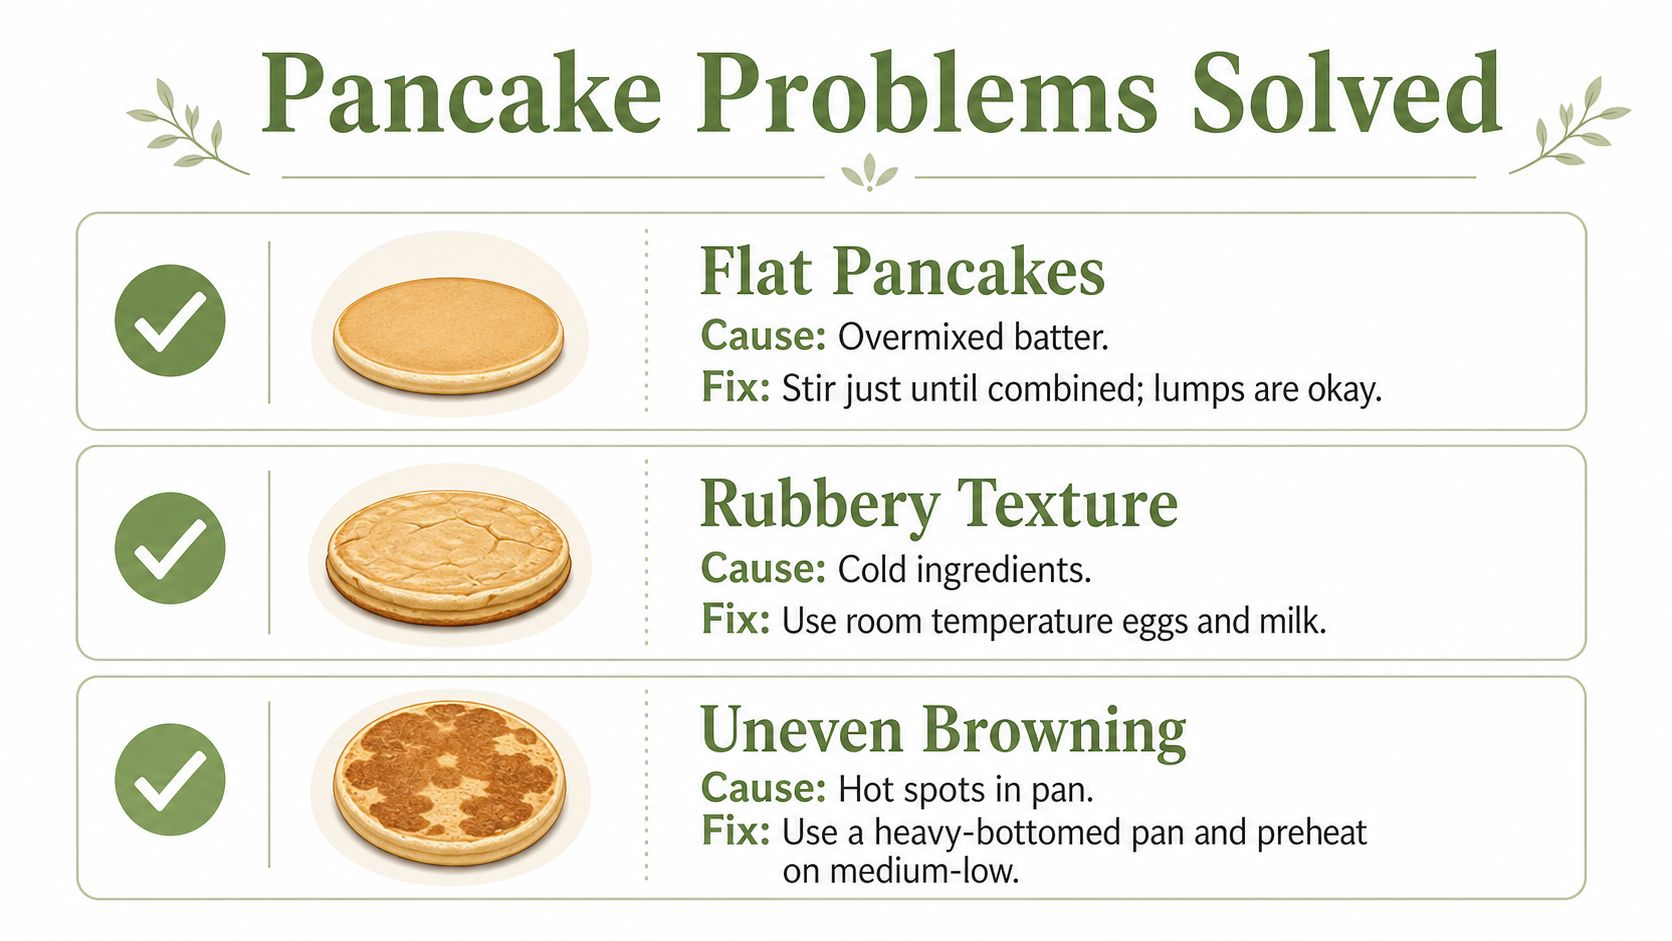
- Flat pancakes: Overmixed batter develops too much gluten. Stir until just combined, accept small lumps, then rest the batter for about ten minutes.
- Rubbery texture: Cold eggs and milk can make the batter uneven and slow to rise. Bring them to room temperature before mixing.
- Pale surfaces: The pan is probably not holding enough heat. Use medium-low heat, test it with a splash of water, and allow the first side to cook longer.
- Bitter flavour: High heat drives bitterness and darkens the powder. Whisk the matcha in at the end of the wet-mixture stage and avoid cooking over a high flame.
- Sticking: Use a well-seasoned pan and add butter between batches rather than flooding the pan at the start. Wait for visible bubbles before attempting the flip.
- Brown-green colour: Oxidation and excessive heat are usually responsible. Fold the matcha in last, cook gently and serve the pancakes promptly.
Don't flip because a timer says you should. Flip when the edges have set, the surface bubbles have opened and the pancake releases with a confident slide. That cue is more reliable across ceramic, cast iron and non-stick surfaces.
Storage, Reheating and Quick Nutrition Notes
Cool the pancakes on a wire rack so steam can escape instead of making the undersides wet. Once cool, store them in a sealed container in the fridge for up to three days, or freeze them with parchment separators for up to two months.
The toaster gives a single pancake the best balance of crisp edges and soft centre. For a whole stack, a low oven at 150°C warms the pancakes evenly. A microwave works when you're in a hurry, especially if you cover the pancake with a damp paper towel, but it can soften the crumb and dull the green colour.
| Method | Time | Texture Result | Best For |
|---|---|---|---|
| Toaster | Short | Lightly crisp outside, tender centre | One or two pancakes |
| Oven at 150°C | Gentle warming | Even and soft | A full stack |
| Microwave with damp paper towel | Very quick | Softest, sometimes slightly chewy | Speed over surface texture |
Matcha contributes caffeine because the powdered leaf is consumed rather than steeped and discarded. A peer-reviewed review reports published matcha caffeine concentrations ranging from 18.9 to 44.4 mg per gram, while an Australian matcha FAQ gives a common range of 19 to 44 mg per gram and describes a standard usucha serving as about 2 g, or roughly 38 to 88 mg of caffeine. (Peer-reviewed matcha review) (Australian matcha FAQ)
Because the exact amount in a pancake depends on the powder and recipe quantity, don't treat the stack as caffeine-free. FSANZ identifies caffeine as a regulated substance in the food supply, and its guidance notes that the Food Standards Code restricts caffeine in certain products to a maximum of 320 mg per litre. (FSANZ caffeine guidance)
I won't invent calorie, protein or carbohydrate figures without the exact flour, milk, fat, sweetener and serving size. For practical planning, treat the recipe as a breakfast containing flour-based carbohydrates, egg-derived protein and matcha caffeine, then adjust toppings according to whether you're aiming for a light home meal or a more substantial café plate. For matcha storage guidance, use Pep Tea's matcha shelf-life guide.
Pep Tea offers organic Japanese matcha suited to drinking and culinary use, alongside Australian-brewed organic kombucha from the Hunter Valley, NSW. Visit Pep Tea to choose a matcha for your next pancake batch and explore sugar-free kombucha pairings for a bright, balanced breakfast.
Your 2026 Guide to the Best Matcha Cake Brisbane

You're standing in a Brisbane café, staring at a green slice of cake and wondering if it's real matcha or just a pretty sponge with colouring. That hesitation makes sense. matcha cake Brisbane searches have surged because matcha is no longer a niche order, it's now part of the city's everyday café language, but the quality gap is still wide.
The tricky part is that a cake can look right and still miss the mark completely. It might taste flat, look unnaturally bright, or feel like the matcha was added for branding rather than flavour. For Brisbane diners, the key question isn't just where to buy it, it's how to tell when a cake is worth the price.
The Search for Brisbane's Perfect Matcha Cake
Brisbane's matcha scene has grown into something far more visible than a passing trend. That matters, because once an ingredient becomes mainstream, the market fills with both thoughtful, high-quality versions and quick opportunistic ones. A recent Australian consumer panel analysis found matcha was up 53% year-on-year nationally, with the ingredient sitting at 3.58% social share and still described as “emerging” (Tastewise).
That trend shows up in menus across the city too. Iced matcha lattes now appear at major chains including McDonald's, Krispy Kreme, Starbucks, Rashays, and Chatime, and Brisbane prices in that dataset ranged from $6.30 to $18.95 (Tastewise). When an ingredient moves from specialty cafés into chain menus, dessert makers usually follow, because customers start recognising the flavour and expecting it in more formats.
Practical rule: if a city already accepts matcha as a menu flavour, cakes and pastries usually follow the drink trend.
The problem is that popularity doesn't guarantee quality. Brisbane coverage has been rich on where to find matcha, but much thinner on whether the boom is still backed by good ingredients, especially in desserts (Torrens University). That gap is exactly where smart buyers get an advantage, because a great matcha cake should taste balanced, aromatic, and fresh, not just look green.
Not All Matcha Is Created Equal
A good matcha cake starts with the right grade of powder, a distinction that often confuses many buyers. Ceremonial grade is the high-end powder people usually drink on its own, while culinary grade is built for baking and mixing. The simplest way to think about it is like cooking wine versus a fine bottle you'd pour into a glass, one is made to shine in a dish, the other is made to be savoured directly.
The reason this distinction matters in cake is flavour structure. Baking dilutes and reshapes ingredients, so a matcha that's lovely in a bowl can disappear in batter, while a culinary grade designed for mixing can hold its own through flour, eggs, and butter. That's also why the best matcha cakes tend to show a natural green colour rather than a pale, dull, or artificially bright one.
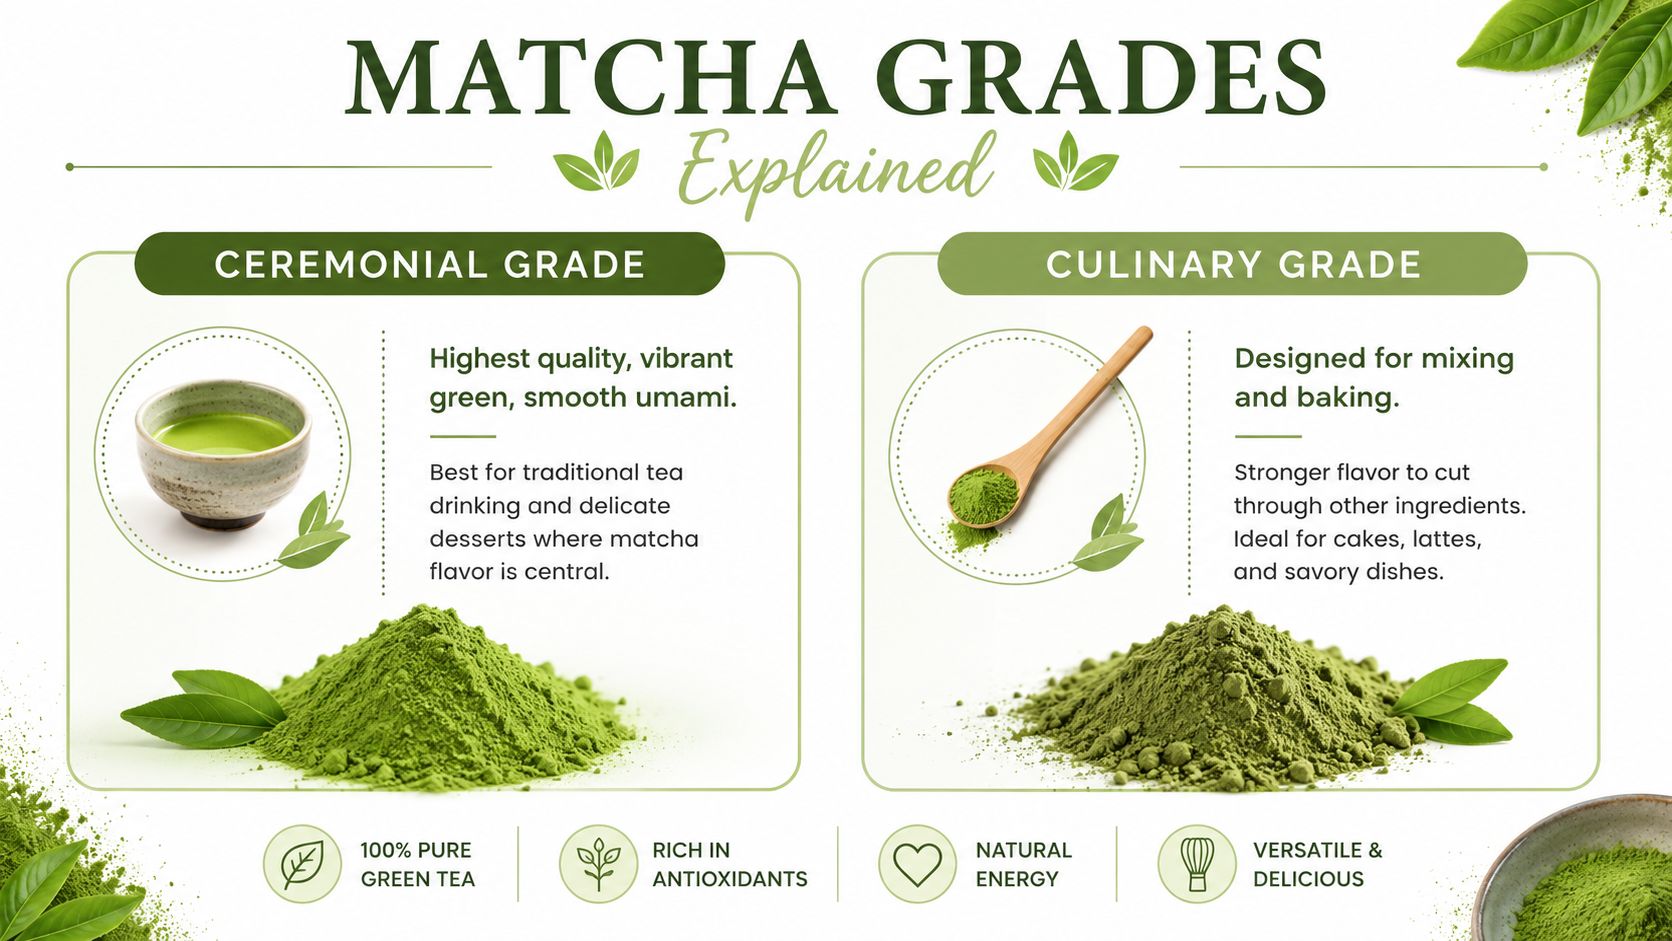
A good café menu usually gives clues if you know what to look for. A cake made with stronger culinary matcha often tastes more rounded and less sugary, while a weak one can taste mostly like vanilla sponge with a faint grassy note. When the powder is high quality, the colour is more even and the finish feels cleaner rather than bitter or dusty.
| Feature | Ceremonial Grade Matcha | Culinary Grade Matcha (High Quality) | Best For |
|---|---|---|---|
| Flavour | Smooth, delicate, umami-rich | Stronger, more robust | Drinking, delicate desserts |
| Colour | Vibrant natural green | Good green colour, slightly less delicate | Cakes, lattes, baked goods |
| Texture | Fine and refined | Designed to mix well | Whisking, batter, sauces |
| Best use case | Traditional tea preparation | Baking and recipes | Matcha cake, café drinks, desserts |
If you're shopping or ordering, ask one simple question, what grade of matcha is in the cake? If the answer is vague, that's usually a sign the product is built for appearance first.
Learn more about different grades of matcha
Where to Find Great Matcha Cake in Brisbane
Brisbane's matcha market is now broad enough that you can start your search in several parts of the city instead of chasing one hidden specialty spot. Dedicated outlets across Teneriffe, the CBD, and Sunnybank show how far the flavour has moved into the mainstream, while chain cafés have made matcha familiar to casual drinkers too (The Urban List). That broader awareness helps dessert menus, because customers already know what matcha should taste like.
The best way to judge a café is to look at how seriously it treats matcha across the menu. A venue that serves it as a throwaway novelty will usually lean on colour and sweetness. A place that treats it as a core flavour tends to show more restraint, with better balance, cleaner colour, and a more deliberate texture.
A useful buying cue: the strongest café cakes usually sit in places that already serve matcha regularly, not just once as a special.
Price can also reveal positioning. Brisbane sources note drinks ranging from $4.50 to $18.95, with dedicated tea houses like Sinmei Tea pricing cakes around A$6 to A$7 and specialty items such as a lava cake at A$20 (The Urban List; Sinmei Tea at Scrumptious Reads). Those numbers don't tell you quality by themselves, but they do show that Brisbane already accepts a premium tier for matcha products.
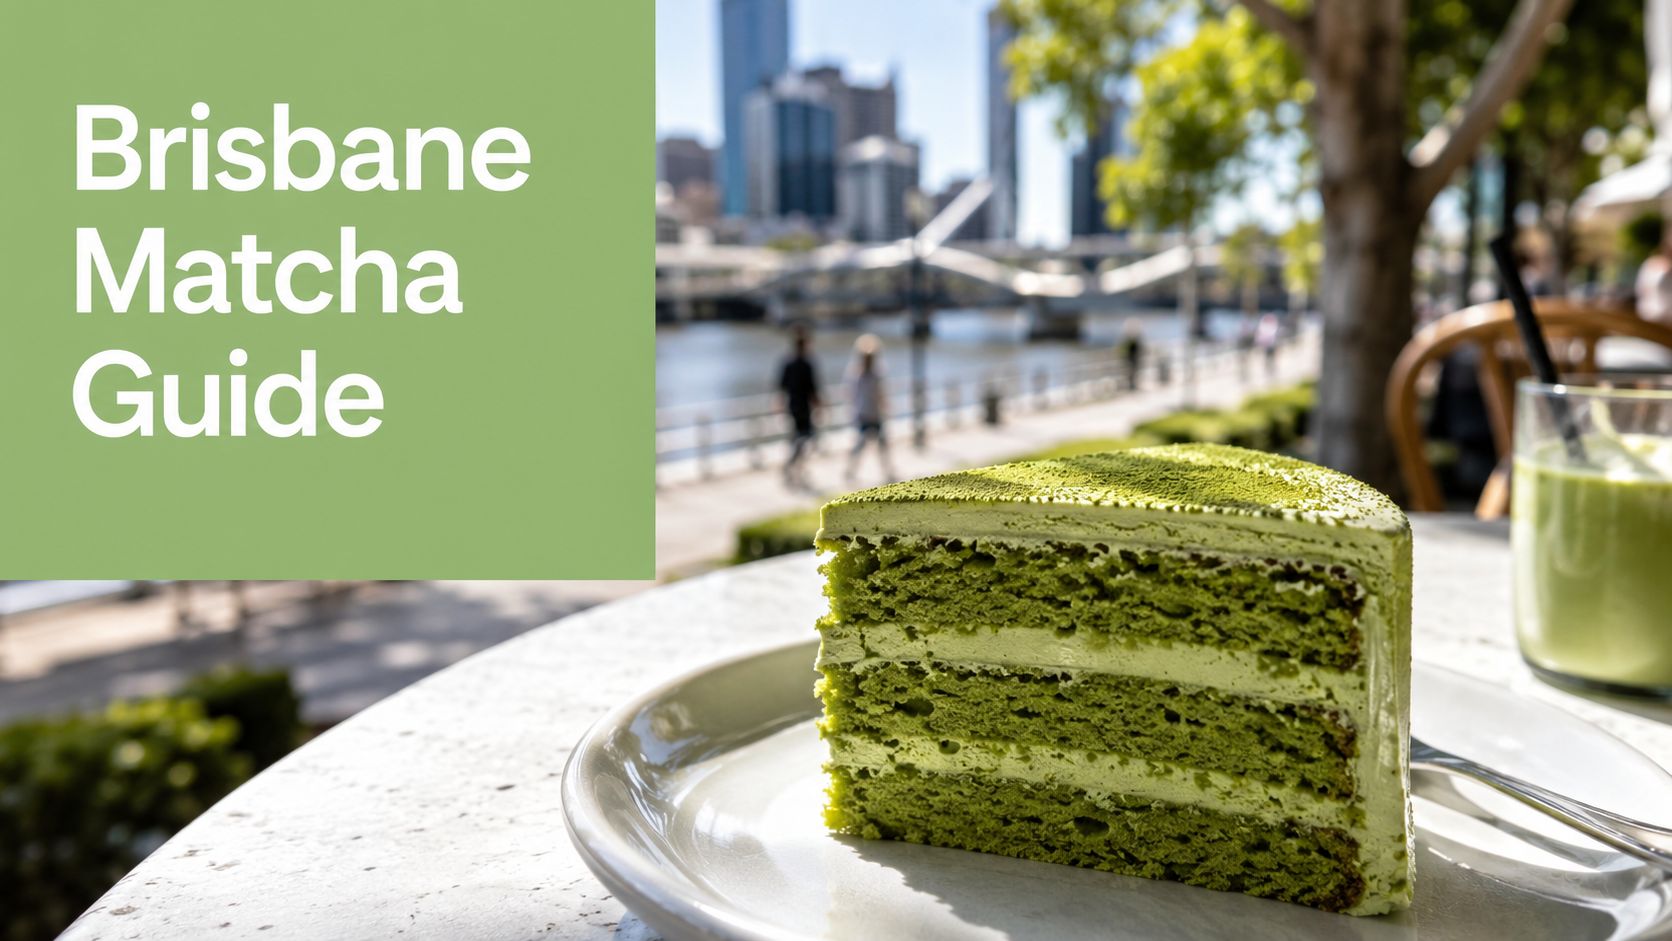
For Brisbane buyers, the smartest approach is to compare three things at once, flavour depth, colour consistency, and how the cake sits in the venue's broader dessert offer. If a café is already comfortable charging premium prices for matcha drinks, its cake is more likely to be made with intention. If you're after a starting point, look around the CBD for specialist tea houses, then check Brisbane suburbs with established dessert culture like Teneriffe and Sunnybank.
Bake Your Own with Our Pep Tea Matcha Recipe
Baking your own cake removes the guesswork. You choose the powder, control the colour, and decide whether the result tastes fresh or merely decorative. That's especially useful if you've been disappointed by cakes that look promising but collapse into sweetness once you take a bite.
The key technique comes before the oven
Matcha cake is sensitive to temperature and dispersion. One tested method bakes at 162°C and heats milk only to 82 to 85°C, which helps preserve colour, while another Australian recipe uses 180°C and stresses whipping eggs and sugar until the mixture triples in volume before folding in the dry ingredients (Texanerin; Zen Green Tea). The logic is simple, lower liquid temperature and solid aeration help reduce clumping, protect the green tone, and keep the crumb finer.
A practical home method looks like this:
- Sift the matcha first. This breaks up soft lumps before they meet liquid.
- Warm the milk carefully. Body-temperature milk can help matcha disperse more evenly, while some tested cakes heat milk to 82 to 85°C for colour control (Zen Green Tea; Texanerin).
- Pre-slurry the powder. Mix matcha with a little warm liquid before it goes into batter, because warm liquid improves solubilisation and helps prevent bitter specks (Zen Green Tea).
- Whisk for structure. If the method uses eggs and sugar, beat until the mixture is visibly lighter and expanded.
- Fold gently. Once the dry ingredients go in, keep mixing light so the batter stays airy.
If you want a beginner-friendly foundation for the sponge side of baking, the Just Cook It simple baking guide is a handy companion. It won't teach matcha nuance, but it does help with the basic rhythm of mixing, baking, and cooling.
Practical rule: if your batter contains visible green flecks, the matcha probably wasn't dispersed well enough before baking.
A simple matcha cake base
Use a light sponge or chiffon style, because those styles let matcha remain the star. Keep the sugar moderate, use a good culinary matcha, and don't overdo the add-ins. A thick frosting can drown the flavour before it reaches the palate.
For a recipe that keeps the ingredient quality front and centre, see our baking with matcha and beyond guide.
Once the cake is out of the oven, let it cool properly before slicing. Matcha colour looks strongest when the crumb is settled, not steaming hot, and the flavour usually tastes cleaner the next day.
Perfect Pairings and Smart Storage Tips
Matcha cake tastes best when the plate doesn't fight the flavour. Fresh berries, a light spoonful of cream, or a fine dusting of extra matcha all work because they add contrast without overwhelming the tea note. If the cake is already rich, keep the garnish simple and let the green tea character stay in charge.
A cold, crisp drink can make a slice feel lighter. That's one reason a sugar-free organic kombucha pairs so naturally with matcha cake, the brightness cuts through richness while keeping the overall experience clean and refreshing. If you're storing leftovers for later, keep the cake covered, refrigerate it if the filling is dairy-heavy, and bring it back to a cool room temperature before serving so the texture softens again.
For shelf-life questions, the most useful habit is to treat matcha cake like a fresh tea dessert rather than a long-life bakery item. The colour fades faster when it sits uncovered, and the crumb dries out quickly if air reaches it. This shelf-life guide is a practical reference if you want to keep the slice tasting close to day one.
A Note for Brisbane Cafés and Retailers
Brisbane diners have already accepted matcha as a premium café flavour, which means cafés and dessert bars have a clear opportunity to build trust with better ingredients. When customers can already buy matcha drinks across mainstream chains and specialist venues, a cake made with high-quality matcha becomes a visible quality signal, not just another dessert on the cabinet. That's especially important in a market where people are starting to ask whether the product is authentic or just aesthetic.
For café owners, the commercial case is straightforward. A well-made matcha cake can justify a premium price point because it gives customers a taste difference they can notice, cleaner bitterness, better colour, and a more layered finish. It also helps with repeat business, since people remember a dessert that tastes balanced rather than sugary and generic.

If you're planning a dessert offer for a café, market stall, or food truck, pairing a premium cake with a practical payment setup matters too. A resource like POS integration for food truck owners is useful when you're building a smoother service flow around specialty desserts and drinks.
The simplest strategy is also the strongest one, make the ingredient quality obvious. Use a matcha that delivers colour, aroma, and consistency, then serve the cake in a way that makes those qualities easy to notice. If Brisbane is already paying attention to matcha, the venues that respect the ingredient will stand out fastest.
If you're ready to bake, stock, or serve better matcha desserts in Brisbane, explore Pep Tea for premium organic matcha and sugar-free kombucha that fit café menus, wholesale kitchens, and home baking alike.
Mango Passion Fruit Drinks: A Flavour & Recipe Guide

You're probably here because one of two things happened. You had a mango passion fruit drink somewhere that tasted bright, juicy and perfectly balanced, then tried to remake it at home and ended up with something flat, too sweet, or oddly sharp. Or you're staring at ripe fruit on the bench and wondering how cafés make this flavour combo feel so polished.
The good news is that mango passion fruit is one of the most forgiving tropical pairings once you understand what each fruit is doing. Mango brings body, round sweetness and that soft, almost creamy finish. Passion fruit brings perfume, tang and lift. Get the ratio right, and the drink tastes fuller without becoming heavy.
That balance also suits the way many Australians like to drink now: fresh flavour, less cloying sweetness, and ingredients that feel real rather than artificial. Used well, mango passion fruit can move across still drinks, spritzes, kombucha, iced matcha and café specials without losing its identity.
The Allure of Mango Passion Fruit Flavours
A great mango passion fruit drink lands in layers. First comes the aroma from the passion fruit. Then the mango fills out the middle so the drink doesn't taste thin. At the end, the tartness keeps your palate awake and ready for the next sip.
That's why this pairing works so well in everything from a quick sparkling cooler to a more thoughtful café serve. It gives you both comfort and freshness. One fruit softens. The other brightens.
Why the pairing feels complete
Mango on its own can be lovely, but in drinks it sometimes needs help. It's naturally dense and can read as one-note if there isn't enough acid around it. Passion fruit fixes that fast. It adds a tart edge and a floral top note that makes the whole glass smell alive.
This is also why the combination works for more than juice. You can use it in:
- Syrups for sodas, mocktails and dessert drinks
- Second-fermented kombucha where fruit sugar and acidity create a livelier profile
- Layered matcha drinks where tropical fruit softens earthy notes
- Café batched bases for faster service during busy periods
A good tropical drink shouldn't just taste sweet. It should taste lifted.
The role of ingredient quality
When the ingredient list is short, quality matters more. Ripe fruit tastes fuller and needs less fixing. Organic ingredients can also make the finished drink feel cleaner and more focused, especially in recipes where tea, fruit and fermentation all sit in the same glass.
That's one reason we're fussy about what goes into functional drinks. If you're pairing tropical fruit with kombucha or matcha, there's nowhere for dull flavours to hide. Real fruit, properly fermented bases, and fresh preparation make the difference between “nice enough” and “I'd order that again”.
Crafting a Versatile Mango Passion Fruit Syrup
A reliable syrup is the engine room of a good mango passion fruit menu. Once you've got one bottle in the fridge, you can build sparkling drinks, mocktails, iced teas and dessert-style serves in minutes.
The trick is not making it taste like jam. You want concentration, not heaviness.
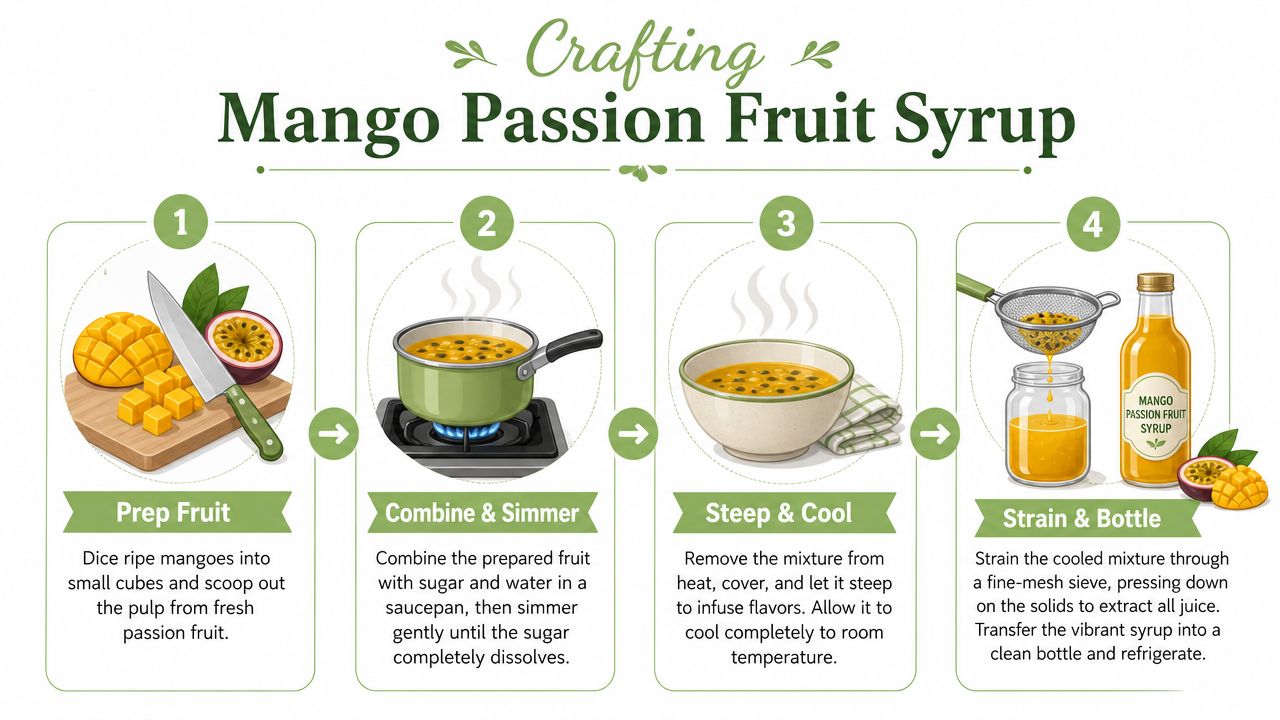
A practical flavour ratio
In Australian recipes, 1 cup (250ml) of passionfruit pulp is often paired with 1,300g of mango to create a balanced sweet-tart flavour, and passionfruit has a lower glycaemic index than mango, which makes it a thoughtful inclusion when you're blending fruit for drinks, as noted in this Australian mango and passionfruit sauce recipe.
You don't need to make a huge batch, but that ratio teaches an important lesson. Mango usually needs more volume. Passion fruit needs less, because its flavour is intense.
What to use
For a home batch, work with ripe fruit and keep the method simple.
Mango
Fresh ripe mango gives the best texture and aroma. Frozen mango works well if fresh fruit is expensive or inconsistent.Passion fruit
Scoop the pulp from ripe fruit. If you like a silkier syrup, strain some or all of the seeds out later.Sugar and water
Sugar isn't there only for sweetness. It also helps carry flavour and gives the syrup body.A pinch of salt
Not enough to taste salty. Just enough to sharpen the fruit.
Step-by-step method
Prep for clarity and control
Dice the mango quite small so it breaks down quickly. Scoop the passion fruit pulp into a bowl and check for any underripe pieces. If the fruit smells flat rather than fragrant, the syrup will too.
Add your fruit to a saucepan with water and sugar. Keep the heat gentle. A hard boil can mute delicate top notes and push the syrup toward a cooked-fruit flavour.
Simmer, steep and strain
Once the sugar dissolves, let the mixture simmer lightly until the mango softens fully. Turn off the heat, cover the pan, and let it sit. That rest gives the passion fruit time to infuse without overcooking it.
Strain through a fine sieve, pressing the solids gently. If you press too hard, you can force fibrous pulp through and end up with a cloudy syrup that separates faster in the bottle.
Practical rule: Stop reducing while the syrup still looks slightly looser than you think it should. It thickens as it cools.
How to adjust the flavour
If the syrup tastes too sweet, don't immediately add more sugar-free mixer later and hope for the best. Fix the base first.
Use this quick guide:
| Syrup problem | What it usually means | How to correct it |
|---|---|---|
| Too thick | Reduced too far | Stir in a little water while warm |
| Too tart | Passion fruit is dominating | Blend in more mango puree |
| Too dull | Fruit wasn't ripe enough | Add fresh passion fruit pulp before a brief reheat |
| Too pulpy | Straining was too light | Pass through a finer sieve |
Storage and café prep
Bottle the syrup in a clean glass container and chill it once fully cool. For home use, smaller bottles are easier because you'll open them more often and expose less syrup to air each time.
For cafés, batch one master syrup, then portion part of it into service bottles. That keeps your main batch cleaner during rush periods and gives staff a more consistent pour for each drink.
Second Fermentation for Mango Passion Fruit Kombucha
Second fermentation is where kombucha becomes lively, fragrant and properly drinkable rather than merely sour. It's also the stage where mango passion fruit can go from pleasant to brilliant, because the fruit adds both flavour and fuel for carbonation.
The key is restraint. Too much fruit pulp, too little headspace, or fruit that isn't fully ripe can all create problems.
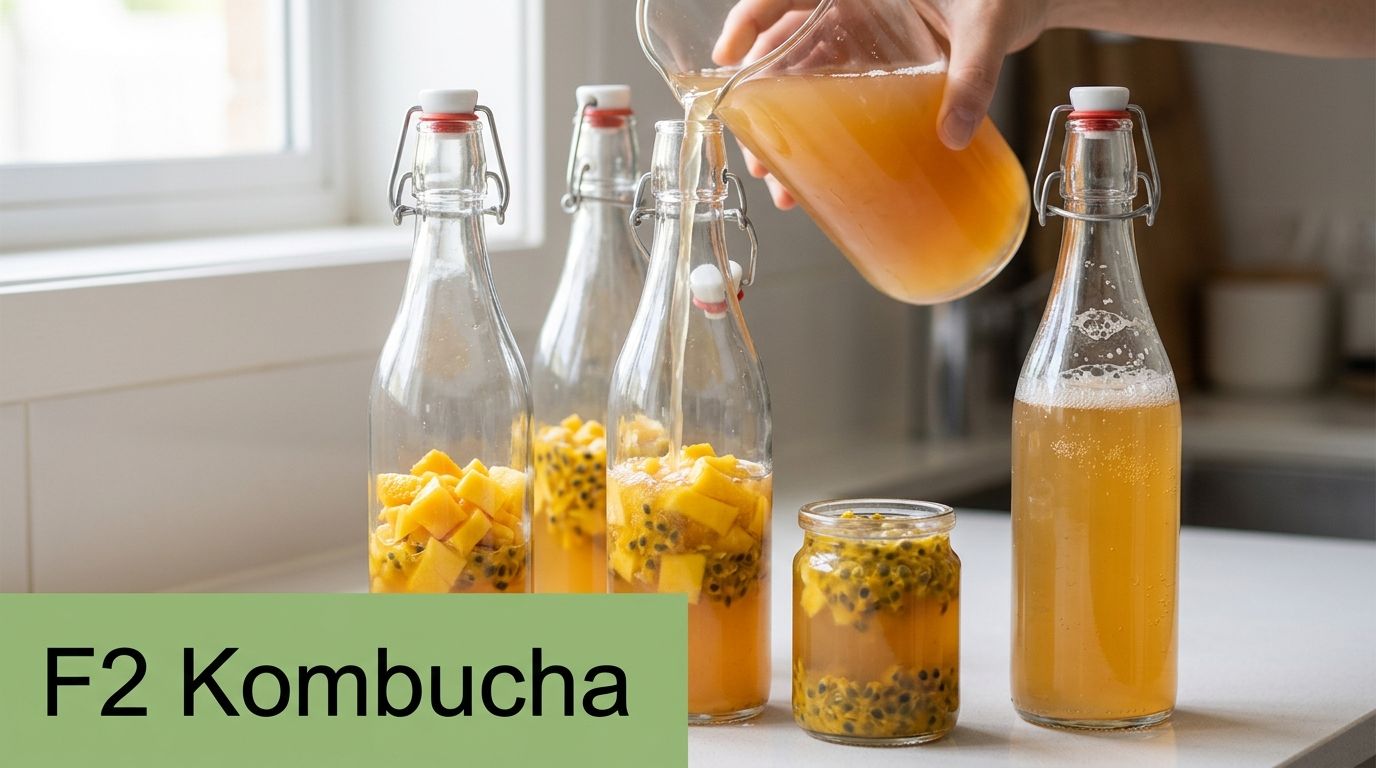
Start with ripe fruit only
A critical safety point often missed in home recipes is that unripe passion fruit seeds can contain cyanogenic glycosides, which are cyanide precursors. Always use fully ripe, mature fruit for infusions and fermentations, as explained in this passion fruit safety overview.
That matters even more in kombucha because fermentation doesn't rescue poor fruit choices. It amplifies what you put in.
How the second ferment works
In plain language, your kombucha still contains live cultures after the first ferment. When you bottle it with fruit, those cultures keep working on the available sugars. That creates carbonation and pulls fruit character into the liquid.
Mango adds roundness and gentle sweetness. Passion fruit keeps the finish bright, so the kombucha doesn't taste sticky or overripe.
A reliable home method
Use clean, fermentation-safe bottles with secure lids. Add a small amount of mango puree or finely chopped ripe mango, plus a spoonful of ripe passion fruit pulp, then top with plain kombucha and leave some headspace.
Don't pack the bottle with fruit. More fruit doesn't always mean more flavour. It often means blocked pours, excess sediment and harder pressure control.
Choose texture wisely
Smooth puree gives more even flavour. Fruit chunks can work, but they're less predictable.Leave room at the top
Headspace helps manage pressure and gives the liquid room to carbonate.Keep bottles warm, not hot
Moderate room temperature helps the second ferment along without pushing it too fast.Burp carefully if needed
If your bottles are building pressure quickly, open them briefly over a sink.
If you hear an aggressive hiss the moment the cap loosens, chill the bottle before opening it again.
A ready-made benchmark for flavour direction is this passion fruit kombucha option, which shows how bright tropical acidity can sit comfortably inside a kombucha profile.
Common problems and what they mean
No fizz
Usually, the kombucha was too cold, the seal wasn't tight enough, or the fruit amount was too timid. It can also happen if the base kombucha had already fermented too far and had less energy left for bottle conditioning.
Too much pressure
This often comes from overfilling fruit, warm storage, or leaving bottles too long before chilling. Mango pulp can also trap gas in a way that makes the bottle seem quiet until it's suddenly not.
Here's a useful visual walkthrough before you bottle your next batch:
Murky, sludgy pours
That's usually a fruit-prep issue rather than a fermentation fault. Strain your syrup or puree more thoroughly if you want a cleaner café-style pour. If you like a rustic finish at home, that's fine too, but warn guests before they tip the last mouthful into the glass.
For cafés and small-batch service
If you're serving mango passion fruit kombucha in a hospitality setting, consistency matters more than novelty. Keep your fruit base standardised, label batch dates clearly, and refrigerate promptly once carbonation is where you want it.
Staff also need one clear opening protocol. Tropical kombucha can foam hard if handled roughly. Open cold bottles slowly and pour on an angle, just as you would with other lively fermented drinks.
Stunning Mango Passion Fruit Mocktails and Sparklers
Mango passion fruit shines in non-alcoholic drinks because it already has built-in drama. You've got sweetness, acidity, aroma and colour before you add anything fancy. The job of the mocktail is to support that, not bury it.
That popularity also makes sense locally. Australia's passionfruit industry includes about 130 commercial growers and produced approximately 5,200 tonnes of fruit last year, underscoring how established the flavour is in our food culture, as noted in this Australian passionfruit industry report.
Three easy serves that look polished
Tropical Spritz
Build this in a tall glass with ice, mango passion fruit syrup, sparkling water and lightly slapped mint. It's the cleanest expression of the syrup, and the bubbles push the passion fruit aroma upward.
Best for: brunch, warm afternoons, and customers who want something refreshing rather than creamy.
Sunrise Cooler
Shake the syrup with coconut milk and ice, then pour into a chilled glass. The coconut softens the tart edge and gives the drink a rounder finish.
Best for: a snack-like serve, especially when someone wants a more filling alcohol-free option.
Chilli Mango Tango
Add a very thin slice of fresh red chilli to the syrup before shaking with ice and soda. You don't want a spicy drink. You want a soft warmth at the back of the palate that makes the fruit taste brighter.
Best for: menus that want one conversation-starting drink without going too far.
Garnish should hint at flavour, not confuse it. If the drink tastes tropical, garnish tropical.
How to make them taste balanced
Many homemade mocktails fail because every element pulls in the same direction. Sweet juice, sweet cordial, sweet garnish. That's when the drink tastes childish rather than café-worthy.
Use contrast instead:
- For lift add sparkling water or mineral water
- For aroma use fresh mint, citrus peel, or a spoon of passion fruit pulp
- For texture bring in coconut milk or crushed ice
- For tension add chilli, fresh lime, or unsweetened tea as a lengthener
For broader alcohol-free serving ideas, this guide to fruity non-alcoholic kombucha cocktails is useful for café teams building a more grown-up menu.
Presentation details that matter
Glassware changes the mood of the drink. Highballs feel clean and modern. Stemmed glasses make a spritz feel more celebratory. Short tumblers suit creamy serves.
Try these finishing touches:
| Drink style | Best garnish | Why it works |
|---|---|---|
| Spritz | Mint sprig and passion fruit float | Fresh aroma and visual contrast |
| Creamy cooler | Toasted coconut rim | Adds texture and signals richness |
| Spicy sparkler | Thin chilli slice and mango cheek | Warns the palate and looks striking |
If you're serving families or groups, set up a small garnish station and let everyone finish their own glass. It makes a simple syrup-based drink feel much more special.
An Unexpected Pairing with Organic Matcha
At first glance, matcha and mango passion fruit can sound like they belong in different worlds. One is grassy, savoury and deep. The other is sunny, lush and aromatic. In the glass, though, they often solve each other's problems.
Matcha can feel too assertive if there isn't enough softness around it. Mango gives it body. Passion fruit trims the edges and keeps the drink from becoming heavy.
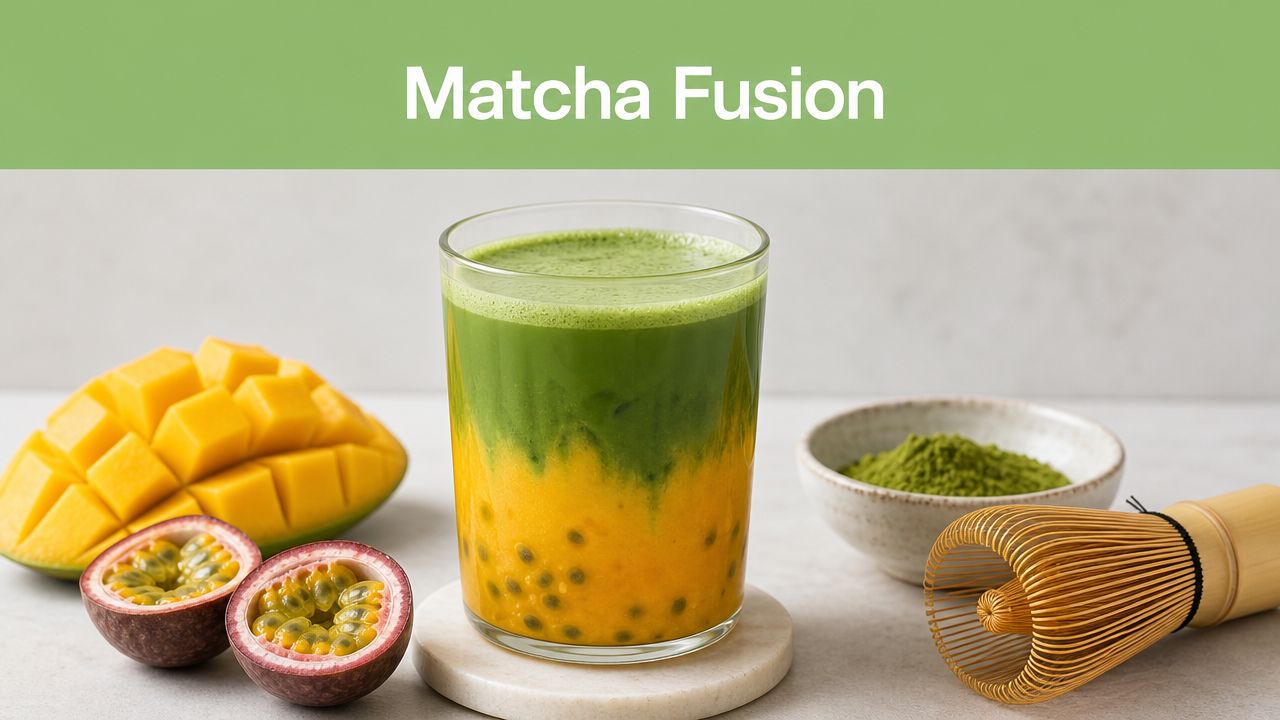
Why the flavour pairing works
Think of it as a triangle. Matcha brings earthiness and a gentle bitter line. Mango contributes sweetness and texture. Passion fruit delivers acidity and perfume. Remove any one of the three and the drink becomes less interesting.
This pairing also suits people who want a drink that feels indulgent but still purposeful. In organic matcha, epigallocatechin gallate, or EGCg, makes up 60% of the catechins, which is why it's often highlighted as a key antioxidant component in matcha, as explained in this organic matcha benefits article.
The smartest matcha pairings don't hide the tea. They give it a better frame.
A layered iced mango passion fruit matcha latte
Build the fruit base
Start with chilled mango passion fruit syrup or a slightly thicker fruit puree in the bottom of the glass. If it's too thin, the layers will blur immediately.
Add ice next. Plenty of it. Ice isn't only there to chill the drink. It slows mixing and helps create visual separation.
Prepare the matcha properly
Whisk culinary-grade or ceremonial-grade organic matcha with a small amount of water until smooth. Then add your milk of choice. Pour this gently over the ice so it settles above the fruit layer.
If you want a more wellness-focused variation, this immune booster drink idea offers another way to think about combining vibrant ingredients with tea.
Two mistakes to avoid
Don't over-sweeten the fruit layer
Matcha already benefits from mellow companions. If the fruit is too sugary, the tea disappears.Don't use weak matcha
A timid whisked tea gets lost under tropical flavour. Choose a quality organic matcha with enough depth to stay present.
Which grade should you use
Ceremonial-grade is lovely if the drink is matcha-forward and minimally sweetened. Culinary-grade works beautifully in lattes and blended recipes where the tea needs to hold its own against fruit and milk.
That doesn't mean culinary-grade is second best for this job. It often gives a stronger, more grounded matcha note in flavoured drinks, which can be exactly what you want.
Scaling for Your Café or Hospitality Venue
A mango passion fruit special is easy to make once. The main challenge is making it quickly, consistently and profitably across a full service.
That starts with one decision. Don't let every staff member freestyle the fruit component. Create one batched base, train one standard pour, and build several menu items from it.
Batch for speed, not just convenience
Your syrup or fruit base should pour cleanly, taste the same each time, and fit multiple drinks. A single batch can support spritzes, kombucha serves, iced teas, sodas and matcha specials if the sweetness is kept in check.
Set up a simple workflow:
- Prep and strain fruit base before service.
- Store master batch cold in labelled containers.
- Decant into smaller service bottles at the bar or coffee station.
- Record the date and staff initials on each bottle.
That system reduces waste and makes troubleshooting easier if a batch tastes off.
Menu language that actually sells
Customers respond to flavour first, then function. “Mango passion fruit” does more work on a menu than vague wellness wording.
Try descriptions like:
- Hunter Valley brewed kombucha with mango passion fruit
- Iced matcha with tropical mango passion fruit
- Sparkling passion fruit mango spritz with mint
- Creamy coconut mango passion fruit cooler
Short descriptions are easier for front-of-house staff to remember and repeat.
Costing and staffing reality
Fruit-based drinks can look profitable on paper and still cause service bottlenecks if prep isn't organised. That's why labour matters as much as ingredient cost. If you're checking whether a new non-alcoholic range makes sense in your venue, a tool like this restaurant labor cost calculator can help you estimate how prep time affects the margin.
Train the team on flavour cues
Don't train staff with recipe cards alone. Train their palate.
Have them taste:
- The base syrup on its own so they know the target balance
- The over-sweet version so they can recognise when soda or coconut milk won't rescue it
- A correct finished serve with the intended garnish and glassware
That makes service stronger because staff can spot mistakes before the drink leaves the pass.
One product mention that fits service
For venues that want a ready-to-pour fermented option on the menu, Pep Tea's Manga Organic Kombucha Tea is one example of a kombucha product built around mango and passion fruit flavour, which can simplify service when a café doesn't want to run its own fruit-forward fermentation program.
Seasonal promotion works well here too. Tropical flavours feel natural in warm weather, but they can also brighten winter menus when paired with sparkling water, tea, or a creamy matcha format.
If you'd like to turn these ideas into everyday drinks at home or on your menu, explore Pep Tea for organic matcha, Australian-brewed sugar-free kombucha, and more beverage inspiration built around clean, functional flavour.
Matcha Protein Shake: Healthy Blends for 2026 Energy
Some mornings call for more than a flat white and good intentions. You want something cold, fast, satisfying, and steady enough to carry you through a workout, a commute, or a packed morning of meetings without feeling like you've had dessert for breakfast.
That's where a good Matcha protein shake earns its keep. Done well, it isn't just green powder plus protein. It's a balanced drink with clean flavour, real texture, and a practical job to do. It can sit comfortably between breakfast and café ritual, between recovery drink and daily wellness habit.
The problem is that most recipes stop at “blend and enjoy”. That's not enough if you've ever ended up with a gritty mouthfeel, a bitter finish, or a shake so thick it barely moves through the straw. The better approach is to understand what each ingredient is doing, especially the protein source, because whey, pea, and collagen all behave differently once matcha enters the mix.
Why a Matcha Protein Shake is Your New Morning Ritual
There's a reason this style of drink keeps showing up in home kitchens, gym bags, and café fridges. It suits the way many Australians eat and drink now. People want convenience, but they also want something that feels purposeful.
Australian beverage market data from Mintel shows that half of non-alcoholic beverage buyers seek products with added health benefits, and matcha fits neatly into that demand because it brings protein for satiety together with matcha's natural caffeine at around 70 mg per serve as reported in this functional beverage overview.

It solves two common morning problems
Coffee can be brilliant, but it isn't always enough on its own. If you're hungry an hour later, or you feel like your energy spikes and then falls away, a shake with both matcha and protein can be a more useful first drink.
Protein changes the feel of the morning. It adds staying power. Matcha changes the mood of it. Instead of reading like a treat or a random smoothie, the drink starts to function like a proper part of your routine.
For anyone trying to build a more reliable breakfast habit, practical nutrition matters more than novelty. If you're also trying to lift your daily protein intake without overcomplicating meals, PlateBird's protein intake guide is a handy companion resource because it helps frame where a shake fits into the bigger picture.
Practical rule: A Matcha protein shake works best when you treat it like a functional breakfast or recovery drink, not a milkshake with wellness branding.
Matcha brings more than flavour
A lot of people first come to matcha for the taste and colour, then stay for the ritual. In a shake, though, matcha does something slightly different. It lifts the whole drink. Vanilla protein tastes cleaner with it. Banana tastes less heavy. Even richer bases like oat milk or yoghurt can feel brighter.
Nutritionally, matcha contributes some protein and fibre, but it's still a modest protein contributor on its own. A peer-reviewed analysis found matcha powder contains about 17.3 g of protein per 100 g, and one tablespoon, about 12 g, provides roughly 2 g of protein and 6.73 g of dietary fibre, equal to 26.92% of an adult's recommended daily fibre allowance, according to the peer-reviewed analysis of matcha composition. That same analysis also noted that the fibre is predominantly insoluble.
That matters because matcha isn't replacing your protein powder. It's improving the drink's functional profile, flavour complexity, and satiety appeal.
Why it fits modern café and home routines
At home, a Matcha protein shake is easy to scale up or down. In cafés, it gives staff a drink that can sit between smoothie, iced latte, and wellness menu item. It also speaks to customers who want low-sugar options without giving up flavour or ritual.
If you're curious about the broader wellness appeal of matcha itself, this guide to the amazing benefits of matcha green tea is a helpful read.
Choosing Your Ingredients for the Perfect Shake
A great shake starts before the blender turns on. Ingredient choice decides whether the final drink is silky and fresh, or grassy, lumpy, and strangely sweet.
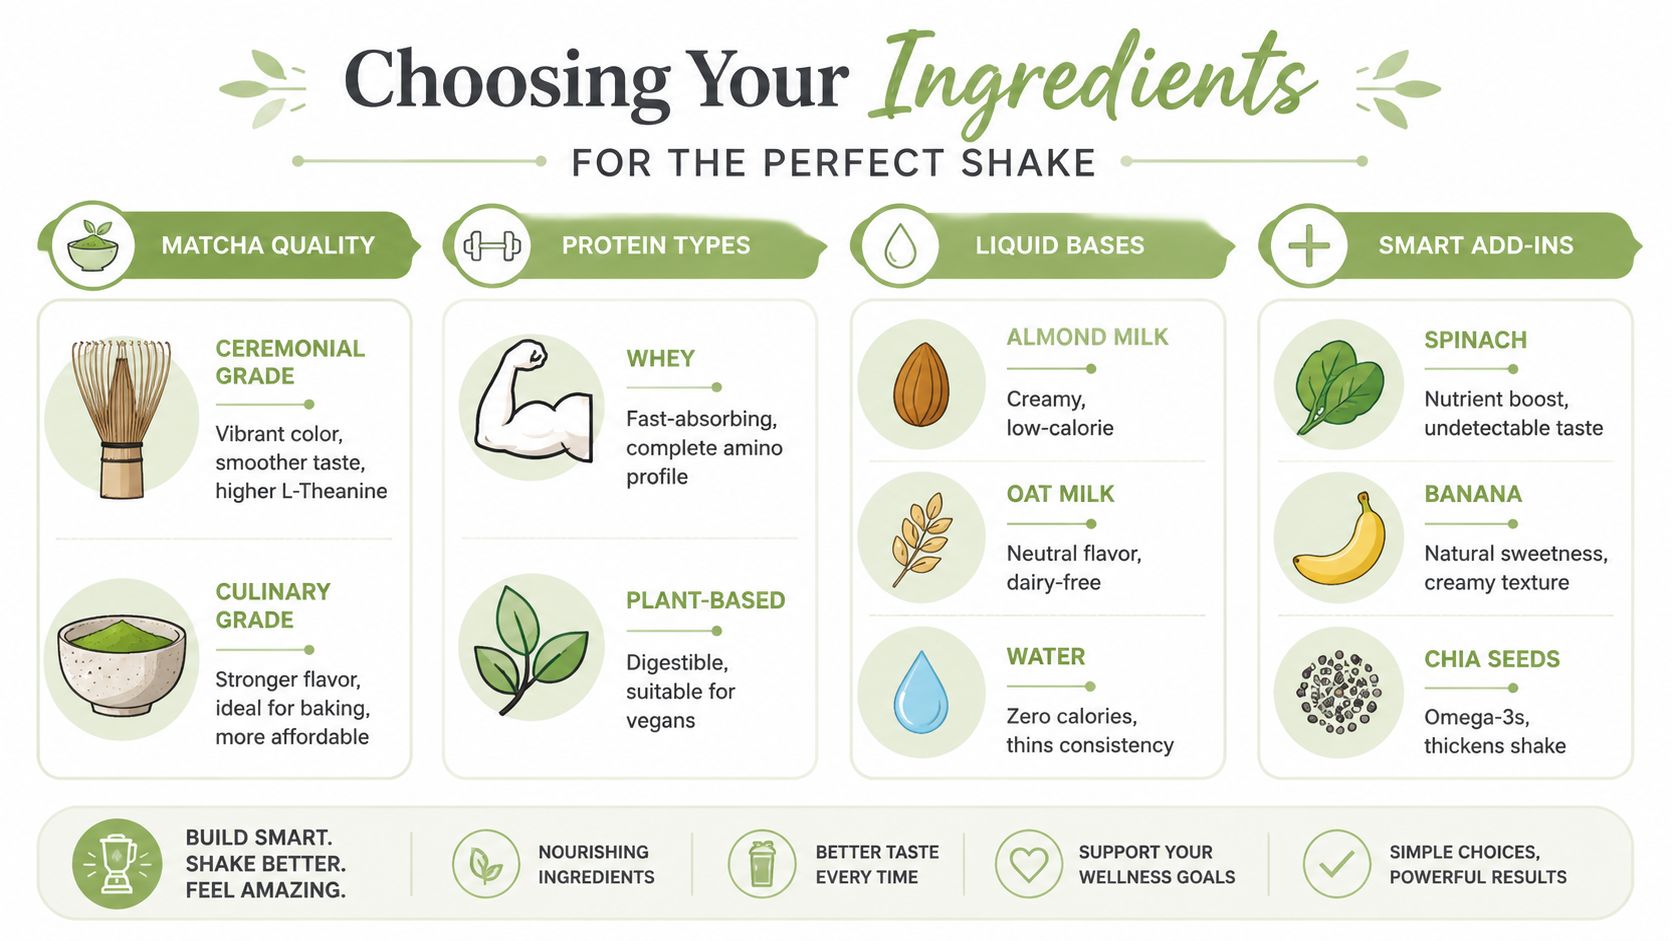
Pick the right matcha for blending
For shakes, culinary-grade matcha usually makes more sense than ceremonial. Ceremonial grade is lovely for whisking with water, where its finer flavour can shine on its own. In a shake, that subtlety often gets buried under milk, protein, fruit, or ice.
A strong culinary matcha stands up better in the blender. It gives you a clearer tea flavour and usually offers better value if you're making shakes regularly at home or serving them in a café setting.
If you want a clearer sense of what separates one grade from another, this matcha grade and quality guide breaks down the key differences.
Your protein choice changes everything
Most weak recipes treat protein powder as interchangeable. It isn't. Texture, sweetness, thickness, and how the shake sits on the palate all depend on the protein base.
The broad rule is simple. Plant-based proteins often need more liquid, while whey isolate tends to blend more cleanly, a point noted in this recipe discussion on protein texture and blending behaviour.
Here's how the common options behave in practice:
| Protein type | What usually works | What often goes wrong |
|---|---|---|
| Whey isolate | Smooth, light texture, easy to blend, lets matcha stay bright | Can taste overly sweet if flavoured strongly |
| Pea protein | More filling, good for dairy-free drinkers, sturdy in thicker shakes | Can turn chalky or earthy without enough liquid |
| Collagen | Dissolves easily, keeps the drink lighter | Doesn't create the same creamy body as whey or pea |
| Soy protein | Better emulsifying than some plant blends, fuller body | Can dominate the flavour if the powder is strong |
| Mixed plant blends | Useful for vegan formats and menu flexibility | Texture can vary wildly from silky to sandy |
Matcha is delicate, but it isn't shy. The best protein powder supports it instead of fighting for attention.
Liquid bases matter more than people think
The liquid decides body and finish. Water gives you the cleanest tea flavour, but the thinnest result. Unsweetened almond milk keeps things light. Oat milk adds roundness and makes the shake feel more café-style. Dairy milk creates a fuller, sweeter profile naturally.
For training-focused shakes, some people prefer a simpler base so the drink feels cleaner after exercise. For breakfast shakes, a creamier liquid often makes the drink feel complete enough to replace a meal.
A few reliable pairings:
- Unsweetened almond milk brings a lighter body and lets grassy notes stay crisp.
- Oat milk softens sharper matcha edges and makes vanilla proteins taste more rounded.
- Dairy milk adds natural richness and can balance stronger matcha doses.
- Water plus yoghurt can work well if you want body without too much sweetness.
Smart add-ins that actually improve the drink
Not every “healthy” add-in helps. Some just muddy the flavour.
The useful ones tend to do one of three jobs:
- Creaminess: banana, avocado, Greek yoghurt
- Sweetness: banana, dates, a small amount of honey or maple if needed
- Satiety: chia seeds, nut butter, extra fibre-rich ingredients
If the goal is a clean, vibrant Matcha protein shake, restraint usually wins. One creamy ingredient and one sweetness adjustment are often enough. Once you add too many boosters, the tea disappears.
Four Essential Matcha Protein Shake Recipes
A Matcha protein shake can be light and brisk, thick and filling, or somewhere in the middle. The best recipe depends on what you want the drink to do.
Independent recipe and product references note that a well-built matcha-protein drink can land in the range of 20 g to 41 g of protein per serve and roughly 92 to 100 mg of caffeine per serve when formulated with more concentrated matcha servings, as outlined in this matcha protein shake recipe reference.
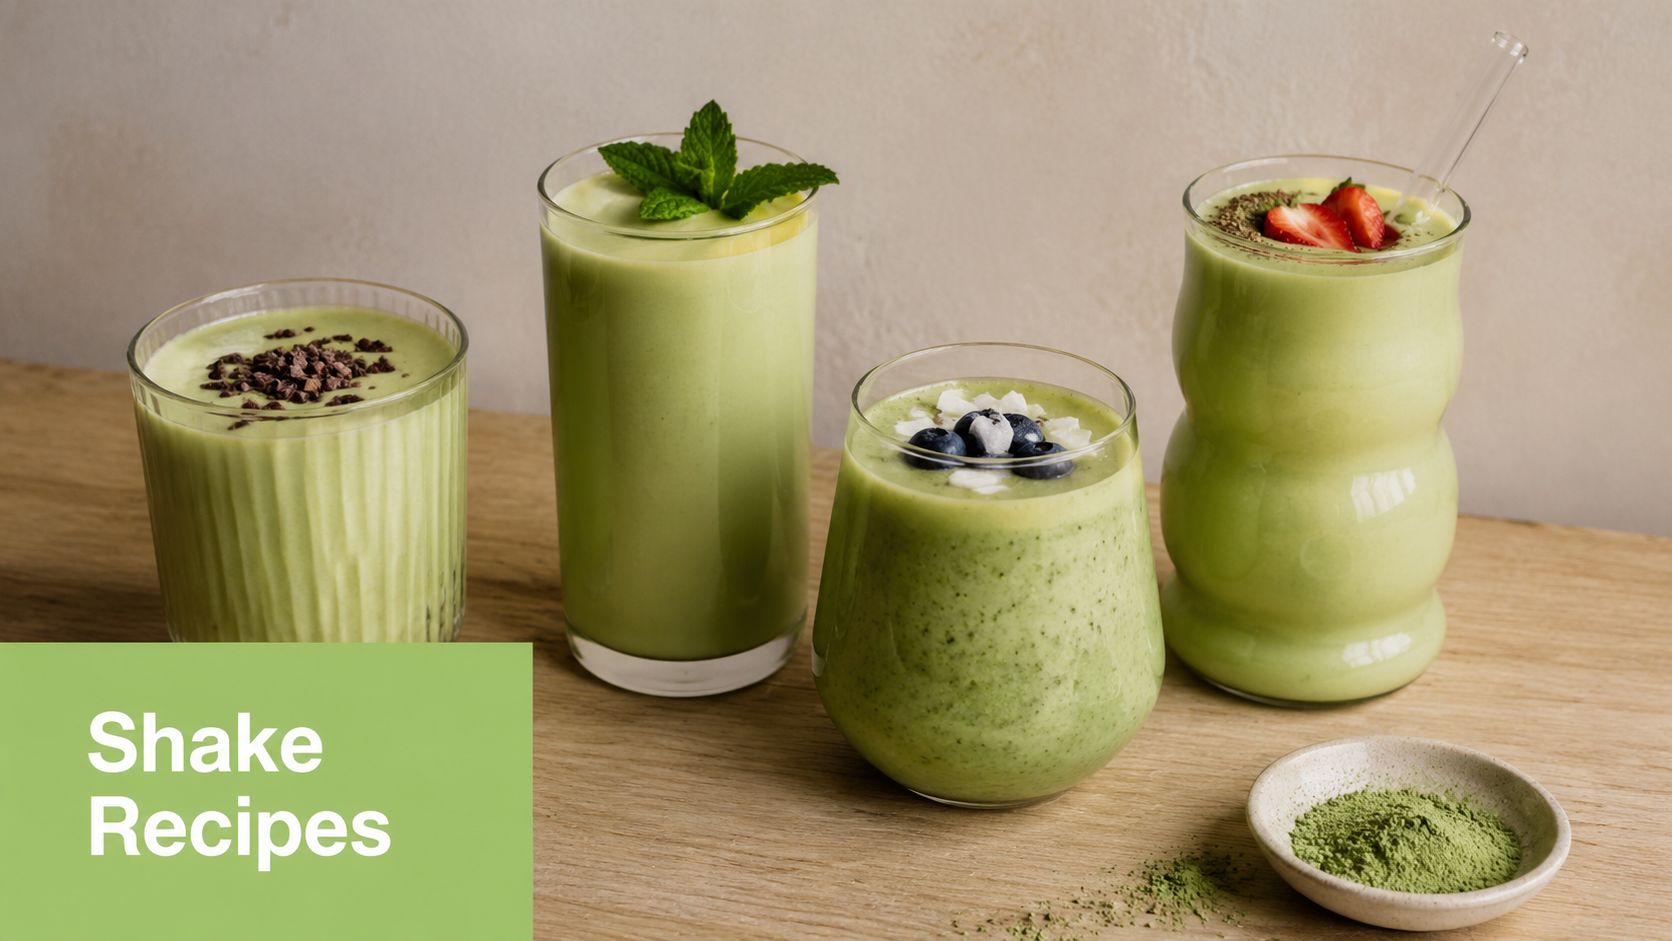
The Classic Energiser
This is the one to make when you want a dependable daily blend. It's balanced, not too heavy, and easy to repeat on busy mornings.
You'll need
- 1 teaspoon matcha
- 1 scoop vanilla whey isolate
- 1 cup unsweetened almond milk
- 1/2 frozen banana
- A small handful of ice
Start with the almond milk in the blender, then add the matcha and whey. Finish with banana and ice. Blend until the colour turns evenly green and the texture looks glossy.
The banana rounds out the edges without making the shake taste like dessert. Whey isolate keeps the body smooth and lets the tea stay centre stage.
The Creamy Vegan Powerhouse
Plant-based protein can be excellent with matcha, but it needs more care. This version leans into richness so the shake feels intentional rather than compromise-driven.
You'll need
- 1 teaspoon matcha
- 1 scoop pea or mixed plant protein
- 1 cup oat milk
- 1/2 frozen banana
- 1 tablespoon chia seeds
- A few ice cubes
Blend the oat milk and matcha first if you can, then add the plant protein. Once that's incorporated, add banana, chia, and ice. Give it a little extra blending time.
Pea protein can pull the drink towards chalkiness if the liquid is too low. Oat milk and banana solve much of that. Chia thickens the shake and gives it a more complete breakfast feel.
The Iced Post-Workout Refresher
After training, some people don't want a thick smoothie. They want something cold, brisk, and easy to drink. This one is lighter on the palate.
You'll need
- 1 teaspoon matcha
- 1 scoop unflavoured or lightly flavoured whey isolate
- 3/4 cup cold water
- 1/4 cup unsweetened almond milk
- Ice
Keep the flavour profile clean. Blend just until smooth and drink it straight away. The water lifts the freshness, while a smaller amount of almond milk stops it feeling thin.
This is a good format if heavy dairy or a thick vegan blend doesn't sit well after exercise.
A quick visual can help if you like seeing the process before trying your own variations.
The Ultimate Meal Replacement
This is the version for long mornings, late breakfasts, or anyone who wants one glass to do more work.
You'll need
- 1 teaspoon matcha
- 1 scoop protein powder of choice
- 1 cup milk of choice
- 1/2 avocado
- 1 tablespoon nut butter
- 1 tablespoon chia seeds
- Ice as needed
This one should be blended until fully velvety. Avocado creates body without adding obvious flavour. Nut butter gives the shake more substance. Chia helps it stay satisfying for longer.
Use collagen if you want this version to stay lighter. Use whey if you want the smoothest body. Use pea protein if you want the biggest breakfast feel.
Mastering the Blend for a Smooth Clump-Free Shake
If your shake is gritty, the problem usually isn't the blender. It's the order. People often throw everything in together, then wonder why matcha sticks to the sides and protein forms damp little pockets that never fully dissolve.
Recipe testing points to a simple fix. Add wet ingredients first, then powders like matcha and protein, which helps stop powder sticking and improves emulsion, as noted in this blending method guide.
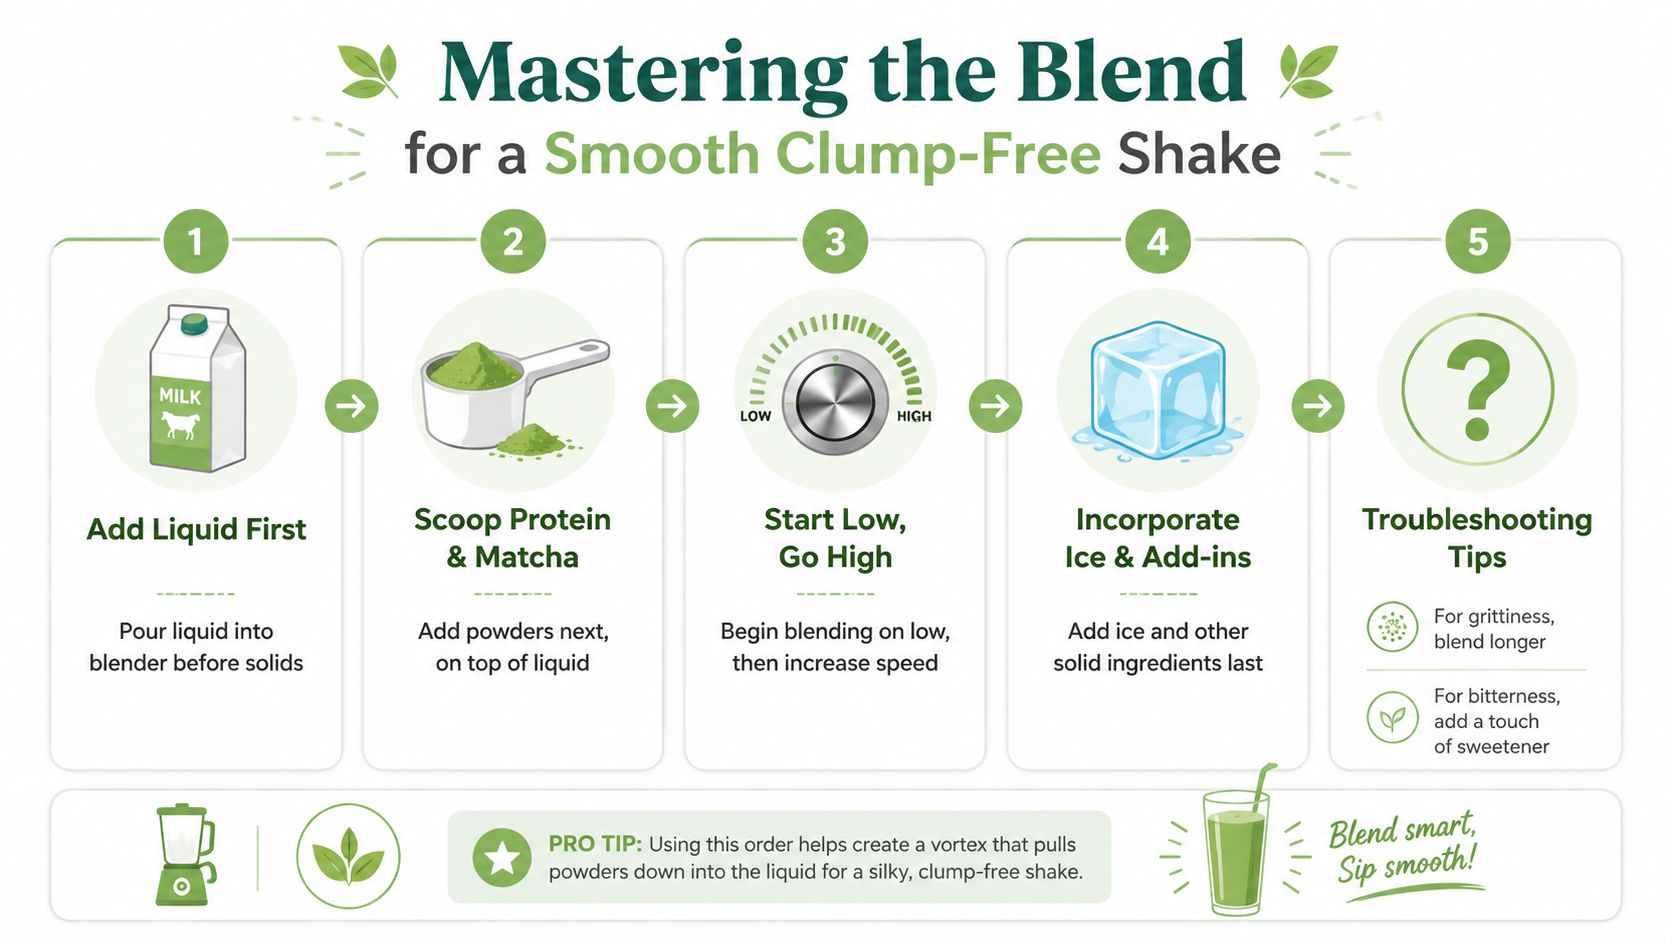
The order that works
Use this sequence every time:
- Pour in your liquid first so the blades have immediate movement.
- Add matcha and protein next so they disperse into liquid instead of compacting under frozen ingredients.
- Add soft ingredients like banana, yoghurt, or avocado.
- Finish with ice or frozen fruit so the heavier solids don't trap dry powder underneath.
This one adjustment fixes most beginner mistakes.
Pre-mix if you want café-level texture
Matcha behaves best when it's given a little attention before blending. If you've got thirty extra seconds, whisk it with a small amount of liquid into a loose slurry first. That prevents dry tea particles from lingering in the finished shake.
A fine sifter helps too, especially if your matcha has compacted in the tin. A dedicated matcha tea sifter makes it easier to break up small clumps before they ever hit the blender.
A silky Matcha protein shake usually comes from preparation, not power. Even a strong blender can't fully rescue badly layered ingredients.
How to fix common problems fast
A few small adjustments can save a disappointing shake:
- Too thick means add a splash more liquid, then re-blend.
- Too thin means add a little more ice, chia, or frozen banana.
- Too bitter usually means too much matcha, or a matcha that's too harsh for cold drinks.
- Too chalky often points to plant protein needing more liquid and more blending time.
If the flavour feels flat, don't automatically add sweetener. A pinch more vanilla, a creamier milk, or a little banana often improves the drink without pushing it into sugary territory.
Serving Storage and Cafe Menu Inspiration
A Matcha protein shake is best fresh, when the top is still lightly frothy and the colour is brightest. That said, real life isn't always fresh-blended and leisurely. Sometimes you need to make it ahead, cap it, and get out the door.
At home, the easiest make-ahead approach is to blend the shake, refrigerate it in a sealed bottle, and give it a hard shake before drinking. Separation is normal, especially with lighter liquids or collagen-based blends. A quick stir usually brings it back.
Small serving touches make it feel better
The drink tastes the same either way, but presentation changes the experience. A simple garnish can make a weekday shake feel less utilitarian.
A few good finishing touches:
- Dusting of matcha for aroma and colour
- Hemp seeds for a subtle nutty top note
- Mint leaf if you want it to read fresh and café-like
- Clear glass to show off the vivid green
Why cafés should pay attention
For cafés, this drink fills an increasingly useful gap. It sits comfortably beside smoothies and iced drinks, but it carries a more premium, wellness-led identity. It also gives staff room to customise.
One café-friendly approach is to prep a house matcha base in advance, then build to order with different protein options. That lets customers choose what suits them best, whether that's whey for smoother texture, pea for dairy-free service, or collagen for a lighter feel.
A compact menu could offer:
- An everyday Matcha protein shake with vanilla protein and almond milk
- A vegan version with oat milk and plant protein
- An upgrade option with greens, chia, or collagen
- A lower-sweetness format for customers who don't want banana in every blend
That kind of flexibility works well in Australian cafés where people often want something quick, functional, and not overloaded with sugar.
Storage without disappointment
If you're storing one overnight, keep expectations sensible. The flavour will still be good, but the texture is rarely as lively as it is straight from the blender. Thicker shakes hold better than very icy ones, and banana-heavy versions often need a good re-blend or extra shake in the morning.
The best compromise is often prep-ahead rather than fully blend-ahead. Measure the dry ingredients, portion the frozen ingredients, and keep the liquid ready in the fridge. In the morning, it takes only moments to finish.
Embrace Your New Favourite Healthy Habit
A good Matcha protein shake earns a permanent place in the routine because it solves practical problems. It gives you a more satisfying start than a plain caffeinated drink, a more interesting flavour than many standard protein shakes, and enough flexibility to suit breakfast, post-workout recovery, or an afternoon reset.
The key difference comes from making it properly. Use a matcha that can stand up in a cold drink. Choose a protein that suits your goal and your digestion. Blend in the right order. Adjust the liquid before you blame the recipe.
That's when the drink shifts from trend to habit.
There's plenty of room to make it your own. Keep it lean and brisk with water and whey. Build it creamy and filling with oat milk, chia, and plant protein. Go lighter with collagen. Go fuller with avocado. Once you understand how the ingredients behave, you can shape the shake around your day instead of forcing yourself to drink a version that never quite works.
If you're ready to make your own Matcha protein shake with better flavour and cleaner ingredients, explore Pep Tea for premium organic matcha suited to daily blending, lattes, and wellness recipes.
Your Perfect Matcha Cheesecake Recipe No Bake

You're probably here because you want a dessert that looks polished, tastes grown-up, and doesn't ask you to heat the kitchen. That's exactly where a good matcha cheesecake recipe no bake shines.
This is the kind of dessert that feels right in an Australian summer, on a dinner-party table, or tucked into the fridge the night before guests arrive. It has the cool creaminess of cheesecake, the gentle depth of green tea, and that striking green colour that makes everyone think you've gone to far more effort than you did.
An Elegant Dessert Without the Oven
You get home to a warm kitchen, want a dessert that looks polished, and have no interest in baking a cheesecake in summer. A no-bake matcha version solves that beautifully. You press in a biscuit base, whisk and fold the filling, chill it, and let the fridge do the setting.
That simplicity is part of its appeal, but the magic resides in its texture. A good no-bake matcha cheesecake should land somewhere between classic cheesecake and mousse. It needs enough body to slice neatly, yet enough air to feel soft and light on the spoon. That is why technique matters so much here. If you beat everything together too aggressively, the filling can turn heavy. If you fold with a gentle hand, you keep the whipped cream airy and the final texture far more delicate.
In practical terms, it is also an easy dessert for Australian home cooks. You can make it ahead, keep the kitchen cool, and pull out a cake that feels calm and considered rather than last-minute.
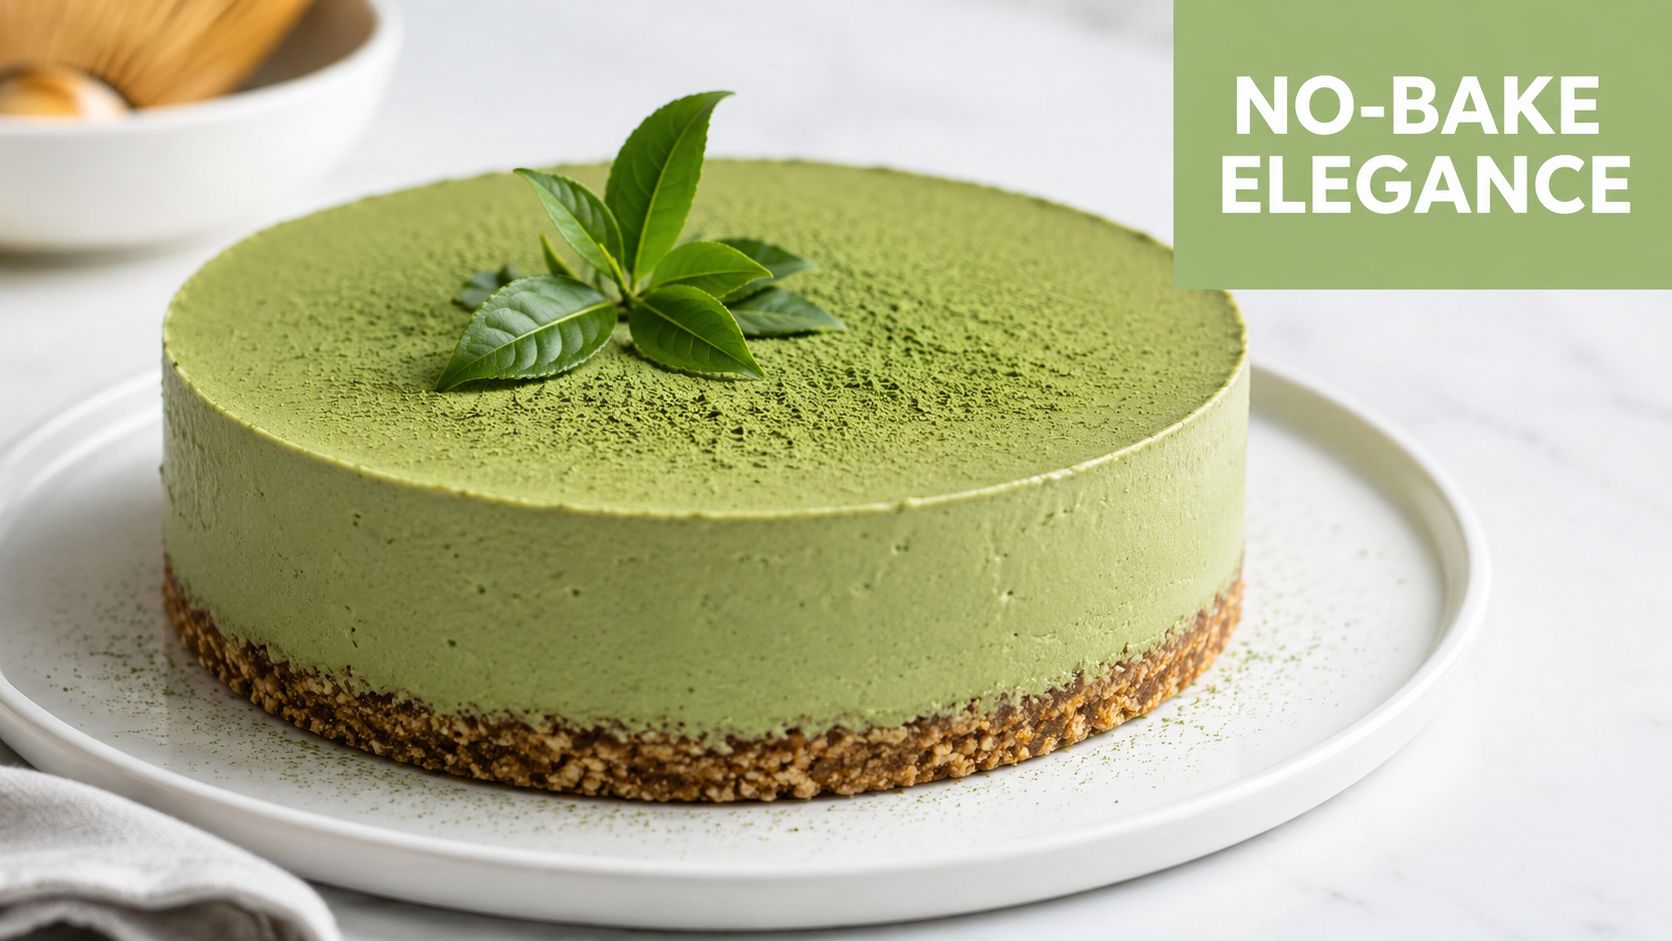
Why this dessert feels so special
Matcha does much more than tint the filling green. Good matcha brings gentle bitterness, fresh grassy notes, a little sweetness, and that clean tea finish that keeps cream cheese from feeling too rich. The result tastes poised and balanced, with richness held in check by the tea.
The choice of matcha makes a bigger difference than many recipes admit. Low-quality powder can taste flat, muddy, or sharply bitter, which is often why homemade matcha desserts disappoint. For baking and desserts, I like using organic culinary matcha powder chosen for cooking because it gives you stronger flavour and better colour without forcing you to use an excessive amount. If you want to find unique matcha from local makers, look for a powder with a fresh aroma and a vibrant green tone rather than an olive or brown cast.
The pan style is flexible too. Many home bakers use a springform tin for clean edges, but the same filling can work in a smaller pan or sliced bars if you want a different presentation.
A good no-bake cheesecake should feel cool, creamy and light on the palate, not dense and stodgy.
What success looks like
When this cheesecake is made well, each layer has a clear role. The base is firm enough to hold together, the filling is smooth and airy, and the matcha comes through clearly without any harsh, dry finish.
You should get creaminess first, then the green tea notes, then a clean finish that invites the next bite. That is what gives the dessert its elegant feel. It is refined, yes, but still very achievable at home when you use good ingredients and treat the filling gently.
Your Ingredients and Equipment Checklist
The ingredient list is short, but each item has a job. In a no-bake cheesecake, you don't have heat doing the setting for you, so texture comes from fat, temperature and technique. That's why this recipe works best when you use the proper ingredients, not lighter substitutes.
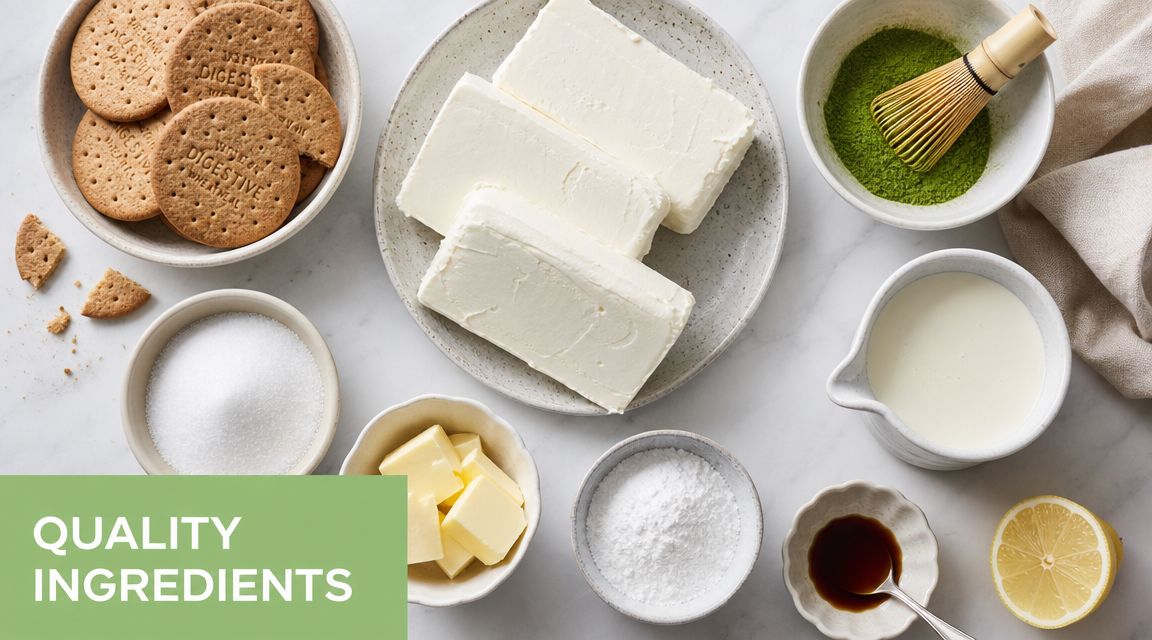
The core ingredients
For the base and filling, keep your shopping list simple:
- Plain sweet biscuits such as digestives or similar. These crush evenly and make a tidy, buttery base.
- Melted butter to bind the crumbs so the crust slices cleanly.
- Full-fat cream cheese for body, richness and structure.
- Caster sugar or icing sugar, depending on your preferred texture.
- Thickened cream or heavy cream to create the light finish.
- A little acid such as lemon juice. It brightens the filling and helps balance richness.
- Pure matcha powder for flavour and colour.
A lot of confusion starts with the cream cheese. Use block-style, full-fat cream cheese if you can. Spreadable tub versions are often softer and can leave the filling looser than you want.
Choosing the right matcha
Often, recipes become vague. One of the biggest gaps in no-bake matcha cheesecake recipes is that they often tell readers to add “matcha” without explaining how culinary grade versus ceremonial grade affects flavour, colour or bitterness, as discussed in this matcha cheesecake guide.
That matters because cheesecake is rich. The dairy can mute delicate tea notes, so your matcha needs enough presence to come through clearly.
Here's the practical rule:
- Use high-quality culinary matcha for baking and desserts. It has the strength to stand up to cream cheese, cream and sugar.
- Don't reach straight for ceremonial matcha unless you know the flavour profile you want. Ceremonial matcha is lovely whisked as tea, but in a cheesecake it can be an expensive ingredient whose subtle notes get lost.
- Sift the matcha first so you don't end up with little dark green lumps in the filling.
If you enjoy comparing tea styles before choosing one for baking, it can help to find unique matcha from local makers and notice how colour, aroma and bitterness differ from one powder to another.
For dessert use, a dedicated organic culinary matcha powder for cooking is the easiest starting point because it's designed to perform well in recipes, not just in a tea bowl.
The best matcha for cheesecake gives you a fresh green colour and a rounded tea flavour, not an aggressive grassy finish.
Equipment that makes life easier
You don't need a professional kitchen. You do need a few reliable tools:
| Tool | Why it helps |
|---|---|
| Springform pan | Releases the cheesecake neatly without damaging the sides |
| Electric mixer | Smooths the cream cheese properly |
| Mixing bowls | One for the cream cheese base, one for the whipped cream |
| Spatula | Essential for folding without knocking out air |
| Fine sieve or sifter | Breaks up clumps in the matcha |
| Food processor or rolling pin | Crushes the biscuits evenly |
A 20 cm springform pan is the usual home-baker choice in Australia and sits comfortably within the common 9-inch recipe style found in published no-bake versions.
The Step-by-Step No-Bake Method
The secret to a mousse-like cheesecake isn't luck. It comes from handling the filling in two distinct stages. Recipe sources consistently warn that the main failure point is overmixing, and that the best texture comes when you beat the cream cheese and flavourings until smooth, whip the cream separately to stiff peaks, then gently fold it in according to this technique-focused recipe.
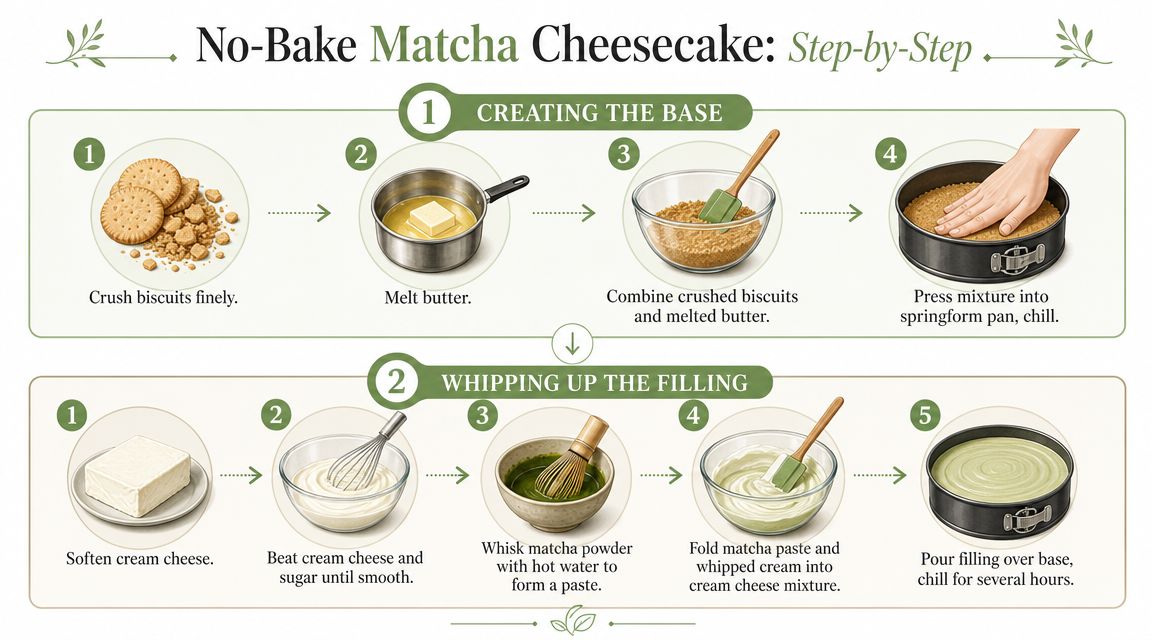
Stage one for the biscuit base
Crush the biscuits finely.
You want an even crumb, almost like damp sand once the butter is added. Large chunks make the base harder to slice neatly.Stir through melted butter.
Mix until every crumb looks coated. If some crumbs stay dry, the base won't hold together well.Press the mixture into your springform pan.
Use the back of a spoon or the base of a glass. Press firmly across the bottom and slightly up the sides if you like a taller edge.Chill the base while you make the filling.
This helps it firm up early so it doesn't shift when the filling goes in.
Stage two for the filling
Here, the texture is won or lost.
Beat the cream cheese until smooth.
It should be soft enough to mix without lumps. Cold cream cheese fights back and leaves grainy bits through the filling.Add sugar, matcha and any flavourings.
Sift the matcha before adding it. If you like, whisk the matcha with a small amount of liquid first to make a smooth paste before it goes into the bowl. That helps the colour distribute evenly.Mix until fully homogenous.
You're aiming for one smooth, green mixture with no streaks and no pockets of unmixed cream cheese.Whip the cream separately to stiff peaks.
This matters more than many readers realise. Stiff peaks mean the cream holds shape when you lift the beaters. That whipped air is what gives the cheesecake its lighter body.
For a smoother, lump-free finish in the tea itself, a matcha tea sifter is useful before the powder ever reaches the mixing bowl.
Practical rule: Stop the mixer once the cream reaches stiff peaks. Keep going and you risk turning silky cream into a grainier mixture that won't fold as cleanly.
The folding step that changes everything
Fold the whipped cream into the matcha cream cheese mixture gently.
Use a spatula, not the mixer. Scoop from the bottom of the bowl and lift over the top in broad, slow motions.Work in batches if that feels easier.
Fold in a small amount first to loosen the base, then add the rest. This makes it easier to keep the air you've whipped in.Stop once combined.
The mixture should look smooth and airy. If you keep stirring after that point, you'll deflate the whipped cream and lose the mousse-like texture.
This is the step many home bakers rush. Mixing feels faster, but folding is what protects the tiny air bubbles in the cream. Those bubbles help the filling feel soft and elegant instead of compact and heavy.
Finish the cheesecake properly
Spoon the filling over the chilled base.
Spread it gently to the edges with a spatula.Smooth the top.
A small offset spatula works well, but the back of a spoon is fine too.Cover and refrigerate.
Let the cold do the setting.
A simple workflow helps:
- Room-temperature dairy for mixing makes the filling smoother.
- Cold cream for whipping gives better volume.
- Gentle folding at the end protects the final texture.
If you keep those three ideas straight, this dessert becomes very reliable.
Achieving the Perfect Set and Finish
You lift the springform tin, slide in the knife for the first slice, and hope the centre holds. This is the stage where a no-bake matcha cheesecake becomes either beautifully mousse-like or a little too loose. The difference usually comes down to time, temperature, and restraint.
This cheesecake sets in the fridge as the fats in the cream and cream cheese firm up and the airy filling settles into a stable structure. Cold does the work slowly, which is why a rushed chill often gives you soft, untidy slices. An overnight rest gives the cleanest result, but a longer daytime chill can still work well if the filling was folded gently and whipped to the right stage earlier.
Texture matters here just as much as appearance. A good no-bake matcha cheesecake should hold a neat edge on the plate, then soften quickly on the fork. That is the sweet spot. You want a dessert that feels light, almost like a set cream, not dense or rubbery.
What a proper set looks like
The outer edge should look smooth and hold its shape when the ring is removed. The centre may have a slight wobble, but it should not ripple like liquid. If you press the top very lightly with a clean fingertip, it should feel softly springy.
That gentle wobble can confuse home bakers. It does not mean failure. It means the filling is chilled yet still delicate, which is exactly what gives this cheesecake its mousse-like character.
How to finish it neatly
Keep the decoration simple so the matcha can stay the star, both in flavour and colour. High-quality organic culinary matcha earns that spotlight. It gives you a fresher green hue and a fuller tea flavour, without the dull colour or harsh bitterness that can make other versions taste flat.
A few finishing options work especially well:
- A fine dusting of matcha just before serving for a clean, classic look
- Fresh raspberries for brightness and contrast
- White chocolate shavings for a softer, sweeter finish
- Black sesame seeds for a nutty accent and a striking dark detail
Use a light hand. Too many toppings can hide the clean flavour of the tea and make the dessert look busy.
Small finishing habits that make a big difference
For the cleanest slices, warm your knife in hot water, wipe it dry, and clean it between cuts. Chill the cheesecake fully before dusting with matcha, or the powder can darken in patches on the damp surface. If you are making this for guests, topping it shortly before serving keeps the finish sharp and fresh.
If you enjoy learning how fine powders behave in desserts, instant coffee baking techniques offer useful ideas about dissolving flavour evenly without creating gritty pockets. The principle is similar with matcha. A smooth, even finish starts with careful handling from the beginning and pays off at the end.
Patience gives you the final polish here. Let the chill do its job, keep the finish elegant, and your cheesecake will slice with confidence and taste as lovely as it looks.
Troubleshooting and Recipe Variations
Even when the recipe is straightforward, small things can throw the texture off. The good news is that most problems come from one of a few easy-to-fix causes.
If something went wrong
The filling seems too soft
The cream may not have been whipped firmly enough, or the cheesecake may need more time in the fridge.The cheesecake tastes bitter
The matcha may be too strong for the amount of dairy and sugar, or the powder itself may be lower quality and more astringent.The base crumbles when sliced
It usually needs a little firmer pressing next time. Very uneven biscuit crumbs can also make the crust less stable.The filling looks lumpy
Cream cheese that was too cold is often the culprit. Beat it until smooth before adding anything else.
Easy ways to adapt it
This recipe is flexible enough to suit different dietary needs:
- Gluten-free version uses gluten-free biscuits for the base.
- Lower-sugar option works best with a powdered sweetener so the filling stays smooth rather than gritty.
- Vegan version can be made with vegan cream cheese and coconut cream or a whipped plant-based alternative, though the final texture may differ.
If you enjoy flavour layering in desserts, it's worth studying methods from other baking niches too. For example, instant coffee baking techniques offer useful ideas about dissolving bold powders smoothly into creamy mixtures, and that same thinking can help when you're trying to avoid matcha clumps or harsh pockets of flavour.
Most no-bake cheesecake problems aren't disasters. They're texture clues. Once you know what caused them, the next one is usually excellent.
How to Serve and Pair Your Creation
You have chilled the cheesecake, lifted out a clean slice, and that soft green centre looks almost like a set matcha mousse. This is the moment to keep everything else simple, so the texture stays the star and the flavour of the matcha stays clear.
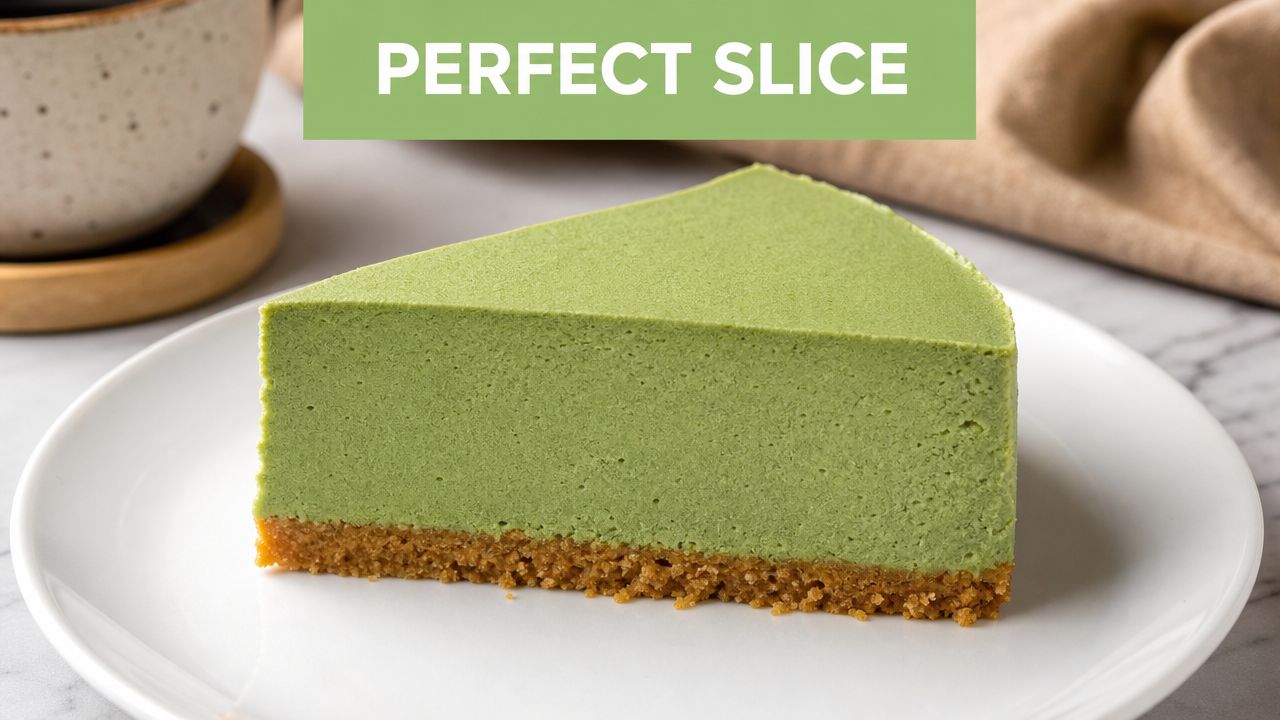
For the neatest slices, use a sharp knife dipped in hot water, then wipe it dry before cutting. Clean the blade between each slice too. It works like cutting custard with a warm spoon. You glide through the filling instead of dragging it, which keeps those layers distinct and protects that light, airy structure you worked so carefully to build.
Serve each slice well chilled, but not ice-cold straight from the back of the fridge. A few minutes at room temperature lets the creaminess soften slightly, and the matcha becomes easier to taste. This matters even more if you used a good organic culinary matcha, because its grassy sweetness and vivid colour deserve room to show themselves. Lower-quality matcha can taste flat or bitter, so keep garnishes and drinks restrained rather than piling on extra sweetness to cover it.
Pairings that make the dessert feel complete
The best pairing refreshes your palate between bites. Sparkling water with lemon, a cold yuzu drink, or lightly sweetened iced tea all do that job beautifully because they cut through the richness without fighting the tea notes.
An iced matcha drink can work well too, as long as it is lighter and less creamy than the cheesecake itself. If you enjoy matching dessert with a tea-based drink, this guide on how to make an iced matcha latte is a lovely companion read.
For garnish, less is usually more. A small dusting of matcha, a few white chocolate curls, or a couple of fresh raspberries give contrast without distracting from the filling. White chocolate is especially good with matcha because its sweetness rounds out any faint astringency and lets the green tea flavour feel softer and fuller. If you want to add coloured chocolate details or a decorative drizzle, DBakerAid™'s expert chocolate coloring advice is a helpful resource.
A quick visual guide can help before you plate your own.
A thoughtful plate is enough. One clean slice, one restrained garnish, one fresh drink on the side. That balance lets the mousse-like texture and the clean flavour of quality matcha come through clearly.
If you'd like to make this with premium organic matcha chosen for both drinking and kitchen use, explore Pep Tea for Australian matcha and tea inspiration, including recipe ideas, iced matcha guides and pantry staples for your next bake.
Immune Booster Drink: Matcha & Kombucha Recipes

Most advice about an immune booster drink starts in the wrong place. It starts with the fantasy that one glass, one powder, or one exotic ingredient can somehow do the heavy lifting for your immune system.
That's not how good drinks work, and it's not how the body works either.
The strongest everyday options are much less glamorous. They hydrate well. They keep sugar in check. They use ingredients with a real nutritional role, such as vitamin C, tea catechins, and live cultures. They also taste good enough that you'll keep drinking them. In my experience as a tea brewer in the Hunter Valley, that last part matters more than people think. A functional drink that's unpleasant, gritty, or overloaded with sharp botanicals usually ends up as a one-off experiment, not a habit.
Rethinking the Immune Booster Drink
Search for an immune booster drink and you'll find a lot of noise. Bright labels, loud promises, and recipes built around whatever ingredient is trending this month.
The better question is simpler. Does the drink support daily wellness in a way that's realistic, low in sugar, and enjoyable enough to become part of your routine?

In Australia, that shift is already happening. By the mid-2020s, immune support had become one of the top functional-beverage purchase drivers in Australia, and immune-health claims accounted for about 61% of new functional beverage introductions globally, according to Beverage Industry's report on immune-support beverages. That helps explain why tea-based wellness drinks now show up as everyday fridge staples rather than winter-only comfort drinks.
Why the old advice falls short
A lot of popular recipes make two mistakes.
- They chase novelty: Turmeric, cayenne, charcoal, herbal blends, syrups, and juices all thrown together doesn't automatically create a better drink.
- They forget the base: If the drink is sugary, poorly balanced, or dehydrating, the “functional” ingredients don't rescue it.
- They ignore consistency: One intense morning shot won't outdo steady habits such as hydration, sleep, balanced meals, and lower sugar intake.
A sensible immune booster drink isn't magic. It's a clean, repeatable drink built on hydration and ingredients that earn their place.
What actually deserves space in your glass
For a practical Australian kitchen or café, two of the most useful bases are matcha and kombucha.
One gives you a tea-based format with naturally occurring compounds people already enjoy drinking hot or cold. The other gives you a fermented base that can fit neatly into a low-sugar, flavour-forward drink when it's brewed and handled properly.
Here's the no-nonsense version:
| Base | What it does well | Common mistake |
|---|---|---|
| Matcha | Easy to pair with citrus, ginger, and water or milk alternatives | Turning it into a dessert with too much sweetener |
| Kombucha | Adds acidity, complexity, and live-culture potential | Choosing overly sweet versions or treating storage casually |
Daily immune support isn't built from hype. It's built from good brewing, sensible formulation, and ingredients that do more than decorate the label.
The Real Heroes Behind Immune Support
The most credible drinks don't “boost” immunity in some dramatic, superhuman way. They support normal function by delivering something your body can use.
That's why I trust drinks built from known components, not vague wellness language.
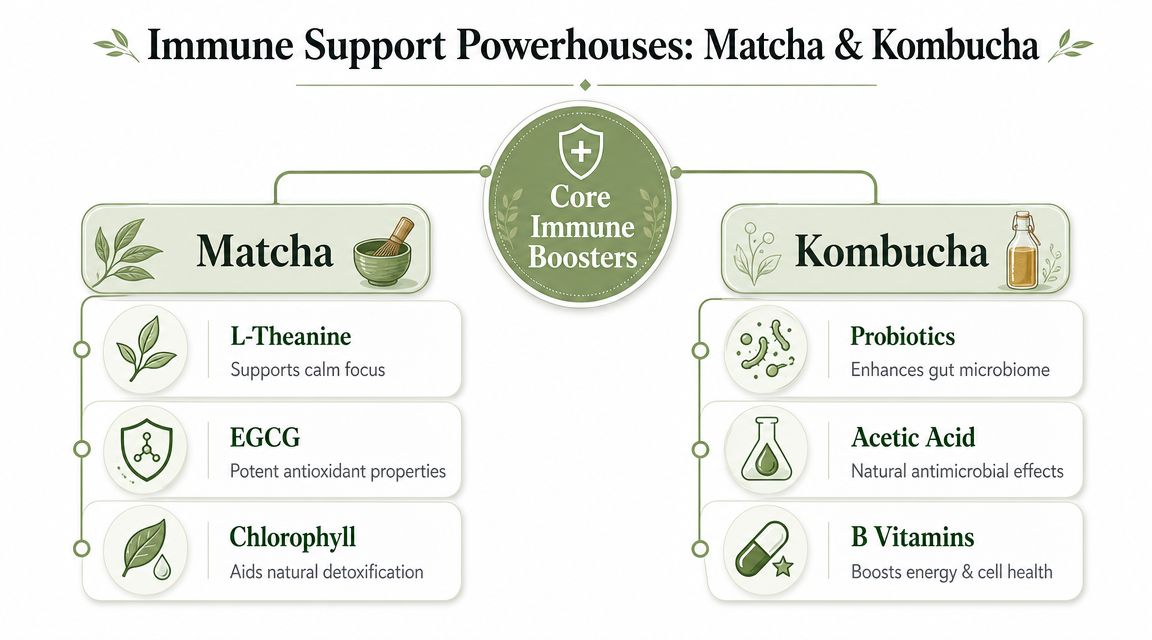
A useful summary comes from Harvard's nutrition and immunity guide, which notes that balanced eating patterns and lifestyle habits matter most, while evidence around functional beverages is strongest when they provide known nutrients. The same source highlights that green tea catechins such as EGCG may improve immunological function, and that probiotic-rich foods can enhance mucosal and systemic immunity.
What matcha brings to the table
Matcha works because it's more than green-coloured powder. A well-made matcha drink gives you tea compounds in a concentrated, drinkable format.
Three components matter most in practice:
- EGCG: This is the green tea catechin most often discussed in relation to matcha's functional value.
- L-theanine: It's one reason matcha tends to feel smoother and more composed than a standard high-caffeine drink.
- Chlorophyll and whole-leaf intake: Because matcha is whisked into the drink rather than steeped and discarded, you consume the leaf material itself.
For home drinkers, that means quality matters. Dull, stale matcha tastes bitter and grassy in the wrong way. Bright, fresh matcha is cleaner, softer, and much easier to build into a low-sugar drink.
What kombucha contributes
Kombucha's value is different. It's not there to mimic tea. It brings fermentation character, acidity, and in properly made versions, live cultures.
That matters because gut health and immune function are closely connected in everyday wellness discussions. A kombucha-based drink can be a smart format when you want something cold, savoury-sharp, and less heavy than a smoothie or juice.
The best kombucha recipes don't bury the brew. They use kombucha as the backbone, then add fresh elements around it.
Known actives beat vague promises
People often ask whether a drink needs a long list of ingredients to count as functional. Usually, no.
A shorter ingredient list often works better if each part has a clear purpose:
- A water-based or tea-based foundation for hydration.
- A vitamin C source, such as lemon or orange.
- A meaningful functional layer, such as matcha or a well-made kombucha.
- Low sugar, so the drink still fits a health-oriented routine.
Here's a simple way to understand it:
| Ingredient type | Why it belongs |
|---|---|
| Tea catechins | Give tea-based drinks a functional role beyond flavour |
| Probiotic foods or drinks | Support gut-focused wellness when handled properly |
| Citrus | Adds brightness and a familiar vitamin C source |
| Fresh ginger or mint | Improve flavour and make low-sugar drinks more satisfying |
If a drink can't explain why each ingredient is there, it usually isn't well designed.
Recipe The Energising Matcha Immunity Elixir
A good matcha-based immune booster drink should wake you up without tasting like a punishment. It needs brightness, a little warmth, and a finish clean enough that you'd happily make it again tomorrow.
This is the version I reach for when I want something warming but not heavy.
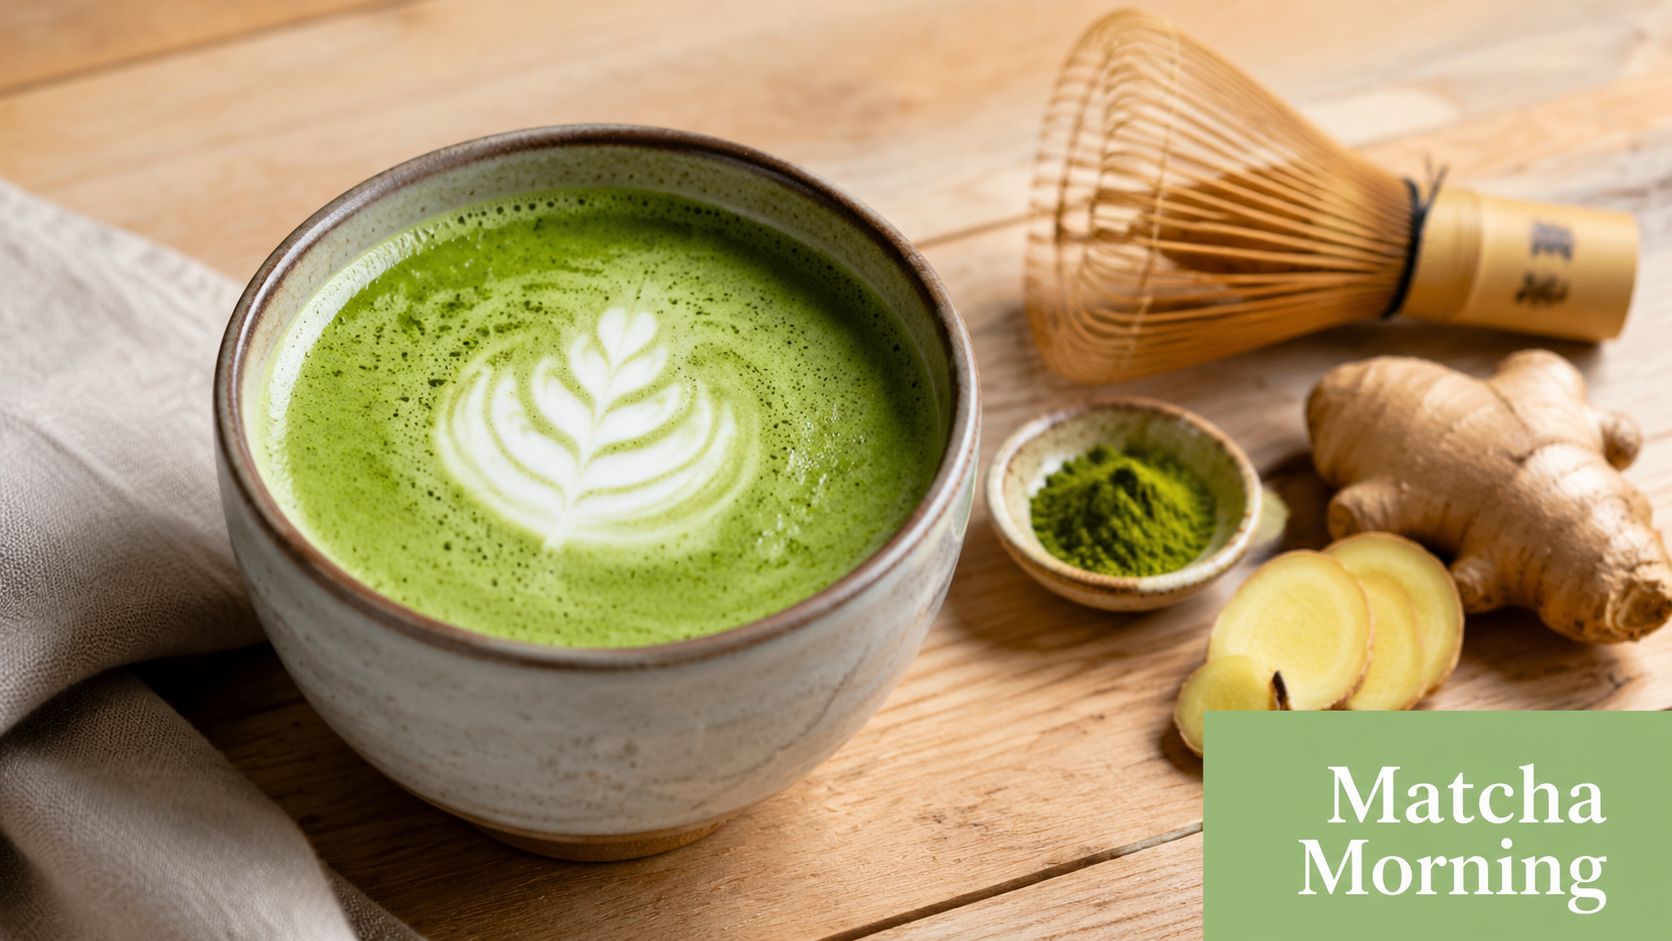
Ingredients that pull their weight
You don't need a crowded recipe. You need one with purpose.
For one serve:
- Matcha powder
- Warm water
- Fresh lemon juice
- Freshly grated ginger
- Optional milk or plant milk if you want a softer latte-style finish
- Optional small amount of honey if you need it sweeter
The logic is straightforward. Matcha gives the drink its tea-based functional backbone. Lemon adds brightness and vitamin C. Ginger rounds out the flavour and brings warmth, which makes the whole drink feel more satisfying without relying on sugar.
How to make it properly
- Sift the matcha into a bowl or cup. This prevents clumps and gives you a smoother texture.
- Add a small amount of warm water. Not boiling. Too much heat can roughen the flavour.
- Whisk until glossy and foamy. A bamboo whisk is ideal, but a small handheld frother works.
- Stir in lemon juice and a little fresh ginger. Add gradually so the citrus sharpness doesn't dominate.
- Top with more warm water for a lighter drink, or warm milk for a creamier version.
- Taste before sweetening. Often the ginger and lemon make it lively enough without much else.
Where most recipes go wrong
The biggest mistake is overbuilding. Too many spices, too much syrup, or a huge pour of fruit juice can flatten matcha's fresh, green character.
Another common problem is sugar. A useful warning from this PMC review on functional beverages is that wellness drinks often rely on “fairy dust” levels of botanicals while also carrying high sugar loads that undermine health goals. That's exactly why I prefer a low-sugar format with a tea base and a few fresh additions.
Practical rule: If your “healthy” matcha drink tastes like melted dessert, rebuild it from scratch.
A few smart variations
If you make this often, keep the structure the same and change the edges.
- For hot mornings: Use just water, lemon, ginger, and matcha for a clean finish.
- For a café-style cup: Add textured milk and keep the lemon very light so the drink stays balanced.
- For warmer weather: Shake it cold over ice instead of serving it hot.
If you want a chilled version with better texture, this iced matcha tea recipe is a useful starting point. The same low-sugar thinking still applies.
A short visual guide helps if you're still dialling in whisking technique:
Flavour notes worth noticing
This drink should taste lively, not aggressive.
You want:
- Fresh grassy sweetness from the matcha
- Citrus lift rather than sourness
- Ginger warmth without a harsh burn
- A dry, clean finish that leaves you ready for another sip
When those pieces line up, the drink feels functional because it's well made, not because the label shouts at you.
Recipe The Probiotic Kombucha Zing
A kombucha-based immune booster drink should feel crisp and alive. Not sticky, not flat, and not overloaded with juice.
The best versions build on the kombucha's own acidity and fizz instead of fighting it.

Build around the base, not around sugar
Start with a plain, ginger, or lime-leaning kombucha that isn't trying to pass as soft drink. From there, add small fresh elements that lift the drink without burying the fermentation.
For one glass:
- Chilled kombucha
- A few muddled berries
- Fresh mint leaves
- A squeeze of lemon or lime
- Ice
- Optional slice of cucumber for a cleaner finish
This works well because the berries add depth and freshness without requiring much quantity. Mint cools the palate. Citrus sharpens the edges.
Method that keeps the drink bright
Use a tall glass and work gently. Kombucha loses its charm fast if you beat the bubbles out of it.
- Muddle lightly: Press the berries and mint just enough to release flavour.
- Add ice next: This protects the carbonation when you pour.
- Pour the kombucha slowly: Let it run down the inside of the glass.
- Finish with citrus: Add just enough to lift the aroma.
You should still taste the tea and fermentation underneath the fruit.
What to avoid
Kombucha drinks become clumsy when people treat them like smoothies or mocktails loaded with syrup.
Skip these habits:
- Large juice pours that swamp the base
- Heavy sweeteners that make the finish sticky
- Too many herbs competing for attention
- Warm storage after opening, which dulls flavour and can affect the drink's behaviour
Keep kombucha recipes sharp and restrained. The brew should still taste like kombucha when you're done.
For a broader look at what makes kombucha appealing in the first place, this overview of the benefits of kombucha is a handy read.
Two useful serving styles
Not every kombucha drink needs the same shape. For home use and café service, these two styles tend to work best.
| Style | Best for | Flavour profile |
|---|---|---|
| Berry and mint spritz | Afternoon refreshment | Bright, tart, slightly herbal |
| Ginger citrus highball | Cooler weather or food pairing | Zesty, warming, more savoury |
The ginger citrus version is especially good with a drier kombucha. You get a pleasant bite without needing extra sugar.
Why this recipe earns the “functional” label
This drink makes sense because every part has a job. The kombucha gives the structure. The citrus freshens it. The herbs and fruit make it easier to enjoy regularly.
That's the standard I use for any immune booster drink. If it hydrates reasonably well, keeps sugar under control, and starts with a quality fermented base, it's already doing more than most flashy wellness blends.
Menu Ideas for Australian Cafés and Retailers
Cafés don't need another syrup-heavy “wellness” special. They need drinks that staff can make consistently, customers can understand quickly, and fridges can hold safely.
That's where matcha and kombucha stand out. Both already have flavour identity. Both fit non-alcoholic menus naturally. Both can be positioned as everyday wellness drinks without drifting into claims you can't support.
Build a menu around repeatability
For cafés, the winning move is restraint. Keep the menu language clean and the prep simple.
A practical line-up might include:
- Hot matcha ginger cup: Matcha, warm water, fresh ginger, light citrus
- Iced matcha citrus spritz: Matcha over ice with lemon and sparkling water
- Kombucha berry cooler: Kombucha, muddled berries, mint
- Ginger kombucha highball: Kombucha with fresh lime and lots of ice
The commercial advantage is that these drinks share ingredients. Ginger, mint, lemon, lime, and berries can move across multiple menu items, which helps reduce waste and keeps service organised.
Say less on the menu, but say it better
In Australia, kombucha and other fermented drinks need disciplined handling in commercial settings. As noted by guidance referenced for fermented beverage controls, fermented beverages like kombucha must be managed with validated HACCP controls, including cold-chain integrity and microbiological verification, because ambient distribution can alter sugar, carbonation, and alcohol levels.
That matters for menu wording too. Don't promise disease prevention. Don't imply a single drink can “fix” immunity. Describe the drink for what it is.
Good menu phrasing sounds like this:
- Low-sugar matcha drink with citrus and ginger
- Live-culture kombucha served chilled with fresh mint and berries
- Tea-based wellness drink with a clean, bright finish
Poor menu phrasing usually overreaches.
Customers trust cafés that explain drinks clearly. They don't trust menus that read like supplement ads.
Batch prep without wrecking quality
For café service, batch what's stable and finish what's fresh.
Batch these:
- matcha concentrate for same-day service
- pre-washed mint
- sliced citrus
- ginger infusion
Finish to order:
- whisked hot matcha
- sparkling or carbonated elements
- opened kombucha
- muddled fruit
This keeps flavour lively and reduces the chance of flat, tired drinks during the lunch rush.
Retail fridges and social promotion
Retailers should merchandise these drinks as part of a better daily-drinks habit, not a panic purchase for cold season. Place them near lunch items, grab-and-go snacks, or non-alcoholic alternatives.
For cafés posting short-form drink content, visual consistency matters almost as much as flavour. If you're filming pours, foam, and garnish shots for Instagram, this guide to SleekPost for Reels success is a useful resource for making the drinks look polished without overcomplicating the shoot.
A clean menu, cold storage discipline, and simple visual storytelling go a long way.
Sourcing Storing and Important Safety Notes
A well-made immune booster drink starts before the first pour. It starts with what you buy, how you store it, and how properly you use it.
Choose ingredients that show their quality
With matcha, colour tells you a lot. Look for a vibrant green powder with a fresh aroma and a smooth finish when whisked. Stale matcha tends to look dull and taste flat or bitter.
With kombucha, read for live cultures, a sensible ingredient list, and a lower-sugar profile. If the bottle tastes more like soft drink than fermented tea, it probably won't behave like a functional drink base either.
Store for flavour and function
Matcha is delicate. Heat, air, moisture, and light all work against it. Keep it sealed and cool, and don't leave the packet open while you fuss around making breakfast.
Kombucha needs proper refrigeration and sensible handling after opening. If you're checking acidity or refining your own brewing process at home, a reliable digital pH meter for beverage testing is one of the most useful tools you can keep in the kitchen.
Safety matters more than hype
A few grounded reminders are worth keeping in mind:
- Caffeine counts: Matcha contains caffeine, so some people will want smaller serves or earlier timing in the day.
- Fermented drinks need care: Home-brewed or poorly stored kombucha can be unpredictable.
- More isn't always better: Loading a drink with extra powders and extracts doesn't automatically make it smarter.
- General support is the right frame: These drinks can fit a wellness routine, but they aren't a substitute for medical care, sleep, balanced eating, or hydration.
Buy fewer ingredients, but buy better ones. Quality is easier to taste in simple drinks.
If you're making these at home, keep them enjoyable. If you're serving them professionally, keep them consistent. That's the difference between a functional drink people trust and a trend that disappears after one season.
If you'd like to put these ideas into practice, explore Pep Tea for premium organic matcha, Australian-brewed sugar-free kombucha, and practical tea gear that makes everyday wellness drinks easier to get right.