Matcha Tea Brush: Your Ultimate Guide to Whisking
You’ve probably done this before. You buy beautiful matcha, warm the bowl, add water, then stir with a spoon or attack it with a whisk that feels far too delicate for the job. The result looks dull, tastes flat, and leaves little green clumps hugging the side of the bowl.
That’s usually the moment the matcha tea brush starts to make sense.
A proper bamboo whisk, or chasen, isn’t decorative extra gear. It’s the tool that turns powdered tea and water into something silky, airy, and balanced. It helps with texture, helps with mixing, and it helps you slow down enough to do matcha properly. In Australian kitchens and cafés, that matters even more because our humidity, storage conditions, and hard water can be rough on bamboo tools if you treat them like ordinary utensils.
If you’ve ever wondered which whisk to buy, how to use it without breaking the prongs, or why your brush keeps going mouldy in a coastal cupboard, you’re in the right place.
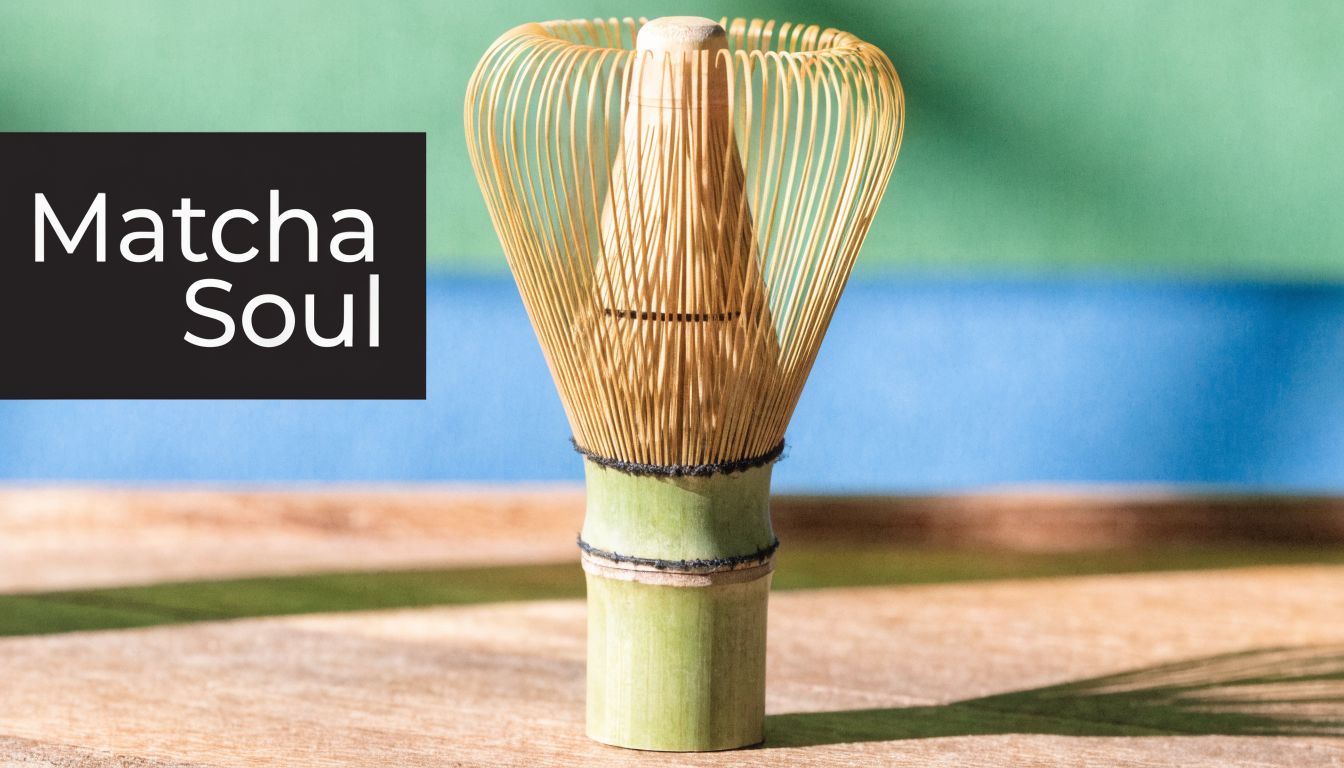
More Than Just a Whisk The Soul of Your Matcha Ritual
The first time many people see a chasen, they hesitate. It looks fragile. The fine bamboo tines seem almost too delicate to touch, let alone move quickly through a bowl of tea. But once you use one properly, you realise it’s built for a very specific job.
The matcha tea brush creates the desired texture of “good matcha”. Not just mixed. Properly suspended, lightly foamed, and smooth across the tongue. A spoon can combine powder and water. A bamboo whisk brings the bowl to life.
There’s also something practical hidden inside the ritual. When you pick up a chasen, you naturally pay attention to temperature, bowl shape, and movement. You stop rushing. That’s often the difference between a harsh, grassy cup and one that tastes creamy and rounded.
Why the tool changes the drink
A good chasen is hand-carved from a single bamboo stalk. In traditional crafting, the bamboo is split into fine tines, then shaped so the tips flex in water and move quickly through the bowl. That flexibility is the secret. The whisk doesn’t mash matcha against the bowl like a kitchen whisk might. It suspends the powder through fast, light movement.
A matcha tea brush works best when it barely skims the liquid, not when it grinds against the bowl.
For home drinkers, that means a smoother morning cup. For cafés, it means a more consistent base for straight matcha or lattes. In both cases, the whisk is doing more than mixing. It’s controlling mouthfeel.
Why Australians need a slightly different mindset
A lot of online matcha advice assumes stable storage conditions and softer water. Australian homes don’t always offer either. If you live in coastal NSW, your whisk may stay damp longer than expected. If you’re in a city with hard water, the bamboo can age faster than you think. So learning the ritual isn’t about being precious. It’s about helping the tool last and helping the tea taste right.
That’s where pleasure begins. Once the matcha tea brush stops feeling mysterious, it becomes one of the simplest and most satisfying tools in your kitchen.
How to Choose Your Perfect Matcha Tea Brush
You’re standing in an Australian kitchenware shop or scrolling late at night, and suddenly every whisk looks the same. One has 80 prongs. Another has 100. One looks pale and tidy. Another looks rustic and “handmade,” but the listing says almost nothing. That confusion is normal. A good choice gets easier once you know what changes the cup.
Three things matter most. Prong count, craftsmanship, and whether the seller gives clear information about care and sourcing.
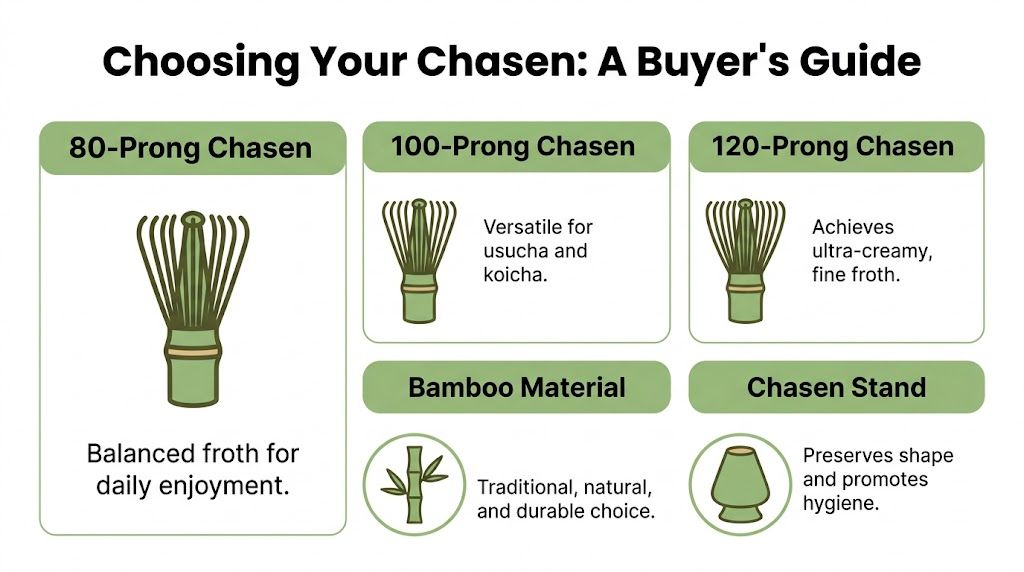
Start with prong count
Prong count changes how the whisk moves through water and matcha. More prongs usually create finer foam with less effort. Fewer prongs often feel a little firmer in the hand and can suit thicker mixes or latte prep.
A simple way to read it is below.
| Matcha Tea Brush (Chasen) Comparison |
|---|
| Prong Count | Ideal For | Foam Level | Best Matcha Grade |
|---|---|---|---|
| 80-prong | Daily matcha and lattes | Balanced froth | Ceremonial or culinary depending on style |
| 100-prong | Usucha, or thin matcha tea | Fine, lively foam | Ceremonial grade |
| 120-prong | Very delicate whisking and ultra-fine froth | Creamier foam | High-quality ceremonial grade |
For many home drinkers, a 100-prong chasen is the easiest place to start. It gives you enough fine movement to make a proper bowl of usucha without feeling fussy. If your goal is that light foam on top and a smooth body underneath, this is usually the safest choice.
If you mainly make matcha lattes, an 80-prong whisk can be practical. It often feels a bit sturdier during everyday use, especially if you are whisking a slightly thicker base before adding milk.
A 120-prong whisk suits drinkers chasing a very fine foam and using high-grade matcha regularly. It can be lovely, but it is not the automatic “better” option for beginners. More delicate tines also demand gentler care, which matters in Australian homes where humidity can slow drying and shorten a whisk’s life if you store it carelessly.
Look closely at craftsmanship
A good chasen is carved from a single piece of bamboo. The tines should look even and neatly spaced. The tips should be slender and slightly curved rather than blunt or splintered.
The easiest comparison is a paintbrush. A brush with tidy, flexible bristles gives you control. One with rough, uneven bristles leaves streaks. A chasen behaves the same way in the bowl.
If the whisk looks ragged before you even use it, it will usually feel rough in the water too. That can mean weaker foam, more clumping, and more pressure against the bowl than you want.
Australian buying advice that generic guides skip
This part gets missed a lot.
A whisk that works beautifully in a dry showroom may behave differently in Brisbane humidity, a Sydney coastal kitchen, or a Melbourne café using mineral-heavy tap water. Australian conditions change what “good value” means. Sometimes the better buy is not the fanciest whisk. It is the one you can dry properly, store properly, and replace without guessing.
Hard water can leave bamboo looking tired sooner. High humidity can keep the inner tines damp long after the outside seems dry. If you live in a humid area, a whisk stand is not just a nice extra. It helps the shape hold while the whisk dries more evenly. If your local water is hard, you may also want to rinse the whisk briefly with filtered water after use to reduce mineral buildup.
Ask better sourcing questions
Many product pages say “natural bamboo” and stop there. That tells you very little.
A better retailer explains where the whisk is made, what style it suits, and how to care for it in real kitchens. The Tezumi guide to chasen is useful here because it shows how much variation exists in bamboo whisks and why details matter.
Use these checks before you buy:
- Purpose. Is it described for usucha, koicha, or general daily use?
- Construction. Does the listing say it is carved from one piece of bamboo?
- Photos. Can you clearly see the tine shape and centre coil?
- Care guidance. Does the seller explain soaking, drying, and storage?
- Australian practicality. Do they mention a whisk stand, humidity, or water conditions?
Buying rule: match the whisk to your routine, your water, and how often you drink matcha.
If you want to compare tools in one place, Pep Tea lists matcha tea accessories with the core preparation pieces Australians usually need.
A simple buyer profile guide
A home drinker making one bowl most mornings will usually do well with a 100-prong whisk.
A latte-focused café may prefer an 80-prong option for repeat service and slightly thicker mixes.
A gift buyer should look past decorative packaging. Clear care instructions and a well-shaped bamboo whisk are more useful than a flashy set with a weak tool inside.
The right matcha tea brush should feel suited to your habits, not just traditional on a product page.
How to Prepare and Season Your New Chasen
On a sticky Brisbane morning or in a Melbourne kitchen with hard tap water, a new chasen can feel confusing. The tines look tight. The bamboo feels stiff. Nothing about it resembles the soft, open whisk you see in matcha videos. That is normal. A new whisk needs a short preparation ritual before it touches tea.
The goal is simple. You are helping dry bamboo absorb a little warmth and moisture so the prongs can flex safely. Bamboo works like a wooden spoon before first use. Straight from storage, it is drier and less forgiving than it will be after a gentle soak.
The quick blooming ritual
Before your first bowl, fill your chawan or a small bowl with hot water that feels just below boiling. Warm, not furious. Place only the tine end of the chasen into the water and leave it there briefly, until the outer tines begin to open and relax. Then lift it out, shake off excess water, and empty the bowl.
A simple routine looks like this:
- Add hot water to your bowl.
- Lower in the prongs, not the handle.
- Soak briefly, just long enough for the tines to soften.
- Check that the outer tips have spread slightly.
- Empty the bowl and start preparing your matcha.
That short soak matters in Australia more than many overseas guides admit. Hard water can leave mineral residue on bamboo over time, and very humid homes can make storage conditions unpredictable. A quick pre-soak prepares the whisk for use without overloading the bamboo with water.
Common mistakes with a new whisk
The first mistake is over-soaking. Leaving a chasen in water for too long weakens the bamboo fibres and can warp the shape.
The second is using boiling water. Excess heat stresses fine tines, especially on a delicate 100-prong whisk.
The third is trying to fix clumpy matcha with force. If your powder has lumps, the whisk ends up doing heavy mixing work it was never meant to do. A fine matcha tea sifter helps here by breaking up clumps before the bamboo starts moving.
A good comparison is warming up a tendon before exercise. You want flexibility, not strain.
Practical rule: store your chasen dry, then soften the tines briefly right before use.
If your local water is very hard, use filtered water for the soak when you can. If your kitchen is humid, let the whisk dry fully after use instead of leaving it enclosed in a drawer or container while damp. Those two small habits make a noticeable difference in how evenly the tines open and how long the chasen keeps its shape.
A properly seasoned chasen feels less brittle, moves more freely, and gives you a much better start on the first whisk.
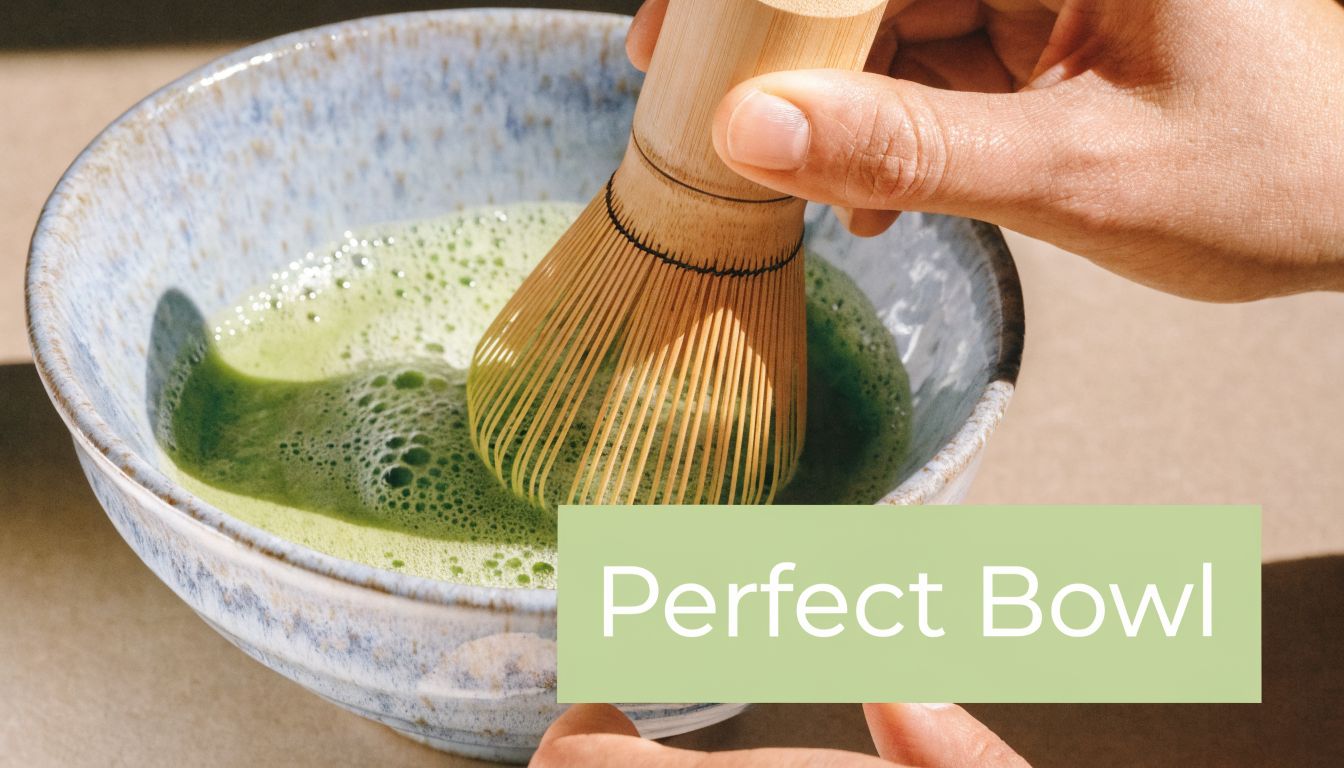
The Art of Whisking a Perfect Bowl of Matcha
You have the bowl ready, the matcha measured, and the whisk softened properly. Then comes the part that decides whether your tea tastes creamy and rounded or flat and rough. The difference usually comes down to motion, water, and restraint.
A chasen works like a small bamboo engine. Its job is to suspend fine powder evenly through the water and build a soft layer of foam near the surface. It does that best with a light wrist and quick movement through the upper part of the bowl, not by pressing into the ceramic.
The basic usucha method
For a classic bowl of usucha, start with sifted matcha in a wide bowl, add a small amount of hot water, and whisk before topping up. A practical guide is 2g of matcha, 50ml of water at 75 to 80°C to start, then the remaining water once the paste has loosened and the surface begins to foam. Keep the whisk about 1 to 2cm above the base so the tines can flex freely instead of scraping.
If you are used to stirring tea, this feels different at first. The movement is compact and fast, mostly from the wrist. Your forearm stays fairly quiet.
A simple way to remember the technique
- Sift first so the whisk is not fighting lumps.
- Start with a small amount of water so the matcha disperses evenly.
- Whisk with the wrist for speed and control.
- Work near the surface zone where fine foam forms.
- Finish with a gentler pass to even out the top.
The motion that creates froth
The classic pattern is a fast W or M motion. That shape keeps the whisk moving across the bowl without grinding the tips into the bottom. Circular stirring tends to leave heavier liquid below and larger bubbles on top, a bit like stirring cocoa and wondering why the powder still sits in patches.
The bowl gives you useful feedback. A soft brushing sound usually means the whisk is floating where it should. A scratchy sound means the tines are hitting the base too often.
This matters in Australia because local conditions can affect texture. In hard-water areas, minerals can flatten flavour and make foam a little less fine. In humid kitchens, especially in coastal homes and busy cafés, matcha can clump faster once the tin is open. If your whisking feels correct but the bowl still looks uneven, the issue may be the powder or the water rather than your hand.
A matcha whisk stand for drying and shape retention also helps the whisk keep its open form between uses, which makes the next bowl easier to froth consistently.
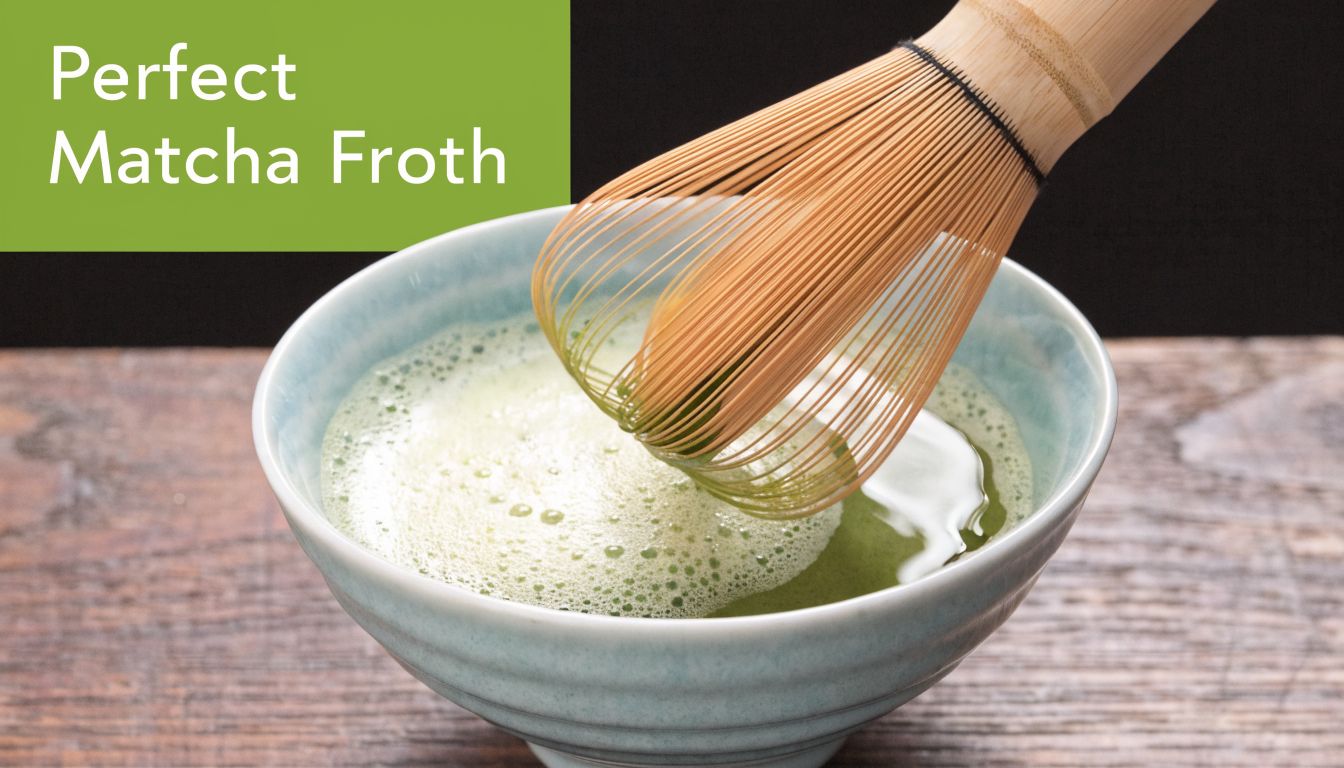
What the foam should look like
Good usucha foam is fine-bubbled and even, with a soft sheen across the top. Velvety is the right target.
A few larger bubbles around the edge are not a disaster. They usually mean the movement was slightly uneven or the final whisking pass was too forceful. Lighter, quicker strokes often fix that faster than whisking longer.
A short demonstration helps if you’re more visual:
Water temperature matters more than people think
The whisk often gets blamed for bitterness, but overheated water is a common cause. Matcha prepared around 75 to 80°C usually tastes sweeter, fuller, and less sharp than matcha hit with freshly boiled water.
That point is especially useful in Australian homes where kettles boil fast and many people pour immediately. If you do not have a temperature-controlled kettle, let the water sit briefly after boiling, or pour it into another vessel first to drop the heat before it meets the tea.
Small technique changes that improve the bowl
A few adjustments make a noticeable difference:
- Keep the whisk lifted slightly so the tines glide instead of grind.
- Build speed in the middle of the whisking, where the foam forms fastest.
- Stop once the surface looks fine and even rather than chasing extra froth.
- Use a wider bowl for usucha so the whisk has room to move.
For café prep, the same rules apply. A latte still needs a smooth matcha base before milk goes in. Milk can soften the taste, but it cannot undo clumps or poor suspension.
Good whisking feels quick because it is precise. Light hand, loose wrist, correct water, and a bowl that sounds quiet while you work. That is what turns powdered tea into a smooth, balanced cup.
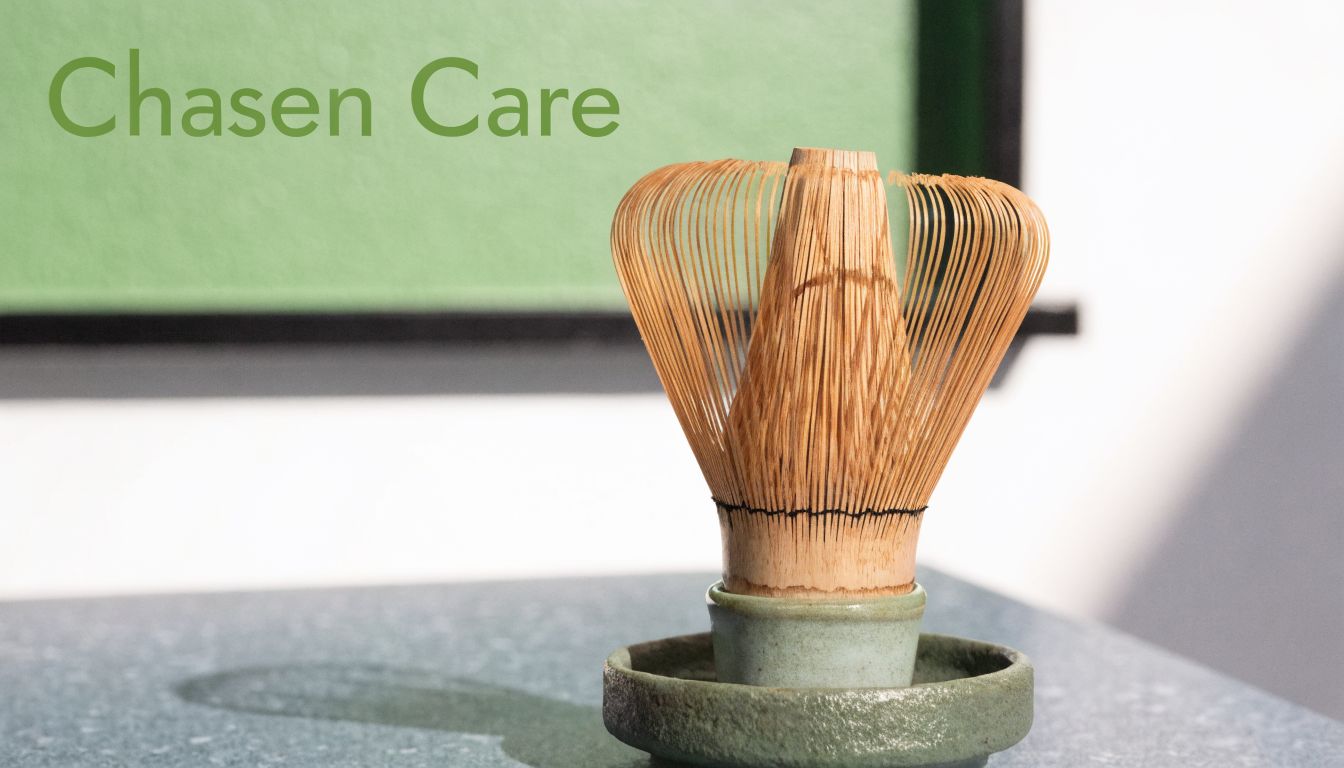
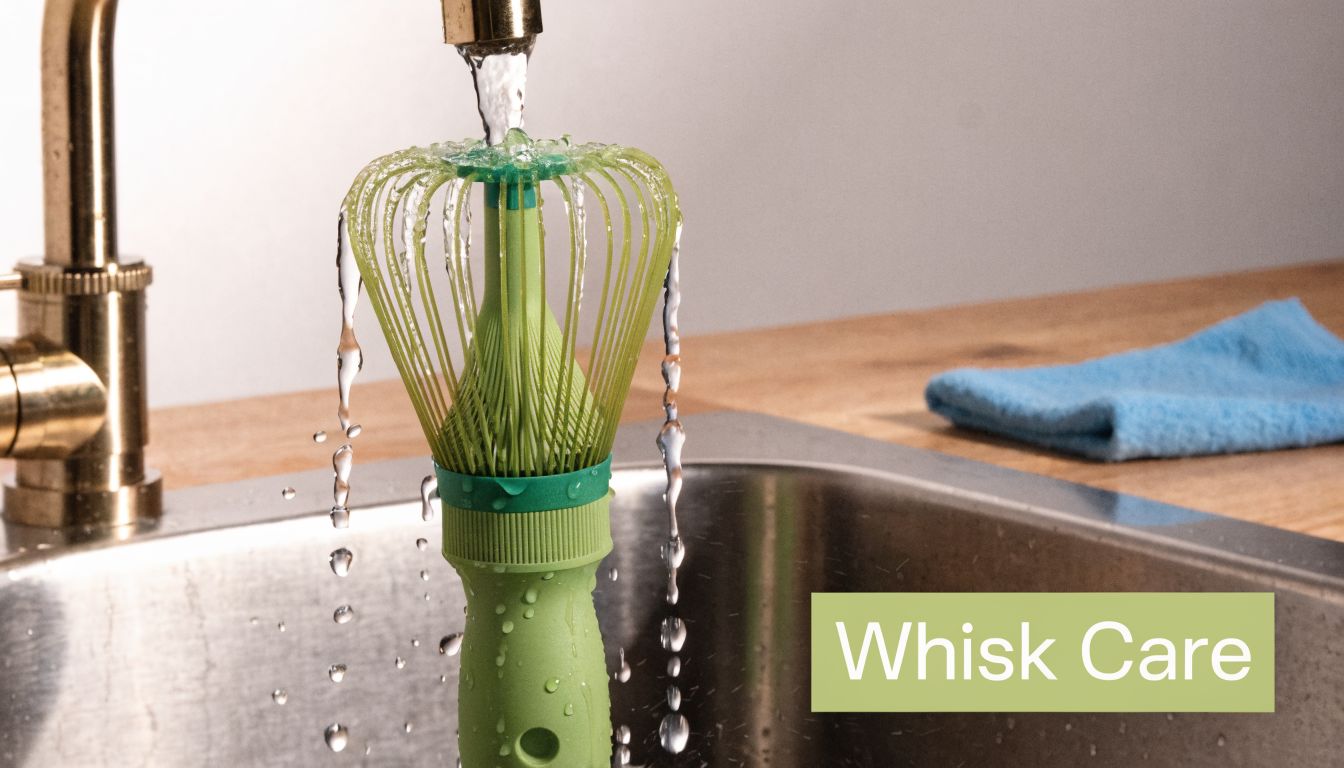
Proper Cleaning and Storage for Your Matcha Brush
You finish a bowl, set the whisk in the sink, answer a message, and come back later to bamboo that smells faintly damp and looks tighter than it did ten minutes ago. That is how many chasen problems start. The whisking part gets the attention, but the actual wear often happens in the few minutes after you drink the tea.
A chasen is carved from one piece of bamboo. It behaves more like a fine wooden kitchen tool than a metal whisk. Leave it wet, trap it in a drawer, or wash it like cutlery, and the tines lose flexibility fast.
In Australia, that risk goes up because local conditions are rarely neutral. Coastal humidity slows drying, and hard water in some suburbs can leave a mineral film on the bamboo. Generic care advice often skips both.
The correct cleaning routine
Clean the whisk as soon as you finish using it. Dried matcha sticks between the tines and pulls them inward as it hardens.
The routine is simple. Rinse the chasen in warm water. Use your fingers only if a little matcha is caught near the centre, and keep the touch light. Skip soap completely. Bamboo absorbs it, and the residue can dry the fibres and leave an odd scent that shows up in the next bowl.
After rinsing, shake off excess water and check the shape. If a few tines have curled together, ease them apart gently with wet fingers rather than forcing them dry later.
Why a stand matters in Australian homes
Drying shape matters almost as much as cleaning. A whisk left flat on the bench holds moisture where the tines meet, which is the slowest part to dry.
A holder supports the natural curve while air moves through the centre. That helps the whisk dry evenly and keeps the prongs from collapsing inward. If you want a practical example, a ceramic matcha whisk stand for drying and shaping a chasen gives the brush a dedicated place to rest between bowls.
Store it in the open, not in a closed cupboard straight after washing.
That point matters in Sydney, Brisbane, the Gold Coast, and other humid parts of the country where a kitchen can stay damp for hours. A whisk that seems dry on the outside may still be holding moisture at the base.
Hard water and humidity need a local fix
Hard water leaves clues. The bamboo starts to feel slightly rough, the tines look chalky, and the whisk loses some of its spring even when you are handling it well. If your kettle builds scale quickly, your chasen is dealing with the same minerals.
An occasional rinse with filtered water can help if your tap water is particularly mineral-heavy. If buildup is already visible, a very diluted vinegar rinse used sparingly can remove residue, but follow it with plain water so no smell remains. This is not an every-day step. It is a reset for mineral film.
Humidity needs a different approach. Keep the whisk away from the kettle plume, the dishwasher, and the splash zone beside the sink. Those spots look convenient, but they create a damp little climate around the bamboo.
A practical care routine for Australian kitchens
- Rinse straight after use so matcha does not dry between the tines.
- Use warm water only. No detergent, no soaking in cleaning products.
- Dry upright in open air so the centre of the whisk can dry.
- Use filtered water sometimes if your tap water is hard and leaves mineral marks.
- Keep the whisk away from steam and enclosed storage until fully dry.
What cafés should standardise
In cafés, the problem is usually inconsistency. One staff member rinses and stores the whisk properly. The next leaves it damp beside the machine during a rush.
Set one routine for everyone:
- Rinse immediately after each use.
- Use warm water only.
- Shake off excess water.
- Dry on a holder in a ventilated spot.
- Replace the whisk if it smells musty, shows mould, or has significant tine loss.
A good chasen does not need complicated care. It needs prompt rinsing, open airflow, and a bit of respect for bamboo in Australian conditions.
Troubleshooting Common Matcha Brush Issues
You whisk a bowl before work, and the chasen suddenly feels wrong. A few tines have snapped, the matcha looks flat, or there is a damp smell that was not there last week. In Australian kitchens, that usually comes back to a small mismatch between bamboo and its environment. Hard water, coastal humidity, and hot tap habits all show up quickly in a matcha brush.
My tines keep breaking
Broken tines usually point to stress on the bamboo, not bad luck. A chasen is carved from one piece of bamboo, so each tine is thin by design. That gives you speed and fine foam, but it also means rough contact shows up fast.
Check the common causes:
- The whisk is hitting or scraping the bottom of the bowl. The tines should flex through the water, not grind against ceramic.
- The water is too hot. Very hot water makes bamboo more brittle.
- The whisk went in dry. Dry tines are stiff, so they are more likely to snap under pressure.
- Mineral buildup is making the tines less flexible. This is more common in parts of Australia with hard tap water.
- The whisk was knocked around in storage. A drawer full of cutlery is a terrible place for a chasen.
A good test is to watch your whisk from the side while you prepare matcha. The tips should skim just above the base, like a brush sweeping over paper without digging in.
My matcha is still clumpy
Clumps often start before the whisk even touches the bowl. Matcha behaves a bit like cocoa powder. Once small lumps get wet on the outside, the dry centre can hide inside and resist whisking.
If your bowl stays grainy, work through the process in order:
- Sift the matcha first if the powder has compacted in the tin.
- Start with a small amount of water to make a smooth paste before adding more.
- Use quick wrist motion in a W or M pattern near the surface.
- Give the whisk room to move. A narrow mug makes proper whisking harder than a wide bowl.
Water quality can also play a part. In hard-water areas, matcha can feel slightly duller and less lively in the bowl. If your technique is sound but the texture still seems heavy, try filtered water for a few days and compare.
The prongs are bending outward
Some spreading is normal. A new whisk opens up with use, just like a new paintbrush softens once the bristles get wet. What you are looking for is uneven splaying, flattened tips, or a shape that looks twisted.
That usually happens for three reasons. The whisk is being pressed down too hard. It is drying in a cramped position. Or it is staying damp for too long, then drying unevenly.
Australian conditions matter more than many guides admit. In a humid Brisbane or Sydney summer, a whisk can stay slightly damp in the middle long after the outside feels dry. That trapped moisture can leave the shape sloppy over time.
The centre looks loose
The centre loop can worry new matcha drinkers because it rarely looks perfectly symmetrical after repeated use. Mild movement is normal. Bamboo softens, flexes, and settles.
Focus on performance instead of perfect appearance. If the whisk still creates a fine surface froth and feels stable in the bowl, the centre does not need to look pristine. If the inner tines are collapsing inward, catching on each other, or no longer springing back, the whisk is wearing out.
There’s a smell I don’t trust
A healthy chasen smells faintly woody, dry, or almost like nothing at all. Sour, musty, or stale smells usually mean moisture sat in the core too long.
In Australia, this often happens in two places. One is beside the kettle, where repeated steam keeps the bamboo damp. The other is in enclosed cupboards that feel tidy but hold humid air.
If the smell is light and there is no visible mould, let the whisk dry fully in a well-ventilated spot and reassess. If the odour is persistent, or you can see mould spotting, replace it. Bamboo is porous. Once contamination settles deep into the fibres, trying to save it is rarely worth the risk.
My whisk is leaving weak foam
This problem confuses a lot of people because the whisk gets blamed first. Sometimes the actual issue is old matcha, too much water, or a slow wrist.
A tired chasen can contribute, though. If many tine tips have broken off, or the whisk has lost its spring, it will struggle to introduce enough air into the bowl. Café teams see this often when one whisk gets pushed far past its useful life.
Ask three quick questions:
- Is the matcha fresh enough to foam well?
- Am I whisking briskly near the surface rather than stirring deep in the bowl?
- Has the chasen lost enough tines that it can no longer move the liquid cleanly?
Troubleshooting a chasen works best when you read it like a bamboo tool, not a kitchen gadget. Snapped tines usually mean friction or heat. A musty smell points to trapped moisture. Weak foam often traces back to technique, age, or worn tips. Once you match the symptom to the cause, the fix is usually straightforward.
Your Matcha Brush Questions Answered
A lot of confusion around the matcha tea brush comes from people trying to simplify it too much. It’s not a fussy object, but it is a specialised one. These are the questions that come up most often once people start using a chasen regularly.
Quick answers in one place
| Frequently Asked Questions |
|---|
| Question | Answer |
|---|---|
| Do I really need a bamboo whisk for matcha? | If you want traditional texture and a fine surface froth, yes. A spoon mixes, but it won’t create the same suspension or mouthfeel. |
| Is a 100-prong whisk a good starting point? | Yes, especially for usucha. It’s the most straightforward choice for home drinkers who want a foamy bowl. |
| Can I use an electric frother instead? | You can for convenience, especially in latte prep, but it won’t behave like a chasen in the bowl and it changes the ritual and texture. |
| Should I soak the whisk every time? | A short warm soak before use helps the tines soften and flex safely. |
| Can I wash it with dish soap? | No. Warm water is the safe choice for bamboo care. |
| Do I need a whisk stand? | It’s strongly recommended because it helps the whisk dry upright and keep its shape. |
| When should I replace my chasen? | Replace it when tine loss is heavy, the shape is badly compromised, or mould or persistent odour appears. |
| Can I make lattes with a matcha tea brush? | Yes. You can whisk a concentrated matcha base first, then add milk. |
Is the bamboo whisk only for traditional tea drinkers
Not at all. The chasen is useful whether you drink straight ceremonial matcha, iced matcha, or a latte. The key difference is the end texture you want.
For a straight bowl, the whisk creates a fine surface and more integrated texture. For a latte, it gives you a smoother concentrate before milk enters the cup. That first stage still matters.
What’s the difference between a matcha tea brush and a kitchen whisk
A kitchen whisk is built to beat, fold, and combine larger volumes. A chasen is built to move quickly through a small bowl with minimal friction. The bamboo tines are fine enough to lift the tea into suspension while staying gentle on the powder.
That’s why a metal whisk often feels too heavy-handed for traditional preparation. It can mix the drink, but it doesn’t create the same finesse.
Does prong count really matter
Yes, but not in a snobbish way. It changes the feel of the tool and the kind of foam you’re likely to get.
A higher-prong whisk usually helps newer drinkers create a more even froth with less effort. A lower-prong whisk may suit thicker tea styles or drinkers who prefer a different feel. The “best” option depends on what you make most often.
Why does my whisk look different after a few uses
Because it’s supposed to change a little. Dry bamboo looks tighter. Soaked and used bamboo opens up. The tines relax, the shape settles, and the brush becomes more responsive.
What you don’t want is severe splitting, snapped tips, mould, or deep distortion. Gentle visual change is normal. Rapid collapse isn’t.
Can I leave the whisk soaking while I drink my matcha
Better not. A short pre-use soak is helpful. Extended soaking isn’t. Bamboo likes brief moisture exposure followed by proper drying.
If you leave the whisk sitting in water while you chat, work, or clean the kitchen, the tines stay stressed and the drying cycle gets delayed. That’s not great in humid weather.
Is a darker bamboo whisk better than a lighter one
Not automatically. Colour can reflect the type of bamboo or finish, but it doesn’t guarantee quality. Pay more attention to even carving, tine shape, and whether the seller explains origin and care clearly.
Can I travel with a chasen
Yes, but protect it. Don’t throw it loose in a drawer or bag. If you’re taking matcha to the office or on holiday, keep the whisk in a breathable container and let it dry fully before packing.
Is mould always obvious
No. Sometimes you’ll see spots. Sometimes you’ll just notice a stale smell or a tacky feeling in the tines. If something seems off, trust your nose and your eyes.
In humid parts of Australia, mould prevention is mostly about routine. Rinse, shake off water, dry upright, and don’t trap the whisk in a closed damp space.
Should cafés keep one whisk per staff member
That depends on service style, but the more important issue is shared standards. Every person preparing matcha should use the same method for soaking, whisking, rinsing, and drying. A beautifully made whisk won’t survive a chaotic prep station.
What’s the smartest beginner setup
Keep it simple:
- A 100-prong chasen
- A bowl with enough width to whisk comfortably
- A sifter
- A whisk stand
- Fresh matcha and water that isn’t boiling
That’s enough to learn properly without cluttering the process.
A matcha tea brush seems niche until you use one well. Then it feels obvious. It’s the small bamboo tool that makes the whole bowl come together.
If you’re building a better matcha routine at home or in your café, Pep Tea offers organic matcha, preparation accessories, and practical guidance for Australian drinkers who want cleaner flavour, better texture, and tools that fit real daily use.
Master Matcha Making Kit: Your Perfect Brew Awaits

You’ve probably seen a matcha making kit online, loved the look of the bowl and whisk, then paused at the checkout wondering whether you need all of it. Fair question. A lot of first kits are bought on impulse, used twice, then pushed to the back of the cupboard because the tea came out bitter, lumpy, or oddly flat.
The good news is that making proper matcha at home isn’t hard. It’s just precise. A few simple tools, the right powder, and a couple of small habits make all the difference. Once those pieces are in place, your morning cup starts to feel less like a fiddly task and more like a ritual you’ll want to repeat.
A good matcha making kit should do two jobs well. It should help you whisk a smooth bowl of tea, and it should remove doubt about what you’re putting into that bowl. For Australian drinkers, that second part matters more than most guides admit.
Choosing Your First Matcha Making Kit
The cheapest kit is rarely the best first buy.
That doesn’t mean you need something ornate or collector-level. It means your matcha making kit should be built around safety, usability, and powder quality, not just aesthetics. Plenty of kits look lovely in product photos but fall short where it counts. The whisk splays too quickly, the bowl is awkward to whisk in, or the included matcha is an afterthought.
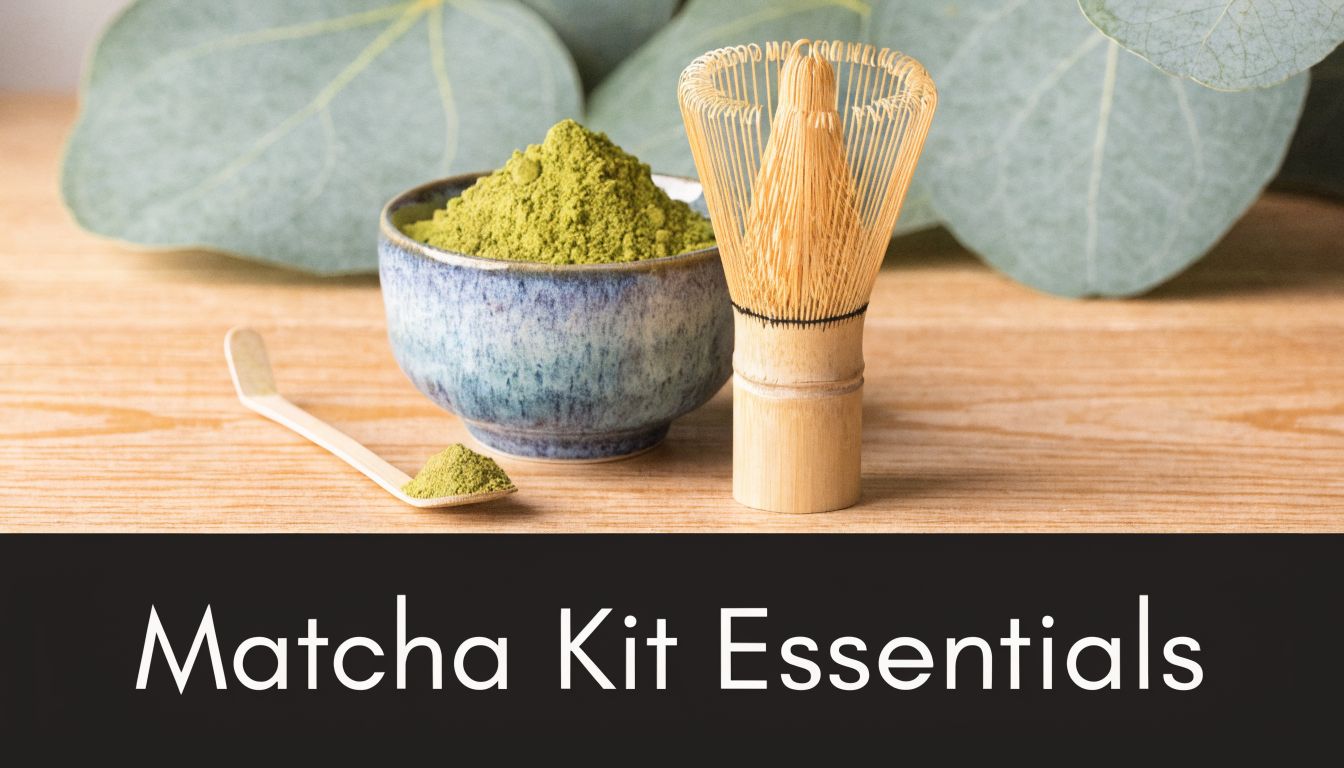
What a first kit should include
At minimum, look for these pieces:
- A chawan bowl: Wide enough to whisk in comfortably. A narrow mug makes frothing harder and usually leaves clumps around the edges.
- A chasen whisk: This is the bamboo whisk that gives matcha its light foam and smooth texture.
- A chashaku scoop: Helpful for consistent portions and part of the traditional process.
- A fine sifter: Often skipped in budget sets, but it’s one of the most useful tools in the whole routine.
If a set omits the sifter, I’d still consider buying it, but only if you’re happy to add a fine kitchen sieve yourself. Skipping sifting is one of the quickest ways to end up with gritty matcha.
The real buying question isn’t price
Most beginners compare kits by appearance first and price second. I’d reverse that thinking. Compare them by what they let you avoid.
You want to avoid a whisk with rough or brittle tines. You want to avoid unclear materials. You want to avoid powder with vague sourcing. And you want to avoid kits that bundle in low-grade matcha just to look complete.
Practical rule: If the seller is detailed about the tools but vague about the matcha, treat that as a warning sign.
There’s a genuine gap in the Australian market around organic certification and sourcing. One review of starter kit content notes that many kits focus on the tools while leaving buyers with very little clarity about certified-organic powder and food-grade tool standards, which matters for Australian consumers trying to buy carefully from trusted suppliers (matcha kit sourcing and certification gaps).
What matters most for Australian buyers
If you care about clean ingredients, don’t treat the powder as separate from the kit. Treat it as the centrepiece.
A whisk can help texture. A bowl can help technique. But the flavour, colour, aroma, and overall drinking experience come from the matcha itself. For that reason, I’d rather see a simple kit paired with certified organic matcha than a deluxe set with uncertain powder.
Here’s the short version of what to check before buying:
| What to check | Why it matters |
|---|---|
| Organic certification | Gives you a clearer standard for how the powder was produced |
| Food-grade tool materials | Helps you avoid uncertainty around bamboo and glaze quality |
| Wide bowl shape | Makes whisking easier and improves foam |
| Separate scoop and sifter | Keeps your portioning and texture more consistent |
| Clear sourcing information | Usually signals better care and transparency overall |
For gifting, presentation still matters. If you’re comparing more polished options for birthdays, housewarmings, or wellness gifts, it can help to browse various gift guides and then come back to the practical checklist above so the set looks good and works well.
What works and what usually disappoints
What works:
- A simple ceramic bowl with room to whisk
- A bamboo whisk that feels springy, not dry or fragile
- Matcha sold with clear quality cues rather than bundled as filler
- A set from a supplier that understands preparation, not just packaging
What often disappoints:
- Tiny bowls: Pretty on a shelf, frustrating in use
- Decorative kits with no sifter: You’ll fight clumps from day one
- Mystery matcha: Dull colour, harsh taste, poor value
- Ultra-cheap bundles: Fine for photos, less fine for daily drinking
If you want an example of a straightforward set designed for home preparation, Pep Tea offers a Japanese matcha set that includes the traditional tool format essential for most beginners.
Your First Bowl A Mindful Matcha Ritual
Making your first bowl of matcha goes better when you stop trying to rush it.
The best bowls I’ve made at home haven’t come from speed. They’ve come from giving each part of the process a reason. Warm the bowl because temperature matters. Sift the powder because texture matters. Whisk with focus because the final cup shows every shortcut.
Start by warming the bowl
Pour hot water into your bowl and let it sit briefly. Then warm the whisk in that same water for a moment.
This step does two useful things. It takes the chill off the bowl so your tea stays pleasant to drink, and it softens the whisk tines slightly so they’re less likely to feel stiff or scratchy when you begin. Empty the bowl, then dry it well. If the bowl is wet before the powder goes in, the matcha can stick and form paste-like lumps.
Sift the powder every single time
For a traditional everyday bowl of usucha, use 2g per serving. Sift it into the dry bowl.
That amount is small enough to feel approachable and strong enough to show the character of the tea. Sifting is the difference between smooth and frustrating. Matcha is a fine powder, but it still clumps easily in the tin. Once hot water hits those clumps, they’re harder to break apart cleanly.
Skip sifting once and you’ll usually spend the rest of the bowl chasing little green lumps around the bottom.
Add water that’s hot, not scalding
Your water should be hot enough to wake up the matcha, but not so hot that it knocks the life out of it. If you’ve just boiled the kettle, let the water cool a little before pouring.
When the water is too hot, matcha can taste sharper and less balanced. When the temperature is gentler, you’re more likely to notice sweetness, softness, and that fresh green character people are often chasing in cafés.
A helpful beginner method is this:
- Boil your kettle
- Warm the bowl and whisk
- Dry the bowl
- Sift in your 2g of matcha
- Add a small amount of hot water first
- Whisk into a loose paste before adding the rest
That first small splash of water matters. It helps the powder open up evenly rather than floating in dry pockets.
Let your senses guide the process
As you whisk, listen for the light tapping sound of bamboo moving quickly across the surface. Watch the colour brighten. Notice when the texture changes from thin and watery to silky and lightly foamed.
A good first bowl doesn’t need to look perfect. It just needs to feel integrated. No dry clumps, no sludge at the base, no harsh burnt note from overheated water.
Here’s a simple sensory checklist:
- Colour: Fresh, vivid green rather than dull olive
- Aroma: Grassy, creamy, or softly vegetal, not burnt
- Texture: Smooth and fine, with a light layer of froth
- Finish: Clean and rounded, not aggressively bitter
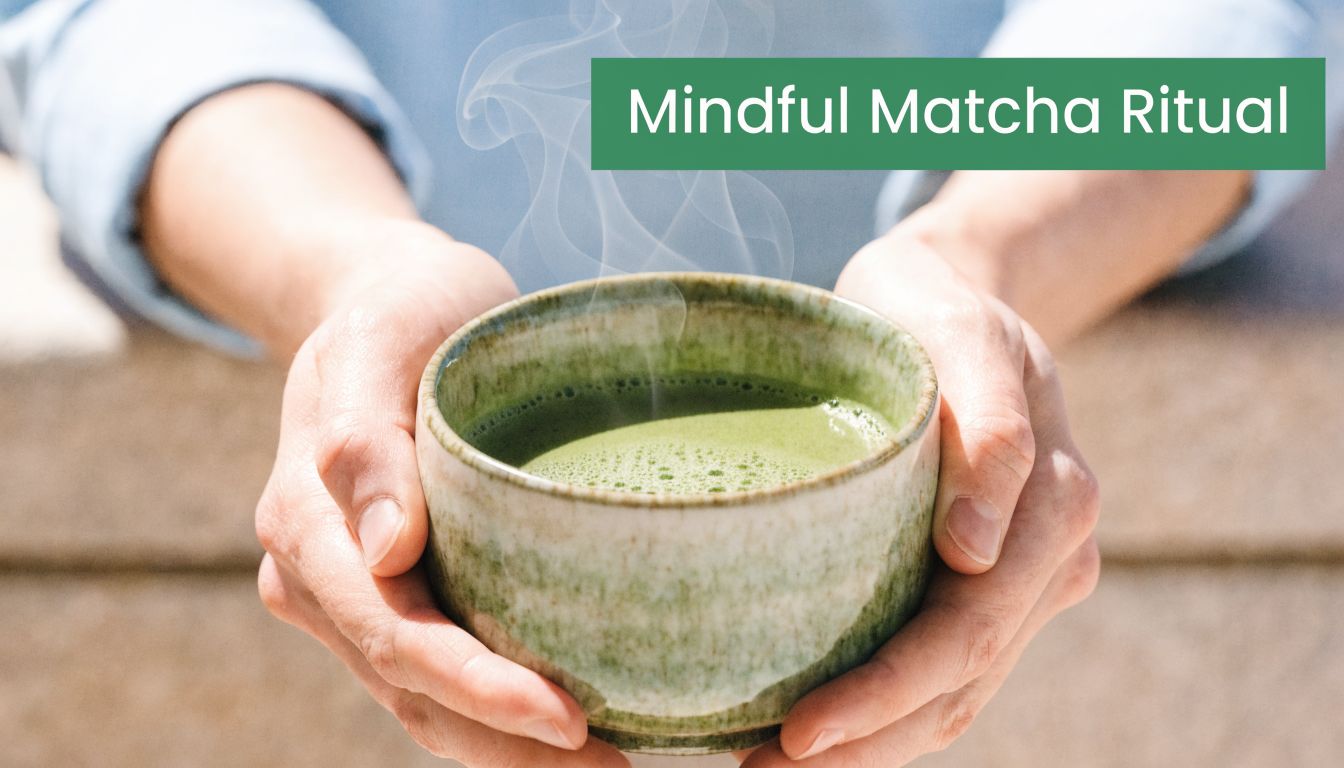
Drink it while it’s alive
Matcha doesn’t improve by sitting around. Once whisked, drink it promptly.
That’s part of why the ritual feels grounding. You make one bowl, you hold it warm in your hands, and you drink it in the moment it was prepared. It isn’t a brew to forget on the bench while you answer emails.
Small habit, big payoff: Sit down for the first few bowls you make. When you’re standing and distracted, you’ll rush the whisking and miss the flavour cues.
If you’re new to the taste, don’t judge matcha by your first sip alone. The opening can feel grassy or savoury if your palate expects sweetness. Give it a few mouthfuls. Good matcha tends to settle into itself as you drink, and your palate catches up quickly.
Mastering the Whisk The Art of the Perfect Froth
The chasen, or bamboo whisk, is the heart of the matcha making kit. It has been central to matcha preparation since Japan’s Muromachi period (1336–1573), while the broader practice of whipping powdered tea reaches back to China’s Song Dynasty (960–1279 AD), which gives this simple tool a long history in tea preparation (history of the matcha whisk).
That history is lovely, but what matters in your kitchen is this. The whisk isn’t there to stir. It’s there to aerate.
Use your wrist, not your whole arm
A lot of beginners whisk matcha as if they’re beating cake batter. Big arm movement, lots of effort, not much foam.
The better approach is smaller and quicker. Hold the bowl steady with one hand. Hold the whisk lightly with the other. Then move from the wrist in quick M or W motions near the surface of the tea.
The whisk should glide, not grind. If you press the tines hard into the bottom of the bowl, you’ll wear them out faster and get less froth.
What the motion should feel like
Think of it as fast sketching, not stirring.
You’re not tracing perfect letters, but the motion is similar. Short, rapid passes create tiny bubbles and a finer foam. Slow circles usually produce a flatter drink with larger bubbles.
A few signs you’re on track:
- The surface starts to lighten
- Fine foam forms across the top rather than only at the edges
- The whisk moves freely without scraping
- The tea underneath looks evenly blended
If you hit a stubborn little clump, press it gently against the side of the bowl first, then return to whisking. Don’t keep attacking it in the middle of the bowl.
For a closer look at hand position and movement, Pep Tea’s guide on how to whisk matcha is useful if you like seeing the technique broken down visually.
Finish cleanly
Once you’ve got a fine foam, slow down. A gentle final sweep across the surface tidies the top and settles any oversized bubbles.
That last movement changes the look of the bowl more than people expect. The tea appears more even, the foam looks finer, and the whole drink feels more deliberate.
A quick visual demo helps here:
Don’t chase huge foam. Chase fine foam. Matcha should look soft and velvety, not like aggressively frothed milk.
Beyond the Bowl Three Simple Matcha Creations
Once your whisking is organised, your matcha making kit becomes more versatile than people expect. The same bowl, whisk, and sifted powder can take you from a quiet morning tea to an iced afternoon drink or a quick kitchen add-in.
The trick is not changing everything. It’s keeping the matcha base smooth, then adapting what surrounds it.
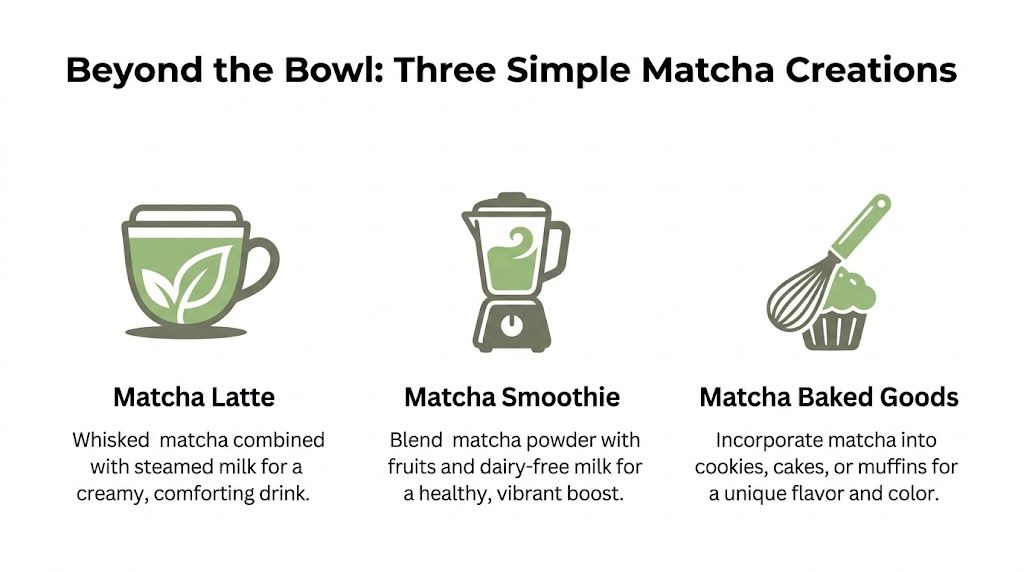
Matcha latte
A latte is often the easiest way for new drinkers to settle into matcha because milk softens the grassy edge.
Start by making a small concentrate in your bowl:
- Sift your matcha first: This keeps the latte smooth rather than chalky.
- Add a small amount of hot water: Whisk until fully blended and lightly foamy.
- Pour in warmed milk or cold milk over ice: Oat milk is popular for body, but use what you enjoy.
If your latte tastes weak, the issue usually isn’t the milk. It’s that the concentrate was too diluted before the milk went in. Keep the base strong, then stretch it.
A good matcha latte still tastes like tea. If it only tastes like milk, build a stronger bowl before you pour.
Iced matcha
Iced matcha can be fresh and crisp, but it turns disappointing fast if you skip the basic prep and try to shake dry powder straight into cold water.
Do this instead:
- Sift the matcha into your bowl
- Whisk with a small amount of hot water until smooth
- Add that concentrate to a glass of cold water and ice
- Stir or shake briefly, then drink straight away
That small amount of hot water matters because it dissolves the powder properly. Cold liquid alone doesn’t handle clumps nearly as well.
If the drink tastes sharp, reduce your brewing water temperature next time when you make the concentrate. The bitterness usually starts earlier than people think.
Matcha in smoothies and baking
Grade matters here.
For a straight bowl or a simple whisked tea, ceremonial-style matcha is the better fit because the flavour sits front and centre. For smoothies, yoghurt, muffins, pancakes, or biscuits, culinary matcha usually makes more sense because it’s designed to work with other ingredients.
A few easy uses:
- Smoothies: Add a small spoonful to banana, mango, or vanilla-based blends
- Yoghurt bowls: Stir through plain yoghurt and top with fruit
- Baking: Fold into cake batter, icing, cookies, or muffins
- No-bake snacks: Mix into energy balls or chia puddings
Here’s a simple comparison:
| Use | Better style |
|---|---|
| Traditional whisked bowl | Ceremonial-style matcha |
| Hot or iced latte | Ceremonial-style matcha or a smooth everyday blend |
| Smoothies | Culinary matcha |
| Baking | Culinary matcha |
If you’re using matcha in the kitchen regularly, keep one powder for drinking and another for recipes. It’s cleaner, more practical, and saves you using your nicest tea where subtle flavour will get buried.
Caring For Your Tools A Guide to Longevity
A matcha making kit lasts much longer when you clean it straight after use.
That’s especially true for the whisk. Bamboo is practical and beautiful, but it doesn’t respond well to neglect. Leave matcha residue sitting in the tines, or tuck the whisk away damp, and you’ll shorten its life quickly.
How to clean the whisk properly
Rinse the whisk under warm water as soon as you finish your bowl. Use your fingers very gently if a bit of powder is caught between the tines, but don’t scrub and don’t use soap.
Soap can linger in bamboo and affect flavour later. Rough handling can snap the fine tines or pull them out of shape.
A simple routine works best:
- Rinse immediately: Dried matcha is harder to remove later
- Use warm water only: Enough to release residue without stressing the bamboo
- Shake off excess water: Don’t leave it dripping on the bench
- Air dry thoroughly: Moisture is the enemy
Why a whisk stand helps
A kusenaoshi, or whisk stand, helps the chasen dry in a more natural shape. That matters because the curved form supports better whisking and reduces stress on the tines over time.
If you use your kit often, a matcha whisk stand is a practical addition rather than a decorative extra.
Store the whisk upright only after it has been rinsed and allowed to dry properly. A damp cupboard is where bamboo tools start going wrong.
Bowl and scoop care
The bowl is the easiest part of the set to maintain. Wash it with warm water and a soft cloth or sponge. If you use dish liquid, rinse it thoroughly so no scent remains.
The scoop needs a lighter touch. Wipe it clean or rinse briefly if needed, then dry it well. Don’t leave bamboo pieces soaking in water.
For best flavour, keep all tools away from strong kitchen smells. Matcha is delicate enough to pick up unwanted aromas over time.
Troubleshooting Common Matcha Mistakes
Even with a solid matcha making kit, the first few bowls can be inconsistent. That’s normal. Most problems come down to one of three things: water, whisking, or powder prep.
Why does my matcha taste bitter
The usual culprit is water that’s too hot. If you pour freshly boiled water straight onto the powder, the cup can taste harsher than it should.
Another common issue is using more powder than your palate is ready for. Strong matcha isn’t the same as balanced matcha.
Try this:
- Let the water cool slightly after boiling
- Stick to a modest serving when you’re learning
- Choose matcha suited to drinking, not baking
- Whisk thoroughly so the flavour is evenly distributed
If the bitterness is only at the end of the bowl, check whether sediment is collecting at the bottom. That often points to weak whisking or poor sifting.
Why am I getting clumps
Clumps usually begin before the whisk ever touches the bowl.
Matcha compacts in storage, so the powder needs air introduced back into it. That’s what sifting does. Once you skip it, the whisk has to work much harder.
The fix is straightforward:
- Sift into a dry bowl
- Add a small amount of water first
- Make a smooth paste
- Then add the rest of the water
- Break any stubborn bits gently against the side
Don’t dump all the water in at once and hope the whisk sorts it out. Sometimes it can. Often it won’t.
Why am I not getting any foam
Foam depends on technique more than force.
If you’re whisking in slow circles, you’re mixing, not aerating. If you’re pressing the whisk heavily into the bowl, the tines can’t flick the liquid properly. And if there’s too much water for the amount of matcha, the surface won’t build the same fine froth.
A quick diagnosis table helps:
| Problem | Likely cause | Better approach |
|---|---|---|
| Flat surface | Circular stirring | Use quick wrist-led M or W motions |
| Big bubbles only | Whisking too high or too slow | Keep the whisk low and fast near the surface |
| No foam with clumps | Unsifted powder | Sift first, then whisk |
| Thin, weak bowl | Too much water | Keep the base more concentrated |
Most bad bowls aren’t ruined bowls. They’re useful feedback. Change one variable at a time and the pattern becomes obvious.
Once you get the feel for the whisk and start noticing how bowl shape, water temperature, and powder texture affect the cup, matcha becomes much easier to repeat well.
If you’re ready to build a calmer, cleaner daily ritual, Pep Tea offers organic matcha, preparation tools, and practical guides for making matcha at home with more confidence and less guesswork.
Perfect Matcha: Your Matcha Whisk Electric Guide

If you're standing in the kitchen with a bowl of matcha, a splash of hot water, and a frother in hand, you're probably after one thing: a smooth, vivid, café-worthy drink without the clumps, sludge, or flat foam.
That's exactly where a matcha whisk electric setup earns its place. Used well, it isn't just the faster option. For lattes, iced drinks, and busy home routines, it can be the better option. The trick is knowing when it outperforms a bamboo chasen, when it doesn't, and how to use it without roughing up a beautiful powder.
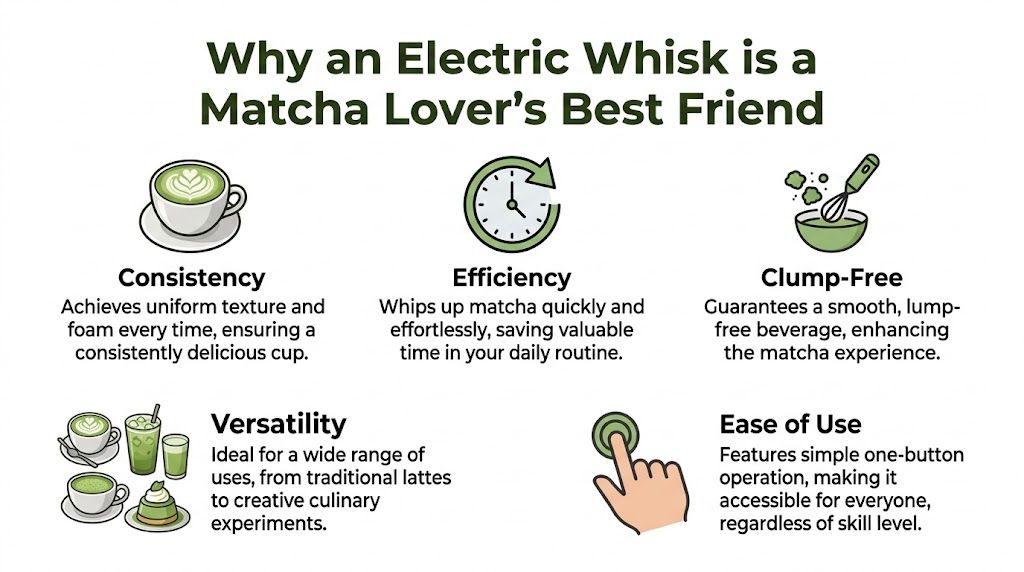
Why an Electric Whisk is a Matcha Lover’s Best Friend
You’ve sifted good matcha, added the right water, and still ended up with a gritty latte that settles before you finish the cup. That is the point where tool choice matters.
A bamboo chasen still deserves its place. For usucha or a quiet bowl at home, it gives gentle agitation and a texture many tea drinkers enjoy. But for modern matcha drinking in Australia, especially oat milk lattes, iced matcha, and quick café service, an electric whisk often produces the better result. It disperses powder fast, builds a finer top layer, and does it with less effort and more repeatability.
In Australia, that shift is already showing up in buying habits. The Australian matcha whisk market is projected to be valued at AUD 65 million in 2025, with electric whisks holding 35% market share, according to this Australian market overview. Analysts cited there also expect the category to grow at a 12% CAGR through 2033, which fits what many of us are seeing in cafés, wellness studios, and home kitchens.
Electric whisk versus chasen versus standard frother
These tools do different jobs, and treating them as interchangeable usually leads to disappointing matcha.
| Tool | Best use | Where it struggles |
|---|---|---|
| Electric matcha whisk | Lattes, iced matcha, quick daily prep, consistent blending | Can over-aerate if you run it too long |
| Bamboo chasen | Traditional bowl preparation, slower ritual, gentle mixing | Less practical for milk drinks and busy mornings |
| Standard milk frother | Frothing milk | Often adds air well but does a poor job dispersing matcha evenly |
The key difference is control. A good electric whisk can break up powder quickly and create controlled microfoam in a small volume of liquid. A standard milk frother often pushes too much air too early, which leaves you with foam on top and sediment underneath.
Why it shines for lattes
For lattes, the electric whisk is not only convenient. In the right hands, it is often the superior tool.
That is because a latte needs a concentrated, lump-free matcha base that can stand up to milk without turning chalky. A chasen can do that, but it takes more room, more technique, and more time. An electric whisk gets there quickly, which matters on a busy morning and matters even more in a café where consistency is the whole job.
I see this most clearly with oat milk. Oat milk can mute aroma and expose any clumping in the matcha base. A short whisk in a small amount of water gives you a smoother concentrate before the milk goes in, so the final drink tastes cleaner and looks brighter.
If your daily matcha includes oat, almond, or soy milk, an electric whisk is usually the more reliable choice.
The nutrient question deserves a straight answer
A lot of articles dodge this. They say electric is faster and stop there.
There is no strong evidence that a brief mix with an electric whisk, used properly, strips matcha of its goodness in any meaningful way. What does affect quality is heat, oxidation over time, and rough handling. In practice, nutrient preservation comes down to method more than motor. Use warm water, not boiling. Whisk for seconds, not minutes. Drink it soon after making it.
That is a sensible middle ground for anyone in the Australian wellness crowd who wants both convenience and quality. If you want a traditional reference point for hand preparation, this guide on how to whisk matcha properly is a useful comparison.
What works in real life
An electric whisk is the better fit when you want repeatable results with milk drinks, cold matcha, or a fast morning routine. It is also easier to teach to staff or family members because the technique is less fussy.
A chasen still wins for ceremony, slower preparation, and the tactile pleasure of making a bowl by hand. Both tools have value. But if the goal is a polished matcha latte with fine texture, even colour, and less grit at the bottom of the cup, the electric option earns its place very quickly.
Your Step-by-Step Guide to a Flawless Matcha
You boil the kettle, grab the oat milk, and want a smooth green latte before the train leaves. A tight method is essential. With an electric whisk, the goal is not just speed. It is a cleaner concentrate, finer foam, and a better result in milk than a traditional chasen usually gives in a rushed home routine.
Good matcha starts before the whisk turns on. Water that is too hot pulls out more bitterness and can flatten the sweeter, creamier notes, so keep it warm rather than boiling. For most everyday matcha, 70 to 80°C is a reliable range.
Gather the right tools
You do not need much, but each item has a job.
Use:
- A small bowl or wide mug so the whisk head can move freely
- A fine sieve to break up clumps before they hit the water
- A temperature-aware kettle or thermometer to keep the water gentle
- An electric whisk that mixes quickly without throwing liquid everywhere
- A spoon or scoop for repeatable portions
If you want to compare electric prep with the classic method, Pep Tea’s guide on how to whisk matcha is a useful reference.
Build the base properly
For a hot latte, add 1 to 2g of sifted matcha to your bowl or mug. Pour in a small amount of filtered water at 70 to 80°C. About one-quarter of the final drink volume is enough if milk is coming later.
This concentrated start is what gives lattes better flavour. If you dilute too early, the powder can skate across the surface, leave grit behind, and taste weak once milk goes in.
I use this same approach in café service and at home because it is repeatable.
Skip the sieve once and you will spend the next 20 seconds chasing green lumps instead of making a smooth base.
Use the whisk like a precision tool
Start the whisk with the head low in the liquid. Dissolve the powder first, then introduce a little air once the base looks smooth. Small circles work well. A loose W motion also works if your bowl is wide enough.
Short whisking is usually all you need. Many high-speed matcha whisk and frother brands suggest a brief mix of around 15 to 20 seconds for a smooth, lightly foamed result, depending on bowl size, dose, and motor strength. The exact number matters less than what you see in the cup. Stop when the surface looks even and glossy, with no visible specks hugging the sides.
A few habits make the process easier:
- Keep the whisk head submerged at the start so the powder hydrates fully
- Tilt the bowl slightly if the liquid is too shallow for the whisk head
- Lift only a little near the end if you want a fine top layer for a latte
- Stop early rather than late because overworking can make the texture too airy
If you are building café habits at home, some of the workflow discipline is the same as learning how to become a barista. Small technique changes show up clearly in the cup.
Finish the drink without knocking it flat
Once the concentrate is smooth, add your milk. Oat milk is the standard for many Australian cafés because it rounds out matcha well, but almond and soy can work nicely if you keep the base strong.
Give the drink a short final pulse after the milk goes in. You are combining, not whipping. That is one of the big advantages of an electric whisk for lattes. It can blend the matcha evenly through milk and leave a finer texture than a bamboo whisk usually manages in the same format.
This video gives a useful visual for the motion and pacing:
The three mistakes that cause most bad cups
| Mistake | What happens | Better move |
|---|---|---|
| Water too hot | The cup tastes harsher and less balanced | Let boiled water cool before mixing |
| Skipping the sieve | Clumps survive and settle into the bottom of the cup | Sift first, even for a single serve |
| Whisking too high too soon | You get splashes, uneven mixing, and coarse foam | Start low, then lift slightly only at the end |
A flawless matcha comes from sequence. Sift first, use gentle water, make a proper concentrate, then whisk briefly and with control. That method protects flavour, keeps texture smooth, and gives electric whisk users their best result where it matters most. In a proper latte.
Pro Tips for Café-Quality Matcha Every Time
Home matcha gets better fast once you stop treating every drink the same. A thick hot latte, an iced matcha, and a baking paste each need a slightly different finish.
The common mistake is overworking the drink. A 2025 survey of Australian home baristas found that whisking for more than 30 seconds can cause a 25% collapse in foam structure, while 10 to 15 seconds works best for a paste before a short pulse to incorporate milk, according to this home barista preparation guide.
Match the texture to the drink
For a better result, decide what you're trying to make before the whisk ever turns on.
Hot latte
Aim for a smooth concentrate first, then a light final pulse after milk is added. Dense foam looks nice, but too much air can mute the matcha flavour.Iced matcha
Keep the base slightly stronger than you would for a hot drink. Ice softens flavour quickly, so a properly mixed concentrate matters more than a dramatic foam cap.Baking or dessert base
You're after a glossy paste, not froth. Short whisking is enough. Once the powder is dispersed, stop.
Choose a whisk that suits your routine
Not every electric whisk feels good in the hand or behaves well in a mug. Stainless steel models are usually easier to clean and better suited to frequent use. Dual-head options can be handy if you like one head for matcha and another for milk finishing.
If you're the sort of person who enjoys refining technique, barista training habits help more than people think. This guide on how to become a barista is useful because it trains your eye for texture, temperature, and consistency, which all carry over neatly into matcha prep.
A good matcha routine looks boring from the outside. Same bowl, same water range, same whisking time, same result. That's why it works.
Fine-tuning that café feel
Small adjustments create the polished finish people usually associate with a good café.
Try this checklist:
- Warm the cup first if you're serving hot. It helps the drink hold texture a little more gracefully.
- Sweeten after the matcha base is smooth so you're not trapping dry powder under syrup or honey.
- Pour milk steadily rather than dumping it in. The surface stays neater and the drink tastes more integrated.
- Use better matcha for simpler drinks. The fewer extra ingredients you add, the more obvious the powder quality becomes.
The best home setups aren't complicated. They're repeatable.
Creative Recipes Beyond the Morning Latte
Mid-afternoon is where a matcha whisk electric tool often proves its worth. Morning bowls are one thing, but cold drinks, baking mixes, and thicker wellness blends are where an electric whisk can produce a better result than a traditional chasen. A bamboo whisk is brilliant for a classic usucha. For iced lattes and recipe work, a small motor gives you faster dispersion, fewer dry pockets, and a smoother finish.
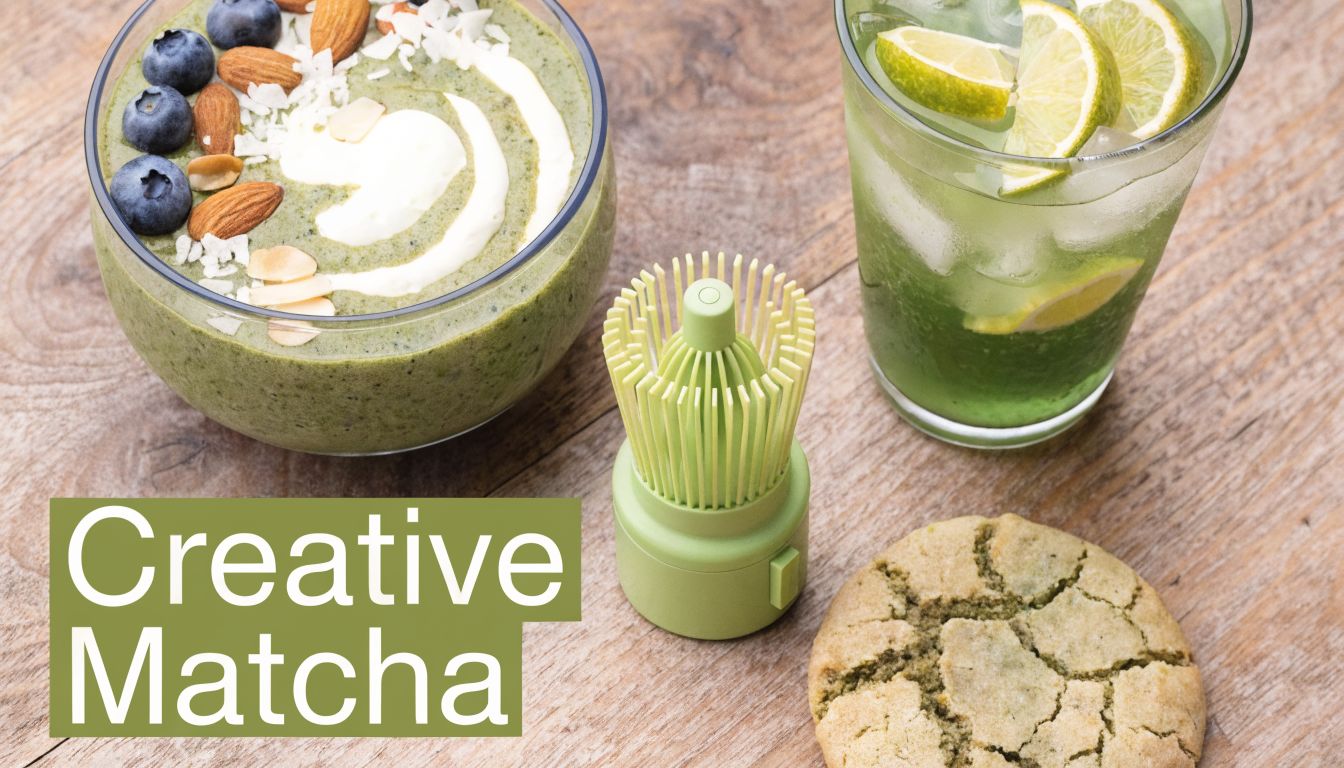
A quick iced matcha for warm afternoons
In much of Australia, iced matcha gets more use than the ceremonial bowl. The best version starts with a concentrate, not with powder dumped straight over milk and ice. That one small change gives you cleaner flavour and a silkier texture, especially in oat milk or high-protein milk that tends to show every little lump.
If you want a fuller method, Pep Tea's how to make iced matcha latte guide is a good reference.
A reliable method looks like this:
- Sift your matcha into a bowl or cup.
- Add a small amount of warm water.
- Whisk for a few seconds until smooth and glossy.
- Pour that concentrate over ice.
- Add cold milk and stir gently.
The result tastes brighter because the matcha hydrates properly before it hits the cold liquid. In cafés, this is also the easiest way to keep each cup consistent during a busy run.
Matcha paste for baking
Baking is where an electric whisk proves its worth. Dry matcha added straight to batter often leaves little bitter spots and uneven colour. A quick paste fixes that.
Use just enough liquid to make a thick, smooth green base, then fold it into cheesecake filling, brownie batter, yoghurt, or overnight oats. The flavour spreads more evenly, and the colour looks cleaner too.
This works especially well for:
- Matcha cheesecake swirls
- Protein balls and raw slices
- Pancake or waffle batter
- Yoghurt bowls with fruit and seeds
For thicker mixes, I prefer the electric whisk over a chasen every time. It cuts through the paste faster and gives a more uniform result.
A cleaner smoothie or wellness blend
Smoothies can mute matcha if you throw everything into the blender and hope for the best. Pre-mixing the powder with a little water gives you a concentrated shot that blends in properly, instead of sticking to the jug walls or leaving green specks through the drink.
That matters if you're using matcha with banana, mango, ginger, mint, or citrus, where balance is easy to lose. Start with a smooth base, then add it to the rest of the blend. You keep more control over flavour, and the drink tastes deliberate rather than messy.
The nutrient question still comes up with electric tools. In practice, the sensible approach is simple. Use warm rather than hot water, whisk only until the powder is fully dispersed, and avoid running the whisk longer than needed. For lattes, smoothies, and recipe bases, that gives you excellent texture without treating the matcha roughly.
Caring For and Troubleshooting Your Electric Whisk
A matcha whisk electric tool lasts longer when you clean it immediately. Matcha dries fast, and once it hardens around the whisk head, performance drops.
Clean it before residue sets
The simplest routine is the best one:
- Rinse straight after use under warm water
- Add a little mild soap if milk has touched the whisk head
- Spin briefly in clean water to help release any fine powder
- Dry the metal head well before storing
Avoid soaking the handle unless the product is explicitly designed for that. Most problems start when water gets where it shouldn't.
If you're building out a home setup, Pep Tea's matcha tea accessories collection gives a clear sense of the supporting tools that make prep and cleanup easier.
Store it so it keeps its shape
Don't toss it into a crowded drawer where the whisk head can bend. A bent head often leads to wobble, splashing, or weak mixing. Stand it upright if possible, or keep it in a dedicated utensil area away from heavier tools.
What to do if it stops performing properly
A weak or unreliable whisk usually comes down to something simple.
| Problem | Likely cause | What to do |
|---|---|---|
| It spins slowly | Low battery or incomplete charge | Replace batteries or fully recharge |
| It splutters or cuts out | Moisture or residue around the mechanism | Dry it thoroughly and check for build-up |
| It wobbles in use | Bent whisk head | Gently inspect and realign if safe to do so |
| It won't mix matcha cleanly | Old residue on the head | Wash more thoroughly and test in water |
Kitchen habit: Clean the whisk before you drink the matcha. If you leave it until later, later rarely comes.
A reliable whisk doesn't need much attention. It just needs quick care, dry storage, and the occasional check before you blame the matcha.
If you're ready to upgrade your home ritual, Pep Tea is a solid place to explore premium organic matcha, brewing essentials, and Australian-made wellness drinks. Browse the range for ceremonial and culinary matcha, or pick up accessories that make daily preparation simpler and more consistent.
Uji Matcha Powder: A Definitive Explainer for Australians

The first time you whisk a proper bowl of Uji matcha, the aroma hits before the taste does. It smells green, soft, almost creamy, and you realise very quickly that this isn’t just “green tea powder”.
What is Uji Matcha Powder Really?
Uji matcha powder comes from Uji, near Kyoto in Japan, a place long associated with some of the country’s most prized tea. When people talk about Uji matcha with a bit of reverence, they’re usually responding to two things at once. The first is flavour. The second is history.
Matcha itself is powdered green tea, but uji matcha powder is a more specific category. It refers to matcha connected to the Uji region and its tea-making traditions. That matters because place affects taste, texture, aroma, and the way the tea feels in your daily routine.
A lot of confusion starts here. People often assume all matcha is basically the same, just sold at different prices. It isn’t.
Why it’s different from ordinary green tea powder
Regular green tea is usually steeped, then removed from the cup. With matcha, you consume the powdered leaf itself. That creates a fuller flavour and a more concentrated drinking experience.
Uji matcha also carries a very particular identity. It’s linked to long-established cultivation and processing methods, including shading and stone-grinding, which help create the vivid colour and smooth texture many tea drinkers look for.
A simple way to think about it: matcha is a category, but Uji is a place with a reputation. Not every matcha offers the same depth, softness, or finish in the bowl.
For Australians, this matters because matcha often sits at the crossroads of taste and wellness. Some people come to it for a café-style latte at home. Others want a cleaner-feeling ritual than their usual coffee. Others are curious about antioxidants, L-theanine, and calm focus.
If you’re new to the category, a helpful starting point is this guide on what matcha powder is. It clears up the basics before you start comparing grades, origins, and brewing styles.
What people usually get wrong
Three myths show up again and again:
- “All bright green powders are matcha.” Some powders are milled green tea, not true matcha in the traditional sense.
- “The stronger the bitterness, the better the tea.” Good matcha can have structure and character, but harsh bitterness usually isn’t the goal.
- “It’s only for tea ceremony.” Uji matcha can be whisked traditionally, but it also works beautifully in lattes, smoothies, and cooking.
At its best, uji matcha powder is both ancient and practical. It belongs in a tea bowl, but it also belongs in a modern Australian kitchen.
The 800-Year-Old Secret of Uji's Terroir
A tea region earns trust the way a family recipe earns loyalty. By getting the small things right for a very long time.
Uji’s name carries that kind of weight. Tea has been cultivated there since the late 12th century, and over hundreds of years growers refined methods that suited the area’s hills, rivers, mist, and seasonal rhythm. That long memory matters. It helps explain why Uji is still the benchmark many tea drinkers use when they want matcha with depth, softness, and a clean finish.

Why terroir matters in tea
Terroir is the taste of place.
In wine, people talk about soil, slope, sun, and climate. Tea works the same way, but with an added human layer. Farming knowledge passed down across generations shapes the result just as much as weather and geography do. In Uji, that means local conditions and local craft have grown together for roughly 800 years.
For matcha drinkers, terroir shows up in the bowl, not in an abstract concept. You notice it in aroma first. Fresh, green, slightly sweet. Then in texture. Fine, creamy, almost velvety if the powder is well made. Then in flavour, where good Uji matcha often brings a savoury umami note, gentle sweetness, and less of the rough edge that can make lower-grade powders feel aggressive.
That matters for Australians using matcha as part of a daily wellness routine. If you want sustained energy rather than a jittery spike, flavour is not separate from function. A smoother, more balanced matcha is easier to enjoy consistently, whether you whisk it traditionally or add it to your morning latte.
Why Uji became a name people trust
Uji’s prestige grew because tea growers, tea masters, and buyers kept returning to the same conclusion. Tea from this region tasted refined and reliable.
By the Edo period, Uji had become strongly associated with high-quality Japanese tea, especially for people seeking a more polished drinking experience. That reputation still shapes the market today. You can see it in how often Uji is used as the reference point for premium matcha, and in how carefully serious buyers check origin before they buy.
This is also where confusion can creep in. "Uji-style" and "matcha from Japan" do not always mean the same thing as authentic Uji matcha. If you want to understand how origin connects to production quality, this guide to how matcha tea is made helps link what happens in the field to what ends up in your cup.
The place behind the flavour
A good Uji matcha often shows its origin in a few clear ways:
- Umami that feels deep and savoury, not harsh
- A softer finish that leaves the palate clean
- A vivid green colour that reflects careful growing and handling
- A creamy mouthfeel that makes daily drinking more pleasurable
Those qualities are not just for tea ceremony. They matter in ordinary life. A smoother matcha is easier to drink straight, easier to blend into a clean breakfast routine, and easier to return to every day if you are replacing part of your coffee habit with something calmer.
For Australian buyers, that practical side is worth keeping in mind. The best Uji matcha brings together tradition and usefulness. It carries centuries of craft, but it also fits neatly into modern goals like better focus, less sugar, cleaner ingredients, and a morning ritual that feels grounding. Brands that clearly state origin and offer organic options, including carefully sourced selections such as Pep Tea’s, make that choice much easier.
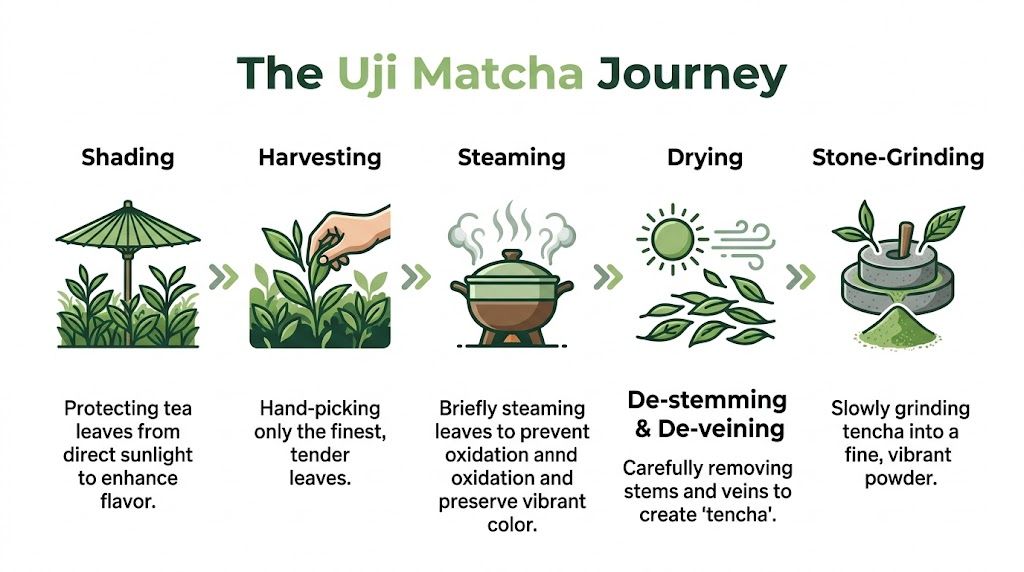
From Shaded Leaf to Stone-Ground Powder
A bright bowl of Uji matcha can look simple on the breakfast bench. Water, powder, whisk, done. Yet that soft green foam begins weeks earlier in the field, then passes through a series of careful steps that shape how the tea smells, tastes, and feels in your mouth.
Authentic uji matcha powder is made with restraint at every stage. The goal is not speed. The goal is to protect what is delicate in the leaf so it reaches your cup with its sweetness, colour, and creamy texture intact.
The craft in six practical steps
Price starts to make more sense once you see how much handling happens before the tea is ever packed into a tin.
The plants are shaded
Several weeks before harvest, growers reduce the amount of sunlight reaching the tea bushes. This slows photosynthesis and changes the leaf’s chemistry. The result is a leaf that tends to taste sweeter, more savoury, and less sharp.Tender leaves are harvested
The youngest, most suitable leaves are selected for matcha production. This is one reason fine matcha feels more refined than everyday green tea.The leaves are steamed
Steaming stops oxidation soon after picking. That helps hold onto the fresh green character and keeps the flavour from drifting into duller, flatter notes.The material is dried
For matcha, the leaves are dried without the rolling used for many other Japanese green teas. That difference matters because it prepares the leaf for the next stage.Stems and veins are removed
What remains is called tencha. Tencha is the clean, leafier material used to make matcha, and removing the tougher parts helps create a softer texture and cleaner finish.Tencha is stone-ground
The dried tencha is milled into an extremely fine powder. If you want a clear visual guide to the full process, this explanation of how matcha tea is made connects each production step to what you notice in the bowl.
Why stone-grinding changes the result
Stone-grinding works like using a very slow, careful hand in the kitchen instead of a fast industrial blade. The aim is a fine powder with a silky feel, not a rough grind that drinks chalky or hits the palate too hard.
This slower method also reflects a real supply constraint. As noted in the Sazen Tea discussion already cited, strong demand has put pressure on Uji’s tencha supply. That matters for Australian buyers because authentic Uji matcha is not an unlimited commodity. It is a specialised product built from skilled farming and limited raw material.
Traditional processing does not guarantee a wonderful matcha on its own. Poor leaf in a stone mill stays poor leaf. But careful shading, steaming, sorting, and grinding give excellent tea the best chance to show its full character.
What this means in the cup
Production choices become sensory clues once you start drinking matcha regularly.
- Colour looks brighter and fresher
- Aroma feels greener and sweeter, with less dull hay-like character
- Texture lands finer on the tongue, closer to cream than grit
- Foam whisks up more evenly
- Taste feels rounder, with umami and gentle sweetness instead of a hard, bitter edge
For anyone in Australia building a cleaner morning routine, those details are practical, not decorative. A smoother matcha is easier to drink with just water, easier to enjoy without loads of sugar, and easier to keep as a steady daily habit. That is where centuries of Uji craft meet modern wellness. You get a ritual that feels grounded, plus energy that arrives with more calm than a rushed second coffee.
Drink slowly and pay attention to the finish. Better matcha usually feels composed from first sip to last, with no dusty coarseness interrupting the experience.
Decoding the Grades Ceremonial vs Culinary Matcha
The most common matcha mistake is simple. People buy one tin and expect it to suit every use.
Then the results feel confusing. A beautiful drinking matcha disappears under milk and honey, while a stronger kitchen-grade powder can taste sharp if you whisk it with water on its own. The problem is not that one is “real” matcha and the other is inferior. The problem is fit.
Ceremonial grade is made for the bowl. Culinary grade is made for the recipe.
That distinction helps Australian buyers a lot, especially if your first experience with matcha came through a café latte. A latte can make almost any matcha seem pleasant. Plain matcha is less forgiving, so the grade matters more.
Ceremonial vs. Culinary Uji Matcha at a Glance
| Attribute | Ceremonial Grade Matcha | Culinary Grade Matcha |
|---|---|---|
| Best use | Whisked with water, minimal additions | Lattes, smoothies, baking, desserts, cooking |
| Flavour | Smoother, softer, more umami-led | Bolder, more assertive, better for blending |
| Colour | More vibrant green | Can be slightly deeper or less vivid |
| Texture | Silky and refined | Still fine, but made for mixing into recipes |
| Price logic | You’re paying for drinking quality | You’re paying for versatility and value |
How the difference shows up in real life
Ceremonial matcha aims for harmony. You notice sweetness, savoury depth, and a soft finish that invites slow sipping. It suits a quiet morning ritual, especially if you want a cleaner start to the day without loading your cup with sugar or syrups.
Culinary matcha has a different job. It needs enough presence to stay noticeable beside oat milk, banana, vanilla, cacao, or flour. In that setting, a firmer flavour is useful, much like a spice blend that still tastes vivid after cooking.
Neither grade is automatically the smarter buy. The better choice is the one that matches your routine.
How to choose without overthinking it
If you want one clear rule, start with how you drink it most often.
- Morning bowl with water only. Choose ceremonial.
- Daily latte at home. Choose culinary.
- Smoothies, baking, protein balls, or desserts. Choose culinary.
- Both pure tea and lattes. Keep one of each if your budget allows.
A practical guide to different grades of matcha can help you compare options before buying, especially if you are trying to balance flavour, budget, and wellness goals.
What to look for in each grade
For ceremonial grade, look for ease and composure in the cup. It should whisk well, smell fresh, and taste pleasant without milk covering roughness. If plain water leaves the matcha feeling flat, harsh, or overly astringent, it is probably not the right pick for sipping.
For culinary grade, strength is not a flaw. It is part of the design. You want a matcha that keeps its green tea character once it meets milk, fruit, or sweetener.
A helpful test is to ask one direct question. Does this powder taste good in the way I plan to use it?
That mindset saves money and disappointment. It also helps turn matcha into a steady daily habit, whether your goal is a traditional bowl before work or a clean afternoon latte that feels energising without the heaviness of a sugary café drink.
The Science of Calm Energy and Radiant Health
Many people start drinking uji matcha powder because they want energy. They stay with it because the feeling is different.
Coffee often arrives fast and loudly. Matcha tends to feel steadier. That doesn’t mean it’s magically better for everyone, but it does help explain why so many people describe it as clean, focused, and easier to live with day after day.
Why matcha feels different from a standard caffeine hit
A key reason is the combination of caffeine and L-theanine. According to this explanation of Uji matcha and L-theanine, Uji matcha’s shade-growing process can increase L-theanine concentration by up to 137% compared to sun-grown tea. The same source notes that this pairing is associated with improved physical performance and cognitive function by increasing alpha wave activity linked with calm alertness.
In plain language, that means matcha doesn’t deliver caffeine on its own. It brings it together with a compound that helps soften the edge.
What L-theanine actually does
L-theanine sounds technical, but the effect is easy to understand. It’s one reason many matcha drinkers say they feel more composed than buzzy.
Consider it this way:
- Caffeine helps you feel switched on
- L-theanine helps that alertness feel smoother
- Together they can create a more even experience
That’s especially appealing if regular coffee leaves you scattered, jittery, or flat later in the day.
Matcha’s appeal isn’t only about stimulation. It’s about the quality of attention it can support.
Where EGCg fits in
You’ll also hear about EGCg, one of matcha’s best-known antioxidant compounds. For many wellness-minded drinkers, that’s part of the draw. Matcha isn’t just a warm drink. It’s a whole-leaf tea that brings together plant compounds people actively seek out in a daily routine.
It’s best to stay realistic here. Matcha isn’t a cure-all, and it shouldn’t be treated like medicine. But as a regular beverage, it can fit neatly into a pattern of mindful choices around energy, focus, and less sugary drinking habits.
The benefits people notice in real life
Individuals typically don’t sit around thinking about alpha waves. They notice practical things instead.
Common reasons people keep matcha in the pantry include:
- A gentler start to the morning
- A focused afternoon ritual
- A café-style drink without relying on syrups
- A wellness habit that feels enjoyable rather than strict
For some, the ritual matters as much as the chemistry. Measuring, sifting, whisking, and drinking slowly can create a pause in the day that coffee sometimes doesn’t.
That combination of sensory pleasure and functional appeal is why Uji matcha has such staying power. It tastes good, it feels good, and it suits a lot of modern routines without asking you to become a tea purist.
Your Guide to Brewing the Perfect Cup
The first time many people make matcha at home, the result can be a surprise. You open a beautiful tin of Uji matcha, whisk it up, take a sip, and instead of sweet green depth, you get lumps, bitterness, or a flat latte that tastes more like warm milk than tea.
That usually comes down to method, not the matcha itself.
A good bowl of matcha is a bit like cooking with a premium olive oil. Small handling choices change what you taste. Water temperature, sifting, and whisking all shape whether the cup feels creamy, lively, and gently energising, or rough and disappointing.
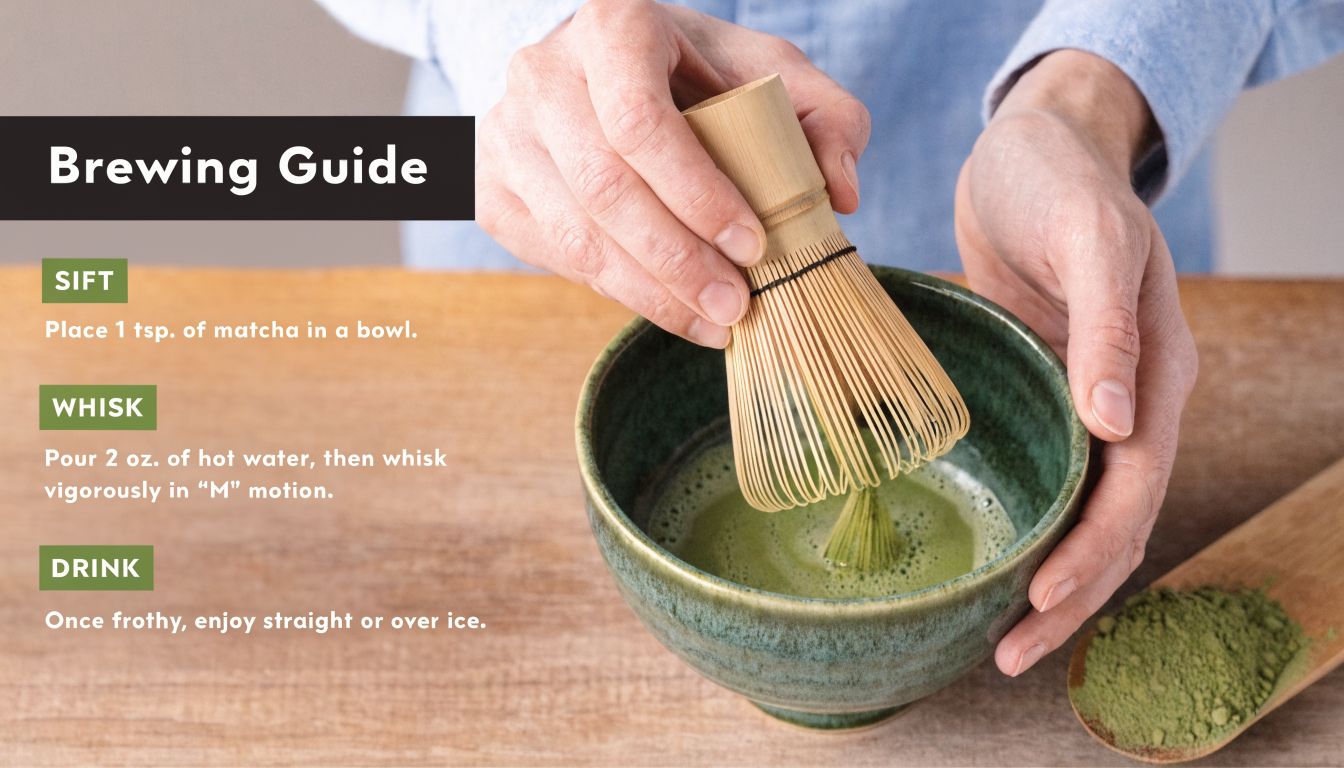
Traditional whisked matcha
If you want to understand Uji matcha properly, start with it on its own. This style lets you notice the creamy texture, the fresh aroma, and the gentle savoury sweetness that can get lost in milk.
What you’ll need
- A bowl large enough to whisk comfortably
- A bamboo whisk
- A small sieve
- Matcha powder
- Hot water, not boiling
Step by step
Warm the bowl
Swirl a little hot water in the bowl, then tip it out. This helps keep the temperature steady and makes whisking easier.Sift the powder
Matcha clumps easily because it is so fine. Sifting separates the powder so it blends more evenly with water.Add a small amount of water first
A splash is enough. Stir it into a smooth paste so you do not have dry pockets hiding at the bottom.Add more hot water
Water around 80°C usually gives a sweeter, rounder result. Boiling water can push the tea toward bitterness and bury the softer notes that make Uji matcha special.Whisk briskly
Use quick wrist movements until a light froth forms on the surface. You are aiming for a smooth suspension of tea in water, not heavy foam like a cappuccino.
Practical rule: If your matcha tastes harsh, check the water temperature first.
A simple home matcha latte
For plenty of Australians, a latte is the easiest way to turn matcha into a daily wellness habit. It fits the café rhythm many people already enjoy, but it can offer a steadier kind of lift for mornings and mid-afternoons.
Start with sifted matcha in a mug or bowl. Add a little hot water and whisk or stir until smooth. Then heat your milk separately and pour it in.
Dairy milk, oat milk, and soy can all work well. Oat milk is often the easiest starting point because its mild sweetness softens matcha’s savoury edge without covering up the tea completely.
If your latte tastes weak, the tea-to-milk ratio is usually the issue. Matcha should still be clearly present. You want harmony, not a green-coloured milk drink.
Here’s a visual guide if you like watching the whisking motion before trying it yourself:
Troubleshooting common problems
A disappointing cup does not always mean you bought the wrong matcha. Preparation errors are far more common, especially at the start.
Lumps in the drink
Sift the powder before adding water, and make a paste first.Too bitter
Let freshly boiled water cool a little before using it.Weak flavour in a latte
Add more matcha or reduce the amount of milk.No froth
Use a wider bowl and whisk with faster, lighter wrist movement.
A few habits that improve every cup
The ritual does not need to be formal to feel grounding. A few simple habits can turn matcha from an occasional experiment into a clean, enjoyable part of everyday life.
- Keep your tools dry before adding powder
- Use fresh matcha rather than a tin that has been open too long
- Start small and adjust the strength to your taste
- Drink it soon after whisking for the best aroma and texture
Once the method clicks, making matcha stops feeling fussy. It becomes a small daily reset, one that tastes good and sits neatly alongside a healthier, more intentional routine.
Exploring Matcha Beyond the Teacup
One of the best things about uji matcha powder is that it isn’t limited to a bowl and whisk. Once you understand its flavour, you start seeing it as an ingredient, not just a drink.
That opens up a lot of possibilities for Australian kitchens, especially if you enjoy café-style drinks, low-fuss baking, or simple ways to make everyday food feel more interesting.
Cold drinks for warm afternoons
On a hot day, matcha becomes something else entirely. Whisk it with a little warm water first, then pour it over ice and milk for an iced latte.
If you want something more breakfast-like, blend matcha into a smoothie with milk, yoghurt, banana, or a mild fruit that won’t drown out the tea. The key is balance. Matcha has a savoury side, so it usually works better with creamy ingredients than with very sharp citrus.
Baking that still tastes like matcha
Culinary matcha shines here. It brings colour, aroma, and a gentle bitterness that can stop sweets from feeling one-note.
Good starting points include:
- Shortbread or biscuits, where butter carries the tea flavour well
- Simple cakes or muffins, especially with vanilla or white chocolate
- Yoghurt bowls and chia puddings, where a spoonful can change the whole profile
- Ice cream or nice cream, for a softer dessert-style expression
A common mistake is using too little. If you want visible colour and a recognisable matcha flavour, be confident enough with the quantity that the tea doesn’t disappear behind sugar and flour.
Matcha works best in recipes where there’s room for its grassy, umami character to remain noticeable.
Savoury uses that surprise people
Matcha gets underrated in this aspect. Used carefully, it can add depth to savoury dishes.
Try whisking a small amount into a salad dressing with oil and a mild acid. Or stir a pinch into a sauce where you want a subtle green, savoury note. Some cooks also dust it lightly over vegetables or use it in seasoning blends.
The trick is restraint. Matcha is concentrated. A little can lift a dish, while too much can flatten it into bitterness.
A pantry ingredient, not just a wellness trend
When people only think of matcha as a health drink, they miss half the fun. It can become part of your broader food routine.
One day it’s a morning latte. Another day it’s folded through a biscuit dough. Another day it adds a fresh edge to a dressing for lunch. That kind of versatility is what makes culinary-grade matcha especially useful. It earns its place in the cupboard because it does more than one thing well.
How to Store and Buy Authentic Uji Matcha
Good matcha is delicate. Light, heat, air, and moisture all work against it. If you’ve ever opened an old tin and found the colour duller and the aroma flatter, that’s usually storage talking.
Buying well matters. Storing well matters just as much.
How to store it once opened
The goal is to protect freshness for as long as possible.
- Keep it sealed tightly after each use
- Store it away from heat and light
- Avoid moisture from steamy kitchens or wet scoops
- Use a clean, dry spoon every time
If you refrigerate matcha, keep it sealed well so it doesn’t absorb odours. Before opening a chilled tin, let it come to room temperature so condensation doesn’t settle into the powder.
What authenticity looks like in practice
You don’t need to be a tea judge to shop more confidently. You just need a few filters.
Look for:
- Clear origin information that names Uji or Kyoto, Japan
- A vibrant green colour rather than swampy or brownish tones
- A fresh aroma that smells lively, not stale
- Organic certification, if that matters to your buying standards
- A seller who explains grade and intended use clearly
If a product description is vague, that’s useful information in itself. Good tea usually comes with good traceability.
Buying for your actual routine
A lot of buyers overpay because they purchase the most premium-sounding option without thinking about use. If you mostly make lattes and smoothies, choose a matcha suited to that. If you love whisking plain tea, spend more on a finer drinking grade.
Cafés and retailers think this way too. If you work in hospitality and want to better understand how product quality, brand trust, and education influence buyer decisions, this Food & Beverage Marketing Guide offers a useful commercial lens.
A final buyer checklist
Before you click “add to cart”, pause and ask:
- Is the origin clearly stated?
- Is the grade appropriate for how I’ll use it?
- Does the colour suggest freshness?
- Does the brand explain the tea in plain, specific language?
- Will I realistically finish it while it’s still tasting its best?
Those questions protect you from a lot of disappointing purchases. They also help you appreciate why authentic uji matcha powder earns such loyalty among people who care about flavour, ritual, and a cleaner kind of daily energy.
If you’re ready to put this into practice, explore Pep Tea for organic matcha options suited to everyday whisking, café-style lattes, and creative kitchen use.
Natural Energy Drinks Australia: The Ultimate 2026 Guide

It’s 3 pm. You’ve already had a coffee, lunch has worn off, and your brain is doing that foggy little shuffle between “push through” and “find something cold and fizzy.”
A lot of Australians know that cycle well. You grab a sugary drink or another strong caffeine hit, feel a quick lift, then cop the flat feeling later. That’s usually the moment people start looking into natural energy drinks australia shoppers are reaching for, not because they want hype, but because they want energy that feels steadier and easier on the body.
For some, that means matcha instead of a second flat white. For others, it’s kombucha, yerba maté, or a botanical drink with ingredients they can recognise on the label. Café owners are seeing the same shift from the other side of the counter, with more customers asking for low-sugar, functional drinks that fit a wellness routine.
The End of the 3 PM Slump
A bloke working from home in Newcastle opens the fridge and stares at his options. Leftover soft drink. Another coffee. Sparkling water. Maybe something with a bit more life in it.
That moment says a lot about why natural energy drinks are having a real moment in Australia. People still want energy, focus, and something convenient. They just don’t want the old trade-off of a sharp spike followed by a rough slide.

That shift isn’t imaginary. The Australian energy drinks market, including a rising segment of natural and organic variants, was valued at AUD 131.52 million in 2025 and is projected to reach AUD 226.58 million by 2034, growing at a CAGR of 5.5%, according to Research and Markets’ Australia energy drink market analysis.
What matters in everyday life is what that trend looks like in practice. It looks like:
- Parents swapping high-sugar options for drinks with tea-based caffeine
- Office workers looking for focus without feeling overcooked
- Gym-goers wanting something lighter than a syrupy can
- Cafés adding non-alcoholic functional drinks to the menu
Natural energy isn’t about chasing a massive buzz. It’s about finding a drink that helps you stay switched on without feeling rattled.
That’s where this category gets interesting. “Energy drink” used to mean one very specific thing. In Australia now, it can also mean matcha, kombucha, yerba maté, green tea blends, or other plant-based options that support a more even kind of lift.
What Makes an Energy Drink Natural Anyway
A lot of people still hear “energy drink” and think of neon cans, intense sweetness, and an ingredients panel that reads like a chemistry worksheet. That’s old thinking.
Natural energy drinks sit in a different lane. They usually lean on plant-based caffeine sources, lower sugar, and ingredients people already know from tea, herbs, or whole-food style formulations.
The ingredient shift people are looking for
Australian shoppers are reading labels more closely. They’re paying attention to where the caffeine comes from, how sweet the drink is, and whether the formula looks more like food or more like a science experiment.
That change shows up in market behaviour too. As TechSci Research’s Australia energy drinks report notes, consumers are moving away from artificial additives toward natural caffeine sources for steadier energy. The same source says health-centric soft drinks like fruit and vegetable juices captured 57.1% of consumer spending in the soft drink category as of 2023.
That doesn’t mean every “natural” drink is automatically a smart choice. It means the category has widened, and you’ve got better options than the old sugar-heavy model.
Natural versus synthetic in plain language
Here’s the simplest way to think about it.
| Type | Common feel | What to look for |
|---|---|---|
| Traditional energy drink | Fast hit, often very sweet, can feel abrupt | Artificial flavours, added sugar, synthetic-style stimulant blends |
| Natural energy drink | Gentler lift, often more balanced | Tea, maté, botanical caffeine, low sugar, simpler label |
A natural energy drink often gets its lift from ingredients such as:
- Matcha or green tea for calm alertness
- Yerba maté for a more rounded stimulant feel
- Guarana when used in a cleaner formulation
- Botanicals and functional ingredients that support focus or refreshment
Why people get confused
The word “natural” isn’t magic. A drink can still be highly processed, overly sweet, or full of things you don’t want. That’s why the label matters more than the front of the can.
A useful rule is to ask three questions:
- Where does the energy come from
- How much sugar is riding along with it
- Can you recognise most of the ingredient list
Practical rule: If the energy source is clearly named and the ingredient list looks like something a real person would understand, you’re usually starting in a better place.
For many Australians, the appeal is simple. They want energy that fits a health-conscious routine, not something that fights against it.
The Power Players of Natural Energy in Australia
You can feel the difference within a sip or two.
A matcha latte on a busy Tuesday morning tends to suit a very different moment from a sparkling yerba maté after school pickup, or a kombucha pulled from the café fridge on a warm afternoon. For households, that means choosing a drink that matches the job. For café owners, it means building a menu with clear roles instead of stocking three products that all do the same thing.
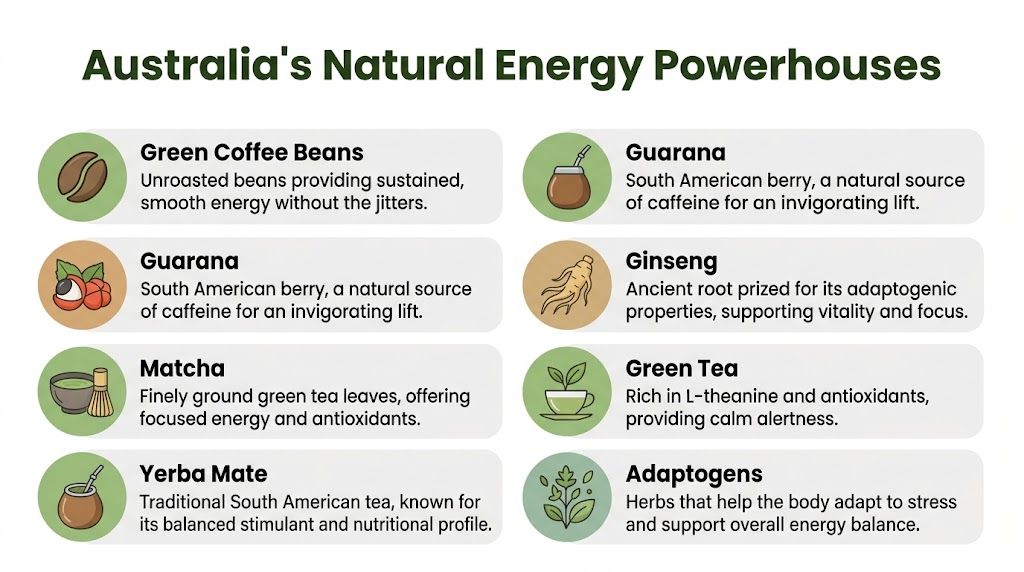
Matcha for calm focus
Matcha often suits people who want their brain switched on without feeling pushed around by their drink.
The reason is fairly simple. You are drinking the whole powdered green tea leaf, so the experience is not identical to a fast, isolated caffeine hit. Many Australians describe it as steadier and more organised, which helps explain why it keeps showing up in home kitchens, studio fridges, and café menus.
A lot of the curiosity around matcha centres on L-theanine. That pairing is one reason matcha has become such a favourite among professionals, students, and shift workers who want cleaner-feeling focus. If you want the practical safety side explained clearly, Pep Tea’s guide on how many cups of matcha tea powder are safe per day is a useful place to start.
For households, matcha is one of the easiest natural energy ingredients to work with. Hot, iced, blended into smoothies, or folded into yoghurt and oats, it adapts well.
For cafés, it also earns its shelf space because one ingredient can become several menu items:
- Hot matcha latte for regulars who want a coffee alternative
- Iced flavoured matcha for wellness-focused customers
- Sparkling matcha tonic for a lighter, sharper serve
- Smoothie add-on for gym and recovery traffic
Kombucha for a lighter daily option
Kombucha plays a different role.
People usually reach for it when they want refreshment with a bit of lift, not when they are chasing the strongest stimulant on the shelf. Tea-based fermentation, lighter flavour profiles, and lower-sugar options make it a comfortable fit for people trying to clean up their everyday drinking habits.
That gives kombucha a practical edge in Australia. It works at home as a soft drink replacement, and it works in hospitality as a chilled grab-and-go, a non-alcoholic pairing, or a mocktail base that still feels grown-up.
If matcha is the focused study drink, kombucha is often the easy afternoon reset.
Yerba maté for a brisk, sparkling lift
Yerba maté sits in the middle ground between tea culture and energy-drink convenience.
That middle ground matters. Some customers want something canned, cold, and ready to go, but they are also trying to move away from syrupy mainstream energy products. A well-made yerba maté drink answers that need neatly. It often feels brighter and cleaner, especially in sparkling formats.
For households, it can be a handy fridge option for active days or long drives. For cafés and venues, it works as a bridge item. It still speaks to the customer who normally buys an energy can, while giving health-conscious regulars a product with a more ingredient-led story.
Green tea and botanical blends for a softer profile
Some of the strongest products in this category do not rely on one headline ingredient.
Green tea, citrus, native botanicals, and herbs can work together like a good café blend. No single note has to dominate for the drink to do its job well. The result is often gentler and more rounded, which suits people who care about how they feel an hour later, not just the first 15 minutes.
In the Australian market, these blends often include:
- Green tea for a familiar tea-based caffeine source
- Matcha with citrus for freshness and a cleaner finish
- Botanicals such as lemon myrtle for flavour and local character
- Electrolyte support for hot weather, training days, or long shifts
This is also where café owners can stand out. A botanical sparkling tea or house matcha-citrus serve can feel more thoughtful than adding another canned product to the fridge.
Hydration-support drinks for flat, drained days
Some energy slumps have less to do with stimulation and more to do with fluid, food, and recovery.
That is why hydration-friendly drinks deserve a place in this conversation, even if they are not the highest-caffeine option. After a workout, a humid day, or a long hospitality shift on your feet, a drink with fluid support can make more sense than reaching straight for another stimulant.
For households, that can mean keeping a few lighter recovery-style options on hand. For cafés, it can mean offering a post-Pilates or post-beach drink that suits the customer who wants to feel better, not buzzier.
If someone is tired because they are dehydrated or under-fuelled, more caffeine may miss the real problem.
Which one suits which person
A simple matching exercise usually clears up the confusion.
| Drink type | Best suited to | Common appeal |
|---|---|---|
| Matcha | Desk work, study, morning focus | Calm alertness, flexible hot or cold |
| Kombucha | Everyday refreshment, low-sugar swaps | Light, fermented, tea-based |
| Yerba maté | Ready-to-drink energy seekers | Brighter lift, sparkling formats |
| Hydration-support drinks | Active days, recovery-minded drinkers | Fluid support, useful after heat or exercise |
| Green tea botanical blends | Gentle caffeine drinkers | Softer profile, layered flavour |
Australian buyers are getting more specific, and smart café menus are doing the same. The better question is no longer “Which drink gives energy?” It is “Which kind of energy fits this person, this moment, and this setting?”
Understanding the Health and Safety Evidence
Most confusion around natural energy drinks comes down to one word. Caffeine.
People often treat caffeine as if it always behaves the same way, no matter where it comes from. In real life, the source and the company it keeps can change the experience a fair bit.
Why natural caffeine can feel different
A tea-based drink doesn’t always land like a synthetic-style energy product. The same goes for yerba maté.
In Australian clean energy drinks, yerba maté is used for that reason. Perla’s guide to clean energy drinks describes yerba maté with natural caffeine at 30-50mg/100ml and theobromine, with a sustained release and a half-life extended 2-3x versus synthetic caffeine due to xanthine synergies.
You don’t need to memorise the chemistry. The practical takeaway is easier than that. Some plant-based caffeine sources feel smoother because they arrive with other naturally occurring compounds, not as a blunt isolated hit.
Matcha and calm alertness
Matcha notably stands out.
People don’t just drink matcha because it’s green and pretty in a bowl. They drink it because the experience often feels more organised. You’re awake, but not necessarily buzzing. Focused, but not edgy.
That’s the reason so many people use it during work, study, or long afternoons when they need their brain online without tipping into over-caffeinated territory.
If you’re wondering about sensible intake, Pep Tea has a practical guide on how many cups of matcha tea powder are safe per day.
A good natural energy drink should help you feel more like yourself, not less.
The kombucha question
Readers often ask whether kombucha “counts” as an energy drink.
It can, depending on how you use it. Kombucha made from tea can offer a mild lift, but the bigger reason many people keep it in rotation is that it feels lighter, less sugary, and easier to drink regularly than conventional soft drinks or heavy energy products.
There’s also a broader wellness link people care about. When digestion feels settled and meals aren’t swinging all over the place, daily energy often feels steadier too. That’s not a miracle claim. It’s just the practical reason many people pair low-sugar fermented drinks with a more balanced routine.
A few safety points worth keeping in mind
Natural doesn’t mean unlimited. It means you still need to pay attention.
- Check caffeine source: Tea, maté, and guarana all contribute differently to the feel of a drink.
- Watch serving size: A small bottle and a large can won’t hit the same.
- Notice timing: Late afternoon caffeine can still affect sleep, even when it feels smoother.
- Read the full label: “Natural” on the front doesn’t excuse a messy formula on the back.
For cafés, this matters too. Staff should be able to explain what’s in a matcha, kombucha, or maté-based serve in simple language. Customers appreciate that clarity.
How to Choose and Read Labels Like a Pro
You are standing at the fridge in a Newcastle café or your local health shop. Two cans both say “natural energy”. One will give you a clean, steady lift. The other is basically a soft drink in activewear.
The difference usually sits on the back label.
For everyday drinkers, that label helps you choose something you will feel good drinking again tomorrow. For café owners, it does another job too. It helps your staff explain the product in plain English, which is often the difference between a curious glance and a confident sale.
Read the back before the front
Front-of-pack words are there to catch your eye. The ingredient list tells you what is really in the bottle.
Start with the first few ingredients. They usually reveal the base of the drink, much like the first ingredients in a stock tell you whether a soup was built on vegetables or salt. If the energy source is genuine, it should be easy to spot. Look for clear names such as matcha, green tea, yerba maté, kombucha, or chia.
A shorter list can help, but length is not the whole story. Clarity matters more. If you can see what the drink is made from and why those ingredients are there, you are already ahead.
A strong label often shows four things:
- A named plant source of energy. Matcha, green tea, yerba maté, or another clearly identified ingredient
- A sensible sugar profile. Helpful if you want steadier energy rather than a quick spike
- Ingredients with a clear job. Cultures, botanicals, or hydration-supporting additions that make sense in the formula
- Plain flavour cues. Fruit, herbs, spices, and tea are easier to assess than vague flavour claims
Learn to spot the “why” behind the formula
Some drinks are built for more than stimulation. That is where label reading gets interesting.
A chia-based drink, for example, may also support hydration and make the drink feel more filling. A kombucha product may be chosen by customers who want something lighter and less syrupy. A matcha drink often appeals to people chasing focus without the heavy coffee edge. If you run a café, these distinctions matter because they shape how you place the drink on your menu and how your team describes it at the counter.
The simplest question is this: what job is this drink trying to do?
If the answer is clear, the label is doing its job.
Red flags worth slowing down for
You do not need a chemistry degree to read a label well. You just need a few filters.
Pause when you see:
- Big natural claims without a clear source of energy
- Long ingredient lists that hide the main ingredient
- Sweetness doing most of the heavy lifting
- Intense marketing words with very little explanation of formulation
- Serving sizes that make the numbers look smaller than the actual intake
That last one catches plenty of people. A bottle can look light and “better for you”, then turn out to contain more than one serve. For a household shopper, that changes what you are drinking. For a café buyer, it changes cost, portion planning, and how transparently you can present the product.
Quick test: If you cannot tell where the energy comes from and how sweet the drink is within ten seconds, put it back.
A practical label check for home and hospitality
Here is a simple way to assess a drink without overthinking it:
| Check | Why it matters |
|---|---|
| What is the actual energy ingredient? | Helps you predict whether the lift will feel tea-like, botanical, or sugar-driven |
| How sweet is the formula? | Affects flavour, repeat purchase, and how steady the experience feels |
| Is the serving size realistic? | Gives you a truer read on what one bottle or can delivers |
| Can a staff member explain it simply? | Important for cafés, delis, and wellness venues selling to curious customers |
If you are choosing for home, ask whether the drink fits your real routine. Can you have it mid-morning, pre-gym, or instead of a second coffee without regretting it later?
If you are choosing for a café, go one step further. Ask whether it fits service. Ready-to-drink options need to be easy to chill, easy to explain, and aligned with the kind of customer who already orders your matcha, kombucha, or low-sugar specials. If matcha is part of your offer, it also helps to understand the flavour profile customers expect from a well-made serve. Pep Tea’s guide to making an iced matcha latte with a smooth café-style balance is a useful reference point.
Good label reading is really pattern recognition. After a while, you stop being swayed by earthy colours and wellness buzzwords. You start seeing what is in the drink, who it suits, and whether it deserves a place in your fridge or on your menu.
Practical Uses From Your Kitchen to Your Café
A good natural energy drink shouldn’t live only in theory. It should fit into the way you eat, work, train, and socialise.
At home, that usually means speed. In a café, it means flexibility and menu appeal.

At home with minimal fuss
Matcha is one of the easiest places to start because it works in more than one format.
A few simple ways to use it:
Morning iced matcha latte
Good when you want something cooling and focused rather than another hot coffee. If you want a simple method, Pep Tea has a step-by-step guide on how to make an iced matcha latte.Smoothie boost
A small amount of culinary matcha can add a gentle tea-based lift to a banana, oat, or mango smoothie.Kombucha over ice with citrus
This works as an afternoon swap for soft drink and feels a bit more grown-up than a standard sugary mixer.Sparkling botanical serve
If you keep a yerba maté or green tea drink in the fridge, pour it into a nice glass with fresh mint or a wedge of lime. It turns a functional drink into something you look forward to.
For cafés building a better non-alc menu
Customers aren’t only asking for less alcohol. They’re also asking for more thoughtful alcohol-free options.
Natural energy drinks fit beautifully into that shift because they can sit across breakfast, lunch, and afternoon trade. They’re useful for people who want something purposeful but still café-friendly.
A practical menu mix might include:
- Hot ceremonial-style matcha latte for coffee alternators
- Iced flavoured matcha latte for warm weather and younger customers
- Kombucha by the bottle or poured serve for grab-and-go fridges
- Maté-based spritzes for premium non-alcoholic menus
- Botanical energy mocktails using tea, herbs, and citrus
This short demo gives a feel for how visual and approachable these drinks can be in service.
Why these drinks work so well in hospitality
They solve more than one problem at once.
They give cafés and casual venues a way to serve customers who want:
- Less sugar
- Less heaviness
- Less sameness than coffee or soft drink
- More interest in the fridge and on the menu
For a venue, natural energy drinks aren’t just products. They’re a way to meet morning regulars, wellness customers, and non-alc drinkers with one smarter category.
A Sourcing Guide for Households and Hospitality
Where you buy natural energy drinks shapes what you get. Range, freshness, product knowledge, and consistency all vary depending on the channel.
That matters whether you’re stocking your home fridge or planning a café drinks list.

Supermarkets and major retail shelves
This is the most convenient path.
You can compare formats quickly, spot new launches, and grab a drink with the rest of your shop. The trade-off is that range can be patchy, and the better-for-you category often sits beside mainstream products that look similar at a glance.
Retail shelves are useful when you want speed and convenience. They’re less useful when you want depth or specialist guidance.
Health food stores and independent grocers
These shops often curate more carefully.
You’re more likely to find products that lean organic, low sugar, fermented, or tea-based. Staff may also understand the category better, which helps if you’re deciding between kombucha, maté, or a matcha-based option for the first time.
This route suits shoppers who want a more thoughtful selection.
Buying direct online
Direct buying gives households access to the full range, product details, and educational content that usually doesn’t fit on a shelf tag.
If kombucha is your starting point, this guide on where to buy organic kombucha in Australia is a handy place to compare your options.
For repeat buyers, direct ordering is often the easiest way to stay consistent. You know what you like, and you don’t have to hope the local fridge is stocked.
Wholesale for cafés and hospitality venues
Wholesale is its own decision.
A venue needs more than a nice product. It needs reliable supply, a format that works in service, and a supplier who understands that drinks have to perform both on the shelf and in the glass.
For cafés, bars, and health-focused venues, the best supplier relationship usually offers:
- Consistent product quality
- Clear ingredient information for staff
- A drink story customers can understand
- Local relevance and dependable ordering
For Australian venues, local sourcing can also make the menu feel more grounded. That matters more than many businesses realise.
Your Next Step Towards Cleaner Energy
The best natural energy drinks don’t try to flatten your body into one speed. They support the way real days work. Sometimes you need focus. Sometimes you need refreshment. Sometimes you just want something that won’t leave you feeling ordinary an hour later.
That’s why this category makes sense for both households and hospitality. Matcha offers a calm, steady style of energy that suits work, study, and café menus. Kombucha brings a lighter, low-sugar option that fits daily drinking and non-alcoholic serves. Yerba maté, green tea blends, and hydration-focused drinks fill out the rest of the picture.
Cleaner energy isn’t about perfection. It’s about making better swaps, one fridge and one menu at a time.
If you’d like to explore cleaner everyday options, have a look at Pep Tea for organic matcha and Australian-made kombucha, along with practical guides for home drinkers and hospitality venues.
Mastering Making Matcha Tea At Home
You’re probably here because you’ve had one of two matcha moments.
The first is the café one. You order a beautiful bright green bowl or latte, take a sip, and wonder why it tastes smooth, creamy and clean there, yet muddy or bitter when you try making matcha tea at home.
The second is the wellness one. You want something that feels steadier than coffee, more intentional than a quick tea bag, and a little more special than another rushed morning drink.
Good news. Matcha isn’t hard. It is precise.
Small details make the difference between a sweet, rounded cup and one that tastes flat or sharp. That’s why matcha feels like both an art and a science. The ritual matters, but technique matters just as much.
Beyond the Green Powder The Art of Making Matcha
A lot of people first meet matcha through a latte. That makes sense in Australia, where café culture shapes what ends up in our kitchens. But once you start making matcha tea properly, it stops feeling like a trend and starts feeling like a practice.
The appeal isn’t just flavour. It’s the kind of energy matcha offers. Many tea drinkers reach for it because it supports a calmer, more focused feeling, which is why matcha has become part of so many wellness routines.
That local interest isn’t imagined. In Australia, matcha imports from Japan increased by over 150% between 2018 and 2023, and café adoption of matcha lattes rose 78% in Sydney and Melbourne venues by 2022, according to this overview of the global matcha tea industry.
Those numbers line up with what’s happening on the ground. More cafés are serving matcha. More people want to make it at home. More shoppers are learning that not all green powder is the same.
Practical rule: Great matcha is less about fancy gear and more about doing a few simple things properly.
That starts with understanding what matcha is meant to be. It isn’t brewed like ordinary leaf tea. You’re whisking powdered tea directly into water, so every choice matters. The powder quality, the water temperature, the bowl shape, the whisking motion, even whether you sift first.
When people struggle with matcha, it usually isn’t because they’re bad at it. It’s because nobody showed them the small mechanics that change the result.
If you want the full background on sourcing and production, how matcha tea is made is worth reading before you buy your next tin. Knowing how it gets from leaf to stone-ground powder helps you understand why fresh, well-handled matcha behaves so differently in the bowl.
Making matcha tea well is a skill. The nice part is that it’s a very learnable one.
Gathering Your Tools and Choosing Your Matcha
Before the water goes on, set yourself up properly. Matcha rewards preparation. A little order at the start makes the whole process smoother.
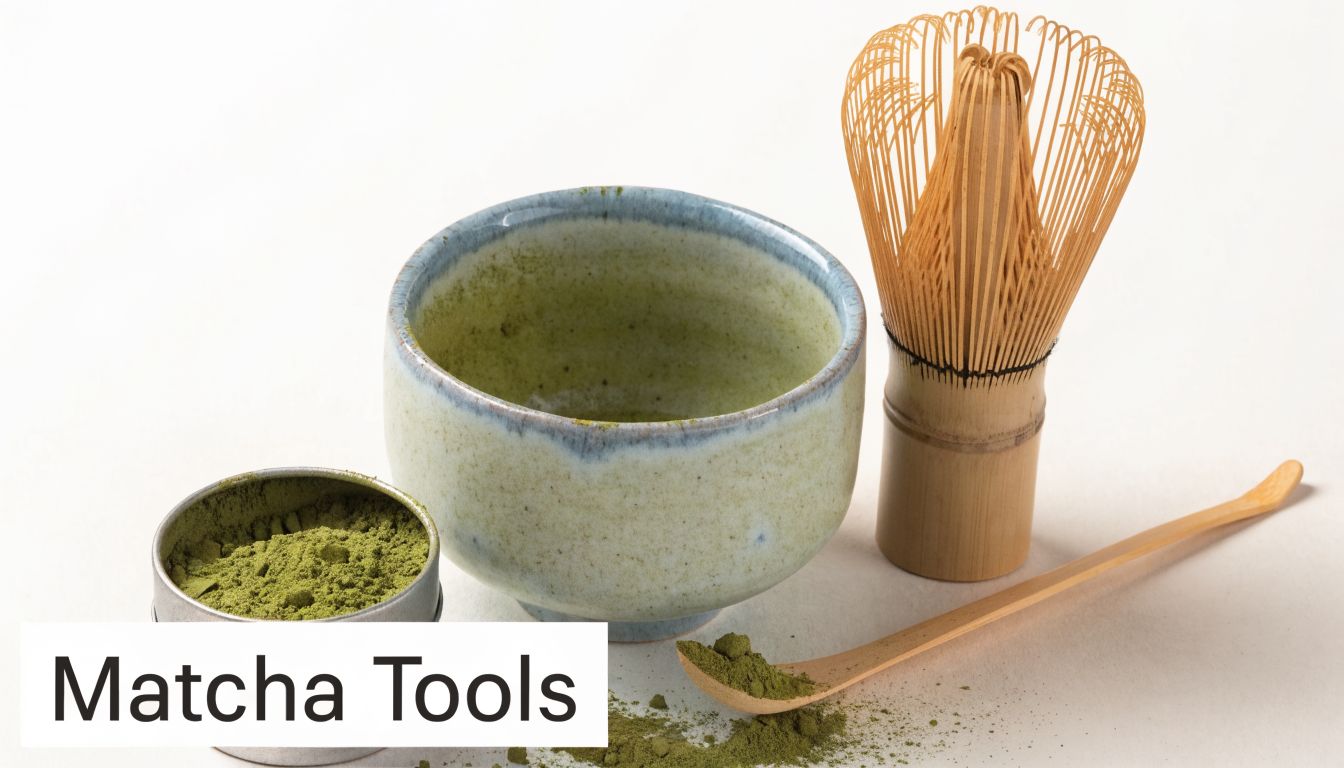
The classic tools and what each one does
The traditional setup is simple.
- Chawan: This is the bowl. Its wide shape gives you room to whisk properly and helps the foam form instead of splashing up the sides.
- Chasen: The bamboo whisk. This is the tool that transforms matcha and water into a smooth suspension rather than a gritty drink.
- Chashaku: The bamboo scoop. It helps with consistent portioning and makes the ritual feel more deliberate.
- Fine sieve: Not always included in a starter set, but essential if you want a smooth cup.
- Kettle and thermometer: Useful because water temperature is one of the most important variables.
A good bowl and whisk do most of the heavy lifting. If you only invest in two things, make them those.
What to use if you don’t have traditional gear
You do not need a formal tea setup to start making matcha tea at home.
A small cereal bowl can stand in for a chawan. A kitchen sieve works well for sifting. If you don’t own a chasen yet, a handheld milk frother is the most practical substitute for lattes and casual home use.
That said, alternatives do change the experience.
A bamboo whisk gives you more control in a traditional bowl of matcha. It creates a finer foam and lets you feel the texture changing as you whisk. A milk frother is convenient, but it can over-aerate or create larger bubbles, especially in a narrow mug.
If you want ritual and texture, use a chasen. If you want speed on a weekday morning, use what gets you drinking good matcha consistently.
Ceremonial and culinary grade are not interchangeable
At this stage, many people waste good powder, or judge matcha unfairly.
Ceremonial-grade matcha is best for drinking with water. It should taste softer, cleaner and more nuanced on its own. When you’re preparing usucha or koicha, this is the right place to spend more.
Culinary-grade matcha is better for recipes where it has support. Think lattes, smoothies, baking, overnight oats or energy balls. It’s designed to hold its character when mixed with milk, fruit, sweeteners or fats.
Here’s the easiest way to decide.
| Use | Best matcha choice | Why |
|---|---|---|
| Traditional bowl with water | Ceremonial grade | The flavour has nothing to hide behind |
| Hot latte | Culinary or robust ceremonial | Milk softens edges and changes the balance |
| Iced latte | Culinary grade | Cold drinks often need a stronger flavour presence |
| Smoothies and baking | Culinary grade | Better value and more assertive character |
If you’re still comparing options, this guide to different grades of matcha helps clarify what each grade is for and what to look for before buying.
What quality looks like before you even taste it
You can spot a lot from the tin.
Look for:
- Colour: A lively green is a good sign. Dull, khaki or yellow-green powder often signals age, oxidation or lower drinking quality.
- Texture: Good matcha should feel very fine, almost silky.
- Aroma: Fresh matcha smells green, soft and slightly sweet. If it smells stale or dusty, it probably tastes that way too.
- Behaviour in water: Better matcha incorporates more willingly and tastes more balanced.
A simple home setup that works
If you’re building a practical home station, keep it modest:
- One bowl you enjoy using
- One bamboo whisk
- One sieve
- One matcha for drinking
- One matcha for lattes and recipes
That setup covers nearly all common preparations. You don’t need a collection. You need tools that suit the way you drink matcha.
Mastering the Ceremonial Brew for a Mindful Moment
The most satisfying bowl of matcha is often the simplest one. No milk. No sweetener. Just powder, water, air, and a few minutes of attention.
Traditional usucha, or thin matcha, is the ideal style for beginners. It teaches you what matcha tastes like and makes every later drink better, including lattes.
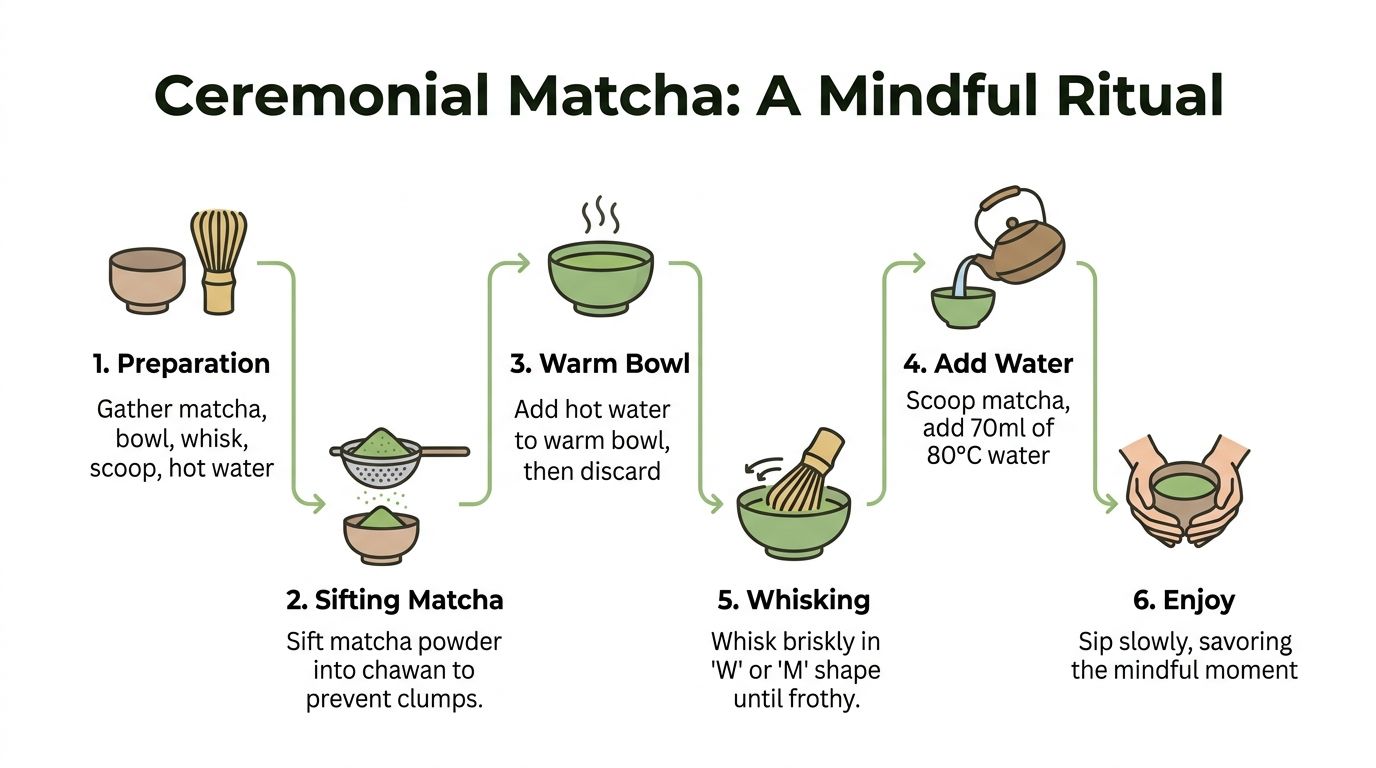
Start with warmth and order
Warm the bowl first. Add a little hot water, swirl it around, and let the whisk soften briefly in the bowl. Then tip the water out and dry the bowl.
That little preparation step matters. A warm bowl helps the powder disperse more evenly and makes the ritual feel settled from the first movement.
Sift your matcha into the bowl. For usucha, use 1 to 2 teaspoons, or 2 to 4 grams, and pass it through a fine mesh sieve. The reason is simple. Matcha clumps easily, and once wet, those clumps are harder to break apart cleanly.
According to this usucha preparation guide, the usual method starts by sifting 1 to 2 teaspoons (2 to 4g) of ceremonial-grade matcha into a preheated bowl before adding water.
The water matters more than people think
Most bad homemade matcha comes down to one problem. The water is too hot.
For usucha, use water at 70 to 80°C. That same guide notes that 70 to 80°C is the critical range, and that overheating can degrade beneficial compounds and create bitterness.
If you’ve just boiled the kettle, let it sit briefly before pouring. If you own a temperature-control kettle, use it. If you don’t, make a habit of slowing down rather than pouring straight off the boil.
Here’s a practical ratio that works well for a bowl of usucha:
- 2 to 4g matcha
- 60ml warm water to begin
- More hot water if you want a longer, lighter bowl
You’re not trying to drown the powder. You’re trying to suspend it smoothly.
Water that’s too hot makes matcha taste harsher than it is. People often blame the powder when the kettle is the real problem.
Whisk for foam, not force
Once the water is in, start by gently combining the powder and water so there are no dry pockets. Then whisk briskly with the chasen in a zigzag M or W motion.
Don’t stir in circles. Circular stirring blends, but it doesn’t create the same fine foam.
The same usucha source notes that whisking vigorously for 30 to 45 seconds is key to building a creamy froth layer over 2mm thick. That foam isn’t just for looks. It changes how the liquid feels on the palate and gives the bowl a softer first sip.
A few technique notes help:
- Use your wrist, not your whole arm
- Keep the whisk tips near the surface once the mixture is combined
- Finish with a gentle sweep to tidy larger bubbles
- Drink promptly while the texture is lively
The finished bowl should look vibrant, lightly glossy and topped with fine foam rather than big soap-like bubbles.
Taste it before changing it
Sip before you decide it needs sweetener.
Well-made ceremonial matcha should have a balance of green freshness, slight savoury depth, gentle bitterness and a round finish. If it’s aggressively bitter, something usually went wrong in preparation.
Common causes include:
| Result in the bowl | Likely cause | What to change |
|---|---|---|
| Sharp bitterness | Water too hot | Lower the temperature |
| Gritty texture | Powder not sifted well | Sift before whisking |
| Flat or weak flavour | Too much water | Use less water first |
| No foam | Poor whisking motion | Use a fast zigzag movement |
Turn it into a quiet ritual
One reason people stick with matcha is that the process slows them down in a useful way. There’s enough technique to hold your attention, but not so much that it becomes fussy.
If you enjoy pairing your tea with a few minutes of breathing or stillness, these simple meditation techniques are an easy companion resource. Matcha and a short mindful pause work well together because both ask you to pay attention to small things.
The best ceremonial bowl isn’t the one that looks perfect. It’s the one that makes you slow down enough to notice it.
For enthusiasts who want to try koicha
Koicha is thick matcha. It’s richer, denser and far less forgiving than usucha.
The method changes noticeably. The verified preparation guidance for koicha calls for 4g (2 tsp) of sifted matcha with 30ml of 75°C water, then slow kneading rather than vigorous whisking, as outlined in this koicha technique guide.
A few distinctions matter:
- Texture: Koicha should be glossy and thick, more like a smooth paste than a frothy tea.
- Movement: You knead and press with the whisk rather than beating air into the bowl.
- Powder quality: Koicha demands excellent matcha. Lower grades become unpleasant quickly.
- Serving style: It’s sipped slowly in small amounts.
If usucha is your daily practice, koicha is your deep dive. Start there only after you can make a balanced bowl of thin tea without guessing.
Creating the Perfect Matcha Latte and Iced Drinks
A good matcha latte should still taste like matcha. Too many homemade versions end up as sweet milk with a green tint.
The fix is straightforward. Build a proper matcha base first, then add milk.
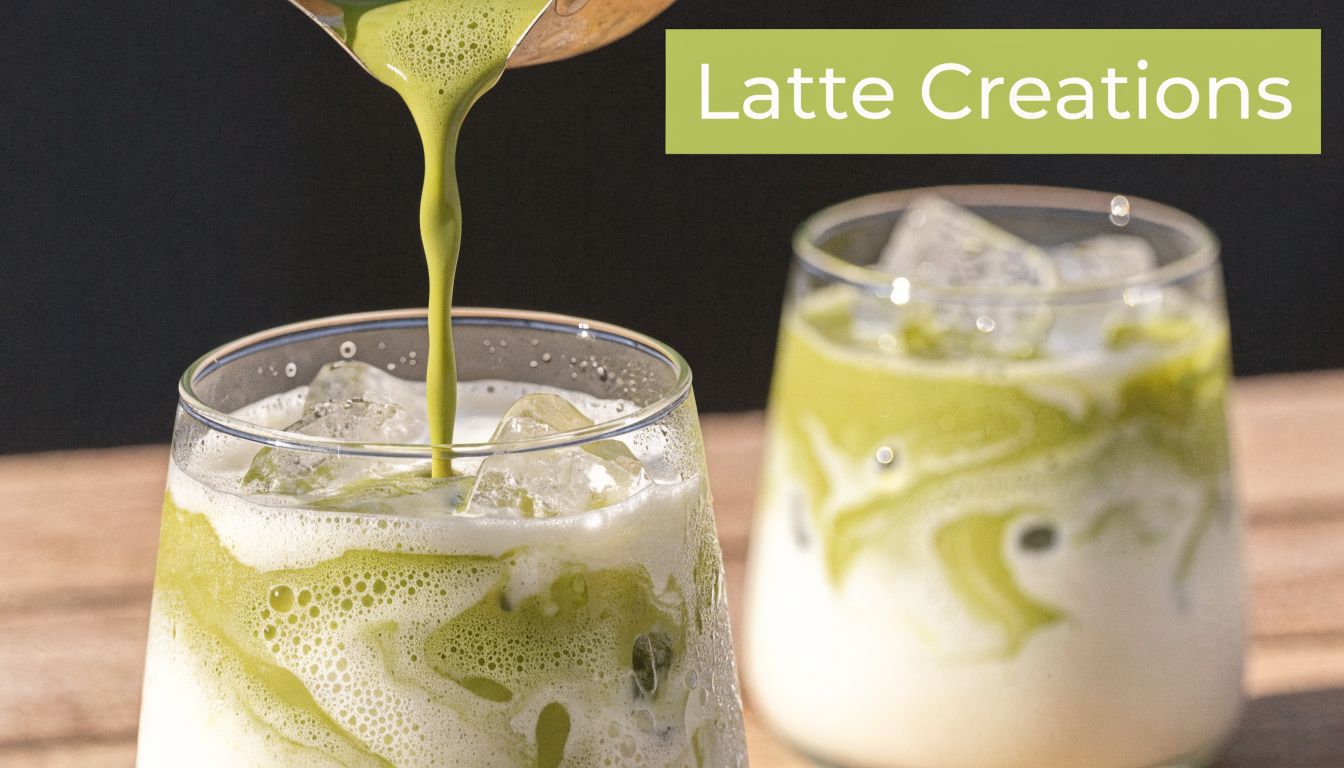
The hot latte method that stays smooth
Start with sifted matcha in a bowl or cup. Add a small amount of hot water, just enough to make a smooth paste. Whisk or froth until there are no lumps.
Then add warm or steamed milk.
That order matters. If you dump powder straight into a full cup of milk, it tends to float, clump or leave sediment at the bottom. A concentrate-first method gives you colour, flavour and a much cleaner texture.
A practical home formula looks like this:
- Use culinary-grade matcha for everyday lattes
- Make a smooth paste with a little hot water
- Add your preferred milk
- Sweeten lightly only if needed
Which milk works best
Different milks change the drink more than people expect.
Oat milk gives body and softness. It’s often the easiest route to a café-style texture.
Soy milk has enough protein to foam well and gives a more structured finish.
Almond milk can taste lighter and nuttier, though some versions split more easily.
Dairy milk creates richness, but it can mute delicate matcha if you use too much.
For café service, consistency matters as much as flavour. Whatever milk you use, keep it stable across drinks so the matcha behaves predictably from one cup to the next.
Iced matcha needs a stronger base
Cold dulls flavour. That’s why an iced matcha latte usually needs a slightly bolder concentrate than a hot one.
Make the matcha base first, let it smooth out completely, then pour it over ice and cold milk. If you build it directly in the glass without dissolving the powder, you’ll often get clumps stuck to the ice or streaks of unmixed powder.
If you want a fuller method with serving ideas, how to make iced matcha latte is a useful reference.
For anyone experimenting beyond the classic version, this Strawberry Matcha Latte is a good example of how fruit can work when the layers are kept clean and the matcha base is made properly first.
Here’s a quick visual if you like seeing the pour and texture in action.
What works in cafés and what doesn’t
For home drinkers, making one latte at a time is fine. For cafés, speed changes the approach.
What works:
- Batching a matcha concentrate for short service windows
- Sifting powder in advance for rush periods
- Training staff to dissolve matcha before milk is added
- Using the same cup size and milk ratio every time
What doesn’t:
- Scooping matcha straight into cold milk
- Relying on vigorous shaking to fix poor mixing
- Using boiling water for the base
- Over-sweetening low-quality powder to hide bitterness
In latte prep, smoothness starts before milk enters the cup. If the concentrate is rough, the finished drink will be rough too.
Keep the flavour in balance
The best latte still lets you taste the tea.
If you need lots of syrup to enjoy it, the issue may be the matcha choice, the water temperature, or the ratio. Start by correcting those before adding more sweetness.
That’s the trick to making matcha tea in modern café form. Respect the original ingredient even when the drink is casual.
Troubleshooting and Storing Your Matcha for Lasting Freshness
Most matcha problems look mysterious but aren’t. The bowl tells you what went wrong if you know what to watch for.
Why your matcha tastes bitter
People often assume bitterness means they bought the wrong powder. Sometimes that’s true. More often, the water was too hot or the ratio was off.
If your matcha tastes harsh, check three things first:
- Water temperature: Boiling water is a common culprit.
- Powder amount: Too much matcha in too little water can create an unpleasantly dense bowl.
- Drink style: A powder suited to lattes may taste rough when prepared with just water.
A bitter bowl is often a preparation problem before it’s a product problem.
Why it’s clumpy or gritty
Clumps come from moisture, static, storage conditions, or skipping the sieve.
The quickest fix is also the simplest. Sift every time. It takes seconds and improves texture immediately.
If your matcha still feels gritty after whisking, the powder may already have absorbed some moisture in storage. That’s common in humid kitchens.
Why it won’t froth
No foam usually comes down to one of four issues:
| Problem | Likely reason | Better move |
|---|---|---|
| Flat surface | Stirring instead of whisking | Use a quick zigzag motion |
| Large bubbles only | Whisking too high or too slowly | Keep whisk tips near the surface |
| Thin weak foam | Too much water too early | Start with less |
| Poor texture overall | Old or poorly stored matcha | Open a fresher tin |
Storage matters more in Australia
A common assumption is that preparation gets all the attention and storage barely matters. In practice, storage can ruin excellent matcha before you even whisk it.
Verified guidance notes that matcha oxidises when exposed to light and air, and that for warm, humid climates like many parts of Australia, it should be kept in an airtight, opaque container in the refrigerator to preserve flavour and antioxidant quality, as explained in this storage advice on common matcha mistakes.
A good Australian storage routine
This works well for most homes and hospitality settings:
- Keep it sealed tight: Air is one of the fastest ways to dull aroma and colour.
- Use an opaque container: Light exposure gradually strips away freshness.
- Store in the fridge: Especially helpful in warm or humid conditions.
- Avoid steam zones: Don’t keep matcha above the kettle or near the dishwasher.
- Open only when needed: Repeated warm-air exposure shortens the life of the powder.
Fresh matcha smells alive when you open the container. If the aroma has almost disappeared, the cup usually has too.
If you refrigerate matcha, let the container come closer to room temperature before opening. That reduces the chance of condensation settling into the powder.
Expanding Your Matcha Horizons Beyond the Tea Bowl
Once you can make a clean bowl and a reliable latte, matcha becomes much more than a drink. It turns into a flexible pantry ingredient.
That’s where culinary-grade matcha earns its keep. You can use it often, generously, and without feeling like you’re wasting a tea meant for quiet sipping.
Easy ways to use matcha daily
Some of the best uses are the least complicated.
- Morning smoothie: Blend matcha with banana, yoghurt or plant milk, and a handful of ice.
- Overnight oats: Stir a little into your oat mixture for a greener, more savoury breakfast profile.
- Yoghurt bowl: Mix a small amount with honey or yoghurt, then top with fruit and seeds.
- Baking: Add it to cookies, muffins, bliss balls or pancake batter.
- No-bake snacks: Matcha works well in coconut-based bites and cashew slices.
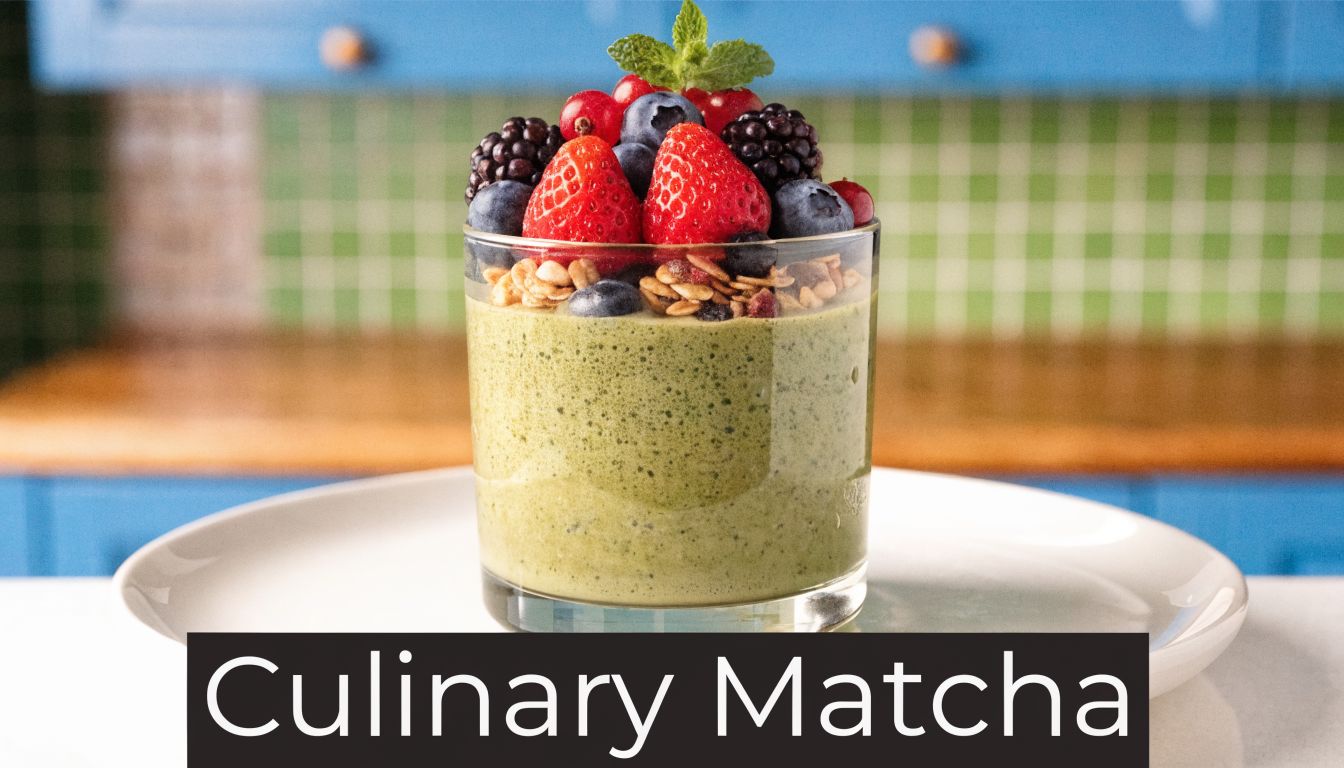
The main rule is balance. Matcha has a distinct green, slightly savoury personality. Pair it with ingredients that support that rather than bury it.
Matcha works best when the format suits the grade
A lot of disappointment comes from using one type of matcha for everything.
Use ceremonial matcha when you want the tea to stand alone. Use culinary matcha when other ingredients are involved. That simple decision makes recipes cleaner and more cost-effective.
A thoughtful matcha and kombucha pairing
For wellness-focused drinkers, one of the more interesting ideas is pairing matcha with kombucha.
The verified brief notes that combining matcha with kombucha is an emerging trend in functional beverages and that the pairing brings together matcha’s L-Theanine for calm focus with kombucha’s probiotics for gut health, while also pointing out that existing online guidance on this combination is still limited.
That makes sense from a practical point of view. Matcha offers depth and structure. Kombucha adds acidity, lift and fermentation character.
A simple way to explore the pairing at home is to whisk a small, smooth matcha concentrate first, let it cool slightly, then add it to a glass with ice and a plain or gently flavoured kombucha. You want the tea integrated, not dumped in dry.
A few trade-offs matter:
- Acidity changes flavour perception: Kombucha can sharpen matcha’s edges.
- Sweetness level matters: A drier kombucha tends to let the tea show through more clearly.
- Texture needs care: If the matcha isn’t mixed smoothly first, the drink can feel chalky.
Matcha and kombucha can complement each other nicely, but only when each one still tastes like itself.
For cafés, this pairing opens up non-alcoholic menu ideas that feel more thoughtful than another sugary spritz. For home drinkers, it’s a good reminder that making matcha tea well gives you a base for far more than the traditional bowl.
Your Questions About Making Matcha Answered
Do I need a bamboo whisk to make matcha?
No, but it helps. A chasen is still the best tool for traditional matcha because it disperses the powder gently and creates fine foam. If you’re making lattes, a handheld milk frother is a practical substitute. A standard spoon is the least effective option because it tends to leave clumps behind.
Why isn’t my homemade matcha as bright green as the café version?
Usually it’s one of three things. The matcha may be older, the grade may be better suited to recipes than straight drinking, or your ratio may be too diluted. Lighting also changes what you see in the cup or glass, especially with iced drinks.
Is matcha better than coffee?
That depends on what you want from it. Coffee is direct and punchy. Matcha tends to feel steadier and more ritualistic. Many people prefer matcha when they want a calmer kind of focus and a slower start to the day.
Can I make matcha without sweetener?
Absolutely. In fact, learning to enjoy it unsweetened is one of the best ways to judge powder quality and improve your technique. If it tastes unpleasant without sweetener, fix the preparation before assuming the drink always needs sugar.
Should I use ceremonial matcha in a latte?
You can, but it isn’t always necessary. For everyday lattes, a good culinary-grade matcha often makes more sense. Save ceremonial-grade powder for bowls where you want to taste the tea on its own.
Can I prepare matcha in advance?
You can make a short-term concentrate for convenience, especially for lattes, but freshly whisked matcha always has the best texture. If you’re drinking it as a bowl of tea, make it and drink it straight away.
If you’re ready to put this into practice, explore Pep Tea for premium organic matcha and Australian-made sugar-free organic kombucha. Whether you want a ceremonial bowl, a café-style iced latte, or a more functional daily ritual, we’ve got the ingredients to help you make it well.
Is Kombucha Halal? An Australian Consumer’s Guide

Kombucha often gets treated as a simple health drink question. For many Muslim consumers in Australia, it isn’t simple at all.
The gap is this. Consumers often hear “fermented” and stop at one of two conclusions. Either they assume kombucha must be haram because fermentation creates alcohol, or they assume it must be halal because it’s sold as a wellness drink. Neither shortcut is good enough.
If you’re asking is kombucha halal, the answer depends on a few practical details. The alcohol level matters. The way it’s brewed matters. Scholarly opinion matters. In Australia, local labelling and halal certification also matter.
That’s especially important if you’re buying for a family, stocking a café fridge, or choosing drinks for a Muslim customer base. You need a standard you can use, not vague reassurance.
Your Guide to Kombucha and Halal Explained
Is kombucha halal if it is sold as a health drink, but made through fermentation that can produce alcohol?
That question matters in real life, not just in theory. In Australia, Muslim shoppers are reading bottle labels in Woolworths and health food stores. Cafe owners are deciding what belongs in the fridge. Parents are asking whether a product marketed as natural and probiotic is also suitable for the family.
Kombucha can feel confusing because it sits between two categories people usually keep separate. It is fermented tea. It is also marketed as a non-alcoholic beverage. Once those two facts meet, halal concerns naturally follow.
Islamic dietary rulings work a bit like checking both the ingredients list and the finished meal. A dish is not judged by marketing alone, and a drink is not judged by its name alone either. The practical questions are clearer than they first seem. What was used to make it? What is in the final bottle? Can it intoxicate? Was it produced and labelled in a way a careful Muslim consumer in Australia can verify?
That is why one broad answer rarely satisfies everyone. Some Muslims want formal halal certification. Others look closely at alcohol testing, manufacturing controls, and whether the product stays within Australian non-alcoholic standards. For hospitality venues, the bar is often higher because staff are choosing on behalf of customers, not only for themselves.
If you want a better grounding in how fermented tea is made before judging halal status, PepTea’s explanation of the art of fermented tea is a useful starting point. For a wider food context, this discussion of the principles of fermentation helps explain why fermented foods can raise different questions from ordinary soft drinks.
Simple takeaway: Kombucha is judged by the finished drink, the production method, and the level of alcohol present, not by the word “kombucha” on the label.
That practical approach is especially helpful in Australia, where consumers may see imported kombucha, locally brewed brands, and products with very different labelling standards. It also explains why brands that test carefully and document compliance, including Australian producers such as PepTea, are often easier for Muslim consumers and cafe buyers to assess with confidence.
Understanding Kombucha Fermentation
Kombucha has a simple start. Tea is brewed, sugar is added, and then a SCOBY goes in. SCOBY stands for Symbiotic Culture of Bacteria and Yeast.
That culture does the work of fermentation. The yeast and bacteria feed on the sugar and gradually turn sweet tea into something tart, lightly fizzy, and full of fermentation byproducts.
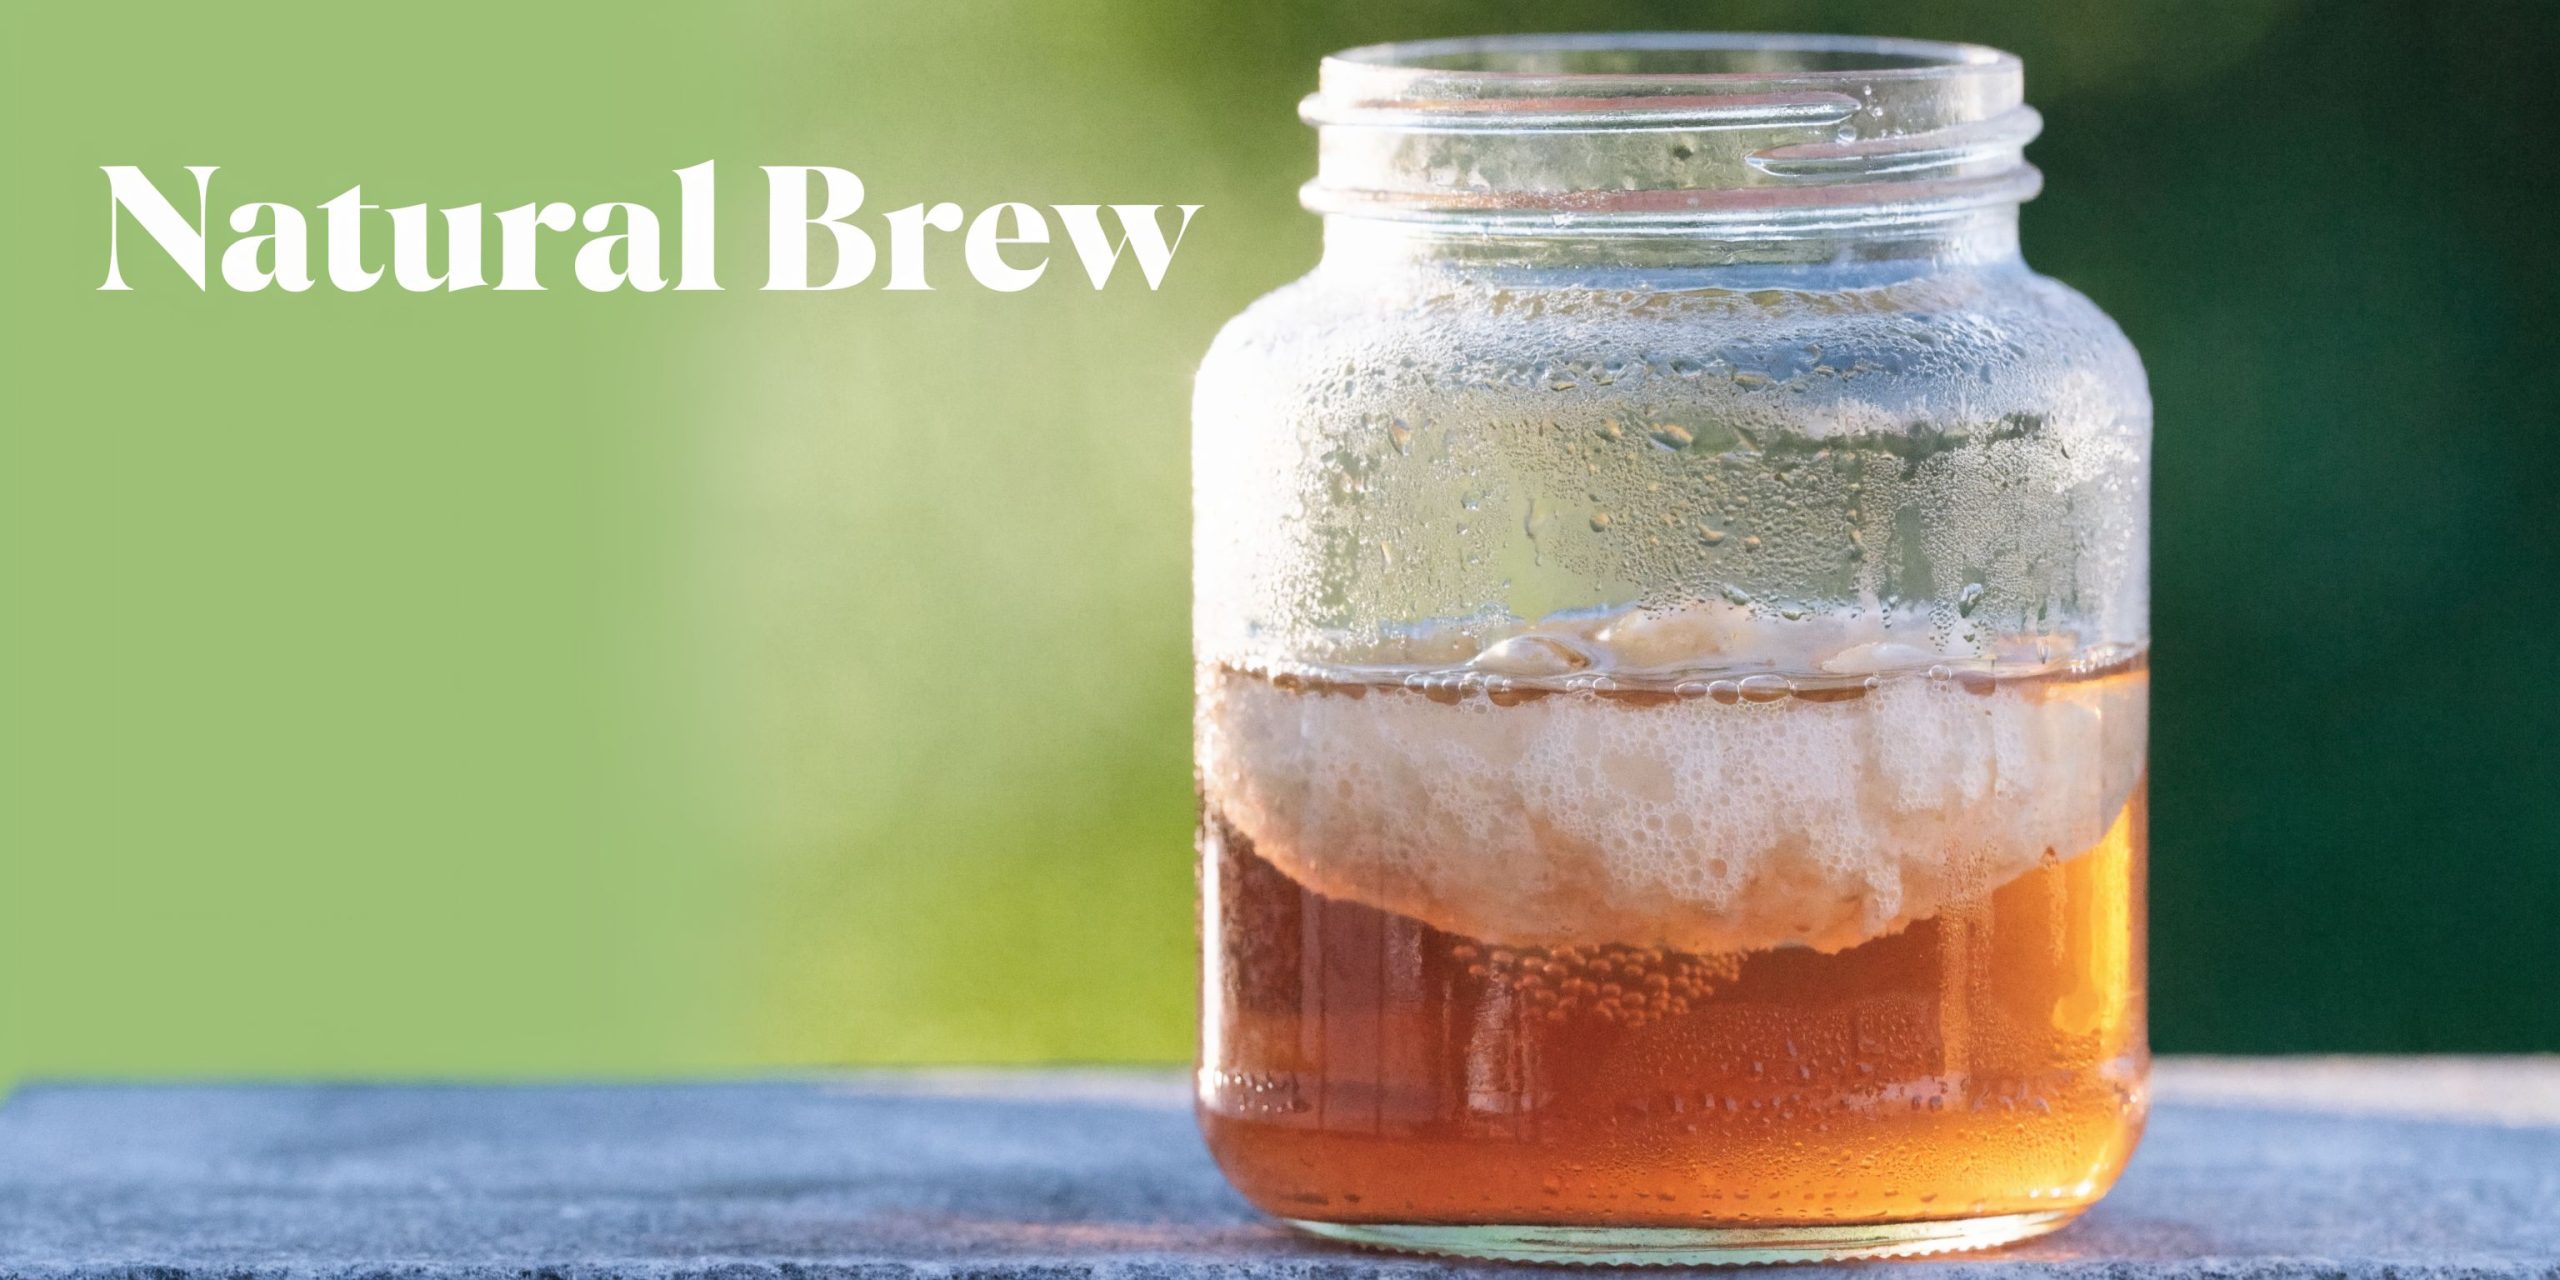
What fermentation is really doing
A simple analogy helps. Think of kombucha fermentation a bit like sourdough baking.
In sourdough, microbes eat sugars and transform the dough. In kombucha, microbes eat sugars and transform tea. The ingredients change, and the finished product is very different from the starting liquid.
If you want a broader explanation of traditional food processes, this discussion of the principles of fermentation is useful because it shows how fermentation changes flavour, stability, and digestibility across many foods.
Why sugar is added if the drink isn’t meant to be sugary
Here, readers often get stuck. They see sugar on the ingredient list and assume kombucha must stay sugary.
That’s not how fermentation works.
The sugar acts like fuel for the culture. The SCOBY consumes much of it during brewing. That’s why a properly fermented kombucha tastes sharper and less like sweet tea.
Why fermentation raises halal questions
Fermentation can also create trace alcohol as a natural byproduct. That doesn’t mean kombucha is brewed as an alcoholic drink. It means the same natural microbial process that creates acidity and fizz can also produce a very small amount of ethanol.
That single detail is what drives most of the halal discussion.
For readers who want a deeper look at how real fermented tea differs from quick, simplified versions, Pep Tea’s article on the true art of fermented tea is a practical companion.
The Critical Question of Alcohol Content
Could a drink be fermented, contain a trace of alcohol, and still be treated differently from an alcoholic beverage in halal decision-making?
That is the key question with kombucha. For Muslim consumers and café owners in Australia, the answer usually comes down to two practical points. How much alcohol is present in the finished drink, and is the product sold and consumed as an intoxicating beverage.
In day-to-day retail practice, 0.5% ABV is a common reference point for non-alcoholic drinks. FSANZ explains how foods and beverages must be labelled for alcohol content, including the threshold at which alcoholic beverages require an alcohol declaration, which helps Australian buyers understand what they are looking at on a shelf or café menu (Food Standards Australia New Zealand alcohol labelling guidance). For halal assessment, that number is not the whole ruling on its own, but it is often the first practical checkpoint.
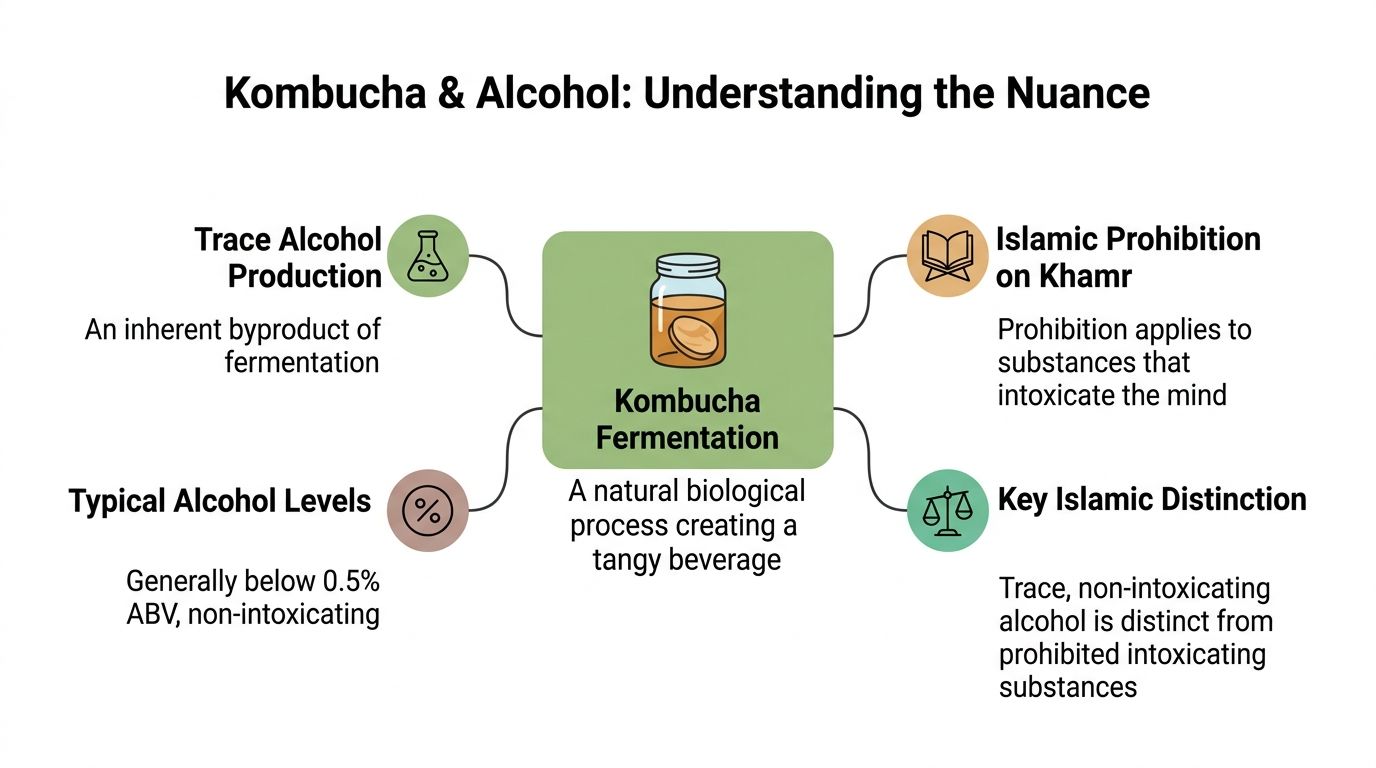
Commercial kombucha and homebrew are not the same thing
A professionally brewed kombucha works like a recipe followed in a commercial kitchen. Time, temperature, sugar, and storage are controlled so the final drink stays consistent from batch to batch.
Homebrew is less predictable. If fermentation keeps going longer than planned, alcohol can keep rising too. That uncertainty matters for halal-conscious households and for cafés that want to serve kombucha with confidence.
For the clearest halal option, professionally brewed and clearly labelled kombucha is usually easier to assess than an untested homemade batch.
Why a trace amount does not settle the ruling by itself
Islamic law does not usually assess fermented foods by scanning the ingredient list for one word and stopping there. It asks what the finished product is, what effect it has, and how people use it.
A simple comparison helps here. Vanilla extract, vinegar, bread dough, kefir, and kombucha all involve processes that can produce tiny amounts of alcohol at some stage. That does not place every fermented product into the same category as wine or beer. The legal and practical question is whether the drink is intoxicating in its final form.
That is also why people compare kombucha with other drinks sold as non-alcoholic. Can You Get Drunk on Non Alcoholic Beer? offers a plain-language way to understand the difference between trace alcohol and actual intoxication.
What Australian buyers should check
An Australian shopper or café manager does not need to become a fermentation scientist. A few careful checks go a long way.
- Read the label closely. Look for any stated alcohol content and whether the product is presented as standard kombucha or hard kombucha.
- Ask how the brand controls fermentation. A producer that explains testing, cold storage, and batch consistency makes assessment easier.
- Check where it is sold. A kombucha in the soft drink fridge is not automatically halal, but retail context can still help you spot whether it is being marketed as a non-alcoholic refreshment or an alcoholic drink.
- Look for brand transparency. This matters in Australia, where Muslim consumers often rely on a mix of label information, supplier answers, and local trust.
For readers comparing alcohol-free drink options in a practical Australian setting, Pep Tea’s guide to kombucha for a healthier dry January shows how some brands position kombucha as a non-alcoholic alternative while keeping production standards clear.
Navigating Different Islamic Scholarly Opinions
The most common ruling you’ll hear is that kombucha is permissible when it remains non-intoxicating and the alcohol is only a trace byproduct of fermentation. But there isn’t just one view, and pretending otherwise doesn’t help anyone.

The majority view
Most scholarly opinions discussed in halal guidance focus on intoxication. In that approach, the prohibition applies to substances that function as intoxicants, not every food or drink that contains a negligible fermentation byproduct.
That’s why many scholars permit kombucha when it stays under the accepted threshold and doesn’t alter the mind. The reasoning is that the final drink is not consumed as alcohol and does not behave like an intoxicating beverage.
A useful way to understand this is by thinking about intent and effect together. A vinegar-like ferment with trace alcohol left over from a natural process is treated differently from a beverage produced for intoxication.
The minority and stricter view
There is also a stricter opinion that some Muslims follow. According to the verified data, while most scholars permit kombucha with less than 0.5% ABV, some interpretations, such as rulings from Shia authority Ayatollah Sistani, deem it haram regardless of the percentage. That matters in Australia because the Shia Muslim community is estimated at around 20% to 25% of the total 813,400 Muslims in the country (reference).
So the answer to is kombucha halal may differ depending on whose ruling you follow.
Some Muslims ask, “Is this generally halal?” Others ask, “Is this halal according to my marja or school?” Those are related questions, but they are not identical.
A short explainer can help if you want to hear a spoken overview before making up your mind:
A practical way to handle the difference
If you follow the majority Sunni position, the main issue is usually whether the kombucha is non-intoxicating and properly controlled.
If you follow a stricter Shia ruling, you may choose to avoid kombucha altogether, even when brands present low alcohol test results. That isn’t confusion. It’s a different legal standard.
For households, cafés, and event organisers, the safest approach is to ask one more question before serving kombucha to a mixed group: Are you looking for a general halal standard, or one that also accommodates stricter interpretations?
That question prevents awkward assumptions.
Finding Halal Kombucha in Australia
Once you know the ruling depends on the finished product, shopping gets easier. You don’t need to guess. You need to verify.
In Australia, halal certification plays a practical role here. According to the verified data, Australia has over 70 registered halal certifiers, and bodies such as AFIC certify fermented drinks like kombucha when they are non-intoxicating and contain less than 0.5% ABV. The same source notes this matters for Australia’s 813,392 Muslims (reference).

What to look for on the bottle or website
A strong label won’t always answer every faith-based question, but it can answer several practical ones.
Look for:
- Halal certification marks from recognised Australian certifiers.
- Non-alcoholic or low-ABV disclosure that’s easy to find.
- Ingredient transparency so you can rule out other concerns.
- Brand contact details in case you want to request more information.
If a brand is serious about Muslim consumers, it should be ready to explain its process in plain language.
Questions worth asking a brand
You don’t need a chemistry degree. A short email can do the job.
Ask:
- Is your kombucha tested for alcohol content?
- Does it remain below the accepted halal threshold?
- Is it produced in a controlled commercial facility?
- Do you hold halal certification, or can you provide batch information?
A trustworthy producer won’t treat those questions as inconvenient. They’ll see them as part of responsible food transparency.
If you’re buying locally and want to compare Australian options, Pep Tea’s guide on where to buy organic kombucha in Australia is a useful place to start.
For café owners and retailers
If you’re serving a diverse customer base, don’t rely on “it should be fine.”
Keep product information on file. Train staff to answer basic questions. If a customer asks whether the kombucha is halal, the best response is specific and calm: “This is a commercially brewed kombucha, and we can show you the producer’s information.”
That level of care builds trust fast.
A Practical Guide for Cafes and Consumers
For most buyers, the safest choice isn’t the most complicated one. It’s the most verifiable one.
The verified data points to several critical control points for halal kombucha. These include using halal-certified SCOBYs, ensuring ingredient purity, and monitoring batches to keep alcohol levels consistently below 0.5% ABV. It also notes that professional brewers using UV-sterilised equipment and pH monitoring in HACCP-accredited facilities can provide a Certificate of Analysis to verify compliance (reference).
What this means for consumers
If you’re buying kombucha for yourself or your household, your decision can be very practical.
Choose products that are professionally brewed, clearly labelled, and easy to verify. If a brand is vague about alcohol testing, ingredient sourcing, or production standards, that’s a sign to slow down.
A careful buyer usually does three things:
- Checks the process: Controlled fermentation matters.
- Asks for proof: A Certificate of Analysis can remove guesswork.
- Avoids uncertainty: Homebrew may be enjoyable, but it’s harder to assess from a halal perspective.
What this means for cafés
For cafés, restaurants, and caterers, the issue is bigger than one bottle in the fridge. It’s about what you can confidently tell customers.
A venue that stocks kombucha without understanding the product can create confusion. A venue that keeps supplier documentation, trains staff, and chooses professionally brewed options can answer questions with confidence.
Here’s a simple service standard:
| Venue task | Why it matters |
|---|---|
| Keep supplier specs on file | Staff can respond clearly to halal questions |
| Prefer professionally brewed kombucha | Controlled production lowers uncertainty |
| Ask for a CoA when needed | Helps verify low alcohol compliance |
| Separate standard and hard kombucha | Prevents customer confusion |
For hospitality businesses, that clarity matters just as much as flavour and presentation.
Conclusion Your Informed Choice
So, is kombucha halal?
For many Muslims in Australia, the practical answer is yes, if it is commercially produced, non-intoxicating, and kept below the accepted alcohol threshold. That is the position reflected by many halal certification approaches and the majority scholarly view discussed earlier.
But that isn’t the only answer in circulation. Some Muslims follow stricter rulings and may avoid kombucha entirely. That choice deserves respect.
The most useful way to make a decision is to stop thinking in labels alone and start thinking in evidence. Ask what kind of kombucha it is. Check whether it’s professionally brewed. Look for transparent alcohol information or halal certification. If needed, ask the brand directly.
The best halal decisions are often the clearest ones. Choose products that remove doubt rather than products that require you to guess.
For cafés and retailers, the same principle applies. A verified product is easier to serve responsibly than a trendy product with unclear standards.
Kombucha doesn’t need to be a grey area. With the right questions, it becomes a manageable choice.
Frequently Asked Questions
Does NSW alcohol labelling change the halal answer
Not necessarily, but it can confuse people.
According to the verified data, 2025 NSW food labelling laws define anything under 1.15% ABV as “low alcohol”, and a 2025 Halal Australia survey found 35% of Sydney Muslims avoid kombucha due to “fermentation uncertainty” (reference).
That means a product could fit one legal label while still raising halal concerns for consumers who use a stricter threshold. Legal compliance and halal comfort are related, but they are not identical.
Is hard kombucha halal
Hard kombucha is generally treated differently from standard kombucha because it is made to have a higher alcohol content. For halal-conscious consumers, that usually places it outside the category of non-intoxicating fermented tea.
Is homemade kombucha halal
Homemade kombucha is harder to assess because fermentation is less predictable outside a controlled commercial setup. If there is no testing, many consumers will see it as doubtful.
What should I ask before buying kombucha from a café
Ask whether it is standard kombucha or hard kombucha, whether the brand provides alcohol information, and whether the product is halal-certified or backed by batch testing.
Quick Guide to Kombucha Types and Halal Status
| Kombucha Type | Typical ABV | General Halal Ruling |
|---|---|---|
| Commercial kombucha with verified low alcohol | Below 0.5% ABV | Generally considered halal by the majority view |
| Homemade kombucha without testing | Can vary | Doubtful unless verified |
| Homemade kombucha that exceeds accepted threshold | Above accepted halal threshold | Generally not halal |
| Hard kombucha | Alcoholic | Generally not halal |
| Kombucha for consumers following stricter Shia rulings | Even if below 0.5% ABV | May still be considered haram according to that view |
If you’re looking for Australian-made kombucha and organic tea with a strong focus on quality, transparency, and everyday wellness, explore Pep Tea. We offer premium organic matcha and proudly brewed NSW kombucha for households, cafés, and retailers who want cleaner, more considered drink options.
Matcha Tea Accessories: Your Complete 2026 Guide

You buy a good tin of matcha, heat the water, stir it with a spoon, and somehow end up with green lumps floating in a drink that tastes sharper than it should. Many assume the problem is the powder.
Usually, it’s the setup.
Matcha behaves differently from leaf tea because you drink the whole powdered leaf. That means texture, water temperature, and tool choice all show up in the cup straight away. The right matcha tea accessories don’t just make things look traditional. They change how the powder dissolves, how the foam forms, and how balanced the final drink tastes.
That’s one reason these tools have become more common in Australian kitchens and cafés. Australia’s tea market, including matcha, grew at a 3.2% CAGR from 2018 to 2023 and reached $450 million in revenue, while premium segments such as matcha accessories contributed 15 to 20%. A 2024 Euromonitor International study also found that 68% of surveyed Melbourne and Sydney cafés added matcha to menus post-2020, which helped drive 25% annual growth in accessory imports according to the summary in this matcha accessories overview.
If you’ve been curious about whisks, bowls, sifters, or whether they’re worth buying at all, the short answer is yes. But each tool matters for a different reason. Once you know what each piece does, matcha feels much simpler.
Why Your Matcha is Lumpy and How to Fix It
Lumpy matcha usually comes from two things. The powder has compacted in storage, and the mixing method isn’t strong or fine enough to break those clumps apart.
A spoon pushes powder around. It doesn’t suspend it evenly. A fork does a bit better, but it still tends to leave tiny gritty pockets that settle to the bottom.
What’s going wrong
Matcha is extremely fine. The moment it meets moisture, little balls of powder can form. Once that happens, stirring often makes the outside wet while the centre stays dry.
That’s why a cup can look mixed but still taste rough.
Common signs you’re fighting the tools instead of the tea:
- Dry specks on the surface that never fully disappear
- A sandy finish at the bottom of the bowl or mug
- Bitterness that seems stronger than expected
- Flat foam or no foam at all
A smooth bowl of matcha starts before the water goes in.
The simplest fix
Use a sifter first, then whisk in a wide bowl.
A fine sifter breaks up compacted powder before it has a chance to clump. If you want a dedicated tool for that step, a matcha tea sifter makes the process much easier than pressing powder through a generic kitchen strainer.
Then whisk with short, brisk motions near the surface rather than stirring in circles. That movement disperses the powder and adds the light foam that softens matcha’s edge.
A better home routine
Try this order next time:
- Warm the bowl with a little hot water, then dry it.
- Sift the matcha directly into the bowl.
- Add a small splash of warm water first and make a loose paste.
- Add the remaining water and whisk briskly.
- Stop when the surface looks fine and even, not bubbly like dish foam.
If your matcha has been disappointing, don’t change everything at once. Start with the tool that prevents clumps. Many notice the difference immediately.
The Essential Trio for Authentic Matcha Preparation
Three tools do most of the heavy lifting in traditional preparation. The chasen, chashaku, and chawan aren’t decorative extras. They solve three separate problems. Mixing, measuring, and whisking space.
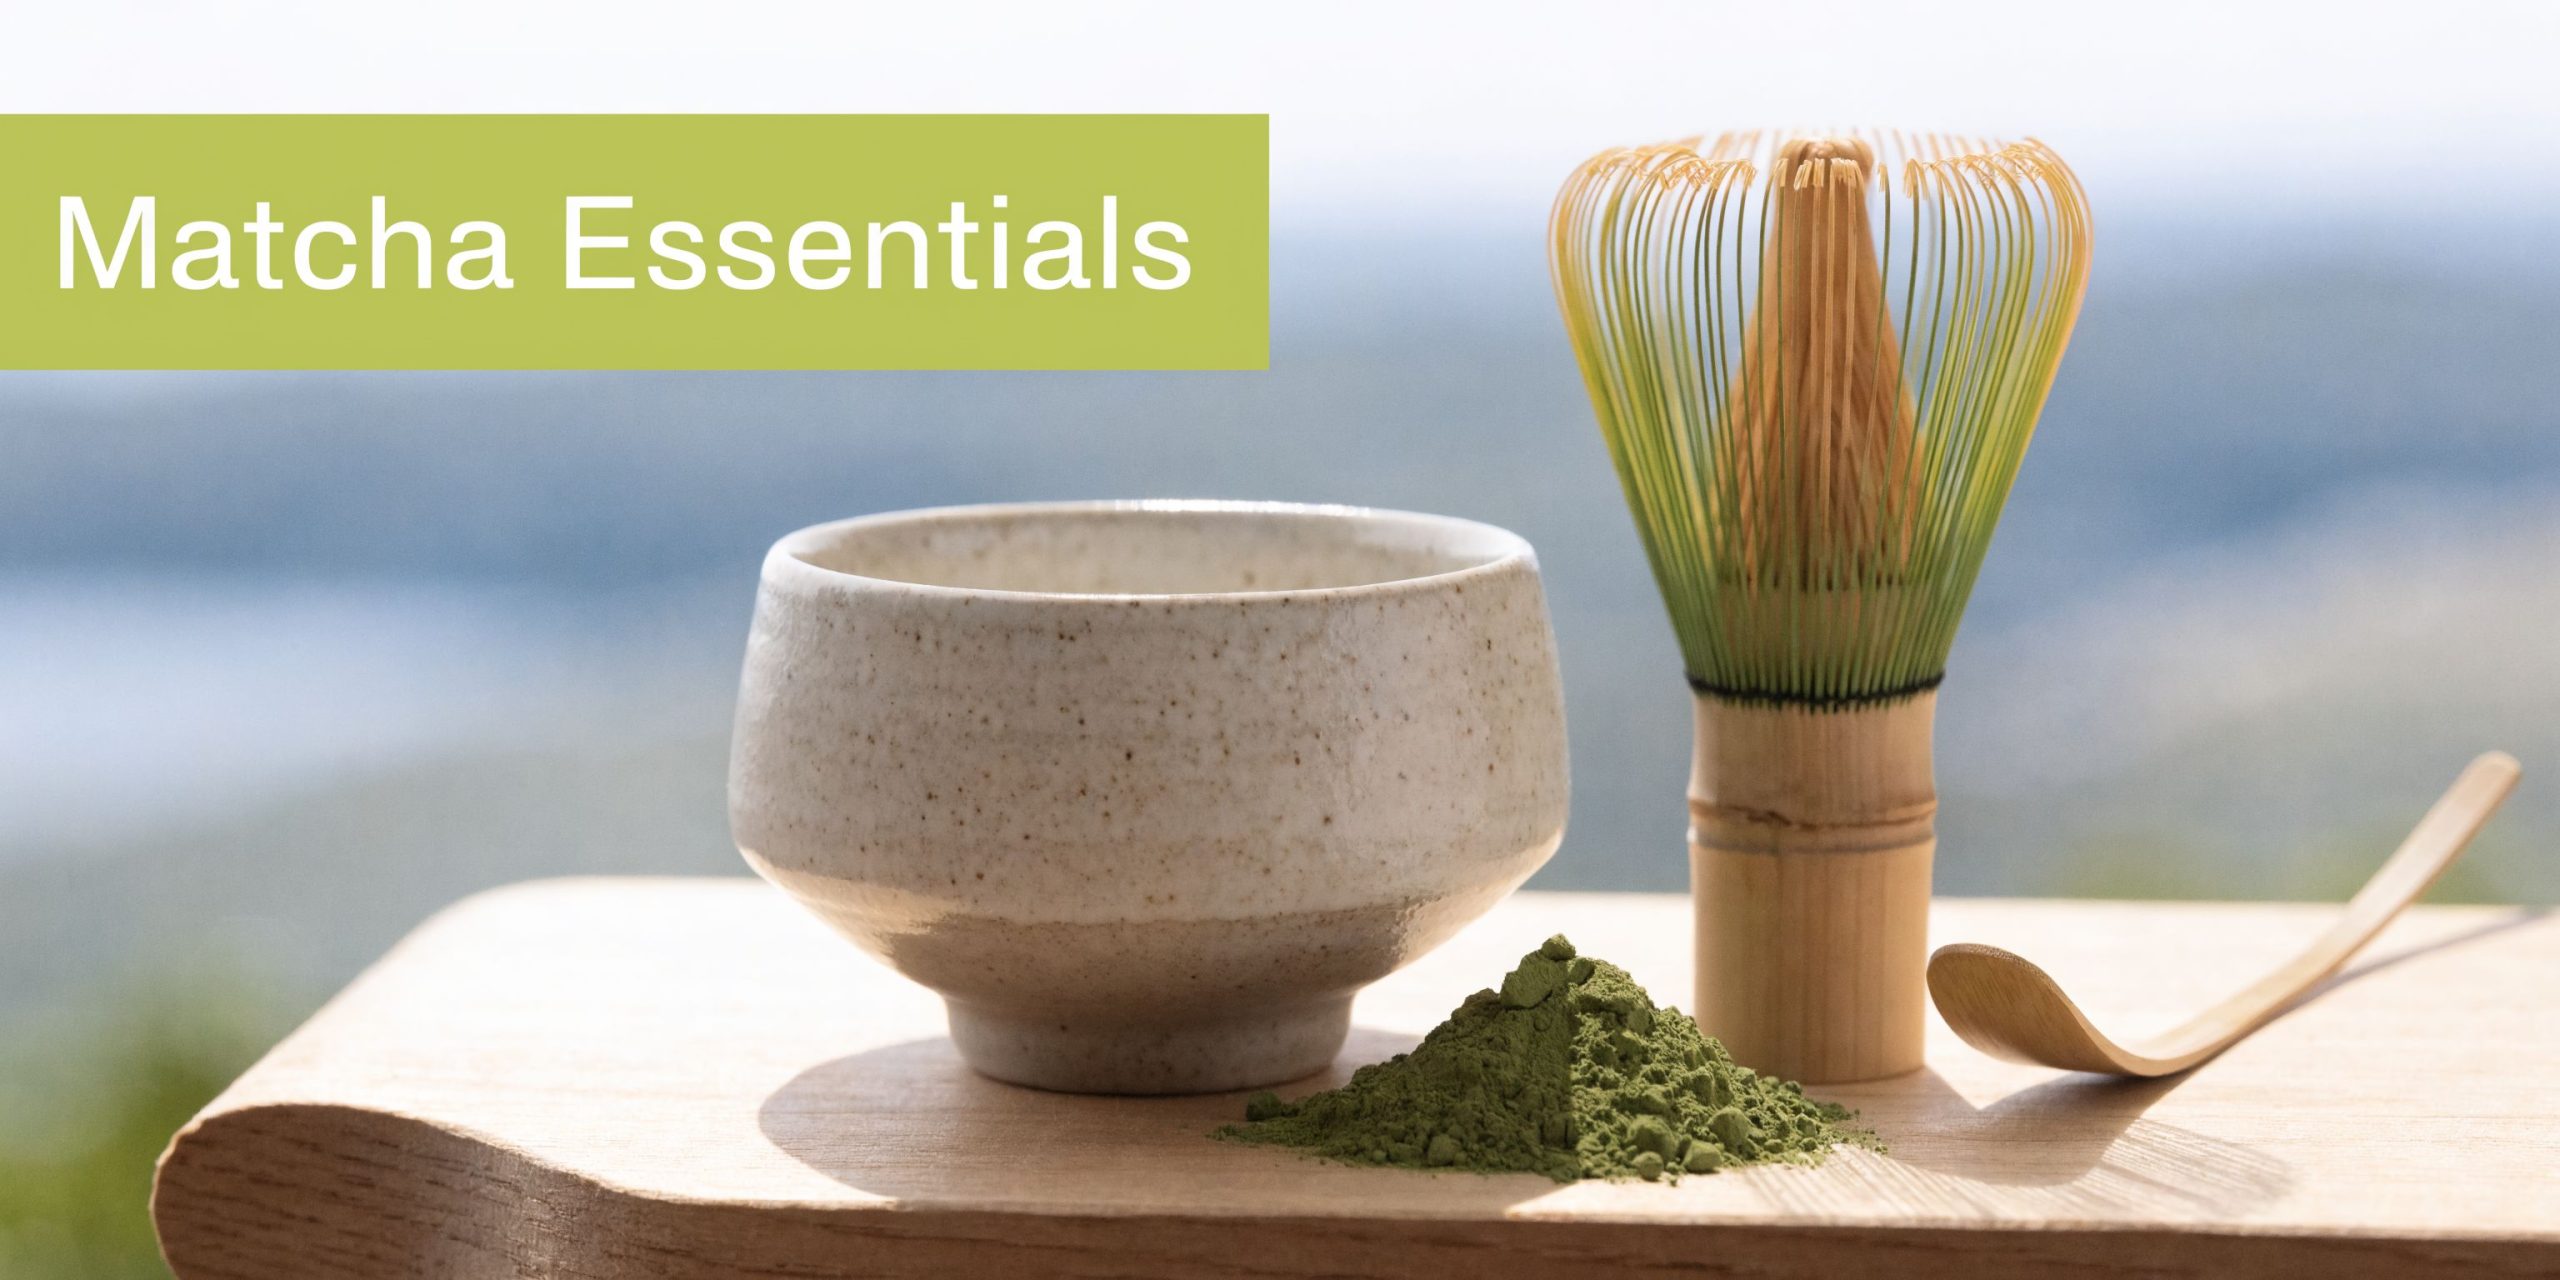
If you’re starting from scratch, a complete matcha tea set Australia option is a practical way to get the core pieces in one go.
The chasen and why it works
The chasen is the bamboo whisk. It’s the tool that changes the cup most.
In premium Australian matcha preparation, a bamboo chasen with 80 to 120 finely split tines is used to aerate 2g of matcha in 60 to 80ml of water at 75 to 80°C, creating a stable crema layer. That froth can enhance EGCg bioavailability by 15 to 20%, while unsifted, unwhisked brews can reduce antioxidant extraction by 30%, according to this detailed guide on matcha accessories and whisking technique. The same source notes that poor whisking leads to clumping and more bitterness from uneven heat exposure.
That sounds technical, but the practical meaning is simple. The whisk creates tiny, even bubbles and keeps the powder suspended. A spoon can’t do that. An electric frother creates a different kind of foam, which matters for mouthfeel.
The chashaku and why scooping matters
The chashaku is the curved bamboo scoop. It looks delicate, but it has a very practical job.
It lets you portion matcha without compacting it or introducing moisture from a metal spoon that’s been sitting near steam. It also makes your routine repeatable. If one day’s cup tastes balanced and the next feels harsh, inconsistent measuring is often part of the reason.
Consider salting food with your fingers versus using a measured spoon. Both can work. One is easier to repeat accurately.
The chawan gives your wrist room to work
The chawan, or matcha bowl, is wider than a mug for a reason.
Whisking in a narrow cup forces the whisk into the sides. Your motion gets smaller. The powder stays less evenly mixed. A wide bowl gives you enough surface area to whisk quickly without splashing.
The bowl also changes the drinking experience in a way people often underestimate:
- Better movement for the whisk
- More even mixing across the base
- A more stable grip while whisking
- A nicer aroma release than a tall glass or travel mug
Practical rule: If the whisk keeps tapping the sides, the bowl is too narrow for proper matcha.
Why this trio is enough for many
You don’t need a shelf full of specialised gear to make a good bowl.
For daily matcha, this trio does the important work:
| Tool | Main job | What improves in the cup |
|---|---|---|
| Chasen | Aerates and suspends the powder | Foam, texture, smoother flavour |
| Chashaku | Measures consistently | Balance, repeatability |
| Chawan | Creates whisking space | Even mixing, less mess |
If you only buy three matcha tea accessories, make them these. Everything else helps refine the process, but this is the working foundation.
Expanding Your Toolkit Beyond the Basics
Once your core setup is sorted, a few extra tools make matcha less fiddly and more consistent. These pieces don’t change the ritual for the sake of it. They remove the little annoyances that ruin an otherwise good cup.
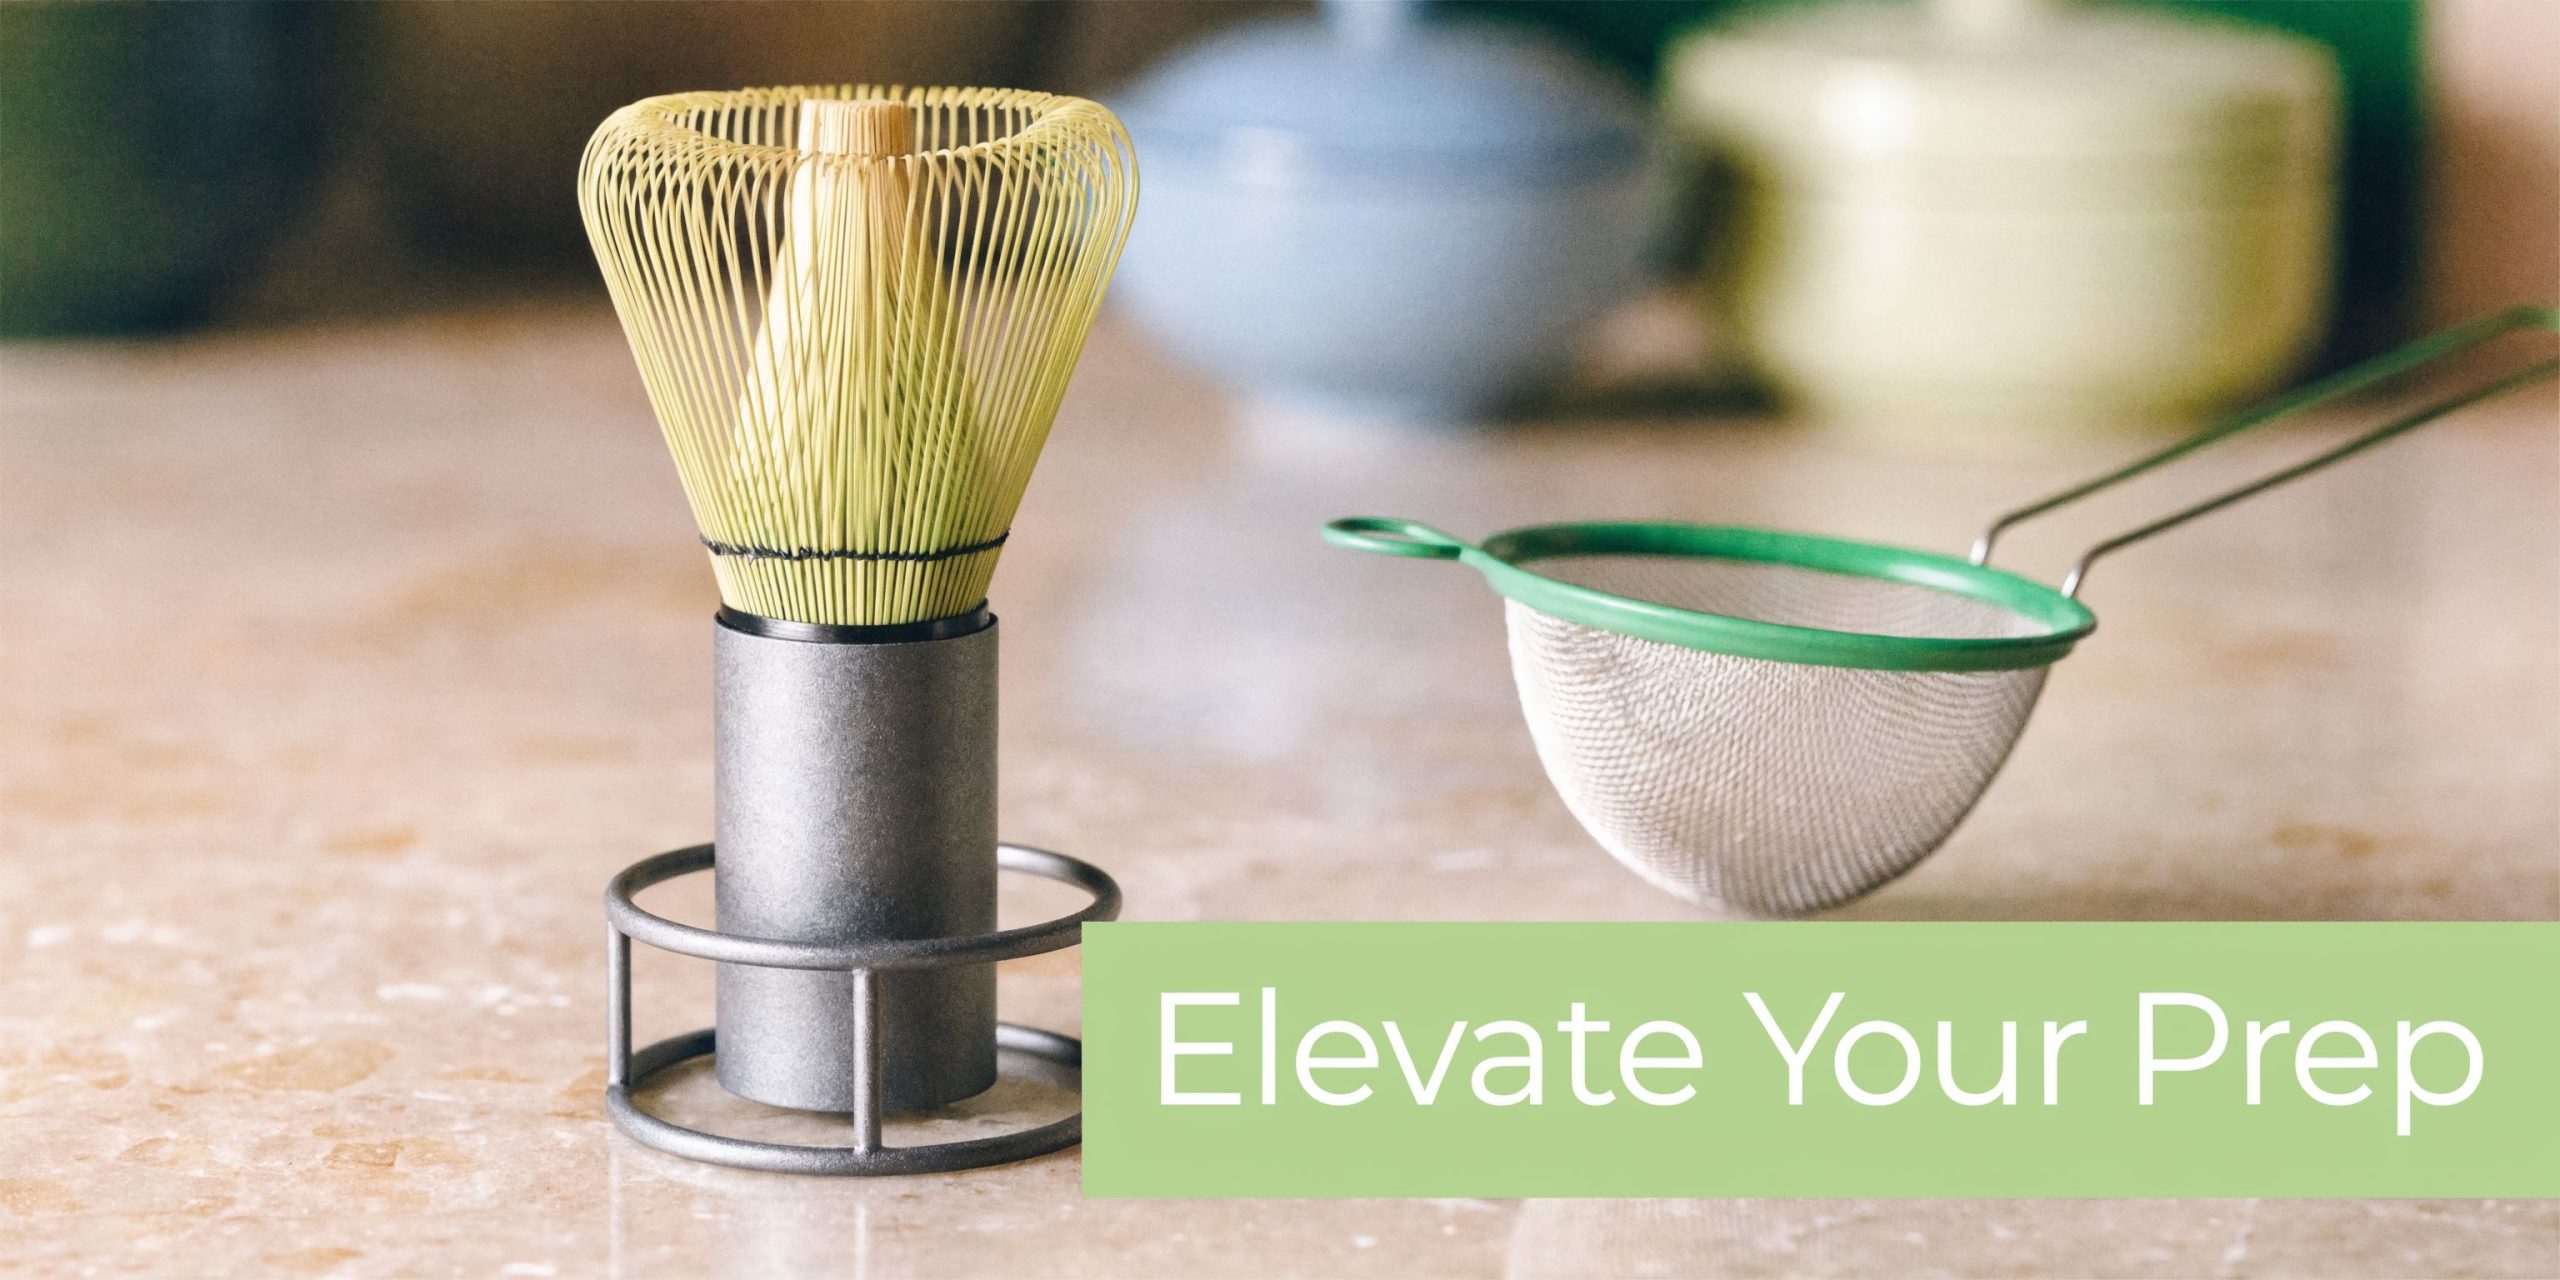
The sifter is the quiet problem-solver
If one extra accessory deserves a place in almost every kitchen, it’s the sifter.
Matcha powder naturally compacts. Even a fresh tin can contain small clumps from storage and humidity. Sifting fluffs the powder before water touches it, which means the whisk spends less effort breaking lumps and more effort creating smooth foam.
A small step, but it changes the result.
The whisk holder protects the whisk you already paid for
The whisk holder, often called a kusenaoshi, helps the bamboo whisk dry in its proper shape.
Without one, the tines can dry bent, flattened, or uneven. That makes whisking less effective and shortens the useful life of the tool. With a holder, airflow improves and the whisk keeps the open curve it needs.
This matters more than people expect because a whisk that looks only slightly misshapen often performs much worse.
A proper storage tin protects the powder itself
People often focus on the whisk and forget that matcha is sensitive to its environment. Air, light, and moisture all work against freshness.
A good storage tin helps preserve:
- Colour, so the powder stays vibrant rather than dull
- Aroma, which fades quickly when left exposed
- Flavour, especially the softer sweet and savoury notes
- Texture, because less humidity means fewer clumps
The accessories that earn their place
Not every extra belongs in every setup. These are the upgrades that usually make sense first:
- Fine sifter for anyone tired of lumps
- Whisk holder for anyone using bamboo regularly
- Airtight tin for anyone buying better-quality matcha
- Clean tea cloth for drying bowls and keeping the area tidy
A lot of matcha tea accessories are sold on appearance. These three are worth owning because they solve preparation problems.
Modern Alternatives Electric Frothers and Scales
Traditional tools aren’t the only option. Plenty of people make matcha with an electric frother, a shaker bottle, or a small blender. That doesn’t make the result wrong. It just changes the drink.
Electric frother versus bamboo whisk
An electric frother is fast. It’s handy when you’re making a quick latte before work or mixing matcha into milk.
A bamboo whisk is slower, but it creates a finer foam and a gentler texture. That matters most when you’re drinking matcha with water rather than masking it with milk and sweetener.
The main differences look like this:
| Tool | Strength | Trade-off |
|---|---|---|
| Electric frother | Speed and convenience | Larger bubbles, less refined texture |
| Bamboo chasen | Fine micro-foam and traditional mouthfeel | More hands-on, needs care |
If you mainly drink iced lattes, an electric frother can be perfectly reasonable. If you want to taste the detail in ceremonial-style matcha, the chasen is still the better tool.
Where a digital scale helps
A small digital scale is one of the most useful modern additions, especially if you like consistency.
The bamboo scoop gives you a traditional feel, but a scale helps when you want to repeat a recipe exactly. That’s useful at home, and even more useful in hospitality where one person’s “slightly heaped scoop” can become another person’s “too much powder”.
A scale is particularly handy for:
- Testing recipes for iced drinks or baking
- Comparing different matcha grades
- Training café staff to prepare drinks consistently
- Troubleshooting when a cup tastes too thin or too strong
For lattes, convenience can win. For straight matcha, texture usually decides.
A sensible middle ground
You don’t have to choose between old and new.
Many people settle into a hybrid routine. Traditional whisk, proper bowl, and a digital scale. Or ceremonial-style preparation on weekends, frother-made iced lattes on busy weekdays. The best setup is the one you’ll use often enough to enjoy good matcha regularly.
Choosing Your Accessories Home vs Café Use
The right setup at home isn’t always the right setup behind a busy bar. A home drinker usually wants ease, comfort, and a sense of ritual. A café needs consistency, speed, and tools that hold up under repeated use.
That’s where total cost of ownership becomes more useful than the sticker price.
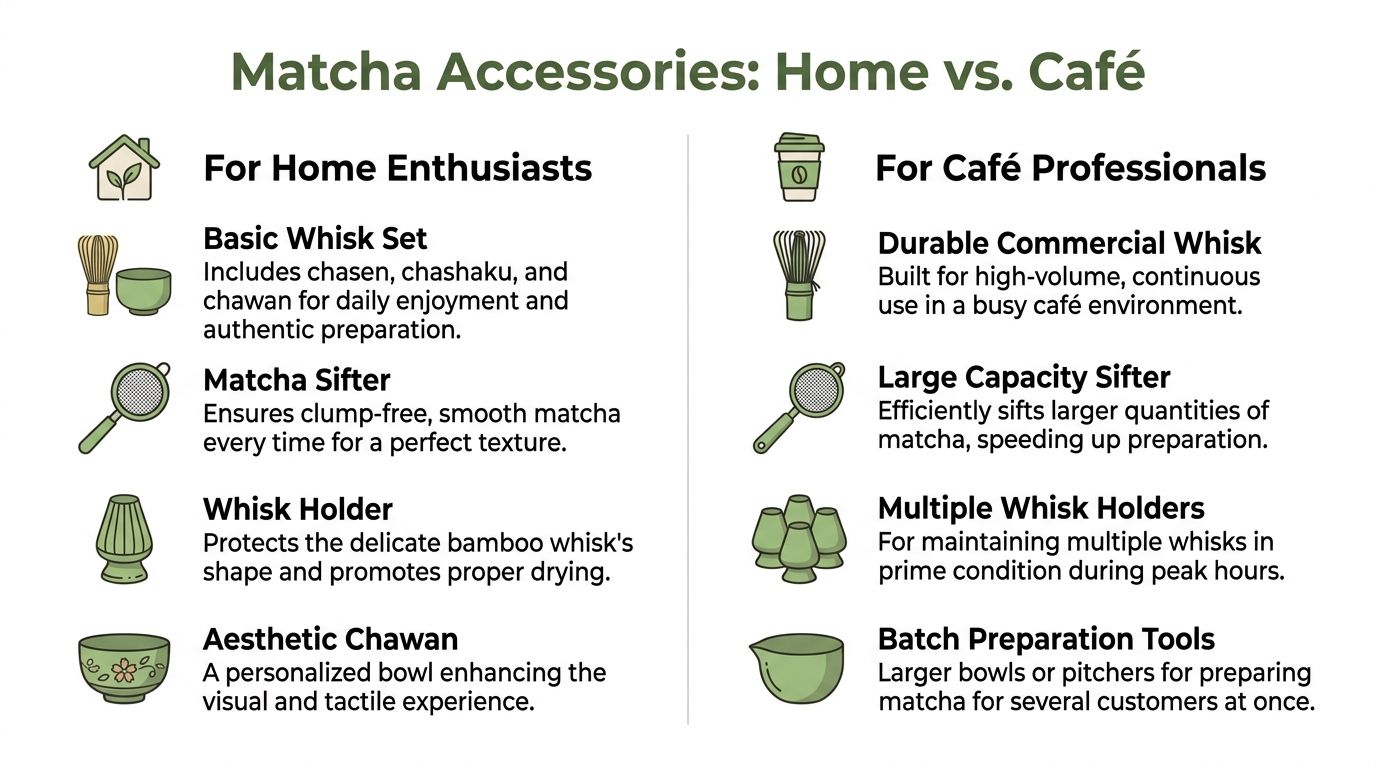
What matters most at home
For home use, it makes sense to keep the kit simple and enjoyable.
A good starter setup usually includes a whisk, bowl, scoop, and sifter. If you drink matcha several times a week, a whisk holder quickly becomes worthwhile too. You don’t need commercial-grade anything. You do need tools that feel pleasant to use and easy to clean.
Home buyers usually care about:
- A balanced starter set rather than individual specialty pieces
- A bowl shape they enjoy holding
- A whisk that feels flexible, not stiff
- Easy storage in a small kitchen
There’s also the visual side. If a bowl and whisk are attractive enough to leave on the bench, you’re more likely to use them.
What changes in a café
In a café, the questions shift.
The issue isn’t whether the whisk looks lovely on a shelf. It’s whether the setup supports fast prep, reliable results, and manageable replacement costs over time. The research around matcha tea accessories often skips these practical realities. This summary on traditional and non-traditional matcha tools notes that buyers need clearer guidance on durability, climate effects, maintenance, and long-term cost comparisons, especially in Australian conditions.
That’s the key buying question for hospitality. Not “What’s traditional?” but “What keeps service smooth without lowering quality?”
Thinking in total cost, not just upfront spend
A cheaper whisk can become expensive if it warps quickly, sheds tines, or gives inconsistent texture that leads staff to remake drinks. A better-made whisk may cost more initially but can be easier to maintain and more reliable in service.
For cafés, it helps to think in layers:
Preparation quality
Does the tool support a repeatable drink with the right texture?Durability in your environment
A coastal or humid venue may need stricter drying and storage habits for bamboo.Staff usability
If a tool is awkward, people won’t use it well during busy periods.Replacement rhythm
Tools that hold shape longer are easier to budget for.
Material choices and practical trade-offs
A café doesn’t have to be rigidly traditional to be thoughtful.
For example:
- Bamboo whisks offer the texture many customers expect in premium matcha
- Stainless steel sifters can make sense in higher-volume settings because they’re sturdy and easy to clean
- Larger bowls or pitchers may help when building a smooth matcha base before pouring into cups
- Multiple whisk holders make daily drying more organised
If you’re fitting out a broader beverage station, it can also help to look at well-designed general kitchen accessories for storage, prep flow, and cleaning tools around the matcha setup itself.
A useful rule of thumb
Home drinkers should buy for pleasure and consistency.
Cafés should buy for workflow, training, and maintenance discipline.
Those goals overlap, but they’re not identical. The most practical accessory setup is the one that fits how matcha is made in your space, not the one that looks most impressive in a product photo.
Care Maintenance and Sustainable Sourcing
Good matcha tools aren’t high-maintenance, but they do need the right kind of care. Bamboo especially rewards gentle habits.
Australia has also seen a long rise in demand for these tools. Matcha accessories entered Australia prominently in 2005 alongside the first certified organic matcha imports, and Australian Department of Agriculture trade data recorded matcha-related imports rising from 150 tonnes in 2010 to 1,200 tonnes by 2023, a 700% increase. Accessories such as chasen whisks and chawan bowls accounted for 22% of value, or AUD 4.2 million. In NSW, a 2024 Nielsen survey found 62% of wellness consumers prioritise accessories for authentic preparation, and whisk holders can extend chasen life by 6 to 12 months, reducing replacement rates by 40%, as summarised in this article on matcha accessory adoption in Australia.
How to clean each tool properly
The biggest mistake is over-cleaning. Matcha tools usually need less soap and less soaking than people think.
For the chasen
- Rinse with warm water only straight after use
- Don’t use detergent because bamboo can retain odour and residue
- Don’t leave it soaking in a bowl or sink
- Place it on a holder to dry in shape
If you need a proper drying stand, a matcha whisk stand is designed for that exact job.
For the chashaku
Wipe it clean and keep it dry. Avoid washing it like cutlery. Bamboo can swell or lose shape if it’s exposed to water too often.
For the chawan
Rinse it soon after drinking, wipe gently, and let it dry fully before putting it away. If matcha sits in the bowl too long, staining becomes more likely.
Bamboo lasts longer when it’s cleaned quickly, dried well, and left alone the rest of the time.
Storage matters more than people realise
Steam, humidity, and trapped moisture do a lot of quiet damage. A whisk left near the kettle, or stored before fully drying, won’t age well.
Helpful habits include:
- Keeping bamboo away from direct steam
- Letting every tool dry fully before storage
- Storing matcha separately from strong food odours
- Avoiding direct sunlight on bamboo and tea powder
Sustainable choices start with longer use
One of the most sustainable things you can do is keep a well-made tool in use for longer. That means buying thoughtfully and maintaining it properly, rather than cycling through cheap accessories.
If sustainability is already part of how you organise your kitchen, broader ideas around materials and lower-waste habits can be useful too. This guide to eco-friendly kitchen products is a handy reference point for that wider mindset.
What to look for when sourcing accessories
You don’t need a museum-grade set. You do want tools that feel intentional.
Look for:
- Responsibly sourced bamboo where possible
- Evenly cut whisk tines
- Bowls with a stable base and enough whisking room
- Craftsmanship that supports repeated use, not just gifting
That approach fits the spirit of matcha nicely. Better tools, fewer replacements, less waste, and a calmer daily routine.
Putting Your Tools to Work With Pep Tea Matcha
Once the tools make sense, the ritual gets much easier. You don’t need complicated recipes to feel the difference. A simple bowl of usucha and a clean iced latte are enough to show what good preparation does.
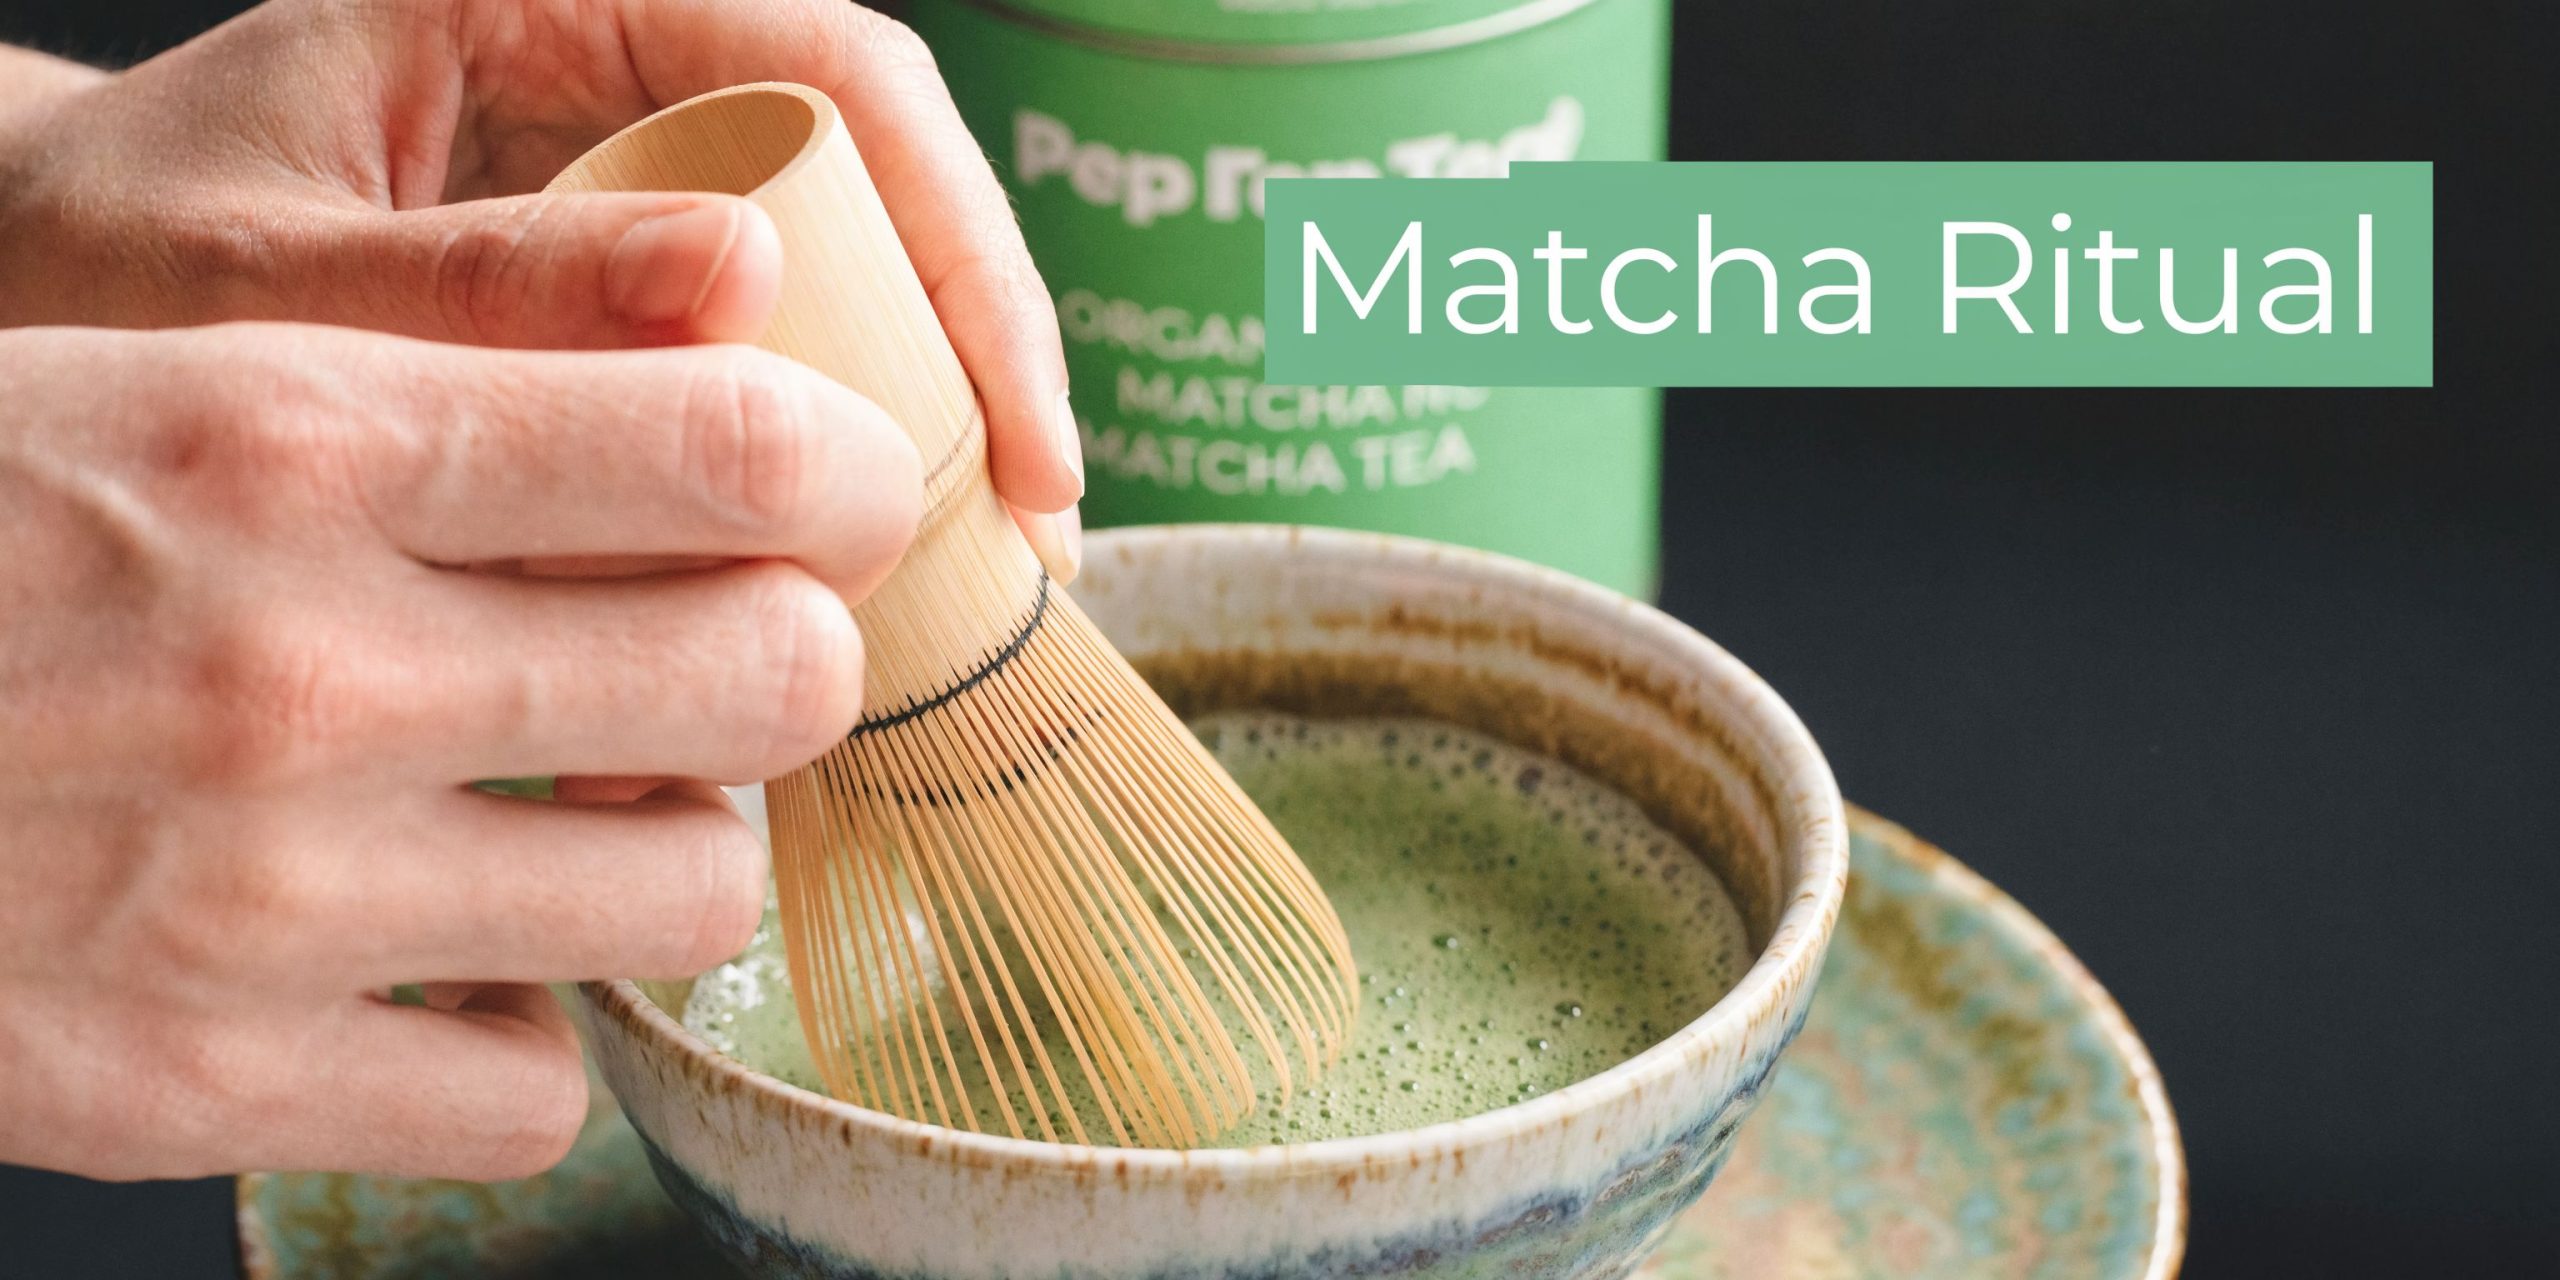
Pep Tea offers organic matcha in grades suited to different uses, including ceremonial-style preparation and lattes, so it’s a practical example of how the right tea and the right tools work together.
A simple usucha for quiet mornings
Use your ceremonial grade organic matcha when you want to drink it with water and appreciate the flavour on its own.
Try this method:
- Warm the chawan, then dry it.
- Sift matcha into the bowl.
- Add a little warm water and mix into a smooth paste.
- Add more water.
- Whisk briskly in a W motion until the surface looks smooth and lightly foamy.
The goal isn’t giant bubbles. It’s a fine, even top layer and a clean, rounded taste.
An iced matcha latte that stays smooth
For milk-based drinks, culinary grade organic matcha is usually the better fit because it stands up well in a latte.
A simple approach:
- Sift the matcha into the bowl
- Add a small amount of warm water
- Whisk until fully smooth
- Pour that concentrate over ice
- Top with your milk of choice
Starting with a smooth concentrate matters. If you add dry powder straight into cold milk, it’s much harder to dissolve properly.
Here’s a quick visual guide for whisking technique and setup:
Small adjustments that improve both drinks
These details make a noticeable difference:
- Sift first if your matcha has been sitting for a while
- Use warm, not boiling, water for the initial mix
- Whisk near the surface for better foam
- Rinse the whisk immediately after use so it stays in working shape
A good bowl of matcha feels light, smooth, and integrated. It shouldn’t taste like powder added to water at the last minute.
Once you’ve made a few bowls this way, the accessories stop feeling specialised. They just feel like the right tools for the drink.
From a Simple Drink to a Mindful Ritual
The nicest thing about matcha tea accessories is that they solve practical problems and slow you down in a good way at the same time.
A sifter gets rid of lumps. A chasen improves texture. A whisk holder helps your tools last. Those are useful, concrete benefits. But the experience goes further than utility. The act of warming the bowl, sifting the powder, and whisking until the surface turns glossy gives the drink a shape in the day. It asks for attention, but not much time.
That’s why these tools appeal to very different people. A home drinker may want a few quiet minutes before work. A café may want a more authentic matcha service and a better-looking cup. Both are using accessories to make the drink more intentional.
The good news is that you don’t need to become a purist. You just need to understand what each tool is for and choose the pieces that match the way you drink matcha. Start small if you like. A whisk, a bowl, a scoop, and a sifter are enough to transform the result.
Once the process becomes familiar, the ritual doesn’t feel complicated. It feels organised, calming, and repeatable. That’s part of matcha’s appeal. It brings together flavour, craft, and a little moment of focus in the middle of ordinary life.
If you’re ready to build a better matcha routine, explore Pep Tea for organic matcha, accessories, and practical guidance for home kitchens, cafés, and everyday wellness.
Matcha Tea Sifter: Smooth, Clump-Free Brews

You whisk. You pour. You take a sip. And instead of a smooth, vivid bowl of matcha, you get little green lumps, a sandy finish, and a drink that feels far less special than the powder you started with.
That’s one of the most common matcha frustrations I see. It happens to beginners, and it happens to café teams too. People often blame the whisk, the water, or their technique. Usually, the underlying issue started a few seconds earlier.
The fix is simple. Use a matcha tea sifter.
This tiny tool looks modest, but it changes almost everything about the cup in front of you. It helps your powder fall light and fluffy into the bowl, makes whisking easier, and gives your matcha a better chance to taste smooth, creamy, and balanced. If you’ve invested in quality powder, whether you drink it straight, make lattes, or build it into a café menu, sifting is one of the easiest ways to respect the tea.
The Secret to Lump-Free Matcha Begins Here
A lot of people have the same first matcha experience. They buy a beautiful tin of green powder, maybe inspired by a café latte they loved, and they expect the home version to feel calm, rich, and silky. Instead, the powder sticks together, floats in clumps, and turns the whole ritual into a small annoyance.
That moment matters because matcha is personal. You’re not just making a drink. You’re preparing something you’ve chosen for flavour, focus, and a better daily rhythm. When the texture is gritty, it’s disappointing in a way that feels bigger than it should.
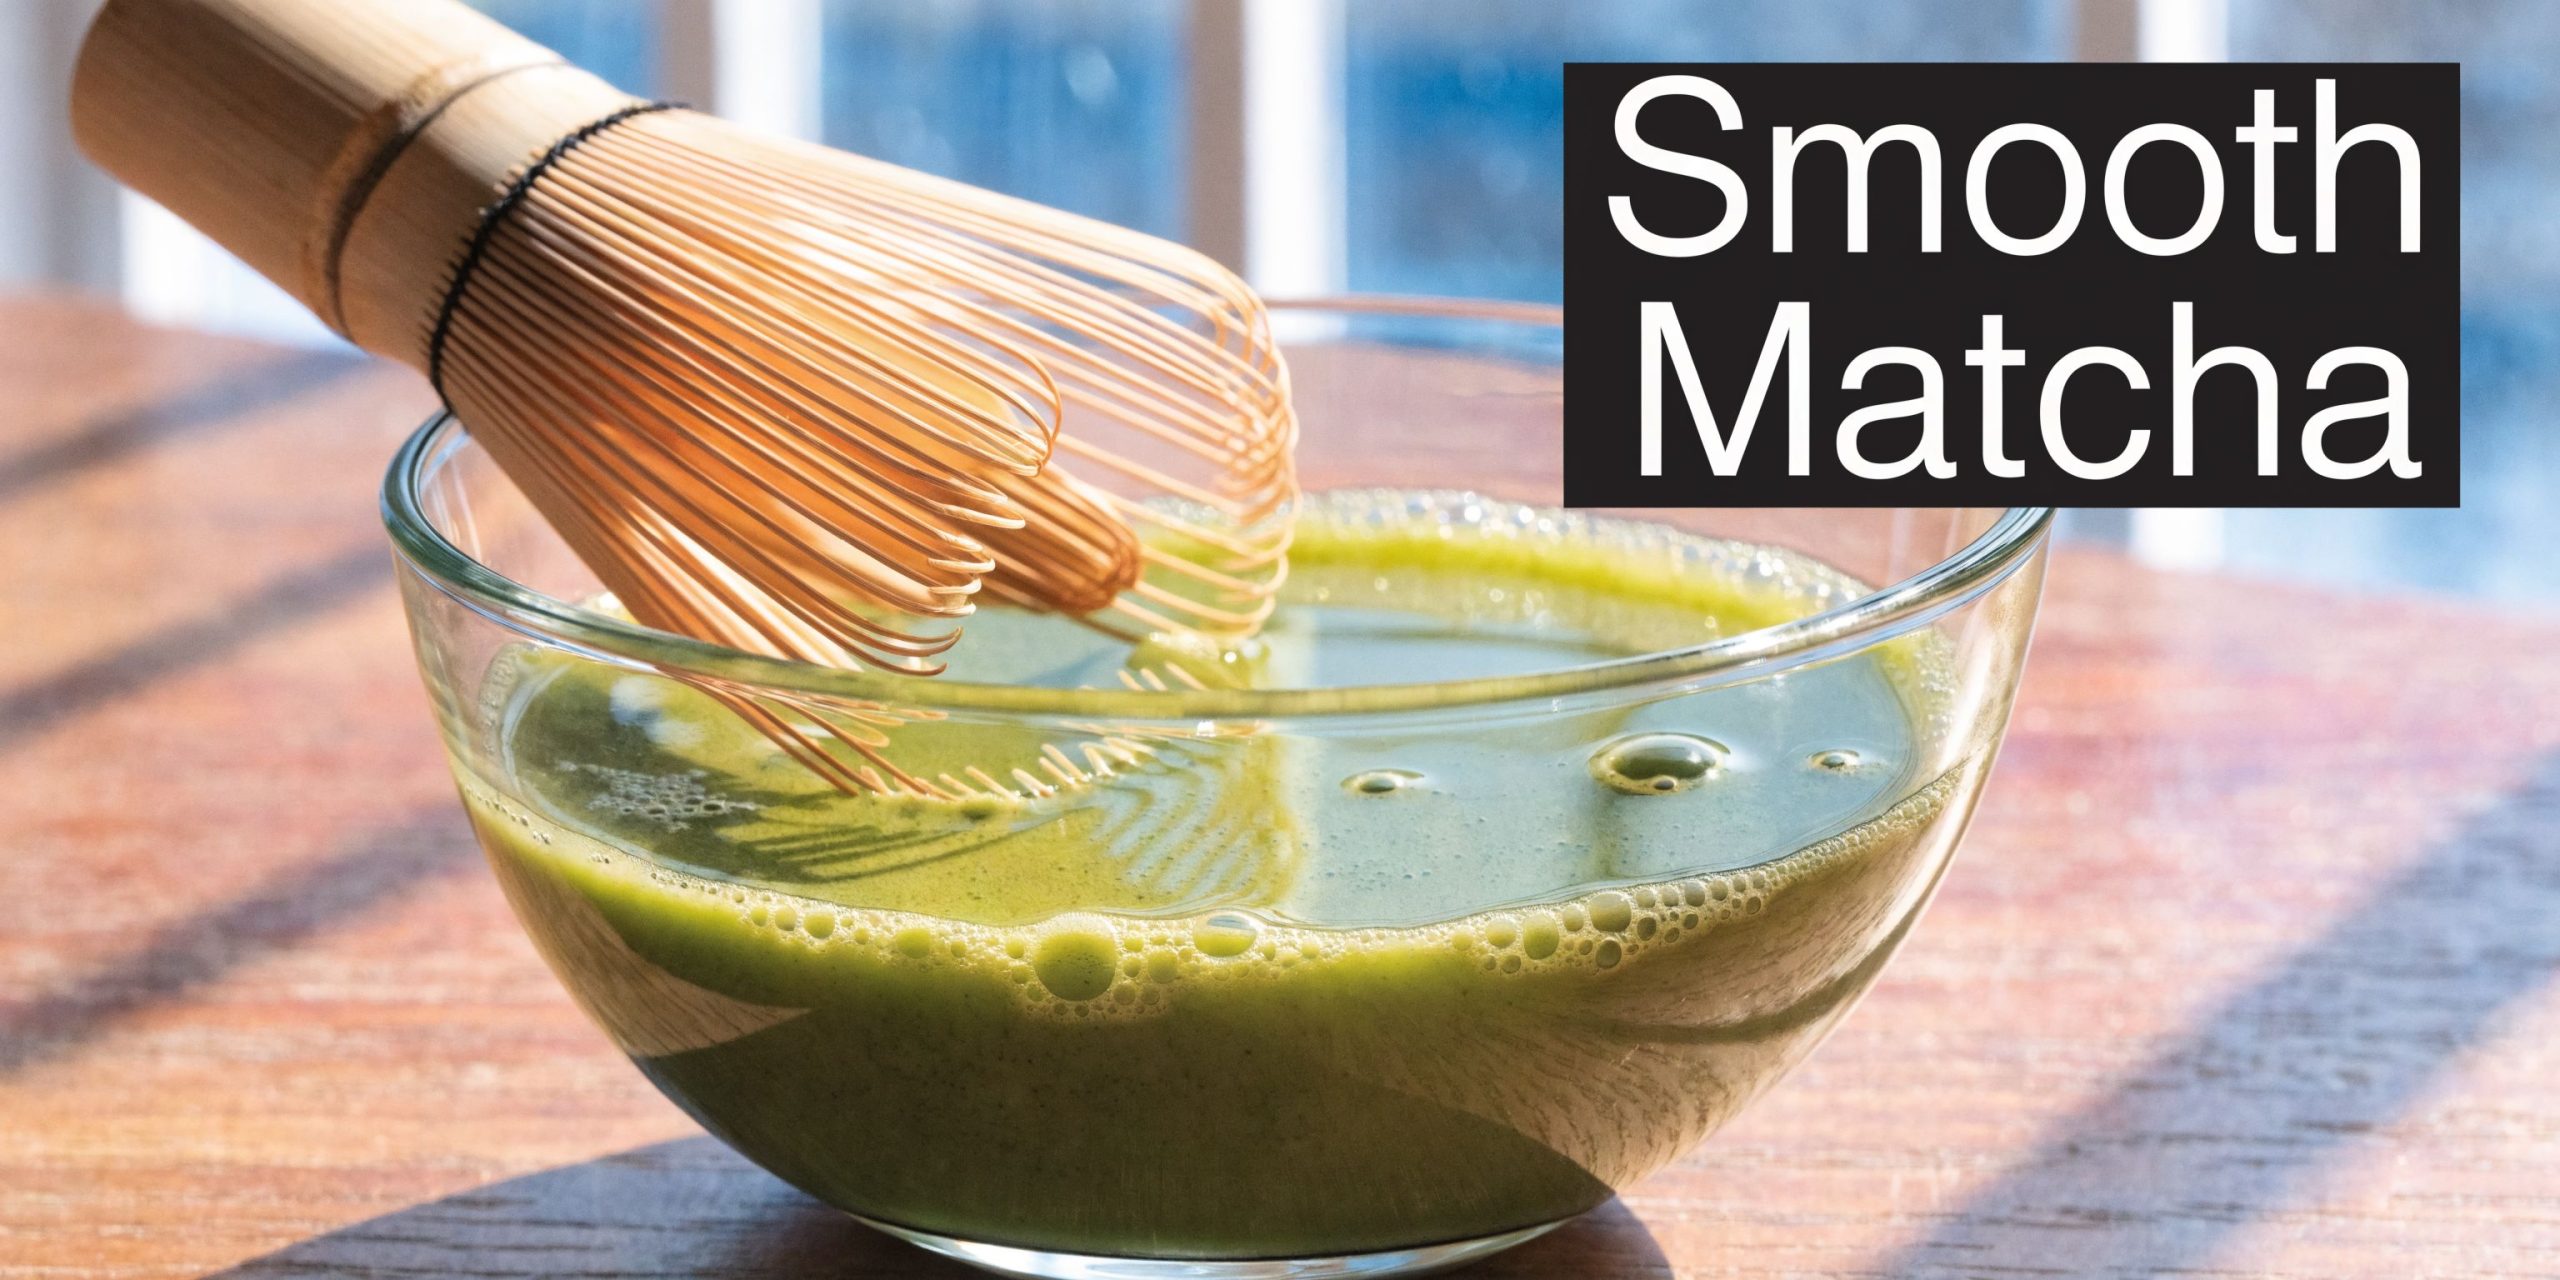
The small tool that changes the whole bowl
A matcha tea sifter is the quiet hero here. Before any water touches the powder, the sifter breaks up tiny compacted bits so the matcha lands in the bowl as a soft, even layer. That gives your whisk a fair chance to do its job.
If you’ve been exploring different grades and styles, it also helps to compare how preparation changes the experience across different powders. Looking at options such as high-quality matcha tea from Key West Coffee Company can be useful because it reminds you that quality and technique work together. Good powder still needs good handling.
A great whisk can’t fully rescue matcha that went into the bowl already clumped.
For beginners, that’s encouraging. It means you probably don’t need stronger wrists or a more complicated ritual. You just need one extra step that takes only moments and makes the rest of the process easier.
For café owners, the same lesson applies at scale. If the base isn’t smooth, the final drink won’t be either, no matter how polished your service is.
Why Sifting Matcha Powder Is Non-Negotiable
The first thing to know is that clumps don’t mean your matcha is poor quality. In fact, fine matcha often clumps precisely because it’s so delicate. The powder is extremely light, and it reacts quickly to moisture in the air and to static.
In Australian preparation settings, that matters even more. Humidity and storage conditions can make a fresh tin behave very differently from one day to the next.
What a matcha tea sifter does
The Japanese name for this tool is chakoshi. In practical terms, it’s a fine-mesh strainer designed to turn compressed powder back into a loose, airy mound before whisking begins.
According to this reference on a matcha tea sifter and tea strainer, a chakoshi in premium matcha preparation commonly uses mesh apertures finer than 10 microns, and matcha clumps formed by static and moisture can reach 50 to 100 microns. The same source notes that unsifted matcha can lead to a grainy texture with 20 to 30% reduced froth volume, because clumps reduce powder-water contact area by 40%. It also states that sifting can increase effective surface area by 3 to 5x, lifting extraction efficiency from 65% to 95% in a 2g/60ml brew.
Those numbers sound technical, but the takeaway is simple. When the powder is evenly dispersed, water can reach more of it quickly and consistently.
Why clumps create bigger problems than you think
A clump isn’t just a lump sitting in your bowl. It acts like a barrier.
Instead of each fine particle meeting water and whisk movement, parts of the powder stay trapped inside little packed pockets. That leads to a few familiar issues:
- Uneven mixing means some sips taste dull while others taste sharp or bitter.
- Poor suspension means sediment drops faster to the bottom.
- Weaker froth means the top of the bowl looks flat rather than lively.
- Less control means you keep whisking harder, which often makes the ritual feel frustrating.
Why this matters for premium matcha
The better the matcha, the more you want to protect what makes it special. If you’re working with a fine ceremonial powder, proper prep helps you taste the softness, sweetness, and savoury depth the producer intended. If you want to understand how grade affects preparation, our guide to https://peptea.com.au/different-grades-of-matcha/ is a helpful place to start.
It’s also useful to compare sift-friendly powders when learning. Browsing products such as Ceremonial Grade Matcha from AQEEK Coffee can help you notice how very fine powders benefit from careful handling.
Practical rule: If your matcha is worth buying, it’s worth sifting.
Improve Flavour, Texture, and Crema
People often think the matcha tea sifter is only about removing lumps. That’s true, but it’s only the beginning. Sifting changes how the drink feels, how it tastes, and how the foam forms on top.
Those three things are closely linked. Better particle distribution gives you better contact with water. Better contact gives you smoother whisking. Smoother whisking gives you a more balanced cup.
Texture starts before the whisk
Texture is often where the difference is first noticed.
When matcha falls through a fine mesh, it becomes light and even. That means your whisk meets a fluffy powder bed instead of stubborn little pebbles. The result is a bowl that feels softer across the tongue, with less graininess and less sludge left behind.
If your goal is a velvety usucha or a café-style latte base, this matters. A smooth base carries milk better, blends more cleanly, and leaves less sediment at the bottom of the cup.
Flavour becomes more balanced
Unsifted matcha doesn’t dissolve evenly. Some parts stay trapped in little clumps while others overexpose to water and agitation. That’s one reason a bowl can taste oddly bitter in one sip and flat in the next.
A more even powder bed supports a more even extraction. In plain language, the bowl tastes more coherent. You’re more likely to notice sweetness, savoury depth, and the gentle grassy freshness people chase in good matcha.
Foam and crema improve in a visible way
Here, the change becomes obvious, especially for café service. According to this reference on a matcha hand strainer, sifted matcha froths to 2 to 3x higher foam height, reaching 15 to 20mm, with microbubble stability lasting 4 to 6 minutes. The same source links that improvement to 30% improved L-theanine-caffeine synergy (1:2 ratio) and notes that unsifted matcha can produce a thinner, more bitter brew due to a 15% increase in polyphenol oxidation.
That sounds scientific, but the visual cue is easy to recognise. Sifted matcha tends to produce a finer, more even top layer. It looks creamy rather than bubbly and rough.
If you’re still working on your whisking motion, our guide to https://peptea.com.au/how-to-whisk-matcha/ pairs well with this step, because sifting and whisking work best together.
What this means in the cup
Here’s a simple perspective:
- Better texture makes the bowl feel luxurious, not chalky.
- Better flavour makes the tea feel composed, not scattered.
- Better crema makes the drink look alive and drink beautifully from the first sip.
Smooth matcha isn’t only a visual win. It changes the whole drinking experience.
For home drinkers, that means a more enjoyable ritual. For cafés, it means a more consistent product that looks good, tastes right, and holds up better on the pass.
How to Choose the Right Matcha Sifter
Not every sifter feels the same in use. Some are made for a single bowl on a quiet morning. Others are more practical for a busy café bench. The right choice depends on how much matcha you prepare, how often you make it, and whether hygiene and workflow need to meet commercial standards.
There’s also a growing Australian angle here. According to this video reference discussing the local market and tool selection, there has been a 35% rise in Australian searches for “organic matcha tools” since Q1 2025, alongside growing interest in sifters that align with FSANZ Code requirements for premium organic handling in hospitality settings: organic matcha tools in Australia.
The two common sifter styles
Many choose between a small handle-style strainer and a larger canister-style sifter.
The handle-style version is the classic choice for making one bowl at a time. You rest it over the chawan, add the powder, and press it through with a scoop or small spatula.
The canister style is built for batching. It’s more useful when you want to pre-sift a larger amount for service, recipe prep, or repeated drinks across a shift.
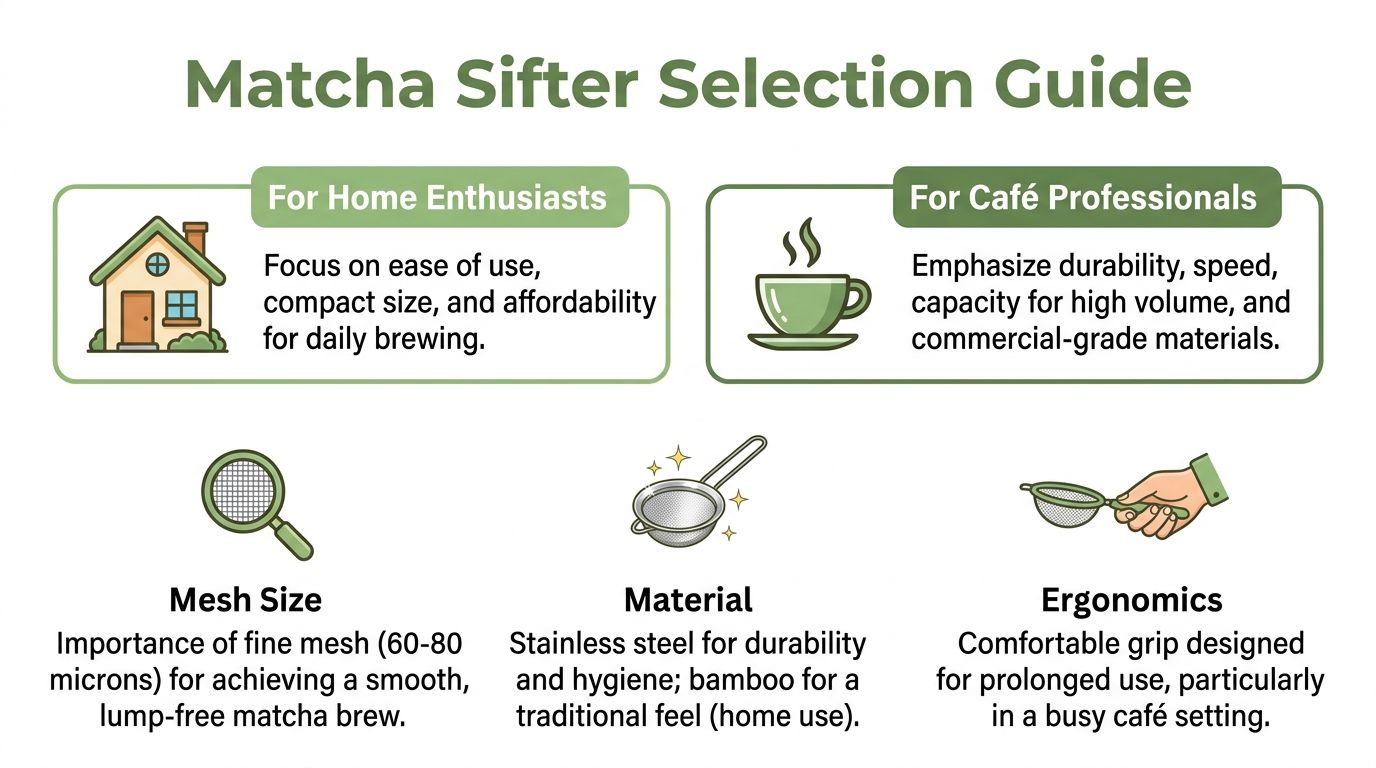
What to look for in the material and mesh
Food-grade stainless steel is usually the safest practical choice. It’s easy to clean, durable, and better suited to repeated use in a home kitchen or commercial setting.
A very fine mesh matters too. A generic kitchen sieve might work in a pinch, but it often isn’t designed for such fine powder. That’s why dedicated matcha tools feel easier and more predictable.
If you’re shopping as a beginner and want an all-in-one setup, the https://peptea.com.au/matcha-tea-set-australia/ page shows a full set format that includes the key preparation tools, including a sifter.
Matcha Sifter Comparison
| Sifter Type | Best For | Material | Pros | Cons |
|---|---|---|---|---|
| Handle-style strainer | Daily home use, single bowls, small latte prep | Usually stainless steel | Easy to store, simple to use, precise for one serve | Slower for batch work |
| Canister-style sifter | Café prep, repeated service, recipe batching | Usually stainless steel | Better for volume, tidier for larger prep | Takes more space, less nimble for one bowl |
| Bamboo-style traditional option | Home enthusiasts who value ritual and aesthetics | Bamboo or mixed materials | Traditional feel, visually appealing | Harder to sanitise well, less practical for commercial use |
| Generic kitchen sieve | Emergency substitute only | Varies | Easy to find | Mesh may be too coarse, less control, less tidy |
A simple buying checklist
- Choose stainless steel if you want durability and easier cleaning.
- Check the mesh and avoid anything that looks obviously coarse.
- Think about volume. One bowl at a time and café prep are different jobs.
- Consider ergonomics if you’ll use it repeatedly during service.
- Keep compliance in mind if you run a venue and need cleaner, more controlled tool choices.
One mention worth making here is practical rather than promotional. Pep Tea’s Japanese Matcha Set includes a sifter, which is useful for people who want the core tools together in one setup.
Your Step-by-Step Sifting Method
Sifting looks refined, but it’s very straightforward once you’ve done it once or twice. Many learn it in minutes.
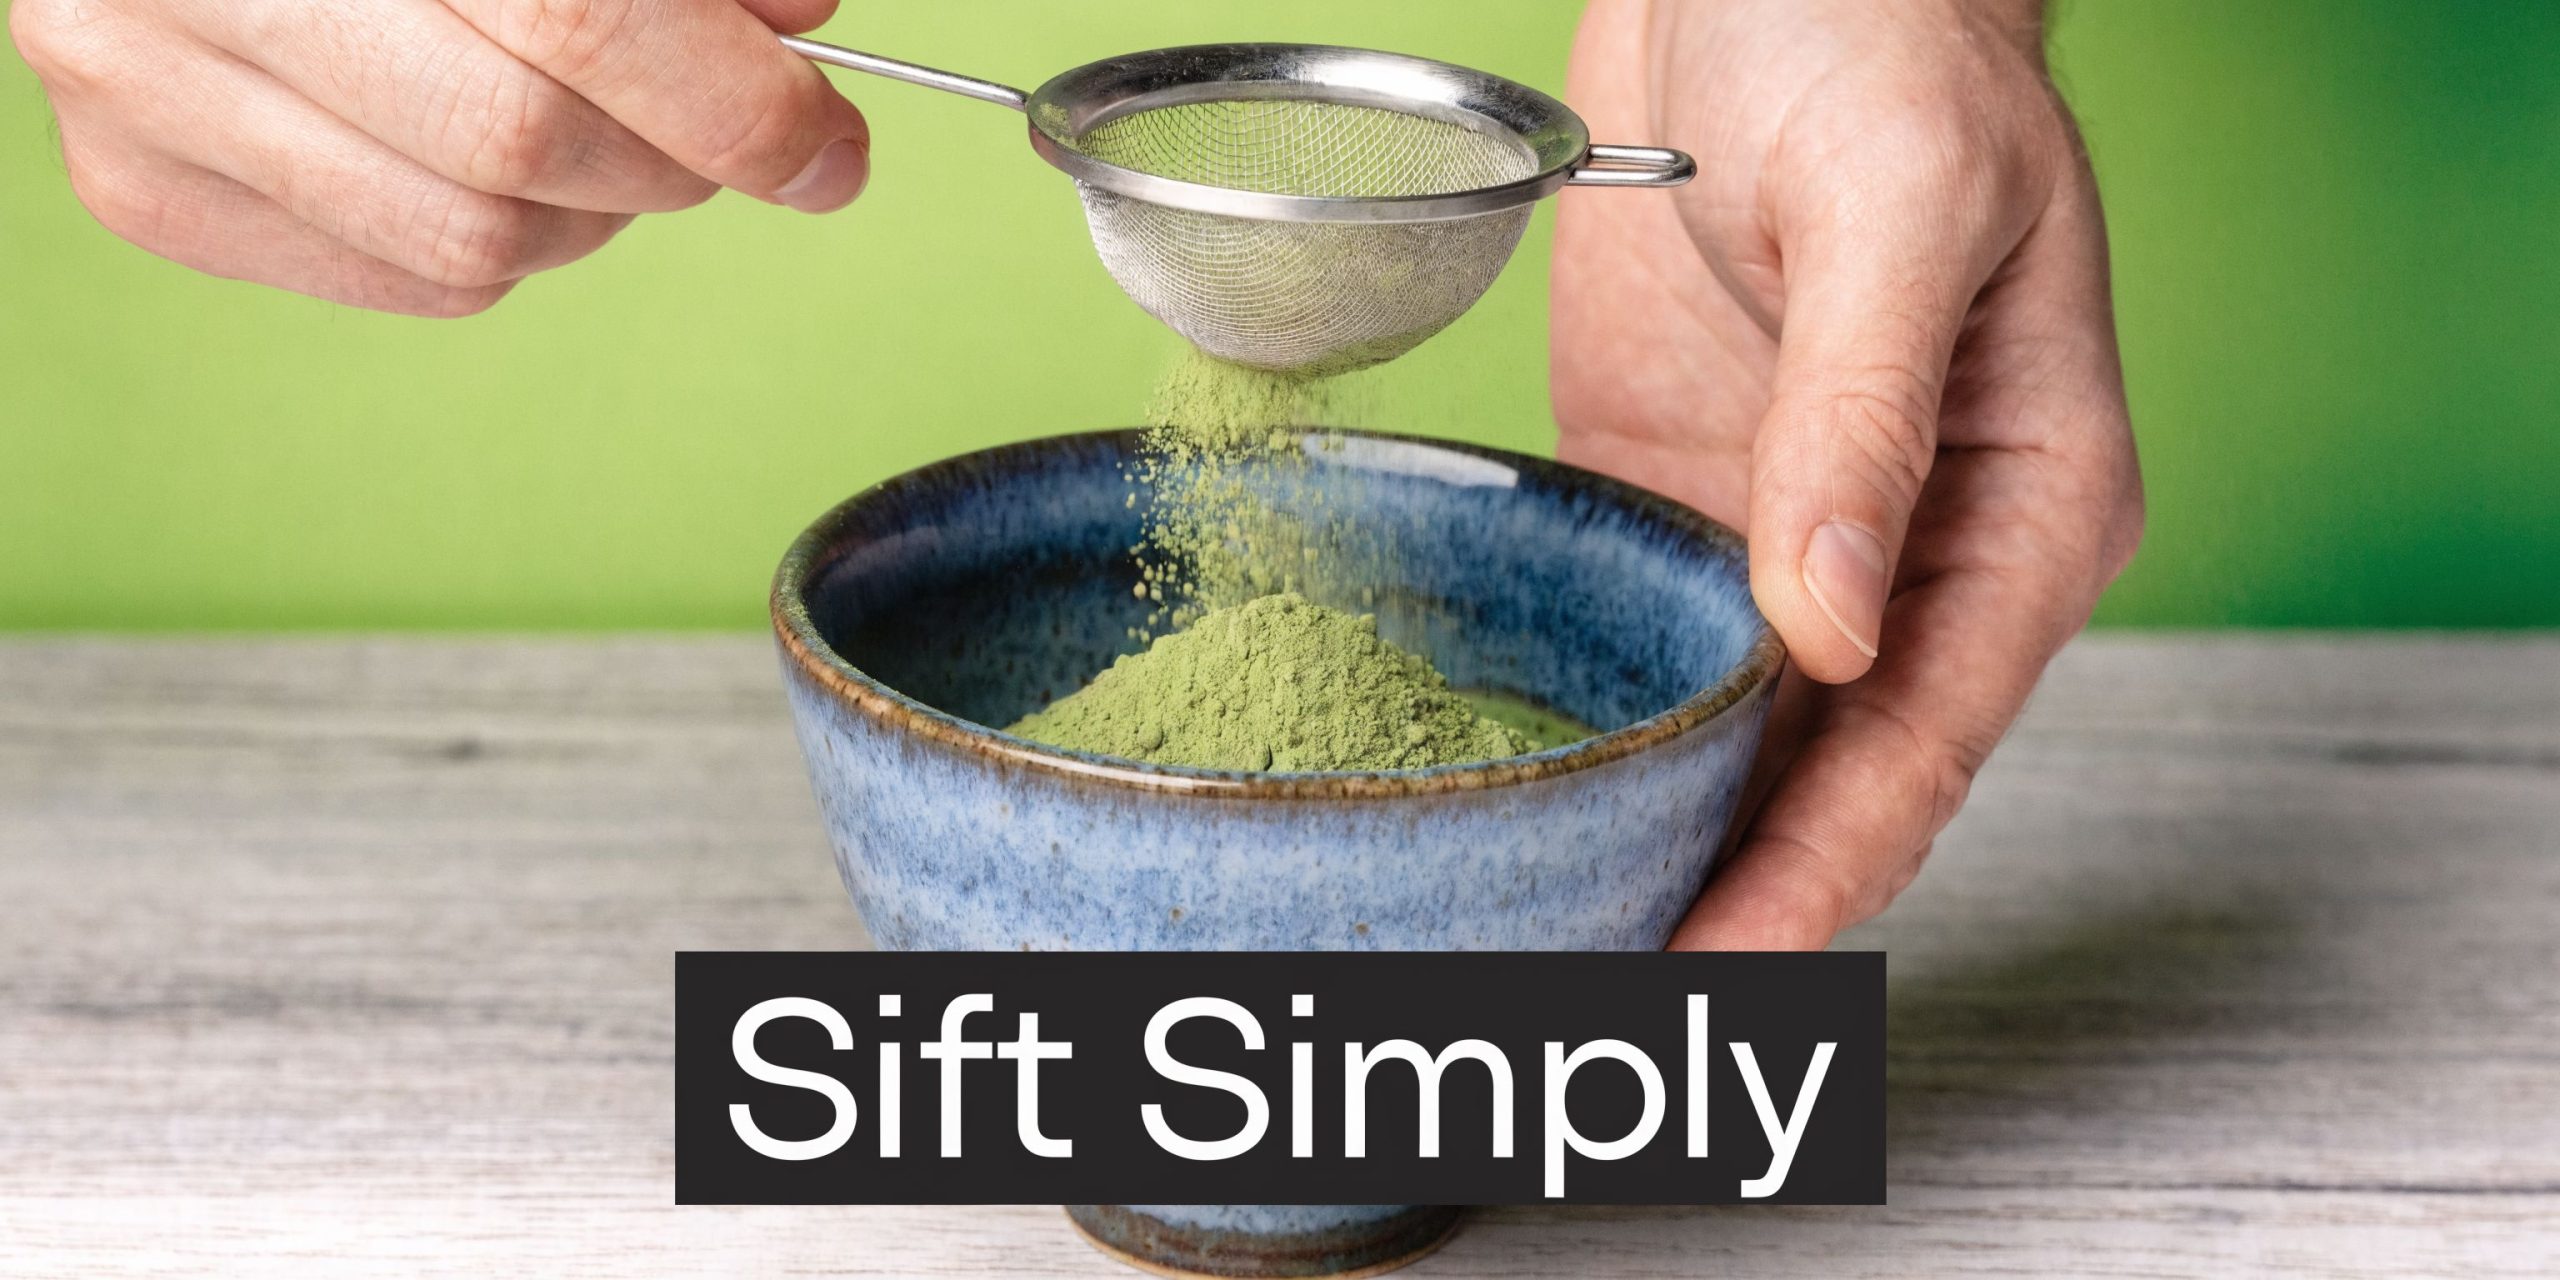
The easiest way to do it
Start with a completely dry bowl and a dry sifter. Moisture is the enemy at this stage, so even a few drops can make the powder catch.
Then follow this sequence:
Set the sifter over the bowl
Make sure it sits securely. You don’t want it wobbling while you work.Measure your matcha into the sifter
Use your bamboo scoop or measuring spoon and place the powder gently into the centre.Press lightly, don’t mash
Use the scoop, a small spoon, or a spatula to coax the powder through the mesh. Gentle circular movements work well.Tap only if needed
If a little powder clings to the mesh, a light tap can help. Don’t smack the sifter hard or you’ll create a puff of green dust.Whisk straight after sifting
Once the matcha is airy and loose in the bowl, add your water and whisk while it’s at its freshest.
Common beginner mistakes
A few tiny habits make the process much easier:
- Using a damp tool causes immediate sticking.
- Forcing the powder through too aggressively can compact it again.
- Sifting too far ahead can expose the powder to more air than necessary.
- Overfilling the sifter makes the process messier than it needs to be.
Keep the motion light. You’re fluffing the powder, not grinding it.
If seeing the movement helps, this short video shows the rhythm clearly:
How long should it take
Not long. Once your tools are within reach, sifting becomes one of the quickest parts of the ritual. It often saves time overall because whisking becomes easier and more predictable afterward.
For a café team, that’s good news. For a beginner, it’s even better. One small habit removes a lot of unnecessary frustration.
Troubleshooting and Advanced Tips for Cafés
Sometimes the problem isn’t your technique. It’s the room.
In parts of Australia, especially through humid periods in NSW and QLD, matcha can start clumping much faster than people expect. That’s why a method that worked perfectly on a cool dry day suddenly feels messy and stubborn in summer.
When humidity keeps ruining your prep
This Australian matcha reference notes that searches for matcha spike 42% in summer, and that matcha agglomeration can happen 3x faster in humidity above 70%. It also reports that home users can pre-chill sifters to -5°C for 10 minutes to cut clumping by 50%, while cafés handling larger amounts may use electric vibrating sieves for 100g batches: sifting matcha powder in humid conditions.
That’s useful because it gives us two practical paths. One for the home kitchen, and one for service.
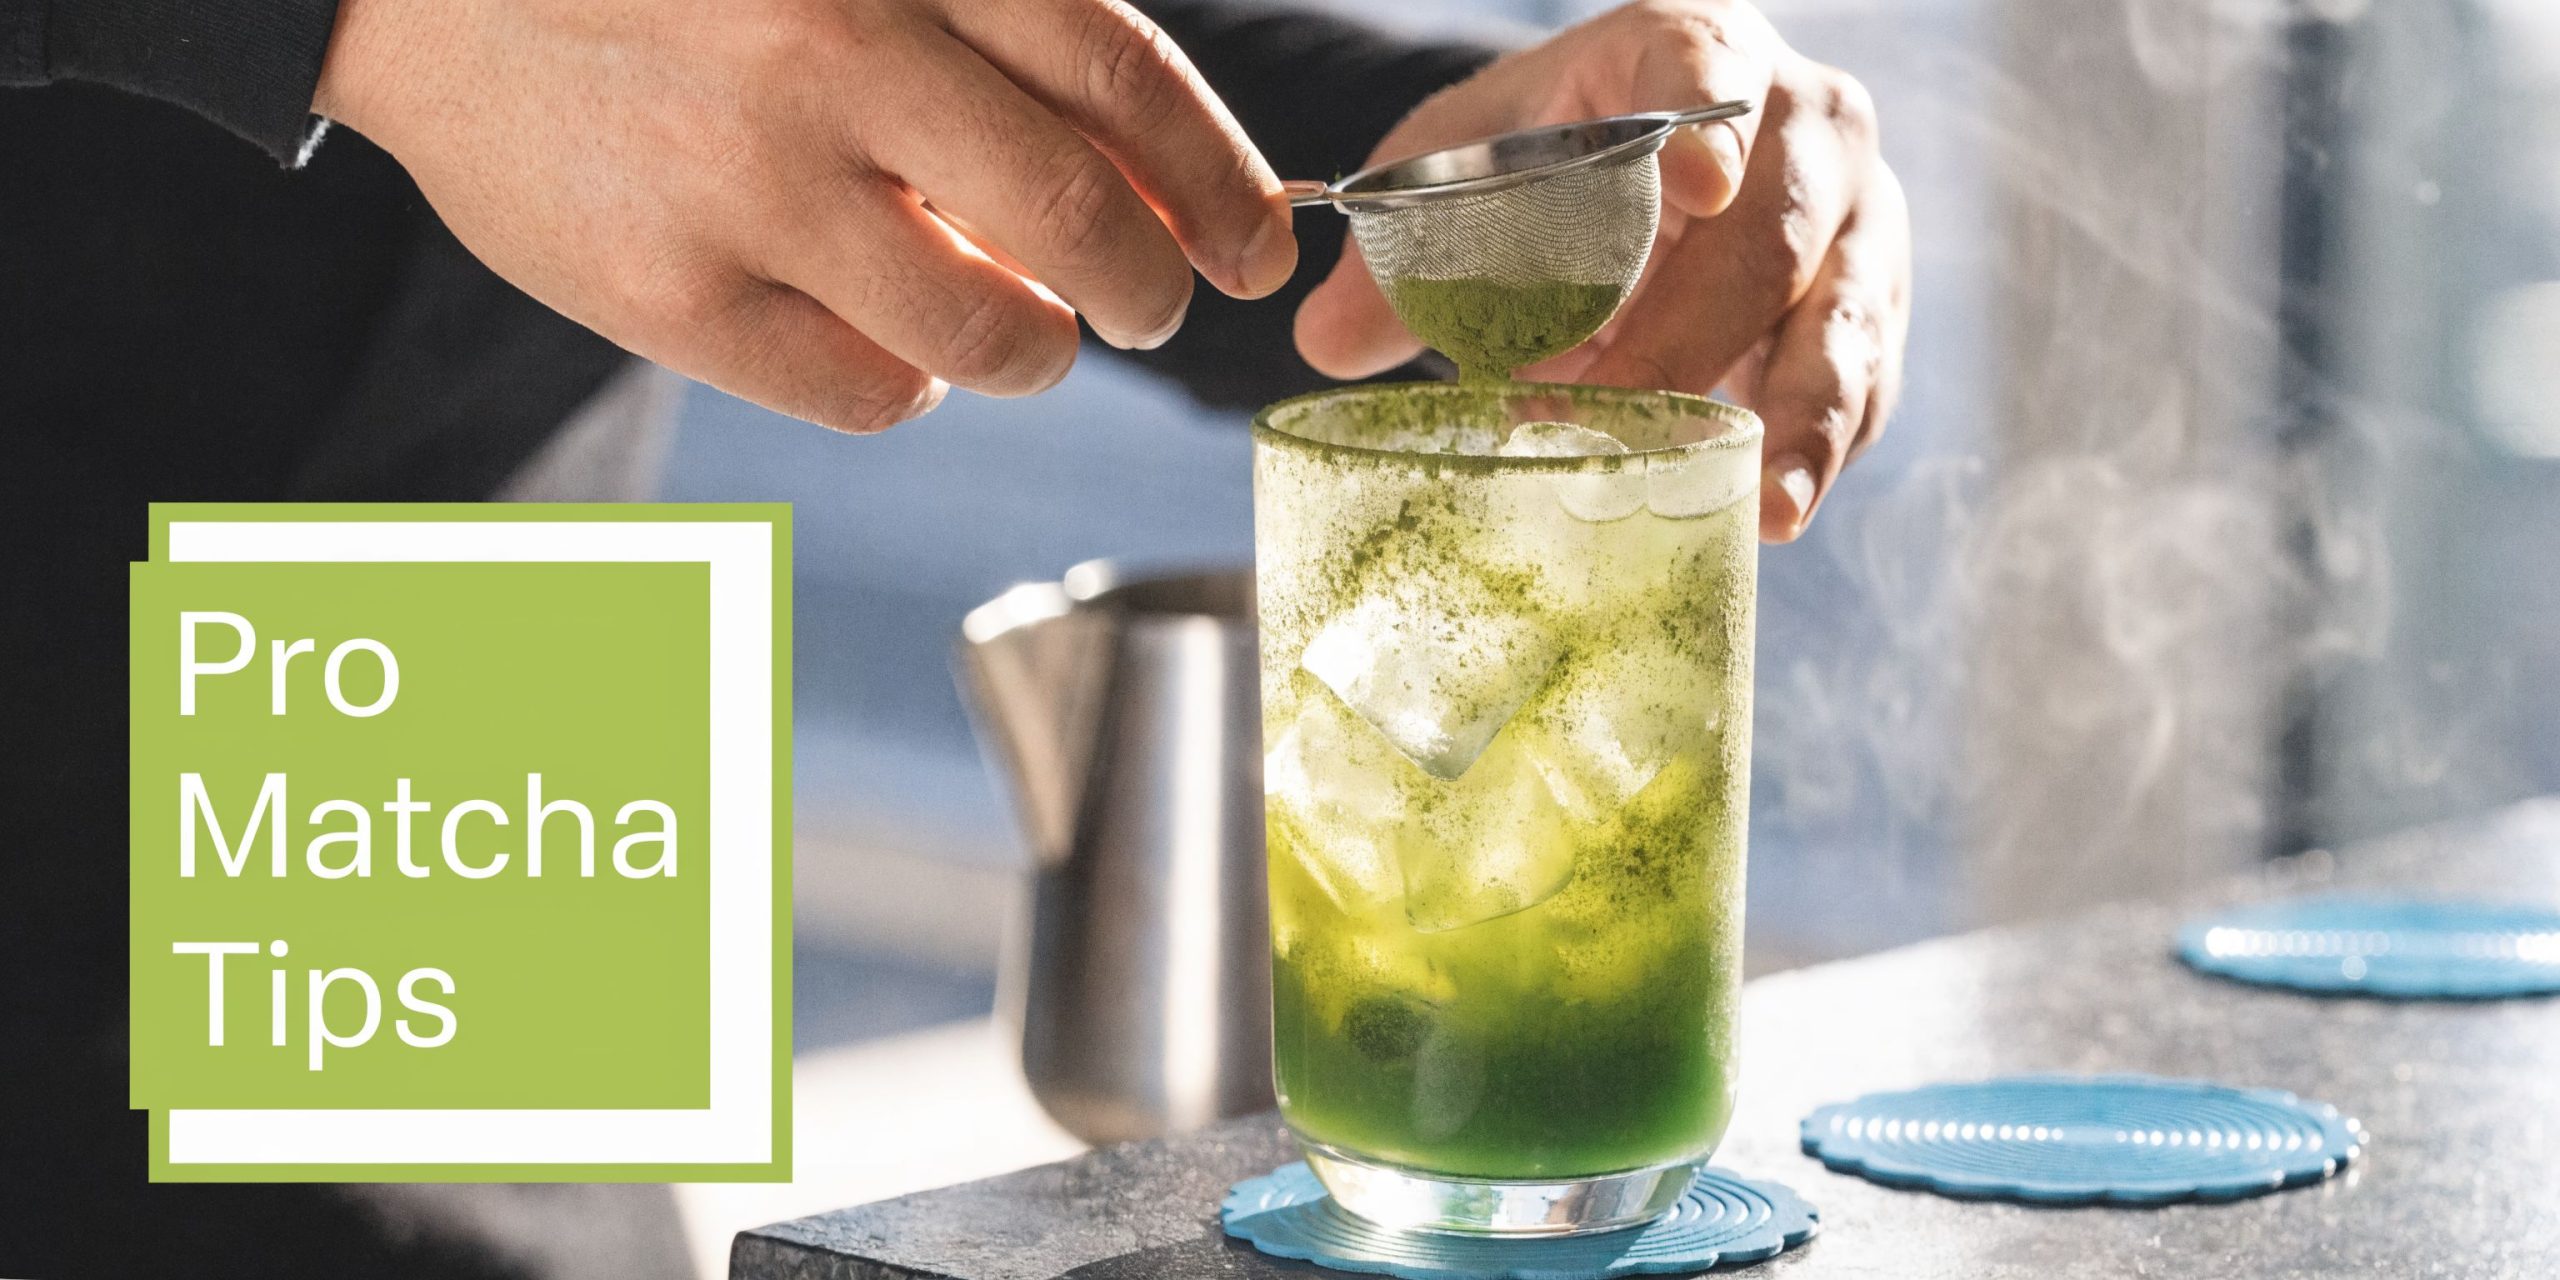
Quick fixes at home
If your matcha keeps clumping, try these:
- Sift just before use rather than preparing it well in advance.
- Keep tools dry and cool so moisture doesn’t catch on the mesh.
- Use a fine tea strainer temporarily if you don’t own a dedicated matcha tea sifter yet.
- Store your matcha tightly sealed and away from steam, sunlight, and heat.
A regular fine tea strainer can work as a stopgap, but it usually feels less tidy and less precise. It’s a practical substitute, not a long-term matcha ritual tool.
Workflow tips for cafés
For hospitality teams, speed matters, but consistency matters more. A rushed bowl with lumps isn’t saving time if the drink comes back or pours poorly into milk.
Try a workflow like this:
- Assign one dry prep zone for matcha only.
- Pre-portion small service amounts instead of exposing a larger container repeatedly.
- Use batch sifting tools only when turnover justifies it.
- Train every staff member the same way so texture stays consistent across shifts.
In a café, the best sifting method is the one staff will repeat accurately during a busy service.
That’s true whether you’re serving straight matcha, iced lattes, or using matcha as part of a non-alcoholic menu.
Caring for Your Tools and Your Tea
A good matcha tea sifter doesn’t need complicated care. It needs clean, gentle care.
Rinse metal sifters with warm water after use if powder has caught in the mesh, then dry them thoroughly before putting them away. Avoid leaving them damp in a drawer or on a crowded sink. If you can brush out dry powder first, that’s often even easier.
Soap can be useful for a deeper clean when needed, but residue is the thing to avoid. You don’t want cleaning smells lingering on a tool that sits close to a delicate tea.
Good habits that protect flavour
A few small habits make a real difference:
- Keep the sifter dry before the next use.
- Store matcha airtight so moisture and kitchen odours stay out.
- Avoid heat and light because they dull freshness.
- Clean promptly so powder doesn’t cake into the mesh.
The bigger point is simple. Sifting is an act of care. It respects the work that went into growing, grinding, packing, and preparing matcha.
If you’ve been skipping this step, don’t feel bad. Many do at first. Once you make it part of your routine, it quickly feels natural, and the bowl in front of you reflects that care straight away.
If you’d like to put this into practice, explore Pep Tea for organic matcha, tea education, and tools that support a smoother everyday ritual at home or in hospitality.
Your Guide to a Perfect Matcha Whisk Stand

You buy a lovely bamboo whisk, open a fresh tin of vibrant matcha, and feel properly organised for your new morning ritual. A week later, the whisk looks tired. The fine tines have started curling in, the centre seems squashed, and after rinsing it, you’re left wondering where on earth to put it so it dries.
That’s where a matcha whisk stand changes everything.
For a small piece of teaware, it solves a surprisingly important problem. It helps your whisk keep its shape, dry more evenly, and stay ready for the next bowl. If you drink matcha most days, that matters. If you run a café serving matcha lattes, it matters even more.
At Pep Tea, we talk a lot about the quality of the tea itself. But good matcha also depends on the tools around it. A bamboo whisk is delicate by design. If you want creamy foam, a smooth texture, and a whisk that lasts, care matters just as much as technique.
The Unsung Hero of Your Matcha Ritual
A lot of people assume the whisk stand is decorative. It looks neat on the bench, matches the bowl, and makes a matcha set feel complete. But its true value becomes apparent after use, when your whisk is wet and vulnerable.
Consider the usual routine. You whisk your matcha, rinse the chasen, then leave it on a saucer, on its side, or standing awkwardly in a cup. It seems harmless. Over time, though, the bamboo prongs start drying unevenly.
Some bend inward. Some stay damp longer than others. The whisk that felt springy and precise when it was new starts feeling clumsy.
A good whisk stand protects the part of your setup that does the hardest work.
That’s why experienced matcha drinkers keep coming back to this simple tool. The stand isn’t there to make your bench look more traditional. It’s there to support the whisk between bowls, when shape and airflow matter most.
For beginners, this is often the missing piece. You can have excellent matcha and still struggle to get the texture right if your whisk has lost its form. For café owners, a worn whisk can affect consistency across drinks.
The nicest part is that using a stand doesn’t add effort. It removes guesswork. Rinse. Place. Dry. Done.
What Exactly Is a Matcha Whisk Stand
A matcha whisk stand is a small holder designed specifically for a bamboo matcha whisk, also called a chasen. You may also see the stand referred to by its Japanese names chasen-tate or naoshi.
Its job is simple. After rinsing your whisk, you place it over the stand so the prongs rest in a supported, open position while drying.
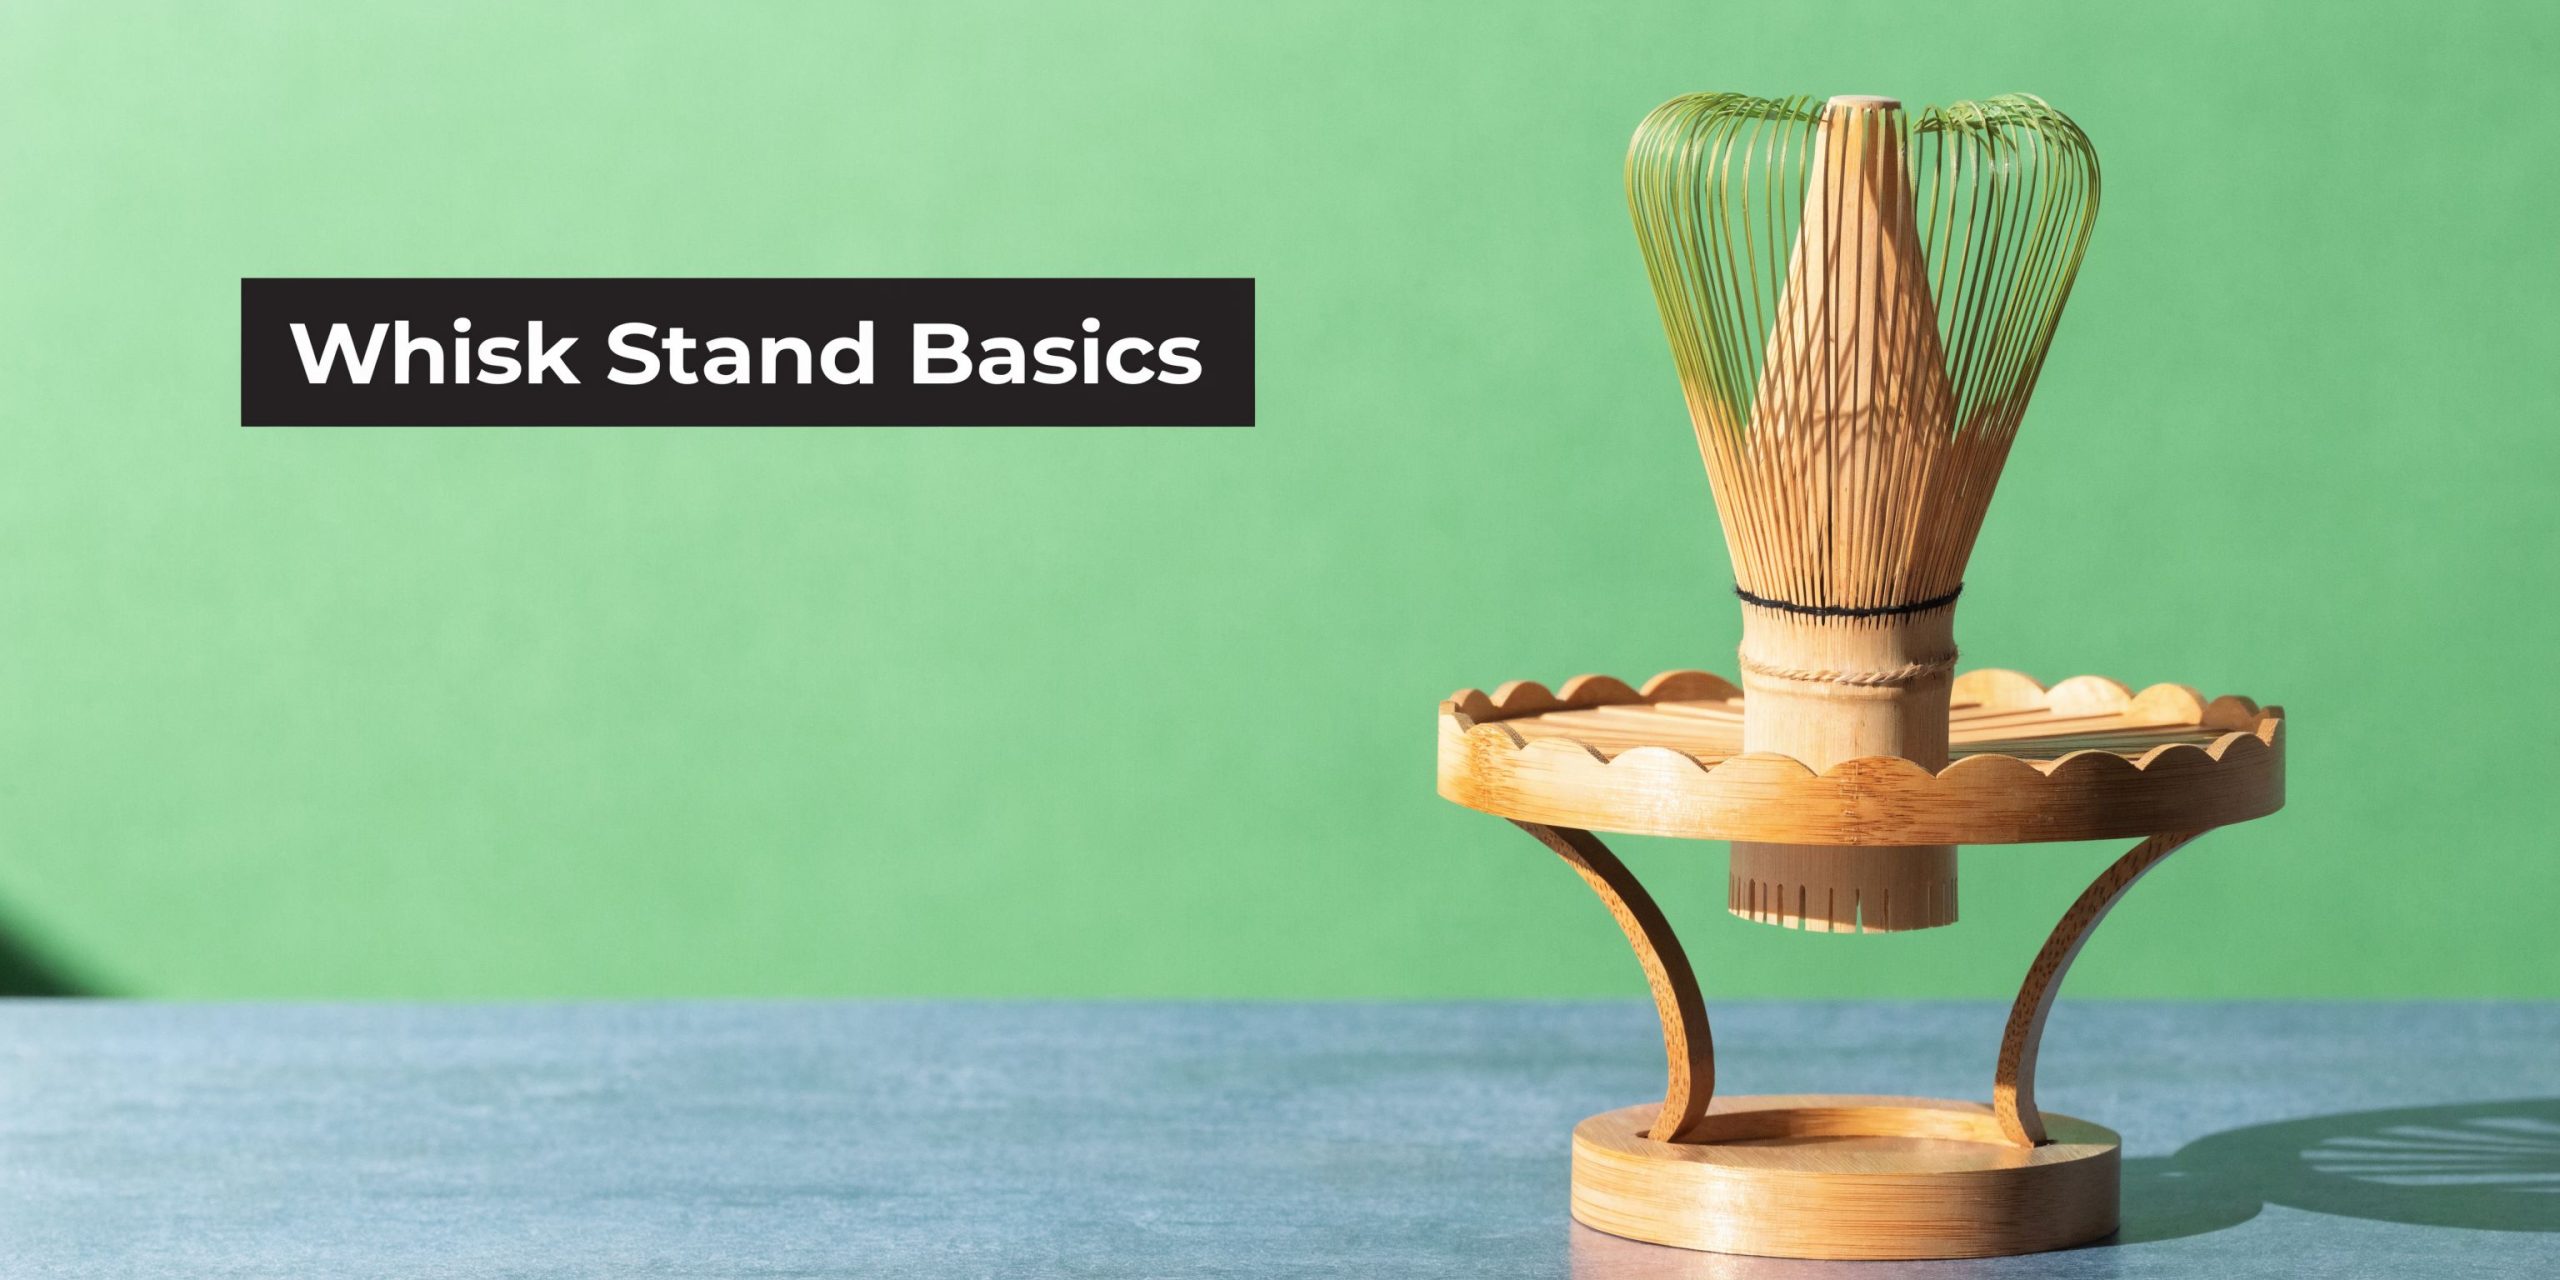
A small tool with deep roots
The whisk itself has a long history. The chasen originated around 600 years ago in Japan’s Muromachi period (1336–1573), refined by tea master Murata Jukō, and about 90% of authentic chasen are still produced in Takayama, Japan according to this history of the matcha whisk.
That matters because a handcrafted tool deserves proper care. The stand exists for a reason. It’s part of looking after a traditional whisk in the way it was intended to be used.
Why the shape matters
A whisk stand isn’t just a generic holder. It has a tapered form that supports the whisk from the inside, helping the prongs dry in a more natural spread. That’s different from dropping the whisk into a mug or balancing it on a plate.
If you’re building your setup from scratch, a complete Japanese matcha set often includes the core tools that make daily preparation easier.
If you’d like another practical overview of how the whisk and holder work together, this guide to the matcha whisk and holder is a helpful companion read.
Why a Whisk Stand Is Essential for Your Chasen
A matcha whisk stand earns its place by improving three things at once. performance, hygiene, and lifespan.

It helps your whisk make better matcha
The bamboo prongs on a chasen aren’t random. Their flare is part of how the whisk works. The flared geometry of a chasen’s tines is critical for creating foam, and a ceramic whisk stand supports these prongs during drying so they keep their shape. Without that support, the tines collapse, whisking performance drops, and trapped moisture can lead to mould and a shorter lifespan, as explained in this demonstration of whisk care and stand use.
When people say their whisk “stopped frothing properly”, the issue often isn’t their wrist movement. It’s the whisk’s shape.
A fresh, well-kept chasen moves through matcha differently. It spreads the liquid, introduces air, and gives you that finer layer of foam many people struggle to achieve at home.
It improves drying after every bowl
Wet bamboo needs airflow. If water sits deep near the base of the prongs, the whisk stays damp longer than it should.
A purpose-built stand helps in two ways:
- It opens the prongs gently so moisture doesn’t get trapped as easily.
- It lifts the whisk upright so air can circulate around more of the bamboo.
That’s especially useful if you make matcha early and leave for work, or if your café tools need to dry neatly between services.
Practical rule: If your whisk dries squashed, it will perform squashed.
It protects your investment
A good bamboo whisk isn’t disposable in spirit, even if it will naturally wear over time. If you’ve chosen a quality chasen for ceremonial matcha, you want it to stay springy and balanced for as long as possible.
Without a stand, the whisk often develops:
- Bent outer tines
- A narrowed centre opening
- Lingering dampness near the base
- More fragile-looking prongs after repeated drying cycles
A stand doesn’t make a whisk last forever. What it does is reduce avoidable wear.
It matters for home users and cafés
At home, the benefit is simple. Your morning bowl is more consistent, and your tools stay in better nick.
In a café, the benefit is operational. Staff can rinse a whisk and place it where it dries properly instead of improvising with cups, cloths, or crowded sink areas. That makes the setup cleaner and more predictable.
Consider these comparisons:
| Situation | Without a stand | With a stand |
|---|---|---|
| Daily home use | Whisk can dry misshapen | Whisk keeps a more usable form |
| Humid kitchen | Moisture may linger | Better airflow around prongs |
| Café service | Tools get stored wherever there’s space | Tools have a consistent resting place |
A matcha whisk stand looks modest, but in practice it protects the tool that determines texture more than anything else in your setup.
Exploring Different Types of Whisk Stands
Not all whisk stands feel the same in use. The biggest difference usually comes down to material, then shape, finish, and weight.
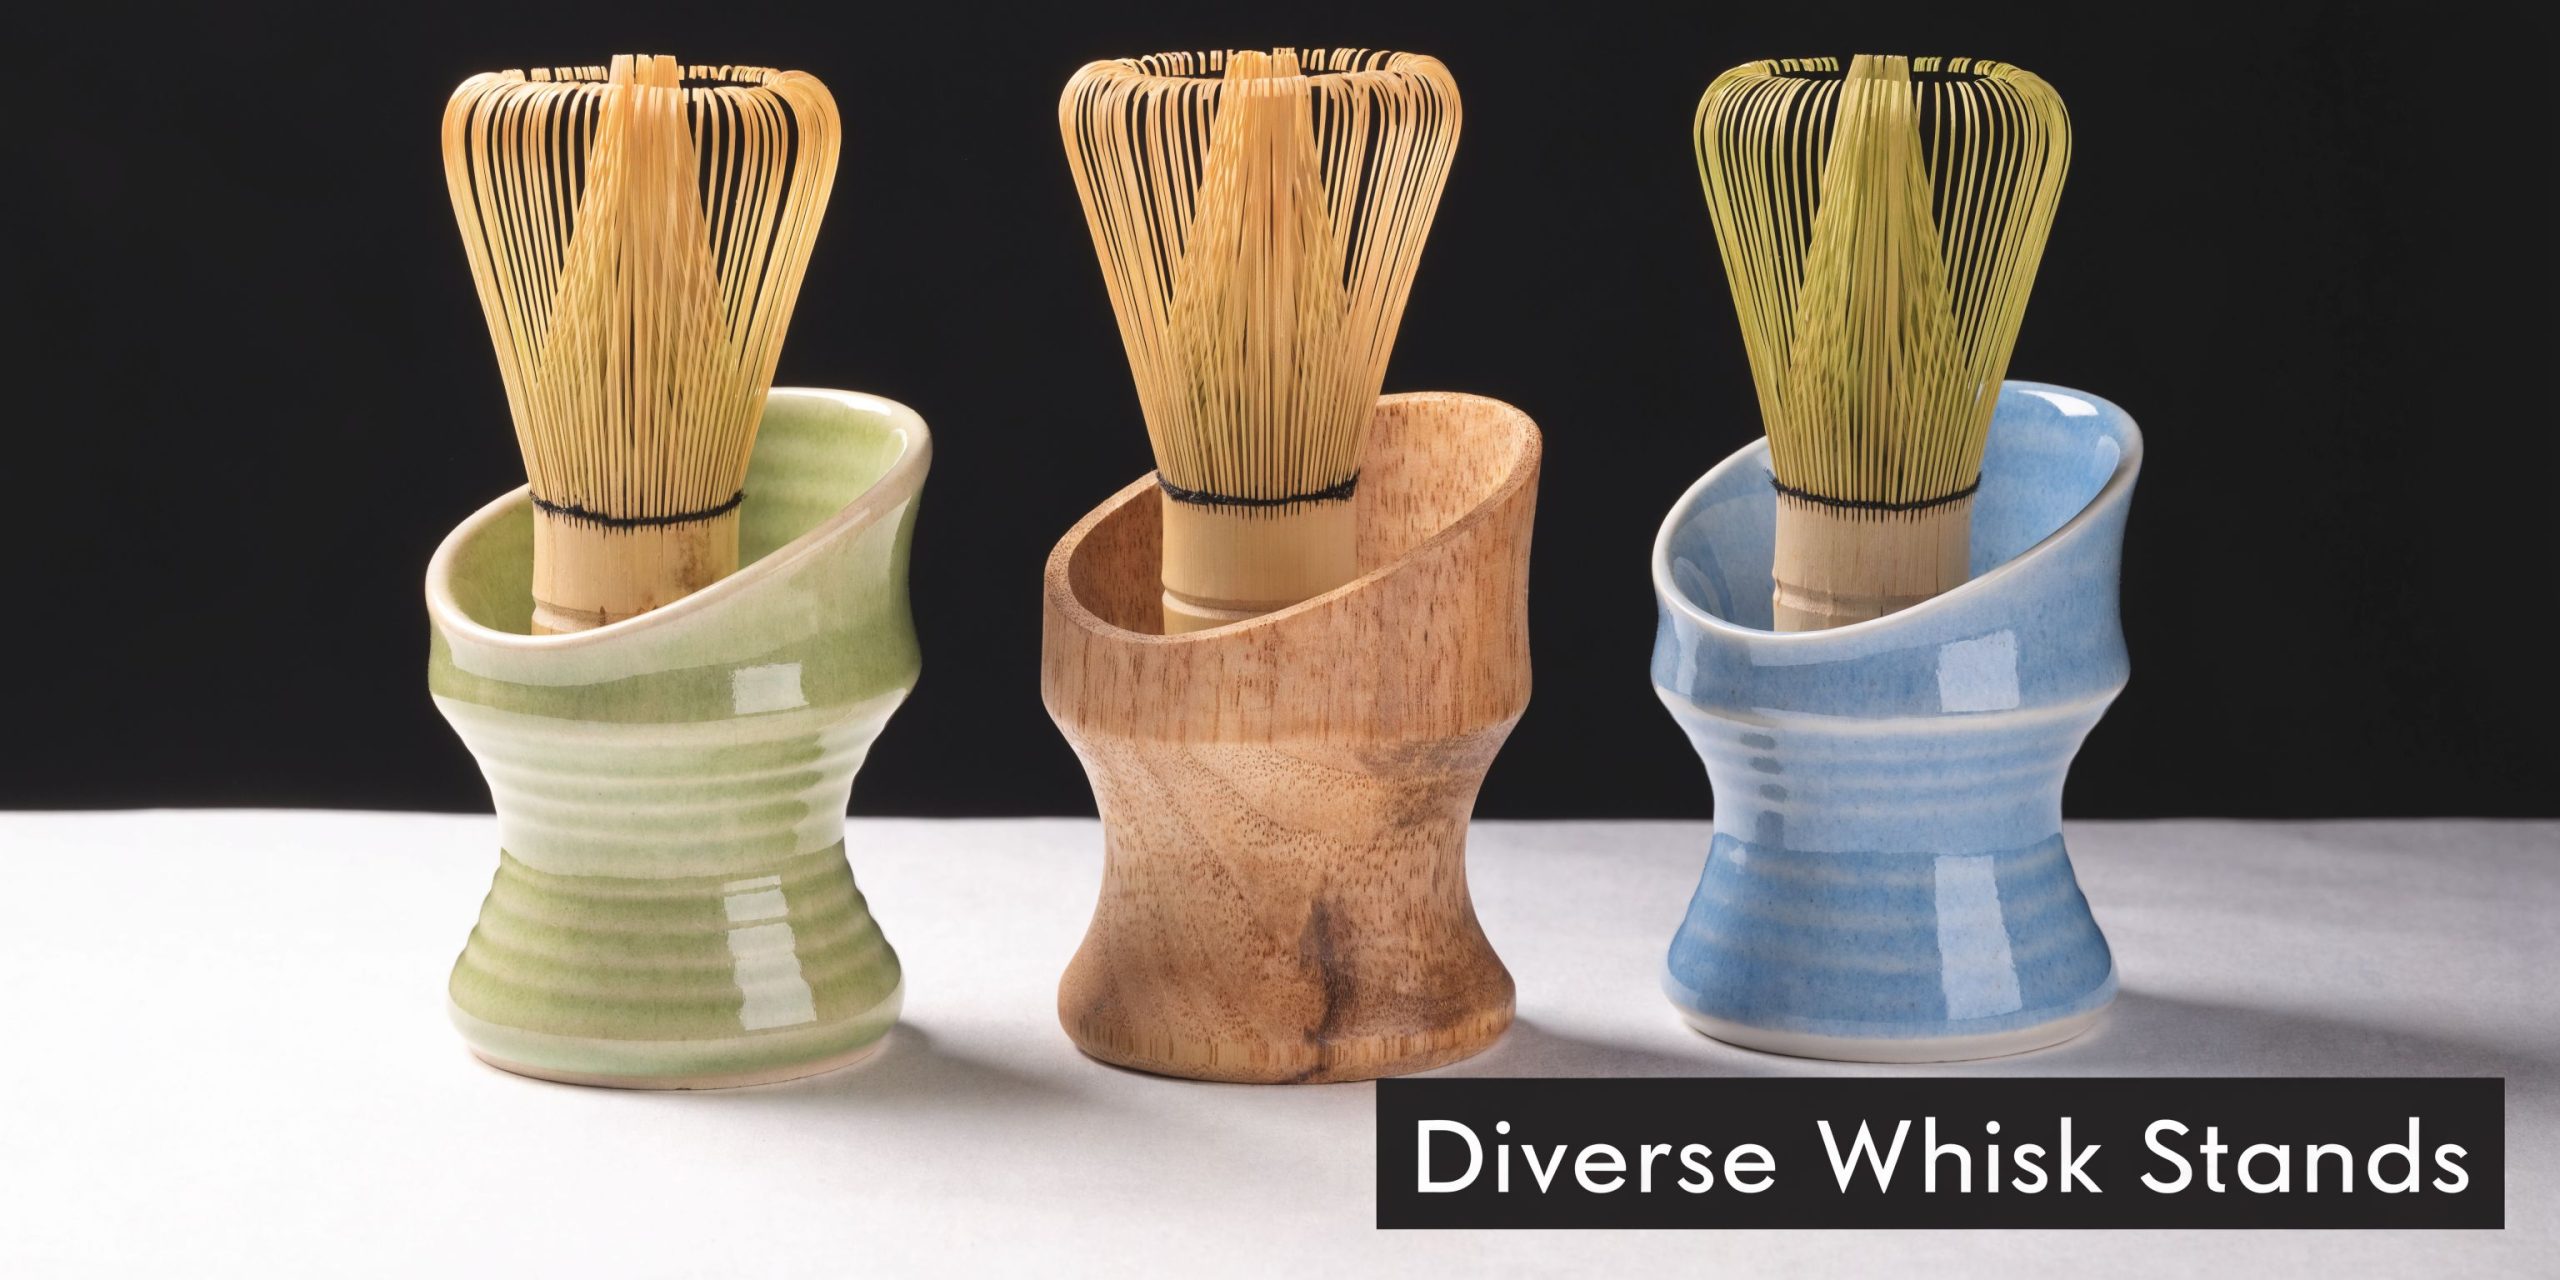
Ceramic and porcelain
These are the classic choices, and for good reason. They tend to feel stable on the bench, they’re easy to rinse clean, and they suit the traditional look of matcha teaware.
Ceramic also works well visually. A plain white stand feels minimal. A deep green or speckled glaze can tie the whole setup together.
Glass and lighter modern styles
Glass stands can look elegant, especially in a more contemporary kitchen or café. They show off the whisk nicely, but some people find them less forgiving in busy spaces.
Lighter stands can also feel less planted when you’re lifting the whisk off after drying. That may not matter to everyone, but it’s worth noticing if you use your tools often.
Wood or plastic alternatives
You’ll occasionally see stand-like holders made from wood or plastic. They can work as storage pieces, but they don’t always provide the same smooth interior shape or easy-clean surface as glazed ceramic.
Wood can suit a rustic setup, though it’s usually better as an accent material than the part directly supporting a damp whisk every day.
What to compare at a glance
| Material | What it does well | What to watch |
|---|---|---|
| Ceramic | Stable, traditional, easy to clean | Can chip if dropped |
| Porcelain | Smooth finish, refined look | Also breakable |
| Glass | Modern appearance | May feel less practical in busy kitchens |
| Wood or plastic | Budget-friendly or decorative | May be less ideal for long-term whisk care |
If you want to browse different holder styles and forms, Pep Tea’s matcha tea stand collection shows the kinds of designs commonly used with bamboo whisks.
How to Choose the Right Matcha Whisk Stand
Choosing a matcha whisk stand is less about fashion and more about fit. The right one should feel stable, support the whisk properly, and make your routine easier instead of fussier.
Start with size and stability
A standard matcha whisk stand is about 2.5 to 2.75 inches high and weighs around 3.6 ounces. That weight helps provide stability so the stand doesn’t lift with the whisk when you remove it, which protects the delicate bristles according to this product specification for a standard whisk stand.
That detail sounds minor until you use a stand that’s too light. You lift the whisk, the stand comes with it, and suddenly you’re doing a little balancing act over the sink.
For regular home use, a stable stand feels nicer. For cafés, it reduces one more small point of friction during service.
Look closely at the inner shape
The best stands have a gently tapered form. That shape supports the whisk without forcing the prongs too wide or letting them collapse inward.
A poor fit usually shows up fast:
- Too narrow and the whisk sits awkwardly.
- Too wide and the support becomes vague.
- Too sharp inside and the contact points can feel harsher than they need to.
Run your eye over the opening. A smooth, rounded shape is what you want.
Check the finish
A glazed ceramic or porcelain stand is usually the easiest option to live with. It rinses clean, resists staining well, and feels comfortable against the bamboo.
If the finish looks rough or uneven where the whisk rests, skip it. Your chasen is delicate. It doesn’t need abrasion added to its daily routine.
Choose the stand the same way you’d choose a good bowl or scoop. By how it works in the hand, not just how it looks on a shelf.
Match the stand to how you make tea
For home drinkers, appearance might matter a bit more. If your matcha tools live on the bench, you’ll probably enjoy something that suits your bowl and kitchen.
For cafés, practicality should lead. Ask:
- Will it stay put during repeated use?
- Is it easy for staff to rinse quickly?
- Does it hold a standard bamboo whisk neatly between drinks?
If you’re refining your whisking routine as well as your tools, Pep Tea’s guide on how to whisk matcha is a useful reference.
And if you like thinking through small tool purchases more broadly, this guide to choosing kitchen gadgets offers a sensible lens for separating useful gear from clutter.
A simple buying checklist
- Stable base
- Smooth interior
- Shape that suits a standard bamboo chasen
- Easy-to-clean material
- A look you won’t mind seeing every day
Pep Tea offers a matcha whisk holder as part of its starter kit, which gives buyers one practical way to keep the whisk drying in the shape it was made to hold.
Practical Tips for Using and Caring for Your Stand
Daily care is straightforward. The key is doing the small things consistently.
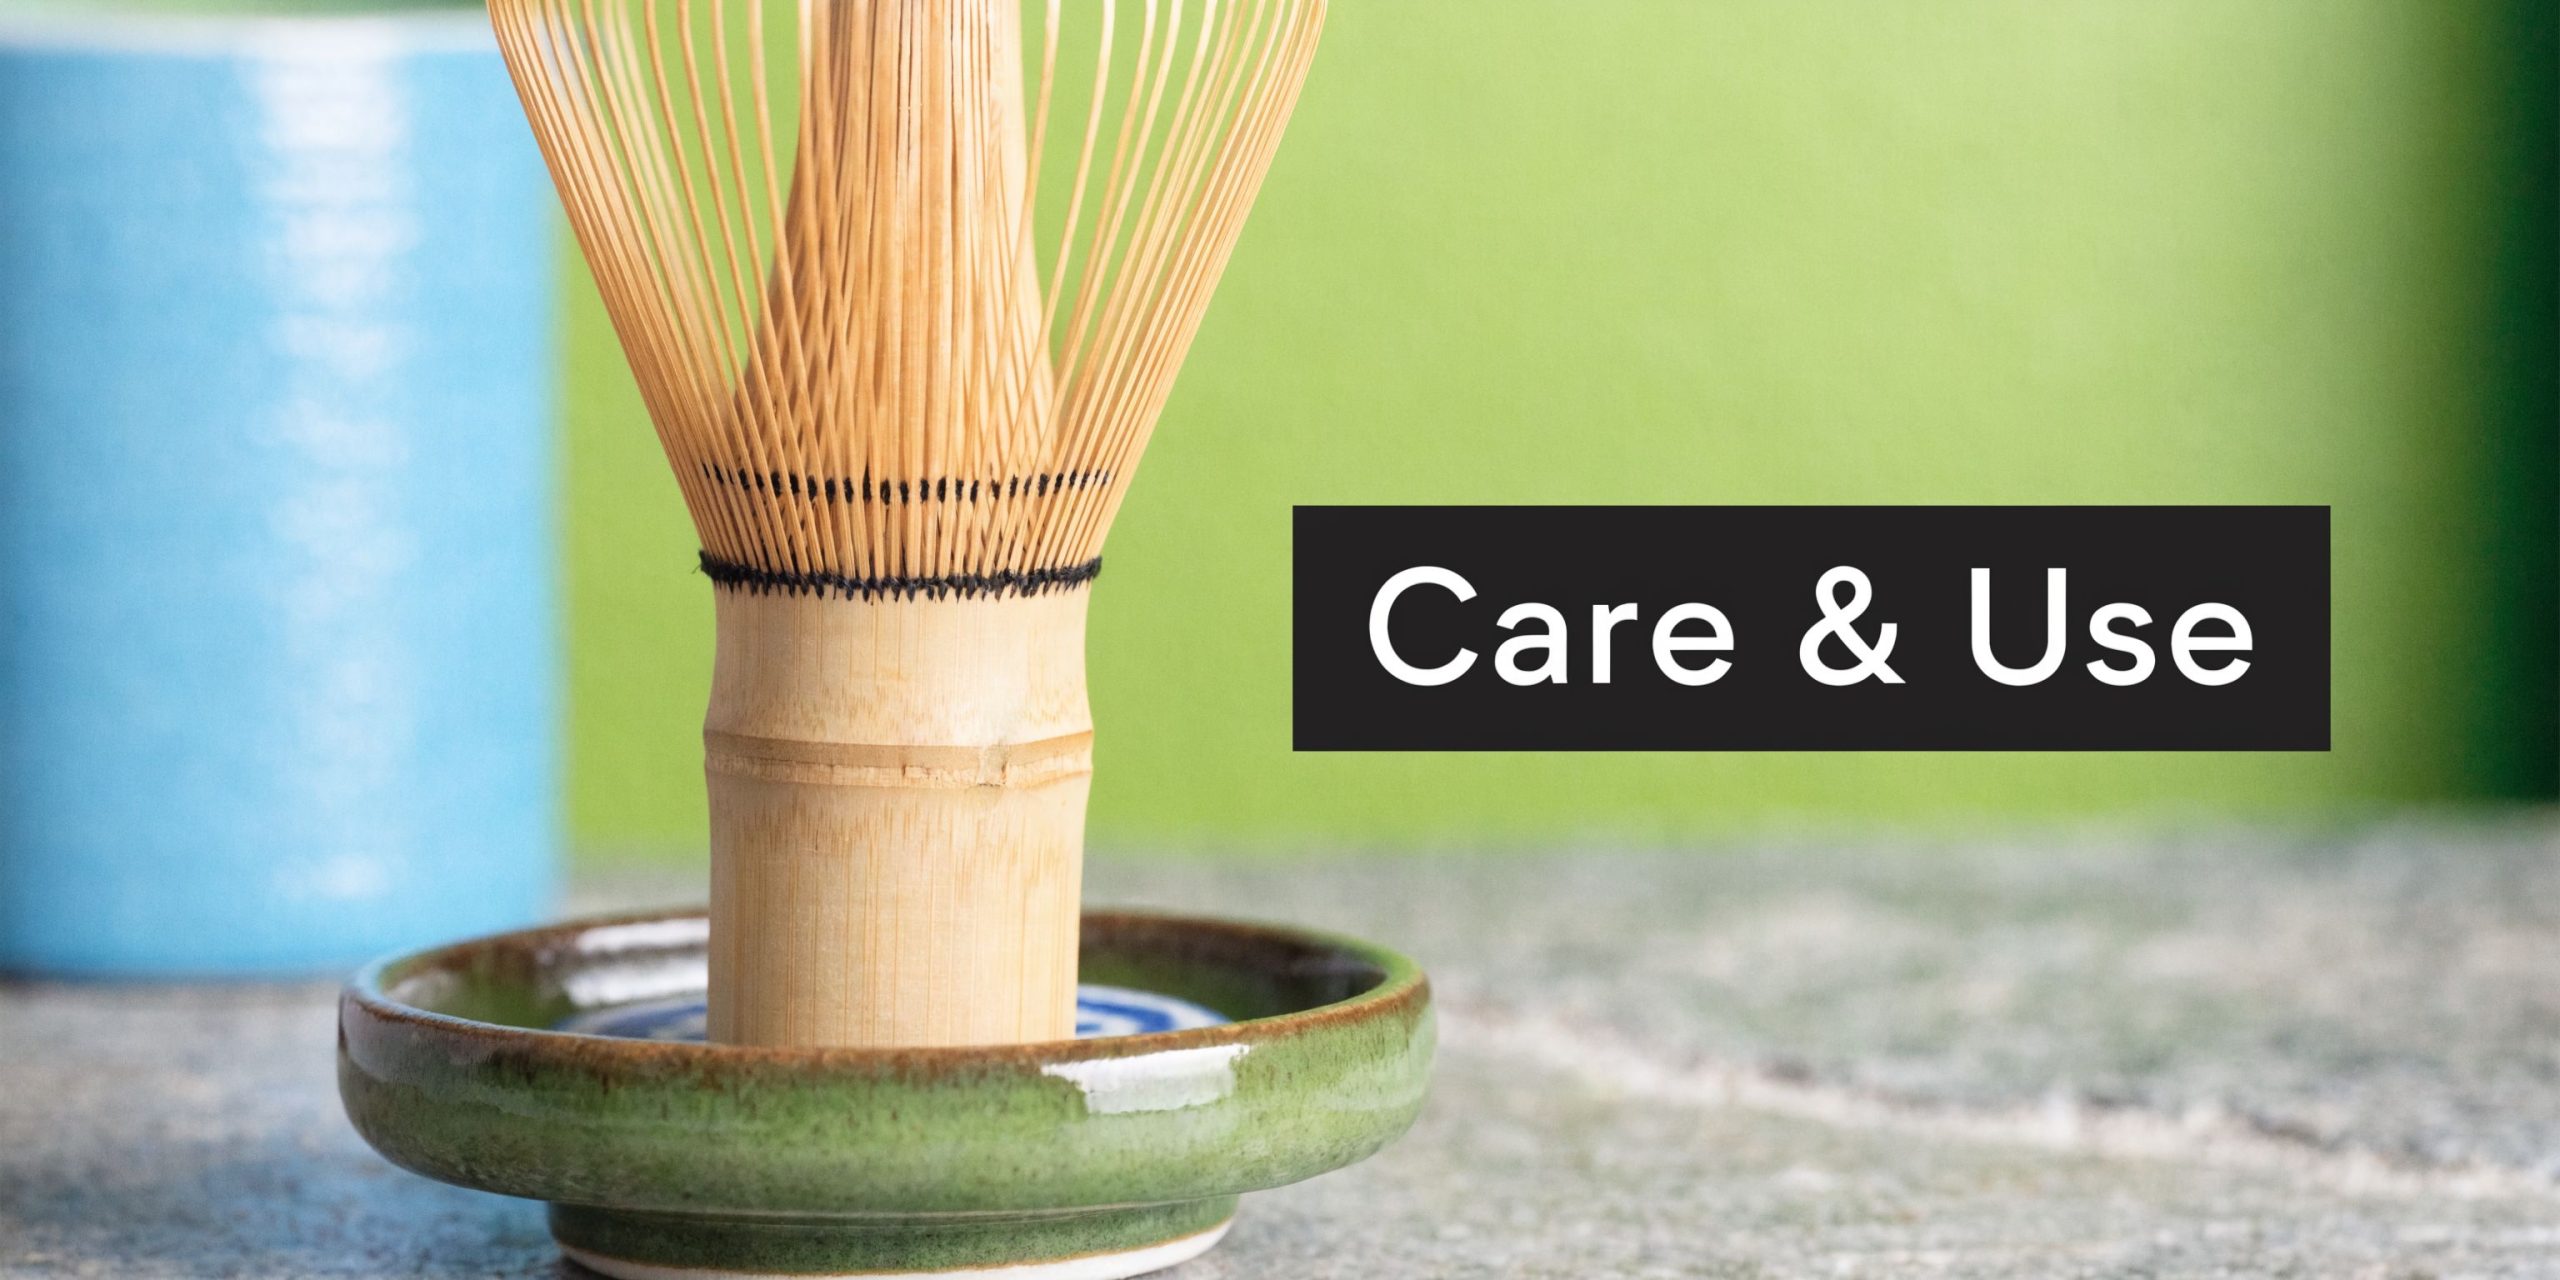
The basic routine
After whisking your matcha, rinse the chasen with warm water. Shake off excess water gently, then place it on the stand with the prongs facing down over the holder.
That’s it. No complicated maintenance schedule. No special products.
A good routine looks like this:
- Rinse promptly so matcha doesn’t dry between the tines.
- Use warm water rather than harsh cleaners.
- Set the whisk onto the stand immediately instead of leaving it flat on the sink or bench.
- Let it air dry fully before storing nearby tools around it.
Why this matters more in humid parts of Australia
Humidity changes the equation. In subtropical parts of NSW and QLD, humidity can reach 70 to 90%, and user data from Australian tea forums shows untreated bamboo can degrade up to 40% faster in these conditions compared with drier climates, according to this Australian humidity discussion around whisk care.
If you live near the coast or your kitchen already tends to hold moisture, airflow matters even more.
In humid weather, the stand stops being a nice extra and starts being part of basic whisk care.
A whisk left damp on a plate in summer won’t thank you for it.
Here’s a helpful visual if you want to see the care process in action:
Cleaning the stand itself
The stand needs a quick rinse too, especially if water gathers around the base. Most glazed stands clean easily with hot water and gentle drying.
A few habits help:
- Don’t let residue build up under the rim or inside the curve.
- Dry the outside if it lives on timber or stone benches to avoid water marks.
- Check for chips if it gets knocked around in a café setting.
The whole point of the stand is to make care easier. Keep it clean, keep the whisk aired, and your setup stays simple.
Creative Alternatives and DIY Solutions
If you don’t have a matcha whisk stand yet, you can improvise for a short while. An egg cup, a small narrow glass, or a similarly shaped holder can sometimes keep the whisk upright after rinsing.
That’s better than laying the whisk flat on the bench.
Still, these substitutes have limits.
Where DIY options fall short
A proper matcha whisk stand is shaped to support the whisk evenly. A random household item usually isn’t. It may hold the handle area awkwardly, press the prongs in the wrong place, or reduce airflow around the base.
An egg cup might seem close enough, but “close enough” is exactly the issue. The whisk needs support in the area where the bamboo opens and dries, not just somewhere to perch.
When a temporary fix is fine
DIY can work if:
- You’re waiting for a proper stand to arrive
- You only need a stopgap while travelling
- You’ve just started making matcha and want to test your routine first
For regular use, though, a purpose-built stand is the better call. It asks very little of you and gives the whisk the support it was designed to have.
A makeshift option can hold a whisk. A real matcha whisk stand helps preserve it.
Enhance Your Matcha Experience with Proper Care
The matcha whisk stand is easy to overlook because it’s small and quiet. Yet it does one of the most important jobs in your setup. It helps the whisk dry properly, hold its shape, and stay ready for the next bowl.
That means better texture in the cup, less frustration in the kitchen, and more respect for a traditional tool that’s meant to be cared for.
For Australian matcha drinkers, that practical side matters. Humidity, busy mornings, and compact kitchens all make simple, effective tool care more valuable. For cafés, a stand adds consistency without adding complexity.
We see matcha as more than a drink. It’s a ritual built from good ingredients, good tools, and good habits. Looking after the whisk is part of looking after the whole experience.
If you’re building a more thoughtful matcha routine, explore Pep Tea for organic matcha and practical teaware that support everyday use in Australian homes and cafés.