Tag: matcha guide
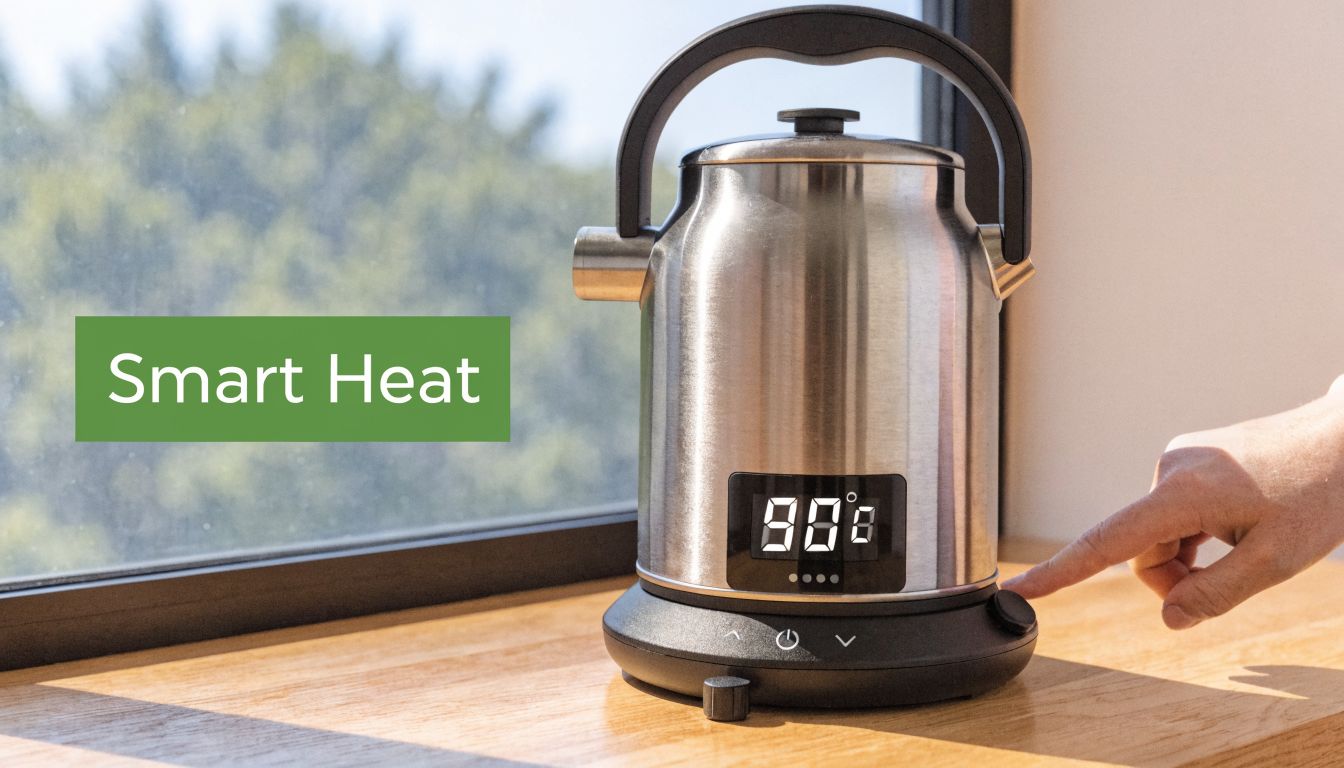
Electric Tea Kettle with Temperature Control: Elevate Your

You make a cup that should taste fresh and lively. Instead, the liquor turns sharp, dull, or strangely bitter after the first sip. In many Australian kitchens, the tea gets blamed when the culprit is much simpler. Water that was far too hot for the leaves or powder in the cup.
A standard kettle gives you boiling water. An electric tea kettle with temperature control gives you choice. That sounds like a small upgrade, but it changes the result in a very practical way. Delicate green teas stay softer and sweeter. Matcha keeps more of its creamy, rounded character instead of turning harsh. Even the aroma is clearer, much like cooking vegetables gently instead of blasting them until their colour and freshness disappear.
That precision matters for more than taste. Heat changes how flavour compounds show up in the cup, and it also affects the qualities people often seek from premium organic drinks. With matcha, the wrong temperature can make a beautiful powder taste aggressive before you have a chance to enjoy its natural sweetness. With kombucha, careful heating matters when you want to serve it warm without being careless with the living culture.
A useful way to picture it is as the difference between using a toaster and using an oven with a proper dial. One gives you the highest setting every time. The other lets you match the heat to the job. Tea is much the same. If you are whisking matcha before breakfast or warming water for an afternoon kombucha serve, precision gives you repeatable results instead of guesswork.
That is why temperature control kettles have become so popular with home tea drinkers. They suit the way many of us brew now. One person wants a clean, sweet sencha. Another is making ceremonial-style matcha. Someone else wants warm, not scalding, water ready in seconds. The right kettle makes those small decisions easier, and the drinks in your cup taste better for it.
The End of Burnt Tea Your Introduction to Precision Brewing
The biggest mistake home tea drinkers make is simple. They use boiling water for everything.
That works well enough for some black teas and many herbal infusions, but it can ruin more delicate styles. Green tea, white tea, and matcha respond very differently to heat. Too much, and you draw out harshness before you get the sweetness and aroma you were hoping for.
A temperature control kettle removes the guesswork. Instead of waiting for boiled water to cool down and hoping you’ve judged it right, you press a button or dial in a setting and let the kettle stop at the right point. That means fewer disappointing cups and a lot more consistency.
Practical rule: If your tea tastes bitter, dry, or overly grassy, the water may be too hot rather than the tea being poor quality.
For many people, this is the first tool that makes premium tea feel easier rather than fussier. You don’t need to memorise complex brewing rituals. You just need water at the right temperature.
That matters even more when you’re working with drinks where heat affects both flavour and useful compounds. Matcha is the clearest example. Precision helps preserve the character you paid for, instead of scorching it away in the first pour.
What Exactly Is a Temperature Control Kettle
You fill the kettle, choose a temperature, and the water stops there instead of rolling all the way to a boil. That simple change gives you far more control over what ends up in your cup.
A standard kettle has one job. Heat until boiling. A temperature control kettle adds a small layer of judgment. It monitors the heat as the water warms and cuts off at the point you selected, whether that is a gentler setting for organic matcha or a hotter one for black tea.
How the kettle knows when to stop
Inside the kettle or its base, a temperature sensor measures the water as it heats. Many models use a thermistor. As the reading rises, the control system compares it with your chosen setting and switches the heating element off at the right moment.
The better ones do more than just stop. They hold the water close to that temperature for a set time, which is handy if you are whisking matcha for two people, pausing between pours, or serving tea alongside breakfast. In a practical Australian kitchen, that means less waiting around for boiled water to cool and less guesswork with every second cup.
Local compatibility matters too. Kettles sold for Australian homes should match our 220 to 240V, 50Hz power supply. The wattage varies by model, but the goal is the same. Fast, stable heating that behaves predictably on your bench.
What makes it different from an ordinary kettle
The easiest way to understand the difference is to compare it to cooking. Boiling all tea water is a bit like cooking every vegetable on high heat until it is soft. You will get something drinkable, but you lose nuance.
A temperature control kettle lets you match the water to the drink. Lower temperatures suit delicate teas and matcha, where too much heat can push the flavour toward bitterness and flatten the creamy, sweet notes people look for in premium powders. Higher temperatures suit sturdier teas and many herbals, where more heat helps draw out body and aroma.
That precision also matters for what you are trying to keep, not just what you are trying to taste. With premium matcha, gentler water helps protect the smooth character and useful plant compounds that make people choose it in the first place. With kombucha, careful heating is useful in a different way. You can prepare tea for brewing without accidentally treating every step as if it needs boiling water.
Common features you’ll see
Some electric tea kettles with temperature control keep things simple. Others give you fine control down to a specific degree. The most useful features are the ones that make good results repeatable.
- Preset temperatures for drinks like green tea, black tea, or coffee
- Variable temperature selection if you want to choose the exact setting
- Keep warm mode for multiple pours or slower mornings
- Auto shut-off for safety
- Boil-dry protection so the kettle does not keep heating when empty
If you are new to precision brewing, start with one idea. The kettle is not there to make tea feel complicated. It is there to make good tea easier to repeat, especially when you care about getting the best flavour and benefits from drinks like organic matcha and kombucha.
Why Temperature Unlocks Flavour and Health Benefits
You fill the kettle, scoop out a premium matcha, and do everything right except one small step. The water is a bit too hot. Suddenly the bowl tastes sharper than expected, the sweetness fades, and that soft, creamy finish never quite shows up.
That one detail changes more than flavour. Water temperature affects how quickly tea compounds move into the cup, how balanced they taste, and how gentle the brewing process is on the elements people value in drinks like organic matcha and kombucha.
What hot water actually changes
Tea leaves and tea powders contain many different compounds. Some bring sweetness, umami, floral aroma, or briskness. Others can taste harsh if they come out too fast. Temperature acts a bit like the flame under a frying pan. Low heat coaxes flavour out gently. High heat can push things too hard and throw the balance off.
With delicate teas, that balance matters a lot. Matcha is a clear example because you are consuming the whole powdered leaf, not just an infusion poured off the leaves. If the water is too hot, the result can taste bitter, rough, and slightly flat rather than smooth and rounded.
The same idea matters for kombucha in a different way. If you are brewing the base tea for fermentation, careful heating helps you prepare a clean, pleasant tea without treating every style as if it needs a rolling boil. If you are serving finished kombucha warm, gentler heat is also kinder to its fresh, lively character.
Water temperature shapes both taste and what you keep in the cup.
A practical temperature guide for everyday brewing
You do not need to memorise chemistry to brew well at home. A simple temperature map is enough for most Australian kitchens.
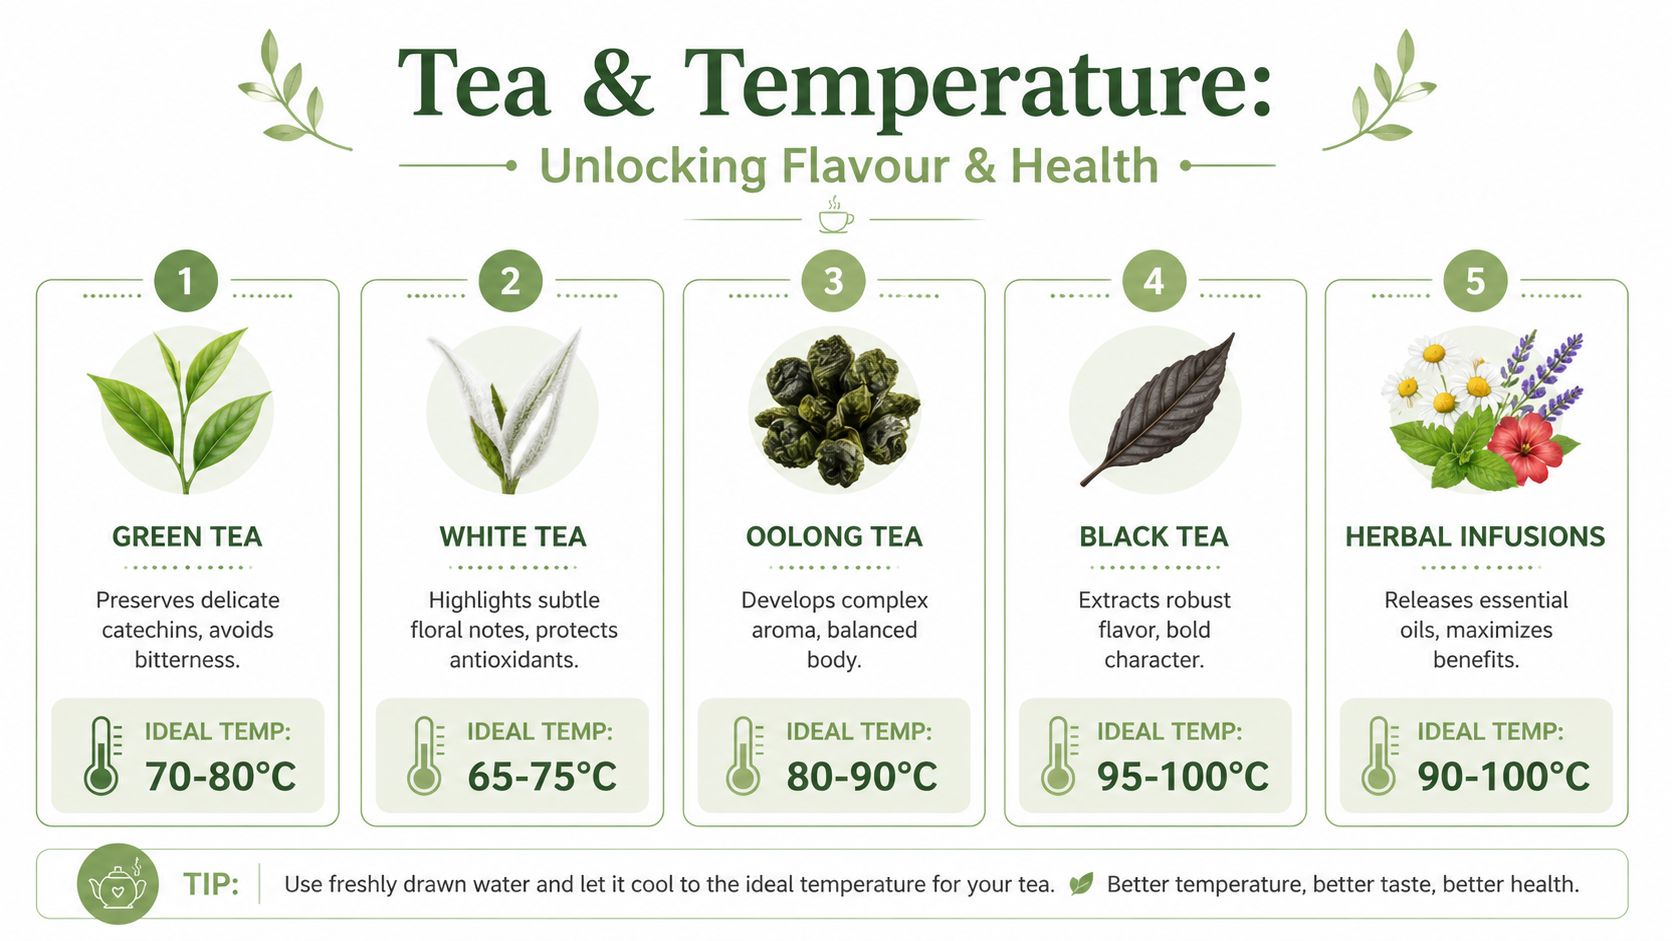
| Tea Type | Ideal Temperature (°C) | Steeping Time | Notes |
|---|---|---|---|
| Green Tea | 70 to 80 | Short infusion | Helps preserve delicate character and reduce bitterness |
| Matcha | 70 to 80 | Whisk briefly, don’t steep | Best for smooth texture and rounded umami |
| White Tea | 65 to 75 | Gentle infusion | Supports subtle floral notes |
| Oolong | 80 to 90 | Moderate infusion | Brings out aroma and body |
| Black Tea | 95 to 100 | Full infusion | Suits bold flavour extraction |
| Herbal Infusions | 90 to 100 | Full infusion | Useful for drawing flavour from herbs and spices |
Use this chart as a starting point, not a strict rulebook. A grassy Japanese green, a roasted oolong, and a spice-heavy herbal blend all respond a little differently. The value of a temperature control kettle is that you can repeat what tastes good, then adjust one variable at a time.
Why this matters for health-focused brewing
People often choose premium organic matcha for more than taste. They also care about plant compounds such as catechins, along with the calm, steady feel that makes matcha different from a standard cuppa. Gentler brewing supports a more pleasant drinking experience and avoids the scorched taste that can make a quality powder seem ordinary.
Kombucha drinkers often have a similar goal. They want a drink that feels fresh, bright, and easy to enjoy. Good temperature habits help there too, whether you are preparing tea for fermentation or warming a serve without stripping away its appealing character.
If you are still learning the basics, a clear matcha whisking guide for home preparation pairs well with controlled water temperature, because technique and heat work together.
Why stronger teas behave differently
Black tea usually handles hotter water better because its processing changes how the leaves respond during brewing. More heat helps draw out body, colour, and deeper maltier notes. Delicate teas are less forgiving. Treat them the same way, and the cup can lose finesse very quickly.
That is why precision is so useful. It gives each tea the kind of heat that suits its structure, flavour, and purpose, whether you are chasing the savoury sweetness of matcha or the clean, lively profile of kombucha.
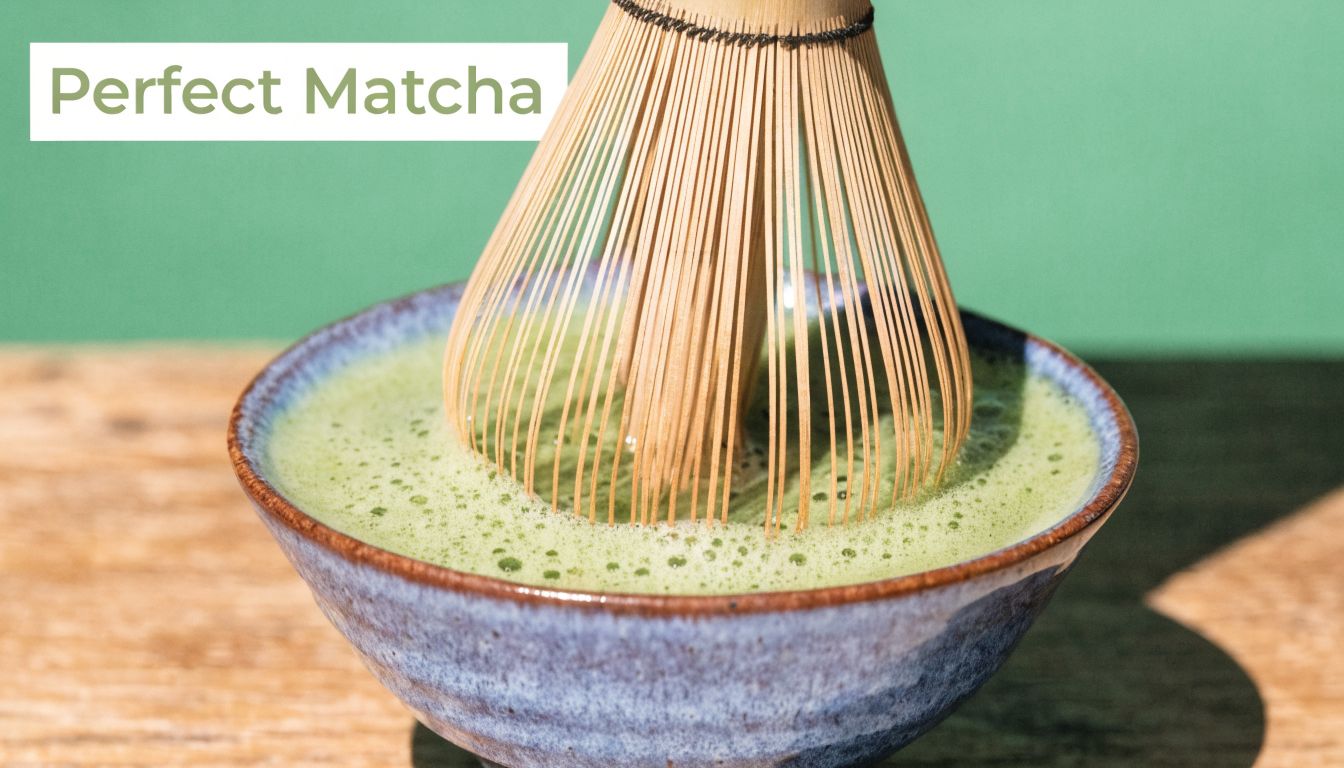
A Practical Guide to Perfect Matcha Every Time
You boil the kettle, pour the water, whisk with good intentions, and your premium matcha still comes out harsh. That moment catches plenty of home brewers off guard, especially when the powder itself is fresh, organic, and beautifully made. In many Australian kitchens, the problem is simpler than people expect. The water is too hot.
A home method that gives you a smoother bowl
Matcha is a fine powder, so it reacts to heat quickly. Leaves steep more gradually. Powdered tea gives up flavour almost at once, which is why a few degrees can change the whole bowl. Gentler heat helps the sweet, creamy, savoury side show up before bitterness takes over.
For everyday preparation, aim for water around 70 to 80°C. A setting near 75°C is a practical starting point for many ceremonial-style matchas. Then keep the rest of the method simple and repeatable:
- Sift the matcha into the bowl to break up clumps
- Add a small amount of water first
- Whisk into a smooth paste
- Pour in the remaining water
- Whisk briskly until a light foam forms
A common home ratio is 2g of matcha with 60ml of water, whisked for about 15 seconds. You can then adjust from there. If the bowl tastes too intense, add a little more water. If it feels thin, increase the matcha slightly next time rather than overheating the water.
If you want help with the whisking motion itself, this step-by-step matcha whisking guide for home preparation is a handy reference.
Why this matters for flavour and the good stuff in the cup
Premium organic matcha is often chosen for more than colour and taste. People also want the plant compounds that make it feel satisfying and steady, along with the fresh, clean character that sets a good matcha apart from a dull one.
Heat affects both experience and enjoyment. Water that is too hot can flatten sweetness, push bitterness forward, and make a vibrant powder taste tired. It is a bit like overcooking good greens. The ingredients are still there, but the pleasure drops off fast.
That is why precision matters so much with matcha. You are not chasing perfection for its own sake. You are giving a high-quality tea a fair chance to show its flavour and character.
Straight matcha and matcha lattes need slightly different handling
A straight bowl of matcha usually benefits from the lower to middle part of the range. That helps preserve softness, umami, and a cleaner finish.
A latte still needs the matcha base prepared with care. Hot milk cannot hide scorched powder. If the base is rough, the whole drink tastes muddy, no matter how creamy the milk is.
A reliable latte routine looks like this:
- Whisk the matcha with water in the correct temperature range.
- Make sure the base is smooth before adding anything else.
- Pour in warmed milk or your preferred milk alternative.
- Taste before sweetening.
That small order of operations makes a big difference.
Common mistakes that make matcha harder than it needs to be
A few habits cause most home matcha problems:
- Using boiling water, which makes bitterness harder to avoid
- Skipping the sift, which leaves dry lumps that resist whisking
- Adding all the water at once, which makes a smooth paste harder to form
- Guessing the temperature, especially after letting boiled water sit and hoping for the best
A quick visual can help if you prefer to watch the process before trying it yourself.
Matcha responds best to controlled heat and a routine you can repeat with confidence.
Good matcha is worth treating gently. Once your kettle is set correctly, the rest of the ritual becomes much easier, and the bowl in your hands tastes more like the tea you paid for.
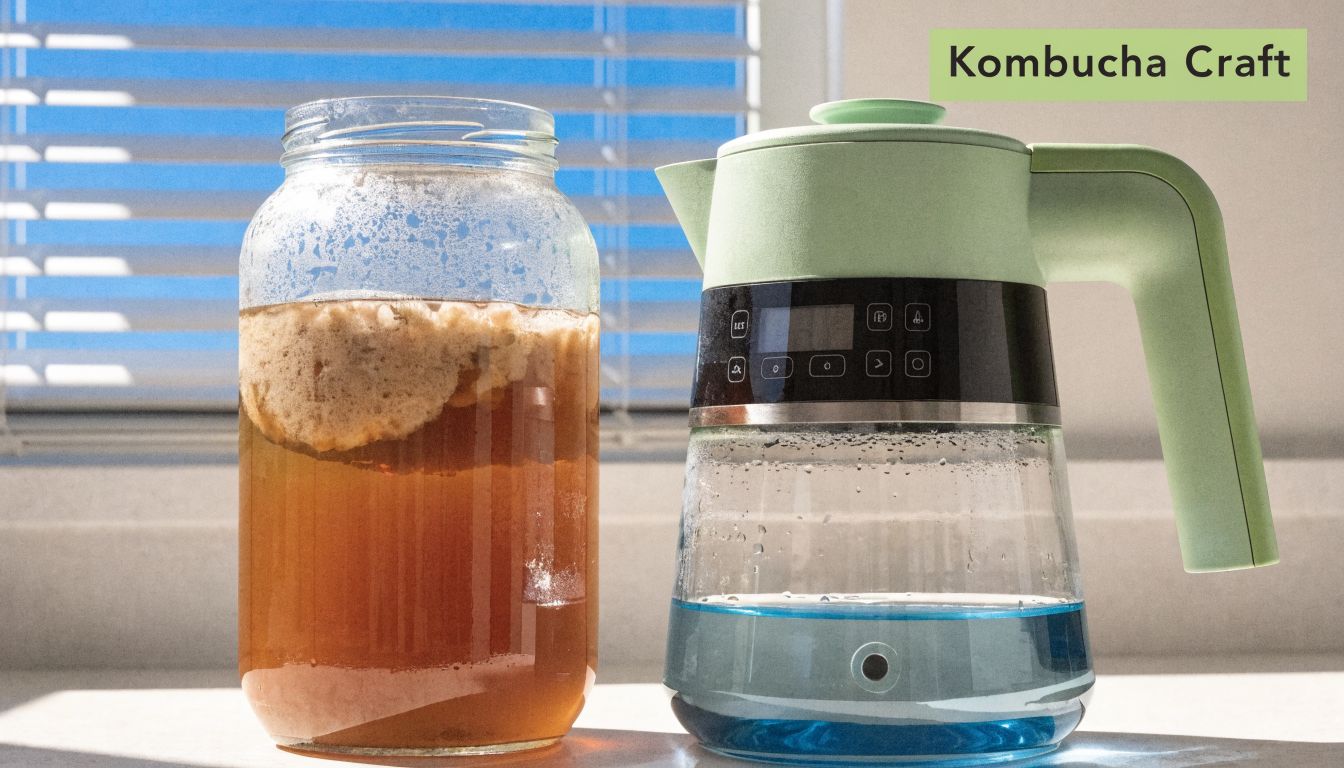
Using Your Kettle for Kombucha Brewing and Serving
You brew a beautiful tea base, add your SCOBY, then wonder why the finished kombucha tastes flat or the culture seems sluggish. In many home kitchens, the problem starts with heat. A temperature control kettle helps you treat kombucha more like a living food and less like a standard hot drink.
For brewing the tea base
Kombucha begins as tea, so the same temperature choices that shape flavour in a cup of green tea also shape the character of your ferment. If the base is harsh, overly tannic, or muddy, fermentation will not magically tidy it up. You often taste those early decisions all the way through to the bottle.
That matters if you use premium organic tea. Green tea bases can become bitter with water that is too hot, while black tea usually handles higher heat more comfortably. A variable-temperature kettle gives you a repeatable starting point, which is handy when you want brighter, cleaner flavours rather than a rough edge.
The next heat decision matters even more. Once live culture is involved, very hot water can damage the bacteria and yeast that make kombucha distinctive. The safe habit is simple. Brew the tea first, let it cool to an appropriate temperature, then add the starter liquid and SCOBY. If you are learning the process, a kombucha tea kit makes that order much easier to follow in a real Australian kitchen.
A kettle with precise settings also helps with consistency between batches. If your first brew tastes lively and balanced, you can repeat the same tea, the same steep, and the same temperature instead of guessing your way back.
For serving a warm kombucha-style drink
Some people enjoy kombucha cold all year. Others want something gentler in winter, especially at night. You can warm the experience without treating the kombucha like boiling tea.
The easiest method is to heat water separately, then use that warm water with spices, citrus, or a little honey before adding a smaller amount of kombucha. It works a bit like protecting delicate matcha. Gentle heat keeps more of the drink’s character intact, while aggressive heat strips out the freshness that made you reach for kombucha in the first place.
If preserving live cultures is your priority, keep the final drink only mildly warm. Once kombucha is in the cup, high heat works against the probiotics many people are trying to enjoy.
A practical kombucha workflow
A simple routine keeps both flavour and culture in better shape:
- Heat water to suit the tea you are using.
- Brew the tea base with attention to strength and steep time.
- Cool the sweetened tea before adding starter liquid and SCOBY.
- Ferment as directed for your recipe.
- For serving, warm water or flavourings first, then add kombucha last if you want a softer drink.
That order removes a lot of confusion.
Which kettle features help most
For kombucha drinkers, the best kettle is usually the one that gives you control without fuss.
Variable temperature control
This is the feature that matters most. It lets you brew green, black, or herbal tea bases with more accuracy and helps you avoid overheating ingredients that benefit from a gentler approach.
Keep warm function
Useful while you prepare sugar, jars, or flavourings. It is most helpful before live kombucha enters the process.
Clear controls
You want settings you can read at a glance, especially if you brew early in the morning or while juggling other kitchen tasks.
Safe shut-off and practical design
A stable base, comfortable handle, and dependable shut-off make daily use easier. If you are planning a kitchen that supports regular brewing, this broader guide to Templeton Built kitchen renovation advice can help you choose appliances that suit the way you cook and serve at home.
For kombucha, precision is less about gadget appeal and more about respecting a live ferment. A good kettle helps you get cleaner flavour, steadier batches, and a serving routine that makes sense.
How to Choose the Right Kettle for Your Kitchen
You fill the kettle for a quick morning matcha, press boil out of habit, and end up with water that is too hot before the whisk even touches the bowl. The result is familiar. Sharper bitterness, less sweetness, and a cup that hides the clean, grassy character you paid for.
That is why choosing the right kettle matters. In a tea-focused kitchen, the kettle is less like a basic appliance and more like the thermostat for flavour. A few degrees can change how your matcha tastes, how gently you warm ingredients for kombucha service, and how consistent your routine feels on a busy Australian weekday.
Start with fit for an Australian kitchen
Before you compare colours, spouts, or presets, check that the kettle is designed for Australian power and local safety requirements. Imported appliances can look appealing online, but compatibility should be confirmed through the manufacturer, retailer listing, product documentation, or local certification details rather than relying on a video discussion.
If you’re planning a bigger kitchen update rather than just replacing one appliance, this broader guide to Templeton Built kitchen renovation advice is a practical read. It helps you think about how your bench appliances should fit the way you cook and serve at home.
Match the kettle to your brewing habits
The best kettle depends on what happens on your bench most often.
If organic matcha is part of your daily ritual, fine temperature control should sit near the top of your list. Matcha is delicate. Water that is even a little too hot can push tannic, harsh notes forward and cover the softer umami character many drinkers want. Gentler heat also supports a more careful approach to compounds like catechins, which is part of why temperature matters for both flavour and the wellness side of tea.
If your household brews several styles, presets can save time. Green tea, black tea, herbal infusions, and warm water for serving all ask for slightly different treatment. Good presets remove guesswork without forcing you to memorise numbers before your first cup.
If you also make pour-over coffee, spout shape deserves more attention than many buyers expect. A gooseneck gives slower, steadier flow. A standard spout pours faster and usually suits everyday tea drinking better.
Presets versus manual control
Both can work well.
Presets are handy for households that want speed and consistency. Press one button, get close to the right range, and move on with your morning.
Manual control suits people who like precision. That includes anyone making matcha regularly, because small temperature differences show up clearly in the bowl. If you want a kettle built around that level of control, the Fellow Stagg EKG electric kettle for precision brewing is a well-known example.
Material, shape, and size
Material changes how the kettle feels to use and how easy it is to live with over time.
- Stainless steel is durable, simple to maintain, and a strong all-round choice for frequent use.
- Glass lets you see the water level clearly, though mineral marks are more visible.
- Plastic components vary by model. Many tea drinkers prefer as little plastic as possible in areas that contact hot water.
Capacity matters too. A compact kettle often makes more sense for one or two careful brews than a large model that feels heavy and takes up extra bench space. A bigger kettle suits family breakfast service or households that make several drinks back to back.
Small design details matter every day
Look closely at the parts you will touch and clean, not just the headline features.
A comfortable handle helps when you are pouring slowly into a matcha bowl or teapot. Clear buttons matter at 6 am. A wide opening makes it easier to check for mineral buildup before it affects taste. A removable filter is useful if your local water leaves residue behind.
These details sound minor, but they shape the daily workflow. A kettle that is simple to read, simple to pour, and simple to clean tends to get used properly. That usually means better flavour in the cup and fewer moments of frustration on the bench.
Choose the model that suits your real routine, not the one with the longest feature list. That is how you get cleaner flavour, steadier results, and a kettle that earns its place in the kitchen.
Kettle Care and Safety Tips for Lasting Performance
A temperature control kettle doesn’t ask for much, but it does need some care. If you ignore scale buildup, even a very good kettle can become less accurate and less pleasant to use.
That’s especially relevant in parts of Australia with harder water. A 2024 Choice Australia review reported high user satisfaction with temperature-control kettles, but also noted limescale as a common issue in coastal NSW and QLD, and that buildup can affect temperature accuracy by up to 40% if it isn’t managed, according to this review summary on kettle performance and limescale.
What scale looks like
You don’t need special tools to spot it. Check inside the kettle when it’s empty and cool.
Common signs include:
- White or chalky marks on the base or walls
- Cloudy patches that don’t rinse away
- A rough mineral ring near the waterline
- Water tasting flat or slightly minerally when the kettle is overdue for cleaning
A simple descaling routine
For many households, a gentle food-safe approach is enough.
- Fill the kettle with a mix of water and a natural descaling agent such as white vinegar or lemon juice.
- Let it sit for a short period.
- Empty and rinse thoroughly.
- Boil fresh water and discard it.
- Repeat if needed for stubborn buildup.
If you prefer a ready-made product designed for appliance cleaning, a purpose-made option like this My Nivona cleaning accessory can be a useful alternative.
Small habit, big payoff: Check the inside of your kettle weekly if you live in a hard-water area. It’s much easier to remove light scale than heavy buildup.
Basic safety that’s easy to forget
Most accidents with kettles come from rushing.
Keep these habits in mind:
- Don’t overfill above the marked line
- Don’t run it empty
- Watch for steam when opening the lid after heating
- Keep the base dry and the cord tidy
- Place it on a stable surface away from the sink edge or clutter
Material-specific care
Glass kettles usually need more frequent cosmetic cleaning because scale shows quickly. Stainless steel hides marks better but still needs interior descaling. Exterior fingerprints can usually be wiped away with a soft damp cloth once the kettle is cool.
If the kettle has a removable mesh filter near the spout, rinse that regularly too. It’s a small part, but it can collect residue that affects flow and cleanliness.
A well-maintained kettle stays more accurate, tastes cleaner, and gives you fewer reasons to second-guess your brew.
Brew with Confidence and Taste the Difference
Good tea isn’t only about the leaf. It’s also about the water that meets it.
An electric tea kettle with temperature control gives you something a basic kettle can’t. It gives you intention. You stop treating every tea the same and start brewing each one in a way that suits its character. That means smoother matcha, more expressive leaf tea, and smarter handling when kombucha is part of your routine.
Once you’ve used one for a while, the difference feels obvious. You waste fewer good ingredients. You get more consistent flavour. You build a home brewing rhythm that’s simple enough for weekdays and satisfying enough for slower weekends.
If you care about flavour and want to be gentler with delicate teas, precision is worth it. Not because it’s fancy, but because it works.
If you’re ready to put that knowledge into practice, explore Pep Tea for premium organic matcha, sugar-free organic kombucha, and practical brewing inspiration suited to Australian kitchens.
Master Matcha Making Kit: Your Perfect Brew Awaits

You’ve probably seen a matcha making kit online, loved the look of the bowl and whisk, then paused at the checkout wondering whether you need all of it. Fair question. A lot of first kits are bought on impulse, used twice, then pushed to the back of the cupboard because the tea came out bitter, lumpy, or oddly flat.
The good news is that making proper matcha at home isn’t hard. It’s just precise. A few simple tools, the right powder, and a couple of small habits make all the difference. Once those pieces are in place, your morning cup starts to feel less like a fiddly task and more like a ritual you’ll want to repeat.
A good matcha making kit should do two jobs well. It should help you whisk a smooth bowl of tea, and it should remove doubt about what you’re putting into that bowl. For Australian drinkers, that second part matters more than most guides admit.
Choosing Your First Matcha Making Kit
The cheapest kit is rarely the best first buy.
That doesn’t mean you need something ornate or collector-level. It means your matcha making kit should be built around safety, usability, and powder quality, not just aesthetics. Plenty of kits look lovely in product photos but fall short where it counts. The whisk splays too quickly, the bowl is awkward to whisk in, or the included matcha is an afterthought.
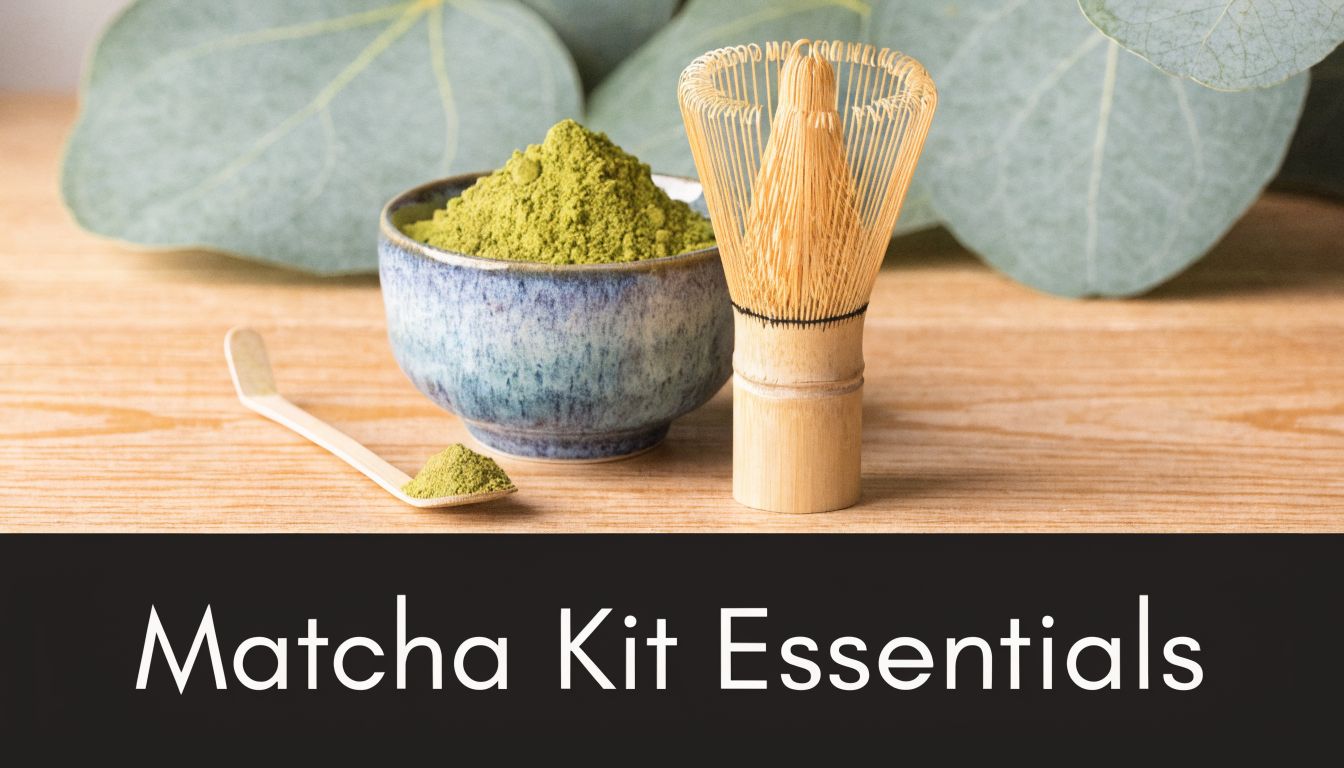
What a first kit should include
At minimum, look for these pieces:
- A chawan bowl: Wide enough to whisk in comfortably. A narrow mug makes frothing harder and usually leaves clumps around the edges.
- A chasen whisk: This is the bamboo whisk that gives matcha its light foam and smooth texture.
- A chashaku scoop: Helpful for consistent portions and part of the traditional process.
- A fine sifter: Often skipped in budget sets, but it’s one of the most useful tools in the whole routine.
If a set omits the sifter, I’d still consider buying it, but only if you’re happy to add a fine kitchen sieve yourself. Skipping sifting is one of the quickest ways to end up with gritty matcha.
The real buying question isn’t price
Most beginners compare kits by appearance first and price second. I’d reverse that thinking. Compare them by what they let you avoid.
You want to avoid a whisk with rough or brittle tines. You want to avoid unclear materials. You want to avoid powder with vague sourcing. And you want to avoid kits that bundle in low-grade matcha just to look complete.
Practical rule: If the seller is detailed about the tools but vague about the matcha, treat that as a warning sign.
There’s a genuine gap in the Australian market around organic certification and sourcing. One review of starter kit content notes that many kits focus on the tools while leaving buyers with very little clarity about certified-organic powder and food-grade tool standards, which matters for Australian consumers trying to buy carefully from trusted suppliers (matcha kit sourcing and certification gaps).
What matters most for Australian buyers
If you care about clean ingredients, don’t treat the powder as separate from the kit. Treat it as the centrepiece.
A whisk can help texture. A bowl can help technique. But the flavour, colour, aroma, and overall drinking experience come from the matcha itself. For that reason, I’d rather see a simple kit paired with certified organic matcha than a deluxe set with uncertain powder.
Here’s the short version of what to check before buying:
| What to check | Why it matters |
|---|---|
| Organic certification | Gives you a clearer standard for how the powder was produced |
| Food-grade tool materials | Helps you avoid uncertainty around bamboo and glaze quality |
| Wide bowl shape | Makes whisking easier and improves foam |
| Separate scoop and sifter | Keeps your portioning and texture more consistent |
| Clear sourcing information | Usually signals better care and transparency overall |
For gifting, presentation still matters. If you’re comparing more polished options for birthdays, housewarmings, or wellness gifts, it can help to browse various gift guides and then come back to the practical checklist above so the set looks good and works well.
What works and what usually disappoints
What works:
- A simple ceramic bowl with room to whisk
- A bamboo whisk that feels springy, not dry or fragile
- Matcha sold with clear quality cues rather than bundled as filler
- A set from a supplier that understands preparation, not just packaging
What often disappoints:
- Tiny bowls: Pretty on a shelf, frustrating in use
- Decorative kits with no sifter: You’ll fight clumps from day one
- Mystery matcha: Dull colour, harsh taste, poor value
- Ultra-cheap bundles: Fine for photos, less fine for daily drinking
If you want an example of a straightforward set designed for home preparation, Pep Tea offers a Japanese matcha set that includes the traditional tool format essential for most beginners.
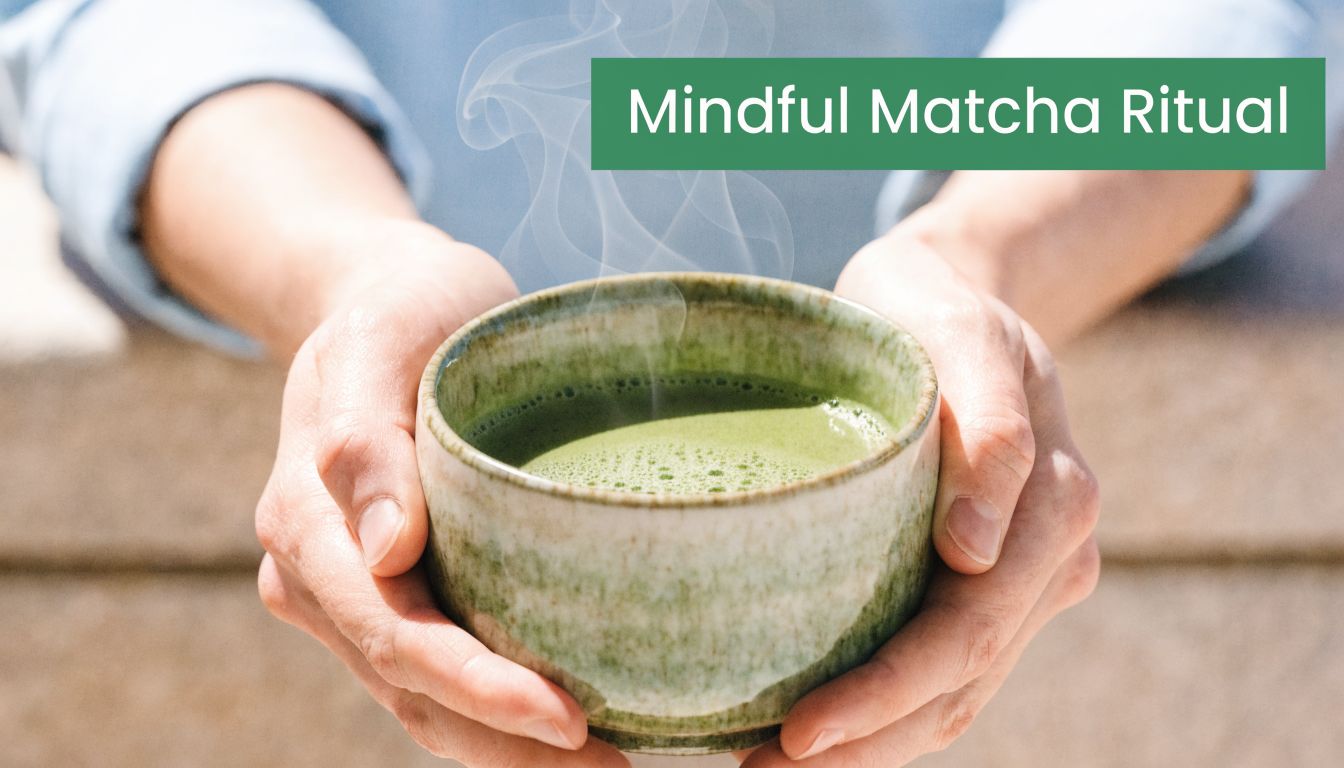
Your First Bowl A Mindful Matcha Ritual
Making your first bowl of matcha goes better when you stop trying to rush it.
The best bowls I’ve made at home haven’t come from speed. They’ve come from giving each part of the process a reason. Warm the bowl because temperature matters. Sift the powder because texture matters. Whisk with focus because the final cup shows every shortcut.
Start by warming the bowl
Pour hot water into your bowl and let it sit briefly. Then warm the whisk in that same water for a moment.
This step does two useful things. It takes the chill off the bowl so your tea stays pleasant to drink, and it softens the whisk tines slightly so they’re less likely to feel stiff or scratchy when you begin. Empty the bowl, then dry it well. If the bowl is wet before the powder goes in, the matcha can stick and form paste-like lumps.
Sift the powder every single time
For a traditional everyday bowl of usucha, use 2g per serving. Sift it into the dry bowl.
That amount is small enough to feel approachable and strong enough to show the character of the tea. Sifting is the difference between smooth and frustrating. Matcha is a fine powder, but it still clumps easily in the tin. Once hot water hits those clumps, they’re harder to break apart cleanly.
Skip sifting once and you’ll usually spend the rest of the bowl chasing little green lumps around the bottom.
Add water that’s hot, not scalding
Your water should be hot enough to wake up the matcha, but not so hot that it knocks the life out of it. If you’ve just boiled the kettle, let the water cool a little before pouring.
When the water is too hot, matcha can taste sharper and less balanced. When the temperature is gentler, you’re more likely to notice sweetness, softness, and that fresh green character people are often chasing in cafés.
A helpful beginner method is this:
- Boil your kettle
- Warm the bowl and whisk
- Dry the bowl
- Sift in your 2g of matcha
- Add a small amount of hot water first
- Whisk into a loose paste before adding the rest
That first small splash of water matters. It helps the powder open up evenly rather than floating in dry pockets.
Let your senses guide the process
As you whisk, listen for the light tapping sound of bamboo moving quickly across the surface. Watch the colour brighten. Notice when the texture changes from thin and watery to silky and lightly foamed.
A good first bowl doesn’t need to look perfect. It just needs to feel integrated. No dry clumps, no sludge at the base, no harsh burnt note from overheated water.
Here’s a simple sensory checklist:
- Colour: Fresh, vivid green rather than dull olive
- Aroma: Grassy, creamy, or softly vegetal, not burnt
- Texture: Smooth and fine, with a light layer of froth
- Finish: Clean and rounded, not aggressively bitter
Drink it while it’s alive
Matcha doesn’t improve by sitting around. Once whisked, drink it promptly.
That’s part of why the ritual feels grounding. You make one bowl, you hold it warm in your hands, and you drink it in the moment it was prepared. It isn’t a brew to forget on the bench while you answer emails.
Small habit, big payoff: Sit down for the first few bowls you make. When you’re standing and distracted, you’ll rush the whisking and miss the flavour cues.
If you’re new to the taste, don’t judge matcha by your first sip alone. The opening can feel grassy or savoury if your palate expects sweetness. Give it a few mouthfuls. Good matcha tends to settle into itself as you drink, and your palate catches up quickly.
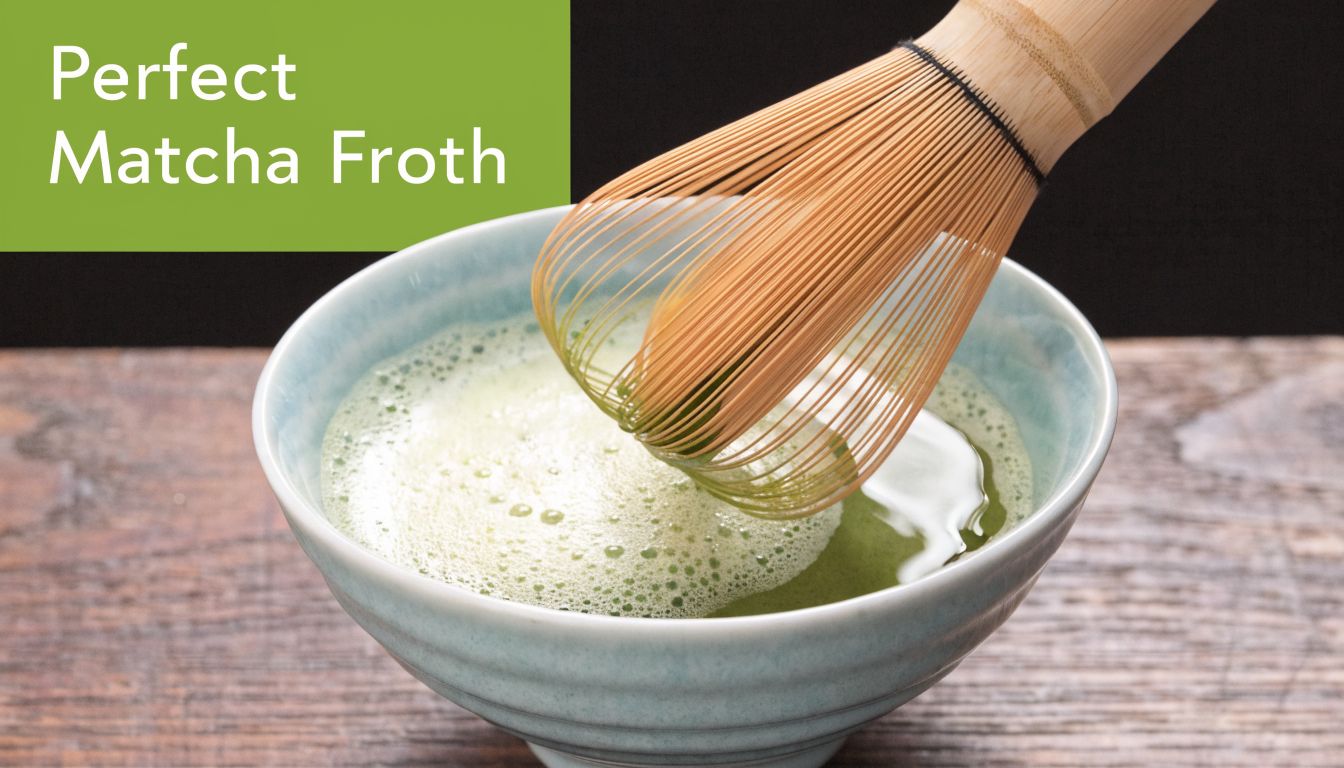
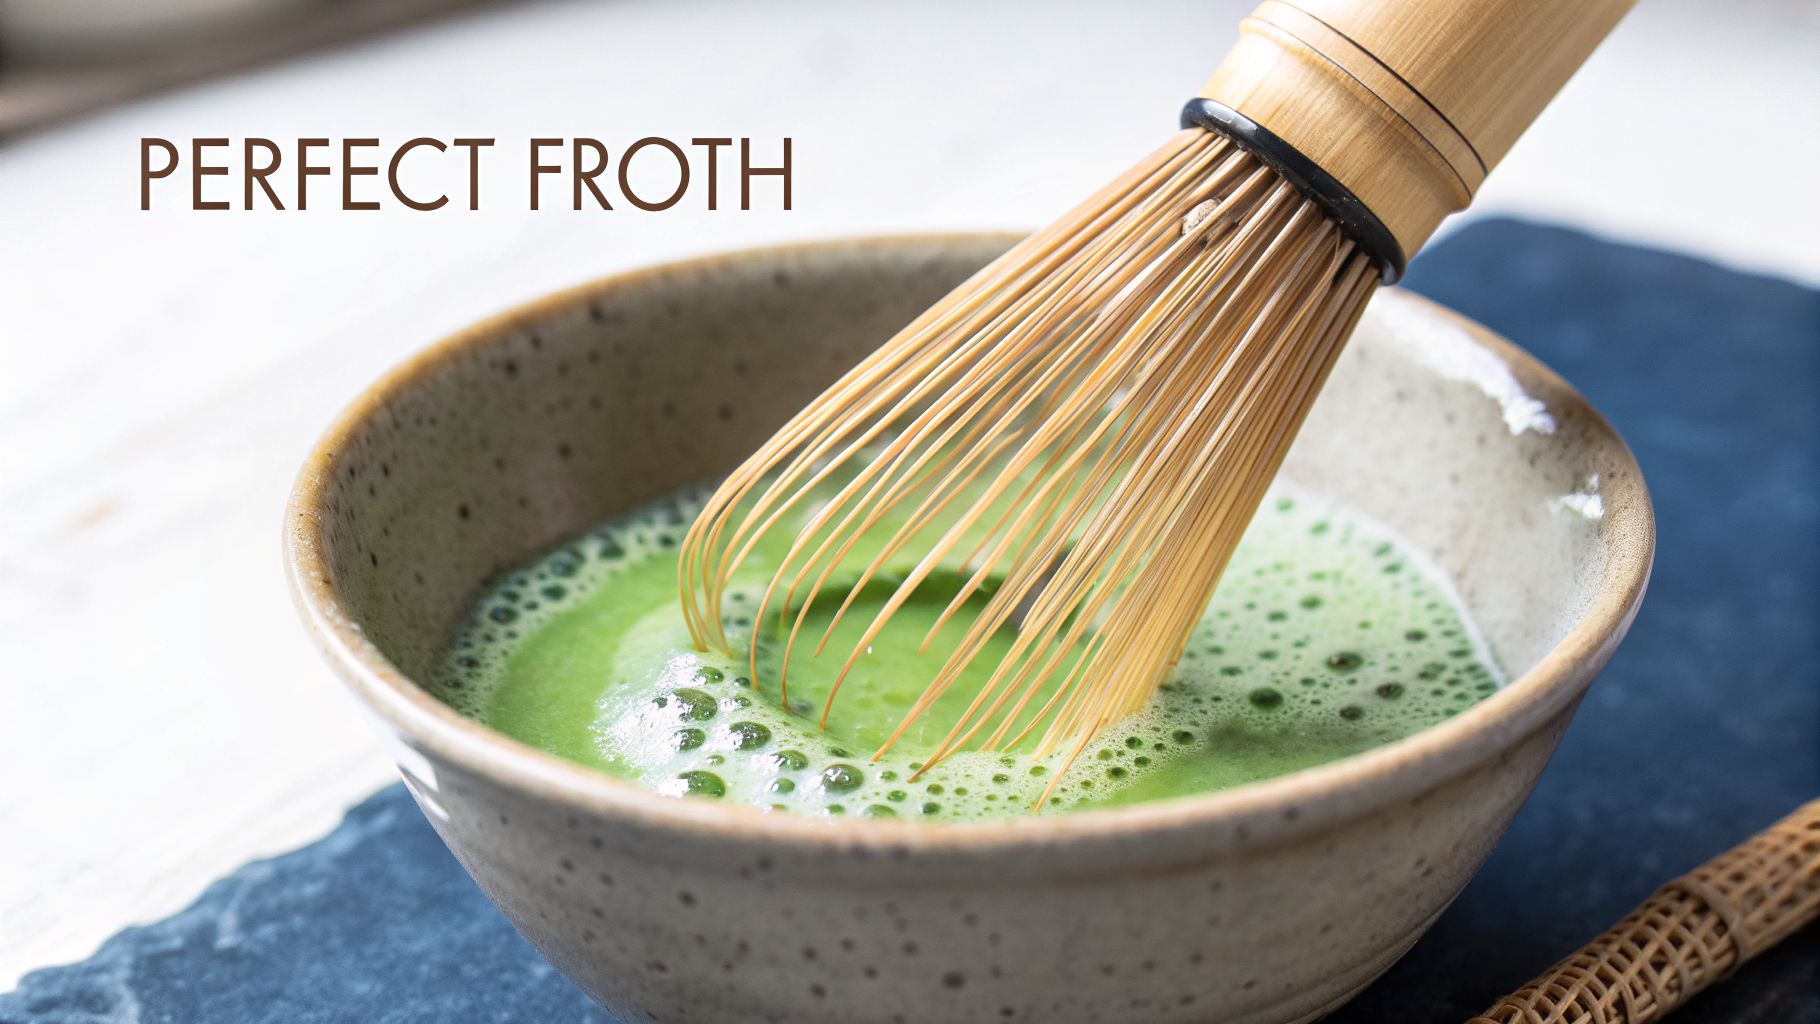
Mastering the Whisk The Art of the Perfect Froth
The chasen, or bamboo whisk, is the heart of the matcha making kit. It has been central to matcha preparation since Japan’s Muromachi period (1336–1573), while the broader practice of whipping powdered tea reaches back to China’s Song Dynasty (960–1279 AD), which gives this simple tool a long history in tea preparation (history of the matcha whisk).
That history is lovely, but what matters in your kitchen is this. The whisk isn’t there to stir. It’s there to aerate.
Use your wrist, not your whole arm
A lot of beginners whisk matcha as if they’re beating cake batter. Big arm movement, lots of effort, not much foam.
The better approach is smaller and quicker. Hold the bowl steady with one hand. Hold the whisk lightly with the other. Then move from the wrist in quick M or W motions near the surface of the tea.
The whisk should glide, not grind. If you press the tines hard into the bottom of the bowl, you’ll wear them out faster and get less froth.
What the motion should feel like
Think of it as fast sketching, not stirring.
You’re not tracing perfect letters, but the motion is similar. Short, rapid passes create tiny bubbles and a finer foam. Slow circles usually produce a flatter drink with larger bubbles.
A few signs you’re on track:
- The surface starts to lighten
- Fine foam forms across the top rather than only at the edges
- The whisk moves freely without scraping
- The tea underneath looks evenly blended
If you hit a stubborn little clump, press it gently against the side of the bowl first, then return to whisking. Don’t keep attacking it in the middle of the bowl.
For a closer look at hand position and movement, Pep Tea’s guide on how to whisk matcha is useful if you like seeing the technique broken down visually.
Finish cleanly
Once you’ve got a fine foam, slow down. A gentle final sweep across the surface tidies the top and settles any oversized bubbles.
That last movement changes the look of the bowl more than people expect. The tea appears more even, the foam looks finer, and the whole drink feels more deliberate.
A quick visual demo helps here:
Don’t chase huge foam. Chase fine foam. Matcha should look soft and velvety, not like aggressively frothed milk.
Beyond the Bowl Three Simple Matcha Creations
Once your whisking is organised, your matcha making kit becomes more versatile than people expect. The same bowl, whisk, and sifted powder can take you from a quiet morning tea to an iced afternoon drink or a quick kitchen add-in.
The trick is not changing everything. It’s keeping the matcha base smooth, then adapting what surrounds it.
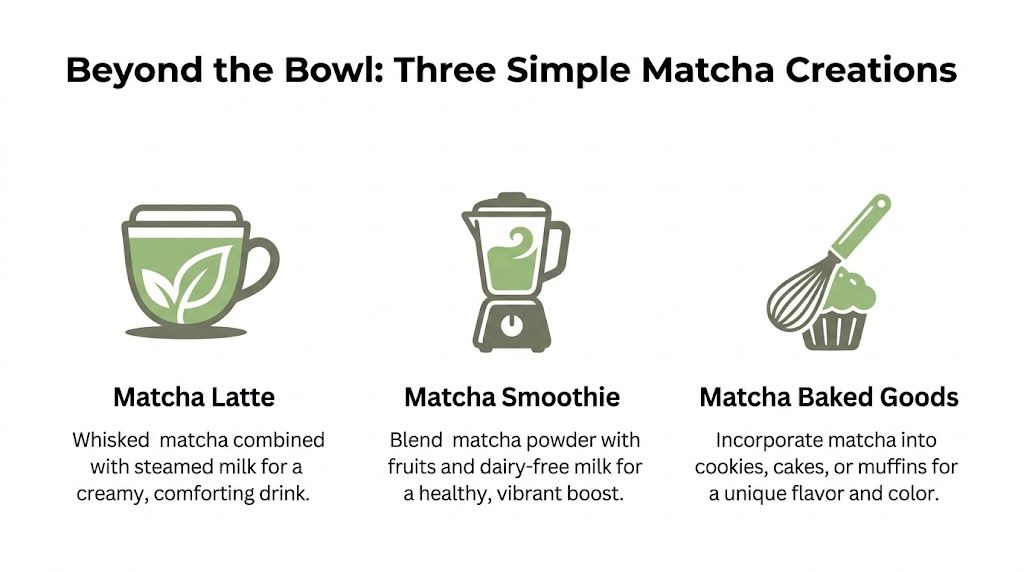
Matcha latte
A latte is often the easiest way for new drinkers to settle into matcha because milk softens the grassy edge.
Start by making a small concentrate in your bowl:
- Sift your matcha first: This keeps the latte smooth rather than chalky.
- Add a small amount of hot water: Whisk until fully blended and lightly foamy.
- Pour in warmed milk or cold milk over ice: Oat milk is popular for body, but use what you enjoy.
If your latte tastes weak, the issue usually isn’t the milk. It’s that the concentrate was too diluted before the milk went in. Keep the base strong, then stretch it.
A good matcha latte still tastes like tea. If it only tastes like milk, build a stronger bowl before you pour.
Iced matcha
Iced matcha can be fresh and crisp, but it turns disappointing fast if you skip the basic prep and try to shake dry powder straight into cold water.
Do this instead:
- Sift the matcha into your bowl
- Whisk with a small amount of hot water until smooth
- Add that concentrate to a glass of cold water and ice
- Stir or shake briefly, then drink straight away
That small amount of hot water matters because it dissolves the powder properly. Cold liquid alone doesn’t handle clumps nearly as well.
If the drink tastes sharp, reduce your brewing water temperature next time when you make the concentrate. The bitterness usually starts earlier than people think.
Matcha in smoothies and baking
Grade matters here.
For a straight bowl or a simple whisked tea, ceremonial-style matcha is the better fit because the flavour sits front and centre. For smoothies, yoghurt, muffins, pancakes, or biscuits, culinary matcha usually makes more sense because it’s designed to work with other ingredients.
A few easy uses:
- Smoothies: Add a small spoonful to banana, mango, or vanilla-based blends
- Yoghurt bowls: Stir through plain yoghurt and top with fruit
- Baking: Fold into cake batter, icing, cookies, or muffins
- No-bake snacks: Mix into energy balls or chia puddings
Here’s a simple comparison:
| Use | Better style |
|---|---|
| Traditional whisked bowl | Ceremonial-style matcha |
| Hot or iced latte | Ceremonial-style matcha or a smooth everyday blend |
| Smoothies | Culinary matcha |
| Baking | Culinary matcha |
If you’re using matcha in the kitchen regularly, keep one powder for drinking and another for recipes. It’s cleaner, more practical, and saves you using your nicest tea where subtle flavour will get buried.
Caring For Your Tools A Guide to Longevity
A matcha making kit lasts much longer when you clean it straight after use.
That’s especially true for the whisk. Bamboo is practical and beautiful, but it doesn’t respond well to neglect. Leave matcha residue sitting in the tines, or tuck the whisk away damp, and you’ll shorten its life quickly.
How to clean the whisk properly
Rinse the whisk under warm water as soon as you finish your bowl. Use your fingers very gently if a bit of powder is caught between the tines, but don’t scrub and don’t use soap.
Soap can linger in bamboo and affect flavour later. Rough handling can snap the fine tines or pull them out of shape.
A simple routine works best:
- Rinse immediately: Dried matcha is harder to remove later
- Use warm water only: Enough to release residue without stressing the bamboo
- Shake off excess water: Don’t leave it dripping on the bench
- Air dry thoroughly: Moisture is the enemy
Why a whisk stand helps
A kusenaoshi, or whisk stand, helps the chasen dry in a more natural shape. That matters because the curved form supports better whisking and reduces stress on the tines over time.
If you use your kit often, a matcha whisk stand is a practical addition rather than a decorative extra.
Store the whisk upright only after it has been rinsed and allowed to dry properly. A damp cupboard is where bamboo tools start going wrong.
Bowl and scoop care
The bowl is the easiest part of the set to maintain. Wash it with warm water and a soft cloth or sponge. If you use dish liquid, rinse it thoroughly so no scent remains.
The scoop needs a lighter touch. Wipe it clean or rinse briefly if needed, then dry it well. Don’t leave bamboo pieces soaking in water.
For best flavour, keep all tools away from strong kitchen smells. Matcha is delicate enough to pick up unwanted aromas over time.
Troubleshooting Common Matcha Mistakes
Even with a solid matcha making kit, the first few bowls can be inconsistent. That’s normal. Most problems come down to one of three things: water, whisking, or powder prep.
Why does my matcha taste bitter
The usual culprit is water that’s too hot. If you pour freshly boiled water straight onto the powder, the cup can taste harsher than it should.
Another common issue is using more powder than your palate is ready for. Strong matcha isn’t the same as balanced matcha.
Try this:
- Let the water cool slightly after boiling
- Stick to a modest serving when you’re learning
- Choose matcha suited to drinking, not baking
- Whisk thoroughly so the flavour is evenly distributed
If the bitterness is only at the end of the bowl, check whether sediment is collecting at the bottom. That often points to weak whisking or poor sifting.
Why am I getting clumps
Clumps usually begin before the whisk ever touches the bowl.
Matcha compacts in storage, so the powder needs air introduced back into it. That’s what sifting does. Once you skip it, the whisk has to work much harder.
The fix is straightforward:
- Sift into a dry bowl
- Add a small amount of water first
- Make a smooth paste
- Then add the rest of the water
- Break any stubborn bits gently against the side
Don’t dump all the water in at once and hope the whisk sorts it out. Sometimes it can. Often it won’t.
Why am I not getting any foam
Foam depends on technique more than force.
If you’re whisking in slow circles, you’re mixing, not aerating. If you’re pressing the whisk heavily into the bowl, the tines can’t flick the liquid properly. And if there’s too much water for the amount of matcha, the surface won’t build the same fine froth.
A quick diagnosis table helps:
| Problem | Likely cause | Better approach |
|---|---|---|
| Flat surface | Circular stirring | Use quick wrist-led M or W motions |
| Big bubbles only | Whisking too high or too slow | Keep the whisk low and fast near the surface |
| No foam with clumps | Unsifted powder | Sift first, then whisk |
| Thin, weak bowl | Too much water | Keep the base more concentrated |
Most bad bowls aren’t ruined bowls. They’re useful feedback. Change one variable at a time and the pattern becomes obvious.
Once you get the feel for the whisk and start noticing how bowl shape, water temperature, and powder texture affect the cup, matcha becomes much easier to repeat well.
If you’re ready to build a calmer, cleaner daily ritual, Pep Tea offers organic matcha, preparation tools, and practical guides for making matcha at home with more confidence and less guesswork.
How to Whisk Matcha for the Perfect Frothy Cup in 2026

Ever had that moment? The matcha you make at home is a bit… clumpy. A little gritty. But the one at your favourite Aussie café is perfectly smooth, with a beautiful layer of foam on top. The difference isn't just the tea; it's the technique. The secret to unlocking that creamy texture and rich, umami flavour is all in the whisk.
Proper whisking is what separates a good matcha from a truly great one. It aerates the powder, suspends it in the water, and creates the delicate froth that defines the entire experience. This guide will show you exactly how to do it.
Why Proper Whisking Is the Key to Great Matcha
Learning how to whisk matcha correctly is more than just mixing tea and water. It’s a foundational skill that completely transforms the drink, turning a high-quality powder into something genuinely exceptional. This isn't just for a traditional Japanese tea ceremony; it’s just as vital for your daily ritual at home in Australia.
When you whisk vigorously, you’re not just stirring. You're forcing the fine, stone-ground tea particles into suspension, distributing them evenly throughout the water. Without this, the matcha powder quickly settles, leaving you with a gritty sediment at the bottom and a watery, unsatisfying drink. A good whisk ensures every single sip is consistently smooth and full-bodied.
Unlocking Flavour and Texture
The rapid motion of a traditional bamboo whisk, known as a chasen, whips thousands of tiny air bubbles into the liquid. This aeration is what creates that signature layer of creamy microfoam on top.
This delicate foam serves a few crucial purposes:
- Softens Bitterness: The foam mellows any inherent sharpness in the tea, allowing the naturally sweet and savoury umami notes to come forward.
- Creates a Creamy Mouthfeel: It gives the matcha a velvety, almost latte-like texture, even when it's made with nothing but water.
- Enhances Aroma: The froth helps release the fresh, vegetal aroma of the matcha, making it a full sensory experience.
Whisking isn't just a step; it's the bridge between a simple powder and a complex, rewarding experience. It’s what makes our Pep Tea organic ceremonial matcha truly shine, ensuring you enjoy the full depth of its flavour and health benefits.
This guide will take you beyond basic stirring. We'll get into the specific motions and tips needed to achieve that perfect, café-quality froth. We'll cover the tools, techniques, and nuances that will get you whisking correctly from your very first try, turning your kitchen into your new favourite matcha spot.
Gathering Your Essential Matcha Toolkit
You might be tempted to grab a fork or your electric milk frother, and look, we get it. It seems like an easy shortcut. But if you want to make an authentic, genuinely delicious bowl of matcha, using the right tools isn't just for show—it's the first step that actually matters.
Preparing matcha is as much about the process as the final drink. The tools were designed for a reason, and they work. It's like drinking good wine from a proper glass versus a coffee mug; the vessel itself fundamentally changes the experience.
The one tool you simply can’t skip is the traditional bamboo whisk, or chasen. This isn't just any whisk. Its dozens of fine, flexible tines are perfectly engineered to do three things at once: break up any stubborn clumps, aerate the tea, and suspend the fine powder evenly throughout the water.
A metal whisk, on the other hand, often imparts a faint metallic taste that clashes with the matcha's delicate flavour. Its rigid tines just can't produce that same creamy, micro-fine froth. The chasen works with the tea, not against it, coaxing out the best texture and taste.
Choosing the Right Chasen
Not all bamboo whisks are the same. You'll see them categorised by the number of prongs (or tines) they have, and this detail isn't just for tea ceremony masters; it directly affects the kind of matcha you can make.
- 80-Prong Chasen: This is your perfect daily workhorse. It has the ideal density and flexibility to whip up a beautiful, frothy foam for usucha (thin tea)—the light, everyday style of matcha most of us drink.
- 100 to 120-Prong Chasen: With more tines, this whisk is much denser. It's designed to create an exceptionally fine, silky foam, making it the go-to for koicha (thick tea). This style has a consistency almost like warm honey, and achieving that level of smoothness is impossible without a denser whisk.
The art of hand-carving a chasen from a single piece of bamboo has a deep history, stretching back to Japan's Muromachi period (1336-1568). It's a tradition born from centuries of perfecting the tea ceremony, and we get to bring that same craftsmanship right into our modern Aussie kitchens.
Completing Your Matcha Set
While the chasen is the hero, a couple of other pieces make the whole process smoother and more consistent.
First is the chawan, or matcha bowl. Its wide, flat bottom is a key design feature. This specific shape gives you the space you need to whisk vigorously in that essential 'W' or 'M' pattern, helping you build a rich froth without splashing tea all over your counter.
Then there’s the chashaku, a simple and surprisingly elegant bamboo scoop. It’s carved to measure out the perfect amount of matcha powder—roughly one gram—for a single serving. Using it takes the guesswork out of your ratios, so you get a consistent bowl every single time.
Having these three items on hand turns making tea from a chore into a mindful ritual. If you want to start with a beautifully curated setup, a complete matcha tea set available in Australia is a brilliant way to get everything you need in one go.
Mastering the Usucha Whisking Technique
Usucha, or 'thin tea', is the matcha you'll likely come back to every day. It’s light, vibrant, and crowned with a delicate layer of foam. Getting this right is the foundation of a great matcha practice, whether at home or in your café, and it's much simpler than it looks once you understand the rhythm.
The journey to a perfect bowl starts before any powder even hits the ceramic. First, prepare your tools. Soaking the tines of your bamboo whisk (the chasen) in warm water for a minute or two is a small ritual that pays off. This simple act 'blooms' the bamboo, making it soft and pliable, which is exactly what you want to prevent the delicate tines from snapping during the vigorous whisking to come.
This visual guide shows the essential trio for your daily matcha ritual.
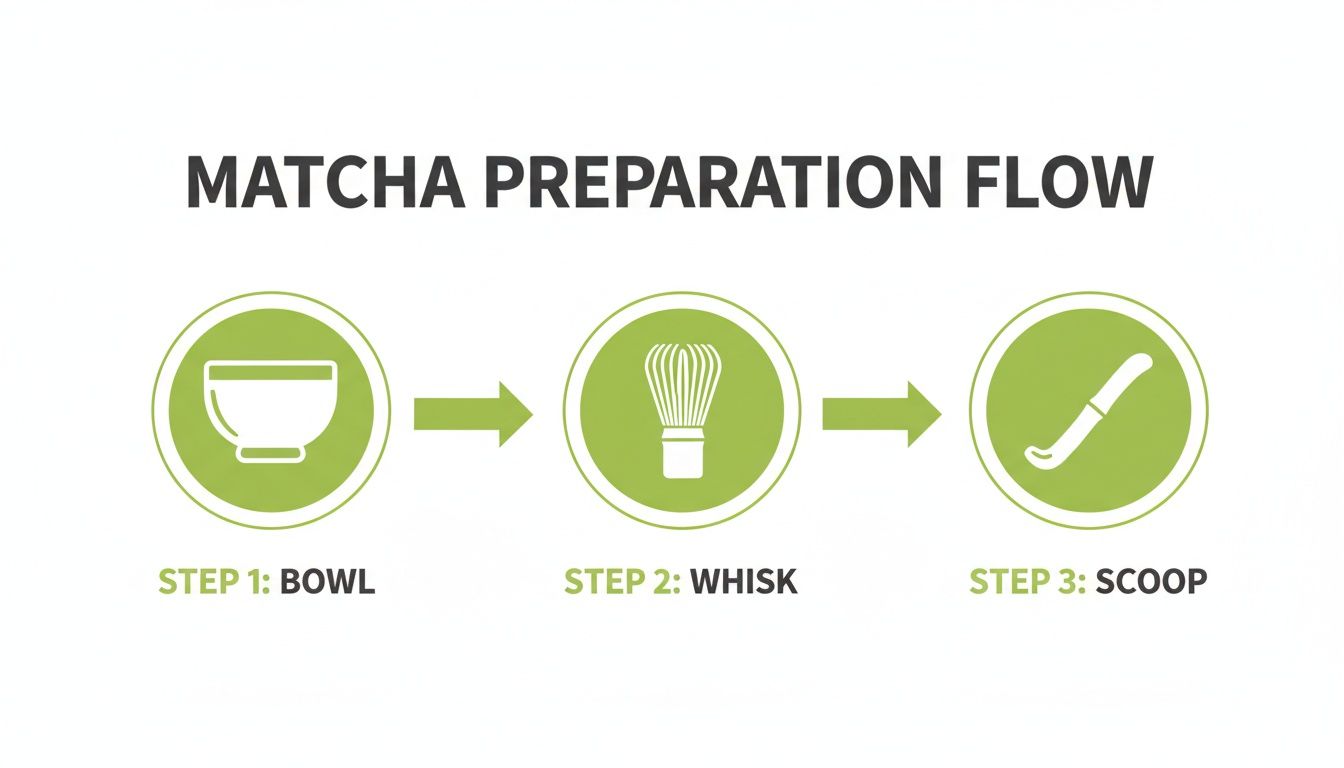
Here you can see how the wide matcha bowl (chawan), the multi-pronged bamboo whisk (chasen), and the traditional scoop (chashaku) work in concert to create the perfect cup.
The Non-Negotiable Sifting Step
Next is the single most important—and most often skipped—step: sifting. Using a small, fine-mesh sieve, press your matcha powder into a warmed bowl. This isn't just for show. It breaks up the tiny clumps that naturally form from static and humidity, guaranteeing a silky-smooth texture and preventing those bitter, undissolved pockets from ruining your drink.
For a classic bowl of usucha, the ratio is key. We find the sweet spot is two scoops from your chashaku, which is about half a teaspoon (roughly 1-2 grams) of a quality organic ceremonial grade matcha. Add this to about 60-80ml of hot water.
And on that note, temperature is everything. Aim for water around 70-80°C. Anything hotter, especially boiling water at 100°C, will scorch the delicate tea leaves. You'll taste it immediately as bitterness, and you'll lose many of the beneficial compounds like antioxidants.
The Whisking Motion
Now for the main event. Hold the chasen lightly from the top, keeping your wrist loose and relaxed. All the power should come from your wrist, not your arm.
- Make a Paste: Start by gently stirring to combine the sifted matcha and water. You're aiming for a smooth, uniform paste with no dry spots.
- Whisk Vigorously: Lift the whisk just off the bottom of the bowl and start a rapid back-and-forth motion. Trace a 'W' or 'M' shape across the bowl, fast enough to hear a soft 'swooshing' sound.
- Build the Froth: Keep this brisk movement going for about 20-30 seconds. You'll see a beautiful layer of tiny, delicate bubbles form—this is the coveted microfoam that defines a good usucha.
- Finish with Grace: Once you have a thick, even froth, slow down your whisking. As a final touch, gently draw the whisk up through the centre of the foam to create a small peak.
Usucha vs Koicha Whisking At a Glance
While usucha is your daily go-to, koicha ('thick tea') is a different experience entirely—a thick, intense, and deeply ceremonial preparation. Understanding the difference in technique is crucial.
| Attribute | Usucha (Thin Tea) | Koicha (Thick Tea) |
|---|---|---|
| Consistency | Light and frothy, like a latte | Thick and viscous, like warm honey |
| Matcha Ratio | 1-2g matcha to 60-80ml water | 3-4g matcha to 30-40ml water |
| Whisking Motion | Rapid 'W' or 'M' zig-zag | Slow, deliberate kneading motion |
| Flavour Profile | Bright, fresh, slightly sweet | Intense, rich, deep umami |
| Occasion | Daily enjoyment, lattes, café service | Special occasions, formal tea ceremonies |
Koicha requires a much slower, more deliberate hand to blend the higher concentration of matcha into a smooth, thick liquid. Usucha, on the other hand, is all about aerating the tea to create that signature froth.
Your usucha is now ready to be savoured directly from the bowl. Once you’ve nailed this technique, you have the perfect base for all sorts of other creations. For a refreshing twist on a warm day, you might want to check out our guide on how to make a delicious iced matcha latte.
Moving On to Koicha: The Ultimate Matcha Experience
So, you’ve mastered the art of a frothy, vibrant bowl of usucha. You know the right temperature, the right ratios, and the right wrist action. If you’re starting to feel the pull towards something deeper, it’s time to talk about koicha, or 'thick tea'.
This isn’t just another way to make matcha. It’s a completely different encounter with the tea itself. Traditionally reserved for formal Japanese tea ceremonies, koicha is a profound, intense, and deeply savoury ritual.
Forget the foam. With koicha, the goal is a smooth, viscous liquid with the consistency of molten dark chocolate. It’s a preparation designed to showcase the full spectrum of a tea’s character, highlighting its most complex, umami-rich notes.
Making the switch requires a serious change in your ratios. For koicha, you’ll be using roughly double the matcha powder and half the water you’d use for usucha. This high concentration means there’s nowhere for a low-quality tea to hide; any hint of bitterness or imperfection will be front and centre.
The Koicha Kneading Motion
The whisking technique is also a world away from the rapid ‘W’ or ‘M’ motions of usucha. Here, you’ll adopt a slow, deliberate kneading action.
- Start by gently folding your sifted matcha into the small amount of hot water.
- Slowly and methodically move the chasen through the bowl, using gentle circular and back-and-forth patterns.
- Think of it as ‘kneading’ the powder and water together. You’re pressing and coaxing them into a single, perfectly blended substance.
This patient process creates a glossy, smooth paste without a single clump. It’s a meditative technique that demands focus and a far gentler touch.
Koicha isn’t just a drink; it's an experience. It demands the best from your tea and your technique, rewarding you with an intensity of flavour that a thin preparation simply can't match.
For this, a chasen with a high prong count is almost a necessity. One with 100 or 120 tines is ideal, as the dense bristles are much more effective at smoothly blending the thick mixture and creating that signature glossy sheen.
Perfecting Your Koicha Technique
Ready to try? You’ll want a wide chawan (tea bowl) to give you room to work.
Measure out 4 grams of a premium-grade powder—something like our Pep Tea Imperial Organic Matcha is perfect for this. Add just 30ml of 80°C water. Now, begin to gently knead the mixture with your chasen for about 50 strokes, until a thick, uniform paste forms.
The emulsification you achieve here is key. Proper preparation is what allows you to taste the full, unadulterated character of an exceptional tea, delivering a potent, well-blended synergy of L-Theanine and antioxidants for that signature clean energy without the crash.
When you’re ready for a koicha that truly sings, using a top-tier powder isn't just a recommendation—it’s essential. We strongly suggest exploring our Imperial Organic Matcha Japanese Ceremonial Grade for this special ritual.
Troubleshooting Your Common Matcha Problems
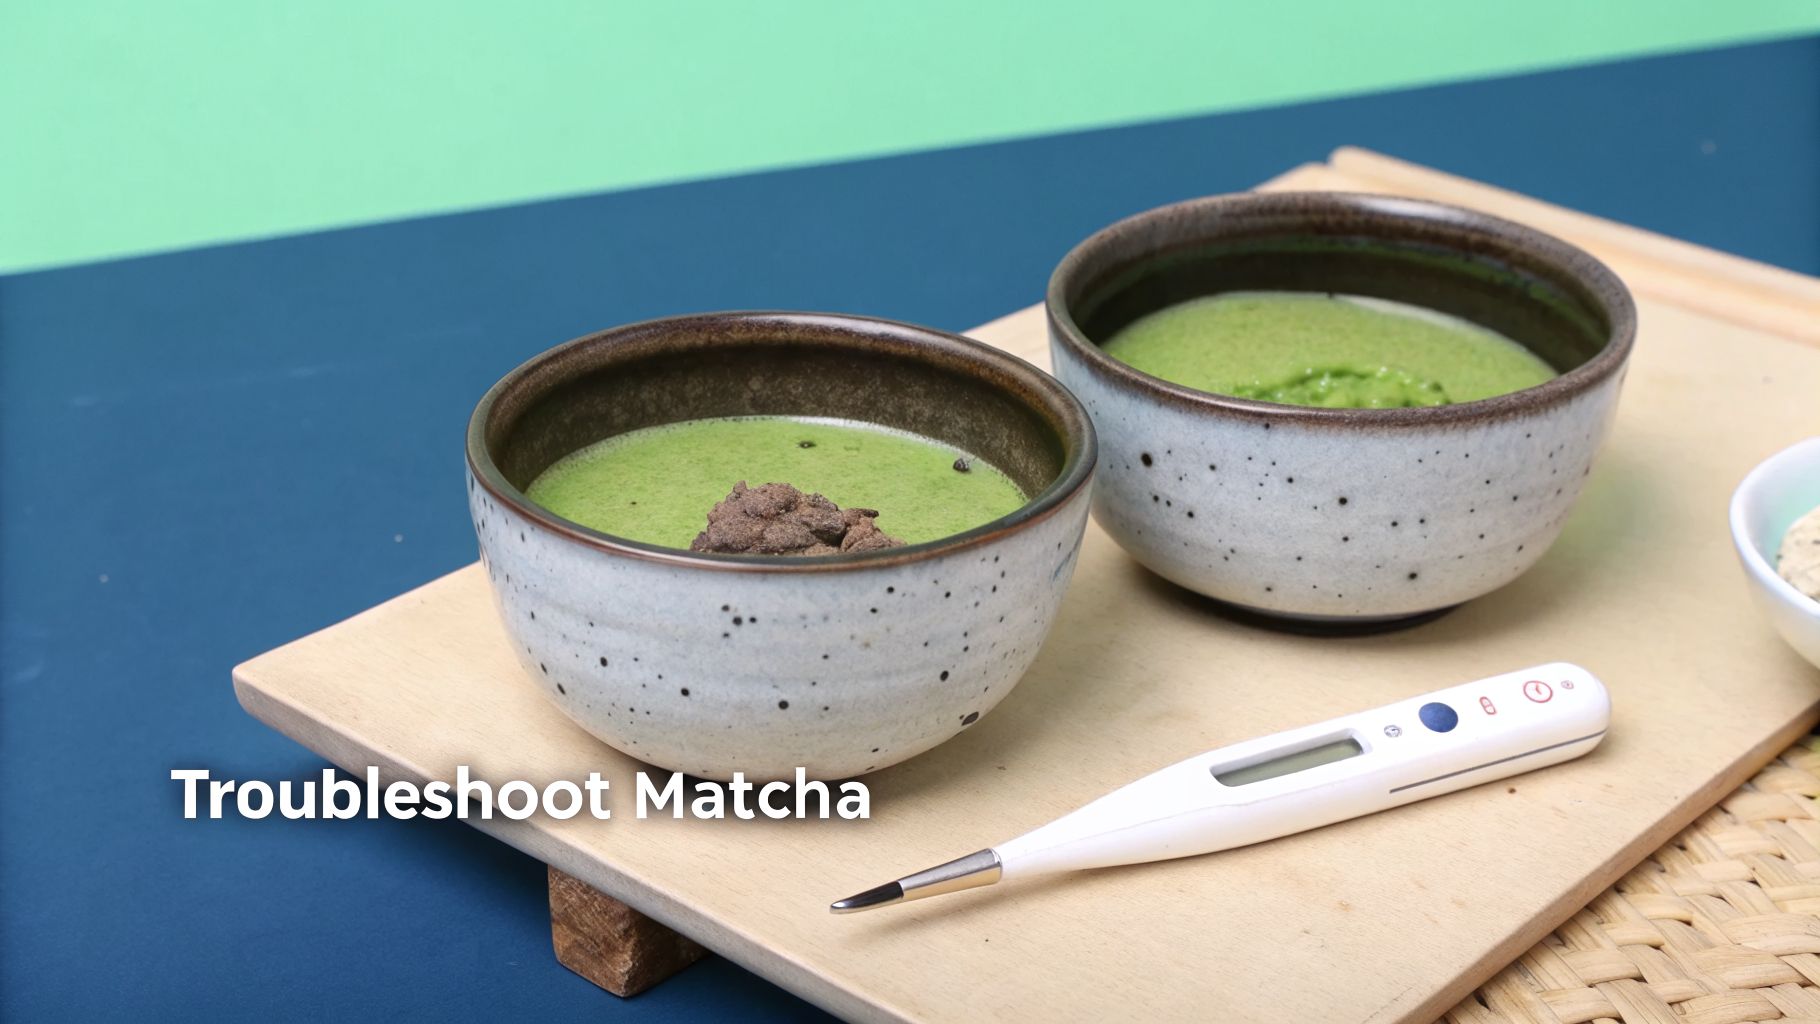
Even when you follow the steps, some days a bowl of matcha just doesn’t come together. Don’t worry, it happens to everyone. A few small adjustments are usually all it takes to turn a frustrating cup into a perfect one.
Let’s walk through the most common issues we see, both in busy Aussie cafés and for home baristas. Mastering these quick fixes is the key to a consistently great brew.
Why Is My Matcha Lumpy?
There’s nothing worse than a sip of matcha ruined by a gritty, undissolved clump of powder. If this is happening, the fix is almost always the same: you need to sift your matcha.
Matcha powder is so incredibly fine that it loves to clump, thanks to static and humidity. No amount of whisking will reliably break up those dense little pockets once water is added.
Pushing the powder through a fine-mesh sieve before you add water is non-negotiable. This one simple step guarantees a silky-smooth foundation every single time.
Why Does My Matcha Taste Bitter?
If your matcha has a harsh, bitter, or almost burnt taste, the culprit is almost certainly your water temperature. This is the single most common mistake people make.
Matcha is delicate. Water that’s too hot—anything boiling or even just over 80°C—will scorch the leaves. This completely changes the chemistry of the tea, destroying the amino acids (like L-theanine, which provides that calm-alert feeling) and releasing a flood of bitter tannins.
The Fix: Always let your boiled water cool for a few minutes before pouring. Better yet, use a temperature-controlled kettle set between 70-80°C. This simple change is what protects the matcha’s delicate sweet and umami notes.
Why Won’t My Matcha Froth?
Struggling to build that signature layer of creamy microfoam? A few things could be going on, and they’re all easy to solve once you know what to look for.
Freshness is Everything: Matcha has a short shelf life once the tin is opened. Old, oxidised powder will look duller and simply won’t froth well. Always use fresh, high-quality matcha and store it in an airtight container in the fridge.
Water Quality Matters: Very hard or very soft water can sometimes interfere with froth formation. If you’ve tried everything else, switching to filtered water might just be the ticket.
Revisit Your Technique: A weak froth often comes down to the whisking motion. You need a fast, energetic M- or W-shaped pattern that comes from the wrist, not a slow stirring motion from your arm. Make sure you’re using a wide-bottomed bowl that gives your chasen enough room to move, and whisk vigorously for a solid 20-30 seconds.
Your Matcha Whisking Questions Answered
We get a lot of questions at Pep Tea about getting the whisking technique just right. It’s the part of the process where things can go wrong, but it’s also where the real magic happens.
Here are the answers to the most common issues we hear about from our Australian customers, designed to help you perfect your daily ritual.
Can I Use a Milk Frother to Whisk Matcha?
Yes, a handheld electric frother is a popular shortcut, especially if you’re making a matcha latte. It's fast, and it certainly creates foam.
But here’s the trade-off: a frother tends to create large, airy bubbles and doesn't suspend the matcha particles as evenly as a traditional bamboo chasen. The texture just isn’t the same.
For a pure matcha experience with water, the chasen is non-negotiable. It creates a far smoother, more integrated emulsion. For lattes, where milk can mask textural imperfections, a frother is a perfectly fine substitute when you're short on time.
Why Is My Matcha Not Frothing?
If you’re struggling to get that beautiful, creamy layer of foam, a few things could be at play. First, check your water temperature. Anything over 80°C will kill the froth before it even forms and scorch the tea, making it taste bitter.
Second, freshness is everything. Old or low-grade matcha loses its vibrancy and its ability to foam well. You need fresh, high-quality ceremonial grade matcha for the best results. It's just not a process you can fake with inferior powder.
Finally, look at your technique. You need a rapid 'W' or 'M' motion, driven from the wrist, not the arm, in a wide bowl. Also, make sure your chasen is in good shape and has been soaked in warm water before you start. This makes the bamboo pliable and far more effective.
Remember: Great froth comes from the combination of fresh matcha, the right temperature, and vigorous wrist action. If one of those elements is missing, the foam will suffer.
How Do I Clean and Care For My Bamboo Whisk?
Proper care for your chasen is simple, but it makes a huge difference to its lifespan. After whisking, rinse it immediately under warm running water. Never use soap—it will get into the bamboo and taint every bowl of matcha you make from then on.
Next, just whisk it in a clean bowl of fresh, warm water to work out any remaining residue from the tines.
To dry it, the best method by far is to place it on a kusenaoshi (a ceramic whisk holder). This is what helps it maintain its signature tulip shape and allows air to circulate evenly. If you don't have a holder, stand it upright on its handle and let it air dry completely before putting it away. Proper drying is the key to preventing mould.
What Is the Best Water Temperature for Matcha?
The ideal water temperature for whisking matcha is between 70°C and 80°C. Using boiling water is probably the single most common mistake people make, and it’s the number one reason they experience bitterness.
Water that's too hot literally scorches the delicate tea powder. This process destroys beneficial compounds like L-theanine (the compound responsible for that calm-alert feeling) and releases a flood of tannins, resulting in a harsh, astringent flavour.
If you don't have a temperature-controlled kettle, there's an easy fix. Simply boil your water, then let it sit and cool for about two to three minutes before pouring it over your matcha. This simple pause makes a world of difference.
Ready to put your new whisking skills to the test? With Pep Tea, you get premium, organic matcha that delivers on flavour and quality every time.
Explore our range of ceremonial and culinary grade organic matcha today.