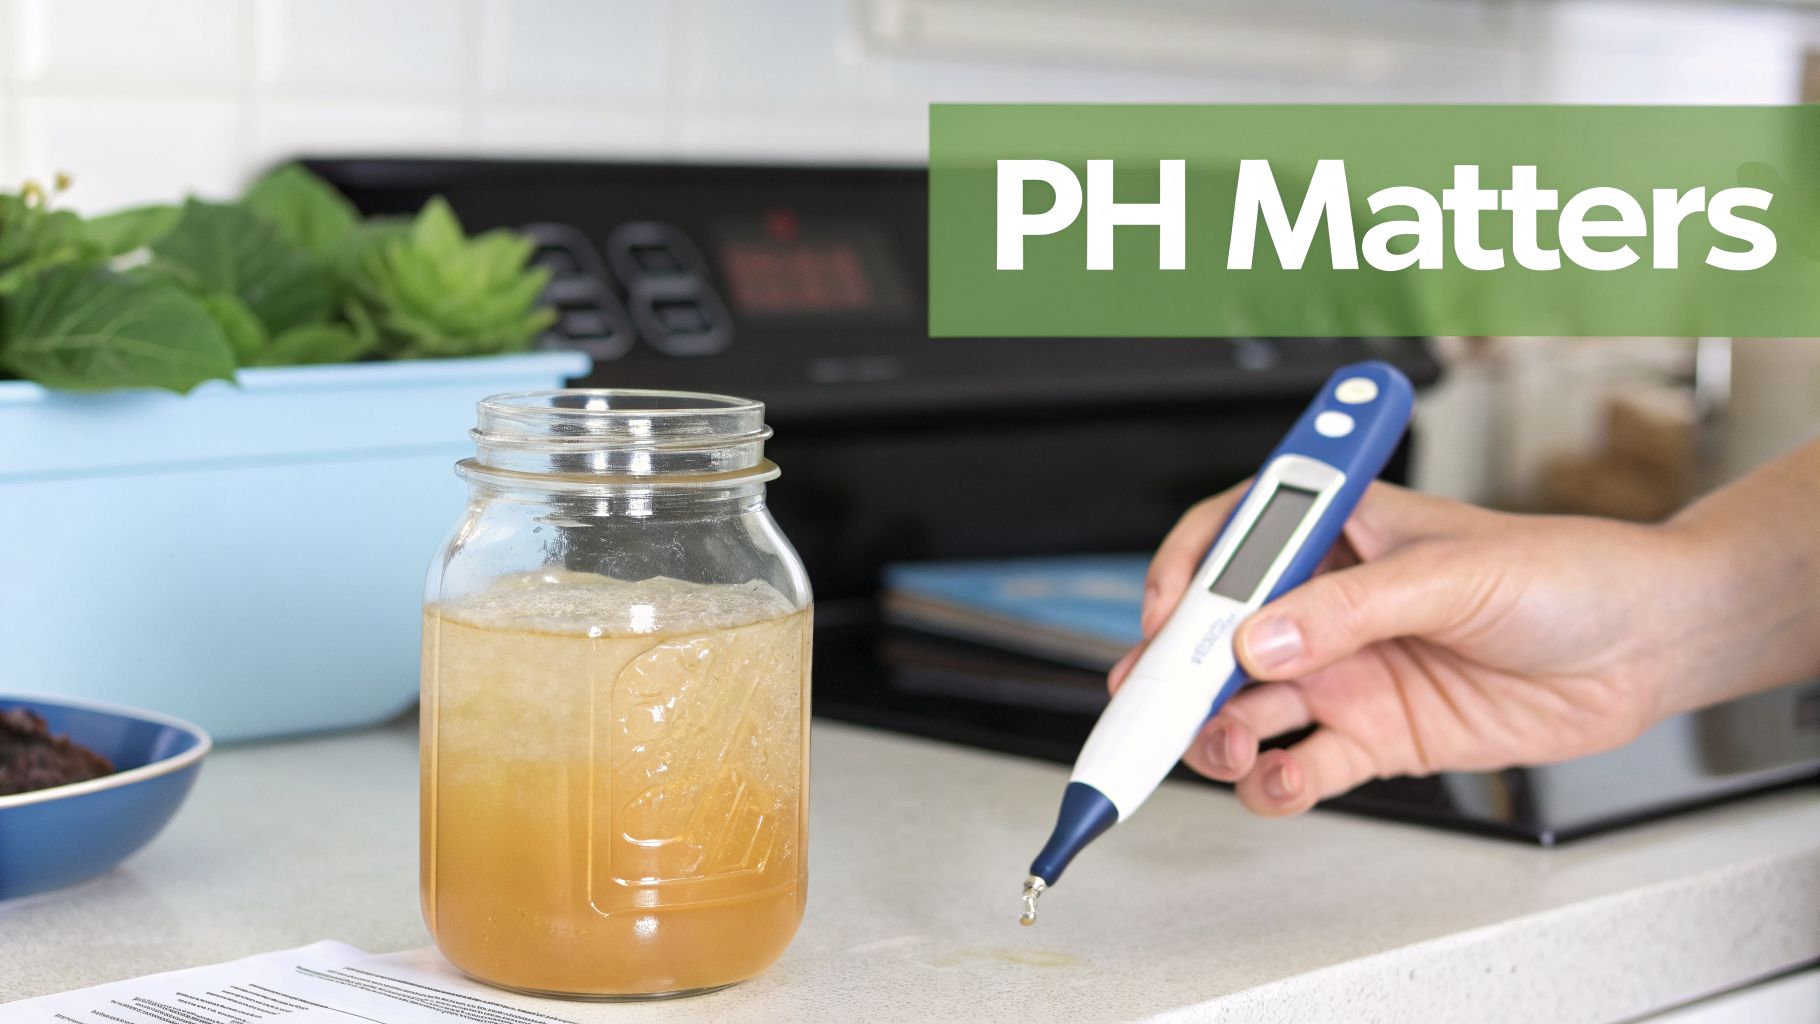
Master Your Brew: A Guide to Using a Digital pH Meter for Kombucha

Before we even get to the tools, let's get one thing straight: pH is the single most important number in your entire kombucha brew. This isn't just a technical detail for chemistry nerds. Understanding and controlling your kombucha's pH is the difference between a delicious, safe brew and a disappointing, or even risky, one. For this crucial job, a digital pH meter is the only tool that truly delivers.
Why pH Is Your Secret to Perfect Kombucha
If you've ever had one batch turn out perfectly tangy and the next fall completely flat, the reason is almost always pH. Think of pH as your fermentation's bodyguard and guide. It's a simple measurement of acidity, but it controls everything from flavour and fizz to safety.
Keeping a close eye on your brew’s pH with a digital meter isn't just about collecting data. It’s about turning a hopeful experiment into a reliable, repeatable process.
It’s a safety net. A low pH (high acidity) creates a hostile environment where mould and other nasty bacteria just can't get a foothold. Getting your starting brew to a pH of 4.5 or lower is the single most effective thing you can do to protect it.
It’s how you dial in the flavour. That signature tang you love in kombucha comes from the organic acids that develop during fermentation. By tracking the pH as it drops, you can decide the exact moment to end your first ferment to get that perfect sweet-to-sour ratio.
It keeps your SCOBY happy. Your Symbiotic Culture of Bacteria and Yeast thrives in a specific acidic window. Monitoring the pH means you’re giving your culture the ideal conditions to stay healthy and work its magic, batch after batch.
The Professional’s Tool for Quality and Consistency
This obsession with precision isn't just a home-brewing quirk. Here in Australia’s booming organic beverage market, a digital pH meter is non-negotiable. At PepTea, we rely on meticulous pH control in our HACCP-accredited Hunter Valley brewery to craft the raw, living kombucha our customers love.
We ensure our brew stays within a specific pH range. This fosters a probiotic-rich environment and guarantees every bottle is not only delicious but consistently safe.
For us, a digital pH meter isn't optional—it's the heart of our quality control. It’s our guarantee that every bottle of PepTea kombucha is a living, probiotic-rich drink you can trust.
Ultimately, once you understand the fundamentals of what kombucha is, the importance of pH just clicks. By taking charge of this one number, you gain the confidence to refine your process, experiment with flavours, and brew amazing kombucha every single time.
Choosing the Right Digital pH Meter for Your Brew
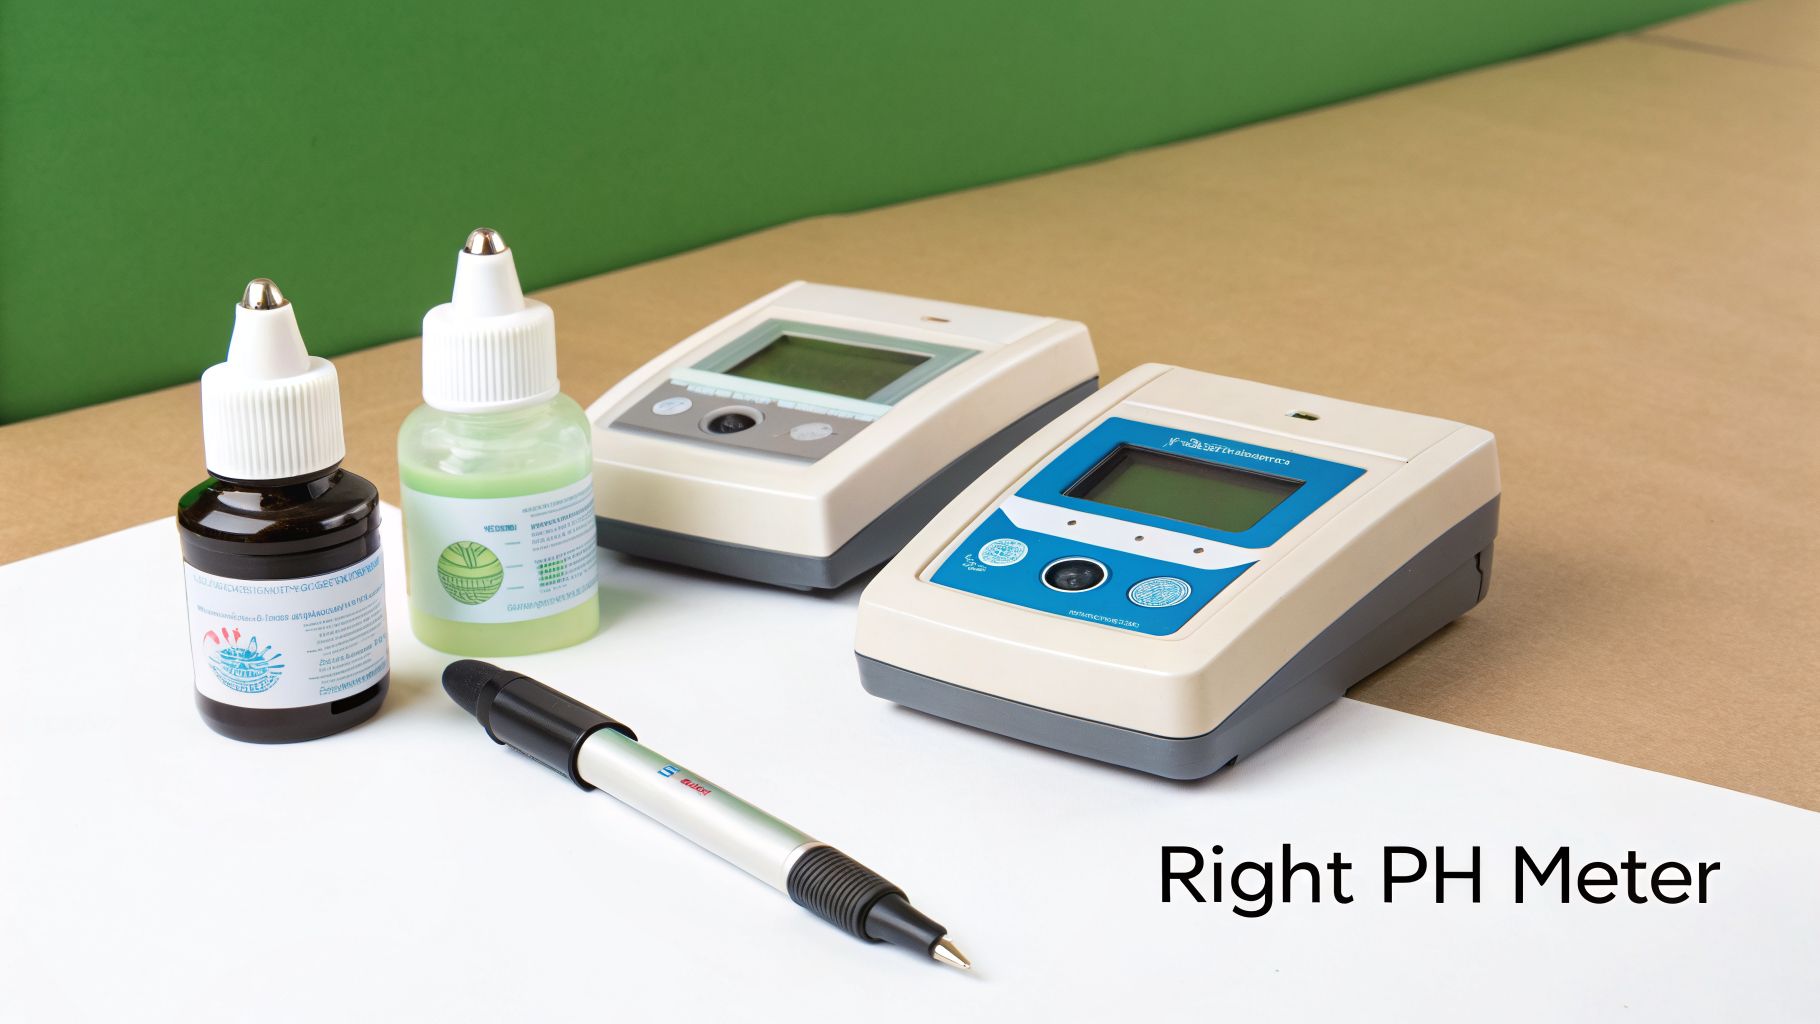
Not all pH meters are created equal, and stepping into the market for the first time can feel a bit overwhelming. Let’s cut through the technical jargon and focus on what you actually need to brew brilliant kombucha. The goal is a reliable tool that gives you accurate readings, not a lab-grade gadget with bells and whistles you’ll never use.
The most common and accessible option for home brewers is the pen-style digital pH meter. They’re affordable, portable, and more than capable of providing the accuracy you need. At the other end of the spectrum are the robust benchtop models, like the ones we use in our commercial brewery, which offer the highest level of precision but are serious overkill for a home setup.
For your kitchen bench, a quality pen meter is the perfect place to start. A compact and easy-to-use option like this Mini pH Water Tester Meter is a great example of what to look for.
Key Features That Actually Matter
When you're comparing models, it's easy to get lost in the specs. To get trustworthy readings for kombucha, you only really need to pay attention to a few key things.
Resolution of 0.1 pH: For brewing, a resolution of 0.1 pH is perfectly fine. You might see meters offering 0.01 resolution, but that’s a level of precision needed for a scientific lab, not your brew. A 0.1 resolution clearly shows you when your kombucha has dropped from a starting pH of 4.5 to a ready-to-bottle 3.0.
Automatic Temperature Compensation (ATC): This one is non-negotiable. The temperature of your liquid directly impacts its pH reading, and ATC automatically corrects for this. It ensures your reading is accurate whether your sample is at a cool 20°C or a warmer 28°C. Without it, you’re just guessing.
A Replaceable Electrode: The electrode—that little glass bulb at the end of the meter—is the most sensitive part of the device. It's also the part that degrades over time. Choosing a meter with a replaceable electrode is a much smarter long-term investment. When it eventually wears out, you can just swap it for a new one instead of buying a whole new meter.
To help you decide, here’s a quick breakdown of what to look for when you're shopping around.
Digital pH Meter Feature Comparison for Brewers
| Feature | What to Look For | Why It Matters for Kombucha |
|---|---|---|
| Resolution | 0.1 pH | Perfectly adequate for tracking fermentation. A resolution of 0.01 is unnecessary and often comes at a higher price. |
| Automatic Temp. Compensation | "ATC" listed as a feature | Guarantees accurate readings as your kombucha's temperature fluctuates, which it will. This is a must-have. |
| Electrode Type | Replaceable glass bulb | The electrode is a consumable part. Being able to replace it saves you from buying a whole new device down the line. |
| Calibration | 1 or 2-point automatic calibration | Makes it simple to keep your meter accurate using pH buffer solutions. Avoids tricky manual adjustments. |
| Display | A clear, backlit LCD screen | You’ll often be taking readings in different lighting conditions. A backlit screen is a small feature that makes a big difference. |
This move towards precision isn't just a niche trend. While global data showed digital pH meters capturing 64.1% of the market in 2021, Australia's own homebrewing scene reflects this shift. Accessible pen-style models are allowing brewers to achieve the same accuracy that was once reserved for professional labs.
Ultimately, choosing a meter with these core features sets you up for consistent, safe, and delicious kombucha from your very first batch.
By prioritising these essential features, you ensure your digital pH meter is a reliable partner, not just another gadget. It sets you up for consistent, safe, and delicious kombucha from your very first batch.
Making Calibration a Simple Brewing Habit
An uncalibrated digital pH meter is just an expensive toy. Think of calibration as teaching your meter what "neutral" and "acidic" actually mean—without it, every number it shows you is built on a faulty foundation. While it might sound technical, getting this right is the single most critical habit for trustworthy readings. It's a non-negotiable step in our Hunter Valley brewery, and it should be in your kitchen, too.
The whole process is much simpler than it sounds. You’re just using standard buffer solutions, which are pre-mixed liquids with a precise, stable pH. For kombucha, most meters use a two-point calibration with a neutral pH 7.0 solution and an acidic pH 4.0 solution. This perfectly brackets the range you'll be working in.
Your Quick Calibration Checklist
Making this a pre-brew ritual only takes a few minutes, but it's the best insurance policy for a safe and delicious batch. It's the only way to be certain you can trust the numbers.
Rinse First, Always: Before you start and between each step, give the meter's electrode (the glass bulb at the end) a good rinse with distilled or deionised water. Never use tap water. The minerals can mess with your readings and slowly damage the sensitive electrode.
Start with pH 7.0: Dip the clean electrode into your pH 7.0 buffer solution. Swirl it gently and just wait for the reading on the screen to stop moving. Now, follow your meter’s instructions to lock this in as your first calibration point.
Rinse Again: Pull the probe out, rinse it thoroughly with distilled water, and gently pat it dry with a clean, soft tissue. This is crucial to avoid contaminating your buffer solutions.
Calibrate with pH 4.0: Now, dip the electrode into your pH 4.0 buffer solution. Again, just wait for the reading to stabilise, then set this as your second point.
And that's it. Your meter is now properly calibrated and ready to give you data you can actually rely on for your brew.
Calibration isn’t just a “nice-to-do” task; it's a non-negotiable part of every single brew day. A quick calibration before you start is the only way to be certain that your digital pH meter is providing accurate data, protecting your kombucha from the very first step.
How Often Should You Calibrate?
For absolute peace of mind and the most consistent results, we strongly recommend calibrating your digital pH meter before every new brewing session.
If you brew weekly, you calibrate weekly. An electrode’s sensitivity can drift over time from temperature changes, how it’s stored, and general use. By making calibration the very first step of your brew day, you eliminate any doubt and make sure every batch starts on the right foot.
How to Correctly Measure Your Kombucha's pH
Alright, you've got your calibrated digital pH meter in hand. Now comes the part that really matters: getting a reliable pH reading from your brew. It’s a straightforward process, but your technique makes all the difference between a guess and a genuinely useful measurement.
The single most important rule? Never dip your meter directly into your main brewing vessel. Always, always take a small, clean sample to test. It’s a simple habit that completely removes the risk of contaminating your entire batch.
Taking an Accurate Sample
First up, grab a clean ladle or measuring cup and draw out a small amount of kombucha—about 50-100ml is more than enough. Pour this into a separate, clean glass or small jar. This little sample is your testing ground.
Now, let that sample sit for a few minutes until it reaches room temperature. pH readings are sensitive to temperature, and letting the liquid stabilise allows your meter’s Automatic Temperature Compensation (ATC) to do its job properly. This step is crucial for an accurate reading.
Once it's at room temp, submerge the clean electrode of your pH meter into the sample. The glass bulb at the tip should be completely covered. Give it a gentle swirl to make sure the liquid is circulating around the probe, then hold it still. Wait for the numbers on the screen to stop fluctuating. That final, stable number is your kombucha's true pH.
Key Moments to Measure Your Brew
Knowing when to measure is just as critical as knowing how. A pH reading at the right time gives you a window into what’s happening inside your fermenter and empowers you to guide the process.
Here are the key checkpoints in any brew cycle:
The Start of Your Batch: Take your very first reading right after adding your starter tea and SCOBY to your fresh sweet tea. You’re looking for a starting pH of 4.5 or lower. This confirms the batch is acidic enough from the get-go to protect against mould and other unwanted microbes.
A Few Days In: Check the pH again a few days into fermentation. You should see the number steadily dropping. This is your proof that the culture is alive, well, and actively converting sugars into those healthy organic acids.
Nearing the End of the First Ferment: This is where your personal taste comes in. As the pH drops, the brew becomes more tart and complex. We recommend starting to taste your kombucha once the pH hits about 3.5. Most brewers find their sweet spot somewhere between pH 2.8 and 3.2.
Before you can trust these readings, you need to be sure your meter is ready. The simple rinse-calibrate-ready process is the foundation of good measurement.
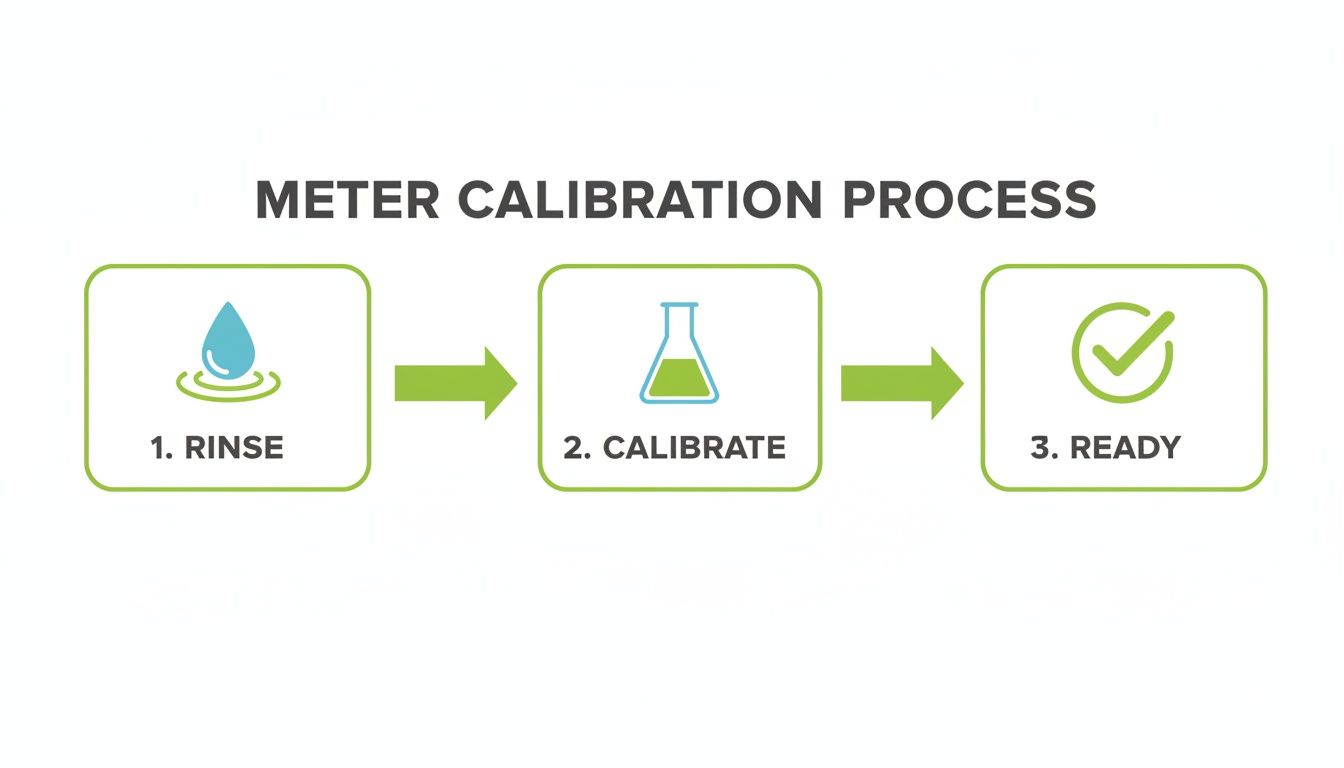
This simple workflow—rinsing the probe, calibrating with buffer solutions, and then taking your reading—is what gives you data you can actually rely on.
Mastering this rhythm of testing at key moments gives you the control to steer your brew towards the exact flavour profile you want. It’s how you move from simply making kombucha to crafting it with intention.
Target pH Ranges for Kombucha Fermentation
To make things even clearer, here’s a quick guide to the ideal pH levels at each stage of your brew. Think of it as a roadmap for your fermentation journey.
| Brewing Stage | Target pH Range | What This Tells You |
|---|---|---|
| Starting the Brew | Below 4.5 | Your brew is acidic enough to be safe from mould and bad bacteria. |
| Mid-Fermentation | 3.5–4.0 | Fermentation is active, and the culture is working as it should. |
| End of First Ferment | 2.8–3.5 | The kombucha is reaching maturity. Time to start tasting for your preferred balance of sweet and tart. |
| Final Product (Bottling) | 2.5–3.2 | Your brew is finished, stable, and ready for bottling or a second fermentation. |
Using this table helps you interpret what your meter is telling you at a glance. It turns a simple number into actionable information, ensuring every batch you make is not only delicious but also consistently safe.
What Your pH Readings Are Telling You
Your digital pH meter is giving you data, but what does that data actually mean? Think of your meter as a translator, telling you the secret story happening inside your brew. Learning to interpret these numbers is what separates a good brewer from a great one, giving you the confidence to solve problems before they even start.
When you understand the story your pH is telling you, you move beyond just following a recipe. You start truly crafting your kombucha, able to diagnose issues and make smart adjustments on the fly.
Your Starting pH Is Too High
You’ve mixed your sweet tea, added your SCOBY and starter liquid, and your meter flashes 4.8. This is probably the most common—and most critical—issue to catch early on. Any starting pH above 4.5 leaves your brew wide open to mould and other unwanted microbes.
The Fix: The solution here is simple: you need to add more acidity. You have two solid options:
- Add More Starter Tea: This is always the best method. Just add another splash of strong, mature starter tea from a previous batch and re-test your pH.
- Add Distilled White Vinegar: If you’re completely out of starter tea, a tablespoon of distilled white vinegar will do the trick and drop the pH into the safe zone. Use this one sparingly, though, as it can subtly change the final flavour of your kombucha.
A high starting pH is a red flag, not a failed brew. Catching it and correcting it right away with your pH meter is the single most important thing you can do to guarantee a safe and successful fermentation.
Fermentation Stalls and the pH Is Not Dropping
It's been three days, and your pH has barely moved from 4.4. This is a classic sign of a stalled or sluggish fermentation. It means your little team of yeast and bacteria isn't working hard enough to produce the acids that naturally lower the pH over time.
This is where a digital pH meter proves its worth. It gives you concrete evidence that something is off, long before you’d notice a lack of fizz or flavour development.
There are a few likely culprits when a brew stalls.
Your Brewing Temperature Is Too Cold: Kombucha cultures love a warm environment, ideally somewhere between 24–29°C. If your house is on the cool side, fermentation will slow to a crawl. The fix is as simple as moving your brewing jar to a warmer spot, away from any draughts.
Your Starter Culture Was Weak: A starter tea that wasn't quite mature enough, or a SCOBY that's been hibernating in the fridge for a while, might not have the oomph to acidify a whole new batch. Always make sure you're using a robust, active starter tea.
Incorrect Ingredient Ratios: Using too little starter tea for the volume of sweet tea is a very common misstep. A good rule of thumb is to use 10-15% starter tea relative to your total batch size. For a standard 4-litre batch, that means using at least 400ml of strong starter liquid.
By paying close attention to what your digital pH meter is telling you, you can pinpoint the exact cause of the problem and, more importantly, learn from it. This knowledge doesn't just save your current batch; it makes every future brew better. It’s all part of the journey to understanding the incredible process behind the many health benefits of kombucha that we all love.
Essential Care for Your Digital pH Meter
Your digital pH meter is a sensitive piece of scientific equipment. A little care goes a long way, and neglecting it is the fastest way to get frustratingly inaccurate readings that can throw off an entire batch of kombucha.
Think of it like any other critical tool in your brewing setup. Just as you look after your SCOBY, your meter needs a bit of attention to keep it performing reliably. A well-maintained meter is a partner you can trust.
Cleaning and Handling Your Probe
The glass bulb at the tip of the probe is where all the magic happens. This electrode is also the most fragile part of the whole device. The absolute golden rule is to never touch the glass bulb with your fingers. The oils on your skin can coat the glass, seriously interfering with its sensitivity and leading to unreliable readings.
Adopting a quick cleaning routine after every single use is non-negotiable. It only takes a few seconds.
- Rinse immediately. As soon as you’re done with your measurement, rinse the probe thoroughly under a gentle stream of distilled or deionised water. This will wash off any residual kombucha or tea.
- Blot, don't wipe. Take a soft, lint-free tissue (like a lens cloth or special lab wipe) and gently blot the probe dry. Wiping it can create a static charge that messes with your next reading, and you risk scratching the delicate glass.
This simple rinse-and-blot process is the single most effective thing you can do to maintain your meter’s accuracy day-to-day.
Storage The Right Way
How you store your meter between brews is just as critical as how you clean it. In fact, improper storage is probably the number one reason pH meters fail before their time.
The most important rule of storage is to never store your electrode in plain water. Storing the probe in distilled, deionised, or even tap water will effectively "kill" it. It leaches the essential reference solution out of the glass bulb, rendering it useless.
Always use a proper pH storage solution, usually supplied by the meter’s manufacturer. This solution is specifically designed to keep the electrode hydrated and in perfect working condition.
Just pour a small amount into the meter’s protective cap, making sure the bulb will be submerged, and click it back into place. This one simple habit will ensure your digital pH meter is ready and reliable for your next brew day.
Your Questions on pH Meters Answered
Getting serious about your brew always brings up new questions. Once you’ve got a digital pH meter in your hands, it’s only natural to wonder if you’re using it right and what the numbers actually mean. As passionate Aussie brewers ourselves, we get these questions all the time. Let’s clear up a few of the most common ones and get you brewing with confidence.
Can I Just Use pH Test Strips for My Kombucha?
While pH strips are definitely better than guessing, they just aren’t accurate enough for brewing kombucha. The natural colour of your tea easily stains the paper, which makes matching it to the colour chart a real shot in the dark. You’re only getting a rough estimate, and that’s not good enough when consistency and safety are on the line.
To be certain your starting pH is safely below 4.5 and to keep mould at bay, you need the precision of a digital meter. It takes all the guesswork out of the equation, which is the only way to replicate your best batches and ensure every single brew is a safe one.
How Often Do I Really Need to Calibrate My Meter?
For readings you can actually trust, you should calibrate your meter before you start a new brewing session. If you brew weekly, you calibrate weekly. It might sound like a lot, but it’s a quick job and the only way to be sure your readings are spot on.
A meter’s electrode drifts over time with temperature changes and normal use. Think of a quick pre-brew calibration as cheap insurance for a successful, safe batch of kombucha. It's non-negotiable.
My Kombucha's pH Is Not Dropping. What Is Wrong?
If your pH reading stays stubbornly high a few days into your brew, the problem almost always comes back to your starter culture. Either the culture itself is a bit weak, or you simply didn't use enough strong starter tea to acidify the fresh sweet tea properly.
The other common culprit is temperature. If your brewing space is too cold, everything slows to a crawl. Your culture does its best work at around 24–29°C. As a firm rule, always use at least 10-15% mature starter tea from your last batch to give the new one a strong, acidic kick-start.
Is It Safe to Put the pH Meter Directly into My Brewing Jar?
It’s much better practice not to. You don’t want to risk contaminating your entire brew. The best approach is to take a small sample from your brewing vessel and pour it into a separate, clean glass.
Let that sample cool to room temperature first, then pop your calibrated meter in. This simple habit guarantees an accurate reading without introducing any unwanted microbes into your main batch.
Ready to take control of your brew? At PepTea, we're passionate about helping Australians discover the benefits of truly authentic, healthy beverages. From our sugar-free kombucha brewed right here in NSW to our premium organic Japanese Matcha, quality is at the heart of everything we do.
Explore our range of organic teas and kombucha supplies at peptea.com.au to learn more.
Non-Alcoholic Cafe Menu: Why Gen Z Changed the Game
The story that has been circulating for a few years now — that Gen Z have stopped drinking — is not quite right. And the correction matters more for your non-alcoholic cafe menu than the original claim ever did.
Australian café culture is in the middle of a genuine generational shift in drinking behaviour, but it is not a shift toward abstinence. It is a shift toward intentionality. Understanding that distinction is one of the more useful things a café operator can do with their menu in 2026, because the commercial opportunity it opens up has nothing to do with catering to people who don’t drink and everything to do with what happens when a customer wants something worth ordering.
The Reality Is More Nuanced Than the Headline
The vast majority of Gen Z drink alcohol. The difference between this generation and the ones before it is not abstinence. It is how, when, and why they drink.
What Has Actually Changed
Gen Z prioritise experience over volume. They choose concept-led venues, make value-conscious decisions about when a drink is worth it, and are considerably more likely than previous generations to simply not drink on a given occasion without it being a statement. Research from Flinders University points to digital socialising, rising living costs, and health awareness as the forces reshaping how young Australians spend their time and money. The result is a generation that drinks less frequently but thinks more carefully about what it orders when it does.
What This Is Not
This is not a generation in revolt against alcohol culture. It is a generation that has grown up with more choices, more information, and a different relationship with social occasions than the generations before them. Non-alcoholic does not mean anti-social. It means different social, and cafés are better placed than almost any other venue type to meet that need.
How Big Is the Non-Alcoholic Market in Australia?
The non-alcoholic beverages market in Australia has grown to a scale that makes it impossible to treat as a niche, with kombucha, alcohol-free beer, and botanical drinks now accounting for significant and growing shares of what Australians consume at cafés, restaurants, and bars. The commercial case does not rest on generational data alone.
A Mainstream Shift, Not a Niche One
What has changed most noticeably is where the growth is coming from. It is no longer driven by people who never drank. It is driven by people who drink and are choosing not to on an increasing number of occasions. That is a fundamentally different customer, and one who will judge a non-alcoholic cafe menu option by the same standard they apply to everything else: is it worth ordering, or is it an afterthought?
The Behaviour Worth Understanding: Zebra Striping
The most practically useful concept to come out of the research on generational drinking behaviour is not sobriety. It is zebra striping: the practice of alternating between alcoholic and non-alcoholic drinks within a single social occasion.
Why This Changes the Menu Conversation
Zebra striping has become mainstream behaviour among younger Australians, and it reframes the non-alcoholic opportunity entirely. The customer is not choosing between drinking and not drinking. They want both options available across the course of an occasion, and they want the non-alcoholic choice to feel equally considered, equally interesting, and equally worth paying for.
That is a fundamentally different brief to “provide an option for people who don’t drink.” It means the non-alcoholic drink on your menu is not a concession. It is competing directly for attention, and it will be judged by the same standard as everything else: does it taste interesting, does it look worth ordering, and does it create a moment?
What Winning That Competition Looks Like
A well-crafted non-alcoholic signature drink is not a lesser option. It is a different kind of drink with its own flavour story, its own visual identity, and its own reasons to be chosen — whether that is a kombucha with fruit and botanicals, a cold coffee mocktail with a seasonal twist, or a warm cacao or matcha-based drink that gives a customer something to come back for. The café that builds across this full spectrum deliberately is offering something that competes on its own terms rather than existing as an apology for the absence of alcohol.
What Is Actually Appearing on Non-Alcoholic Cafe Menus?
Three categories are emerging as permanent fixtures in forward-thinking Australian cafés in 2026, each reflecting a different dimension of the non-alcoholic shift. The best non-alcoholic cafe menus draw from all three rather than defaulting to a single format.
Coffee Mocktails
Complex, non-alcoholic drinks using espresso or cold brew as a base, mixed with botanical syrups, fresh juices, and artisanal sodas, are becoming a signature category in their own right. Leading café groups have already declared 2026 the year of the signature drink, with drinks like coconut cloud strawberry matcha, dragon lychee coffee mocktails, and banana bread matcha appearing on menus. These drinks sit at the intersection of coffee culture and the non-alcoholic movement, offering cafés high-margin, experience-driven products that customers talk about and photograph.
Tea-Based Alternatives
With matcha supply remaining tight through 2026, leading cafés are developing a new wave of tea-driven beverages: hojicha lattes, strawberry sencha spritzes, roasted genmaicha shakes, and botanicals with citrus, rose, or yuzu notes. These create a playground for colour, theatre, and visual identity, borrowing directly from cocktail bar techniques while remaining entirely within the café’s existing equipment and skill set.
Crafted Kombucha and Botanical Infusions
Kombucha has completed its journey from health food aisle to bar menu. The direction of travel across all three categories is the same: less sugar, more balance, and juice-led bases rather than syrup-heavy constructions. Younger customers in particular are increasingly sensitive to over-sweetness, and a drink that feels balanced and adult will consistently outperform one that feels like a soft drink with ambitions.
The Commercial Case for a Considered Non-Alcoholic Cafe Menu
Non-alcoholic signature drinks built around functional ingredients carry a margin profile that is difficult to match elsewhere on a café menu. A cacao-based drink with maca and cinnamon, a spiced matcha latte, and a hojicha and honey drink: each costs a fraction of what a cocktail does to produce but sits comfortably at a speciality coffee price point.
Loyalty and Differentiation
Beyond the margin, the loyalty argument is compelling. A customer who visits specifically for a drink they cannot find elsewhere has a fundamentally different relationship with a venue than one who orders a standard flat white. Signature non-alcoholic drinks create occasions — morning rituals, afternoon treat moments, the kind of drink someone describes to a friend — that drive frequency without requiring a food order every time.
Most Australian café menus still treat non-alcoholic options as an afterthought: a few soft drinks, a sparkling water, perhaps a kombucha from the fridge. Cafés that build this category deliberately are, right now, the exception. That will not last, but it is a genuine competitive advantage whilst it does.
If kombucha is the category you want to start with, it is one of the more straightforward ways to signal that your non-alcoholic range has been thought about. Browse the Opera Foods kombucha range to find the right fit for your menu.
This article was reproduced on this site with permission from operafoods.com.au the “Wholesale Café Suppliers”.
See original article:- Non-Alcoholic Cafe Menu: Why Gen Z Changed the Game
Making Kombucha Granita: Texture That Transforms

Simple to make and surprisingly impressive, the magic of kombucha granita lies in its texture. Frozen kombucha isn’t sorbet, it’s granita, which means visible ice crystals that crunch delightfully against smooth ice cream or silky mousse. Elegant, Instagram-worthy, and undeniably sophisticated, it reads as high-effort even though anyone can master it in a weekend.
This isn’t complicated cooking. It’s one ingredient, a fork, and an understanding of when to pause.
What You’ll Need
For the Granita
- 350ml kombucha (try PepTea lime and ginger organic sugar-free kombucha)
- 1 tablespoon caster sugar
- 1 teaspoon fresh citrus zest
For Making It
- One shallow tray, roughly 20cm square
- A fork
- An ice cream scoop
Time Investment: Five minutes of actual work, spread across two to three hours of freezing (with four quick scrapes in between).
How to Make Kombucha Granita
Pour and Freeze
Pour your kombucha into the tray. Add the sugar and stir thoroughly. It will dissolve more slowly in cold liquid, but the fork scraping during freezing helps the process along. If you prefer fully dissolved sugar from the start, warm the kombucha first to about 40°C, dissolve the sugar, then cool completely before freezing. Add a scrape of citrus zest and slide it into the freezer immediately.
The Scraping (This Is Everything)
At 30 minutes, remove the tray. Run your fork across the entire surface, scraping gently. You’re not being aggressive here. You’re breaking up the ice crystals that want to form a solid block around the edges. The mixture should look like wet sand now, not ice.
At 60 minutes, scrape again. Push slightly deeper this time, bringing the fork through the centre. You’ll notice the whole thing shifting from liquid to something granular, almost snowy.
At 90 minutes, scrape one final time. It should feel distinctly icy now. Push through any chunks that have started bonding together. Return it to the freezer for 30 minutes.
Serve It
At 120 minutes total, remove the tray for a final gentle scrape if needed. Scoop directly into bowls or straight onto your finished desserts. Granita should move easily with the scoop, not fight you. If it’s become too hard, leave it on the bench for two or three minutes to soften slightly.
How Kombucha Granita Works
The sugar lowers the freezing point, which is why it freezes at a lower temperature than pure water and creates smaller ice crystals when frozen. This means smaller ice crystals form, and those smaller crystals are what give granita its signature feel in your mouth: crunchy without being harsh.
When you scrape every 30 minutes, you’re interrupting the freezing process deliberately. Without scraping, one solid block would form. With it, thousands of small crystals suspend themselves in the kombucha liquid. Freeze that, and you have a texture that works.
Carbonation disappears when kombucha freezes into granita. The CO2 gas escapes as ice crystals form, so your finished granita won’t be fizzy like a kombucha drink. But here’s what’s surprising: when the granita melts on your tongue, you still experience a pleasant tingle, just like drinking kombucha with its bubbles intact. That sensation isn’t from carbonation—it’s from the fermented compounds in kombucha itself. The acids, probiotics, and fermentation byproducts that define kombucha’s character persist in the granita. You lose the fizz, but you keep the feeling.
Three Ways to Serve This
First: Dark Chocolate Foundation
Build this from dark chocolate mousse or ice cream as your base. Top it with 30ml of granita. Finish with sesame seeds or a dusting of cocoa powder.
Why it works: Bitter chocolate and fermented tang create contrasting flavours, whilst the cold, crunchy granita against smooth creamy mousse gives textural contrast. The sour edge and citric tang cut through richness.
Second: Vanilla Canvas
Begin with vanilla ice cream or panna cotta. Top with kombucha granita. Finish with fresh citrus zest or an edible flower.
Why it works: It is just sheer simplicity, and somewhere that kombucha granita can really shine. A story of contrasts in motion.
Third: Granita Alone
Scoop granita into a clean glass bowl. A single garnish only: fresh herb, citrus zest, or edible flower. Nothing else.
Why it works: You’re letting the granita speak entirely for itself. No other ingredients to hide behind. This is not about contrast but the granita itself. Minimal elements mean texture and flavour become everything.
In Italy, granita is often served with a small spoonful of whipped cream on top for that tiny touch of contrast.
The Practical Side
Finished granita keeps frozen for two to three days. After that, ice crystals start bonding together, and the texture suffers. Make fresh batches every two to three days rather than trying to freeze ahead for a week. Store it in a covered tray so frost doesn’t build up, and flavours from other frozen items don’t travel.
When Things Don’t Go Quite Right
Your granita froze solid: Set phone reminders for each 30-minute scrape. If this happens, leave it on the bench for three to five minutes, then scrape gently. It’ll soften enough to scoop.
It’s too wet: You either added too much sugar or started with warm kombucha. Return it to the freezer for 30 minutes. Next time, use just 1 tablespoon of sugar and take kombucha straight from the fridge.
Crystals feel too fine: You froze it without scraping, or your freezer is extremely cold. Add 2 tablespoons of water and refreeze with regular scraping every 30 minutes. Larger crystals will form.
Getting Started This Week
This weekend: Make one batch. Taste it. Understand the texture and flavour without any pressure.
Next week: Make two batches. Serve one in-house during service. Taste every dessert your team makes with it. Notice what customers respond to.
The week after: Based on what you’ve learned and how sales are tracking, decide on batch frequency. Most operators settle on one batch per service once they find their rhythm.
The Real Value
Kombucha granita is simple cooking. One ingredient. A fork. Four pauses over two hours. Technique rather than complexity. It also taps nicely into the trend for tangy desserts.
But perception is different. Customers see granita and recognise sophistication immediately. They taste textural novelty. So they photograph it and share it with friends. Then they come back asking for it specifically.
This is what elevates a dessert menu. Not more ingredients or more labour. Intentionality. Texture. Understanding what makes something memorable in a customer’s mouth.
Looking for quality kombucha? Pep Tea kombucha from Opera Foods is organic, sugar-free, and shelf-stable. Available to order online wholesale today.
This article was reproduced on this site with permission from operafoods.com.au the “Wholesale Café Suppliers”.
See original article:- Making Kombucha Granita: Texture That Transforms
Does Kombucha Have Caffeine?

Kombucha has become somewhat of a superstar in the world of health drinks, praised for its unique, tangy flavour and potential benefits. However, one question many newcomers often ask is: Does kombucha contain caffeine? The simple answer is yes, but the amount of caffeine depends on several factors, which we’ll break down for you in this post. Keep reading to learn everything about kombucha and how its caffeine levels compare to your morning coffee or tea.
What Exactly Is Kombucha?
Before we get into specifics, it’s helpful to understand what kombucha is. At its core, it is a fermented tea drink made by combining tea, sugar, and a SCOBY (Symbiotic Culture of Bacteria and Yeast). This magical mix ferments over time, transforming the tea into the slightly fizzy, tangy drink people love. Beyond its unique taste, it is also known for being packed with probiotics and antioxidants, contributing to its reputation as a health-boosting beverage.
Kombucha is typically made with either black or green tea, both of which naturally contain caffeine. This is where caffeine starts to come into play. Spoiler alert: while kombucha does contain caffeine, it’s not quite on the same level as your regular cup of coffee.
Does Kombucha Contain Caffeine?
Yes, kombucha does contain caffeine, and the reason for that is simple—it’s brewed from tea! Whether the base is black, green, or another type of tea, the caffeine content from the tea itself carries over into the finished drink. However, there’s good news for those keeping an eye on caffeine intake. Kombucha generally has much less caffeine than its non-fermented tea counterpart.
The fermentation process plays a role here. While fermenting, the yeast and bacteria in the SCOBY consume some of the tea’s caffeine to fuel the process. This leaves kombucha with lower caffeine levels than the tea it started with.
Still, the final amount of caffeine depends on several variables, which we’ll explore next.
What Influences Caffeine Levels in Kombucha?
Several factors can influence just how much caffeine is in your bottle or glass. Here’s what makes the difference.
1. Type of Tea Used
The choice of tea is the main factor. Black tea generally contains more caffeine than green tea, so kombucha made with black tea will typically have higher caffeine levels. Herbal teas, on the other hand, are naturally caffeine-free, so kombucha made with these will have minimal or no caffeine at all (depending on whether a regular tea blend is also added).
2. Brewing and Fermentation Time
The longer it ferments, the more the bacteria and yeast consume caffeine. A shorter brew time might leave you with slightly more caffeine in your kombucha, while a longer fermentation can lower it further.
3. Homemade vs Store-Bought
When making kombucha at home, you have control over the tea you use and the brewing process. This gives you flexibility in terms of caffeine content. Store-bought varieties typically list their caffeine levels on the label, but it tends to stay in the low range to suit a wider audience.
How Much Caffeine Is in Kombucha Compared to Other Drinks?
For most people, the caffeine in kombucha isn’t anything to stress about. To put it into perspective…
- Kombucha: 10-25 mg of caffeine per 8-ounce serving.
- Coffee: 95 mg or more per 8-ounce cup, depending on the roast and brew method.
- Traditional tea (black or green): 30-50 mg per 8-ounce cup.
- Soda: Around 30-40 mg per can (though this varies by brand).
With these numbers in mind, kombucha’s caffeine content is relatively low, making it a great choice if you’re looking for a lighter boost rather than a big jolt.
Can You Find Low-Caffeine Kombucha?
If you’re sensitive to caffeine or just looking to cut down, there are ways to enjoy booch without worrying about the jitters.
Opt for Herbal Tea
Varieties made from herbal teas—like chamomile or hibiscus—often have little to no caffeine since herbal teas are naturally caffeine-free. This is an excellent option for those sensitive to caffeine or drinking kombucha later in the day.
Go for Decaffeinated Tea
Another approach is using decaf black or green tea to brew kombucha. This way, you can enjoy the classic tea base but without the caffeine. Many store-bought brands offer low-caffeine or decaf options, so be sure to check labels when shopping.
Experiment with Fermentation Time
If you’re brewing at home, letting it ferment for slightly longer can further reduce caffeine content. Just be cautious that over-fermenting might make the flavour a bit too tart.
Who Should Watch Their Caffeine Intake?
Some groups might want to keep track of how much caffeine they’re consuming. These include:
- Pregnant or breastfeeding women: Caffeine intake should be moderated during pregnancy.
- Children: While small amounts of caffeine are generally fine, it’s good to be mindful if kids are sipping on kombucha.
- Caffeine-sensitive individuals: If even small amounts of caffeine affect you, go for low-caffeine options or try herbal blends.
Final Thoughts
Yes, kombucha does contain caffeine, but it’s typically much less than coffee, tea, or even some sodas. The specific amount depends on the type of tea used, how long it’s brewed, and whether it’s homemade or store-bought. The great news is that there are plenty of low-caffeine and even caffeine-free options available, whether you’re buying from the shop or experimenting with your own brew.
Our raw organic kombucha is the real deal. Brewed with green tea, it is naturally lower in caffeine and completely sugar-free.
Read more about the benefits of kombucha.
This article was reproduced on this site with permission from operafoods.com.au the “Wholesale Kombucha Suppliers”.
See original article:- Does Kombucha Have Caffeine?
Easy Iced Matcha Recipes You Need to Try

If you love matcha but feel like you’ve reached your limit with the classic iced matcha latte, it’s time to shake things up! Matcha is incredibly versatile, and there are so many exciting ways to enjoy its vibrant flavour and health benefits.
From fruity twists to creamy indulgences, we’re here to share some simple and creative iced matcha recipes that will take your matcha game to the next level. Get ready to refresh your routine with these delicious ideas! From classic lattes to unique twists like dessert-style affogatos, we are sure there’s something for every matcha lover.
But first, let’s keep it old school with the OG iced matcha latte.
Classic Iced Matcha Latte
Start with the timeless recipe that highlights matcha’s unique flavour in all its creamy glory.
Ingredients
- 1–2 tsp high-quality matcha powder
- 2 tbsp hot water (around 80°C; not boiling)
- 1 cup milk or a milk alternative (such as almond, oat, or soy)
- Ice cubes
- Sweetener to taste (honey, agave, or simple syrup)
Instructions
- Sift the matcha powder into a bowl to remove any clumps.
- Add the hot water and whisk using a matcha whisk or electric frother until fully dissolved and frothy.
- Sweeten the mixture if desired, adjusting to your taste.
- Fill a serving glass with ice cubes, then pour the milk over them.
- Gently pour the whisked matcha onto the milk, creating a stunning layered effect.
- Stir gently before sipping and enjoy.
Pro tip: For extra froth, shake the milk in a sealed jar before pouring it over the ice.
Read our step-by-step guide on how to make an iced matcha latte.
Coconut Iced Matcha
Transport yourself to a tropical paradise with this coconut-infused twist on the classic iced matcha.
Ingredients
- 1–2 tsp matcha powder
- 2 tbsp hot water (80°C)
- 1 cup coconut milk
- Sweetener to taste (maple syrup pairs beautifully)
- Ice cubes
Instructions
- Sift and whisk your matcha with hot water until smooth.
- Add the sweetener and mix.
- Fill a glass with ice and pour in the coconut milk.
- Top with the matcha mixture for a tropical green gradient.
This version is naturally creamy from the coconut milk and works wonderfully with a touch of sweetness.
Bonus tip: Garnish with toasted coconut flakes for a decorative touch.
Lemon Mint Iced Matcha Refresher
For those sweltering summer days, this citrusy and herby refresher offers a fresh and clean update.
Ingredients
- 1–2 tsp matcha powder
- 3 tbsp hot water
- 1/2 a lemon, juiced
- Sprigs of fresh mint
- 1 cup sparkling water
- Sweetener (optional)
- Ice cubes
Instructions
- Dissolve the matcha in hot water and allow it to cool slightly.
- Muddle a few mint leaves at the bottom of a tall glass.
- Add ice cubes, lemon juice, and sweetener, if desired.
- Pour the matcha mixture into the glass, then top with sparkling water. Stir gently.
Mint and lemon elevate matcha’s natural grassy flavour for a crisp, effervescent drink.
Pro tip: Freeze mint-and-lemon-infused ice cubes for extra flavour.
Matcha Affogato with Ice Cream
When a drink becomes dessert, you know you’re in for a treat.
Ingredients
- 1–2 tsp matcha powder
- 2 tbsp hot water
- 1 scoop of vanilla, matcha, or coconut ice cream
- Sweetener to taste (optional)
Instructions
- Whisk together matcha powder and hot water until smooth.
- Place a scoop of ice cream in a small bowl or glass.
- Slowly pour the warm matcha mixture over the ice cream and watch it melt into creamy goodness.
This indulgent treat is perfect for after-dinner cravings or an afternoon pick-me-up.
Pro tip: Experiment with different ice cream flavours, like pistachio or white chocolate.
Spiced Iced Matcha Chai
Spiced Iced Matcha Chai
A refreshing blend of bold spices, creamy milk, and earthy matcha, this is an interesting twist on a comforting classic.
Ingredients
- 1 teaspoon matcha powder
- 1/2 cup hot water
- 1/2 cup milk (dairy or plant-based)
- 1/4 teaspoon ground cinnamon
- 1/4 teaspoon ground cardamom
- 1/8 teaspoon ground ginger
- Sweetener to taste (optional)
- Ice cubes
Instructions
- Whisk together matcha powder and hot water until smooth.
- Add cinnamon, cardamom, and ginger to the matcha mixture, stirring until thoroughly combined.
- Fill a glass with ice cubes and pour the spiced matcha blend over the ice.
- Gently pour the milk of your choice into the glass, watching as it swirls and combines.
- Sweeten to taste if desired, give it a gentle stir, and enjoy this refreshing, flavourful drink.
Pro tip: For an extra touch, top with a sprinkle of cinnamon or a dollop of whipped cream!
Iced Matcha Lemonade
Looking for a zesty, invigorating twist on your usual matcha? Iced Matcha Lemonade is the perfect blend of vibrant flavours to energise your day.
Ingredients
- 1 teaspoon matcha powder
- 1/4 cup hot water
- 1/2 cup fresh lemonade
- 1/2 cup cold water
- Ice cubes
- Sweetener of choice (optional)
Instructions
- Whisk the matcha powder and hot water together in a small bowl until smooth and frothy.
- Fill a tall glass with ice cubes.
- Pour the fresh lemonade and cold water into the glass, stirring to combine.
- Slowly pour the prepared matcha over the lemonade mixture, allowing it to create a beautiful layered effect.
- Add sweetener to taste if desired, give it a light stir, and enjoy this cool, tangy twist on matcha.
Pro tip: Garnish with a slice of lemon or a sprig of mint for extra flair!
Tips for Experimenting with Iced Matcha
Feeling creative? Here are some ideas to personalise your matcha drinks even further.
Add fruits
Blend in berries, mango chunks, or pineapple for a fruity spin on iced matcha.
Infuse with spices
Cinnamon, cardamom, or even a pinch of cayenne can add a unique edge.
Try flavoured syrups
Vanilla, caramel, or hazelnut syrups can bring a café feel to your creations.
The beauty of matcha drinks is their adaptability, so don’t be afraid to play with your ingredients and find your signature recipe.
Your Next Matcha Adventure Awaits…
Creating iced matcha at home is simpler than you think, and these recipes offer something for every mood and occasion.
Why not pick up some high-quality matcha to get started? Our organic imperial grade matcha is ideal for blending into drinks.
This article was reproduced on this site with permission from operafoods.com.au the “Matcha Tea Suppliers”.
See original article:- Easy Iced Matcha Recipes You Need to Try
How to Make an Iced Matcha Latte

With just a few simple ingredients and a little know-how, it is easy to whip up an iced matcha latte at home.
This guide walks you through everything you need to know, from tools and ingredients to step-by-step instructions. By the end, you’ll not only save money but also have complete control over how sweet and creamy you want your drink to taste.
What Is an Iced Matcha Latte?
An iced matcha latte is a chilled beverage made by combining Japanese green tea powder (matcha), milk (or milk alternatives), and a sweetener of your choice, served over ice. Unlike your standard latte, which uses coffee, this drink relies on matcha for its vibrant colour and unique flavour. Think subtly sweet, grassy, creamy, and oh-so refreshing.
Matcha just so happens to be packed with nutrients, antioxidants, and a moderate caffeine kick minus the jitters—perfect for anyone looking to swap out their regular coffee.
Why Make an Iced Matcha Latte at Home?
Sure, it’s easy to pick one up at a café, but making your own iced matcha latte has some major perks.
- Cost-saving: DIY costs less and lets you make them as often as you’d like.
- Control: Like yours less sweet? Prefer almond milk over oat? Making your own lets you adjust every element to your liking.
- Quality: You get to choose high-quality matcha and avoid any artificial syrups or additives used in store-bought versions.
Now, onto the fun part—learning how to make your new favourite drink!
What You’ll Need to Make an Iced Matcha Latte
Here’s everything you’ll need to get started.
Ingredients:
Matcha Powder (1-2 teaspoons): Choose high-quality, organic matcha.
Hot Water (2 tablespoons): To blend the matcha powder.
Milk or Milk Alternative (1 cup): Oat, almond, soy, or dairy—pick your favourite.
Sweetener (optional): Honey, maple syrup, simple syrup, or no sweetener at all—it’s totally up to you.
Ice Cubes (enough to fill your glass): Because what’s an iced latte without them?
Tools:
Matcha Whisk (Chasen) or handheld frother: This ensures your matcha powder blends smoothly without clumping.
Small Bowl or Cup for mixing the matcha.
Tall Glass for serving.
Step-by-Step Guide to Making an Iced Matcha Latte
Here’s how to make an iced matcha latte that’s smooth, creamy, and (more importantly) Insta-worthy.
Step 1: Prep Your Matcha
Start by sifting 1-2 teaspoons of matcha powder into a small bowl or cup. Sifting removes clumps and ensures your matcha will whisk into a creamy froth.
Next, add 2 tablespoons of hot water to the matcha powder. The water should be hot but not boiling (around 80°C is perfect).
Using a matcha whisk, whisk the mixture in a quick “M” or “W” motion until the matcha is fully dissolved and a layer of frothy bubbles forms on top. If you don’t have a whisk, a frother or even a fork can work, though it may not froth as much.
Step 2: Sweeten (If Desired)
Once your matcha is ready, stir in your sweetener of choice. Start with 1 teaspoon, then adjust based on your taste preferences. Honey or maple syrup pairs beautifully with matcha’s earthy notes.
Step 3: Assemble Your Latte
Fill your tall glass about 3/4 of the way with ice. Pour your milk or milk alternative over the ice, leaving enough room for the matcha.
Step 4: Add the Matcha
Gently pour or spoon your matcha mixture on top of the milk. Watch as the vibrant green matcha cascades into the creamy white milk—a very satisfying visual, we promise.
Step 5: Stir and Enjoy
Grab a straw or spoon, give your latte a good stir, and take your first sip. Congratulations—you’ve just made a café-quality iced matcha latte right at home!
Tips to Level Up Your Matcha Latte Game
Use Cold, Frothy Milk
For added creaminess, froth your milk before pouring it into the glass. Many handheld frothers work with cold milk, or you can just shake it up in a sealed jar.
Experiment with Flavours
Feeling adventurous? Try adding a dash of vanilla extract, cinnamon, or a sprinkle of cocoa for a twist.
Make It Double-Thick
Want an extra creamy version? Replace part of the milk with half-and-half or coconut cream.
Go Sugar-Free
If you’re looking for a no-sugar version, opt for unsweetened vanilla almond milk—it adds flavour without extra calories.
If you’re new to matcha, go slow and experiment with ratios until you find your sweet spot. Whether you like yours bold and earthy or light and creamy, the key is to make it your own.
Looking for high-quality matcha powder to get started? This imperial grade matcha is ideal for blending into creamy drinks and baking.
This article was reproduced on this site with permission from operafoods.com.au the “Organic Matcha Suppliers”.
See original article:- How to Make an Iced Matcha Latte
Kombucha Ideas for a Healthier Dry January

With its grown-up flavour profile and numerous health benefits, kombucha is the ideal tipple for a healthier dry January.
What is Dry January?
Dry January is a movement where individuals choose to abstain from alcohol for the entire month of January.
It originated in the UK in 2013 and has since gained popularity worldwide, encouraging participants to reset their bodies and minds after the holiday season. The practice provides numerous health benefits, including improved liver function, reduced blood pressure, enhanced mental clarity, and better sleep quality.
Additionally, taking a break from alcohol can foster more mindful drinking habits for the future, making Dry January a valuable and refreshing start to the year.
What is Kombucha?
Kombucha is a fermented tea beverage known for its tangy flavour and numerous health benefits. It is made by fermenting sweetened tea with a symbiotic culture of bacteria and yeast, commonly referred to as a SCOBY. This fermentation process gives kombucha its unique taste and carbonation, along with potential health-promoting properties, such as probiotics that support gut health.
Available in various flavours, kombucha offers a refreshing alternative to traditional sugary drinks and can be enjoyed by those seeking a low-calorie, nutritious option. Whether you’re new to kombucha or a seasoned fan, this drink provides both complexity and versatility, making it an ideal addition to a sober lifestyle.
Why Kombucha is a Great Alternative to Alcohol
When you’re looking to take a break from alcohol, kombucha can be a refreshing alternative. Available in a variety of flavours, from ginger and lemon to berry blends and even some with a spicy kick, there’s a kombucha for every palate. This diversity allows you to explore different taste profiles, much like you would with wines or craft beers, but without the negative effects associated with alcohol consumption.
Kombucha is rich in probiotics, which are beneficial for maintaining a healthy gut microbiome. Unlike many alcoholic beverages, which can disrupt your digestive system, the probiotics in kombucha can promote digestion and enhance nutrient absorption. This makes kombucha not just a tasty alternative, but a health-conscious choice that contributes to your overall well-being.
On top of these benefits, kombucha is a low-calorie drink, making it an excellent choice for those who are mindful of their calorie intake. While many alcoholic beverages are calorie-dense, kombucha offers a lighter option that satisfies thirst without unnecessary calories. Additionally, those who are watching their sugar intake will find kombucha to be a suitable option, as many brands offer low-sugar varieties.
Finally, swapping out alcohol for kombucha can contribute to better hydration. Unlike alcohol, which is a diuretic and can lead to dehydration, kombucha is hydrating and helps maintain the body’s fluid balance. Whether you’re participating in Dry January or simply looking to moderate your alcohol consumption, making the switch to kombucha can be a step towards a healthier, more balanced lifestyle.
Kombucha Ideas for Dry January
Kombucha is surprisingly versatile and is just as happy alongside your meal as it is in your Dry January mocktail.
Morning Boost: Start your day with a glass of kombucha to kick off your morning routine. Its natural effervescence can be a refreshing alternative to your usual caffeine fix.
Midday Refreshment: Enjoy a chilled kombucha at lunch. It pairs well with salads and lighter meals, providing a tangy counterpart to your lunch break.
Afternoon Pick-me-up: Feeling the afternoon slump? A bottle of kombucha can be a great way to recharge, offering a burst of flavour and a little energy booster.
Evening Wind-down: Savor a glass of kombucha alongside your dinner or as an after-dinner sipper. Its complex taste can complement a variety of cuisines.
Creative Mocktails: Use kombucha as a base for mocktails. Mix it with fresh fruits, herbs, or spices to craft unique non-alcoholic cocktails that are as exciting as their alcoholic counterparts.
Hydration Partner: Keep a bottle on hand during workouts or outdoor activities for a flavorful hydration option that feels a bit more special than plain water.
Pantry Staple: Always have some kombucha stocked at home. With many flavours available, it’s easy to find something for every taste and occasion.
Pairing kombucha with meals
Pairing kombucha with meals can be an interesting way to enhance your dining experience without alcohol. Thanks to its versatile flavour profile and effervescent quality, kombucha can complement a wide range of dishes.
For a light and refreshing pairing, try kombucha with a summer salad or seafood dish, as its crisp acidity can highlight fresh and tangy flavours.
When dining on spicy or savoury cuisine, like Mexican or Thai, the slight sweetness of kombucha can balance heat and spice, providing a soothing counterpoint.
If you’re enjoying a rich, hearty meal, such as pasta or grilled meats, opt for kombucha with more robust flavours, like ginger or berry, to stand up to the dish’s intensity.
Finally, consider using kombucha as a palate cleanser between courses; its bubbly nature can refresh the taste buds and prepare you for the next flavorful bite. With its diverse taste range, kombucha offers endless pairing possibilities that can elevate any meal.
Using kombucha in mocktails
Creating mocktails with kombucha is a fun and creative way to enjoy flavorful beverages without alcohol. The fizzy and tangy characteristics of kombucha make it an excellent base for a multitude of mocktail recipes, adding a touch of sophistication and a burst of flavour.
Start with a kombucha flavour that complements your desired taste profile, such as lemon-ginger or berry, and add fresh ingredients like mint leaves, cucumber slices, or a splash of freshly squeezed citrus juice. The versatility of kombucha allows for endless experimentation and perfect pairings.
Here are a few ideas to get you started.
Citrus Mint Spritzer: Combine this sugar-free lime and ginger kombucha with fresh mint leaves and a splash of orange juice. Add a twist of lime for an extra zing.
Berry Basil Fizz: Mix this apple and pomegranate-flavoured raw kombucha with a handful of fresh basil and a few muddled berries of your choice. Top with a splash of soda water for added sparkle.
Ginger Cooler: Blend cucumber slices with this organic ginger kombucha, a generous squeeze of lemon juice, and a hint of honey. Garnish with a cucumber wheel for a refreshing twist.
Tropical Sunrise: Pour this mango kombucha into a glass and mix it with coconut water, a dash of grenadine, and a slice of fresh pineapple. Serve over ice for a burst of tropical flavour.
Incorporating kombucha into your mocktails offers not only a delicious alcohol-free option but also the potential health benefits associated with kombucha. Whether you’re hosting a party or simply in the mood for something special, kombucha mocktails provide the perfect combination of taste, creativity, and wellness.
Cooking with kombucha
You can use kombucha to add depth to your cooking, much in the same way as you would add a splash of wine.
Marinades: Kombucha’s natural acidity makes it an excellent ingredient for marinades. Use it to tenderize meats and infuse them with flavour. Combine kombucha with soy sauce, garlic, and herbs to create a savoury marinade for chicken or tofu.
Salad Dressings: Enhance your salads with a kombucha-based dressing. Mix kombucha with olive oil, mustard, and honey for a tangy vinaigrette that adds a refreshing twist to any salad.
Soup and Stew Base: Add a splash of kombucha to soups or stews for a subtle depth of flavour. Its slightly tangy profile can enhance the richness of dishes like vegetable soups or chili.
Sauces: Incorporate kombucha into sauces for a unique taste. It works well in barbecue or teriyaki sauces, adding complexity and a hint of sweetness.
Fermenting Vegetables: Use kombucha as a starter culture for fermenting vegetables. It’s an excellent way to create probiotic-rich pickles or sauerkraut with an extra kick.
Choosing kombucha for Dry January comes with a host of benefits that cater to both your health and your taste buds. A delicious, low-calorie alternative to sugary sodas and high-calorie alcoholic drinks, it’s packed with probiotics, which can aid in digestion and improve gut health, making every sip not only tasty but beneficial for your body’s natural processes.
Additionally, kombucha is rich in antioxidants, which help fight free radicals in the body and support overall wellness. The natural carbonation helps satisfy the craving for a fizzy beverage, while its wide range of flavours ensures you’ll never get bored. Whether you’re enjoying it as a daily ritual, mixing it into creative mocktails, or adding a splash to your cooking, kombucha can make your Dry January an enjoyable and health-conscious journey.
Explore our range of real organic raw kombucha today. Made right here in Australia and completely sugar-free.
This article was reproduced on this site with permission from operafoods.com.au the “Organic Kombucha Wholesaler”.
See original article:- Kombucha Ideas for a Healthier Dry January
When To Drink Kombucha

Kombucha is a fizzy, fermented beverage made from sweetened tea, with a tangy taste and many potential health benefits. Often hailed for its probiotic properties that may support gut health and boost overall wellness, it has transcended its humble beginnings to become a trendy drink in cafes and health food stores alike.
Whether you’re a long-time fan or new to the kombucha craze, understanding when to enjoy this bubbly beverage can enhance your experience and help you reap its many rewards. Timing can play a crucial role in how you experience kombucha and the benefits it offers. Enjoying kombucha at the right moment can amplify its positive effects on your body.
By being mindful of when to drink kombucha, you can tailor your intake to suit your lifestyle and personal preferences, ultimately enhancing both your enjoyment and health benefits.
The Best Times To Drink Kombucha
Paying attention to your body’s responses is paramount. For example, some people may find that drinking kombucha on an empty stomach leads to discomfort. In the morning, it can provide a boost to your energy levels, kick-starting your day with essential hydration and a dose of probiotic goodness. On the flip side, consuming kombucha too close to bedtime may not be ideal due to its caffeine content, which could disrupt your sleep.
Morning Boost
Starting your day with a glass of kombucha can be an invigorating way to wake up your senses and set a positive tone for the day ahead. One of the primary benefits is its probiotic content, which can help support gut health by promoting a balanced microbiome. A healthy gut can lead to improved digestion and enhanced nutrient absorption, setting you up for better energy levels throughout the day.
Additionally, kombucha is rich in antioxidants, which help combat oxidative stress in the body, potentially boosting your immune system and overall wellness.
The natural fizz and tangy flavour can also act as a refreshing alternative to your typical morning beverages, keeping hydration levels in check as you start your day. Plus, the mild caffeine content can provide a gentle energy lift without the jitters often associated with coffee, making it a great choice for a mindful morning ritual.
Pre-workout Consumption
Drinking kombucha before a workout can be an excellent choice for many fitness enthusiasts. This effervescent drink is packed with organic acids and electrolytes, which can help replenish your body and keep you hydrated during exercise.
The natural sugars present in kombucha provide a quick energy boost, ensuring you feel invigorated as you engage in physical activity. The mild caffeine content can enhance alertness and focus, helping you get into the right mindset for your workout.
For those looking to incorporate a tasty, refreshing drink into their pre-exercise routine, kombucha serves as a fantastic alternative to sugary sports drinks, making it both a delicious and health-conscious option.
Post-workout Refreshment
Drinking kombucha after a workout can be an excellent way to aid your recovery while also satisfying your thirst. After physical activity, your body needs rehydration and essential nutrients, and kombucha delivers on both fronts.
The probiotics in kombucha can help replenish the good bacteria in your gut, which might be beneficial since intense exercise can sometimes disrupt gut health. Additionally, kombucha’s electrolyte content can assist in replacing lost minerals, helping you to feel more energized and balanced.
Moreover, the antioxidants present in kombucha play a vital role in reducing exercise-induced oxidative stress. This means that sipping on kombucha may not only feel refreshing but could also support your muscle recovery, easing soreness and fatigue.
Post-meal Probiotic Support
Drinking kombucha after a meal isn’t just a tasty way to cap off your dining experience; it also provides several health benefits that can enhance your well-being.
The probiotics in kombucha are beneficial live bacteria that can aid digestion by helping to break down food and promote a healthy gut microbiome. This can lead to improved nutrient absorption, ensuring that your body gets the most out of the delicious meal you just enjoyed.
Additionally, kombucha can assist in alleviating common post-meal discomforts such as bloating or indigestion. Its organic acids may help stabilize stomach acidity, making digestion smoother and more efficient. Plus, the refreshing fizz of kombucha can offer a satisfying ending to your meal, thereby reducing the temptation to reach for high-calorie desserts.
So next time you finish eating, consider reaching for a bottle of kombucha—it’s a great way to support your digestive health while enjoying a flavorful drink!
When To Avoid Drinking Kombucha
Just as there are optimal times to enjoy kombucha, there are also times when it may be best to avoid it.
Before Bedtime
While kombucha offers many benefits throughout the day, it’s wise to steer clear of it right before bedtime. The natural caffeine contained in tea (the base of kombucha) can vary depending on the type of tea used and the brewing time, potentially leading to increased alertness that interferes with your ability to fall asleep.
Additionally, the carbonation in kombucha can cause bloating or discomfort, leaving you feeling restless as you try to settle down for the night. If you’re sensitive to acidity, the organic acids in kombucha may not be ideal for your stomach right before sleep, as they could lead to acid reflux or heartburn.
To ensure a restful night’s sleep, consider enjoying your kombucha earlier in the day when you can fully appreciate its refreshing taste and health benefits!
On an Empty Stomach
Drinking kombucha on an empty stomach isn’t typically recommended, and there are a few reasons for this.
First and foremost, this fizzy drink contains organic acids, which can be quite acidic. When consumed without any food in your system, these acids may lead to discomfort, such as heartburn or an upset stomach, particularly for those who might be sensitive to acidity.
Additionally, the carbonation in kombucha can cause bloating, and when your stomach is empty, this feeling can be heightened. Kombucha also contains trace amounts of alcohol and caffeine, which may not sit well on an empty stomach, potentially leading to feelings of jitteriness or nausea.
To fully enjoy kombucha and its benefits, it’s best to have it alongside or after a meal, ensuring that your digestive system is prepared to handle it.
Possible discomfort after drinking kombucha
While many people adore kombucha for its refreshing taste and potential health benefits, some may experience discomfort after enjoying this fizzy drink. One reason is the presence of probiotics, which, while beneficial for gut health, can also lead to temporary bloating or gas as the digestive system adjusts to the influx of these live cultures.
Additionally, the organic acids in kombucha can sometimes cause stomach upset, particularly in individuals with sensitive digestive systems. The carbonation can also exacerbate feelings of fullness or bloating, leaving some feeling uncomfortable.
Moreover, if consumed excessively, the caffeine and sugar content in kombucha can lead to jitters or energy crashes. To minimize these effects, it’s wise to enjoy kombucha in moderation and to pay attention to how your body responds.
Can Kombucha Be Taken Alongside Medications?
When considering whether to enjoy kombucha while on medication, it’s important to proceed with caution. Kombucha contains active compounds like probiotics, organic acids, and small amounts of alcohol that may interact with certain medications and potentially interfere with your treatment.
Additionally, the acidity of kombucha might affect the absorption of some medications, making them less effective.
It’s always a good idea to consult your healthcare provider before adding kombucha to your routine, ensuring that it aligns safely with your specific health needs and medications.
Personalizing Your Kombucha Intake
When introducing kombucha to your diet, it’s crucial to tune in to your body’s signals. Everyone’s digestive system is unique, and what works for one person may not work for another. Paying attention to how your body reacts can help you understand your personal tolerance levels and identify any potential adverse effects.
If you notice symptoms like discomfort, bloating, or changes in your digestion after consuming kombucha, it may be a sign to adjust your intake or even take a break. Starting with smaller amounts can help you gauge how your body responds before gradually increasing your consumption.
Experimenting with different times of day to enjoy your kombucha can help you discover what works best for your body and lifestyle, whether you prefer a refreshing sip in the morning, a post-workout pick-up, or a relaxing drink in the evening.
As we have seen, incorporating kombucha into your diet is a delicious way to experience new flavours and harness some potential health benefits. However, as we’ve discussed, it’s essential to be mindful of your individual circumstances, particularly when it comes to medication interactions and your body’s unique reactions.
Paying attention to your body’s signals is the best way to enjoy kombucha safely and effectively.
Have you tried our raw, organic, Australian kombucha yet?
This article was reproduced on this site with permission from operafoods.com.au the “Organic Kombucha Supplier”.
See original article:- When To Drink Kombucha
Postbiotics: The Real Benefit of Beneficial Bacteria.

We are all by now familiar with the concept of gut health, and the importance of looking after our gut microbiome. We understand that the link between food and health is far from simple and that our health is largely governed by the trillions of bacteria inside us. Most of us are on board with the need to increase our intake of friendly bacteria. Many of us now understand that we also need to feed those bacteria with a fibre-rich diet. But how many of us understand why?
Postbiotics are the real benefit behind those beneficial bacteria.
What Are Postbiotics?
A quick Google search will tell you that postbiotics are a magical supplement that will benefit your health. And whilst this is an interesting area of research with potentially huge implications for medical science, this does not tell us the true story of postbiotics.
Postbiotics are the by-products of microbial digestion. A natural product of fermentation, these are the bioactive compounds that the probiotic bacteria produce. The waste products of bacteria, they provide many benefits to our health.
The elements of the gut microbiome work together and support each other. Before we explore the subject of postbiotics further, here’s a quick recap.
What is the difference between probiotics, prebiotics, synbiotics, and postbiotics?
Understanding the distinctions between prebiotics, probiotics, synbiotics, and postbiotics is key to optimising gut health.
Probiotics are live beneficial bacteria and yeasts that can be ingested through fermented foods or supplements. They populate your gut with good microbes that support digestion and immunity.
Prebiotics, on the other hand, are types of dietary fibre that feed the beneficial bacteria in your gut. They serve as the fuel that helps these helpful microorganisms thrive.
Synbiotics are a combination of prebiotics and probiotics, designed to synergistically enhance the survival and colonization of probiotics in the gut. Think of them as a one-two punch for gut health, providing both the beneficial bacteria and the nutrients they need to flourish.
Postbiotics are the bioactive compounds produced when probiotics break down prebiotics. These non-living byproducts include substances like short-chain fatty acids, peptides, and enzymes, which contribute to gut and overall health by reducing inflammation, enhancing immune function, and supporting digestion.
Each of these components—prebiotics, probiotics, synbiotics, and postbiotics—plays a unique and integral role in maintaining a balanced and healthy gut microbiome.
Read more about prebiotics and probiotics.
How Do Postbiotics Work?
To understand what postbiotics are, and where they are found, we need to think in terms of fermentation. We already know that our food sources of friendly bacteria (probiotics) are found in fermented foods. So let’s start there.
Very simply, fermentation can be thought of as a kind of digestion. The bacteria break down a substance into smaller parts, and as they do this they also produce other substances. These other substances (often considered to be waste products) are known as metabolites.
In the process of fermenting foods, the metabolites produced become part of the end product. Your kefir, kombucha or whatever.
But there is another side to fermentation, and that happens inside the gut. And it is where the real magic begins.
Although the gut microbiome gets busy at the mere idea of food and plays an important role across the entire digestive process, much of the benefit of postbiotics happens in the large intestine, which is where the final journey of food through the digestive tract plays out. It is also where our old friend fibre takes centre stage.
As something that passes through the gut undigested, we have long overlooked the true nutritional value of fibre. However, the rising interest in gut health and the value of eating prebiotic foods has made us aware that fibre does far more than simply keep things moving along. Although to be clear, this does remain a vital part of our digestive health.
So, prebiotics. Insoluble fibre that provides food for our probiotic bacteria. These fibres pass through to the colon largely unchanged. Ready to be fermented. The same rules apply as they did before in our fermented foods. But now they are happening inside our body, where those useful metabolites can do their work directly.
Examples of Postbiotics
The metabolites (postbiotics) produced by your gut flora are not a random free-for-all. Specific probiotic bacteria will produce specific postbiotic compounds. There is some crossover, but for the most part, they all come with specific jobs to do. Some of these are outlined below.
Short Chain Fatty Acids
Short chain fatty acids (SCFAs) are just one type of postbiotic produced during the fermentation of dietary fibres by gut bacteria. Some of the primary SCFAs include acetate, propionate, and butyrate. These compounds are incredibly beneficial to your health and play a variety of roles within your body.
For instance, butyrate is known for its ability to improve gut barrier function and serve as an energy source for colon cells, helping to maintain the integrity of the gut lining. Acetate can influence lipid metabolism and propionate has anti-inflammatory properties and may help regulate glucose homeostasis.
SCFAs also contribute to lowering the pH of the colon, which can inhibit the growth of harmful bacterial pathogens.
Neurotransmitters
Among the neurotransmitters produced in the gut, serotonin is one of the most notable. In fact, about 90% of the body’s serotonin is made in the digestive tract. Serotonin is key for regulating mood and sleep.
Another important neurotransmitter produced in the gut is gamma-aminobutyric acid (GABA), which helps calm nervous activity. GABA can help soothe the nervous system and promote relaxation. Additionally, dopamine, another neurotransmitter that plays a role in motivation and pleasure, is also partially produced in the gut.
Overall, the production of these neurotransmitters by your gut microbiota can profoundly influence your mental health and well-being, showcasing the deep connection between your gut and brain.
Vitamins
Gut bacteria also synthesise essential vitamins. Among these vitamins, Vitamin K is a standout player.
Specifically, Vitamin K2 is produced by gut bacteria and is crucial for blood clotting and bone health.
Additionally, various B vitamins are also synthesized by gut microbiota. For instance, Vitamin B12, which is essential for nerve function and the production of DNA and red blood cells, can be partially produced by gut bacteria. Other B vitamins produced include Biotin (B7), which helps in the metabolism of fats, carbohydrates, and proteins, and Folate (B9), which is crucial for DNA synthesis and repair.
Enzymes
Postbiotic enzymes produced by gut bacteria play various important roles in maintaining health and supporting digestion.
One such enzyme is lactase, which is responsible for breaking down lactose, the sugar found in milk and dairy products.
Lipase is an enzyme produced by gut bacteria that helps digest fats by breaking them down into fatty acids and glycerol, which are easier for your body to absorb.
These are two examples of valuable enzymes produced by the gut bacteria.
Are dead probiotics beneficial?
There is some contention over the fact that not all live bacteria make it to the gut intact. And, in the case of sourdough bread (which is a prebiotic, not a probiotic food) the bacteria do not survive the cooking process. (The pre and postbiotic benefits of sourdough bread are actually quite unique, but that’s another story for a different time.)
Yet these dead bacteria, whole or fragmented, act as food for the live bacteria and create conditions in which the gut bacteria can thrive. They also come under the collective term postbiotics.
Which Foods Are Postbiotics?
To think of postbiotics in terms of foods, or even supplements, is perhaps missing the point. Whilst probiotic food may contain a range of beneficial compounds beyond that of live bacteria, the real magic happens inside of us.
By including a wide range of both probiotic foods (live bacteria) and prebiotic foods (fibre to feed them with) you will unlock the benefits of postbiotics.
‘Wide range’ is the key factor here. The more diverse your diet, the more diverse your microbiome and the specific postbiotics they can produce.
As we have seen, understanding the roles of probiotics, prebiotics, and postbiotics highlights the intricate and fascinating interplay within our gut. While probiotics introduce beneficial bacteria and prebiotics feed these helpful organisms, postbiotics emerge as a valuable byproduct, supporting gut health and overall well-being.
Emphasising a diverse diet rich in various probiotic and prebiotic foods can significantly enhance the diversity of your gut microbiome, ultimately unlocking the myriad benefits of postbiotics. By nurturing this internal ecosystem, you can foster a healthier, more balanced digestive system, contributing to improved health and vitality.
Explore our different flavours of award-winning raw organic kombucha and start your gut health journey today. Or read more in our informative guide to gut health.
This article was reproduced on this site with permission from operafoods.com.au the “Organic Kombucha Supplier”.
See original article:- Postbiotics: The Real Benefit of Beneficial Bacteria
What are Prebiotics and Probiotics?

Prebiotics and probiotics are two critical components of gut health, each with a unique role in supporting our digestive system and overall well-being. Together, they form a synergistic pair known as synbiotics, which effectively support the gut microbiome’s health and functionality. By maintaining a balanced intake of these elements, individuals can foster a healthier gut microbiome, and positively impact their health.
But what are they exactly, and why are they so important to our health and wellbeing?
The Importance of Gut Health
Every day we discover new things about the importance of gut health and how best to nurture it. But why is it so important?
The significance of gut health extends beyond basic digestive functions; it is integral to our immune system, brain health, mood, and even the prevention of chronic diseases. The gut is often seen as the body’s “second brain” because it produces neurotransmitters that affect mood and cognitive functions.
Furthermore, a healthy gut microbiome can strengthen the immune system, reduce inflammation, and provide a barrier against harmful pathogens. With most of the immune system residing in the gut, maintaining its health through a balanced diet rich in prebiotics and probiotics is vital for overall well-being and disease prevention.
Before we explore the synergy between probiotics and prebiotics, and why they are vital for a healthy gut, let’s look at each in turn.
Understanding Prebiotics
What are prebiotics?
Prebiotics are essentially food for the beneficial bacteria residing in our gut. And it all comes down to the one simple thing we seem to have overlooked in recent years. Fibre. In dietary terms, it really is that simple.
In scientific terms, it gets a bit more complex. Prebiotics are non-digestible fibres and compounds that pass through the upper part of the gastrointestinal tract and stimulate the growth and activity of advantageous microbes in the digestive system. Unlike probiotics, which are live beneficial bacteria, prebiotics are the nourishment that helps these good bacteria thrive.
Found in a variety of foods, especially in high-fibre fruits, vegetables, and whole grains, prebiotics play a crucial role in maintaining a healthy gut microbiome by supporting the proliferation of beneficial gut bacteria. Incorporating prebiotic-rich foods into one’s diet is a key strategy for promoting gut health and, by extension, overall wellness.
Sources of prebiotics
Prebiotic-rich foods are a critical component of a diet that supports gut health. Major sources of prebiotics include:
- Chicory Root: Packed with inulin, a powerful prebiotic fibre, chicory root aids in the growth of beneficial gut bacteria.
- Garlic: Acts as a prebiotic by promoting the growth of beneficial Bifidobacteria in the gut. Garlic also prevents disease-promoting bacteria from growing.
- Onions: Rich in inulin and FOS (fructooligosaccharides), onions can help strengthen gut flora, improve immune function, and enhance digestion.
- Leeks: Like garlic and onions, leeks are high in inulin and FOS, providing the gut with beneficial prebiotic fibres.
- Asparagus: Contains inulin, which supports the growth of friendly gut bacteria.
- Bananas: Green (unripe) bananas are high in resistant starch, a prebiotic that improves gut health.
- Barley: A great source of beta-glucan, known to promote the growth of good bacteria in the gut.
- Oats: Rich in beta-glucan soluble fibre, oats help increase beneficial bacteria in the digestive system.
- Apples: Contain pectin, another soluble fibre that boosts the gut microbiome and decreases harmful bacteria.
- Cocoa: Contains flavanols that are prebiotics, fostering the growth of beneficial bacteria in the gut.
Incorporating these prebiotic-rich foods into your diet can significantly impact your gut’s health, fostering a robust and balanced microbiome.
How prebiotics work in the body
Prebiotics work in the body primarily by serving as food for the beneficial bacteria residing in the gut, such as Lactobacillus and Bifidobacterium species. When prebiotic fibre is consumed, it is not digested by the stomach or small intestine. It reaches the colon intact and is fermented by the gut microbiota. This fermentation process produces short-chain fatty acids (SCFAs) like acetate, propionate, and butyrate, which serve several vital functions. They act as energy sources for colon cells, help regulate electrolyte levels, and can strengthen the gut barrier function.
This process promotes a healthy balance of gut bacteria but also contributes to the overall health of the gastrointestinal system, influencing immune function, nutrient absorption, and possibly even the body’s response to stress and mood regulation.
Exploring Probiotics
What are probiotics?
Probiotics are live microorganisms, often referred to as “good” or “beneficial” bacteria, that provide health benefits when consumed in adequate amounts. These benefits are focused on the digestive system, where probiotics help balance the gut microbiome.
This balance is crucial for maintaining digestive health, enhancing immune function, and influencing mood and mental health. Common sources of probiotics include fermented foods such as kombucha, sauerkraut, kimchi, and kefir, as well as dietary supplements.
Like prebiotics, probiotics support the health of the gut flora, but they do so through different mechanisms, adding beneficial bacteria to the gut ecosystem.
Sources of probiotics
Probiotic-rich foods are an integral part of diets worldwide and are known for their beneficial effects on gut health. Here are some major sources of probiotics:
- Yoghurt: One of the most well-known sources, it’s made by fermenting milk with live bacteria cultures.
- Kefir: A fermented dairy product, similar to yoghurt but with a thinner consistency. It is made by fermenting milk with kefir grains.
- Sauerkraut: Fermented cabbage, rich in live cultures, vitamins, and minerals. It’s important to choose raw and unpasteurized sauerkraut to reap the probiotic benefits.
- Kimchi: A spicy Korean side dish, usually made from fermented cabbage and radishes. It contains a variety of probiotic strains, along with vitamins and minerals.
- Miso: A Japanese seasoning produced by fermenting soybeans with salt and a fungus called koji. It’s used in soups and other dishes.
- Pickles: Cucumbers, or other vegetables, that have been pickled in water and salt. Like with sauerkraut, look for pickles that are naturally fermented.
- Kombucha: A tangy, fizzy tea fermented with a symbiotic culture of bacteria and yeast (SCOBY).
Including these foods in your diet can help enhance gut health by increasing the diversity and quantity of beneficial bacteria in the gut microbiome.
Read more about how fermented foods can help promote a healthy gut
How probiotics affect the gut flora
Probiotics exert a beneficial impact on gut flora through several mechanisms.
Firstly, they restore the natural balance of the gut microbiome, especially after it has been disrupted by factors such as antibiotic use, poor diet, or stress. By colonizing the gut, these beneficial bacteria compete with harmful pathogens for nutrients and attachment sites on the intestinal wall, effectively inhibiting the growth of harmful microorganisms.
Additionally, probiotics stimulate the production of short-chain fatty acids (SCFAs), which serve as a food source for gut cells, thus enhancing the integrity of the gut barrier and reducing inflammation. This reinforcement of the gut barrier prevents toxins and harmful bacteria from leaking into the bloodstream, a condition known as “leaky gut,” which can trigger inflammation and immune responses.
Through these actions, probiotics contribute to a healthier, more resilient gut microbiome, laying a foundation for improved overall health.
The Synergy Between Prebiotics and Probiotics
Synbiotics refer to a synergistic blend of prebiotics and probiotics that work together to enhance gut health more effectively than either could alone. The concept of synbiotics underscores the importance of a holistic approach to gut health, where the focus is on creating a conducive environment for beneficial microbes, enhancing their positive impacts on your health.
How prebiotics and probiotics work together
Prebiotics and probiotics work together, enhancing the gut’s overall environment and promoting optimal digestive health. As we have seen, prebiotics, typically non-digestible fibres, serve as food for probiotics, the beneficial bacteria residing in the gut. This relationship ensures that probiotics have the necessary nutrients to thrive and multiply, effectively outcompeting harmful bacteria for space and resources within the gut microbiome.
The symbiotic interaction doesn’t stop at nutrition; it also stimulates the beneficial bacteria to produce even more short-chain fatty acids (SCFAs), crucial for gut health. These SCFAs nourish gut cells but also play a key role in modulating the immune system, reducing inflammation, and enhancing mineral absorption.
Prebiotics can elevate the beneficial effects of probiotics, making the combination of both essential for a balanced, healthy gut flora and, by extension, a robust immune system and improved overall health.
Tips for Maintaining a Balanced Gut Microbiome
Incorporate a diverse range of foods
A varied diet encourages the growth of different types of beneficial bacteria. Aim to include a wide assortment of fruits, vegetables, whole grains, and legumes in your meals.
Eat plenty of fibre-rich foods
Since prebiotics are typically found in fibrous foods, eating plenty of fruits, vegetables, and whole grains can help fuel the beneficial bacteria in your gut.
Include fermented foods in your diet
Fermented foods like yoghurt, kombucha, kefir, sauerkraut, and kimchi are natural sources of probiotics.
Limit the use of antibiotics
Antibiotics can significantly disrupt your gut microbiome. Use them only when necessary and as prescribed by a healthcare provider.
Stay hydrated
Drinking plenty of water is beneficial for the overall health of your gut, as it helps maintain the mucosal lining and supports the growth of beneficial bacteria.
Manage stress
High levels of stress can adversely affect your gut health. Engage in stress-reduction techniques such as meditation, exercise, or yoga.
Get enough sleep
Aim for 7-9 hours of good quality sleep per night to support overall gut health, as sleep deprivation can negatively impact the microbiome.
Exercise regularly
Regular physical activity has been shown to increase both the diversity and number of beneficial gut bacteria.
Avoid excessive alcohol and processed foods
These can alter the balance of your gut microbiome, reducing the number of beneficial bacteria.
In conclusion, maintaining a healthy gut microbiome is vital for overall health and well-being. Incorporating a diverse range of foods, especially those rich in fibre and fermented products, is essential. Whilst the fibre in prebiotic foods and the microbial content of probiotic foods will be of value individually, understanding how they work together could be the key to making lasting changes to your gut health.
Why not get off to a good start with our raw, organic, sugar-free kombucha today? Or find out more about the benefits of kombucha.
This article was reproduced on this site with permission from operafoods.com.au the “Organic Kombucha Supplier”.
See original article:- What are Prebiotics and Probiotics