Author: admin
Your Ultimate Guide to Using a Kombucha Tea Kit

If you've ever thought about brewing your own kombucha, a tea kit is the perfect way to begin. It cuts through the noise and gives you everything you need—most importantly, the living SCOBY culture—to turn sweet tea into that tangy, probiotic-rich drink you love. Think of it as your entry point into a seriously rewarding wellness practice, right from your own kitchen.
Your Home-Brew Kombucha Journey Starts Here
So, you're ready to dive into the world of home-brewed kombucha. Good on you! What might seem like a complicated science experiment is actually a simple, enjoyable process, and it all begins with your kombucha tea kit. Here at PepTea, we're passionate about authentic fermentation and natural ingredients, just like the proudly Australian, sugar-free kombucha we brew right here in the Hunter Valley, NSW.

More and more Aussies are discovering the satisfaction of home brewing, and for good reason. It’s about more than just making a drink; it's about connecting with your food, knowing exactly what’s going into your body, and unlocking some fantastic gut health benefits along the way. You’re the brewer now. You control the sweetness, the flavour, and the fizz.
Why Brew Your Own Kombucha?
Diving into home brewing isn't just a hobby; it’s a smart move towards a healthier lifestyle with a genuine sense of accomplishment.
- Total Control Over Ingredients: You pick the tea, the sugar, and the natural flavourings. That means no hidden preservatives or artificial junk.
- A Seriously Cost-Effective Habit: Brewing at home is dramatically cheaper than buying bottles from your local café, making daily kombucha an affordable wellness routine.
- An Endless Supply of 'Booch': Once you get started, your SCOBY will keep growing and reproducing. You’ll have a continuous supply for yourself, your family, and maybe even some friends.
- Endless Flavour Experiments: This is where the fun really begins. You can play around with seasonal fruits, fresh herbs, and spices to create your own signature blends.
Think of this guide as having a knowledgeable friend right there with you. We’ll walk you through every step, from unboxing your kit to that first fizzy sip. Your journey to becoming a confident home brewer starts now.
What's Inside Your Kombucha Tea Kit
Opening a new kombucha tea kit for the first time has a certain kind of magic to it. Let’s walk through what’s inside so you know exactly what you’re working with from day one. Each piece has a very specific job to do in turning simple sweet tea into that fizzy, probiotic-rich drink you’re after.
Think of it like getting the ingredients ready for a favourite recipe. The quality of each part directly shapes the taste and health of your final brew, which is why we’re big believers in starting with the best possible gear.
The Heart of Your Brew: The SCOBY and Starter Tea
The absolute centrepiece of your kombucha tea kit is the SCOBY. That stands for Symbiotic Culture of Bacteria and Yeast, and this rubbery, pancake-like disc is the living engine that drives the whole process. It’s not just an ingredient; it's a bustling little ecosystem of good bacteria and yeast that work together to ferment your sweet tea.
Your SCOBY will arrive swimming in a bit of strong, mature kombucha. This isn't just for keeping it safe during travel—it's your starter tea. This liquid is non-negotiable for a successful first batch. It immediately drops the pH of your sweet tea, creating an acidic environment that acts as a bodyguard, protecting your brew from mould and other unwanted microbes.
Always handle your SCOBY with clean hands. It's a living thing, and giving it a healthy, clean start is the single most important thing you can do for your first brew.
Your Brewing Essentials
Beyond the SCOBY, your kit has everything else you need to get fermentation started. We've chosen each item to make the process as straightforward and successful as possible.
- Glass Brewing Jar: This is your SCOBY's new home. Glass is the perfect material because it’s non-reactive and won’t hold onto weird odours or bacteria from previous uses.
- Organic Tea: The SCOBY literally feeds on the nutrients and tannins found in tea. Using a high-quality organic black or green tea—like the ones we use at PepTea—provides the best "food" for a healthy, thriving culture. To learn more about this crucial relationship, check out our guide on why kombucha needs real tea.
- Raw Organic Sugar: Don't stress about the sugar content! The SCOBY consumes almost all of it during fermentation, turning it into the beneficial organic acids that give kombucha its signature tangy kick. Most of this sugar is long gone by the time your brew is ready to drink.
- Cloth Cover and Tie: Your brew needs to breathe, but you also need to keep out dust and pesky fruit flies. A tightly woven, breathable cloth cover allows for that essential airflow while keeping your kombucha protected.
A good kombucha tea kit sets you up for success from the get-go. Here’s a quick inventory of what you'll find and why each part is so important.
Your Kombucha Tea Kit Inventory
A breakdown of each component in your kit, its function, and our tips for getting the best results.
| Component | Primary Function | PepTea Pro-Tip |
|---|---|---|
| SCOBY & Starter Tea | The living culture that ferments the tea. | Always add the starter tea to your brew. It's essential for creating the right acidic environment from the start. |
| Glass Brewing Vessel | Provides a safe, non-reactive home for fermentation. | Avoid metal or plastic containers. A wide-mouth jar makes it easier to access your SCOBY. |
| Organic Tea Leaves | The primary food source of nutrients for the SCOBY. | Stick with plain black or green tea. Flavoured teas with oils (like Earl Grey) can harm your SCOBY. |
| Organic Raw Sugar | The fuel the SCOBY consumes to produce acids and probiotics. | Don't substitute with honey or artificial sweeteners, as they can damage the culture. |
| Breathable Cloth Cover | Allows airflow while protecting the brew from contaminants. | Secure it tightly with a rubber band to keep curious fruit flies out. They love kombucha! |
| pH Strips (Optional) | Helps you monitor the acidity of your brew for safety. | A healthy brew should have a pH of 4.5 or lower within the first few days and finish between 2.5 and 3.5. |
With these components, you have a complete brewing ecosystem ready to go. Now, let’s get it set up.
Setting Up Your First Brew For Success
Getting your first brew right is more than half the battle. This is where you lay the foundation for a healthy, vibrant kombucha, and a little bit of care at this stage goes an incredibly long way. Think of it less as following a recipe and more as creating the perfect environment for your SCOBY to do its work.
We’ll walk through the hands-on process, but more importantly, we'll explain the 'why' behind each step. Understanding this from day one is how you build real brewing intuition.
The Golden Rule: Sanitation
Before you even think about boiling water, we need to talk about cleanliness. This is the single most critical part of home brewing, period. Your SCOBY is a living colony of good bacteria and yeast, and the last thing you want is for it to compete with unwanted airborne mould or other nasties.
A successful brew starts with a spotless setup. Before you begin, you need to know how to properly sterilize jars and all your equipment. For most brewing, a simple wash with hot, soapy water followed by a very thorough rinse is enough. If you want extra peace of mind, a final rinse with plain white vinegar creates an acidic barrier that contaminants hate.
- Wash Everything: Your big glass jar, spoons, and measuring cups all need a good wash with hot water and a little dish soap.
- Rinse Thoroughly: Make absolutely sure no soap residue is left. Soap can seriously harm your SCOBY.
- Clean Hands: Wash your hands well before you handle your SCOBY or any other part of your kombucha tea kit.
Brewing The Perfect Sweet Tea
With a clean station, it’s time to make the food for your SCOBY: sweet tea. It’s important to remember the sugar isn't for you—it’s the fuel your culture will consume during fermentation. Don't be tempted to cut the sugar, as an underfed SCOBY won't ferment properly and can become weak.
First, bring about 1 litre of filtered water to a rolling boil. Using filtered water is a smart move; the chlorine found in some tap water can be tough on the delicate microorganisms in your SCOBY.
Pour the boiled water into your brewing jar, add the organic tea, and let it steep for 10–15 minutes. This isn't just for flavour; it extracts the vital nutrients the SCOBY needs to thrive.
Next, remove the tea bags. Add the raw sugar and stir with a clean spoon until every last crystal is dissolved. You can't have any sugar settling at the bottom, as the SCOBY won't be able to get to it. Finally, top it up with the remaining cool, filtered water to help bring the temperature down.
CRITICAL STEP: You must wait for the sweet tea to cool completely to room temperature, which is somewhere between 20-29°C. Adding your SCOBY to hot or even warm tea will kill it. Seriously. Be patient here; it’s absolutely worth the wait.
This simple flowchart shows how the core components of your kombucha tea kit come together.

As you can see, fermentation is a process of transformation. The SCOBY takes the simple sweet tea you've made and turns it into delicious, living kombucha.
Introducing Your SCOBY To Its New Home
This is the moment it all comes together. Your tea is cool, and your SCOBY is ready to get to work.
Gently pour the entire contents of the SCOBY package—the disc itself and all of the starter liquid—into your jar of sweet tea. That starter liquid is non-negotiable. It’s a measure of strong, mature kombucha that immediately drops the pH of your brew, making the environment acidic enough to welcome your SCOBY and ward off mould.
Don't worry if your SCOBY sinks to the bottom, floats on top, or even turns sideways. This is completely normal. A new baby SCOBY will eventually form at the surface, no matter what the original one decides to do.
Finally, cover the mouth of the jar with the breathable cloth from your kombucha tea kit and secure it tightly with the rubber band. This keeps out dust and pesky fruit flies but allows your brew to breathe. Now, find a warm, dark spot away from direct sunlight, and let the magic begin.
Kicking Off the First Fermentation (F1)
Alright, your brewing jar is set up and tucked away. Now for the magic. This is the first fermentation, or F1, where your SCOBY gets to work, turning that sweet tea into the tangy, probiotic-rich drink you’re after. It’s a quiet but incredibly active process.

During this stage, the yeast and bacteria in your SCOBY are feasting on the sugar you added. They’re converting it into beneficial organic acids, a whole spectrum of B vitamins, and of course, those gut-friendly probiotics. Your only job right now is to let it do its thing.
How Long Does It Take?
Patience is a brewer’s most useful tool. A standard F1 can take anywhere from 7 to 21 days, but that’s just a rough guide. The single biggest factor is temperature.
Think of your SCOBY as a tiny engine. In a warmer Aussie kitchen, say in Brisbane, its metabolism will be in high gear, and you might have finished kombucha in just a week. But in a cooler spot, like a Melbourne pantry in winter, things will slow right down, possibly stretching to three weeks or more.
Don't get fixated on the calendar. The best kombucha is brewed to taste, not to a schedule. Your palate is the most important tool you have.
You’re part of a massive shift in how Australians think about drinks. The local kombucha market is booming, with projections showing it could hit USD 650.4 million by 2033. This isn't just a niche trend; it's a mainstream move powered by a 15.1% CAGR from 2026 to 2033 as people swap sugary soft drinks for something better. You can dive deeper into the numbers in this comprehensive market analysis by Grand View Research.
What to Look For: Signs of a Healthy Brew
It’s completely normal to feel a bit anxious with your first batch. Is it working? Is that normal? Here’s what a healthy, happy fermentation looks like:
- A New SCOBY Forming: After a few days, you should see a thin, almost clear film spreading across the surface. This is your brand new 'baby' SCOBY! It might look patchy at first but will soon grow into a solid, creamy layer.
- Tiny Bubbles: Look closely. You might spot tiny bubbles rising to the surface. That’s carbon dioxide, a natural sign that the yeast is actively fermenting the sugar. It’s alive!
- The Smell is Changing: Your brew will slowly transform from smelling like sweet tea to having a sharper, slightly vinegary aroma. That’s the smell of success—it means those healthy acids are developing.
- Brown, Stringy Bits: Don’t panic if you see brown, stringy strands dangling from your SCOBY or settling at the bottom. These are just bits of healthy yeast and are a completely normal part of the process.
The All-Important Taste Test
Around day seven, it’s time to start tasting. This is how you’ll know exactly when your kombucha is ready for the next step.
Gently push a clean straw or pipette down the side of your SCOBY, past the new growth, and draw out a small sample. You’re looking for a flavour balance that’s right for you.
- Too sweet? It tastes more like sweet tea than kombucha. The SCOBY needs more time. Pop the cloth cover back on and let it keep working its magic.
- Too tart? It’s a bit too sharp or vinegary for your liking. You’ve just let it ferment a little long. No drama at all—this extra-strong brew is the perfect starter tea for your next batch.
- Just right? It has that perfect mix of sweet and tangy. Congratulations! Your first fermentation is done.
Once you get a few brews under your belt, you might want to get a bit more precise. Using a pH meter can help you dial in your process. A finished F1 typically sits in the 2.5 to 3.5 pH range. For brewers looking to achieve that next level of consistency, you can explore the digital pH meters available to help standardise your results.
When you hit that perfect flavour profile, you’re ready for the really fun part.
Mastering Flavour and Fizz with a Second Fermentation (F2)
Right, this is where the real fun begins. The first fermentation gave you kombucha, but the second fermentation, or F2, is where you get to turn it into something special. This is the step that creates that signature fizz and lets you infuse all kinds of creative flavours. It’s how you go from just making kombucha to making your kombucha.

The science is simple. You bottle your finished kombucha in an airtight container with a small sugar source—usually fruit. The yeast that’s still active in your brew gets to work on this new sugar, producing carbon dioxide. Because the gas has nowhere to go, it dissolves into the liquid, creating that lovely natural carbonation.
Bottling for a Perfect Fizz
Before you start experimenting with flavours, we need to talk about bottles. This is the most important safety step in the entire process. Carbonation builds a surprising amount of pressure, and you have to respect it.
- Use Proper Bottles: This is absolutely non-negotiable. You must use pressure-rated, swing-top (Grolsch-style) bottles designed to hold carbonated drinks. Never, ever use regular decorative jars or thin glass bottles. They can and do explode, which is both dangerous and incredibly messy.
- Leave Some Headspace: Don't fill the bottles all the way to the top. Always leave about 2-3 centimetres of empty space. This little air pocket gives the CO2 room to build up without putting too much stress on the glass.
- Get a Good Seal: Make sure the seals on your swing-top bottles are in good condition and create an airtight lock. If the seal is weak, all that lovely carbonation you’re trying to create will just leak out, and you’ll end up with flat, flavoured tea.
Think of the second fermentation as a mini-ecosystem in a bottle. You are providing the yeast with a final meal and trapping the results. The right bottle is your most important piece of safety equipment.
Infusing with Natural Flavours
Now you get to be the artist. The Australian market for wellness drinks is booming, with a projected 9.5% CAGR from 2026 to 2032. A huge driver of that growth is the demand for exciting, natural flavour combinations. You can read more about how flavour is shaping the industry in this insightful Australian kombucha market report.
This is your chance to tap into that trend right in your own kitchen. Here are a few simple ideas to get you started, inspired by our own sugar-free PepTea range and the fantastic fresh produce we have in Australia.
- Classic Ginger: Add 1-2 teaspoons of finely grated fresh ginger to a 500ml bottle. It’s a classic for a reason, delivering a spicy, warming kick that never gets old.
- Zesty Lime & Ginger: Take the classic ginger and add a squeeze of fresh lime juice. It creates a vibrant, sharp combination that is unbelievably refreshing.
- Tropical Mango: Add 1-2 tablespoons of puréed ripe Queensland mango. The natural sugars in the fruit give the yeast plenty to work with, resulting in a fantastic fizz and a beautiful tropical flavour.
Achieving That Signature Carbonation
Once you’ve bottled and flavoured your brew, leave the bottles at room temperature for another 1-3 days. The warmer the room, the faster the carbonation will build.
You'll need to check the fizz level daily. The best way to do this is to "burp" one of the bottles—just carefully and slowly crack the seal. If you hear that satisfying psst, they’re ready. Be warned: a very active brew can gush out like a shaken soft drink, so open it over the sink.
As soon as you’re happy with the level of fizz, get all the bottles into the refrigerator immediately. The cold halts the fermentation process, stopping it from becoming over-carbonated and locking in that perfect sparkle.
And that's it. Your delicious, flavourful, fizzy home-brewed kombucha is ready to drink. Cheers to that.
SCOBY Care and Solving Common Brewing Problems
Your SCOBY is a living thing, and it’s pretty self-sufficient. As you brew more batches with your kombucha tea kit, you'll notice it growing new layers. This is a great sign—it means your culture is healthy and active.
Eventually, you’ll have more SCOBY than you need for one brew. Don’t throw the extra bits away. You can start what brewers call a “SCOBY hotel”. It’s just a spare jar where you keep your extra cultures submerged in some mature kombucha from a previous batch. This keeps them healthy and ready for your next brew or for sharing with a friend.
Your Brewing Troubleshooting Guide
Even experienced brewers run into small issues. Don't worry; most common problems are easy fixes and are just part of the learning curve. Here’s what to look out for.
A slow brew is a frequent concern. If it feels like fermentation is dragging on, temperature is almost always the reason. Your SCOBY is less active when it’s cool, so try moving your jar to a warmer spot. The top of the fridge or near another running appliance often works well, just be sure to keep it out of direct sunlight.
Another thing new brewers notice is a SCOBY that sinks, floats sideways, or just hovers in the middle of the jar. This is completely normal and doesn’t affect the fermentation. A new baby SCOBY will form on the surface, no matter what the mother culture is doing below.
Identifying and Handling Mould
The biggest fear for any new brewer is mould. Thankfully, with basic hygiene, it's quite rare. Mould looks exactly like you'd expect—fuzzy, dry, and often colourful. It will always grow on the surface of the liquid and can be white, green, blue, or black.
Good hygiene is the best defence. Learning how to prevent cross-contamination in your kitchen is a non-negotiable skill for any home brewer. This really just means washing your hands and equipment thoroughly before you start.
What isn't mould? Brown, stringy bits hanging off your SCOBY, cloudy sediment at the bottom of the jar, or even dark patches within the culture itself are usually harmless yeast strands. These are all signs of a healthy, active brew.
If you are 100% certain you have mould, the batch can't be saved. You have to throw out the entire brew, SCOBY included. Don't ever try to scoop the mould off; microscopic spores will have already contaminated the entire liquid. It happens. Just sterilise your equipment thoroughly and start again with a new culture.
Caring for your SCOBY is a hands-on learning process. For a closer look, you can learn more about the life of your kombucha SCOBY in our dedicated guide.
Your Kombucha Brewing Questions Answered
When you're just starting out with a kombucha tea kit, a few questions always come up. It's completely normal. As tea and kombucha specialists, we’ve put together the straightforward advice we give every new brewer.
Think of this as your cheat sheet for a confident and successful first brew.
Is It Actually Safe to Brew Kombucha at Home?
Yes, it’s incredibly safe. When you follow the basic sanitisation steps and start with a quality kombucha tea kit, you're creating an environment where only the good stuff can thrive.
The real magic is in the brew itself. Kombucha naturally develops a low pH, creating an acidic liquid where harmful pathogens just can't get a foothold. It’s the brew’s own clever way of protecting itself, and you.
How Much Homemade Kombucha Should I Drink a Day?
If you’re new to the world of kombucha, start slow. A small glass of about 125ml (a half cup) per day is the perfect starting point. This gives your gut a chance to get acquainted with all those new, beneficial probiotics without feeling overwhelmed.
Once your body adjusts, you can gradually work your way up. Many long-time kombucha drinkers enjoy anywhere from 250–500ml daily. The most important thing? Listen to your body. It knows best.
Can I Use Different Teas for My Kombucha?
You can, but there are a few things you need to know first. For a healthy, thriving SCOBY, nothing beats plain, unflavoured black or green tea. These teas, from the Camellia sinensis plant, provide the specific nutrients and nitrogen your culture needs to do its job properly.
Herbal teas might sound like a fun experiment, but they lack the essential compounds to keep your SCOBY strong, and can weaken it over time. Teas that contain oils, like Earl Grey or other flavoured blends, are a definite no-go for your primary fermentation—the oils can coat and damage the culture. For the best results, stick with a high-quality organic tea.
Ready to get started? PepTea has everything you need to begin brewing authentic, delicious kombucha in your own kitchen.
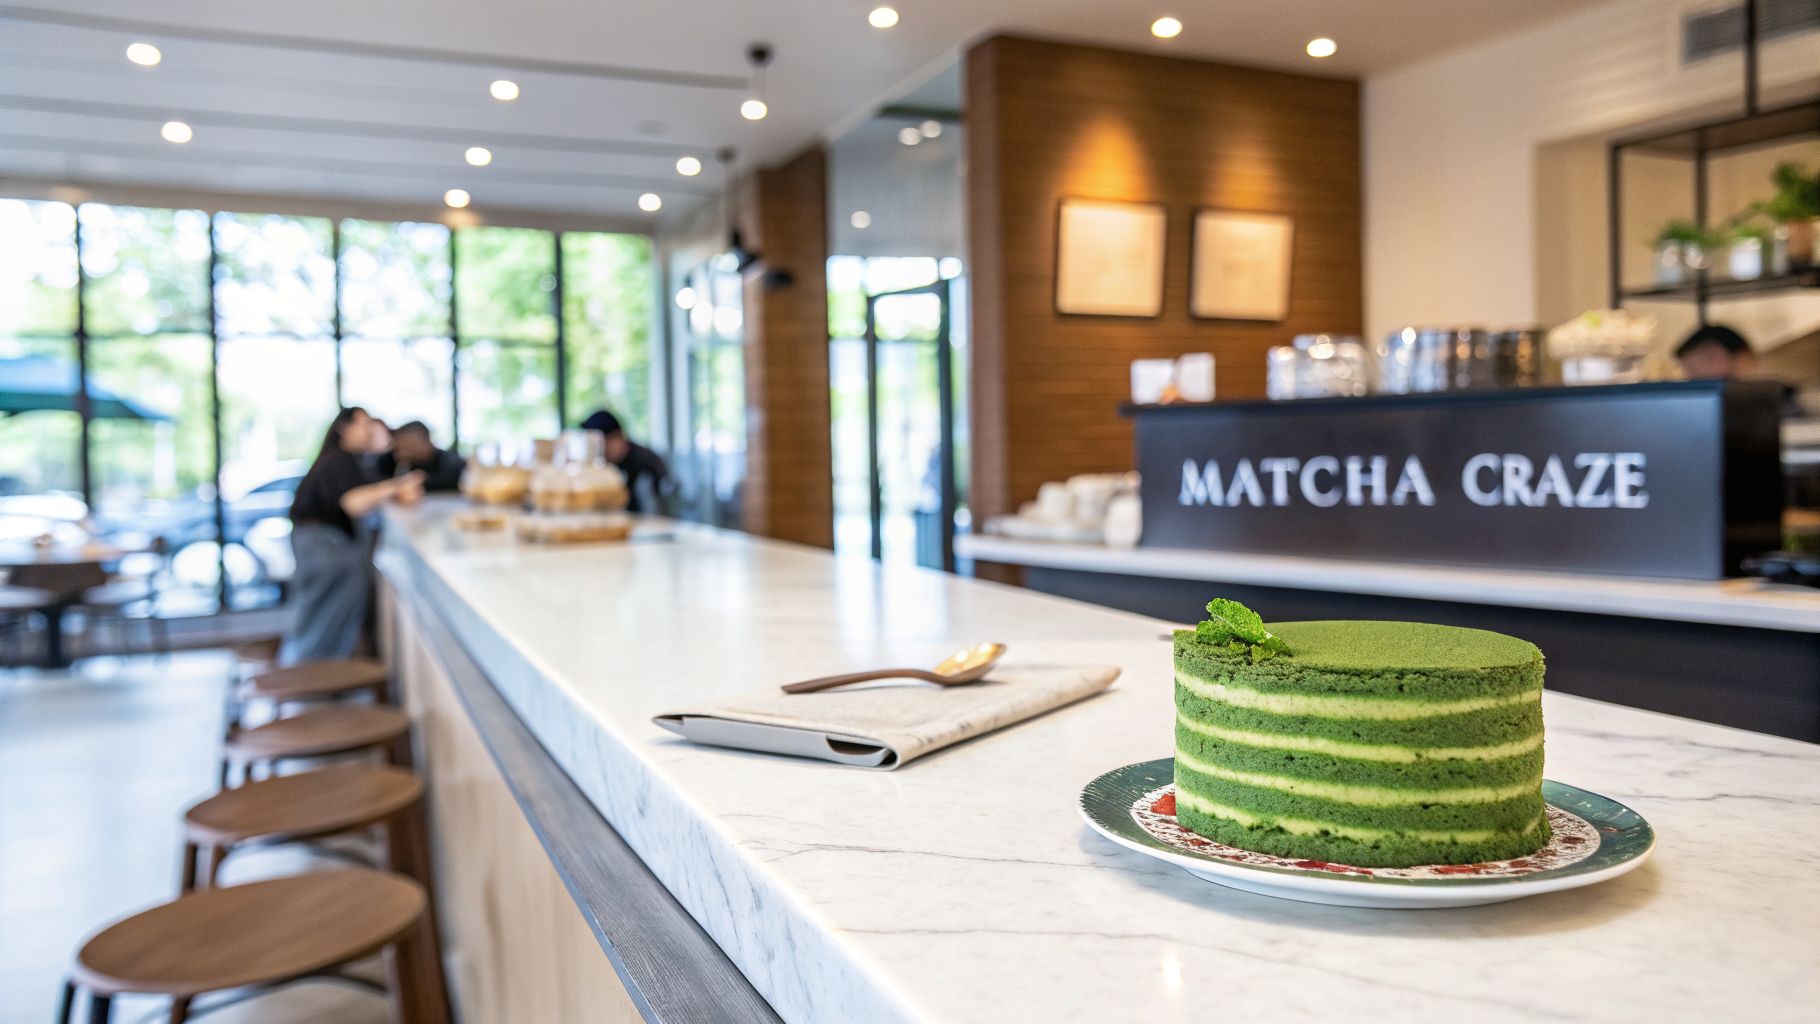
A Guide to the Perfect Australian Matcha Crepe Cake

A matcha crepe cake is the dessert you see everywhere: dozens of paper-thin, matcha-laced crepes stacked high with layers of light, sweet cream. It’s a stunning creation that perfectly balances the earthy, umami notes of matcha against a delicate sweetness. No wonder it has become a fixture in modern Australian cafés and a favourite for home bakers.
It’s less sugary than a traditional cake, celebrated for its unique flavour and that mesmerising layered look.
Why Australia Fell in Love with Matcha Crepe Cake
It’s almost impossible to walk past a contemporary Australian café and not see it. That perfectly layered green marvel, the matcha crepe cake, has gracefully transitioned from a niche pâtisserie treat to a full-blown obsession. And its rapid rise makes perfect sense when you look at how well it aligns with the modern Aussie palate.
This cake offers a kind of mindful indulgence. It hits the spot when you crave something special but does so without the overwhelming sweetness of most other desserts. For a nation that’s increasingly wellness-focused, that balance is everything.
A Symphony of Flavour and Texture
Eating a matcha crepe cake for the first time is a whole experience. Your eyes are drawn to that striking, soft green colour, which signals something natural and different. Then you get the subtle, grassy fragrance of high-quality matcha.
But the real magic is in the first bite. The complex, slightly bitter flavour of the matcha cleanly cuts through the rich, airy cream, leaving a refreshing finish. It’s nothing like a dense, heavy cake; each delicate layer is distinct, yet they all melt together in your mouth. This textural perfection is the reward for the patient work of stacking crepe after crepe.
A Modern Dessert with Deep Roots
The matcha crepe cake is a brilliant piece of culinary fusion. It marries classic French crepe-making with a quintessentially Japanese flavour profile. To really get it, it helps to understand the wider context of traditional Japanese cuisine. This connection to a deep food history adds another layer of appreciation.
The cake’s popularity speaks to our national love for food that is not only beautiful and flavourful but also functional. It’s a dessert that feels both sophisticated and restorative.
If you’re new to the world of matcha, learning about its origins can deepen your appreciation. Taking a moment to read about the brief history of matcha tea reveals the cultural weight behind this powerful green tea.
Making one yourself is an incredibly rewarding process, connecting you directly to this blend of traditions. As you'll see in this guide, it’s an art form you can absolutely master. The satisfaction of slicing into your own handcrafted cake and seeing those perfect layers? There's nothing quite like it.
Selecting the Right Matcha for a Vibrant Bake
The difference between a stunning matcha crepe cake and a disappointing one comes down to a single choice: the matcha itself. Get it wrong, and you're left with a dull, swampy-looking dessert where the flavour gets completely lost behind the cream and sugar. This is where understanding matcha grades becomes your most valuable baking tool.
Not all matcha is the same, and the differences are far from subtle. You’ll generally see two main categories out there: ceremonial grade and culinary grade. Knowing which one to use, and why, is everything.
Ceremonial vs Culinary Grade: What Is the Difference?
Ceremonial grade matcha is exactly what it sounds like—it’s crafted for traditional tea ceremonies. Made from the youngest, most delicate tea leaves, it has a smooth, nuanced flavour that’s designed to be whisked with water and sipped on its own.
That subtlety is its greatest strength, but it's also why it fails in a bake. Its delicate notes are easily steamrolled by ingredients like flour, eggs, and sugar.
Culinary grade matcha, however, is built for the kitchen. It comes from slightly more mature leaves, giving it a bolder, more robust flavour profile. This is precisely what you need. It has the strength to hold its own against the other ingredients, ensuring that distinct, earthy matcha flavour is present in every single layer.
For a successful matcha crepe cake, a high-quality organic culinary matcha is non-negotiable. Its robust flavour is what carries the dessert, and its quality determines the final colour and aroma.
Using ceremonial grade in a cake isn't just a waste of its delicate character; it's a waste of money. You're paying a premium for flavours that simply won't make it to the finished product.
What to Look for in a High-Quality Culinary Matcha
When you're picking a culinary matcha for your crepe cake, a few visual and sensory cues will tell you everything you need to know about its quality.
- Colour: You want a bright, vibrant green. A dull, yellowish, or brownish powder is a red flag. It usually means the matcha is old, has oxidised, and will give your cake a sad colour and bitter taste.
- Aroma: A good culinary matcha should smell fresh, grassy, and a little bit sweet. If it smells dusty or flat, it’s past its prime and won't deliver on flavour.
- Origin: Japanese matcha is the benchmark for quality, backed by centuries of specific cultivation and processing methods. Choosing an organic Japanese matcha, like the one we source at PepTea, guarantees a clean, pure product free from pesticides.
To help you get a better handle on this, we've put together a quick guide.
Choosing Your PepTea Matcha for Kitchen Creations
This table is a quick guide to help you select the best PepTea matcha for any purpose, from a traditional tea ceremony to beautiful baking.
| Matcha Grade | Best For | Flavour Profile | Why It Works for This Recipe |
|---|---|---|---|
| Ceremonial Grade | Traditional tea, lattes | Delicate, smooth, subtly sweet, low bitterness | Not recommended. The flavour is too nuanced and will be lost amongst the other ingredients. |
| Premium Culinary Grade | Lattes, smoothies, ice cream | Balanced, slightly more robust than ceremonial | A good option, but you may need to use more to achieve a strong flavour in a dense bake like this cake. |
| Organic Culinary Grade | Baking, cooking, sauces | Bold, robust, strong umami notes | The ideal choice. Its powerful flavour stands up to the fats and sugars in the crepe cake, ensuring the matcha taste shines through. |
Ultimately, choosing the right matcha is where your success begins. It’s the foundational step that dictates the final result.
By learning to spot quality and understanding what a recipe truly needs, you can find the perfect fit for all your kitchen adventures. For a deeper dive into the nuances between the grades, you can learn more about the different grades of matcha here. Opting for a premium organic culinary matcha isn’t just a suggestion—it’s the one decision that ensures a show-stopping cake with a deep, authentic flavour that makes every bite memorable.
Your Foolproof Matcha Crepe Cake Recipe
This is where it all comes together. We’re about to walk through making a show-stopping matcha crepe cake, breaking the process down into its two essential parts: the paper-thin, tender matcha crepes and the light, perfectly balanced matcha cream.
Forget about those intimidating, overly complex recipes. This is our go-to method, honed over countless batches in our own kitchens. I’ll share the secrets to getting a completely lump-free batter, finding that perfect pan temperature so your crepes never tear, and packing as much vibrant matcha flavour as possible into the cream. Think of this as having a knowledgeable friend right there with you.
Crafting the Perfect Matcha Crepes
The foundation of any great crepe cake is, naturally, the crepes. You’re aiming for layers that are impossibly thin, delicate, and a beautiful, uniform green. It might take a few tries to get into a rhythm, but it’s a genuinely relaxing process once you find your flow.
Crepe Ingredients:
- 240g plain flour
- 4 tablespoons granulated sugar
- 3 tablespoons Pep Tea Organic Culinary Matcha
- A pinch of salt
- 4 large free-range eggs
- 600ml full-cream milk
- 120ml water
- 60g unsalted butter, melted, plus extra for greasing the pan
First things first, you need to get that matcha perfectly smooth. In a large mixing bowl, sift your flour, sugar, salt, and Pep Tea Organic Culinary Matcha together. Sifting is absolutely non-negotiable here. It’s your first and best defence against a lumpy batter and the only way to ensure that gorgeous green colour is perfectly even.
In a separate bowl, whisk the eggs just until they’re combined. Now, make a well in the centre of your dry ingredients and pour the eggs in. Start whisking from the middle, slowly pulling in the dry mix from the sides until you have a thick, smooth paste. Creating this paste first is the secret to preventing lumps later on.
Slowly begin pouring in the milk and water while you keep whisking. Don’t rush this bit. Once all the liquid has been mixed in, switch over to a spatula and gently fold in the melted butter. The final batter should be very thin, with a consistency like thickened cream.
The single most important step is to rest your batter. Cover the bowl with cling film and pop it in the fridge for at least one hour, though overnight is even better. This gives the gluten time to relax, which is what makes the crepes incredibly tender and far less likely to tear.
Cooking the Crepes
After the batter has rested, give it a gentle stir to recombine everything. Heat a non-stick crepe pan or a small frying pan (about 20cm or 8 inches) over a medium-low heat. For the very first crepe, lightly grease the pan with a tiny knob of butter.
Pour about 60ml (a ¼ cup) of batter into the centre of the hot pan and immediately swirl it around to create a thin, even layer. Let it cook for about 60–90 seconds. You’ll know it’s ready to flip when the edges start to lift away from the pan and the surface looks matte.
Using a thin spatula, gently flip the crepe and cook it for just another 20–30 seconds on the other side. Slide it onto a plate and keep going with the rest of the batter, stacking the finished crepes as you work. You should get around 20–25 delicate crepes from this batch.
Whipping Up the Luscious Matcha Cream
While your stack of crepes cools down completely, it’s time to make the filling. The aim here is a cream that feels light and airy but is stable enough to hold its shape between all those layers. Using full-fat cream and making sure it’s properly cold is the key to getting this right.
Cream Ingredients:
- 750ml full-fat whipping cream (at least 35% fat), well chilled
- 120g icing sugar, sifted
- 2 tablespoons Pep Tea Organic Culinary Matcha, sifted
- 1 teaspoon vanilla extract
To get that vibrant green colour and a silky-smooth texture, you’ll want to make a quick matcha paste first. In a small bowl, whisk your sifted matcha powder with just a few tablespoons of the cold cream. Keep whisking until you have a smooth, clump-free paste. This simple move is what stops you from getting little specks of dry matcha in your finished cream.
This flowchart shows how visual and sensory cues help you select high-quality matcha for a vibrant final cake.
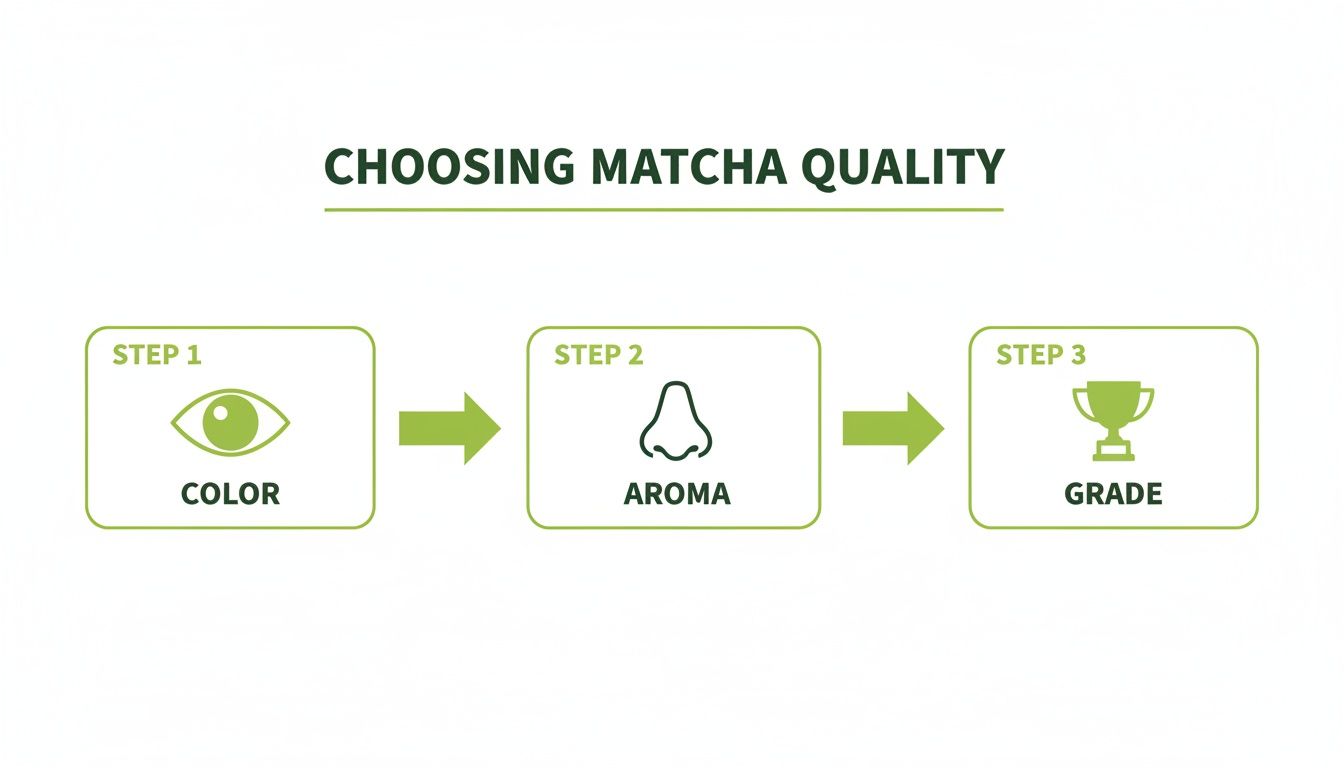
The key takeaway is that vibrant colour and a fresh aroma are direct indicators of the robust flavour needed for a successful matcha crepe cake.
Now, pour the rest of the cold cream into a large, chilled mixing bowl. Using an electric mixer on a medium speed, beat the cream until soft peaks just start to form.
Add the sifted icing sugar, the vanilla extract, and your prepared matcha paste to the bowl. Turn the mixer up to medium-high and continue beating until you have firm, stiff peaks. Just be careful not to over-whip, or the cream can turn grainy. The finished cream should be thick and hold its shape easily on the whisk.
For those who enjoy the process of layered desserts, exploring similar dessert recipes like coffee pancakes can be a great next step. You’ll find many of the core techniques, like getting a perfect batter consistency, are easily transferable. This kind of skill-building is what builds confidence in the kitchen and makes you want to experiment with new flavours.
With your crepes cooled and cream perfectly whipped, you're ready for the best part: assembly.
Assembling and Finishing Your Cake
This is where the magic happens. You have your stack of delicate, green-tea-infused crepes and a bowl of rich, perfectly whipped cream. Assembly is the patient craft of turning those two components into a single, elegant masterpiece.
It’s a process that’s all about a light touch and consistency. This is what creates those clean, distinct layers you see in high-end pâtisseries and ensures your cake is as structurally sound as it is beautiful.
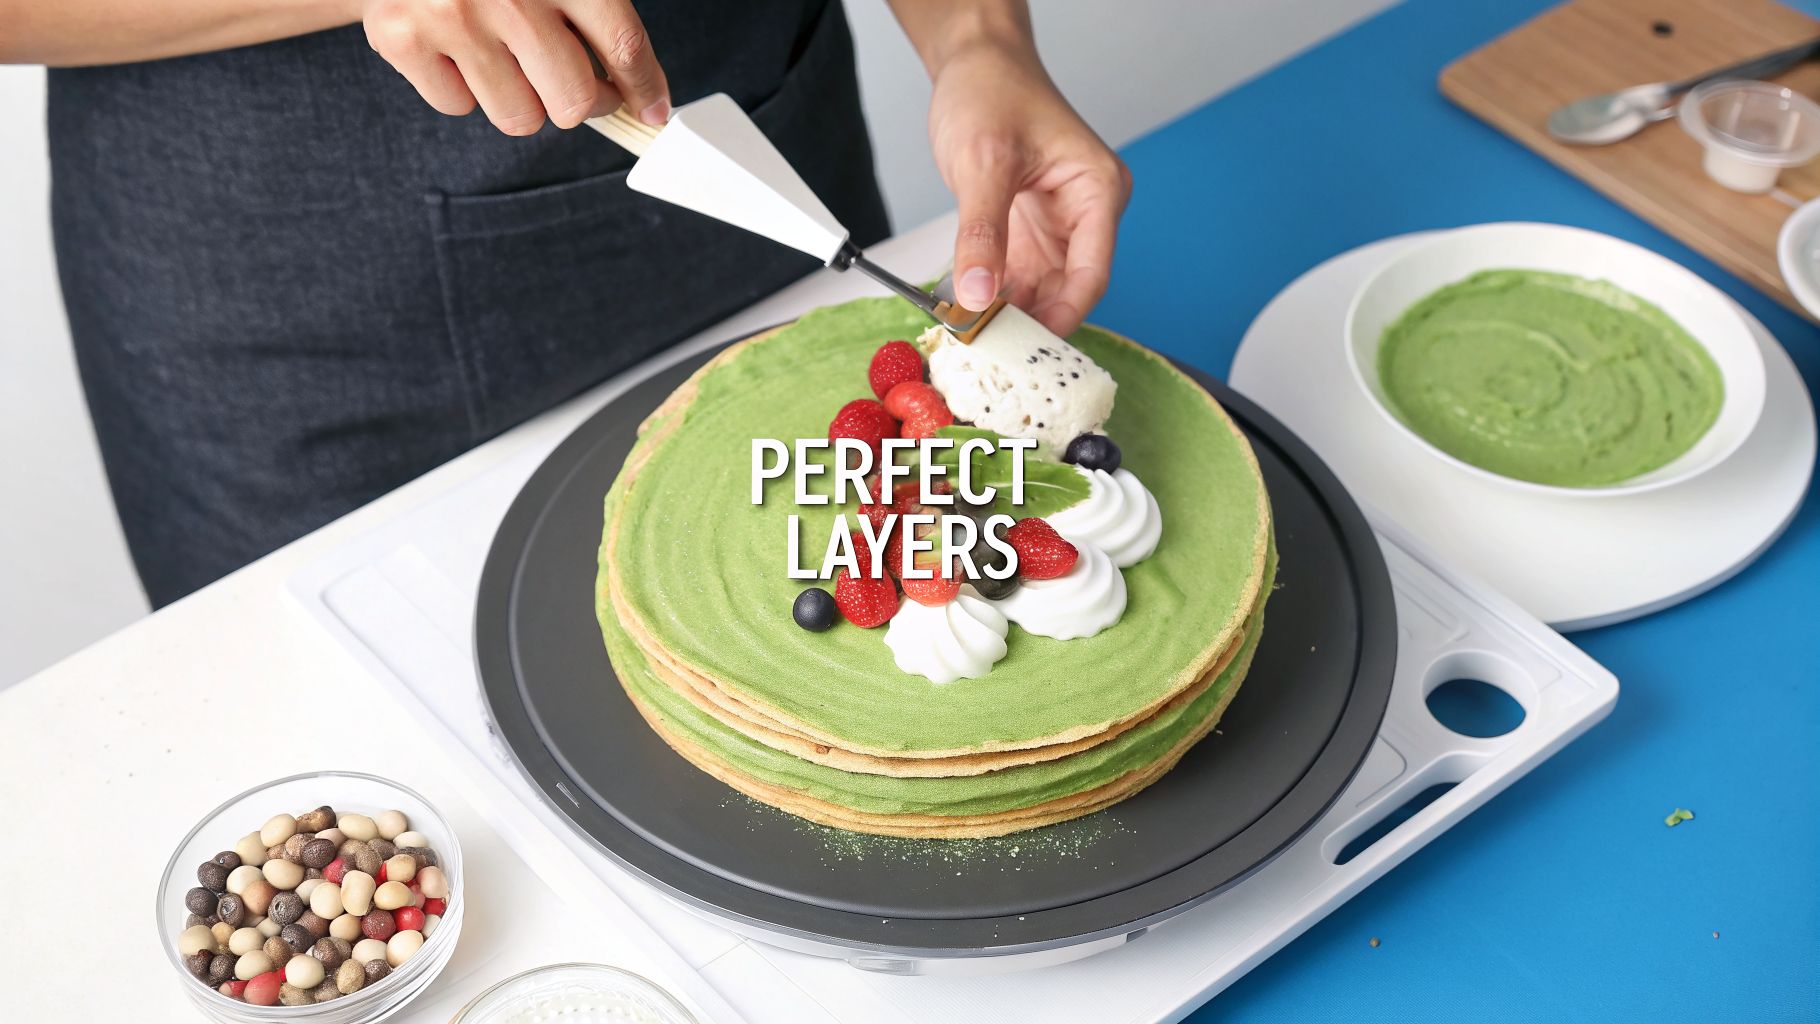
Building the Perfect Layers
Begin by placing your first crepe on a flat serving plate or a cake stand. This is the foundation, so take a moment to centre it properly.
Using an offset spatula, scoop about two to three tablespoons of the matcha cream into the middle of the crepe. Gently spread it into a thin, even layer, but stop short of the edge—leave a small border of about 1 centimetre. This gap is your insurance policy; it prevents the cream from squeezing out as the weight of the cake builds.
The secret to a uniform, professional-looking cake is consistency. Use the same amount of cream for every single layer. This is what keeps the cake standing tall and straight, rather than domed or lopsided.
Carefully lay the next crepe directly on top, pressing down ever so gently to help it adhere. Now, just repeat the rhythm: crepe, cream, crepe. Continue until you’ve used all your crepes, but try to save your best, most perfectly round one for the very top.
Once assembled, the cake needs to chill. This part is non-negotiable. Place it in the fridge, uncovered, for at least four hours—though overnight is even better. Chilling allows the cream to set firmly and the flavours to meld, which is essential for getting those clean, beautiful slices.
Simple Ideas for a Stunning Finish
A cake this striking doesn’t need much help. The real elegance of a matcha crepe cake is in its minimalist design and those gorgeous green layers. A simple garnish is almost always the most effective.
Here are a few ways to add that final touch of class:
- Classic Matcha Dusting: Hold a small sieve over the cake and gently tap a spoonful of our Pep Tea Organic Culinary Matcha across the top. This creates a stunning, velvety finish and an incredible matcha aroma.
- Fresh Berries: A small, artful cluster of fresh raspberries or thinly sliced strawberries adds a brilliant pop of colour. Their tartness also cuts through the richness of the cream beautifully.
- White Chocolate Curls: Take a vegetable peeler to a good-quality block of white chocolate. The delicate white curls provide a lovely visual contrast against the deep green top.
- Edible Flowers: For a truly special occasion, a few carefully placed violas or pansies can turn your cake into a genuine work of art.
These simple touches are designed to highlight the cake's natural beauty, not hide it. After all the care you’ve taken to create those perfect layers, a thoughtful finish is what makes your matcha crepe cake truly unforgettable.
Taking Your Matcha Crepe Cake to the Next Level
Once you’ve nailed the classic matcha crepe cake, the real fun begins. Think of that original recipe as your canvas. This is where you can start experimenting and really make the dessert your own, adapting it for different tastes, dietary needs, or just for the sake of trying something new.
The creative possibilities are endless, from simple fruit swaps to adding new textures. And if you’re catering for different dietary requirements, we’ve got you covered there, too.
Making It Vegan or Gluten-Free
Adapting a recipe as delicate as this might seem intimidating, but a few clever substitutions are all it takes. You can create a version that’s every bit as impressive without sacrificing that signature texture.
For a Gluten-Free Matcha Crepe Cake:
This one is straightforward. Just swap the plain flour in your crepe batter for a high-quality, all-purpose gluten-free flour blend. We’d recommend finding one that already contains xanthan gum—it provides the elasticity you need to stop the crepes from tearing. The rest of the recipe stays exactly the same.
For a Vegan Matcha Crepe Cake:
This requires a couple more tweaks, but the end result is absolutely worth the effort.
- For the crepes: Switch out the cow’s milk for a neutral-tasting plant milk like oat or soy. A commercial egg replacer works best to give the crepes structure, along with a good plant-based butter or a neutral oil.
- For the cream: Use a high-quality vegan whipping cream, which is often made from coconut or other plant fats. The trick is to get it properly cold before you even think about whipping it. This is non-negotiable for getting those stable, stiff peaks.
Flavour Twists That Actually Work
The earthy, slightly savoury flavour of matcha is surprisingly versatile. It plays well with a whole host of other tastes, opening the door for some genuinely inspired combinations.
- A Tart Berry Compote: Spread a very thin layer of raspberry or strawberry compote between every few layers of cream. The sharpness of the berries is fantastic for cutting through the richness, and it adds a beautiful pop of colour when you slice into the cake.
- Toasted Nuts for Texture: Finely chopped, toasted pistachios or almonds, sprinkled over the cream layers, add a welcome crunch. That nutty depth is a natural partner for matcha.
- A Touch of White Chocolate: You can either drizzle melted white chocolate between the layers or even mix it right into the whipped cream itself. It’s a classic pairing for a reason—the sweet, creamy profile just works.
The goal with any variation is always balance. You want to complement the matcha, not steamroll it. Start with small additions and taste as you go. The green tea flavour should always be the star.
Discovering what works is a huge part of the fun of baking. If you’re hungry for more ideas on using this amazing ingredient, our guide on baking with matcha and beyond is packed with inspiration for your next kitchen project.
The Perfect Drink Pairings
A slice of matcha crepe cake is a treat all on its own, but the right drink can turn it into a complete tasting experience. The secret is to pick a beverage that complements the cake’s delicate flavours instead of overpowering them.
While a simple cup of green tea is a good and obvious fit, we think the perfect partner is a glass of crisp, bubbly kombucha. The light fizz and gentle acidity of a well-made kombucha slices right through the cream’s richness, cleansing your palate with every sip.
For this cake, we’d pair it with one of our organic, sugar-free kombuchas, brewed right here in the Hunter Valley, NSW:
- Pep Tea Ginger Kombucha: The warming spice of ginger offers a beautiful contrast to the earthy matcha, creating a pairing that feels both dynamic and invigorating.
- Pep Tea Lime & Ginger Kombucha: The bright, zesty notes from the lime add another layer of freshness, making the whole experience feel even lighter on the palate.
These pairings create a real sense of balance and sophistication, turning a simple dessert into something truly memorable.
Your Matcha Crepe Cake Questions Answered
Even the most detailed recipe can leave you with questions, especially when you’re working with something as delicate as a matcha crepe cake. We get it. A lot can go wrong between the batter and the final slice.
Don’t worry. Most of the common frustrations are simple to fix once you know what’s really going on. Let’s walk through the usual suspects so you can turn any little hiccup into a learning moment.
How Do I Stop My Crepes From Being Tough or Rubbery?
This is the classic crepe problem, and it almost always comes down to two things: patience and heat. When you whisk flour and liquid together, you start developing gluten, which is what gives bread its chew but makes crepes tough.
The single most important step is resting the batter. Pop it in the fridge for at least one hour, though longer is even better. This gives the gluten strands time to relax completely. It's the secret to getting that beautifully tender, delicate texture instead of a leathery one.
Secondly, check your pan temperature. If it's too hot, the batter sets the instant it hits the pan, forcing you to spread a thicker layer that turns rubbery as it cooks. Keep the heat on a steady medium-low.
Why Isn’t My Cake Bright Green Like in the Photos?
If your cake is looking a bit dull, yellowish, or even brownish, the issue isn't your technique—it's your matcha. The colour of the powder is a direct signal of its quality and freshness.
A vibrant, almost electric-green powder tells you it was made from young, high-quality leaves that have been stored properly, protecting their antioxidants. Older, lower-grade matcha has oxidised, which kills both its brilliant colour and its complex, earthy flavour.
For a truly show-stopping matcha crepe cake, you have to use a high-grade culinary matcha. It is the single most important ingredient choice you’ll make, and the difference it makes to the final colour and taste is night and day.
This is exactly why we're so particular about our Pep Tea Organic Culinary Matcha. It's sourced specifically to deliver that signature vibrant green and robust flavour your baking deserves.
Help, My Matcha Cream Is Runny!
Runny cream is every baker’s nightmare, but thankfully, it's usually a quick fix. The problem nearly always traces back to temperature, fat content, or not whipping it quite long enough.
- Temperature is everything. Your cream, the mixing bowl, and even the whisk attachments need to be properly cold. Start with everything chilled right from the fridge. Cold cream whips faster and holds its structure far more reliably.
- Check the fat content. You absolutely must use a full-fat whipping cream with at least 35% fat. Lighter creams simply don't have enough fat globules to trap air and build a stable, pipeable structure.
- Whip to stiff peaks. You need to keep whipping until the cream is thick and holds a firm shape when you lift the beaters out. If you stop at the soft-peak stage, the cream will slowly collapse under the weight of the crepes. Be careful not to go too far, though, or it will become grainy.
Can I Prepare the Cake Ahead of Time?
Absolutely. In fact, a matcha crepe cake is a perfect make-ahead dessert. It actually needs a few hours in the fridge for the layers to set and meld, which makes for much cleaner, more beautiful slices.
You can easily make the crepes a day in advance. Just let them cool completely, then stack them, wrap the stack tightly in cling film, and pop them in the fridge. The matcha cream can also be made ahead and stored in an airtight container in the fridge.
Once assembled, the cake will keep perfectly for up to three days. Many people (including us) think the flavour is even better on day two, once the matcha has had more time to infuse the cream.
Ready to create your own vibrant, delicious matcha crepe cake? Start with the best ingredients for a guaranteed stunning result. At PepTea, we provide premium, organic culinary matcha perfect for all your baking adventures.
How to Make an Iced Matcha Latte Like a Pro Barista

Making a refreshing iced matcha latte at home is surprisingly simple. At its core, you just whisk high-quality matcha powder into a smooth paste with warm water, then pour it over ice and your milk of choice. But the real secret to a café-quality drink—one that’s vibrant and creamy, not clumpy and bitter—is all in the technique and the quality of your ingredients.
Crafting the Perfect Iced Matcha Latte at Home

Forget paying top dollar for inconsistent café lattes. We're here to show you how to create a bright, creamy, and perfectly balanced iced matcha latte right in your own kitchen. This isn't just about stirring some green powder into milk; it's about mastering a few simple details that make all the difference, giving you a delicious and healthy drink every time.
Why Make Your Own Iced Matcha Latte?
When you take control of the process, you guarantee a better drink. Every single time. You get to choose the quality of your ingredients and dial in the flavour exactly how you like it. Plus, there are some pretty great benefits that align with a healthy, wellness-focused lifestyle.
- Customisable Sweetness: So many café versions are just loaded with sugar. At home, you control everything. Use a touch of honey or maple syrup, or have it completely unsweetened to let the matcha’s real flavour shine through.
- Better Quality Ingredients: This is a big one. You can choose a premium organic matcha, which has a much more robust flavour and is packed with antioxidants for clean, sustained energy. The difference in taste and health benefits is immediately noticeable.
- Cost-Effective: A daily café run adds up fast. Making your own is significantly cheaper in the long run. A single tin of quality matcha will see you through dozens of delicious lattes.
The real beauty of a homemade iced matcha latte is in the ritual itself. Taking a few minutes to mindfully whisk that vibrant green powder creates a moment of calm before you even take the first sip.
We’ll guide you through choosing the right ingredients and mastering the whisk, ensuring a silky-smooth, flavourful latte every single time. It's fascinating to see how a few delicate leaves become the powder for your drink, a process you can learn more about by understanding how Matcha tea is made.
Whether you're a long-time matcha lover or just starting out, this guide will give you the confidence to whip up a refreshing drink that’s packed with the clean, sustained energy of premium organic matcha. Let's make your homemade iced matcha latte the best you've ever had.
A great iced matcha latte isn’t about a complicated recipe. It’s about the ingredients. Get these three things right, and the final drink will come together beautifully, giving you that perfect balance of earthy flavour, creamy texture, and vibrant colour you’d expect from a top-tier Australian café.
Your Matcha Grade Makes All the Difference
This is the most important decision you’ll make. The dusty, bitter green powder from the back of the supermarket shelf just won’t cut it here. For a latte with a rich, balanced flavour that doesn’t get lost behind milk and ice, you need a high-quality powder designed for the job.
But not all high-quality matcha is right for a latte. It comes down to choosing between two main grades: Ceremonial and Culinary.
Matcha Grade Guide for Your Latte
Picking the right matcha can feel confusing, but for a latte, the choice is actually quite straightforward. This table breaks down what you need to know.
| Matcha Grade | Best Use | Flavour Profile | Colour | Why It Works |
|---|---|---|---|---|
| Ceremonial Grade | Drunk on its own with water | Delicate, subtle, sweet, umami-rich | Bright, almost neon green | Its nuanced flavour is prized for traditional tea ceremonies but gets completely lost when mixed with milk and sweeteners. |
| Culinary Grade | Lattes, smoothies, baking, cooking | Bolder, more robust, slightly astringent | Deeper, more forest green | It's specifically designed with an assertive flavour that punches through the creaminess of milk, ensuring the matcha taste remains the star. |
For an iced matcha latte, a premium culinary grade matcha is your secret weapon. It has the strength to stand up to other ingredients without tasting bitter.
A high-quality culinary grade, like our PepTea Organic Matcha, delivers that robust flavour you’re looking for. It’s stone-ground from certified organic Japanese leaves, giving you that vibrant green colour and a smooth finish, every time.
Choosing the Right Milk for the Job
The milk you pick has a massive impact on the latte’s final texture and taste. There’s no single "best" option; it’s all about the experience you want to create.
- Full-Cream Dairy Milk: This is the classic for a reason. It delivers a rich, velvety creaminess and has a natural sweetness that complements matcha perfectly.
- Oat Milk: The café favourite. Oat milk is famously creamy and creates a luxurious mouthfeel very similar to dairy. Its neutral, slightly sweet flavour really lets the matcha shine.
- Almond Milk: A lighter, more refreshing choice. It’s less creamy than oat or dairy, resulting in a less decadent latte with a subtle nutty background note.
- Soy Milk: Another fantastic plant-based option. Soy is creamy and has a distinct flavour of its own that pairs surprisingly well with matcha’s earthiness.
The incredible rise of matcha lattes isn't just a fleeting trend. Urban Australia's café culture has embraced them completely, with specialty cafes seeing a 28% year-over-year surge in major cities. This growth, detailed in recent Asia-Pacific matcha market research, is all about premium organic matcha becoming the hero of the iced drink menu.
Using Sweeteners to Enhance, Not Overpower
Even if you prefer a clean, low-sugar drink, a little sweetness can work wonders by rounding out matcha’s complex, earthy notes. The goal is to complement, not to mask.
Natural sweeteners are your best bet. A small drizzle of honey or maple syrup harmonises beautifully with the matcha. Just remember to start small—you can always add another drop, but you can’t take it away. Building your latte from a foundation of quality is what makes it a delicious, guilt-free treat.
How to Prepare a Perfectly Smooth Matcha Paste
If you've ever had a gritty, lumpy homemade iced matcha latte, you know the disappointment. The secret to that smooth, vibrant, café-quality drink isn't complicated, but it all comes down to one crucial step: how you prepare the matcha itself.
Get this first step right, and everything else falls into place. You need to create a smooth, silky paste that will dissolve completely into your milk. This is often called "blooming" the matcha, a process that wakes up the powder, unlocking its full colour and deep, earthy flavour. If you're interested in the food science behind it, this article on what does bloom mean in cooking is a great read.
It all starts with just a few simple building blocks.

Think of these as the foundation: quality matcha, your milk of choice, and a touch of sweetener if you like. That's all it takes.
The Traditional Method Using a Bamboo Whisk
For the most authentic experience, a bamboo whisk (known as a chasen) is the tool for the job. Its fine, flexible prongs are perfectly designed to break up clumps and aerate the tea, creating a beautiful, delicate froth.
Here’s the method that has been used for centuries:
- First, always sift your matcha. Use a small, fine-mesh sieve to sift 1-2 teaspoons of matcha powder directly into a small bowl. This is the single most important thing you can do to prevent lumps. Don't skip it.
- Next, add a splash of warm water. Pour about 60ml (2 ounces) of warm—not boiling—water over the powder. The perfect temperature is around 80°C. If the water is too hot, it will scorch the delicate tea leaves, leaving you with a bitter taste.
- Now, whisk. The technique is key. Move the chasen back and forth in a quick ‘W’ or ‘M’ motion. Forget stirring in circles; you need vigorous, zig-zag movements for about 20-30 seconds. You’ll know you’re done when all the powder has dissolved and a fine layer of foam has formed on the surface.
The goal is a smooth, vibrant green paste with a consistency like thin paint. This concentrated shot is what will mix perfectly into your cold milk and ice, no clumps in sight.
The Modern Shaker Jar Hack
Don't have a bamboo whisk? No worries. A simple shaker bottle or even a small jar with a tight-fitting lid is a brilliant, low-fuss alternative that works surprisingly well. It’s our go-to method when we’re in a hurry or away from our kitchen.
Just add your sifted matcha powder and the same 60ml of warm water to the jar, seal it up tight, and shake it like you mean it for about 30 seconds.
The agitation inside the jar does an excellent job of breaking down the powder, leaving you with a frothy, perfectly mixed matcha shot that’s ready for your latte. It's incredibly convenient and proof that you don't need all the traditional gear to make a seriously good iced matcha at home.
Right, you've got your perfectly smooth matcha paste. The hard part is over. Now for the fun bit: putting it all together to create that beautiful, layered latte you see in good cafés.
This is the easiest step, but a little bit of technique is what makes it look like a pro made it.

First up, grab your favourite tall glass. Getting the café feel at home often comes down to little details like glassware. If you’re curious about what works best, there are some great guides on choosing the best smoothie cups that will do the job perfectly.
Fill that glass all the way to the top with ice. This isn’t just for keeping it cold; the ice is what will help you create those distinct, flowing layers.
Building Your Latte Layers
Pour in your milk—whether that’s creamy oat or full-cream dairy—but be sure to leave about two or three centimetres of space at the top. This is crucial for giving you enough room for the main event without making a mess.
Now for the final touch. Slowly pour your vibrant green matcha paste directly over the ice.
Pro Tip: Don't just pour it anywhere. Aim for one of the larger ice cubes near the top of the glass. When the matcha hits the cold surface of the ice, it will disperse gently and cascade down through the milk, creating that stunning, marbled effect that looks so good.
Before you dive in, give it all a gentle stir with a long spoon or straw. You’ll see the rich, earthy matcha swirl into the creamy milk, creating a drink that’s perfectly balanced.
It's this exact drink that’s seen some serious growth in popularity. Projections show the Australian matcha latte powder market is set to jump from $33.215 million to $76.59 million in sales.
It just goes to show how much Aussies are embracing matcha, especially in a refreshing iced latte. If you’re looking for more ideas, you can check out our other guide on how to make the perfect matcha latte, which covers both hot and cold versions.
Creative Twists on Your Iced Matcha Latte
Once you’ve nailed the classic recipe, your kitchen officially becomes your own private matcha bar. This is where the real fun begins. It’s your chance to get creative, personalise your drink, and discover flavour combinations you won’t find in just any café.
The beauty of a homemade iced matcha latte is that it’s a perfect blank canvas. Let’s explore a few simple but brilliant ways to add your own signature touch.
Fruity and Refreshing Matcha Variations
Adding fruit is a fantastic way to introduce natural sweetness and a vibrant, seasonal twist, especially during the warmer months here in Australia. It’s all about creating a balance where the fruit complements the matcha, not overpowers it.
A few ideas to get you started:
- Strawberry or Mango Matcha Latte: Muddle a few fresh strawberries or a spoonful of mango purée at the bottom of your glass before adding ice. The sweetness of the fruit pairs beautifully with matcha's earthy notes, creating a layered drink that’s both gorgeous and delicious.
- A Hint of Mint or Vanilla: For something more subtle, try a single drop of pure vanilla extract or muddle a few fresh mint leaves with your sweetener. A vanilla matcha latte is creamy and comforting, while mint adds an incredibly refreshing, cool finish.
The key is to start small. You can always add more flavour, but you can’t take it away. A little bit of fruit purée or a single drop of extract is often all you need to completely transform your drink.
The Ultimate PepTea Innovation: The Matcha Kombucha Fizz
Here’s a unique recipe we absolutely love—one that combines the benefits of two of our favourite organic drinks. This is the perfect way to add a probiotic-rich, gut-friendly boost to your afternoon pick-me-up.
This twist creates a lively, effervescent drink that is wonderfully complex and refreshing. The sharp, spicy notes from the ginger in the kombucha cut through the creaminess of the latte, creating a truly unique flavour experience.
To make it, simply prepare your iced matcha latte as you normally would, but leave about an inch of space at the top of your glass. Then, top it off with a generous splash of our PepTea Ginger or Lime & Ginger organic kombucha.
You’ll see it fizz up instantly, creating a beautiful, frothy head. It’s an exciting, modern take on the iced matcha latte that’s as good for your gut as it is for your tastebuds. For more inspiration on chilled drinks, our simple iced matcha tea recipe provides another great starting point.
Troubleshooting Common Matcha Latte Problems
So, you’ve followed the steps, but your iced matcha latte just isn’t quite right. It happens. Most of the time, a disappointing matcha comes down to a few small, easily corrected details. Let’s walk through the common culprits and how to fix them.
A lumpy or gritty texture is the most frequent complaint, and the fix is always at the very beginning. Always sift your matcha powder through a fine-mesh sieve before you add a drop of water. This single step is the difference between a chalky drink and a silky-smooth one. It’s non-negotiable.
Why Does My Matcha Taste Bitter?
A harsh, bitter aftertaste is a dead giveaway that something went wrong. It almost always points to one of two things: the water was too hot, or the matcha itself is poor quality.
If you’re using boiling water to make your matcha paste, you’re scorching the delicate tea leaves. That’s what brings out those unpleasant, bitter flavours. The ideal temperature is around 80°C. No temperature-controlled kettle? No problem. Just boil the water and let it cool for a minute or two before pouring.
The other factor is quality. Low-grade matcha powder often has a dull, yellowish-green colour and a naturally bitter profile. For a clean, rich flavour, you need to start with a vibrant, high-quality culinary grade matcha. There’s simply no substitute.
Solving Weak or Watery Lattes
Does your drink taste more like faintly green milk than a proper matcha latte? The problem is almost certainly your ratio. You’re just not using enough matcha.
A good starting point is one to two teaspoons of matcha per 250ml of milk. Don’t be afraid to add more if you want a bolder, more robust flavour that can stand up to the milk and ice. You’re in control here, so find the balance that you love.
There’s a reason so many people are trying to perfect this at home. The popularity of iced matcha lattes has exploded, with Australia's matcha market soaring to over $54 million in revenue by 2024. It’s become the go-to summer drink in cafes nationwide, a clear sign that Aussies are embracing healthier, antioxidant-rich alternatives. You can read more about this shift by exploring the local matcha boom.
Common Iced Matcha Latte Questions
Even a straightforward recipe can leave you with a few questions. Making a great iced matcha latte at home is mostly about technique, and a few small adjustments can make all the difference. Here are the answers to the questions we get asked most often.
Can I Make an Iced Matcha Latte Without a Whisk?
You absolutely can. While a traditional bamboo whisk (chasen) is designed for the job, it’s not the only way to get a clump-free paste. A simple shaker jar or a blender works just as well.
Just add your sifted matcha and a little warm water, seal the lid, and shake it like you mean it for about 30 seconds. A handheld milk frother is another fantastic alternative for whipping the matcha and water into a smooth, vibrant slurry.
Is Matcha a Better Choice Than Coffee for Anxiety?
Many people report that matcha gives them a "calmer" energy boost compared to coffee. This difference often comes down to L-theanine, an amino acid found in matcha that is thought to promote a sense of relaxed focus.
It works with the caffeine, not against it, helping to smooth out the typical jitters, spike, and crash that some people get from a strong coffee. You get the alertness, but it feels more sustained and level.
How Much Matcha Should I Actually Use?
A good starting point for a balanced latte is one to two teaspoons of matcha for every 250ml of milk. This gives you a noticeable but not overpowering matcha flavour.
That said, the "perfect" ratio is entirely personal. If you love a stronger, more earthy and intense matcha hit, don’t be afraid to add a little more. Start with one teaspoon, taste it, and adjust your next one until you land on a ratio you love.
If you’re making your latte ahead of time, just be aware that the matcha will naturally settle at the bottom. Store it in the fridge (without ice) and just give it a good shake or stir right before you pour and drink.
Ready to create your own vibrant, antioxidant-rich latte? PepTea is an Australian-owned company dedicated to bringing you the best. We offer premium, stone-ground organic culinary matcha that delivers exceptional flavour and colour every time. Explore our range and taste the difference quality makes.
Master Your Brew: A Guide to Using a Digital pH Meter for Kombucha

Before we even get to the tools, let's get one thing straight: pH is the single most important number in your entire kombucha brew. This isn't just a technical detail for chemistry nerds. Understanding and controlling your kombucha's pH is the difference between a delicious, safe brew and a disappointing, or even risky, one. For this crucial job, a digital pH meter is the only tool that truly delivers.
Why pH Is Your Secret to Perfect Kombucha
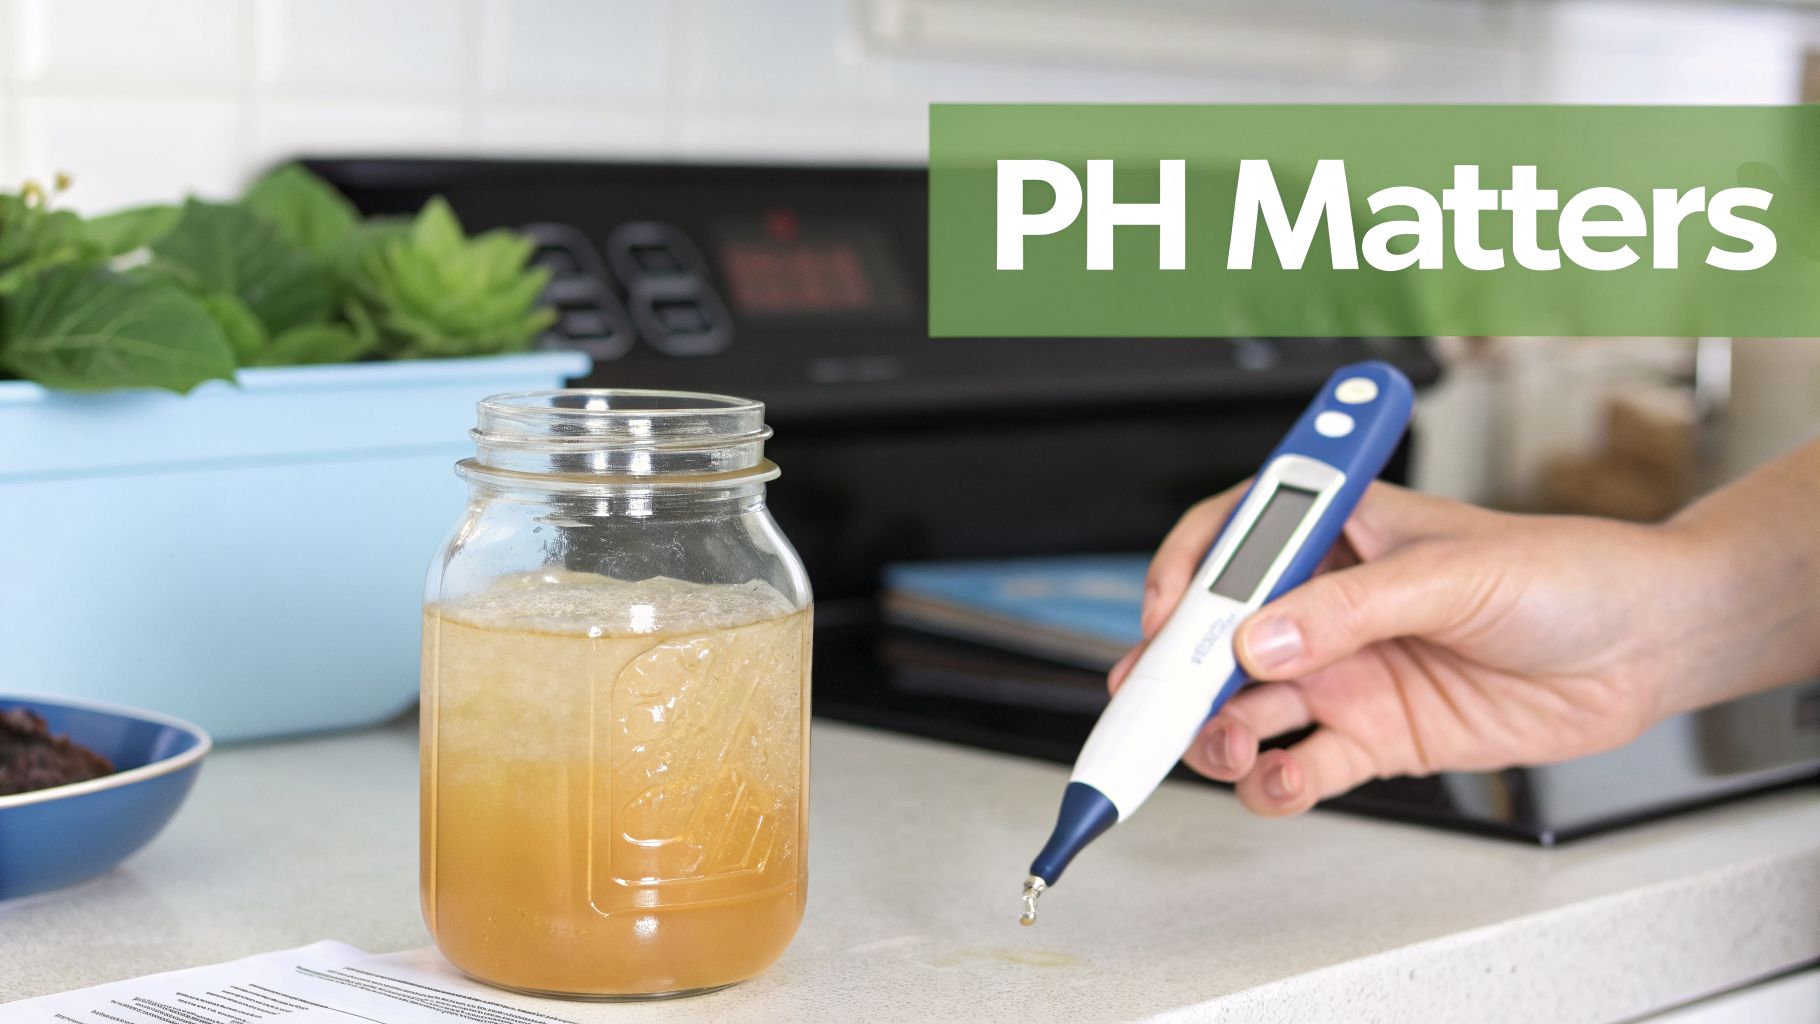
If you've ever had one batch turn out perfectly tangy and the next fall completely flat, the reason is almost always pH. Think of pH as your fermentation's bodyguard and guide. It's a simple measurement of acidity, but it controls everything from flavour and fizz to safety.
Keeping a close eye on your brew’s pH with a digital meter isn't just about collecting data. It’s about turning a hopeful experiment into a reliable, repeatable process.
It’s a safety net. A low pH (high acidity) creates a hostile environment where mould and other nasty bacteria just can't get a foothold. Getting your starting brew to a pH of 4.5 or lower is the single most effective thing you can do to protect it.
It’s how you dial in the flavour. That signature tang you love in kombucha comes from the organic acids that develop during fermentation. By tracking the pH as it drops, you can decide the exact moment to end your first ferment to get that perfect sweet-to-sour ratio.
It keeps your SCOBY happy. Your Symbiotic Culture of Bacteria and Yeast thrives in a specific acidic window. Monitoring the pH means you’re giving your culture the ideal conditions to stay healthy and work its magic, batch after batch.
The Professional’s Tool for Quality and Consistency
This obsession with precision isn't just a home-brewing quirk. Here in Australia’s booming organic beverage market, a digital pH meter is non-negotiable. At PepTea, we rely on meticulous pH control in our HACCP-accredited Hunter Valley brewery to craft the raw, living kombucha our customers love.
We ensure our brew stays within a specific pH range. This fosters a probiotic-rich environment and guarantees every bottle is not only delicious but consistently safe.
For us, a digital pH meter isn't optional—it's the heart of our quality control. It’s our guarantee that every bottle of PepTea kombucha is a living, probiotic-rich drink you can trust.
Ultimately, once you understand the fundamentals of what kombucha is, the importance of pH just clicks. By taking charge of this one number, you gain the confidence to refine your process, experiment with flavours, and brew amazing kombucha every single time.
Choosing the Right Digital pH Meter for Your Brew
Not all pH meters are created equal, and stepping into the market for the first time can feel a bit overwhelming. Let’s cut through the technical jargon and focus on what you actually need to brew brilliant kombucha. The goal is a reliable tool that gives you accurate readings, not a lab-grade gadget with bells and whistles you’ll never use.
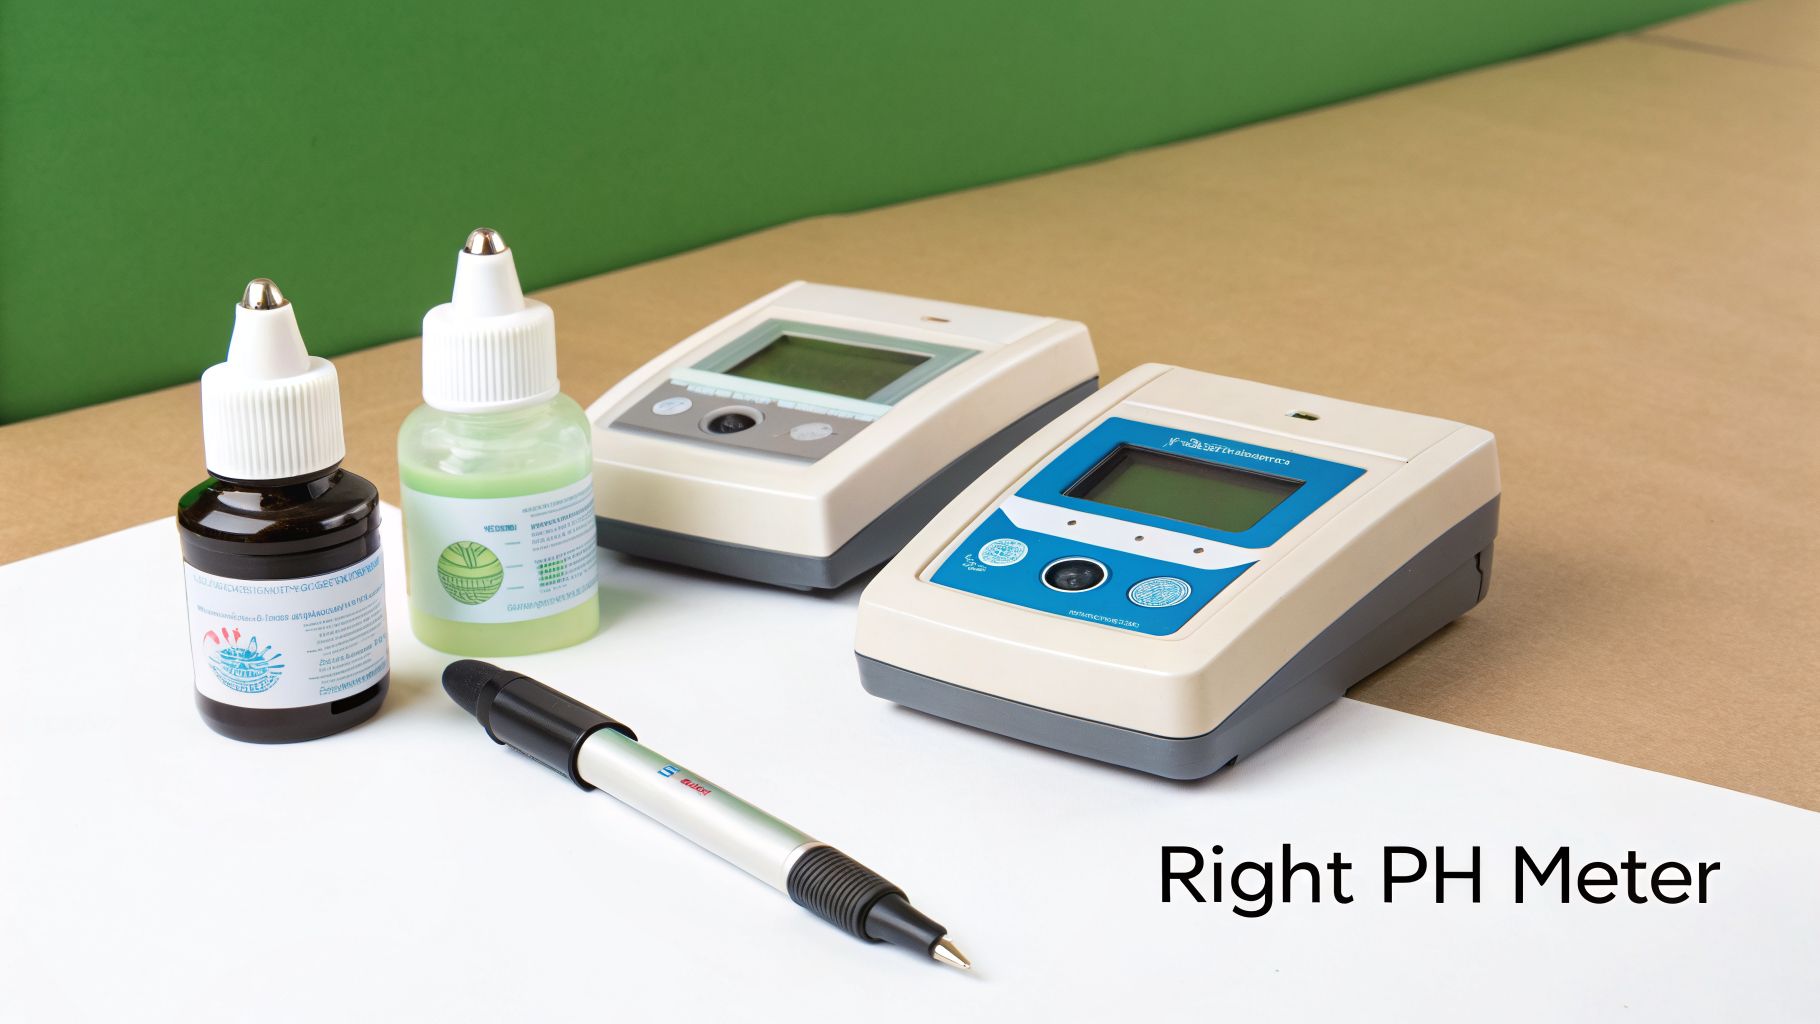
The most common and accessible option for home brewers is the pen-style digital pH meter. They’re affordable, portable, and more than capable of providing the accuracy you need. At the other end of the spectrum are the robust benchtop models, like the ones we use in our commercial brewery, which offer the highest level of precision but are serious overkill for a home setup.
For your kitchen bench, a quality pen meter is the perfect place to start. A compact and easy-to-use option like this Mini pH Water Tester Meter is a great example of what to look for.
Key Features That Actually Matter
When you're comparing models, it's easy to get lost in the specs. To get trustworthy readings for kombucha, you only really need to pay attention to a few key things.
Resolution of 0.1 pH: For brewing, a resolution of 0.1 pH is perfectly fine. You might see meters offering 0.01 resolution, but that’s a level of precision needed for a scientific lab, not your brew. A 0.1 resolution clearly shows you when your kombucha has dropped from a starting pH of 4.5 to a ready-to-bottle 3.0.
Automatic Temperature Compensation (ATC): This one is non-negotiable. The temperature of your liquid directly impacts its pH reading, and ATC automatically corrects for this. It ensures your reading is accurate whether your sample is at a cool 20°C or a warmer 28°C. Without it, you’re just guessing.
A Replaceable Electrode: The electrode—that little glass bulb at the end of the meter—is the most sensitive part of the device. It's also the part that degrades over time. Choosing a meter with a replaceable electrode is a much smarter long-term investment. When it eventually wears out, you can just swap it for a new one instead of buying a whole new meter.
To help you decide, here’s a quick breakdown of what to look for when you're shopping around.
Digital pH Meter Feature Comparison for Brewers
| Feature | What to Look For | Why It Matters for Kombucha |
|---|---|---|
| Resolution | 0.1 pH | Perfectly adequate for tracking fermentation. A resolution of 0.01 is unnecessary and often comes at a higher price. |
| Automatic Temp. Compensation | "ATC" listed as a feature | Guarantees accurate readings as your kombucha's temperature fluctuates, which it will. This is a must-have. |
| Electrode Type | Replaceable glass bulb | The electrode is a consumable part. Being able to replace it saves you from buying a whole new device down the line. |
| Calibration | 1 or 2-point automatic calibration | Makes it simple to keep your meter accurate using pH buffer solutions. Avoids tricky manual adjustments. |
| Display | A clear, backlit LCD screen | You’ll often be taking readings in different lighting conditions. A backlit screen is a small feature that makes a big difference. |
This move towards precision isn't just a niche trend. While global data showed digital pH meters capturing 64.1% of the market in 2021, Australia's own homebrewing scene reflects this shift. Accessible pen-style models are allowing brewers to achieve the same accuracy that was once reserved for professional labs.
Ultimately, choosing a meter with these core features sets you up for consistent, safe, and delicious kombucha from your very first batch.
By prioritising these essential features, you ensure your digital pH meter is a reliable partner, not just another gadget. It sets you up for consistent, safe, and delicious kombucha from your very first batch.
Making Calibration a Simple Brewing Habit
An uncalibrated digital pH meter is just an expensive toy. Think of calibration as teaching your meter what "neutral" and "acidic" actually mean—without it, every number it shows you is built on a faulty foundation. While it might sound technical, getting this right is the single most critical habit for trustworthy readings. It's a non-negotiable step in our Hunter Valley brewery, and it should be in your kitchen, too.
The whole process is much simpler than it sounds. You’re just using standard buffer solutions, which are pre-mixed liquids with a precise, stable pH. For kombucha, most meters use a two-point calibration with a neutral pH 7.0 solution and an acidic pH 4.0 solution. This perfectly brackets the range you'll be working in.
Your Quick Calibration Checklist
Making this a pre-brew ritual only takes a few minutes, but it's the best insurance policy for a safe and delicious batch. It's the only way to be certain you can trust the numbers.
Rinse First, Always: Before you start and between each step, give the meter's electrode (the glass bulb at the end) a good rinse with distilled or deionised water. Never use tap water. The minerals can mess with your readings and slowly damage the sensitive electrode.
Start with pH 7.0: Dip the clean electrode into your pH 7.0 buffer solution. Swirl it gently and just wait for the reading on the screen to stop moving. Now, follow your meter’s instructions to lock this in as your first calibration point.
Rinse Again: Pull the probe out, rinse it thoroughly with distilled water, and gently pat it dry with a clean, soft tissue. This is crucial to avoid contaminating your buffer solutions.
Calibrate with pH 4.0: Now, dip the electrode into your pH 4.0 buffer solution. Again, just wait for the reading to stabilise, then set this as your second point.
And that's it. Your meter is now properly calibrated and ready to give you data you can actually rely on for your brew.
Calibration isn’t just a “nice-to-do” task; it's a non-negotiable part of every single brew day. A quick calibration before you start is the only way to be certain that your digital pH meter is providing accurate data, protecting your kombucha from the very first step.
How Often Should You Calibrate?
For absolute peace of mind and the most consistent results, we strongly recommend calibrating your digital pH meter before every new brewing session.
If you brew weekly, you calibrate weekly. An electrode’s sensitivity can drift over time from temperature changes, how it’s stored, and general use. By making calibration the very first step of your brew day, you eliminate any doubt and make sure every batch starts on the right foot.
How to Correctly Measure Your Kombucha's pH
Alright, you've got your calibrated digital pH meter in hand. Now comes the part that really matters: getting a reliable pH reading from your brew. It’s a straightforward process, but your technique makes all the difference between a guess and a genuinely useful measurement.
The single most important rule? Never dip your meter directly into your main brewing vessel. Always, always take a small, clean sample to test. It’s a simple habit that completely removes the risk of contaminating your entire batch.
Taking an Accurate Sample
First up, grab a clean ladle or measuring cup and draw out a small amount of kombucha—about 50-100ml is more than enough. Pour this into a separate, clean glass or small jar. This little sample is your testing ground.
Now, let that sample sit for a few minutes until it reaches room temperature. pH readings are sensitive to temperature, and letting the liquid stabilise allows your meter’s Automatic Temperature Compensation (ATC) to do its job properly. This step is crucial for an accurate reading.
Once it's at room temp, submerge the clean electrode of your pH meter into the sample. The glass bulb at the tip should be completely covered. Give it a gentle swirl to make sure the liquid is circulating around the probe, then hold it still. Wait for the numbers on the screen to stop fluctuating. That final, stable number is your kombucha's true pH.
Key Moments to Measure Your Brew
Knowing when to measure is just as critical as knowing how. A pH reading at the right time gives you a window into what’s happening inside your fermenter and empowers you to guide the process.
Here are the key checkpoints in any brew cycle:
The Start of Your Batch: Take your very first reading right after adding your starter tea and SCOBY to your fresh sweet tea. You’re looking for a starting pH of 4.5 or lower. This confirms the batch is acidic enough from the get-go to protect against mould and other unwanted microbes.
A Few Days In: Check the pH again a few days into fermentation. You should see the number steadily dropping. This is your proof that the culture is alive, well, and actively converting sugars into those healthy organic acids.
Nearing the End of the First Ferment: This is where your personal taste comes in. As the pH drops, the brew becomes more tart and complex. We recommend starting to taste your kombucha once the pH hits about 3.5. Most brewers find their sweet spot somewhere between pH 2.8 and 3.2.
Before you can trust these readings, you need to be sure your meter is ready. The simple rinse-calibrate-ready process is the foundation of good measurement.
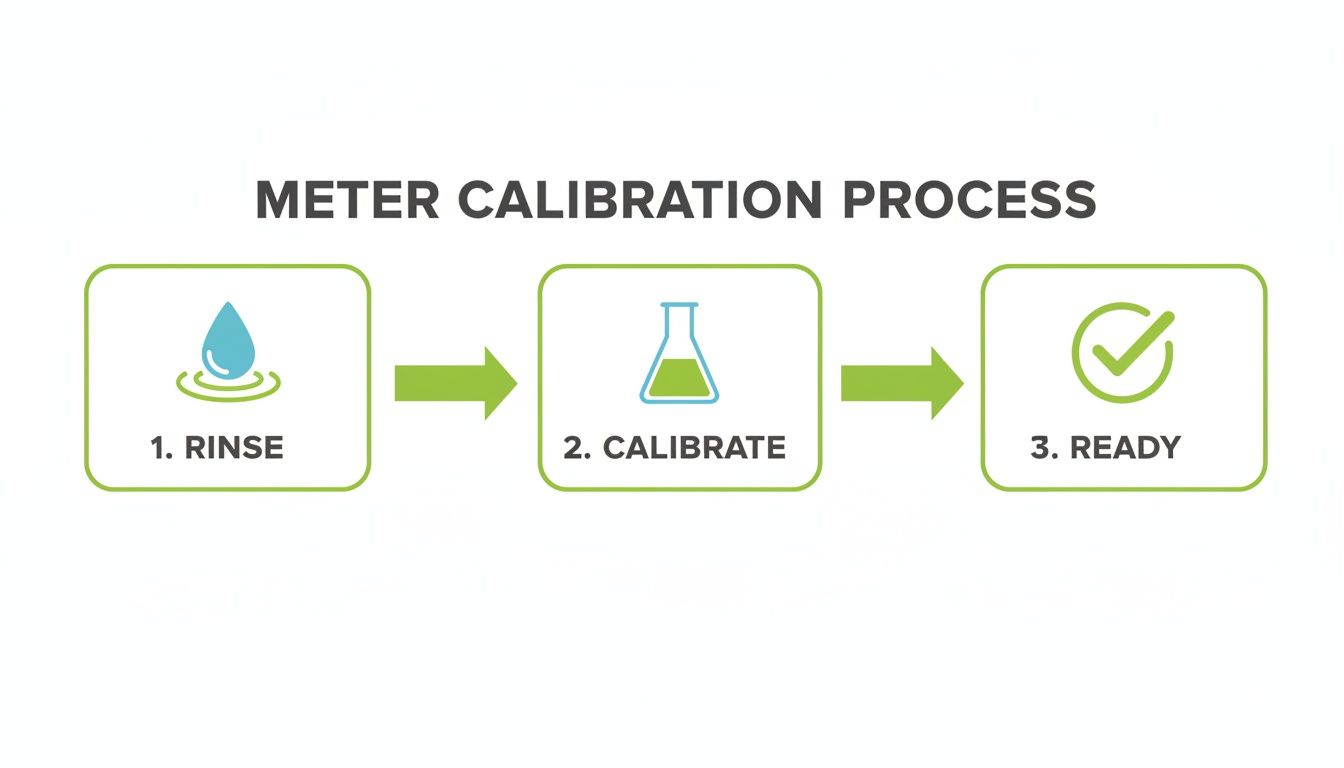
This simple workflow—rinsing the probe, calibrating with buffer solutions, and then taking your reading—is what gives you data you can actually rely on.
Mastering this rhythm of testing at key moments gives you the control to steer your brew towards the exact flavour profile you want. It’s how you move from simply making kombucha to crafting it with intention.
Target pH Ranges for Kombucha Fermentation
To make things even clearer, here’s a quick guide to the ideal pH levels at each stage of your brew. Think of it as a roadmap for your fermentation journey.
| Brewing Stage | Target pH Range | What This Tells You |
|---|---|---|
| Starting the Brew | Below 4.5 | Your brew is acidic enough to be safe from mould and bad bacteria. |
| Mid-Fermentation | 3.5–4.0 | Fermentation is active, and the culture is working as it should. |
| End of First Ferment | 2.8–3.5 | The kombucha is reaching maturity. Time to start tasting for your preferred balance of sweet and tart. |
| Final Product (Bottling) | 2.5–3.2 | Your brew is finished, stable, and ready for bottling or a second fermentation. |
Using this table helps you interpret what your meter is telling you at a glance. It turns a simple number into actionable information, ensuring every batch you make is not only delicious but also consistently safe.
What Your pH Readings Are Telling You
Your digital pH meter is giving you data, but what does that data actually mean? Think of your meter as a translator, telling you the secret story happening inside your brew. Learning to interpret these numbers is what separates a good brewer from a great one, giving you the confidence to solve problems before they even start.
When you understand the story your pH is telling you, you move beyond just following a recipe. You start truly crafting your kombucha, able to diagnose issues and make smart adjustments on the fly.
Your Starting pH Is Too High
You’ve mixed your sweet tea, added your SCOBY and starter liquid, and your meter flashes 4.8. This is probably the most common—and most critical—issue to catch early on. Any starting pH above 4.5 leaves your brew wide open to mould and other unwanted microbes.
The Fix: The solution here is simple: you need to add more acidity. You have two solid options:
- Add More Starter Tea: This is always the best method. Just add another splash of strong, mature starter tea from a previous batch and re-test your pH.
- Add Distilled White Vinegar: If you’re completely out of starter tea, a tablespoon of distilled white vinegar will do the trick and drop the pH into the safe zone. Use this one sparingly, though, as it can subtly change the final flavour of your kombucha.
A high starting pH is a red flag, not a failed brew. Catching it and correcting it right away with your pH meter is the single most important thing you can do to guarantee a safe and successful fermentation.
Fermentation Stalls and the pH Is Not Dropping
It's been three days, and your pH has barely moved from 4.4. This is a classic sign of a stalled or sluggish fermentation. It means your little team of yeast and bacteria isn't working hard enough to produce the acids that naturally lower the pH over time.
This is where a digital pH meter proves its worth. It gives you concrete evidence that something is off, long before you’d notice a lack of fizz or flavour development.
There are a few likely culprits when a brew stalls.
Your Brewing Temperature Is Too Cold: Kombucha cultures love a warm environment, ideally somewhere between 24–29°C. If your house is on the cool side, fermentation will slow to a crawl. The fix is as simple as moving your brewing jar to a warmer spot, away from any draughts.
Your Starter Culture Was Weak: A starter tea that wasn't quite mature enough, or a SCOBY that's been hibernating in the fridge for a while, might not have the oomph to acidify a whole new batch. Always make sure you're using a robust, active starter tea.
Incorrect Ingredient Ratios: Using too little starter tea for the volume of sweet tea is a very common misstep. A good rule of thumb is to use 10-15% starter tea relative to your total batch size. For a standard 4-litre batch, that means using at least 400ml of strong starter liquid.
By paying close attention to what your digital pH meter is telling you, you can pinpoint the exact cause of the problem and, more importantly, learn from it. This knowledge doesn't just save your current batch; it makes every future brew better. It’s all part of the journey to understanding the incredible process behind the many health benefits of kombucha that we all love.
Essential Care for Your Digital pH Meter
Your digital pH meter is a sensitive piece of scientific equipment. A little care goes a long way, and neglecting it is the fastest way to get frustratingly inaccurate readings that can throw off an entire batch of kombucha.
Think of it like any other critical tool in your brewing setup. Just as you look after your SCOBY, your meter needs a bit of attention to keep it performing reliably. A well-maintained meter is a partner you can trust.
Cleaning and Handling Your Probe
The glass bulb at the tip of the probe is where all the magic happens. This electrode is also the most fragile part of the whole device. The absolute golden rule is to never touch the glass bulb with your fingers. The oils on your skin can coat the glass, seriously interfering with its sensitivity and leading to unreliable readings.
Adopting a quick cleaning routine after every single use is non-negotiable. It only takes a few seconds.
- Rinse immediately. As soon as you’re done with your measurement, rinse the probe thoroughly under a gentle stream of distilled or deionised water. This will wash off any residual kombucha or tea.
- Blot, don't wipe. Take a soft, lint-free tissue (like a lens cloth or special lab wipe) and gently blot the probe dry. Wiping it can create a static charge that messes with your next reading, and you risk scratching the delicate glass.
This simple rinse-and-blot process is the single most effective thing you can do to maintain your meter’s accuracy day-to-day.
Storage The Right Way
How you store your meter between brews is just as critical as how you clean it. In fact, improper storage is probably the number one reason pH meters fail before their time.
The most important rule of storage is to never store your electrode in plain water. Storing the probe in distilled, deionised, or even tap water will effectively "kill" it. It leaches the essential reference solution out of the glass bulb, rendering it useless.
Always use a proper pH storage solution, usually supplied by the meter’s manufacturer. This solution is specifically designed to keep the electrode hydrated and in perfect working condition.
Just pour a small amount into the meter’s protective cap, making sure the bulb will be submerged, and click it back into place. This one simple habit will ensure your digital pH meter is ready and reliable for your next brew day.
Your Questions on pH Meters Answered
Getting serious about your brew always brings up new questions. Once you’ve got a digital pH meter in your hands, it’s only natural to wonder if you’re using it right and what the numbers actually mean. As passionate Aussie brewers ourselves, we get these questions all the time. Let’s clear up a few of the most common ones and get you brewing with confidence.
Can I Just Use pH Test Strips for My Kombucha?
While pH strips are definitely better than guessing, they just aren’t accurate enough for brewing kombucha. The natural colour of your tea easily stains the paper, which makes matching it to the colour chart a real shot in the dark. You’re only getting a rough estimate, and that’s not good enough when consistency and safety are on the line.
To be certain your starting pH is safely below 4.5 and to keep mould at bay, you need the precision of a digital meter. It takes all the guesswork out of the equation, which is the only way to replicate your best batches and ensure every single brew is a safe one.
How Often Do I Really Need to Calibrate My Meter?
For readings you can actually trust, you should calibrate your meter before you start a new brewing session. If you brew weekly, you calibrate weekly. It might sound like a lot, but it’s a quick job and the only way to be sure your readings are spot on.
A meter’s electrode drifts over time with temperature changes and normal use. Think of a quick pre-brew calibration as cheap insurance for a successful, safe batch of kombucha. It's non-negotiable.
My Kombucha's pH Is Not Dropping. What Is Wrong?
If your pH reading stays stubbornly high a few days into your brew, the problem almost always comes back to your starter culture. Either the culture itself is a bit weak, or you simply didn't use enough strong starter tea to acidify the fresh sweet tea properly.
The other common culprit is temperature. If your brewing space is too cold, everything slows to a crawl. Your culture does its best work at around 24–29°C. As a firm rule, always use at least 10-15% mature starter tea from your last batch to give the new one a strong, acidic kick-start.
Is It Safe to Put the pH Meter Directly into My Brewing Jar?
It’s much better practice not to. You don’t want to risk contaminating your entire brew. The best approach is to take a small sample from your brewing vessel and pour it into a separate, clean glass.
Let that sample cool to room temperature first, then pop your calibrated meter in. This simple habit guarantees an accurate reading without introducing any unwanted microbes into your main batch.
Ready to take control of your brew? At PepTea, we're passionate about helping Australians discover the benefits of truly authentic, healthy beverages. From our sugar-free kombucha brewed right here in NSW to our premium organic Japanese Matcha, quality is at the heart of everything we do.
Explore our range of organic teas and kombucha supplies at peptea.com.au to learn more.
Cooking with Matcha – How to Make Matcha Donuts

This video shows the recipe and the how-to, in easy steps, to make this Matcha recipe for Match donuts with matcha icing
Organic Kombucha Tea Ginger is Sugar Free and Gluten Free Beverage Drink

Organic kombucha tea Ginger by Pep Tea is a high standard Australian manufactured iced green tea drink that is brewed as well as bottled in the Hunter Valley of NSW. Pep Tea is considered as the highest quality brands in Australia. The kombucha teas of Pep Tea are; organic, raw as well as shelf-stable and this is why it needs no refrigeration until it is opened.
Kombucha is basically a symbiotic culture of yeast as well as bacteria. Kombucha was first brewed in 221 BC in China. Modern science has claimed several health benefits in respect of drinking this amazing tea. The mushroom or mother skoby is quite similar to a pancake float on the top of organic kombucha tea. The brew is transformed into beneficial enzymes, antioxidants, probiotics, minerals as well as organic acids. If this drink is consumed regularly, it helps to develop your body’s immune system. So Good to help fight off illness.
Organic kombucha tea ginger is sugar-free, gluten-free, low calorie, low carbs, low GI and vegan friendly. It contains no artificial colors, sweeteners or preservatives.
For more information visit our site. Buy organic kombucha tea ginger online in bulk at Opera Foods. Get online discounts on this product.
Organic Kombucha Tea Mango is Rich in Probiotics

Organic Kombucha tea mango flavor is the highest quality green tea kombucha from Pep Tea brand. This tea is Brewed and bottled in the Hunter Valley of NSW in a state of the art HACCP certified kombucha brewery . Our organic kombucha tea mango is free from sugar, caffeine, gluten, GMO, lactose, fat and other preservatives. It is low in calorie, carbs, GI and it is vegan-friendly. Pep Tea is among the best kombucha brands in Australia with the highest quality real kombucha probiotics. Pep Tea kombucha is raw, organic and shelf table, therefore, it needs no refrigeration till it unlocked.
Kombucha tea is an ancient health drink first prepared in China in 221 BC. Several claims have been made in respect of health benefits while drinking this magnificent tea. The mushroom-like pancake floats on the upper portions of sweetened organic tea. Then after a period of time, the brew is transformed into probiotics, enzymes, antioxidants, organic acids and minerals. If this organic kombucha tea is taken regularly, it will aid liver function for removing toxins of the individual’s body and increase immune systems of individuals. Mango is one of four tried and true sugar free drinks in Kombucha flavors offered by Pep Tea.
Buy it at your local Harris Farm Markets store in NSW, or Visit our site and buy organic kombucha tea mango online in huge bulks from Opera foods.
Imperial Organic Matcha – Japanese Ceremonial Grade
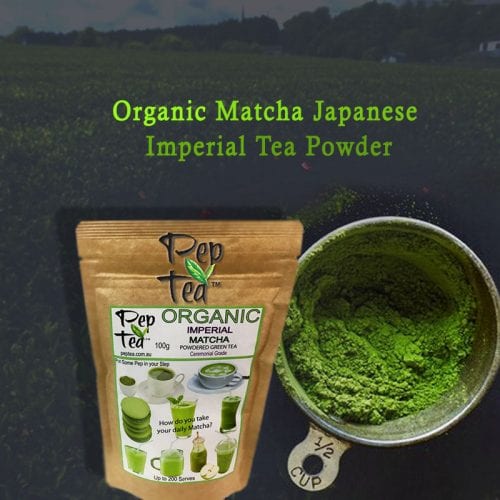
Pep Tea imports superior organic ceremonial grade organic matcha wholesale tea powder. Our organic Japanese Imperial matcha tea powder is noted for that natural true taste of a high grade tea.
The best matcha tea is grown organically in Japan. The product is regarded among the highest grade matcha powders available. Pep Tea’s Imperial grade is an organic ceremonial grade matcha tea often celebrated in Japan.
The cultivation of the worlds best tea is grown in the famous southern region plantations of Japan. Organic Japanese matcha Imperial grade tea powder is produced from nutrient rich tea leaves that are extracted from the early picked tips of the tea plants.
It is also considered as one of the most superior and natural tea powders that are rich in antioxidants and many other nutrients.
Regular servings of Matcha Tea increases metabolism, helps to regulate weight and helps reduce cholesterol levels, plus it improves mood and memory.
Pep Tea is a leading organic Kombucha and organic Matcha tea brand in Australia.
Organic Kombucha Tea – Lime & Ginger Boosts your Immune System

Pep Tea produces great organic matcha powder as well as organic kombucha tea. Organic kombucha tea – Lime and Ginger is very much popular among our superior Sugar Free kumbucha flavours. Organic Kombucha Tea – Lime and Ginger is considered as a healthy tea it is raw and loaded with probiotics and contains no sugar, fat, lactose and other preservatives. It is raw and organic, gluten free and vegan friendly.
Organic kombucha tea-lime and ginger is also low in calorie, carbs and GI. Kombucha is considered as a symbiotic culture of yeast as well as bacteria. Kombucha was first initiated in 221 BC in China. According to a modern science, it contains several health benefits that help to build good gut health. If this magnificent drink is consumed regularly will aid to stabilize gut flora, helps in liver function that will assist an individual’s body to remove toxins and increase the immune system of individuals.
Sugar Free Organic Kombucha Apple Pomegranate Rich In Probiotics

Sugar-free organic kombucha, Apple Pomegranate flavour is a product of a Pep Tea brand. It is free from sugar, gluten, GMO, caffeine, lactose, fat, and other preservatives. Sugar-free organic kombucha Apple Pomegranate is low in calorie, carbs, GI and it is quite vegan-friendly. It is considered as one of the Australia’s highest grade of organic kombucha or iced green tea. Pep Tea brands Kombucha is brewed and bottled in the hunter valley of Australia.
Our Sugar-free organic kombucha in Apple Pomegranate is always a raw, live, organic, as well as a shelf table product made with a lot of science. That is why it needs no refrigeration till opened. The flavor of the this kombucha tea tea is Apple and Pomegranate.
Organic kombucha tea is regarded as a symbiotic culture of yeasts as well as beneficial bacteria. It is documented as a health drink in 221 BC in China. Sugar-free organic kombucha is an ideal drink for kids and all types of ages.
It is rich in probiotics, antioxidants, minerals, organic acids and many more. If this magnificent cocktail is used regularly will aid to stable an individual’s gut flora, help in liver function that may assist an individual’s body to remove respective toxins as well as increase an immune system of an individual.
Pep Tea is among the most popular Kombucha brands in Australia. Buy Real live raw gut health fermented tea at Harris Farm Markets.
Or order your favorite kombucha drink from our Online Store for the best Kombucha brands, the taste, and quality of ours is undeniable.