
Category: Learn About Tea
Roasted Green Tea Guide: Flavour, Brewing, and Uses
You order a hojicha latte at an Australian café, expecting something green, and the barista hands you a warm brown drink with a toasted aroma. Nothing has gone wrong. Hojicha is roasted green tea, and roasting changes the leaf's colour, fragrance, bitterness, and best uses without removing its identity as green tea.
That difference makes roasted green tea an appealing choice for home brewers, matcha drinkers, café owners, and anyone who enjoys coffee-adjacent flavours but wants another option. It also creates confusion, particularly around caffeine and antioxidants. A satisfying cup depends less on a simple label such as “low caffeine” and more on the tea format, serving size, water, and brewing time.
What Roasted Green Tea Is and Why It Matters
The café customer looks at the brown latte and asks, “Is this coffee?” The barista explains that it's hojicha, a Japanese green tea that has been roasted until the leaves develop a warm, nutty aroma and a brown appearance. The drink may contain milk, foam, or a little sweetness, but its foundation is still tea.
Hojicha sits within the broad green-tea family alongside sencha, bancha, genmaicha, and matcha. The important distinction is what happens after the tea leaf is made into green tea. Instead of keeping the fresh, vegetal character associated with unroasted green tea, the producer applies dry heat to create a toasted profile. Similar roasted green teas may use leaves, stems, or a blend of both, so the final cup can range from delicate and cereal-like to deep and coffee-adjacent.

Why the brown colour matters
Unroasted green tea often appeals to people who enjoy fresh, grassy, marine, or slightly astringent flavours. Hojicha offers a different entry point. Roasting softens the sharper impression of the leaf and brings forward aromas that many Australians already recognise from toasted muesli, roasted nuts, cocoa, or a flat white.
That sensory shift makes hojicha useful in formats where bright green tea can feel difficult to balance. It works naturally in a warm infusion, a milk-based latte, an iced drink, and selected desserts. It can also be brewed as an everyday tea without requiring the whisking technique associated with matcha.
A useful distinction: matcha is powdered unroasted green tea, while hojicha is roasted green tea. They're related, but they don't tell the same flavour story.
A helpful introduction to the style is this guide to Hojicha Tea, particularly if you're deciding whether the roasted profile suits your routine. Once you understand the processing, you can choose a leaf or powder, adjust the brew, and use hojicha according to the occasion rather than treating it as a brown version of matcha.
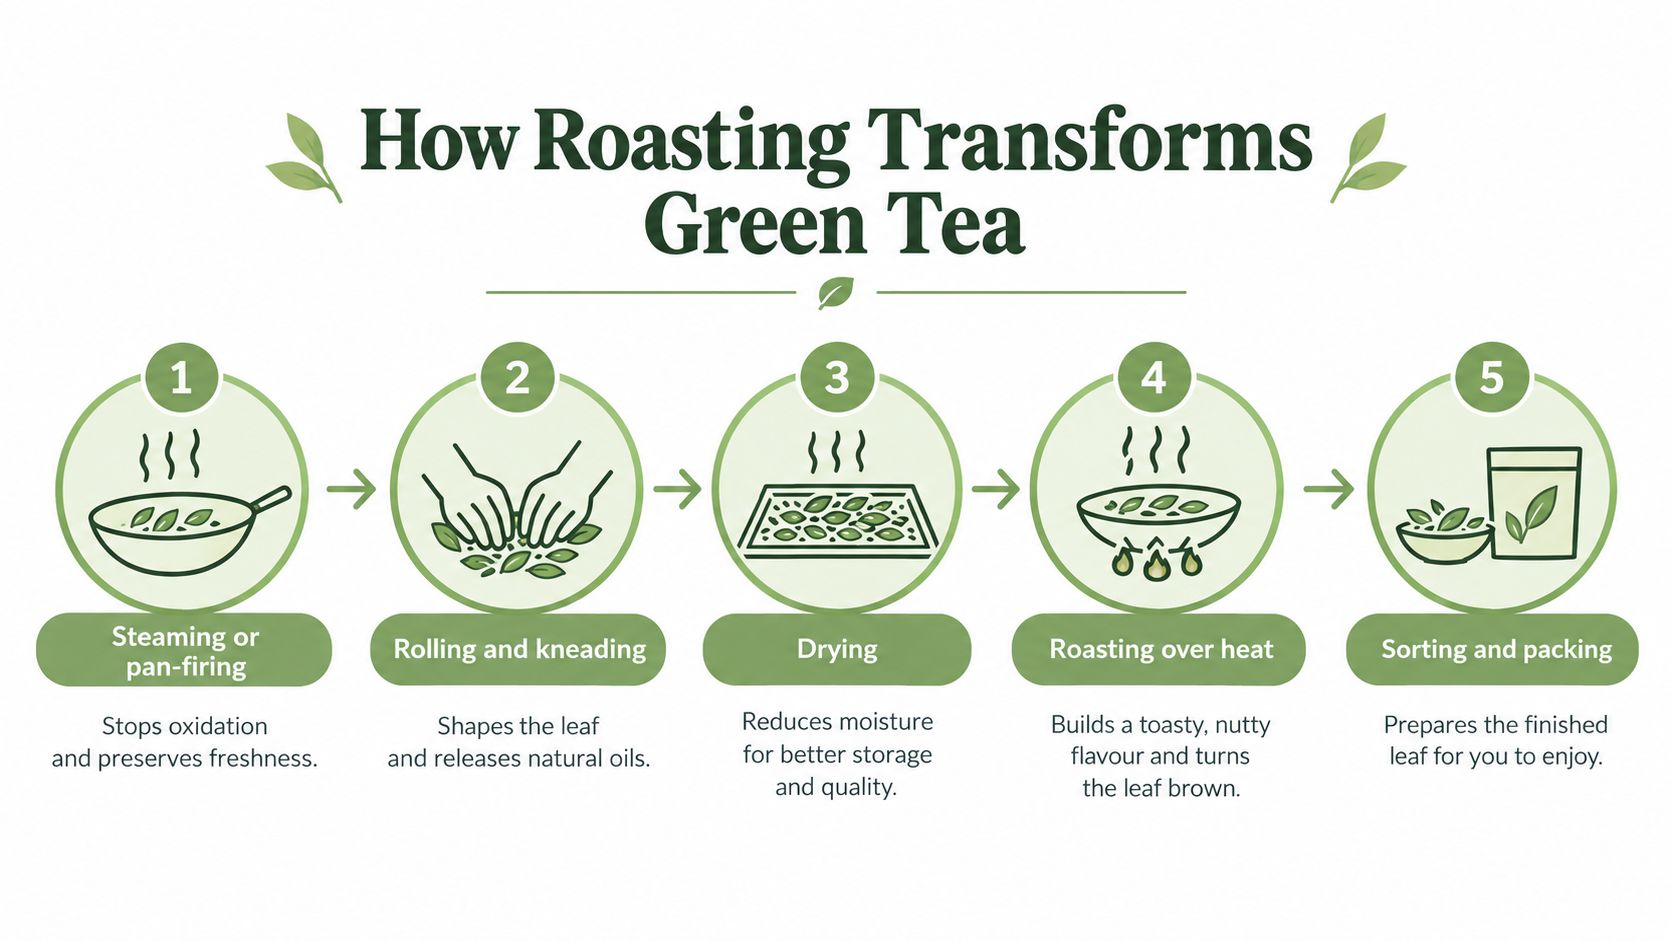
How Roasting Transforms Green Tea
Roasting doesn't just add a flavouring to green tea. It changes the way the leaf smells, looks, and behaves in the cup. Think of the difference between soft bread and toast. The ingredients remain related, but heat creates a new sensory experience.
The production sequence
Steaming or pan-firing stops oxidation. Producers heat fresh leaves soon after harvest to preserve the green-tea character. Japanese teas are commonly steamed, while other green teas may be pan-fired.
Rolling and kneading shape the leaf. This step helps form the finished appearance and influences how water reaches the leaf during brewing.
Drying reduces moisture. A dry leaf stores more reliably and becomes ready for the final roasting stage.
Roasting builds aroma. Dry heat turns the leaf brown and develops toasted, nutty, caramel-like, grainy, or cocoa-like notes. Roast intensity matters. A gentler roast can leave a lighter cereal character, while a deeper roast can move towards coffee and dark toast.
Sorting and packing protect consistency. Producers separate material by size and quality before packing the finished tea.
The roasting decision matters because heat affects more than aroma. Australian green-tea research measured theanine, caffeine, and five catechins, including EC, EGC, EGCG, GCG, and ECG, using high-performance liquid chromatography. The researchers assessed quality through measures such as total catechins and theanine-to-catechin and theanine-to-caffeine ratios. Higher theanine-to-catechin and theanine-to-caffeine ratios correlated with better retail-market quality, while total catechin concentration showed an inverse relationship with quality. The Australian research report also recorded seasonal shifts in catechin composition, with EGCG dominant early in harvest and EGC dominant later after peak temperatures.
That's why sensory quality shouldn't be judged by colour alone. A producer or buyer who wants repeatable roasted green tea should consider the original material, harvest timing, roast profile, aroma, taste, and, where relevant, laboratory testing before and after roasting.
Flavour and Aroma Profile Explained
A well-made cup of roasted green tea announces itself before you taste it. The dry leaves may smell like toasted grain, warm wood, roasted nuts, or a lightly browned biscuit. Once infused, the liquor usually appears amber to brown rather than vivid green.
The first sip tends to feel rounded. Instead of sencha's fresh, grassy lift, you might notice toasted rice, caramel, cocoa, or a mild coffee-like note. The finish can be gentle and dry, but it shouldn't dominate the palate with sharp bitterness. That makes hojicha approachable for people who've tried green tea and decided they dislike “vegetal” flavours.
A café-friendly sensory comparison
A useful comparison is toast rather than coffee. Hojicha can share coffee's warmth and roasted aroma, but the body is often lighter and the finish more tea-like. With milk, the leaf's nutty character can resemble a soft flat white or a toasted-muesli drink, while an unsweetened cup may remind you of a campfire without the smoke becoming the main flavour.
The roast also influences what you should expect:
- Light roast: toasted grain, dry cereal, gentle sweetness, and a lighter body.
- Medium roast: roasted nuts, caramel, biscuit, and a balanced aroma.
- Deep roast: dark toast, cocoa, wood, and a stronger coffee-adjacent impression.
These are tasting directions, not guarantees. Leaf size, stems, cultivar, harvest, roast temperature, and brewing all affect the final cup. A tea that tastes smooth in a café latte may taste more direct when brewed without milk.
If you're comparing styles or looking for Japanese tea terminology, a specialist overview of Hojicha Tea can help you understand how roasted tea sits alongside other Japanese green teas. Use the language of aroma when ordering. Ask for something toasty, nutty, mellow, or suitable for milk, rather than assuming every hojicha tastes the same.
Caffeine and Antioxidant Content in Real Servings
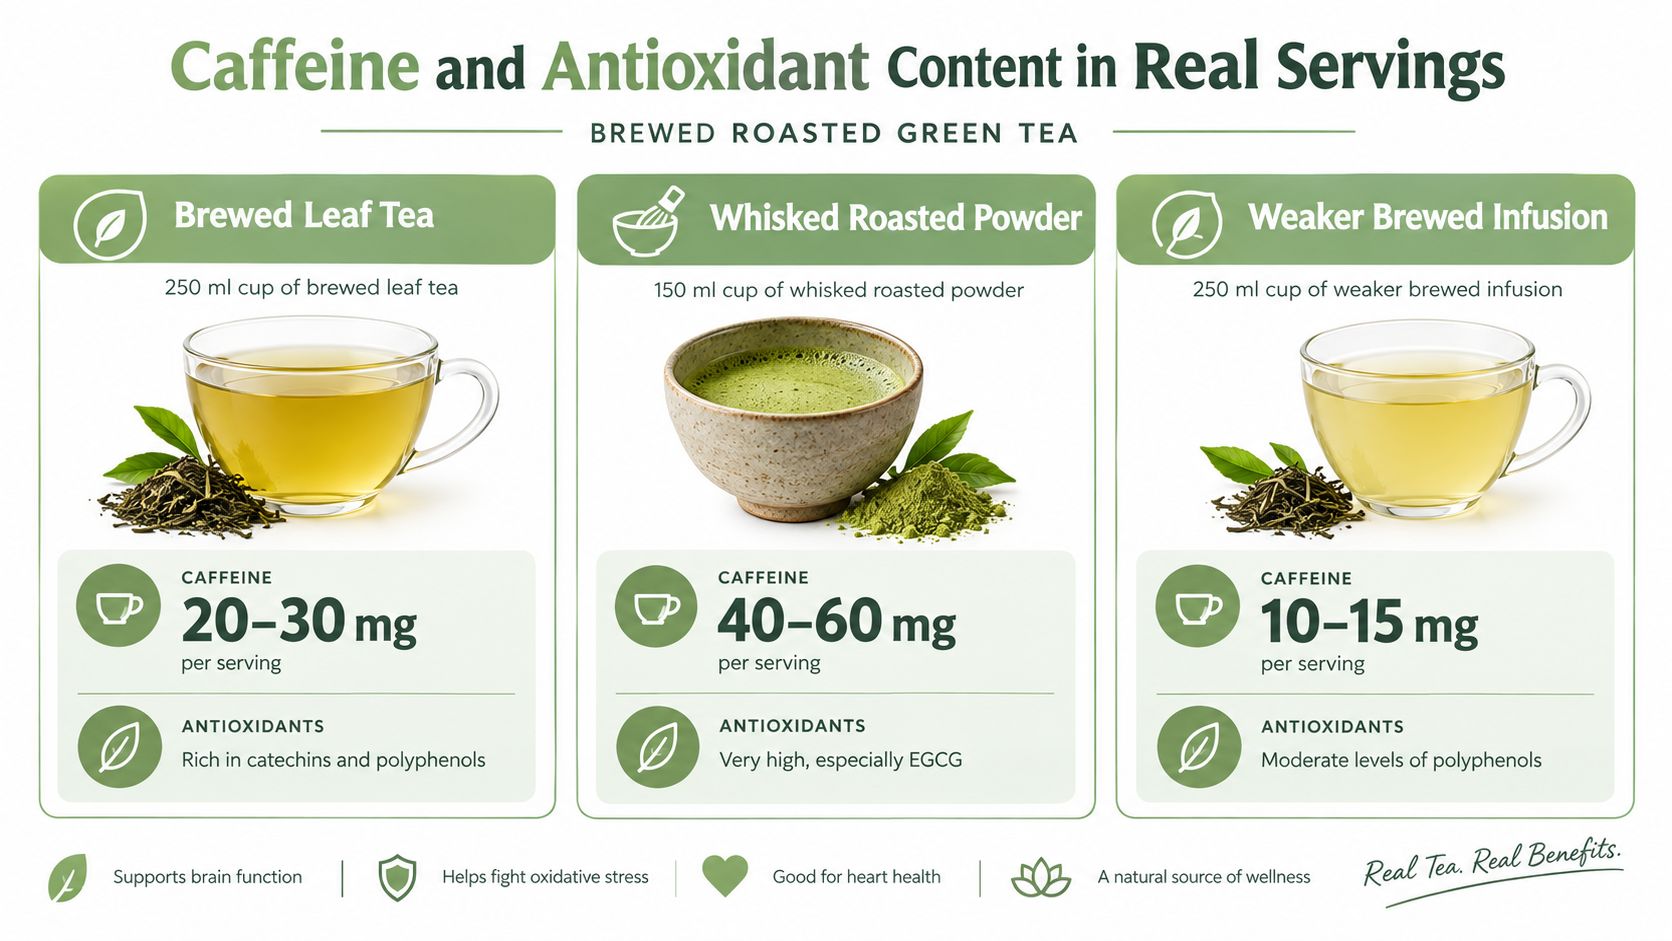
“Low caffeine” is too vague to guide a real drink. Roasting can change perceived bitterness and extraction behaviour, but roasted green tea isn't caffeine-free. The amount in your cup depends on the leaf mass, water volume, temperature, contact time, particle size, and whether you're drinking an infusion or consuming powdered tea.
The Australian Institute of Sport lists approximately 30–50 mg of caffeine in a 250 mL cup of green tea. Food Standards Australia New Zealand also gives a broad tea concentration range of 0–90 mg per serving, reflecting variation in tea type, preparation, and strength. These references are useful for planning, but they aren't a batch-specific result for every hojicha product. Food Standards Australia New Zealand's caffeine material explains why preparation and food composition data need careful interpretation.
Leaf, powder, and the cup you actually drink
A brewed leaf infusion leaves most of the plant material behind. Whisked hojicha powder is different because you consume the finely milled leaf, and a concentrated café preparation may use more tea in less liquid. You shouldn't transfer a caffeine expectation from one format to another without checking the recipe.
Antioxidant language needs similar care. Green tea contains catechins and theanine, but roasting and brewing influence the compounds that reach the cup. Australian field research found that quality relationships were more informative than total catechin concentration alone, so “more antioxidants” isn't a complete measure of a better tea.
Practical rule: standardise the grams of tea, water volume, temperature, and steep time before comparing cups.
For people managing sleep, pregnancy-related caffeine limits, children's intake, or caffeine from coffee, chocolate, energy drinks, and other tea, a prepared serving is more useful than a product category. The Australian Institute of Sport reports average adult caffeine intake at about 175 mg per day, with at least 25% of people consuming more than 230 mg daily. Those figures appear in its Australian caffeine guidance, alongside the green-tea reference.
For a deeper explanation of preparation and serving questions, see hojicha tea caffeine. If you're exploring Japanese caffeine-free or naturally low-caffeine traditions more broadly, this guide on where to buy Japanese herbal tea is a useful place to compare categories, while remembering that hojicha itself is tea and can contain caffeine.
Brewing Roasted Green Tea at Home
Hojicha is forgiving, but a repeatable recipe helps you understand what the leaf can do. Start with 3 grams of roasted green tea leaf, 250 mL of water at 90°C, and a 30–45 second steep. This produces an aromatic cup with enough body for drinking plain or adding milk.
Boiling water poured directly over the leaf can flatten delicate aromatics and draw out a rougher finish. Steeping for several minutes can make even a gentle roast taste dry or over-extracted. Use a kettle with a temperature setting, or let freshly boiled water cool briefly before brewing.
Adjusting the base recipe
For a stronger cup, try 3 grams in 150 mL for 60 seconds. This concentrated brew suits a small serving or a latte. For a softer everyday pot, use 2 grams in 300 mL and keep the steep brief enough to preserve the toasted aroma.
Hojicha powder needs a different method. Sift the powder into a bowl, add a small amount of warm water, whisk until smooth, then add more water or steamed milk. Because the powder is consumed rather than strained, treat it as a separate format when thinking about flavour and caffeine.
| Format | Leaf or powder | Water or milk | Temperature | Time |
|---|---|---|---|---|
| Everyday hot cup | 3 g leaf | 250 mL water | 90°C | 30–45 seconds |
| Strong latte base | 3 g leaf | 150 mL water | 90°C | 60 seconds |
| Light pot | 2 g leaf | 300 mL water | 90°C | Short steep |
| Powdered latte | Hojicha powder | Warm water, then milk | Warm, not boiling | Whisk until smooth |
| Iced infusion | Leaf | Cold water | Refrigerated | Longer, according to taste |
| Syrup or dessert base | Leaf or powder | Small concentrated liquid | Controlled heat | Taste and strain |
For an iced summer drink, cold brewing gives the tea time to release aroma gradually. For a syrup, make a concentrated infusion, strain it carefully, and combine it with your chosen sweetener while warm. You can then use the syrup in a latte, over vanilla ice cream, or in a zero-alcohol drink.
Pin this checklist near the kettle:
- Weigh the tea: Start with the recipe rather than guessing.
- Measure the water: Volume changes strength as much as leaf quantity does.
- Control temperature: Avoid pouring boiling water straight onto delicate material.
- Time the steep: Taste at the lower end of the range before extending it.
- Adjust one variable: Change leaf, water, or time, not everything at once.
Comparing Roasted Green Tea With Other Drinks
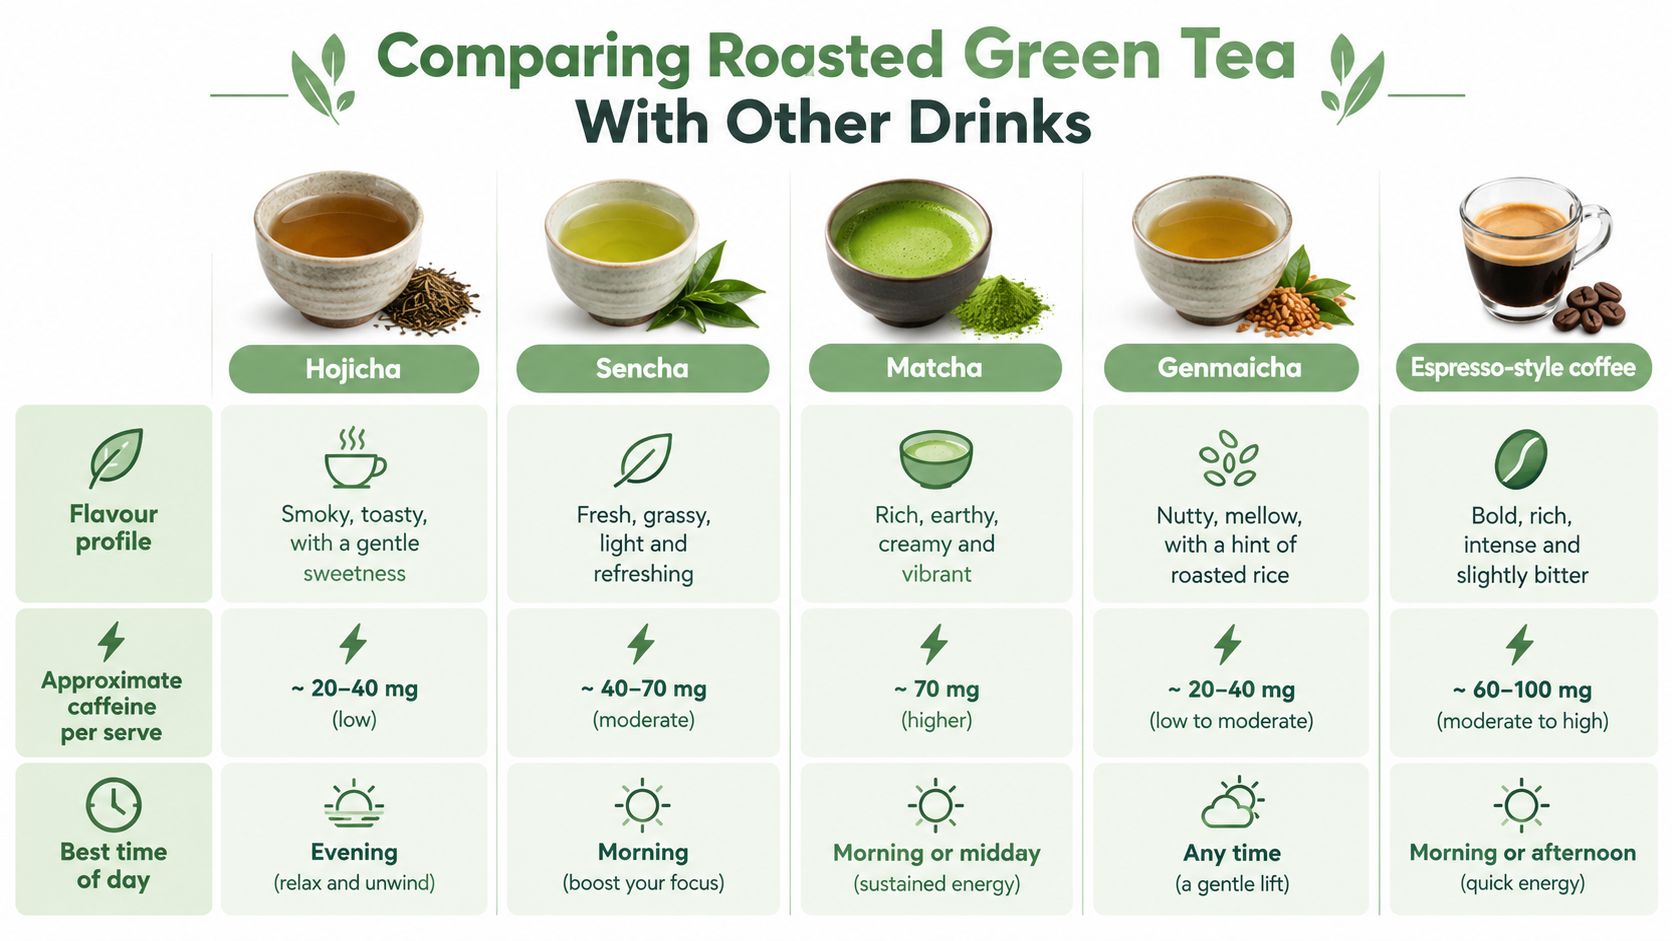
Hojicha earns its place by being different, not by replacing every other drink. Sencha is bright and fresh, matcha is concentrated and vivid, genmaicha combines green tea with toasted brown rice, and espresso-style coffee brings a denser roasted intensity. Roasted green tea sits between these experiences, with a lighter body than coffee and a deeper toastiness than many unroasted green teas.
Choose by taste and occasion
| Drink | Flavour direction | Caffeine approach | Useful format |
|---|---|---|---|
| Hojicha | Toasted, nutty, mellow, cocoa-like | Variable by serving | Hot brew, latte, dessert |
| Sencha | Fresh, grassy, lightly marine, brisk | Variable by serving | Straight hot tea |
| Matcha | Dense, vegetal, umami-rich | Depends on powder quantity | Whisked drink, latte, baking |
| Genmaicha | Green tea with toasted rice | Variable by serving | Food-friendly hot infusion |
| Espresso-style coffee | Roasted, dense, bitter, aromatic | Depends on preparation | Flat white, long black, dessert |
An espresso-style drink may suit the first part of a busy morning, while hojicha can work when you want a roasted flavour without the weight of coffee. Sencha is a better choice when you're seeking freshness and a clean, brisk finish. Matcha makes sense when you want the texture and intensity of powdered tea. Genmaicha offers toastiness through rice, with a recognisable green-tea foundation.
The common mistake is to describe hojicha as “matcha minus the caffeine”. That comparison misses the point. Hojicha's strongest difference is sensory. Its roasted character appeals to people who find matcha too grassy, and its aroma works naturally with oat, soy, dairy, chocolate, vanilla, and lightly sweetened café recipes.
Choose the drink that matches the moment. A plain hojicha infusion suits quiet sipping, a concentrated brew suits a latte, and hojicha powder suits cooking where you want the roasted flavour distributed through the recipe.
Culinary and Café Uses Beyond the Cup
Hojicha shouldn't be positioned only as a healthier matcha. Its most practical advantage in a café or home kitchen is flavour. Toasted, nutty notes can make a dessert feel deeper without relying on a large amount of sweetness, and the profile sits comfortably beside ingredients Australians already order and bake with.
Sweet applications
Hojicha powder works well in cookies, financiers, sponge cakes, ice cream, custards, and chocolate desserts because it disperses through the mixture. A leaf infusion is better when you want a lighter aroma in cream, milk, or syrup and plan to strain the solids before serving.
Try these combinations:
- Chocolate and cocoa: Roasting complements cocoa's bitterness and gives brownies or ganache a warmer finish.
- Vanilla and ice cream: Hojicha syrup adds toastiness to an affogato-style dessert without copying espresso.
- Nuts and grains: Almond, sesame, hazelnut, oat, and toasted rice reinforce the tea's cereal character.
- Fruit: Pear, stone fruit, and banana can work with a gentle roasted base when the sweetness is controlled.
You can also use concentrated hojicha in café drinks that aren't lattes. Build a zero-proof spritz with hojicha syrup, soda, citrus, and ice. Pair a cooled infusion with kombucha for a tea-forward refreshment, or use a small amount in a dessert sauce.
Savoury and seasonal formats
A light hojicha infusion can contribute depth to a broth, while powder can be blended into a finishing spice mix for roasted vegetables. Use it carefully. The aim is aroma, not a heavy tea flavour.
A simple seasonal framework helps café teams keep the idea repeatable:
- Cool weather: Hot hojicha, steamed milk, chocolate, and baked desserts.
- Warm weather: Iced hojicha, citrus, soda, cold brew, and spritz-style drinks.
- All year: Cookies, soft serve, affogato-style desserts, and a short unsweetened tea option.
For bakers comparing formats and applications, you can browse toasty hojicha for baking. For broader low-sugar drink ideas that can sit beside tea on a café menu, Pep Tea's healthy drinks to make offers further inspiration.
Putting It All Together
Roasting determines the aroma. The aroma determines whether hojicha suits a plain infusion, a latte, a dessert, or a savoury experiment. Brewing then decides how much of that character reaches the cup, which is why serving size and timing matter more than a blanket claim about caffeine or antioxidants.
Treat roasted green tea as its own category. It isn't a failed matcha, a brown sencha, or a coffee substitute. It's a flexible Japanese tea style with a toasted profile that can feel familiar in an Australian café and practical in a home kitchen.
Start with three actions:
- Choose the format: Use leaf for clear infusions and concentrated bases, or powder when you want the tea distributed through milk and food.
- Repeat one recipe: Begin with the measured hot-brew method, then change one variable at a time.
- Try one kitchen use: Add hojicha to a syrup, cookie, chocolate dessert, iced drink, or savoury finishing blend.
Check the label for organic sourcing, origin, roast style, and preparation guidance. Australia's tea supply is predominantly import-dependent. In 2021, Australia produced approximately 1,500 tonnes of tea and imported more than 20,000 tonnes, according to market reporting that cites Australian agricultural reporting, including ABARES and the Department of Agriculture, Water, and the Environment. The Australian tea market overview explains why provenance, import controls, certification, and reliable distribution matter.
Australia's tea habit also gives roasted green tea a familiar place to grow. The Australian Bureau of Statistics reports that tea accounted for an average of 153 g of daily consumption within the non-alcoholic-beverage category in 2023, and 32.4% of people consumed tea. Hojicha doesn't need to create a new ritual. It can give an existing one a warmer, more versatile flavour.
Pep Tea offers organic Japanese tea alongside Australian-brewed sugar-free organic Kombucha from the Hunter Valley, NSW, giving home drinkers and cafés practical options for low-sugar, non-alcoholic beverage menus. Visit Pep Tea to explore the range, find recipes, or enquire about wholesale supply for roasted green tea-inspired drinks.
Pure Matcha Green Tea Powder: How to Choose Real Quality
The most popular advice about matcha is also the least useful: “Choose pure matcha and you've chosen quality.” Purity matters, but it only tells you that nothing has been added. It doesn't automatically confirm the tea's origin, freshness, grade, growing practices, flavour, or tested composition.
That distinction matters in Australia, where demand is moving quickly. SBS News reported that Australia's matcha market generated more than AUD 54 million in 2024 and is forecast to grow at approximately 7.1% annually over the following five years, exceeding AUD 81 million by 2030 according to reporting based on industry data. More products can mean more choice, but it can also make a confident-looking label harder to evaluate.
What “Pure” Really Means on a Matcha Label
Pure matcha green tea powder answers a narrow question. Is the tin only matcha, or has something else been mixed in?
On an Australian label, that usually means the ingredient list shows 100% matcha or 100% powdered green tea, with no sugar, milk powder, flavouring, colouring, or filler. That is useful, but it is only the first checkpoint. “Pure” does not tell you whether the tea was selected for drinking, whether it is fresh, or whether it will taste smooth once you whisk it.
It also does not mean caffeine-free. Matcha is powdered green tea, so if it is pure, it still naturally contains caffeine. In other words, purity describes what has not been added. Quality describes what the product brings to the cup.
Purity and quality are different questions
Purity covers ingredients. Quality covers a wider set of buying decisions.
- Purity: Is anything else mixed into the powder?
- Origin: Where was the tea grown and processed?
- Freshness: When was it harvested, milled, packed, or opened?
- Grade: Was it chosen for straight drinking, lattes, or cooking?
- Composition: Are there credible test results or batch records?
- Use: Does the flavour fit how you plan to prepare it?
That distinction saves shoppers from a common mistake. A front label can say “pure” and still leave out the details that affect aroma, colour, bitterness, and value for money.
Practical rule: Treat “pure” as the starting point of your assessment, not the final verdict.
The same reading habit applies beyond tea. A clear pure aloe vera gel guide shows how a simple ingredient claim can be true while bigger questions about sourcing, processing, and suitability still remain. Matcha works the same way.
From Tea Leaf to Stone Ground Powder
Matcha starts with the same tea plant as other green tea, Camellia sinensis. The difference lies in how growers cultivate and process it before you ever open the tin.
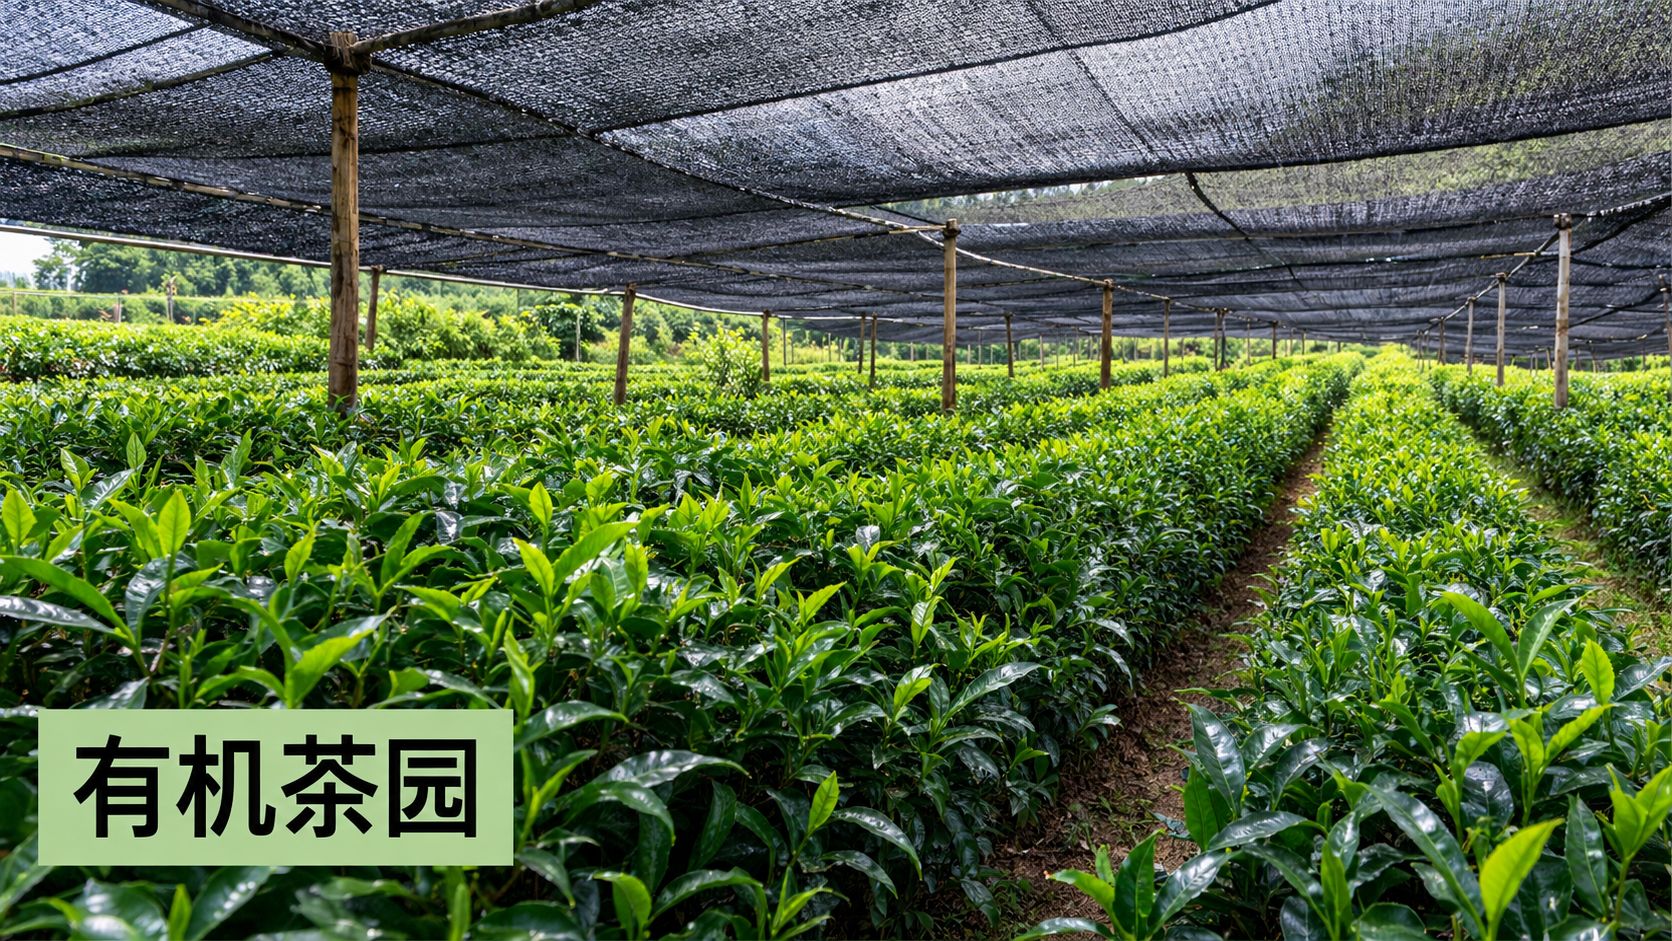
Several weeks before harvest, growers shade the tea plants from direct sunlight. This changes the leaf's growth conditions and contributes to matcha's deep green appearance, savoury umami character, and naturally occurring L-theanine. Farmers then harvest the leaves, steam them to limit oxidation, dry them, and remove stems and veins. The remaining leaf material is called tencha.
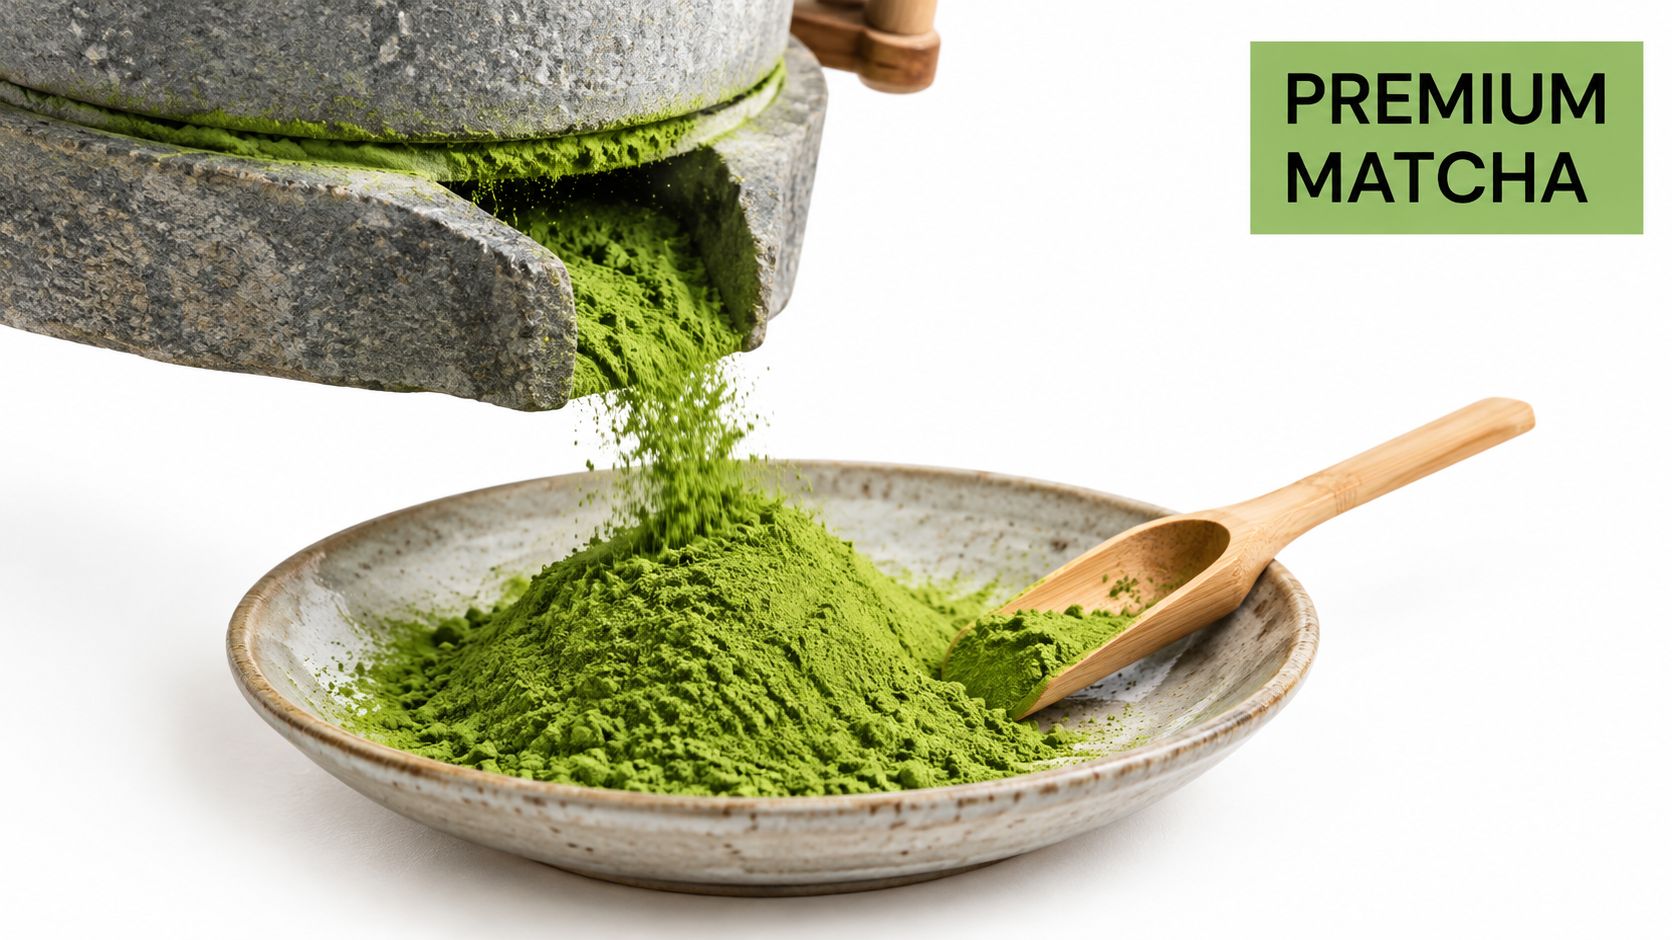
Tencha is slowly ground between stones, traditionally granite, until it becomes an exceptionally fine powder. That slow milling is why authentic matcha feels almost talc-like between your fingers rather than gritty like a coarsely ground green tea ingredient.
What your senses can tell you
A vibrant green colour can be a useful freshness and processing clue, but colour alone can't certify quality. Look for a powder that is fine, evenly coloured, and aromatic, with a fresh grassy or vegetal scent rather than a flat, dusty smell.
Taste gives you more information. Good matcha can have grassy notes, umami depth, gentle sweetness, and some bitterness. Harsh bitterness may come from the grade, preparation, age, or a powder intended for cooking rather than drinking.
The whole-leaf format also changes the way you consume the tea. With ordinary brewed green tea, water extracts compounds from the leaves and you discard the leaves. With matcha, you whisk the powder into water or milk, so the powdered leaf remains in the drink. For a visual explanation of the production stages, see how matcha tea is made.
Analytical testing of commercially available matcha found caffeine concentrations ranging from 17.11 to 35.01 milligrams per gram. Ceremonial matcha averaged 31.45 ± 1.08 mg/g, while culinary matcha averaged 26.29 ± 1.86 mg/g, compared with 23.08 ± 1.43 mg/g for bagged or gunpowder green tea in the reported testing. Those figures are useful context, but they aren't a guarantee for every product or serving.
Ceremonial, Culinary, and Everyday Grades Compared
Matcha grades aren't universal legal categories in the way some shoppers assume. Producers and sellers use them to communicate intended use, sensory character, and leaf selection. The label still needs supporting information, because “ceremonial” by itself doesn't prove a particular origin or laboratory profile.
The simplest decision is practical. If you'll drink the matcha with water, choose a powder that tastes smooth and balanced. If you'll combine it with milk, fruit, chocolate, or flour, a stronger culinary powder may provide better value and a more noticeable tea flavour.
Match the powder to the job
| Grade | Best for | Sensory cues | Typical price band |
|---|---|---|---|
| Ceremonial | Whisked tea and simple drinks | Bright colour, fine texture, softer bitterness, rounded umami | Higher |
| Premium culinary | Lattes, iced drinks, smoothies, and everyday use | Fresh green aroma, fuller flavour, enough strength for milk | Mid to high |
| Ingredient-grade culinary | Baking, ice cream, sauces, and savoury recipes | More robust, earthy, or bitter profile that stands up to other ingredients | Lower to mid |
A ceremonial powder can be wasted in a recipe where chocolate, dairy, or fruit dominates. Conversely, an inexpensive cooking powder may taste rough when whisked with water because there's nowhere for its bitterness to hide.
Choose by preparation, not prestige
For a traditional bowl of matcha, sensory refinement matters most. You're tasting the tea directly, so freshness, texture, sweetness, and umami carry the experience.
For a café latte, a bright premium culinary powder can be a sensible option. Milk softens bitterness, while the matcha needs enough flavour to remain present after dilution. For pancakes, biscuits, frosting, or ice cream, ingredient-grade culinary matcha often makes more sense because you're buying functional flavour rather than a delicate drinking experience.
Compare ceremonial and culinary matcha before buying. The right grade isn't the one with the most impressive name. It's the one that performs well in your favourite preparation.
Caffeine, EGCg, and L-Theanine Explained
Matcha is often described as a calmer alternative to coffee. That description can be useful as a personal observation, but it shouldn't hide the fact that pure matcha contains caffeine. The powder brings several naturally occurring compounds into the same drink, including caffeine, EGCg, and L-theanine.
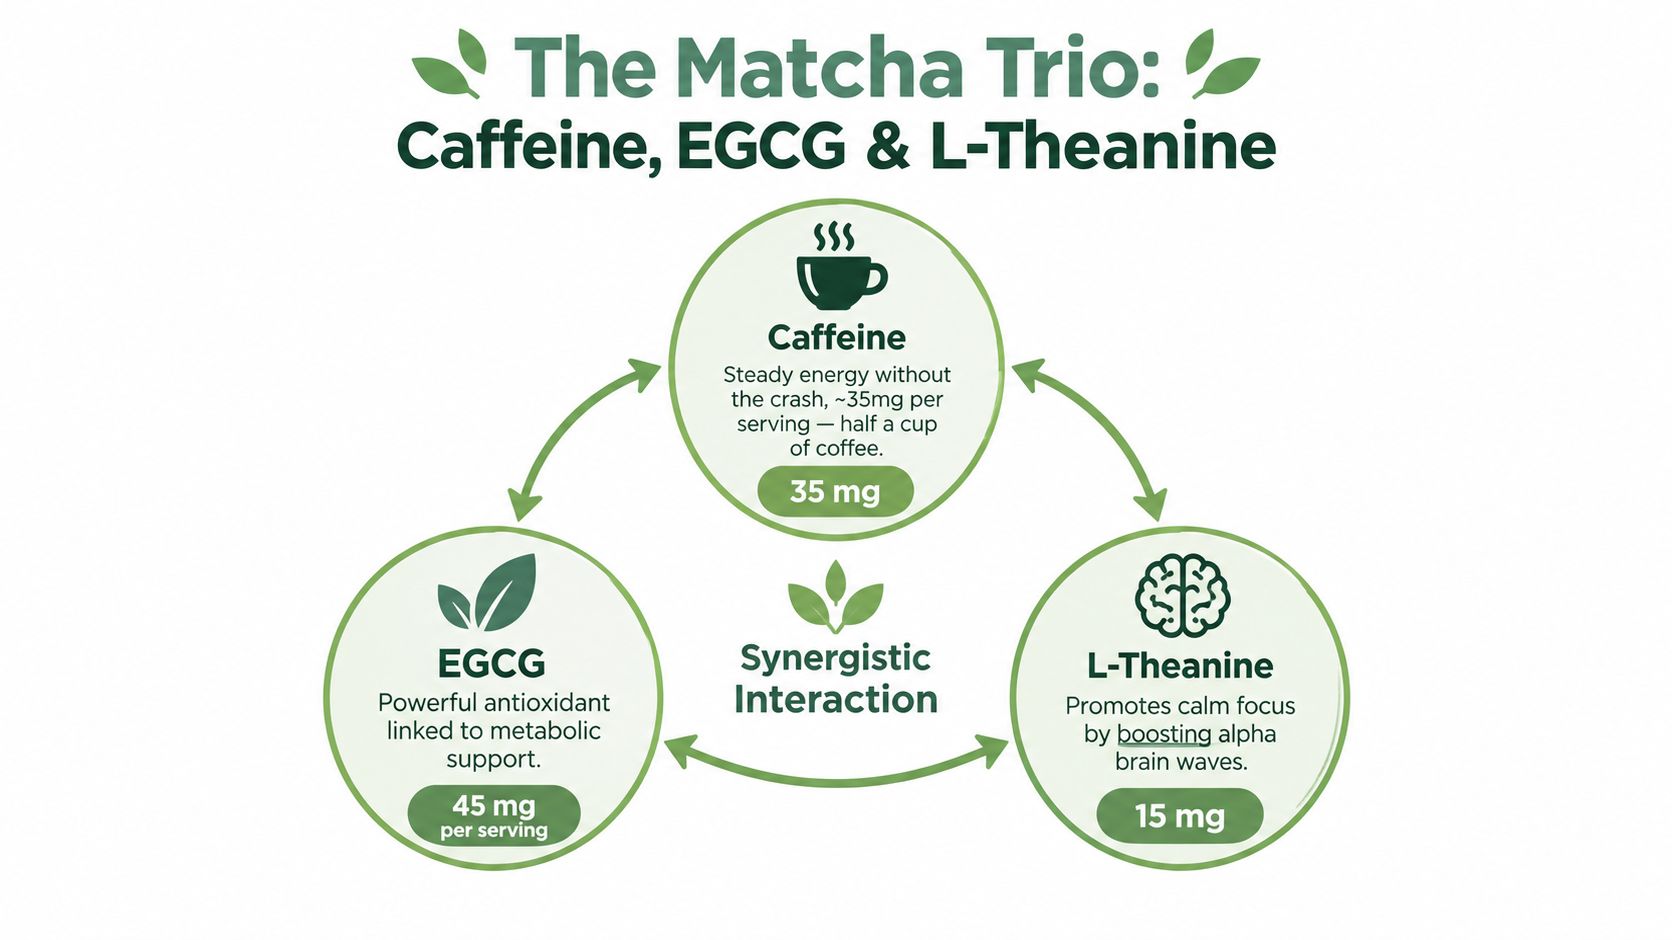
Caffeine contributes to alertness. EGCg, or epigallocatechin gallate, is one of the green-tea catechins commonly discussed in relation to antioxidant content. L-theanine is an amino acid associated with tea, and many people describe the combination of tea caffeine and L-theanine as feeling smoother than caffeine alone. That subjective experience varies, and L-theanine doesn't remove stimulant exposure or guarantee a performance effect.
The serving-size maths
Experimental literature reports approximate dry-weight concentrations of 4% caffeine and 6 to 7% EGCg in matcha. L-theanine commonly exceeds 1% and can exceed 3% in high-grade material in the cited experimental literature.
At a hypothetical 2 g serve, those benchmarks work out to roughly:
- 80 mg caffeine
- 120 to 140 mg EGCg
- At least 20 mg L-theanine
That calculation is illustrative, not a certificate of analysis. Cultivar, shading, harvest, processing, grade, serving size, and laboratory method can all change the result.
For a plain-language explanation of EGCg and its place in matcha, read what EGCg is. Cafés should use gram-weight recipes rather than “one scoop”, because a scoop can vary between staff members and tools.
A useful comparison is not matcha versus coffee in isolation. It's your whole day. If you drink matcha alongside coffee, cola, pre-workout products, or energy drinks, count the sources together. FSANZ identifies 400 mg per day as the maximum daily caffeine dose used in alignment with European Food Safety Authority recommendations in relevant regulatory work, and flags increased anxiety in children at approximately 3 mg per kilogram of body weight per day in its caffeine guidance. That isn't a universal personal allowance, so people who are pregnant, sensitive to caffeine, taking medication, or managing a health condition should seek individual advice.
For a broader look at audits and product information, a resource such as Grumspot Shopify Plus audits illustrates why clear product communication matters. A café menu should never imply that matcha is caffeine-free or automatically calming.
How to Read a Matcha Label Before You Buy
A good label answers practical questions without making you chase the seller for basic information. Start at the back of the pack, not the marketing headline.
Work through the ingredient and origin details
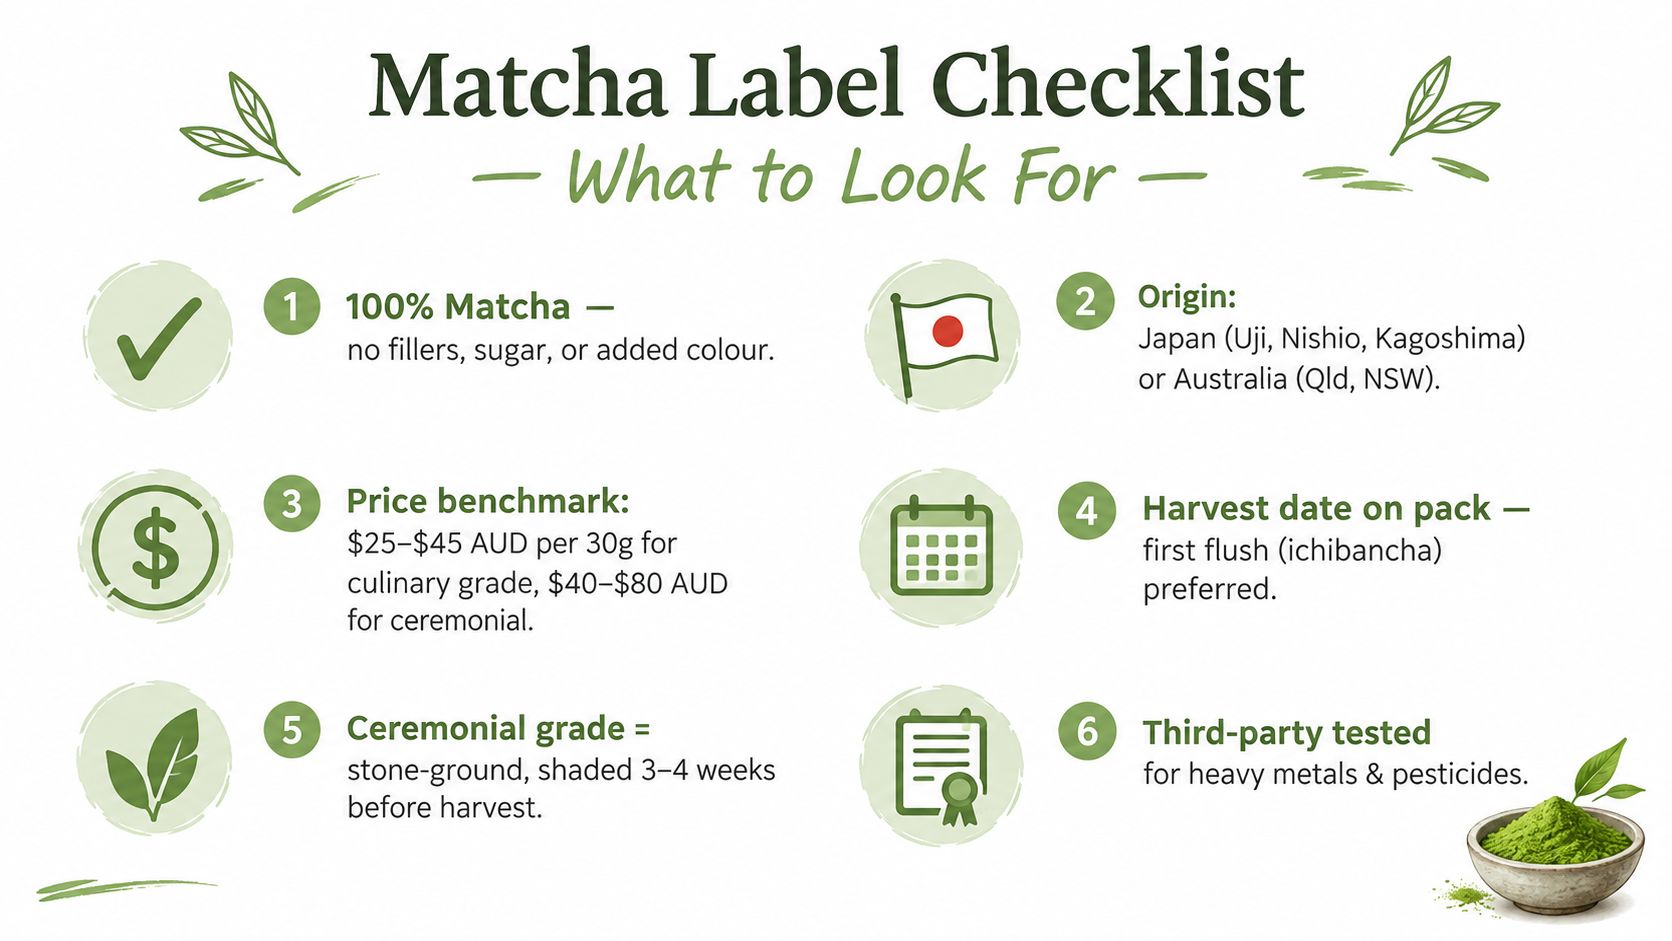
Look for an ingredient list that says 100% matcha or 100% powdered green tea. If you're buying a flavoured latte blend, the label should name every added ingredient so you can distinguish a pure powder from a prepared mix.
Then check the origin. A Japanese growing region such as Uji, Kagoshima, or Nishio can tell you more than a vague phrase such as “Japanese style”. If the pack names a cultivar, harvest, mill, or batch, that extra detail helps you ask better questions about flavour and consistency.
Organic claims deserve the same care. Look for the named certification body rather than assuming that “natural”, “clean”, or “chemical-free” means certified organic. A seller who can explain the certification and provide traceability is giving you stronger evidence than a decorative leaf on the front panel.
Look for evidence, not adjectives
Words such as “super”, “premium”, and “ceremonial” can help describe positioning, but they aren't enough on their own. Ask whether the seller provides storage guidance, batch information, a clear use recommendation, and testing relevant to the product.
For cafés and retailers, ask for documentation covering heavy metals and microbiological safety. For home buyers, a transparent ingredient list, origin statement, certification details where claimed, and sensible freshness guidance are useful signals. A step-by-step guide for DTC brands offers helpful context on why product descriptions should answer specific buyer questions rather than rely on vague promotional language.
Caffeine is another labelling consideration. FSANZ's guidance means the word “pure” doesn't make a powder caffeine-free, and it doesn't replace responsible serving advice. If you're combining matcha with other caffeinated drinks, choose a repeatable serving and keep a simple record of your total intake.
Brewing, Lattes, and Cooking with Pure Matcha
The same powder can taste elegant, creamy, bitter, or flat depending on how you prepare it. Water temperature and technique matter, but so does grade. Save delicate ceremonial matcha for preparations where you'll taste it directly, and use culinary powder where other ingredients need to share the stage.
Start with a whisked bowl
For a traditional drink, sift the powder into a bowl, add hot water around 80°C, and whisk briskly with a bamboo chasen until the liquid is smooth and lightly frothy. Water that's too hot can make the drink taste more bitter, while insufficient whisking leaves clumps.
For an iced matcha, shake sifted powder with a small amount of cool or lukewarm water in a sealed jar or shaker before adding ice and milk. This creates a smooth concentrate without requiring a full traditional setup.
A latte follows the same principle. Whisk the matcha with a little water first, then add textured milk. Keep the sweetener modest if you want the tea's umami and grassy character to remain noticeable.
Take it beyond the cup
Culinary matcha works well in:
- Baking: Add it to pancakes, biscuits, sponge mixtures, icing, or shortbread.
- Cold desserts: Blend it into ice cream, yoghurt, or a creamy frozen mixture.
- Smoothies: Combine it with banana, berries, milk, or yoghurt.
- Savoury dishes: Stir a small amount into salad dressing, a glaze, or a marinade.
Store opened matcha in an airtight tin away from light, heat, moisture, and strong kitchen odours. Refrigeration can help protect freshness, but allow the sealed container to come back towards room temperature before opening so condensation doesn't reach the powder.
Sourcing Matcha for Cafés and Retailers
For cafés and retailers, the first sourcing problem is rarely flavour. It is repeatability. If one staff member uses a rounded spoon, another uses a level scoop, and a third adds extra powder to rescue a weak drink, customers end up buying three different versions of the same matcha latte.
That is why pure and good should never be treated as the same buying standard. A powder can be pure because nothing has been added, yet still be a poor fit for direct drinking, inconsistent in colour, or difficult to trace by batch. For a business, quality means a stable supply, clear origin, freshness, and information your team can use on the floor.
Build consistency into purchasing
A good supplier relationship works like a recipe card for your whole business. It reduces guesswork before the tin is even opened. Ask an importer or distributor for:
- Origin records: Country and, where available, growing region.
- Certification evidence: Documentation supporting organic claims.
- Batch information: A way to trace stock and manage rotation.
- Safety testing: Certificates covering heavy metals and microbiological hazards.
- Preparation guidance: Recommended gram weight, water volume, and application.
- Caffeine communication: Accurate information for staff and customers.
Then standardise service by weight, not by eye. Record the gram dose, water volume, milk type, sweetener, and serving method for each menu item. Staff should also understand that ceremonial and culinary powders suit different jobs. Substituting one for the other can shift taste, colour, and margin.
A practical range usually stays tight. One drinking-focused option, one latte powder, and one baking or wholesale format is often enough. Clear purpose matters more than a long catalogue, because customers and staff both make better decisions when each product has an obvious role.
Menu context matters too. The Australian Bureau of Statistics reported in the National Nutrition and Physical Activity Survey release that sweetened beverages supplied 25.4% of all free sugars consumed in Australia in 2023, that Australians consumed an average of 159 mL of sweetened beverages per day, and that these drinks contributed about 11 g of free sugars daily. An unsweetened or lightly sweetened matcha option can meet that demand for lower-sugar choices, but the menu still needs to describe the product accurately. Pure matcha is not caffeine-free, and staff should be ready to explain that clearly.
Quick Answers and a Practical Checklist
A confident purchase doesn't require specialist vocabulary. It requires a few checks that connect the label to the way you'll use the powder.
The buyer's checklist
- Ingredient: Choose a powder that clearly states 100% matcha or powdered green tea.
- Origin: Look for a named country and, where available, a growing region.
- Quality evidence: Check certification details, batch information, storage advice, and relevant testing.
- Grade: Use ceremonial for direct drinking, premium culinary for lattes, and ingredient-grade culinary for recipes.
- Freshness: Buy an amount you can seal and use while the colour and aroma remain lively.
- Storage: Keep it airtight, cool, dry, and protected from light and odours.
Common questions
How much caffeine does matcha contain?
There isn't one universal amount. The tested products discussed earlier ranged from 17.11 to 35.01 mg per gram, so your exposure depends on the product, gram weight, and preparation. Count matcha alongside your other caffeine sources rather than treating it as a caffeine-free wellness drink.
Is matcha the same as green tea powder?
Not always. Matcha is a specific powdered tea made from specially cultivated and processed leaves, while “green tea powder” can describe a broader range of products. Check the production details and ingredient statement.
Is pure matcha safe during pregnancy?
Pure matcha contains caffeine, so pregnancy changes the question from “Is it pure?” to “How much caffeine does my total daily intake contain?” Ask your midwife, doctor, or qualified health professional for advice suited to you.
Why does my matcha taste bitter?
Possible causes include a naturally strong culinary grade, an older powder, too much powder, water that's too hot, or poor whisking. Milk can soften the flavour, but better preparation and a grade suited to drinking usually make the bigger difference.
Pep Tea offers certified organic Japanese matcha in drinking and culinary formats, with pack sizes suitable for home users and wholesale customers. If you're ready to compare pure matcha green tea powder by grade, origin, use, and supporting information, visit Pep Tea and explore the organic matcha range.
How to Make Matcha Not Taste Like Grass: Fix It Today

An overly grassy bowl is almost always fixable by lowering the water temperature to 70–80°C and adding a creamy base, rather than just using stronger matcha. Start with about 2 g of powder, whisk it properly, then dilute it with milk or chilled water until the flavour suits you.
You've probably had the experience: the colour looks beautiful, the whisk is ready, and then the first sip tastes like freshly cut lawn with a bitter finish. That doesn't necessarily mean your matcha is bad. More often, boiling water, clumps, too much powder, or the wrong serving style has pushed its natural vegetal character too far.
For many Australians, matcha is a big sensory jump from regular black tea. Australian tea-buying data found that 35% of people aged 14 and over purchased regular tea in an average four-week period, compared with 11% for green tea, in the 12 months to March 2015, based on 15,913 respondents. Roy Morgan's tea data helps explain why a strong powdered green-tea flavour can feel unfamiliar.
The good news is that learning how to make matcha not taste like grass is less about hiding the drink and more about controlling heat, texture, concentration and dilution.
Why Your Matcha Tastes Grassy
You whisk up a bright green bowl, take a sip, and get hit with raw lawn, bitterness, or a strange stale edge. That usually points to a specific problem, not a lost cause. Matcha is more concentrated than brewed green tea because you drink the leaf itself, so heat, texture, and dose all show up clearly in the cup.
Start with temperature, because it changes flavour fast. Freshly boiled water pulls out more bitterness and leaves the finish dry, especially in a small, concentrated mix. A lower range gives you a softer, sweeter result and makes it easier to judge the powder fairly. PepTea's matcha brewing temperature guide lays out why gentler water gives you better control.
Then read the flavour before you change everything at once.
Read the flavour before changing the recipe
Your first sip usually tells you what to fix:
- Freshly cut grass or raw greens: the powder itself may lean strongly vegetal. This often shows up more in culinary matcha.
- Drying, puckering bitterness: the water was likely too hot, or the drink is too concentrated.
- Grainy, uneven flavour: the matcha was not sifted or whisked into a smooth suspension.
- Flat, stale green flavour: storage, age, or air exposure may be dulling the powder.
Each fix does a different job. Sugar can soften bitterness, but it will not solve scorched powder. Milk can round off aggressive notes, but it will not remove clumps. If you want a better cup, diagnose the problem first, then change one variable at a time. Keep the amount of matcha steady while you test water temperature or dilution, otherwise it gets hard to tell what improved the flavour.
Off-notes can also come from the vessel itself. If your bottle or shaker carries residue from previous drinks, effective bottle cleaning tablets remove that variable before you blame the matcha. A clean bottle will not rescue overheated powder, but it does stop old protein, sweetener, or tea residue from muddying the aroma.
That diagnostic mindset matters in Australia, where plenty of tea drinkers still find matcha stronger and greener than what they usually reach for. IndexBox's Australian tea market overview shows the category has a solid local base. Matcha usually lands better when the format matches the drinker, whether that is a latte, an iced drink, a smoothie, or a straight bowl made with more care.
Mastering the Basic Preparation Method
A smooth cup starts with a small, controlled preparation. Use a bowl or wide mug, a fine sifter, a bamboo whisk or electric milk frother, a digital scale if you have one, and water that has cooled below boiling.
Use less heat and better dispersion
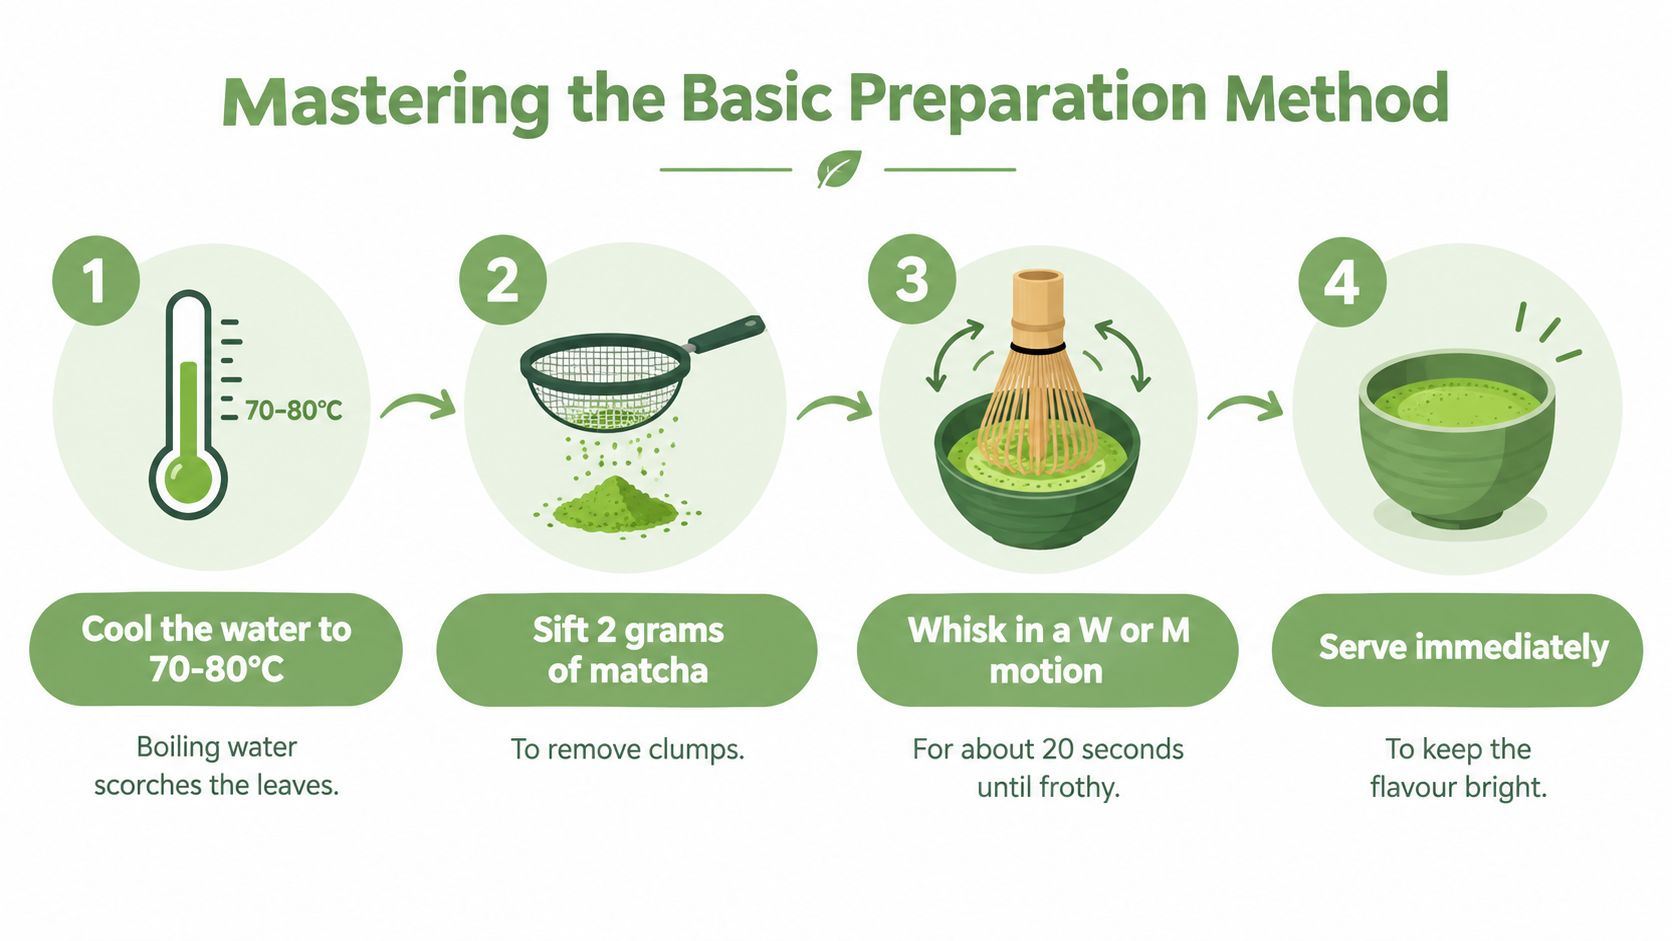
Cool the water. Heat water, then let it cool to 70–80°C. For a particularly grassy powder, begin around 70–75°C. If you don't have a thermometer, leave freshly boiled water to cool for several minutes instead of pouring it directly onto the matcha.
Sift approximately 2 g of matcha. Push the powder through a fine sieve into your bowl. This breaks up compacted particles before they become bitter clumps in the finished drink.
Make a paste first. Add 10–15 mL of the warm water and work it into a smooth slurry. Don't rush this step. A paste gives the powder an even starting point and prevents dry pockets from surviving into the final cup.
Whisk in the remaining water. Add enough water to reach approximately 50–60 mL in total, then whisk rapidly in a W or M motion until the surface looks lightly foamy.
Serve immediately. Matcha begins to settle as it stands. The final sips can taste stronger and more bitter because the powder has collected at the bottom.
This controlled method follows Australian preparation guidance that recommends approximately 2 g of matcha with 50–60 mL of water at 70–80°C. SBS Food's matcha recipe also uses a paste before gradually adding the remaining water, which is a simple way to improve texture.
Troubleshoot with a café-style test
If the drink still tastes sharp, keep the dose and water volume unchanged and compare cooler water. A useful sensory trial is 65°C, 70°C and 75°C, tasted immediately after whisking. Australian brewing guidance recommends cooler water when bitterness develops, and explains that warmer water can increase tannin-driven astringency. You can read the broader comparison in this Australian green-tea brewing guide.
For café service, consistency matters more than guesswork. Weigh the powder, measure the water and check the temperature. If you change all three at once, you won't know what improved the flavour.
You'll find a fuller walkthrough of the drink itself in PepTea's guide to making matcha tea from powder, but the essential principle is simple: cooler water, a smooth slurry and immediate service.
Transforming the Taste with Milk and Sweeteners
If plain matcha still feels too intense, a latte is usually the most reliable next step. Milk changes the drink's texture and spreads the powder through a larger volume, so the concentrated green flavour feels rounder rather than so direct.
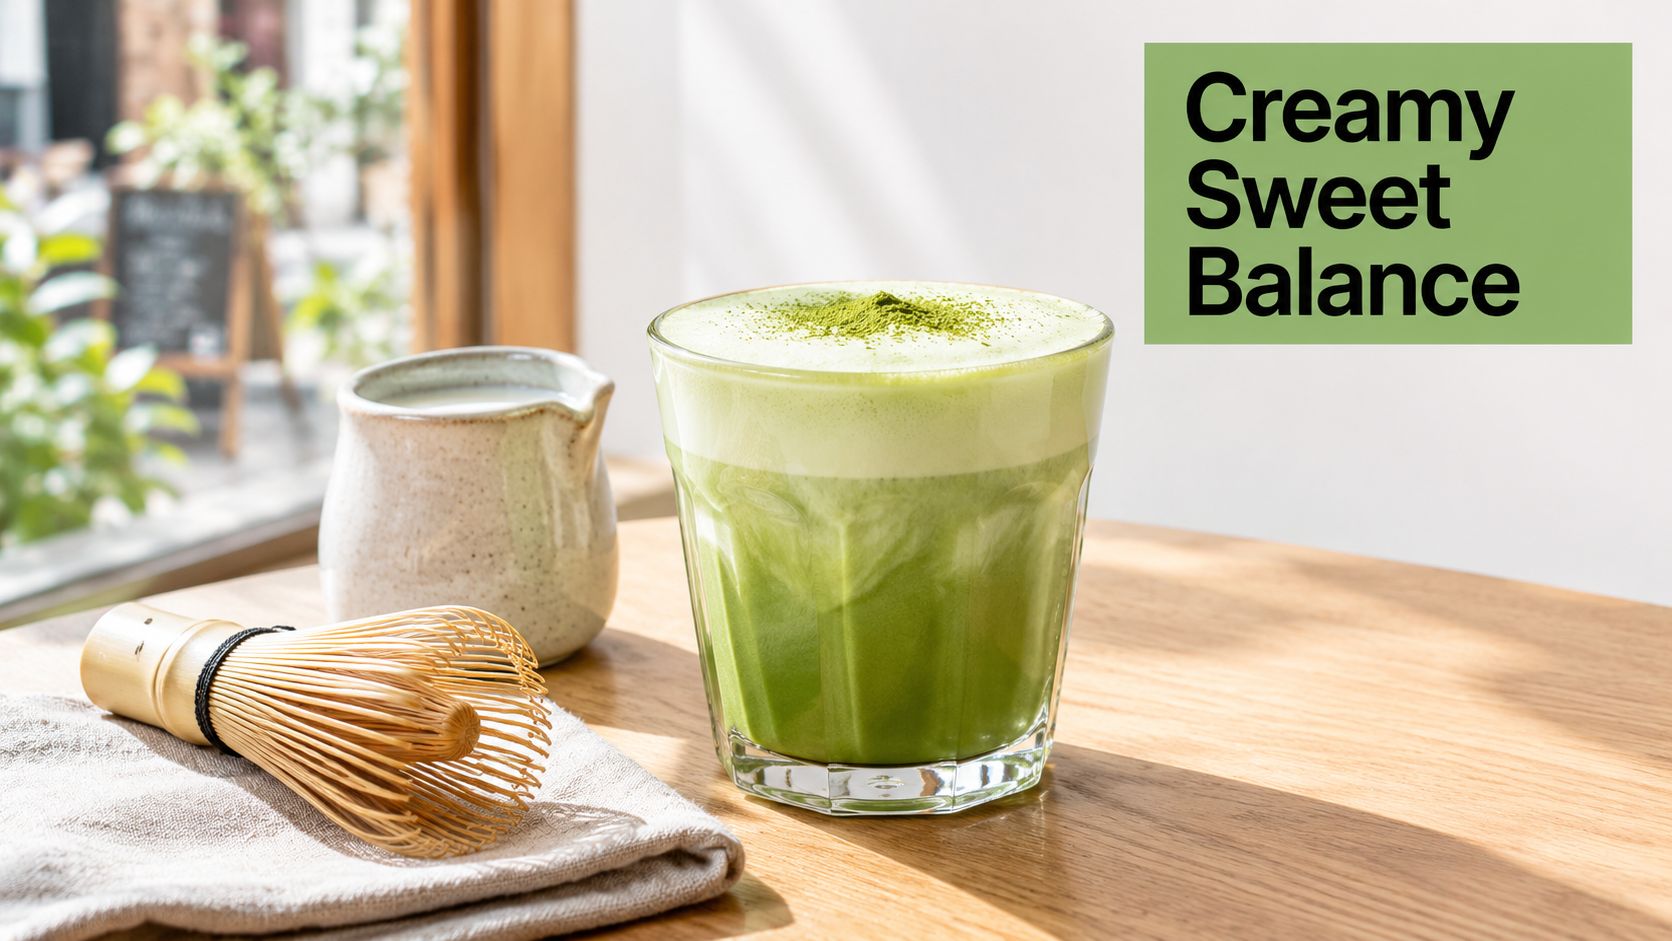
Dairy milk brings creaminess and a familiar café profile. Oat milk adds body and gentle sweetness, while macadamia milk gives a lighter, nutty finish. Unsweetened plant-based milk is a sensible choice if you want to keep the drink aligned with a low-sugar routine. The best option depends on the matcha and your palate, so taste the base before adding a sweetener.
Compare the serving formats
| Format | What it does to the flavour | Best use |
|---|---|---|
| Straight bowl | Keeps the umami and vegetal notes prominent | Fresh, balanced matcha |
| Hot latte | Adds body and softens sharp edges | First-time drinkers and cosy café drinks |
| Iced latte | Makes the flavour feel lighter and more refreshing | Warm Australian days |
| Smoothie or baking | Shares the matcha with other ingredients | Stronger culinary powder |
For a practical latte, whisk the matcha with a small amount of warm water first, then add approximately 150–200 mL of steamed or chilled milk. An iced version works particularly well when you pour the whisked matcha over ice and add milk afterwards. The cold dilution reduces the immediate impact of the vegetal notes without requiring extra sugar.
A smoother drink isn't a caffeine-free drink. Milk, vanilla and sweetener change perceived bitterness and grassiness, but they don't remove the naturally occurring caffeine in matcha.
Sweetness should support the tea, not bury it. A small amount of honey, maple syrup or an approved sugar-free syrup can balance bitterness. Too much sweetness creates a different problem, especially if you're trying to keep a clean-label or sugar-free drink on the menu.
Australian and New Zealand food guidance says naturally occurring caffeine in tea isn't subject to the same maximum limits as caffeine added to beverages, although a standard serving of these foods will normally not exceed 100 mg. FSANZ's caffeine safety information is useful for explaining why matcha can feel stronger than an ordinary brewed green tea.
This video shows the latte process in a visual format:
For a measured home version with milk and optional sweetener, follow PepTea's matcha green tea latte recipe. If you're caffeine-sensitive, pregnant or breastfeeding, or preparing a drink for a child, consider total daily caffeine intake rather than judging the drink by its sweetness.
Understanding Matcha Grades and Flavours
Preparation can only take you so far. If your matcha is naturally forceful, cooler water may reduce bitterness, but it won't turn the powder into a delicate, sweet tea. The grade, cultivation, harvest and processing all contribute to the flavour you're working with.
Ceremonial-grade matcha is intended for drinking with water. It usually offers a finer texture and a more balanced combination of umami, sweetness and gentle vegetal flavour. That doesn't mean it has no grassiness. Authentic matcha can still taste green, savoury and seaweed-like, but the finish should feel more integrated rather than aggressively drying.
Culinary-grade matcha is designed to hold its character alongside other ingredients. Its stronger profile can be useful in cookies, cakes, smoothies, ice cream and savoury recipes, where milk, fruit, flour or fat changes the overall balance. Used as a plain bowl, it may taste more assertively vegetal.
Match the powder to the drink
Choose ceremonial grade when you want to drink matcha mostly with water. Choose culinary grade when you're mixing it into a recipe where a green-tea flavour needs to remain noticeable.
Colour can provide a clue, but it isn't a complete quality test. A vivid green powder may still taste harsh if it has been overheated, while a well-prepared matcha with some vegetal character can be enjoyable. Aroma, texture, freshness and the aftertaste matter as much as appearance.
Organic sourcing is another part of the purchasing decision, but it shouldn't be treated as a guarantee that every cup will taste mild. PepTea offers Japanese organic matcha in ceremonial and culinary styles, so the useful question is not “Is it organic?” It's “Is this grade suited to the way I plan to drink or cook with it?”
Storage affects the result too. Keep the powder sealed, away from heat, light and moisture, and avoid leaving it open beside the kettle. If a powder has lost its fresh aroma and tastes dull or flat, changing technique may not be enough.
When Grassy Notes Are Actually a Good Thing
Not every green flavour is a fault. Matcha is made from powdered tea leaves, so a pleasant vegetal note is part of its identity. The aim isn't to remove every trace of grassiness. It's to separate fresh, savoury character from the harsh bitterness caused by poor extraction or an unsuitable powder.
A well-balanced cup can taste like fresh greens, toasted seaweed, soft umami and gentle sweetness at the same time. Those flavours give matcha its personality. If you force the drink to taste completely neutral with heavy dilution and lots of sweetener, you may lose the reason to drink matcha in the first place.
Tell freshness from over-extraction
Pleasant grassiness usually arrives with aroma and a clean finish. Over-extraction feels more aggressive. It can leave your mouth dry, make the bitterness dominate, or create a burnt impression that lingers after the sip.
This distinction helps you decide whether to keep experimenting with the recipe or replace the powder. If the flavour improves when you cool the water and dilute the drink, technique was the main issue. If it remains blunt, stale or drying even after careful preparation, the grade, freshness or source may not suit a water-based cup.
Matcha is also part of a changing Australian beverage scene. Among surveyed Australians aged 18–24, 40% reported ordering matcha in the previous six months, while 36% ordered flavoured iced matcha, according to Ujiha's Australian matcha flavour guide. Those figures point to a practical lesson for cafés and home drinkers: matcha doesn't need to be introduced only as a strong traditional bowl. Iced and flavoured formats can preserve its character while making the first experience more approachable.
Your Quick Checklist for a Smooth Cup
When the next bowl tastes like grass, don't reach for more powder. Work through the variables in order:
- Start with temperature: Use water at 70–80°C, beginning nearer the lower end if the flavour is harsh.
- Sift before mixing: Break up clumps so the powder disperses evenly.
- Build a paste: Combine the powder with a small splash of water before adding the rest.
- Whisk thoroughly: Use a W or M motion until the drink is smooth and lightly foamy.
- Dilute deliberately: Add chilled water, ice or 150–200 mL of milk if a straight bowl feels too concentrated.
- Sweeten lightly: Use a small amount of honey, maple syrup or sugar-free syrup only after correcting heat and texture.
- Choose the right grade: Use ceremonial matcha for water-based drinking and culinary matcha for recipes.
- Serve promptly: Don't let the powder settle into a bitter final mouthful.
- Check the powder: If careful preparation doesn't soften the flavour, reassess freshness and grade.
The most useful habit is to diagnose before disguising. Cooler water fixes over-extraction, sifting fixes clumps, and milk fixes concentration. Sweetener has a place, but it should be the finishing adjustment, not the rescue plan.
The best matcha routine is the one you'll repeat. A balanced iced latte can be a better introduction than a perfect but intimidating straight bowl.
If your drink contains matcha, remember that a smoother flavour doesn't change its caffeine content. Australian guidance also states that highly concentrated caffeine products, including products with caffeine concentrations of 5% or more in solid or semisolid form, or 1% or more in liquid form, are banned from retail sale to the public. FSANZ's guidance on caffeine powders distinguishes those products from ordinary tea ingredients.
Pep Tea offers organic Japanese matcha in drinking and culinary formats, along with Australian-brewed sugar-free organic kombucha from the Hunter Valley, NSW. Try the temperature and latte methods above, then visit Pep Tea to explore matcha for your next smooth home drink or café menu.
Organic Matcha Green Tea Powder Australia: A Full Guide 2026
Certified organic matcha sold in Australia is generally imported from Japan rather than grown locally at commercial scale. Australia's certified organic agricultural land increased by 48.9% between 2021 and 2022, while the country has more than 53 million hectares of certified organic farmland, about 12.4% of its agricultural land. IndexBox's Australian matcha market overview provides the market context, but those figures describe organic agriculture overall, not domestic matcha production.
You may be standing at a café counter with a new matcha latte on the menu, or comparing tins online after deciding that your usual green tea doesn't deliver the colour or flavour you want. The search for organic matcha green tea powder Australia often creates one immediate confusion: Australian availability doesn't mean Australian origin. The tea may be imported, while the business selling, testing, distributing and educating customers operates locally.
That distinction matters because matcha is a whole-leaf powder. Unlike a brewed infusion, the leaf isn't removed after steeping. Organic certification can help verify how the tea was grown and handled, but it doesn't automatically tell you whether the powder is fresh, potent, well processed or suitable for your recipe. The useful question isn't only whether a tin says “organic”. It's whether the product has a traceable origin, credible certification, suitable grade and testing that matches the risks you need to manage.
Finding Quality Organic Matcha in Australia
A café owner in Newcastle may need a vivid green latte that dissolves cleanly. A home baker in Melbourne may want a stronger powder that remains noticeable in oats, icing or banana bread. Searching for organic matcha green tea powder Australia brings up products with different origins, grades, certification records and handling practices.
For Australian buyers, the local part of the supply chain usually involves importing, distribution and hospitality, rather than cultivation. Matcha is generally imported from overseas tea-growing regions, particularly Japan, where shaded tea leaves are processed into tencha and stone-ground into powder. National organic farmland data can show that Australia has established certification systems and traceability practices, but it does not prove that a product is Australian-grown matcha. The Australian matcha market context helps clarify the difference between local availability and domestic production.

What Australian buyers should look for
A reliable product description gives you several points to check instead of relying on one premium-sounding claim.
- Country and region of origin: “Japan” identifies the country, while a named region gives more supply-chain detail.
- Certification identity: Check the certifier, certificate number and certification scope. Ask the importer for its ACO or JAS certificate number, then verify it through the certifier's public database before purchasing.
- Grade and intended use: Powder for whisking may not suit a café producing large volumes of lattes.
- Lot traceability: A lot number should connect the retail pack with supplier records and relevant testing.
- Storage information: Light, heat, air and moisture can affect matcha, so packaging and handling influence the final cup.
“Ceremonial grade” can indicate intended use, but it is not a universal government-controlled matcha grade. Assess colour, aroma, texture and flavour alongside the label. Fresh matcha should smell clean and vegetal, disperse finely and avoid a harsh, stale or dusty finish.
For an Australian supplier presenting its range and product details, compare the Pep Tea matcha tea powder collection with the documentation supplied by other sellers. The practical goal is a powder with an identifiable origin, verifiable certification, suitable handling information and a flavour profile you can explain to customers.
Ceremonial vs Culinary Matcha Grades Explained
“Ceremonial” and “culinary” are practical buying terms, not a complete quality-control system. In Japan and internationally, “ceremonial grade” doesn't have one universal regulated definition, so a buyer should still examine origin, harvest information, processing, freshness and test documentation.
Ceremonial-style matcha is usually selected for drinking directly with water. It tends to be brighter in colour, finer in texture and more rounded in flavour, with an umami character that can stand on its own. Culinary matcha is usually chosen for recipes where the powder must remain noticeable beside milk, fruit, oats, flour or sweetener. It can have a more assertive bitterness and a less delicate finish, which may be an advantage rather than a defect.
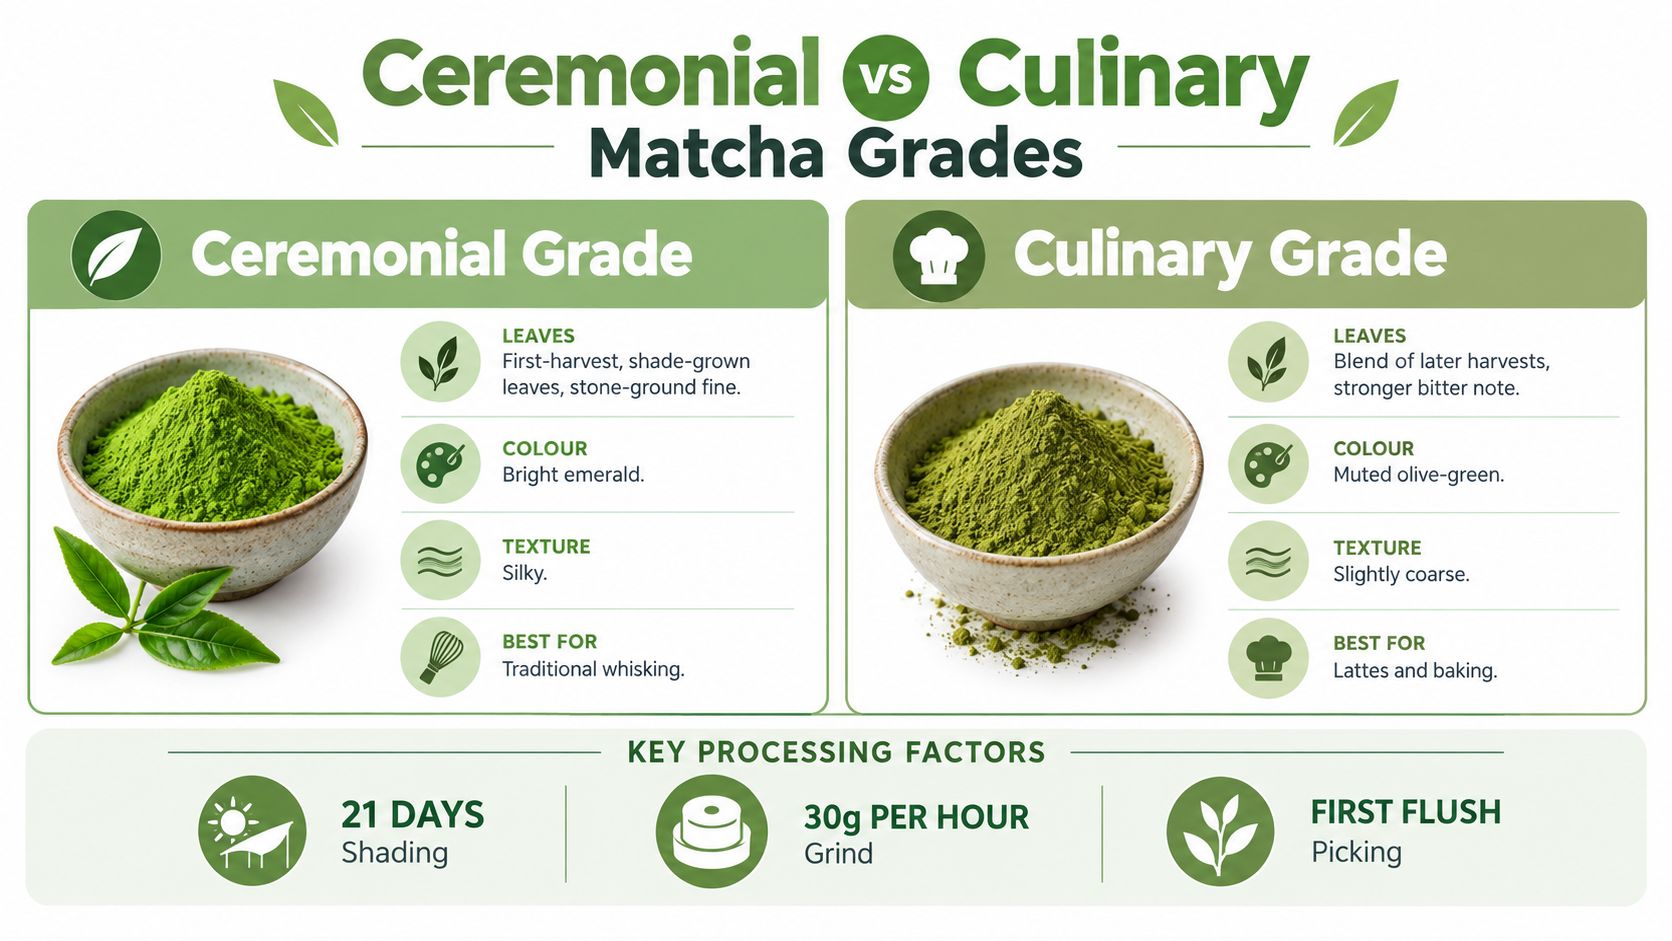
How processing changes the cup
Tea plants used for matcha are shaded before harvest, then processed into tencha, with stems and veins removed before grinding. Shading can influence the leaf's colour and flavour, while cultivar, harvest timing and processing also affect the powder's chemical composition. The Western Sydney University review of matcha's bioactive compounds reports that matcha generally contains catechins, L-theanine and caffeine, but concentrations vary substantially between products.
Stone-grinding is associated with a fine powder and a smooth mouthfeel. However, the phrase “stone-ground” isn't enough to prove that a matcha will taste good. A powder may have been well processed and still be old, poorly stored or unsuitable for the drink you're making.
Try the following comparison:
| Matcha grade | Best for | Key characteristics |
|---|---|---|
| Ceremonial-style | Traditional whisking, thin tea and direct drinking | Brighter colour, fine texture, softer bitterness and a flavour designed to be enjoyed with water |
| Culinary-style | Lattes, smoothies, baking, desserts and sauces | More robust flavour, stronger bitterness and enough presence to work with other ingredients |
Choose by application, not status
A delicate ceremonial-style powder can taste excellent in a bowl but become wasteful in a strongly flavoured latte. Milk, ice and sweeteners can mute subtle notes, so a practical culinary powder may perform better while keeping the menu cost under control.
The reverse problem appears in direct drinking. A coarse or bitter culinary powder whisked with water can leave astringency on the tongue, especially if the water is too hot or the powder is poorly stored. That doesn't mean culinary matcha is inferior. It means the product has been selected for a different job.
Organic status addresses farming and handling standards, not whether a powder is ceremonial-style, culinary-style, mild, strong, fresh or compositionally consistent. For serious café purchasing, ask for the supplier's intended use, batch information and preparation recommendation. The Pep Tea guide to ceremonial and culinary matcha can sit alongside a sensory trial, where staff prepare both powders using the same recipe and taste them in the actual menu format.
One final caution concerns caffeine. Matcha is powdered tea, so the amount consumed depends on powder mass, cultivar, processing and preparation. A supplier shouldn't present a single caffeine number as universal for every tin or serve.
Understanding Organic Certification and Standards
A café can receive a bag labelled “organic” without knowing how that claim was verified. Organic claim and certified-organic status are different. Australian domestic organic sales do not always require mandatory certification, while a business using a certified-organic label must ensure the product meets the stated arrangement. The Australian Government describes AS 6000-2015, the Australian Standard for organic and biodynamic products, as covering production, processing, storage, transport, labelling and importation. The government's organic and biodynamic factsheet explains why checks need to extend through the supply chain, not stop at the farm.
Certification answers one set of questions
Certification verifies the production system, permitted inputs and relevant handling practices. It can support claims about how tea was grown, processed and represented, provided the finished imported product falls within the applicable certification arrangement. For an Australian buyer, the certifier, certificate holder, product scope and import documentation all matter.
See how certification is verified locally in the Pep Tea guide to organic certification in Australia.
Certified status does not establish that every powder has the same caffeine level, catechin profile, moisture content, colour or flavour. The Western Sydney University review found variable bioactive profiles in commercially marketed matcha from different countries. Organic certification is therefore a baseline for production claims, not a guarantee of potency or consistency.
For a café, use separate checks for separate decisions:
- Certification: Was the product produced and handled under the stated organic standard?
- Composition testing: What does this batch contain in terms of caffeine and selected compounds?
- Contaminant testing: Has this batch been assessed for hazards such as heavy metals, pesticides or microbes?
- Sensory evaluation: Does the powder meet the flavour, colour and texture required for the menu?
Certification verifies the production system; laboratory testing verifies what is in this specific lot. Sensory evaluation then shows whether the powder performs in the intended drink. A certificate cannot tell you whether a matcha is too bitter for a latte, while a taste test cannot establish organic status.
Read labels with appropriate caution
The word “natural” offers less verification than a named certification system. A credible pack should identify the product, importer or responsible business, origin and relevant certification information so those details can be checked against supplier records.
Matcha uses the whole leaf, so it is consumed as a powder rather than brewed and discarded. The Food Standards Australia New Zealand caffeine advice distinguishes naturally occurring caffeine in tea from concentrated caffeine products. Organic certification does not make matcha caffeine-free or establish a particular physiological effect.
Businesses should keep certification separate from health marketing. Matcha may contribute naturally occurring tea compounds to the diet, but claims about immunity, detoxification, metabolism or disease prevention require evidence and careful regulatory review. A clear description of origin, grade and preparation gives customers more useful information than benefits a supplier cannot substantiate.
How to Verify Quality and Sourcing
A responsible matcha purchase starts with paperwork, then moves to the powder itself. This approach works for a home buyer comparing tins and for a café owner assessing a wholesale supplier.
Ask for the documents that connect product to batch
Request the following information before committing to a large order:
- A current certificate of conformity. Check the certifier, certificate holder, product scope and validity.
- Country and region of origin. A named Japanese region is more informative than an unexplained “imported” claim.
- Lot number. Confirm that the lot on the pack matches the supplier's documentation.
- Testing date. Recent testing is more useful when it clearly identifies the tested lot.
- Laboratory scope. Find out whether the report covers heavy metals, pesticide residues, microbiological quality and other relevant parameters.
- Product specification. Ask for storage conditions, recommended serving mass, grade, packaging and expected shelf life.
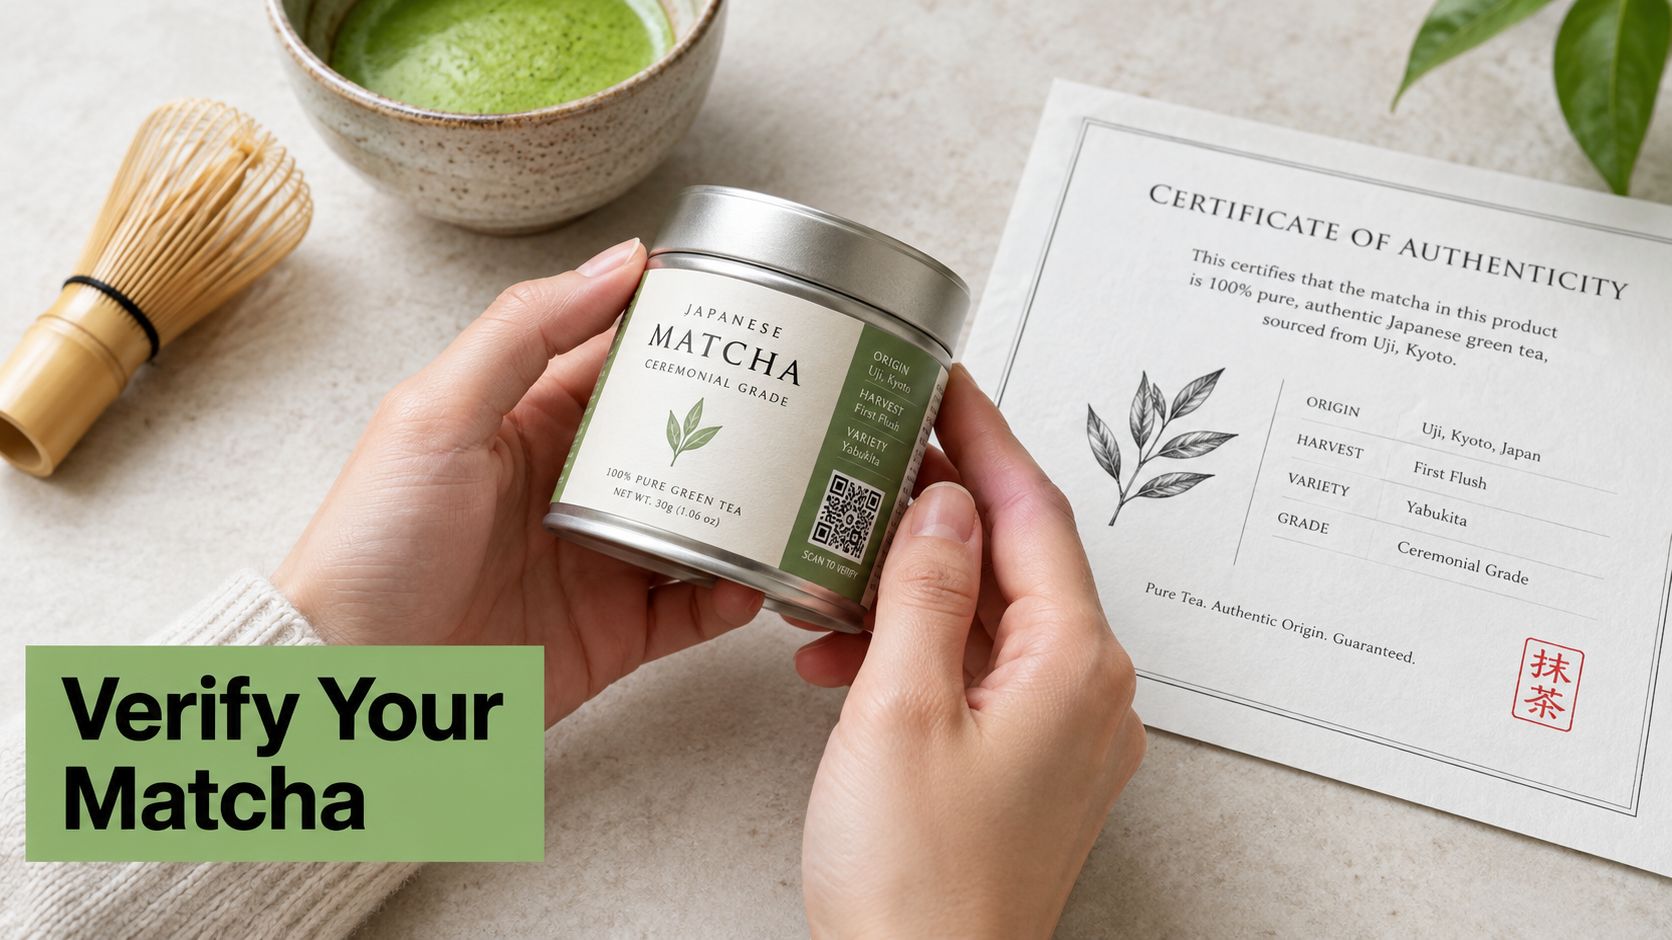
A certificate of conformity is valuable, but it shouldn't be treated as a complete safety report. Organic certification and laboratory testing answer different questions. The certification concerns the production system. Laboratory analysis tests selected hazards or compositional features in a particular sample.
Interpret testing without overclaiming
The available Australian regulatory material doesn't establish one simple matcha-specific consumer threshold for every concern a shopper may have, including lead, cadmium, pesticides and microbial hazards. That's why suppliers should be precise about what was tested, by which method, on what date and for which lot, rather than writing “fully tested” without detail.
For cafés and retailers, the Western Sydney University review recommends batch-level testing where possible, ideally using validated HPLC or UPLC methods for caffeine and major catechins such as EGCG, alongside checks for moisture, microbiological quality and heavy metals. The practical reason is straightforward: colour and sensory grade can't reliably predict functional composition.
Practical rule: Certification tells you how the product was produced. A laboratory report tells you what a particular test found. Keep both records.
Taste and storage remain part of verification
Open the pack and inspect the powder. A lively green colour, fresh aroma and fine texture are useful signs, while dull colour, stale odour, visible moisture or persistent clumping deserve questions. These observations don't replace laboratory testing, but they can reveal poor storage or age.
Keep the powder sealed, away from heat, light, air and moisture. A café should also record when a pack was opened and use a consistent recipe. If one barista uses a light spoonful and another uses a heavily packed scoop, customers won't receive a consistent drink, even if the underlying matcha is sound.
Australian Use Cases and Product Selection
Australian matcha works best when the grade matches the service format. A home user drinking a small bowl with water has different needs from a café building an iced latte, and a food manufacturer needs documentation that a casual buyer may never request.
Matcha preparation at home and in cafés
For direct drinking, sift the powder into a bowl, add warm water and whisk until the surface becomes lightly foamy. Water that's too hot can exaggerate bitterness, so use comfortably hot rather than boiling water. The right technique won't rescue stale matcha, but it can prevent avoidable clumping and harshness.
For a latte, dissolve the powder in a small amount of warm water first, then add milk or a plant-based alternative. Culinary-style matcha usually makes economic and sensory sense here because its stronger flavour can hold up against milk, ice and optional sweetener. Keep the drink unsweetened if the aim is to provide a low-sugar menu option, and let customers choose additions separately.
This video demonstrates a practical preparation approach for customers and café teams:
The same powder can be used in a smoothie with banana and oats, folded into yoghurt, blended into ice cream or added to baking. Heat and strong ingredients change the final flavour, so a powder that tastes slightly assertive on its own may be the better recipe ingredient.
| Matcha grade | Best for | Key characteristics |
|---|---|---|
| Ceremonial-style | Bowl preparation and simple iced matcha | Fine texture, vivid colour and a balanced flavour that remains exposed |
| Culinary-style | Café lattes, smoothies and baking | More pronounced tea flavour and better compatibility with milk or food |
Matcha alongside kombucha
Matcha and kombucha serve different roles. Matcha is a powdered tea ingredient that contributes tea flavour and naturally occurring caffeine. Kombucha is a fermented beverage requiring controlled acidity, clean equipment, reliable cultures and documented process monitoring.
FSANZ identifies kombucha as a beverage requiring careful control. The initial tea infusion is typically around pH 5, and it should be cooled from 60°C to 20°C within two hours. During fermentation, acidity should reduce the drink to pH 4.2 or below, while the finished beverage should generally remain at pH 2.5 or above and below 1% alcohol. These controls are set out in FSANZ's kombucha guidance.
That difference matters for cafés. A properly fermented sugar-free kombucha can provide an alcohol-free, low-sugar menu option, but “fermented” alone doesn't prove that the drink was made safely or contains no residual sugar. Read the nutrition information and ask how the producer manages acidity, alcohol and hygiene. Pep Tea offers organic Japanese matcha and Australian-brewed organic kombucha from the Hunter Valley, NSW, as separate beverage options rather than treating them as interchangeable products.
Australian beverage menus can also use matcha and kombucha in different dayparts. A matcha latte suits a morning or afternoon service, while chilled kombucha can work as a refreshing alternative to soft drinks or alcohol. For venues managing customer questions at scale, drink industry chatbot examples can help inspire ways to organise menu information, ingredient answers and service workflows without replacing staff knowledge.
Your Organic Matcha Shopping Checklist
Use this checklist before buying organic matcha green tea powder in Australia:
- Confirm the origin: Look for Japan and, where available, a named region.
- Verify the certification: Ask which certifier issued it and whether the finished imported powder is covered.
- Match grade to use: Choose ceremonial-style powder for direct whisking and culinary-style powder for lattes, smoothies and baking.
- Request batch details: Certificate, lot number, testing date and product specification should connect to the pack.
- Separate certification from testing: Organic status doesn't replace independent checks for heavy metals, pesticide residues or microbiological quality.
- Ask about caffeine: A serving's caffeine depends on powder mass, cultivar, processing and preparation. Healthdirect Australia's caffeine guidance gives healthy adults a general daily upper guideline of around 400 mg, but that isn't a target and doesn't suit every person.
- Inspect the powder: Fresh aroma, fine texture and lively colour support a better drinking experience.
- Check storage: Heat, light, air and moisture can reduce freshness after importation.
If you're presenting products online or building a café menu, strong photography should show the powder, colour, preparation and serving context accurately. A practical food product photography workflow from MerchLoom can help teams organise those visual assets without making unsupported claims about the product.
Pep Tea offers organic Japanese matcha in grades suited to direct drinking, café lattes and culinary use, alongside Australian-brewed organic kombucha from the Hunter Valley, NSW. Visit Pep Tea to compare the range, review product details and enquire about options for your home, café or wholesale menu.
8 Matcha Recipes Baking Healthy Bakers Will Love

Healthy matcha baking doesn't have to mean dry muffins, bland biscuits or a complicated pantry overhaul. Culinary-grade organic matcha brings vivid colour, earthy umami and a gentle tea character to baked and no-bake treats, so you can often reduce some of the sugar used only to create flavour. The result can be a soft lunchbox muffin, a portable oat bar, a celebration dessert or a comforting loaf, provided you judge the whole recipe rather than one fashionable ingredient.
This roundup brings together eight matcha recipes for healthy-minded baking, including grain-free cookies, dark chocolate brownies, cheesecake, bliss balls and chia muffins. Each one includes a practical texture tip, realistic substitutions and a reminder that “healthy” depends on the complete ingredient list and serving size. Matcha contains caffeine, too, so it isn't automatically suitable for everyone or caffeine-free because it's baked.
Pep Tea's organic culinary-grade matcha is the natural choice for recipes where tea flavour needs to stand up to flour, chocolate, fruit or dairy. Ceremonial-grade matcha is generally better reserved for whisking and drinking, while culinary grade suits cooking. If you're comparing options, Saporia's Clearspring matcha selection provides another useful reference point. The notes below cover sifting, dissolving, lowering added sugar, gluten-free swaps and keeping portions realistic.
1. Matcha Almond Flour Cookies with Coconut Oil
These delicate cookies pair organic culinary-grade matcha with almond flour and coconut oil for a naturally grain-free bake. Almond flour gives the dough a tender, slightly nutty texture, while matcha supplies colour and depth so the recipe doesn't need to rely entirely on sweetness for interest.
They're a useful option for gluten-free households, although almond flour isn't suitable for people with nut allergies and “gluten-free” doesn't automatically mean low in energy or sugar. Keep the sweetener modest, and let a pinch of sea salt sharpen the matcha's earthy character.
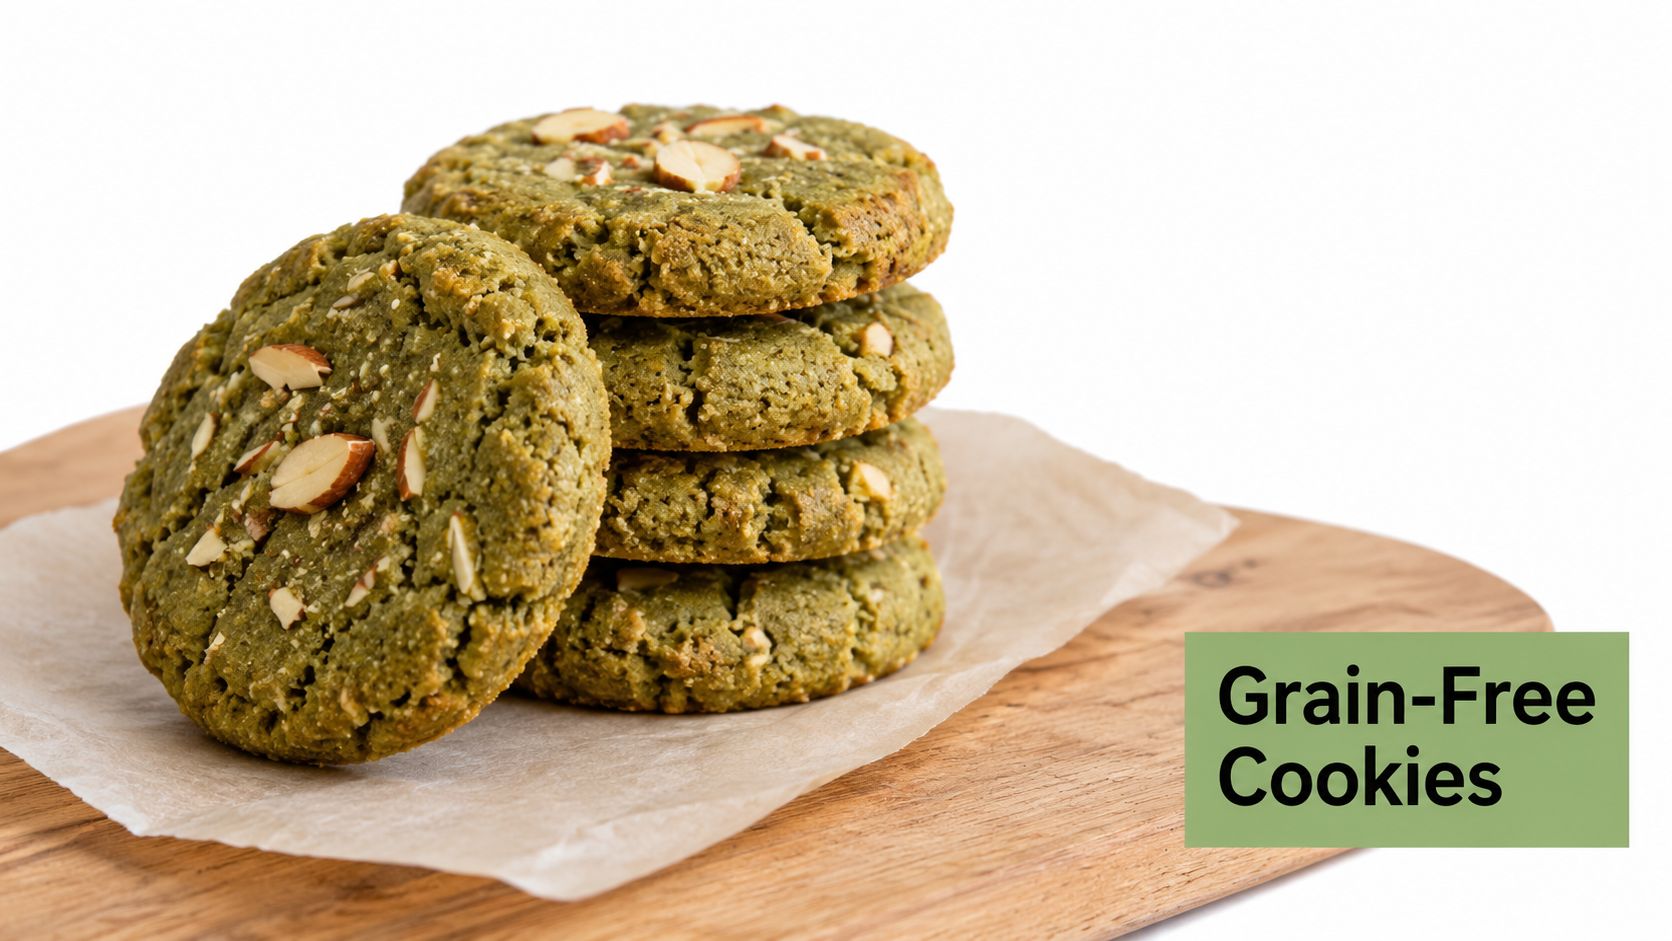
Recipe card
- Base: Almond flour, coconut oil, culinary-grade matcha, egg or suitable binder, a restrained sweetener and sea salt.
- Preparation: Sift the matcha before mixing it through the dough. Chill the dough for 30 minutes so the cookies hold their shape.
- Baking: Bake at 160–170°C, watching for set edges and soft centres.
- Finish: Add sliced almonds or a light dusting of matcha after cooling.
Practical rule: Sifting matters more with almond flour because small matcha pockets can taste sharply bitter in an otherwise mild cookie.
Serve one with an unsweetened matcha latte at home, or offer the cookies as a small café accompaniment. Coconut oil contributes fat, and almond flour contributes energy, so describe these as lower-sugar cookies, not unlimited snacks. For a nut-free version, use a tested seed-based flour blend rather than swapping ingredients by guesswork, because the dough's structure may change.
2. Matcha Green Tea Protein Brownies with Dark Chocolate
Matcha can make a dark chocolate brownie taste more layered, but more powder is not always better. Both ingredients bring bitterness and roasted depth, so the goal is balance. Dark chocolate supplies a rich base, while a modest amount of matcha adds a lingering tea note without turning the brownie harsh.
Protein powder changes the batter's structure. Plant-based varieties absorb liquid differently, much like adding extra flour, so check the mixture before baking. It should look thick and glossy, not stiff or crumbly. If the batter feels dry, a small adjustment to the liquid or oil may help, depending on the powder's instructions.
Recipe card
- Core ingredients: Dark chocolate, plant-based protein powder, flour or a suitable alternative, matcha, eggs or a plant-based binder, oil and a modest sweetener.
- Matcha paste: Whisk the powder with hot water at 60°C before mixing it into the batter. This helps distribute the colour and reduces dry pockets.
- Chocolate base: Melt the chocolate gently over a water bath so it does not seize.
- Mixing: Fold the ingredients together rather than beating them. Overmixing can make the brownies dense.
- Finish: Cool completely before slicing, then add a light matcha dusting if you want a brighter surface.
A gluten-free flour blend can replace standard flour, but choose one designed for baking and expect a slight texture change. If the dark chocolate tastes especially intense, a pinch of salt can sharpen its flavour without relying on extra sweetener.
The brownies firm as they rest. Warm slices may look underbaked and develop ragged edges, while cooled brownies cut more cleanly. For another practical combination of matcha and protein ingredients, try Pep Tea's matcha protein shake recipe.
Serve a small piece with water or an unsweetened drink. Matcha contains caffeine, and protein powder does not turn a brownie into automatic post-workout food. Consider the full recipe, portion and overall eating pattern when describing its wellness value.
3. Matcha Cream Cheese Cheesecake with Ginger Kombucha Drizzle
Matcha cheesecake works best when the tea remains recognisable without dominating the filling. Cream cheese rounds off matcha's bitterness, while ginger kombucha adds acidity and a warm aromatic note to the drizzle. The result suits a dinner table or Japanese-inspired café menu, although fermentation does not make cheesecake a health food.
Start with the powder. Sift the matcha two or three times, then whisk it with a little warm water to make a smooth paste. This paste spreads colour and flavour through the dense cream cheese more reliably than dry powder, which can leave green specks or bitter pockets.
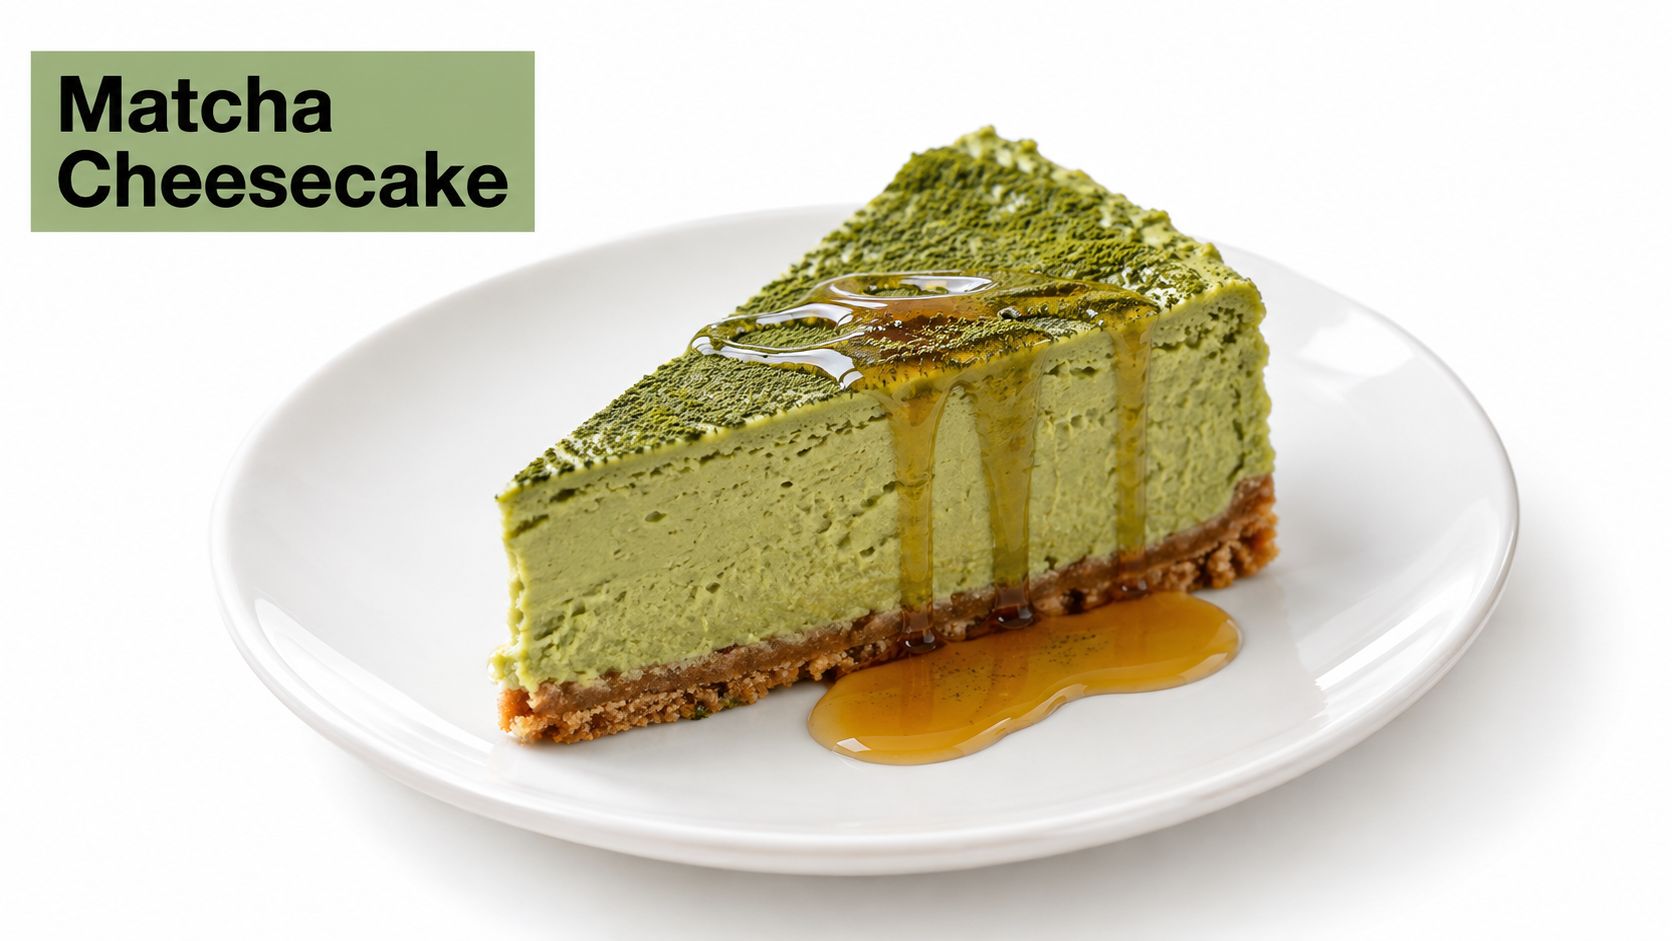
Build the cheesecake
Use cream cheese, eggs, matcha paste, vanilla and a measured sweetener for the filling. A conventional biscuit base gives familiar crunch, while an oat and nut base offers a different texture and may suit a gluten-free adaptation if every ingredient is checked.
Bake on a lower oven shelf with a water bath. The surrounding moisture supports gentler, more even cooking, which helps the filling stay soft rather than turning grainy. Cool the cake gradually at room temperature, then refrigerate it. Rapid cooling can encourage cracks, and overbaking can dry the centre.
For the topping, strain Pep Tea's Lemon & Ginger Kombucha and reduce it gently until concentrated. Use a thin drizzle, since it should sharpen the dessert rather than replace the sugar already calculated in the recipe.
Matcha supplies flavour and colour. It does not cancel the nutritional contribution of cream cheese, biscuits or sweeteners.
Serve smaller slices, with extra drizzle on the side for guests who prefer more acidity or sweetness. For café service, list allergens clearly and calculate nutrition from the exact ingredients used.
4. Matcha Oat Energy Bars with Dates and Chia Seeds
These no-bake bars are a practical pantry recipe, especially when you want a compact snack without turning on the oven. A food processor breaks down the dates into the sticky base, while oats provide chew, chia seeds add small bursts of texture, and nut butter holds everything together. Matcha brings a clear tea flavour, so you may need fewer chocolate chips or no coating at all.
“Energy bar” describes the format, not a guaranteed physiological effect. Dates and other dried fruit still contain sugar, which means a bar made without refined sugar is not sugar-free. That distinction matters for a walk, desk snack or lunchbox, particularly because oats, dates and nut butter create a dense serve.
Build the mixture
- Start with the dates: Pulse them until they become a tacky paste. If they are firm, soften them briefly before processing.
- Prepare the matcha: Whisk it with a small amount of warm water. This spreads the powder through the mixture and helps prevent bitter green pockets.
- Combine: Add rolled oats, chia seeds and nut butter, then stir through the matcha mixture until the ingredients hold together.
- Press and chill: Firmly pack the mixture into a lined tin. Refrigerate for at least two hours before slicing.
- Store: Keep the bars refrigerated for up to two weeks, or freeze them individually wrapped for up to two months.
A hot, wet knife gives cleaner edges. Crumbling means the mixture needs a little more nut butter or a splash of milk. If it feels oily, add oats gradually, then chill it again before assessing the texture.
For a lunchbox-friendly flavour, use less matcha and add orange zest, cinnamon or toasted coconut. Sunflower seed butter provides a nut-free alternative, but check packaged ingredients for allergen cross-contact. Smaller portions make sense when dates, nut butter and oats are pressed into a compact bar.
5. Matcha Lemon Pound Cake with Polenta and Olive Oil
A pound cake does not need butter to feel rich. Mild extra virgin olive oil keeps this version moist, while lemon lifts matcha's grassy, slightly savoury character. Fine polenta adds a delicate grain and lightly golden crumb, so the result has more texture than a plain sponge.
Choose the oil carefully. A peppery or strongly fruity variety can dominate the tea, whereas a mild one supports it. Culinary-grade matcha gives the clearest colour and flavour without turning the cake overly bitter.
A balanced formula
- Dry base: Fine polenta, flour or a tested gluten-free blend, baking powder and culinary-grade matcha.
- Aromatics: Lemon zest and vanilla, with a modest amount of sweetener.
- Liquid ingredients: Room-temperature eggs and mild extra virgin olive oil.
- Optional finish: Lemon juice mixed with icing sugar for a light glaze.
Sift the matcha, polenta and flour together. This distributes the powder evenly, much like spreading food colouring through a batter before it forms concentrated pockets. Rub freshly grated lemon zest gently into the dry mixture with your fingertips to release its aromatic oils. Room-temperature eggs also combine more smoothly with the oil, helping the batter emulsify.
Mix only until the ingredients come together.
Texture check: Stop stirring as soon as no dry patches remain. Extra mixing can make the crumb heavy, especially with a gluten-free flour blend.
For a gluten-free cake, verify the polenta, baking powder and flour blend against the needs of the person eating it. Polenta itself does not rule out gluten cross-contamination.
The glaze sharpens the citrus and improves presentation, but it increases sweetness. Leave it off for a less-sweet slice, then serve the cake with plain yoghurt and fresh berries. That combination keeps the lemon, matcha and olive oil in balance while adding a practical portion contrast for afternoon tea.
6. Matcha White Chocolate Macadamia Bliss Balls
Matcha bliss balls can taste like balanced tea or like sweetened white chocolate with green colouring. The difference comes from the matcha grade, amount and chilling time. Choose culinary-grade matcha for baking, then sift it so its grassy, umami flavour spreads evenly through the mixture.
Use macadamia butter for a smooth centre. Finely chopped macadamias create more texture and make the bites feel less like a truffle. White chocolate brings sweetness and fat, so a restrained version can use less of it and more macadamia, provided the mixture still binds.
Quick recipe guide
- Melt the white chocolate gently in a double boiler or in 30-second microwave bursts.
- Stir in macadamia butter or finely chopped nuts, vanilla and sifted matcha.
- Refrigerate the mixture for one hour before shaping. Chilling works like firming soft clay. It makes rolling cleaner and reduces sticking.
- Finish with desiccated coconut or a very light matcha dusting.
- Place the finished balls on parchment paper or a silicone mat for easier storage and serving.
If the mixture feels greasy, add a little more finely chopped macadamia rather than extra matcha. If it crumbles, it needs more binding from the chocolate or nut butter. Lemon zest can cut through excessive sweetness, although it changes the flavour toward a brighter citrus profile.
Pep Tea's matcha energy balls recipe provides another format for batch preparation. Treat these as confectionery-style bites rather than a sugar-free snack. Their compact size supports deliberate portions, while their sweetness can make several easy to eat unnoticed.
7. Matcha Banana Bread with Walnut and Kombucha Reduction
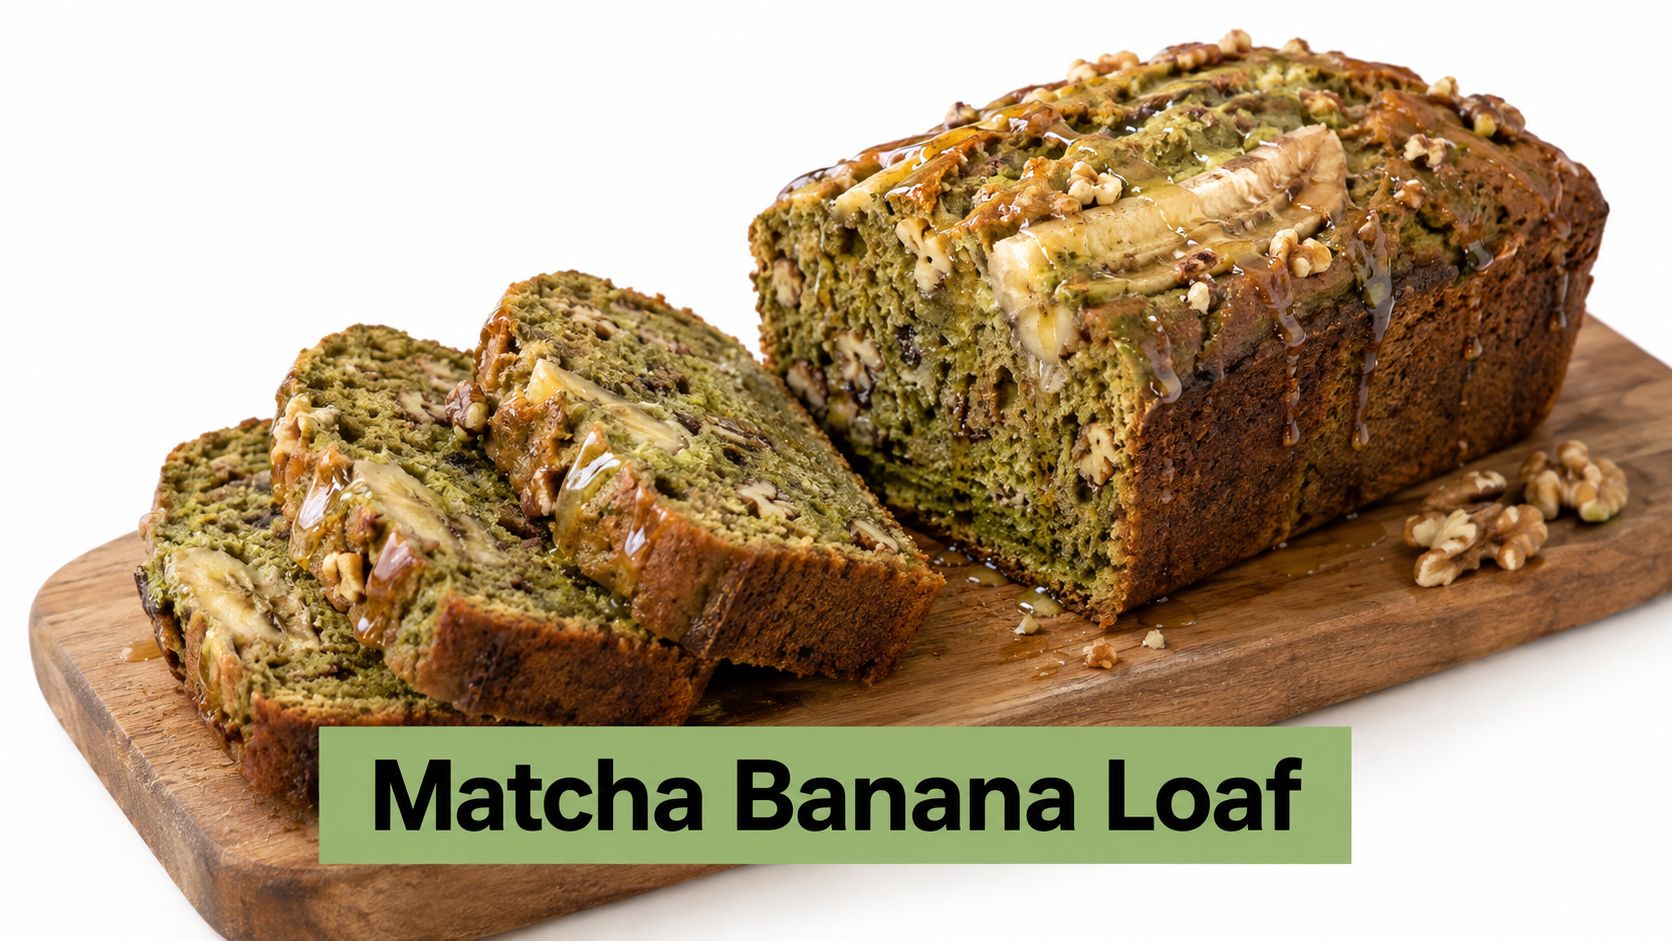
Matcha banana bread needs balance, not a heavy hand with the powder. Very ripe bananas supply moisture and fruit sweetness, while matcha adds a gentle green colour and savoury depth. Toasted walnuts bring aroma and crunch, giving the soft loaf a more interesting crumb.
For a pantry-conscious version, reduce the added sweetener when the bananas are heavily speckled with brown. Bananas still contribute naturally occurring sugars, and honey, maple syrup or a glaze adds more. Keep the liquid ingredients that support the loaf's structure, even when adjusting sweetness.
Recipe card
- Bananas: Mash overripe bananas with brown spots until mostly smooth.
- Matcha: Sift it with the flour and raising agents so the colour and flavour distribute evenly.
- Gluten-free option: Use a tested gluten-free flour blend designed for loaf cakes, rather than a single flour that may leave the crumb heavy.
- Walnuts: Toast them lightly, cool them, then fold them through the batter.
- Mixing: Combine wet and dry ingredients gently. Overmixing can make the loaf dense.
- Reduction: Simmer sugar-free kombucha over low heat until syrupy, strain any sediment, and brush a thin layer over the warm loaf.
A thin reduction acts like a finishing glaze, adding acidity without covering the matcha. If the loaf tastes bitter, use less matcha next time or pair it with riper bananas. If the centre stays wet, check that the loaf has cooled fully before slicing, since the crumb continues to set as it rests.
Serve a modest slice at brunch with plain tea. Sugar-free kombucha works as a separate drink, adding refreshment without making the bread probiotic or nutritionally complete.
8. Matcha Chia Seed Muffins with Honey and Vanilla Bean
Matcha muffins do not need a heavy glaze to taste inviting. The better balance is a soft crumb, gentle sweetness and enough vanilla to round out the tea's grassy edge. Chia seeds bring small bursts of texture, while wholegrain flour makes the muffin more substantial.
Choose culinary-grade matcha with a fresh green colour and fine texture. Sift it with the flour and raising agents to prevent bitter pockets and uneven colour. Honey and maple syrup both sweeten the batter, but they still count as sugars in the finished muffins.
Start with the chia mixture. Stir the seeds into a little plant-based milk and leave them for 10 minutes. They absorb liquid, much like tiny sponges, so pre-hydration helps protect the crumb from becoming dry during baking.
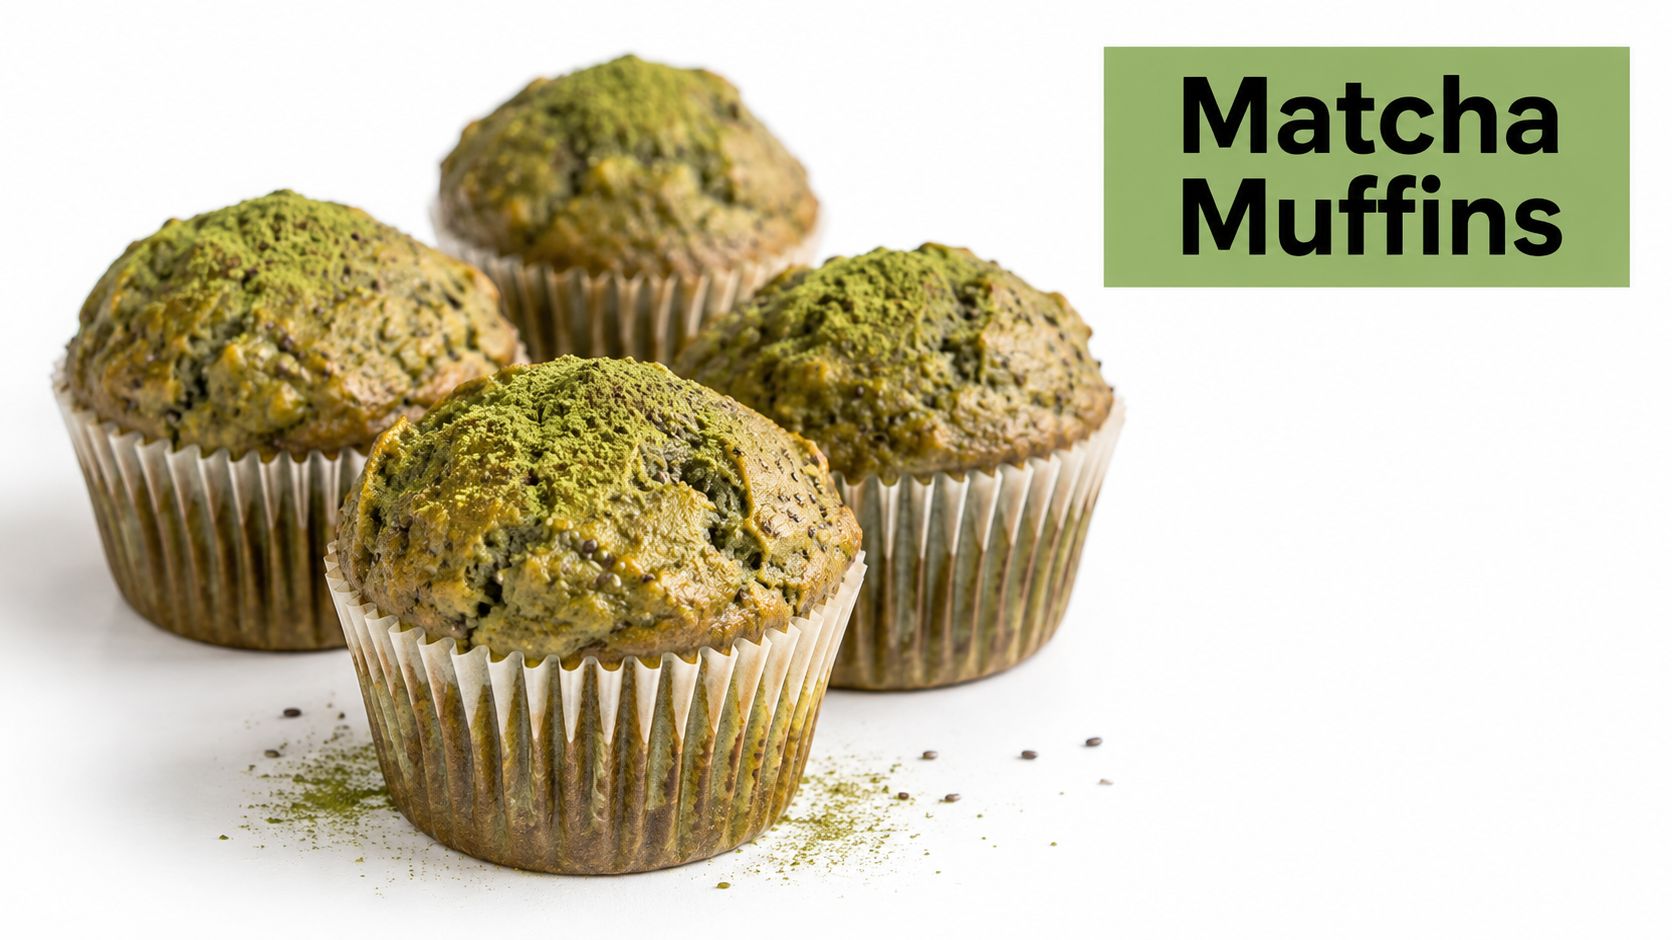
Bake by texture, not colour
Scrape the vanilla bean seeds into the wet ingredients, then combine them with the hydrated chia. Sift the matcha and dry ingredients separately before folding everything together. Stop mixing as soon as no dry streaks remain, because overworking the batter can produce dense muffins.
Fill each muffin cup to three-quarters capacity. Add a small pinch of matcha on top before baking for colour and aroma.
For a brighter flavour, fold through berries or finely grated citrus zest. Their acidity can balance earthy matcha without adding a thick, highly sweet glaze. A dairy-free batch works with plant milk and a tested egg replacement. Choose a milk with enough body to support the chia mixture.
Caffeine note: Baking does not remove matcha's natural caffeine. The amount in each muffin depends on the powder used, the product and the number of portions.
For Australian readers who are pregnant, breastfeeding or caffeine-sensitive, the NSW pregnancy healthy-eating guidance recommends a maximum of 200 mg caffeine per day during pregnancy and breastfeeding. Check the supplier's information, divide the matcha used across the muffins and include other caffeine consumed that day.
Healthy Matcha Baking, 8-Recipe Comparison
| Title | Implementation Complexity 🔄 | Resources & Time ⚡ | Expected Outcomes 📊 | Ideal Use Cases 💡 | Key Advantages ⭐ |
|---|---|---|---|---|---|
| Matcha Almond Flour Cookies with Coconut Oil | 🔄 Low, simple mixing/baking; careful measurement needed | ⚡ Quick (15–20 min); moderate cost (almond flour, coconut oil) | 📊 Gluten-free, low‑sugar, sustained energy; ⭐⭐⭐⭐ | Health-conscious snacks, cafés, gifting | Nutritient-dense, low‑carb, MCTs + L‑theanine |
| Matcha Green Tea Protein Brownies with Dark Chocolate | 🔄 Medium, careful mixing; chocolate handling | ⚡ Moderate, melting chocolate, baking; protein powder needed | 📊 High‑protein, fudgy texture; ⭐⭐⭐⭐ | Post‑workout snack, fitness cafés, vegan desserts | Protein-rich, indulgent yet nutrient-dense |
| Matcha Cream Cheese Cheesecake with Ginger Kombucha Drizzle | 🔄 High, precision baking, water bath, long chill | ⚡ Longer prep + overnight chill; higher ingredient cost | 📊 Restaurant-quality, probiotic glaze; ⭐⭐⭐⭐⭐ | Special occasions, high‑end cafés, signature dessert | Functional (matcha + probiotics), visually impressive |
| Matcha Oat Energy Bars with Dates and Chia Seeds | 🔄 Low, no‑bake or light bake; very accessible | ⚡ Very quick (10–15 min hands‑on); budget‑friendly pantry staples | 📊 Portable, high‑fiber, sustained energy; ⭐⭐⭐⭐ | Meal prep, pre‑workout, hiking, lunchboxes | Cheap, batch‑friendly, gluten‑free option, omega‑3s |
| Matcha Lemon Pound Cake with Polenta and Olive Oil | 🔄 Medium, standard cake technique, gentle handling | ⚡ Moderate bake time; moderate ingredient cost (polenta, olive oil) | 📊 Moist, elegant crumb with citrus lift; ⭐⭐⭐⭐ | Afternoon tea, cafés, breakfast cake | Dairy‑free option, long shelf life, sophisticated flavour |
| Matcha White Chocolate Macadamia Bliss Balls (No‑Bake) | 🔄 Low, no‑bake, simple assembly and chill | ⚡ Quick to make (≈30 min incl. chilling); higher cost (macadamias, quality white chocolate) | 📊 Decadent, giftable bites; shelf‑stable refrigerated; ⭐⭐⭐⭐ | Gifting, events, café grab‑and‑go | Minimal skill, premium presentation, customizable |
| Matcha Banana Bread with Walnut and Kombucha Reduction | 🔄 Low, basic loaf technique + reduction step | ⚡ Moderate, bake time + 15–20 min reduction; uses common pantry items | 📊 Comfort loaf with probiotic glaze; ⭐⭐⭐⭐ | Brunch menus, cafés, bake sales | Uses overripe bananas, freezeable, crowd‑pleasing functional twist |
| Matcha Chia Seed Muffins with Honey and Vanilla Bean | 🔄 Medium, whole‑grain batter, chia prep affects texture | ⚡ Moderate bake time; ingredients like vanilla bean add cost | 📊 High‑fibre, photogenic breakfast item; ⭐⭐⭐⭐ | School lunches, cafés, meal prep | Versatile, omega‑3s from chia, naturally coloured and sweetened |
Make Matcha Baking Work for Your Kitchen
The best recipe depends on the occasion, the texture you want and how much preparation you can manage. Choose muffins or oat bars when you want a batch for breakfasts, lunchboxes or portable snacks. Choose cookies when you need individually portioned, gluten-free-friendly treats, remembering that almond flour creates a nut-based recipe rather than a universally suitable one.
For afternoon tea, banana bread and lemon polenta pound cake offer familiar formats with more interesting flavour. The banana loaf is soft and comforting, while the pound cake is brighter and more refined. Cheesecake and bliss balls suit entertaining because they can be prepared ahead and presented as deliberate, small serves rather than everyday grazing food.
A few technique rules will improve almost every matcha bake:
- Measure the matcha carefully: More powder doesn't always mean better flavour. Higher doses can increase bitterness.
- Sift before mixing: This prevents concentrated green pockets and improves colour consistency.
- Dissolve when the mixture allows: A smooth paste works especially well in dense batters, cheesecake fillings and chocolate mixtures.
- Avoid overmixing: Fold muffins, brownies and loaves until the ingredients have just combined.
- Judge sweetness with the whole recipe: Lemon, vanilla, ginger, berries, dark chocolate and salt can make a lower-sugar bake taste more complete.
- Record the yield: Divide the total matcha used by the number of portions if caffeine awareness matters.
Australia's food-consumption data provides useful context for taking sugar reduction seriously. In 2022–23, apparent free-sugar consumption was 67 grams per person per day, and 89% of that consumption came from discretionary foods, a category that includes cakes, biscuits and pastries, according to the Australian Bureau of Statistics. That doesn't prove matcha baking is healthy, but it does support a practical approach: reduce added sugar where you can, keep portions measured and don't let colour or wellness language disguise a rich recipe.
Natural sweeteners aren't sugar-free. Honey, maple syrup, dates, ripe bananas and kombucha reductions can all contribute sweetness, and the final nutrition depends on the exact quantities. Matcha also doesn't cancel out butter, cream cheese, chocolate, oil or refined flour, so describe these recipes as health-conscious adaptations or lower-sugar options only when the formulation supports that wording.
Matcha selection matters, too. Use culinary-grade organic matcha for baking and reserve ceremonial grade for whisking when you want to appreciate its finer drinking character. For safety, avoid isolated caffeine powder or concentrated performance products. Food Standards Australia New Zealand's guidance on caffeine powders states that pure or highly concentrated caffeine products are banned from retail sale, and foods containing 5% or more caffeine in solid or semi-solid form are banned from sale to the public. Ordinary tea products with naturally occurring caffeine aren't included in that ban, but food-grade matcha from a legitimate retail product remains the sensible choice.
Finally, think about the pairing. A lightly sweetened matcha muffin doesn't need to sit beside a sugary latte, syrup or sweetened mixer. Pep Tea's sugar-free organic kombucha can provide a refreshing Australian-made option alongside a bake, but the drink is a beverage pairing, not proof that the dessert supports gut health or immunity. Explore different matcha strengths, taste as you go and choose the recipe that fits your kitchen rather than chasing a perfect label.
Pep Tea offers organic Japanese matcha suited to whisking and culinary use, along with sugar-free organic kombucha brewed in the Hunter Valley, NSW. Visit Pep Tea to explore matcha for your next bake and find a refreshing kombucha pairing for the finished treat.
Where Do You Buy Matcha Green Tea Powder

Most buying advice starts with the wrong question. Where do you buy matcha green tea powder? The usual answer is “find a reputable shop”, but a polished website, a Japanese-looking tin and the word ceremonial don't prove much. Australians waste money when they judge the storefront instead of the powder, its paperwork and its intended use.
The better question is simple: what evidence does the listing provide? Whether you're comparing an online specialist, a café, a supermarket or a marketplace seller, check the batch details, organic certification, price per serve and freshness date before you pay. Matcha is a whole-leaf powder, so origin, handling and traceability matter more than attractive branding.
The Real Question Is Not Where but What to Check
A specialist tea shop can sell excellent matcha, but it can also sell an expensive product with little useful information. A supermarket can offer a practical everyday powder, while a marketplace listing might show a premium tin with no clear Australian importer, batch code or storage guidance. The channel helps, but the listing makes the case.
Australia's matcha buyers generally use four routes:
- Online specialists, where product pages can explain origin, grade, certification and preparation.
- Cafés, which may sell the powder they use behind the counter or direct customers to a supplier.
- Supermarkets and health-food retailers, which offer convenience and physical access.
- Third-party marketplaces, where choice is broad but seller transparency varies sharply.
Online and health-oriented channels matter particularly for matcha powder. One Australia-focused market estimate places distribution at approximately 40% online, 35% through retail health stores and 25% through foodservice, although those figures are directional market estimates rather than official Australian government statistics. The estimate is useful because it reflects how matcha is bought, as a packaged ingredient for home preparation as well as a café drink. Australia-focused matcha channel estimate
Four tests before you trust the seller
Batch transparency tells you whether the product can be traced. Look for a lot or batch identifier, an importer or Australian business address, and a best-before date.
Certification evidence matters more than the word “organic”. A genuine claim should point to a certifier and identifiable certification details.
Price per serve exposes inflated ceremonial pricing. Compare the pack size with how you drink matcha, not with the prestige of the label.
Freshness information helps you judge whether the powder is likely to retain its colour and flavour. A listing that hides the date or gives only vague wording deserves caution.
Practical rule: If you can't identify the origin, grade, batch information and intended use, don't let a low price make the decision for you.
The best buying habit is to stop searching for a perfect shop and start evaluating a specific product. Use the guidance in our explanation of matcha grades to understand the difference between powder designed for whisking and powder made for food, then demand evidence from the seller.
Australian Matcha Channels Compared
There isn't one correct place to buy matcha in Australia. The right channel depends on whether you want a daily latte, occasional whisked tea, baking powder or a hospitality supply. The available market estimate places online platforms ahead of health stores and foodservice, but it doesn't provide a separate official share for supermarkets or third-party marketplaces. Treat those channels as practical buying options, not as fixed market categories.
What each channel does well
Dedicated online specialists usually provide the clearest product education. A good listing can show Japanese origin, grade, ingredients, storage advice, certification information and pack sizes. The weakness is that you can't inspect the powder before purchase, so the seller's transparency and returns policy carry more weight.
Direct-from-café sales can be useful when you already like the flavour in your drink. Ask whether the café can identify the supplier, batch and grade. The limitation is that cafés often sell for beverage use, not necessarily with the full retail labelling and documentation you should expect from packaged food.
Major supermarkets and health-food retailers win on convenience. They suit a cautious first purchase or someone who wants a small pack without waiting for delivery. Selection may be narrower, and a sachet or small pouch can look cheap while costing more per gram than a larger specialist pack.
Third-party marketplaces offer access to imported tins, unusual origins and a wide range of prices. They also create the greatest need for scrutiny. The seller, importer, packaging date, country of origin and return process may be unclear, particularly when the listing relies on lifestyle language rather than product evidence.
| Channel | Typical AUD price approach | Strength | Weakness |
|---|---|---|---|
| Online specialist | Compare by grade and grams | Strongest product education and selection | You rely on listing accuracy |
| Café direct | Usually tied to the café's chosen product | Taste can be judged in a prepared drink | Batch and retail documentation may be limited |
| Supermarket or health retailer | Small packs and sachets are common | Convenient and easy to access | Less choice and weaker origin detail |
| Marketplace | Wide range, including imported premium tins | Broadest selection | Seller transparency varies |
For an everyday latte, I favour an online specialist or a clearly labelled health-food retailer. Milk, fruit, sweeteners and ice soften the differences between grades, so culinary or middle-tier powder usually makes more sense than paying a ceremonial premium. For a once-a-week whisked tea, buy a smaller, fresher ceremonial pack from a supplier that publishes origin and batch information.
Matcha also fits neatly into simple food routines. If you're making dairy-free snacks alongside your tea, a practical gluten-free and nut-free snacks guide can help you choose recipes where culinary matcha will add colour and flavour without wasting a delicate drinking grade.
How to Read an Australian Matcha Listing
A product page should answer basic food-buying questions before you reach the checkout. If it doesn't, move on. The colour of the tin matters less than the information behind it.
Start with the powder and its identity
A fresh, well-made matcha generally appears vivid jade green, while dull olive, yellow-green or brown tones can indicate age, oxidation or lower-grade leaf. Colour isn't proof by itself, because photography and packaging affect what you see, but a seller should provide a clear product image rather than hiding the powder behind decorative branding.
The texture should be extremely fine. Matcha is stone-ground or finely milled tencha, not crushed loose-leaf tea. A listing should identify the product as matcha or green tea powder and show an ingredient statement. For a plain product, the ingredients should be 100% green tea powder, without sugar, maltodextrin, starch or anti-caking agents.
Look for the following details:
- Country of origin: “Japan” is not the same as “packed in Australia”. Check where the tea was grown and where it was packed.
- Region or producer information: A named growing region or supplier gives you more to assess than “Japanese-style”.
- Batch or lot code: This supports traceability if a product is recalled or a quality issue appears.
- Best-before date: A packed-on date alone doesn't tell you how long the product remains suitable.
- Storage directions: Matcha should be protected from heat, moisture, light and air.
- Particle and preparation guidance: A serious seller explains whether the powder suits whisking, milk drinks or cooking.
Australian food labelling rules cover product identity, ingredients, date marking, storage directions, nutrition information, country-of-origin information and relevant claims. The parliamentary overview of matcha and Australian food requirements also explains why commercial packaging matters, especially for a whole-leaf product that the consumer ingests rather than merely infuses.
Treat “organic” as a claim to verify
Domestic organic certification is voluntary. A product can use organic language without carrying independent certification, but “certified organic” should be supported by a genuine mark and identifiable certification details. Australian guidance recommends checking the certifying organisation, grower name and certification number where applicable. ACCC guidance on organic claims
If a listing hides the origin or grade, don't buy it, regardless of the colour of the tin or the apparent bargain. Those two details define what you're purchasing and how you should use it.
Ceremonial vs Culinary and What Your Money Buys
“Ceremonial” sounds precise, but it isn't a nationally standardised quality grade. Sellers use the term differently, so the label can't replace evidence about origin, freshness, processing, packaging and testing.
The practical distinction is use. Ceremonial matcha is made to be whisked with water, where umami, sweetness, colour and texture are exposed. Culinary matcha is made to work with milk, fruit, sugar, flour and other ingredients, where a stronger or more assertive flavour can be useful.
Verified Australian market guidance places indicative retail pricing at AUD 30–80 per 100g for ceremonial matcha and AUD 18–35 per 100g for culinary matcha. Australian organic green tea and matcha pricing estimate Those are directional ranges, not a guarantee of quality. A high price doesn't turn an anonymous powder into a superior one.
Match the grade to the drink
A daily latte usually doesn't need the most expensive powder. Milk changes the flavour balance, and culinary matcha is designed to hold its own in that setting. Use it for smoothies, baking, pancakes, ice cream, sauces and energy balls. If you're whisking matcha with water and drinking it without additions, a fresher ceremonial product is the sensible place to spend more.
| Attribute | Ceremonial matcha | Culinary matcha |
|---|---|---|
| Best use | Whisked with water | Lattes, smoothies and cooking |
| Flavour focus | Umami, sweetness and smooth texture | More robust flavour that works with other ingredients |
| Colour expectation | Usually brighter when fresh | May be less vivid |
| Buying priority | Origin, harvest detail, freshness and texture | Clean ingredients, flavour strength and cost per use |
| Sensible buyer | Straight-tea drinker | Latte drinker, baker or smoothie maker |
Price-per-serve maths makes the decision clearer. Take the pack price, divide by the total grams, then multiply by the amount you use in one drink. Don't compare a small ceremonial tin with a large culinary pouch by shelf price alone. Compare the cost of the bowl or latte you make.
A middle option can work for people who drink both styles. Labels such as “premium culinary” or “latte grade” may describe a powder positioned between everyday culinary matcha and a whisking-focused product. Treat those names as marketing descriptions, then check the evidence. PepTea's ceremonial and culinary matcha comparison is useful when you're deciding whether the extra spend will be noticeable in your usual preparation.
Labels Certifications and Legal Requirements Decoded
Australian matcha buyers need to separate mandatory food information from optional marketing language. “Ceremonial”, “premium”, “clean” and “Japanese-style” may influence your impression, but they don't prove the powder's origin or quality.
Country-of-origin information is central. An Australian supplier may pack imported matcha locally, but that doesn't make the tea Australian-grown. Read the wording carefully and look for the country where the tea was produced, along with the Australian importer or business details.
Organic systems can also appear on packaging. You may see Australian Certified Organic, USDA Organic, JAS or EU Organic marks, depending on the producer and supply chain. Don't treat the logo alone as enough. Match the mark to an identifiable certifier, operator or certification record, particularly when the product carries a premium price.
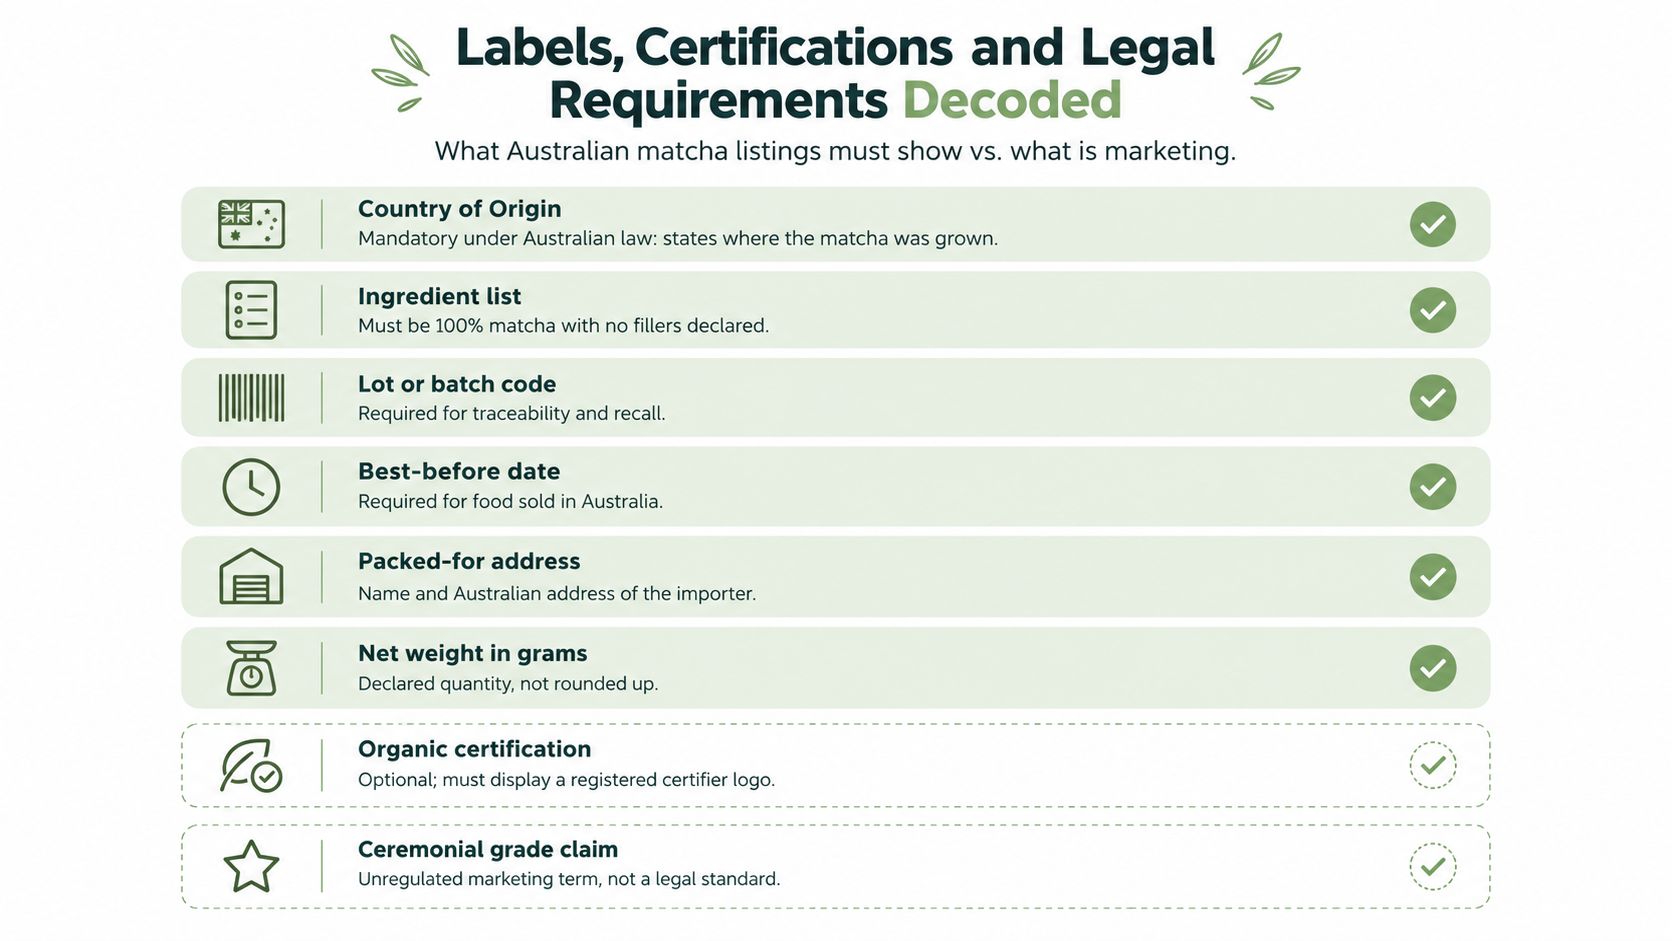
Caffeine and GST require careful reading
Plain tea naturally contains caffeine, while added caffeine must be declared in relevant foods. If matcha is blended with other caffeine sources or sold as a formulated beverage, read the ingredient and advisory statements rather than relying on “energy” or “focus” language. Food Standards Australia New Zealand's caffeine guidance explains the difference between naturally caffeinated tea and products with caffeine added as an ingredient.
Don't confuse ordinary matcha with concentrated caffeine powder. Pure and highly concentrated caffeine products are banned from retail sale in Australia and New Zealand in the categories described by the food regulator. Naturally caffeinated tea is treated differently, but a product presented as a high-concentration caffeine powder is not a normal matcha purchase. FSANZ guidance on caffeine powders and high-caffeine foods
GST treatment isn't as simple as adding a fixed tax assumption to every matcha product. The Australian Taxation Office says tea is generally GST-free when sold as food, but classification can depend on promotion, name, labelling, packaging, display and placement. Check how the product is presented, especially if it is marketed primarily as a supplement, ingredient or ready-to-drink beverage. ATO guidance on GST-free food
The useful information to retain is straightforward: ingredient panel, net weight, batch number, best-before date, origin, importer details and certification documentation. Use PepTea's guide to organic certification in Australia as a reference for the kind of evidence an organic claim should provide.
A Practical Matcha Buying Checklist
Run this checklist on a product page, café menu, supermarket pack or wholesaler quote. You shouldn't need specialist equipment to reject a vague listing.
- Choose the use first. Culinary powder suits lattes, smoothies and baking. Ceremonial powder earns consideration when you whisk it with water and drink it straight.
- Inspect the colour. Look for a lively green product image. Yellow-green or brown powder deserves questions about age, oxidation and storage.
- Find the origin and harvest detail. A named Japanese region such as Uji, Nishio or Kagoshima is more useful than “Japanese-style”. A harvest year or clearly explained shade-growing claim can add context, but it still doesn't replace a batch code.
- Read the ingredients. Plain matcha should identify green tea powder without fillers, sugar, maltodextrin or anti-caking agents.
- Verify the seller. The listing should show a batch number, best-before date, country of origin, Australian business address and, where relevant, ABN or importer information.
- Calculate the unit cost. Compare price per gram and price per serve with the verified Australian guide ranges, rather than comparing tins by sticker price.
- Ask wholesalers direct questions. Request the harvest date, particle size, storage and transport conditions, stone-milling information, specification sheet and certificate of analysis where the product is for café service.
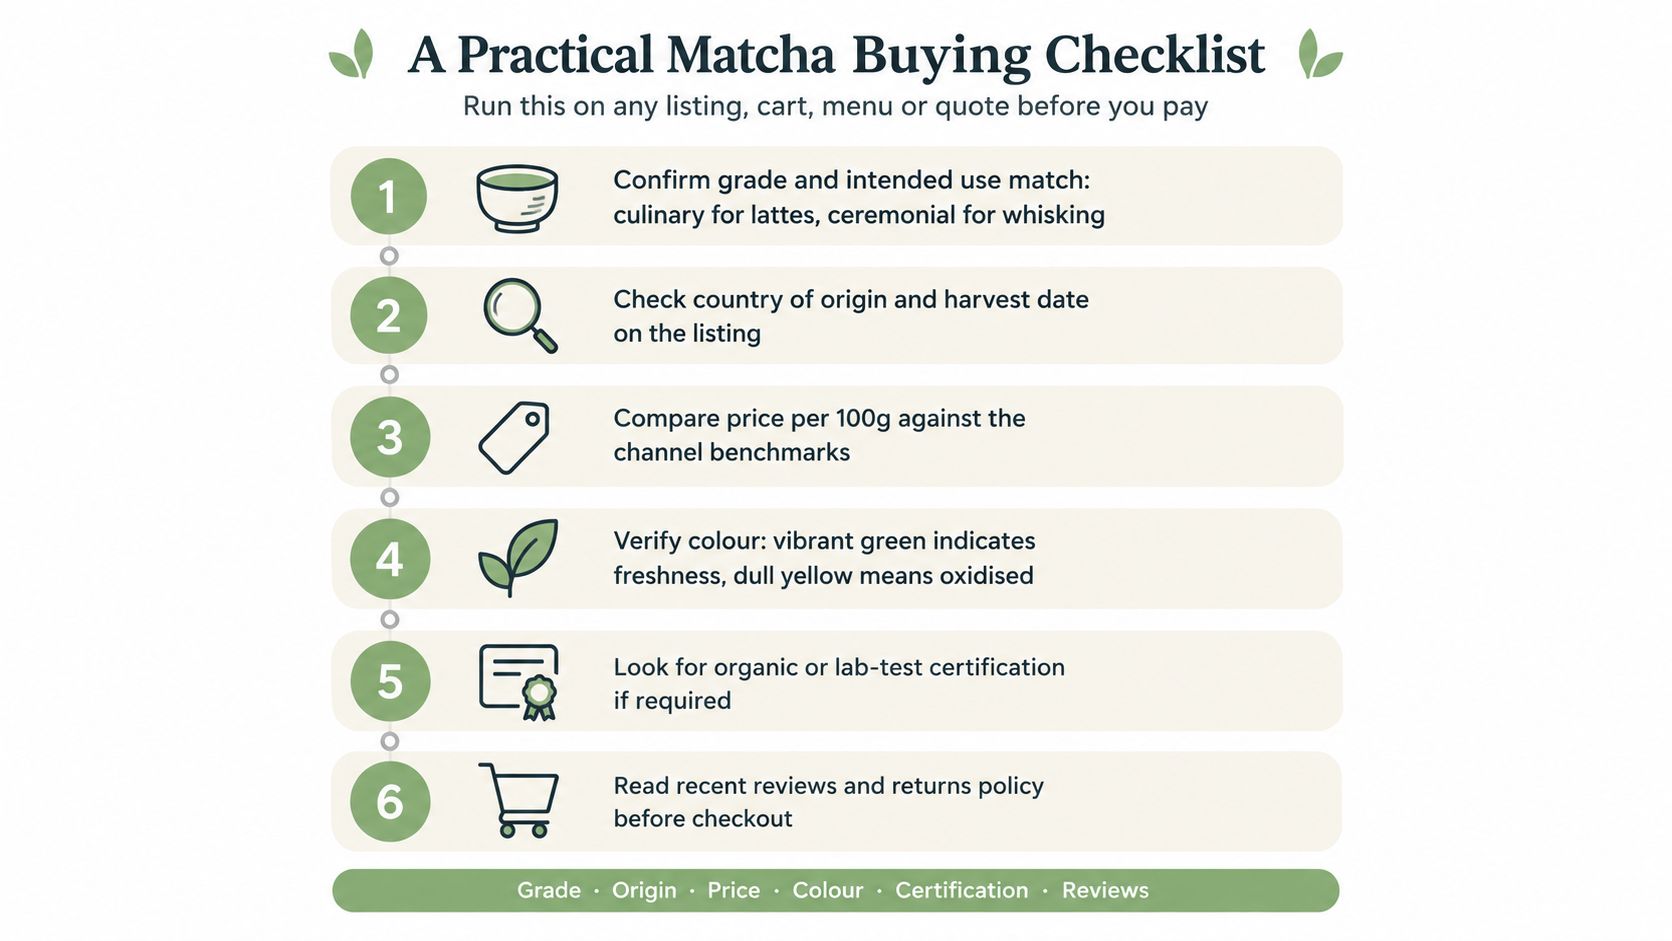
Some red flags should end the purchase immediately:
- Vague origin: “Japanese-style” without a growing country or region.
- Missing business details: No Australian address, importer or traceability information.
- Unclear pack format: Bulk pricing with no sealed retail option or labelling.
- Suspiciously low pricing: A price well below the verified culinary range deserves a full explanation, not an impulse purchase.
- Unsubstantiated certification: “Organic” with no certifier, operator identity or record to check.
For café buyers, request testing information for microbial limits, heavy metals, pesticide residues and moisture. A consumer buying one sealed pack doesn't need the same supplier file, but should still expect a labelled product from an identifiable seller.
Putting It Together and Buying With Confidence
A reliable matcha purchase follows three decisions. First, choose the channel according to your use and budget. Second, apply the evidence checks to the individual listing. Third, calculate the cost per serve and ask whether the grade makes sense for the drink you prepare most often.
Pick the channel for the job
Choose an online specialist when origin, certification and preparation guidance matter. Use a supermarket or health-food retailer for a straightforward first trial, provided the pack is sealed and fully labelled. Buy through a café when you trust the flavour and the business can identify its supplier. Treat a marketplace as a research exercise, not an automatic shortcut to premium quality.
Apply the product checks
Look for a clear grade, growing country, ingredients, best-before date, batch information and Australian seller details. Check the powder's colour and the storage instructions. For an organic product, verify the certification claim rather than assuming the word itself is regulated.
PepTea provides an example of the Australian specialist model, selling Japanese organic matcha online through its Australian operation with products intended for both home use and larger supply formats. The useful standard isn't the brand name. It's whether a seller publishes enough origin, grade and batch information for you to judge the product before buying.
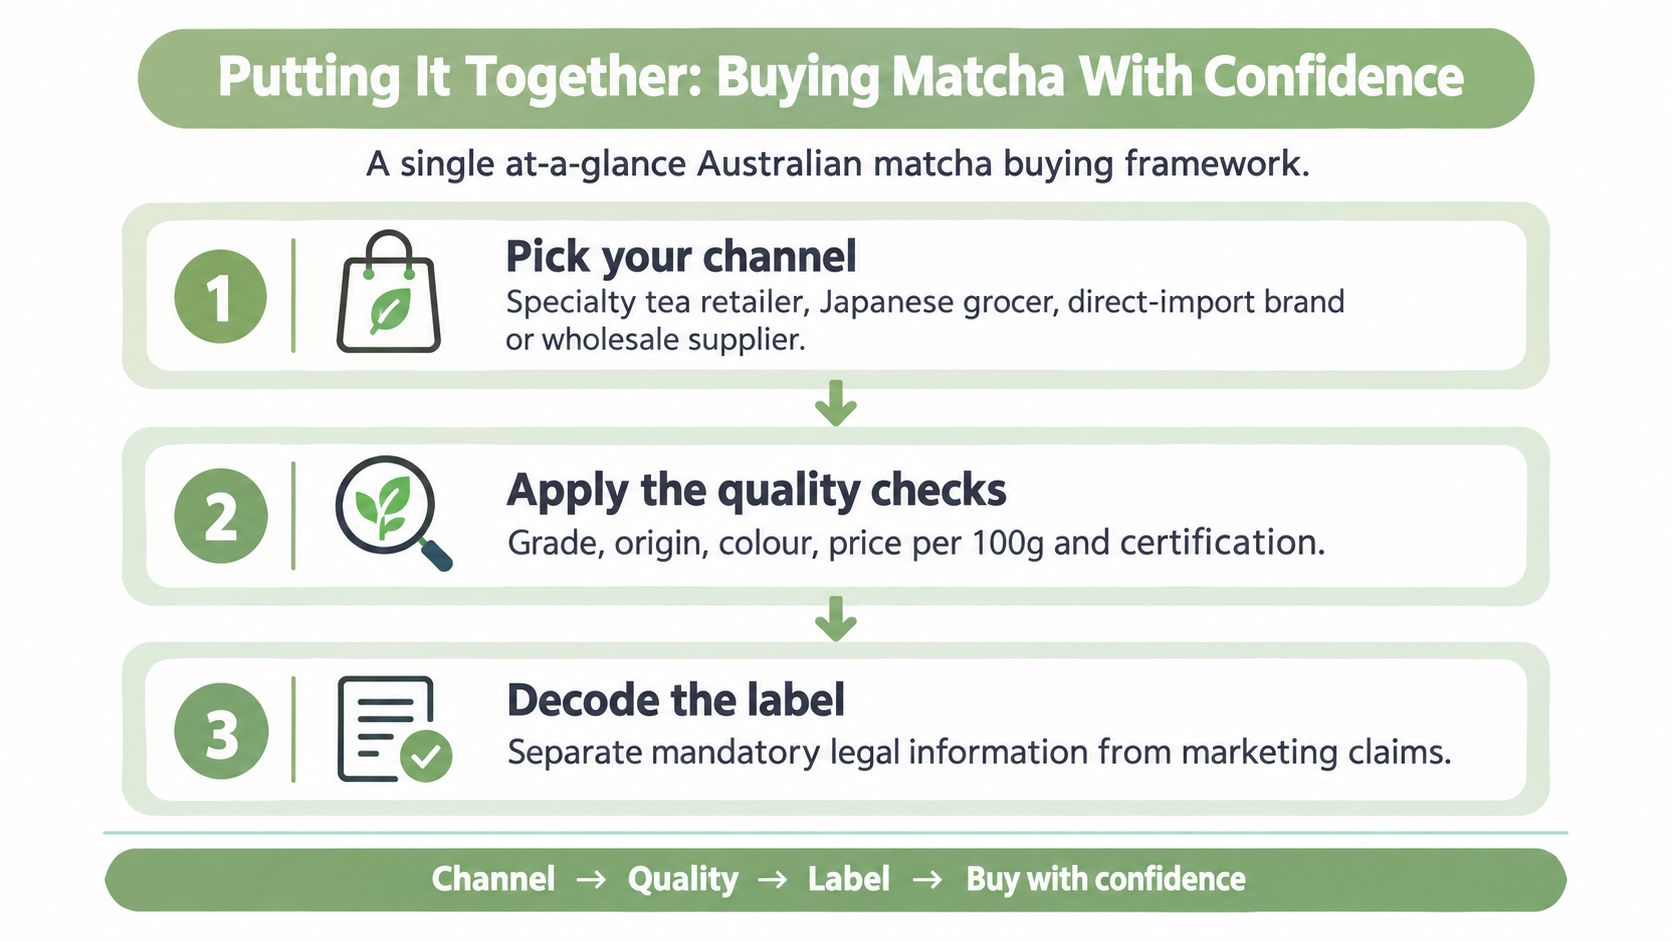
Calculate before you commit
A ceremonial product should make sense for whisked drinking, where texture and flavour are visible. Culinary matcha should make economic sense in lattes, baking and smoothies. If you're paying a ceremonial price for a powder that disappears into milk, reconsider the purchase.
Bookmark the checklist, compare two or three sellers side by side and start with a pack size that suits your consumption. You don't need to commit to a brand after one order. Buy transparently, taste the powder in the preparation you make, and let evidence rather than packaging decide your next purchase.
Pep Tea offers organic Japanese matcha green tea powder online, with options suited to both everyday preparation and larger-use requirements. Visit Pep Tea to compare the range, review the product information and choose a matcha that fits the way you drink it.
Best Organic Kombucha Starter Kit: 7 AU Picks

Is the best organic kombucha starter kit the most complete option, the easiest one to scale, or the kit with the clearest organic credentials? Those are different buying decisions, and a jar filled with tea and a SCOBY doesn't automatically solve all three.
A SCOBY is a living culture of bacteria and yeast that ferments sweetened tea. During the first fermentation, the culture converts some of the sugar into acids and other fermentation products while the brew develops its flavour. The quality and quantity of the starter liquid matter just as much as the rubbery culture itself, because the acidic liquid helps establish the new batch.
This roundup compares compact, family-size, minimalist and continuous-brew options available to Australian buyers. The useful differences are batch capacity, vessel design, monitoring equipment, culture documentation and beginner support. Check whether “organic” applies to the SCOBY, tea, sugar and other edible components, rather than assuming the claim covers the whole kit.
1. Buchi Kombucha Certified Organic Kombucha Home Brew Kit
For buyers who want a complete family-size setup with clear organic credentials, the Buchi certified organic home brew kit is a strong starting point. The Brisbane-based supplier includes a 5 L glass brewing jar, certified-organic SCOBY, organic starter liquid, organic tea and organic sugar. You can begin brewing without sourcing the main ingredients separately.
The kit's main advantage is its culture and ingredient documentation. Buchi markets the edible components as certified organic, including its Australian-brewed cultures and ingredients. That gives certification-focused shoppers more information than a kit that just uses “organic” in its name.
Best fit: Choose Buchi when certified ingredients, a complete bundle and a family-size batch matter more than a dispensing tap or the smallest entry point.
What works well for beginners
The glass jar provides room for the first fermentation, and the supplied instructions set out the process in a practical order. They allow a 7 to 14 day first ferment, helping beginners judge flavour and acidity rather than follow a fixed date. These time figures are included in the Buchi product information.
The setup is straightforward, but it is a standard jar rather than a continuous-brew vessel. Serving requires pouring from the jar, so it suits batch brewing better than a routine that depends on dispensing small amounts while the culture stays in place. Buyers who want that arrangement may prefer a kit with a tap.
Availability is the main practical compromise. Retailer stock can fluctuate, and pricing varies by stockist, so check how replacement cultures are obtained before buying. Also confirm that the instructions cover pH testing, sanitation, cooling and storage. Freshly prepared tea can initially sit at about pH 5, so safe brewing depends on teaching users how to acidify the liquid during fermentation, not just how to develop flavour. FSANZ explains the relevant kombucha control points.
For another Australian option, compare the PepTea kombucha tea kit. Buchi remains the better choice for a certified-organic, family-size starting point.
2. Nourishme Organics Ultimate Kombucha Brewing Kit
Does your brewing routine depend on dispensing kombucha without lifting or disturbing the vessel? The Nourishme Organics Ultimate Kombucha Brewing Kit is built for that use, combining a ceramic brewing vessel with a stainless-steel tap for a more practical continuous-brew setup.
Its 5 to 6 L ceramic vessel leaves enough capacity for regular household brewing while allowing finished kombucha to be drawn from the tap. The vessel is described as lead and cadmium free. The kit also includes organic starter culture, organic raw cane sugar, 100 g of English Breakfast tea, a growler bottle and ongoing brewing resources. Those product specifications are provided by Nourishme Organics.
Where the premium design earns its keep
The tap suits households that serve kombucha regularly and small cafés that want controlled dispensing from an attractive bench-top vessel. It reduces the need to pour from a jar and helps keep the remaining brew in place. Ceramic gives the setup a more considered appearance than a basic preserving jar, although the filled vessel will be heavy and difficult to move.
The equipment is better matched to an established brewing habit than to a cautious first experiment. Its larger capacity commits more tea, sugar and space than a small starter kit, while the ceramic vessel and tap add cleaning requirements. The tap is another contact point for residue and contamination, so it needs thorough cleaning as part of every brewing cycle.
A continuous-brew vessel only saves effort when the tap, cover and surrounding equipment stay clean.
The PepTea kombucha brewing container offers another reference point for buyers comparing dispensing vessels. Nourishme is the stronger fit when serving convenience, a larger batch and an ongoing brewing rhythm matter more than portability. Beginners who are still learning how temperature, sugar, fermentation time and pH affect flavour may find a smaller setup easier to manage.
The included guidance adds value because continuous brewing follows a different routine from a single batch. The brewer removes some finished drink, then replenishes the vessel with fresh sweetened tea. Written instructions can help establish that rhythm, but the culture still needs observation and basic record-keeping. This kit supports repeat brewing well, provided the buyer has room for the vessel and is prepared to maintain the tap carefully.
3. Mad Millie AU Kombucha Kit
Contrasting with Nourishme Organics' larger vessel, the Mad Millie AU Kombucha Kit keeps the equipment compact and the first commitment small. It suits a beginner who wants to learn the basic fermentation process before buying a larger brewing vessel.
The kit includes an organic SCOBY, a 1 L glass jar, muslin cloth, thermometer strip and lid. The instructions set out around 20 minutes of hands-on preparation and an 8 to 25 day fermentation period, according to the brand's product listing. That guidance sets realistic expectations: the brew needs little daily work, but it will not be ready straight away.
The small-batch trade-off
A 1 L batch fits a small kitchen and limits the tea and sugar used during an early experiment. The modest volume also makes it easier to test one choice at a time, such as black tea versus green tea or a shorter ferment versus a longer one. For a cautious beginner, that control can make flavour changes easier to understand.
The culture is identified as organic, while the kit's equipment covers the basic first-fermentation workflow. Buyers should still check the product details for their preferred ingredients and confirm current stock before ordering.
Capacity is the clear compromise. A household that drinks kombucha regularly may finish a litre quickly, then decide to scale up. The jar is not designed for a continuous-brew routine or regular café service, and the compact format leaves less room for serving several people from one batch.
- Good starting equipment: The glass jar, cloth, thermometer strip and lid cover the main needs for a first fermentation.
- Low learning barrier: Clear instructions help first-time brewers begin without already owning specialist equipment.
- Scaling limitation: A larger vessel, extra starter liquid and further monitoring equipment may be needed later.
- Availability consideration: Culture stock can be temporarily unavailable, so check supply before planning a brew.
Mad Millie's broad distribution through Australian kitchenware retailers and online sellers makes replacement equipment convenient to source. This kit is the strongest fit here for a beginner who values a compact learning experience over batch capacity. It is less suitable for anyone already planning frequent brewing or continuous dispensing.
4. Homemade Kombucha Co. 3.8 L Homemade Kombucha Kit
The Homemade Kombucha Co. 3.8 L kit suits brewers choosing between a small trial batch and a larger continuous-brew setup. The Queensland-based specialist supplies a 3.8 L glass brewing jar, breathable cover, starter liquid and a choice between black-tea and green-tea SCOBY options. The product details come directly from Homemade Kombucha Co.
The choice between black-tea and green-tea SCOBY options lets brewers match their preferred flavour profile from the start. Black tea generally gives a more traditional kombucha character, while green tea offers a lighter route into the process. The kit also includes organic tea bags and approximately 500 mL of starter liquid, providing acidic liquid to help establish the new batch. That quantity is stated in the product listing.
A practical family-size compromise
The vessel gives a household more useful batch capacity than a compact beginner jar without moving straight to hospitality-scale equipment. It suits people who want to pour kombucha over several days. The breathable cover allows air exchange during first fermentation while helping keep the jar protected.
Sugar is the main omission. You will need to supply your own, which is straightforward if organic raw sugar is already in the pantry, but it makes this kit less complete than options that include sugar. Use suitable tea, sugar and water, then weigh them consistently so each batch is easier to compare.
Practical rule: A larger jar does not correct an inconsistent recipe. Record the tea, sugar, temperature, fermentation time and pH for every batch.
This kit is a sensible choice for a first-time brewer who wants more capacity than Mad Millie without a tap-equipped continuous-brew vessel. It is not set up for continuous dispensing, so regular high-volume brewing may call for different equipment. Stock can fluctuate, and some variants sell out periodically. Check the available culture and the exact SCOBY option before ordering.
5. Gram Sustainable Kombucha Brew Kit
Do you already have a suitable glass jar for brewing? The Gram Sustainable Kombucha Brew Kit takes a deliberately minimalist approach, supplying the culture, ingredients, cover and instructions while leaving the brewing vessel to you. That keeps the package compact and avoids paying for equipment you already own.
Gram lists an organic-fed SCOBY with more than 200 mL of culture and starter liquid, 50 g of organic tea and 100 g of organic raw sugar, along with a fermentation cloth and instructions. The culture is described as 100% accredited organic and maintained on organic inputs. That gives buyers clearer information about the culture and ingredients than an unverified SCOBY listing, although certification details are still worth checking on the current product page.
Best for an equipped brewer
The absence of a jar is the kit's defining trade-off. It saves duplication for brewers with a clean, food-safe glass vessel, but adds a shopping step for first-timers. Check that your jar is large enough for the supplied culture and starter liquid, has not held unsuitable chemicals, and can be covered with a breathable cloth during first fermentation.
The listed price is positioned as a lower-cost route into organic-fed brewing, but the final cost depends on whether you need to buy a vessel. Product prices and stock can change, so check the current listing before comparing kits.
- Choose it for: An existing jar, organic tea and sugar, and a straightforward first brew.
- Avoid it for: A gift recipient or beginner who needs a complete equipment bundle.
- Check before buying: Current stock, vessel suitability, and whether the instructions cover sanitation and pH checks.
The kit suits conventional batch brewing rather than a tap-based continuous routine. It does not appear designed for dispensing, so choose another setup if you want to draw kombucha regularly from one vessel. For an experienced brewer, the smaller package reduces clutter. A first-timer may prefer a kit that includes every physical component and gives more guidance while learning to judge fermentation.
6. The Good Brew Company Organic Kombucha SCOBY Starter Kit
For brewers who already have jars, tea and sugar on hand, The Good Brew Company's Organic Kombucha SCOBY Starter Kit removes the need for bundled equipment. It puts the focus on a living culture and printed brewing instructions, which suits someone refining an established recipe or replacing an existing SCOBY.
The Melbourne and Daylesford-based maker supplies a 100% accredited-organic SCOBY. The culture is intended to scale from 1 L upward, while the 220 mL starter size qualifies for free Australian shipping, as stated on the product listing. The supplier also describes a culture fed with organic inputs for over a decade.
Culture-first buying
This package is strongest on culture provenance and weakest on equipment completeness. You supply the brewing vessel, tea and sugar unless you add extras, so the total setup cost depends on what is already in your pantry and cupboard. That makes it a practical choice for an equipped brewer, but less suitable as a first-brew gift.
The stated starting capacity is 1 L, giving a manageable batch for testing a recipe before scaling up. The culture can grow with the process, but the kit does not provide a tap or dispensing vessel for continuous brewing. Choose another format if drawing regular servings from one container is a priority.
Quality checks matter with any culture-only purchase. Confirm that the starter includes enough liquid, that care instructions are clear, and that the guidance explains healthy appearance and smell. Discard a batch showing mould or visible contamination. Western Australian fermented-food guidance explains the need for pH monitoring and contamination control identifies mould contamination, including Penicillium and Aspergillus, as a hazard in homemade kombucha starter cultures.
For practical help, PepTea's guide to making a kombucha SCOBY is a useful companion. Choose this kit for an organic culture and a scalable starting point, rather than a complete beginner setup.
7. Karl Kombucha 8 L Brewing Kit With Tap
Need a larger batch and easier dispensing? The Karl Kombucha 8 L brewing kit is the highest-capacity option in this comparison. Sold through Dan Murphy's Marketplace, it includes an 8 L vessel with tap, organic SCOBY, organic tea, organic sugar, measuring aids, a cloth and instructions. The product details are available through Dan Murphy's Marketplace.
The included pH strips and temperature strip give brewers practical checks during fermentation. That is useful at this size, where a batch represents more ingredients and time than a compact trial. Australian guidance recommends monitoring kombucha and reaching pH 4.2 or lower, while acidification below pH 3.0 helps inhibit food-poisoning bacteria. The Western Australian fermented-food guideline provides further food-safety detail.
Capacity brings responsibility
The tap simplifies sampling and bottling, and the vessel is better suited to regular production than a small jar. It could suit a café or bar trialling a fermented soft drink, but hospitality use requires a documented process, consistent cleaning, suitable testing and careful storage.
Alcohol control also needs attention. A national Australian survey found that 64% of sampled fermented beverages contained more than 0.5% ABV, 25% exceeded 1.15% ABV, and 15% of alcohol-containing products had no alcohol warning. The FSANZ fermented soft-drinks survey also reported a 174% increase in kombucha sales over the preceding three years.
Those results do not predict every home batch, but they show why fermentation time, temperature, sugar, secondary fermentation, refrigeration and labelling deserve attention. The Karl Kombucha, 8 L Brewing Kit With Tap suits experienced home brewers or small operators who value batch size, dispensing and monitoring tools over the simplicity of a smaller first kit. Marketplace fulfilment may vary by store or delivery route.
Top 7 Organic Kombucha Starter Kits Comparison
| Product | 🔄 Implementation Complexity | ⚡ Resource Requirements | 📊 Expected Outcomes | 💡 Ideal Use Cases | ⭐ Key Advantages |
|---|---|---|---|---|---|
| Buchi Kombucha – Certified Organic Kombucha Home Brew Kit | Low, guided 7–14 day first ferment | Minimal, includes certified organic SCOBY, starter tea, sugar and 5 L glass jar | Family-size 5 L batches; consistent, certified-organic results | Beginners who want a fully certified-organic end-to-end kit | Certified-organic across edible components; robust, beginner-friendly SCOBY |
| Nourishme Organics – Ultimate Kombucha Brewing Kit (6 L ceramic vessel) | Moderate, continuous-brew setup with ongoing maintenance | Mostly included, 5–6 L ceramic jar with stainless tap, starter, sugar, tea, growler | Smooth continuous dispensing; stable long-term brews | Users wanting a turnkey continuous-brew system and easy dispensing | Turnkey ceramic vessel with tap; strong after-sales support |
| Mad Millie (AU) – Kombucha Kit (1 L) | Very low, simple small-batch process | Included, organic SCOBY, 1 L jar, muslin cloth, thermometer strip | Small test batches; ideal for learning or producing a starter | Budget-first-timers and those testing recipes or scaling up | Low entry price; widely available through retailers |
| Homemade Kombucha Co. – 3.8 L Homemade Kombucha Kit | Low, straightforward family-size ferment | Mostly included, 3.8 L glass jar, choice of SCOBY/tea, starter liquid (sugar not included) | Larger family batches (~3.8 L); good value for volume | First-time brewers who want larger batch sizes | Strong price-to-contents value; clear practical guidance |
| Gram Sustainable – Kombucha Brew Kit (No Jar) | Low, simple if you supply your own vessel | Partial, organic-fed SCOBY, organic tea and sugar, fermentation cloth (no jar) | Reliable small-to-medium batches using an organic-fed culture | Brewers who already own jars and want an organic-fed SCOBY | Affordable; SCOBY is 100% accredited-organic |
| The Good Brew Company – Organic Kombucha SCOBY Starter Kit | Low, SCOBY-only option, process depends on user supplies | Minimal, accredited-organic SCOBY and printed instructions (jar/ingredients not included) | Scalable starter culture usable from 1 L upward | Brewers who only need a certified-organic SCOBY to start or scale | Long-running organic-fed cultures; responsive support resources |
| Karl Kombucha – 8 L Brewing Kit with Tap (Dan Murphy's Marketplace) | Moderate, larger-format setup and handling for higher volumes | Comprehensive, 8 L vessel with tap, organic SCOBY, tea, sugar, pH & temp strips, cloth | High-volume batches; suited to continuous or small hospitality use | Households with high consumption or small hospitality/high-volume home use | Large 8 L capacity with tap; national marketplace distribution and pickup options |
Choose Your First Fermentation Setup
The right kit depends less on a universal ranking than on how you'll brew next month. Choose Buchi if you want an end-to-end certified-organic 5 L setup with the main edible components included. It's the most straightforward match for a household that values ingredient certification, a family-size vessel and beginner guidance.
Choose Nourishme Organics or Karl Kombucha if dispensing and larger ongoing batches are central to the decision. Nourishme Organics has the more polished ceramic continuous-brew presentation, while Karl Kombucha combines a larger vessel with pH and temperature monitoring equipment. Both demand more cleaning discipline than a simple jar, particularly around the tap.
Mad Millie is the sensible compact introduction. Its small format keeps the first experiment manageable, although regular drinkers may outgrow it. Homemade Kombucha Co. offers a useful family-size middle ground, especially for buyers who want a glass vessel and starter liquid but don't mind supplying their own sugar.
Gram Sustainable and The Good Brew Company make more sense when a jar and pantry ingredients are already available. Gram includes tea and sugar, while The Good Brew Company is the stronger culture-first option for a brewer who wants to scale an organic-fed SCOBY.
Before ordering, check:
- Certification: Confirm whether organic claims cover the SCOBY, starter liquid, tea, sugar and other edible components.
- Culture quantity: Look for a healthy live SCOBY supplied with enough starter liquid to establish the new batch.
- Vessel material: Prefer a suitable food-safe glass or ceramic vessel and inspect taps, covers and seals for easy cleaning.
- Batch size: Choose a capacity you can drink and refrigerate responsibly, not the largest vessel available.
- Monitoring guidance: Make sure the instructions explain temperature, pH, sanitation and what to do with visible mould.
- Replacement access: Check whether replacement cultures and ingredients are readily available in Australia.
- Stock status: A kit that repeatedly sells out may be harder to use as the foundation for a regular brewing routine.
Australian food-safety guidance says tea should be cooled rapidly from 60°C to 20°C within 2 hours, and the SCOBY should be added as soon as possible to begin acid production. During fermentation, the drink should reach pH 4.2 or lower, while a finished drink should generally remain at pH 2.5 or above. These control points are set out in FSANZ's safe-food guidance. Treat them as safety controls, not as flavour preferences.
Keep equipment clean, follow the supplied timing, leave the first ferment exposed to air, reserve starter liquid for future batches and change one variable at a time. If you alter tea, sugar, temperature and fermentation time together, you won't know which change affected the result. Refrigerate finished kombucha promptly, and remember that fermentation can continue after bottling.
PepTea offers an Australian perspective on properly fermented, low-sugar alternatives through its sugar-free organic kombucha, brewed in the Hunter Valley, NSW, as well as organic tea for home brewing. The brand's Ginger, Lime & Ginger and Mango flavours provide examples of how live fermented drinks can sit alongside non-alcoholic café menus and everyday wellness routines without assuming that every homemade batch has the same sugar or alcohol profile. The Australian Dietary Guidelines recommend limiting foods and drinks containing added sugars, so assess and label a homemade product according to its actual recipe and the applicable Australian rules rather than relying on the phrase “sugar-free” alone.
Explore PepTea's organic tea and sugar-free organic kombucha to compare properly fermented, low-sugar beverage options for home, café and hospitality use. Visit Pep Tea for kombucha education, brewing guidance and the current range.
Variable Temperature Kettle: A Guide for Aussie Tea Lovers

A variable temperature kettle is an electric kettle with selectable heat settings, usually from 50°C to 100°C, designed to extract the best flavour from different types of tea without burning delicate leaves. For many Australian tea drinkers, it's worth considering if you regularly prepare matcha, green tea or other brews that taste noticeably different when the water is too hot.
You've probably had this experience. You prepare a beautiful green tea or whisk a bowl of matcha, take the first sip and find a harsh, drying bitterness instead of sweetness and umami. It's easy to blame the tea, but the water may be the true culprit.
A standard kettle gives you one main result, boiling water. A variable temperature kettle gives you more control over the part of brewing that happens before the leaves, powder or infusion ever touches your cup.
Why Your Matcha Might Taste Bitter
The morning ritual starts well. You sift your matcha into a bowl, add water and whisk until a soft layer of foam forms on the surface. Yet the first sip tastes gritty, chalky or aggressively bitter. You try more whisking, less powder and a different mug, but the problem remains.
The missing variable is often water temperature.
Boiling water can pull bitter and drying compounds from delicate tea more aggressively than cooler water. An Australian kettle manual explains that lower-temperature brewing is relevant for sensitive infusions because boiling water can over-extract catechins and contribute to bitterness, while cooler water allows more repeatable control over the result in its guidance for variable-temperature brewing.
Matcha needs particular care because you drink the whole leaf in powdered form rather than steeping leaves and removing them. That makes texture, concentration and water temperature especially noticeable. If your water is too hot, the tea's more delicate flavours can become hidden behind astringency.
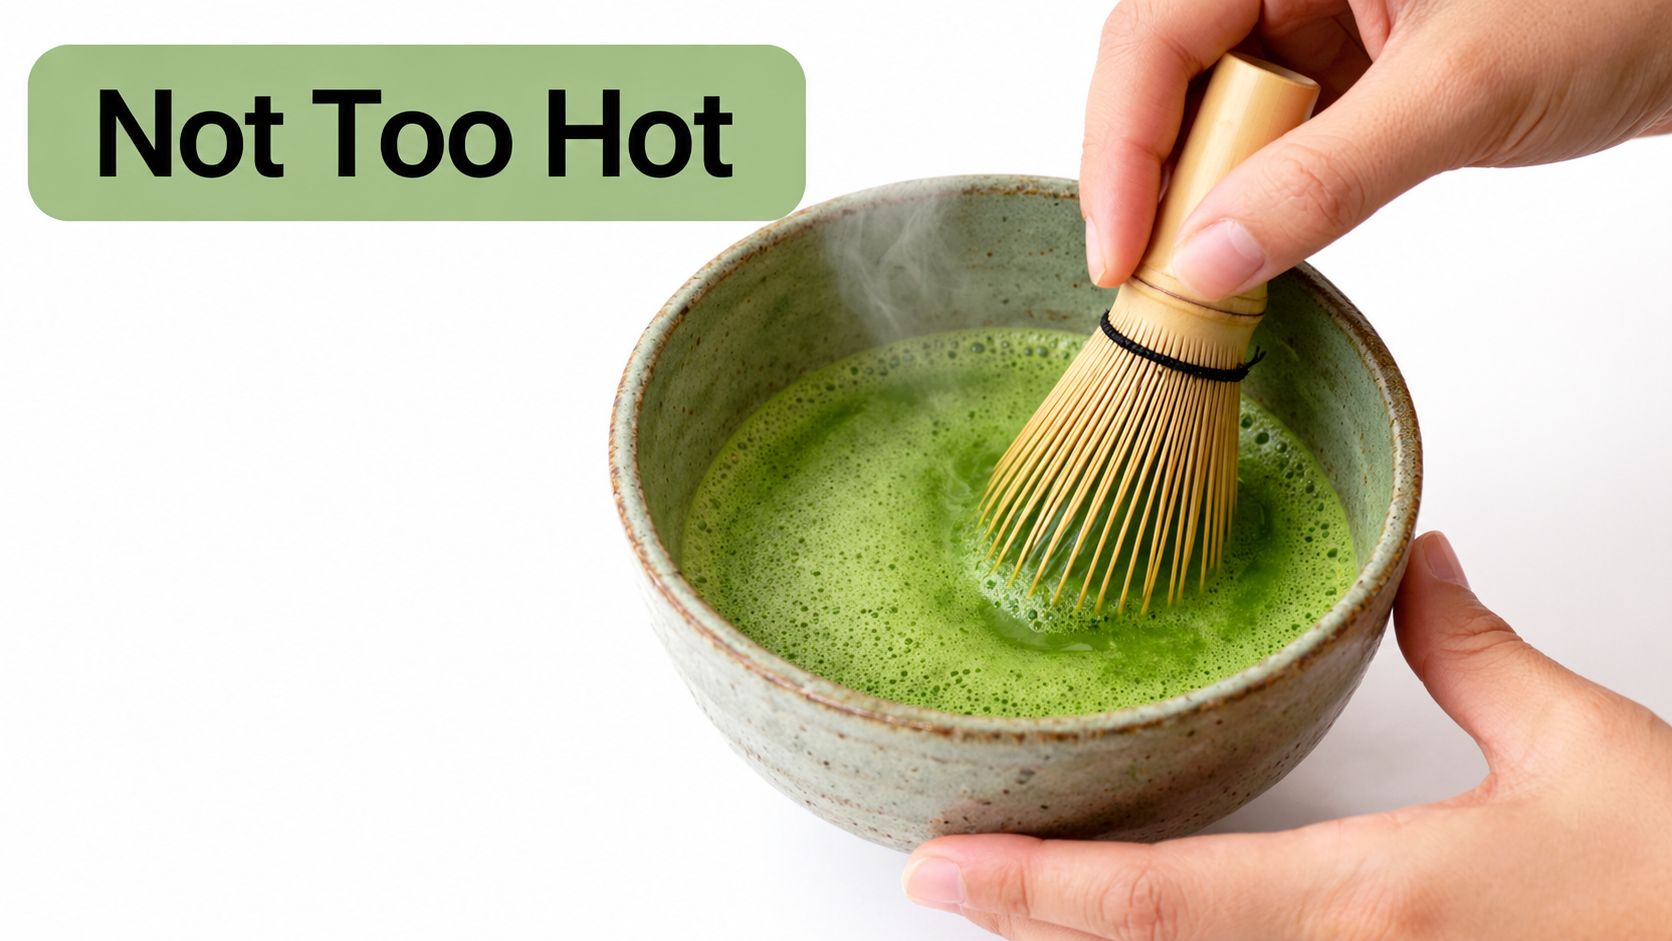
The simple brewing adjustment
Try changing the water before changing the matcha. Use cooler water, whisk thoroughly and taste the result before deciding that the powder itself is poor quality. A smoother cup can make the natural sweetness, savoury character and creamy body easier to notice.
For a practical guide to the complete process, including preparing the powder and whisking technique, follow this guide to making matcha tea from powder.
This principle also applies if you're using tea as part of a calmer alternative to strong coffee. Resources on natural energy boosters without jitters can help you compare different beverage routines, but the preparation method still matters. A carefully brewed tea can be more enjoyable because it tastes balanced.
Practical rule: If green tea or matcha tastes sharp and drying, adjust the water temperature before adding sweetener.
A variable temperature kettle doesn't improve every tea automatically. It gives you the ability to repeat a temperature that suits the particular drink, which is far more useful than boiling water and guessing when it has cooled enough.
What Is a Variable Temperature Kettle
A variable temperature kettle heats water to a selected temperature rather than stopping only at a full boil. Most models in Australia offer a range that broadly spans 50°C to 100°C, although the number of selectable points varies between products.
Smeg Australia's variable kettle range, for example, lists seven settings, at 50°C, 60°C, 70°C, 80°C, 90°C, 95°C and 100°C on its Australian product page. Those settings turn the kettle into something closer to a basic brewing tool. You can choose a gentler temperature for green tea, a warmer setting for oolong or a near-boil for a fuller-bodied infusion.
The category has also spread across different parts of the Australian retail market. Shoppers can find simpler variable-temperature options through mass-market retailers such as Kmart, alongside premium models sold through stores including Myer and Harvey Norman. The difference isn't only appearance. It can include temperature range, display design, pouring control, heat retention and how accurately the kettle reaches its selected setting.
The features that matter
A good model usually combines several functions:
- Selectable heat: You choose a target instead of waiting for boiling water to cool.
- Keep-warm control: The kettle can maintain the selected temperature for later pours, depending on the model.
- Automatic shut-off: The appliance stops heating when it reaches its target or detects a safety issue.
- Clear controls: A readable display or well-marked buttons make repeatable brewing easier.
- Suitable capacity: A compact kettle can suit individual tea preparation, while a larger one may be more convenient for a household.
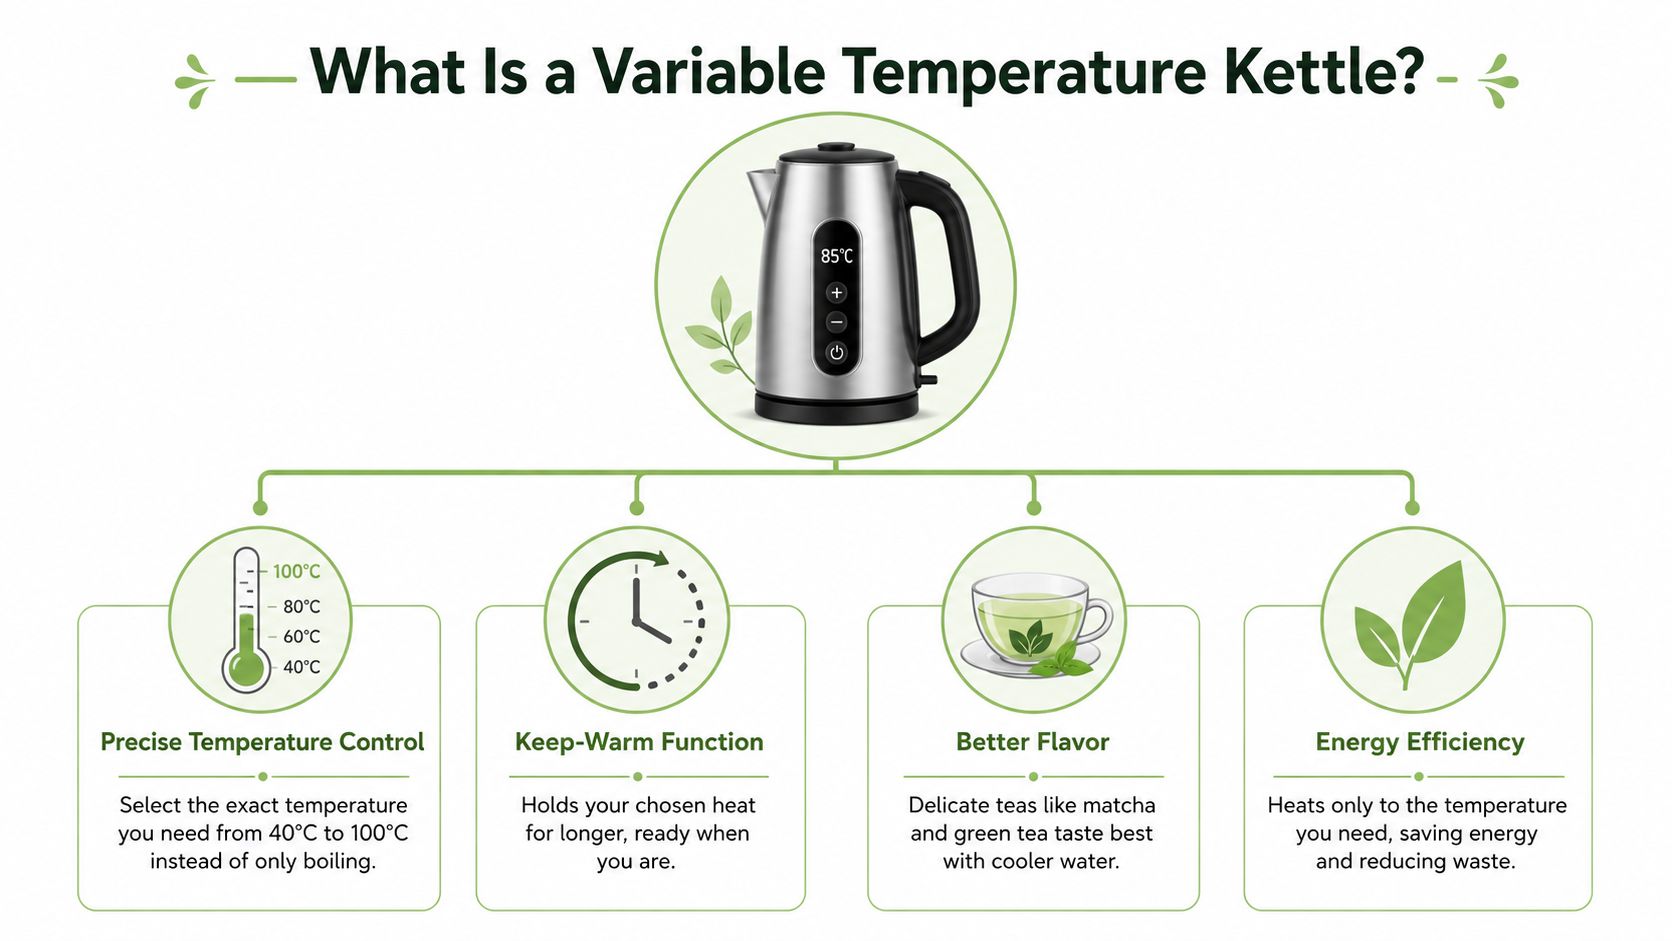
The key distinction is control, not complexity for its own sake. If you mostly boil water for pasta or make drinks that require boiling water, you may not use the extra settings often. If you drink different teas through the week, those settings can remove a frustrating amount of guesswork.
Here's a visual demonstration of how temperature selection and kettle design can fit into a brewing routine:
Optimal Brewing Temperatures for Tea
There isn't one perfect temperature for every tea. Water that suits black tea can overwhelm green tea, while water that produces a gentle green tea may leave some stronger infusions tasting thin.
Use the following as practical starting points rather than rigid rules:
| Drink | Useful starting point | Why it matters |
|---|---|---|
| Green tea | Around 70°C to 80°C | Helps limit harsh extraction from delicate leaves |
| Matcha | Around 70°C to 80°C | Supports a smoother balance of sweetness and umami |
| Oolong | Around 80°C | Gives semi-oxidised leaves enough heat without treating them like a boil-only infusion |
| Black tea | Around 95°C to 100°C | Provides the heat needed for a fuller, more robust cup |
| Herbal infusions | Near boiling | Suits ingredients that need hotter water to release their flavour |
These ranges reflect the broad brewing guidance published for Australian tea drinkers, including recommendations of roughly 75°C to 85°C for green tea, temperatures near 95°C to 100°C for black tea, and an intermediate range for oolong in this Australian tea FAQ. Your exact preference may depend on the tea's origin, the amount used and how long it steeps.
Why a few degrees can change the cup
Heat affects extraction. As water gets hotter, it can draw flavour compounds from tea more quickly. That can be helpful for a strong black tea, but it can make a delicate green tea taste more drying or bitter.
For matcha, temperature also affects the relationship between texture and flavour. Cooler water won't remove the powder's natural character, but it can make the cup feel less aggressive. If your matcha tastes flat rather than bitter, try improving your sifting and whisking before increasing the heat.
You can find more practical guidance in this matcha brewing temperature guide, then adjust gradually rather than changing temperature, powder quantity and brewing time all at once.
The best setting is the one that gives you a balanced cup and that you can repeat tomorrow.
A variable kettle is useful for more than traditional teacups. It can help with matcha lattes, cocoa and other hot drinks where boiling water may damage flavour or make the drink difficult to combine smoothly. If you enjoy steeping tea in alternative equipment, these French press tea tips from PureHQ Inc. offer another preparation option, although a variable kettle still gives you more control over the water before it reaches the press.
Is a Variable Temperature Kettle Worth It
You have a fresh green tea, a good matcha and a busy morning. A basic kettle boils water quickly, yet the cup turns sharp because the water was hotter than the tea needed. In that situation, a variable temperature kettle can make a noticeable difference. Its value depends on what you drink, how often you prepare it and whether you want the same flavour each time.
A basic kettle remains perfectly suitable for black tea, herbal infusions and cooking water. Green tea and matcha make the case for more control, especially when you prepare them regularly. The feature matters because it connects the kettle's settings with the chemistry of the cup. Smeg's seven settings, for example, may look like a reason to upgrade, but the useful question is whether you will use those options for different teas.
Australian shoppers can face a wide gap between entry-level and premium products. A Kmart model can be listed at $69, while premium options may sit around $299 to $349, according to the Australian buying context described by CHOICE in its kettle buying guide. A higher price does not automatically produce better tea. It may pay for sturdier construction, a more polished interface, a better pour or steadier temperature control. Choose features that fit your habits rather than paying for settings that will stay unused.
The energy question
More controls do not automatically mean much higher electricity use. The bigger influence is usually how much water you heat. Filling the kettle for one mug uses less energy than boiling a full chamber, regardless of whether the kettle has a temperature display.
Heating less water to a lower selected temperature may suit some brewing routines, but a variable kettle should not be purchased solely for dramatic savings. Electricity pricing, fill level and daily use affect the result. Its strongest benefits are flavour control, convenience and consistency.
A useful decision test
Choose a basic kettle if:
- You normally prepare drinks with boiling water.
- You do not notice much difference between a gentler and hotter brew.
- Your budget is better spent on higher-quality tea or other kitchen essentials.
Consider upgrading if:
- You prepare green tea or matcha regularly.
- You make several different types of tea.
- You want to repeat a preferred temperature without waiting for boiled water to cool.
- You use a keep-warm function during a longer tea session.
A premium kettle can be a worthwhile daily tool, but it is not required for good tea. A modest variable model may provide the control you need without charging you for design features you will not use.
Buying and Maintaining Your Kettle
A kettle can look impressive on an Australian benchtop without making better tea. Start with performance: it should reach the selected temperature consistently, show clear controls and include practical safety features. A higher price does not automatically mean greater accuracy, lower running costs or a better pour. Match the appliance to the drinks you prepare.
Australian consumer testing treats temperature accuracy as a real performance measure. CHOICE checks accuracy at each variable-temperature setting and conducts a dry-boil safety test, so temperature control and automatic shut-off deserve attention when comparing models in its explanation of kettle testing.
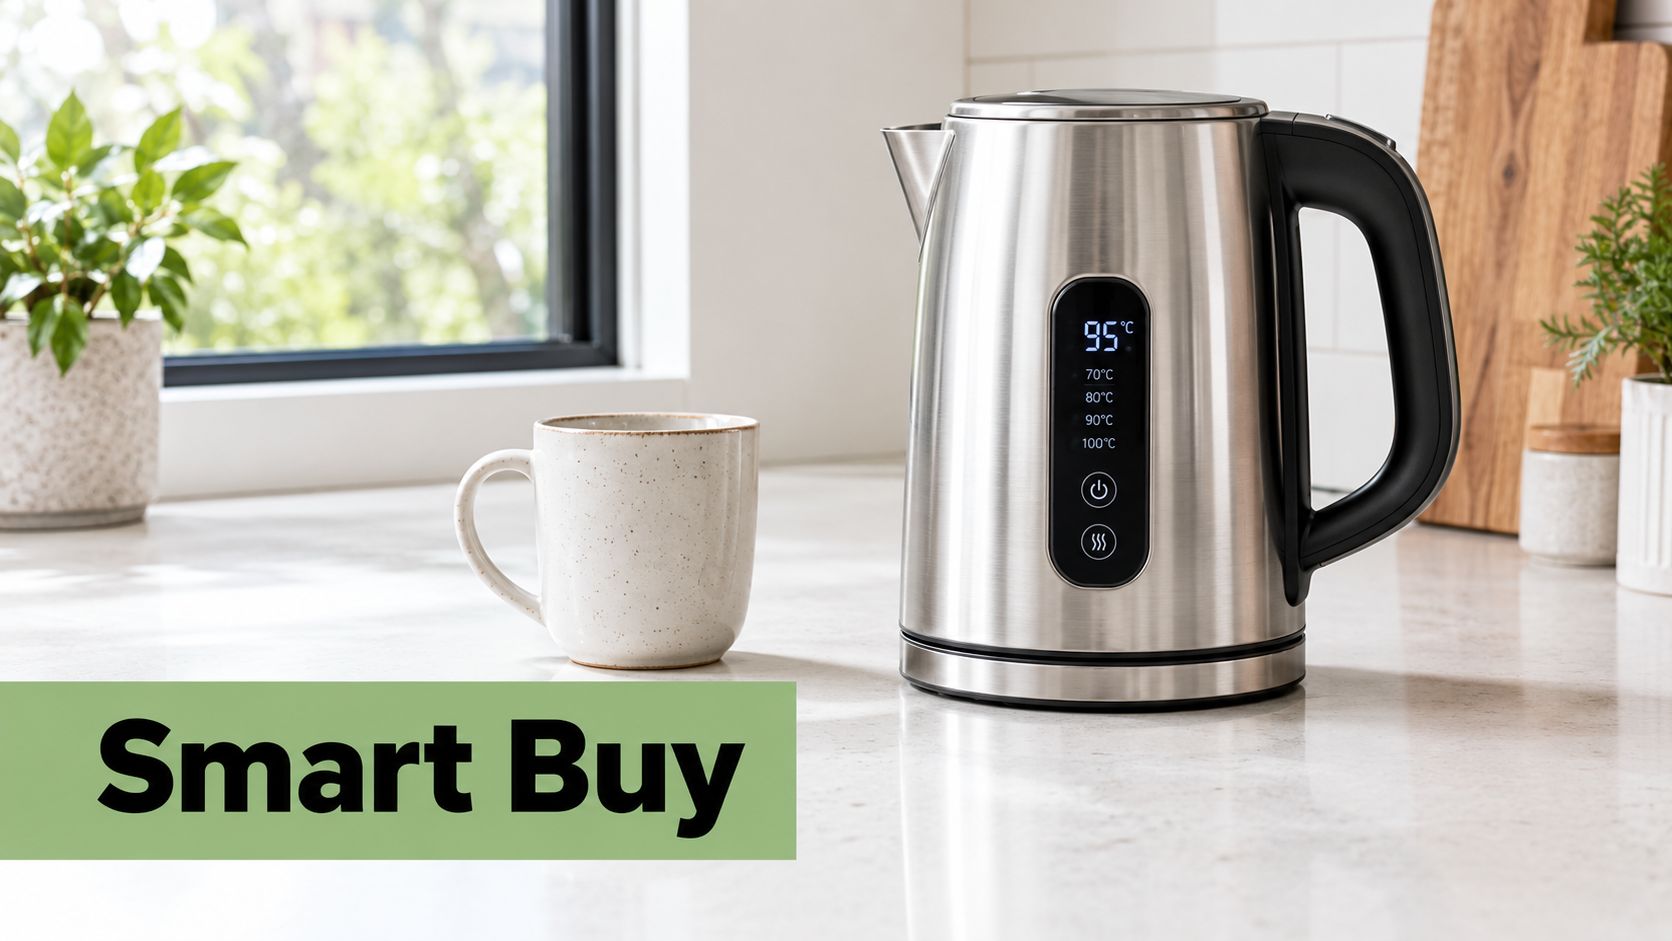
What to check before buying
Start with the controls. A readable display and simple temperature selection matter more than a crowded panel. Smeg's seven settings, for example, can be useful when you move between matcha, green tea and hotter brews, provided the selected temperatures suit the chemistry of each drink. Matcha needs water that will not scorch its delicate flavour, while green tea can become harsh when brewed too hot.
For capacity and accuracy comparisons, see our guide to choosing an electric kettle in Australia. Australian products range from compact 1L gooseneck kettles to family-sized 1.7L models, with some combining temperature selection and heat retention in this Australian product listing. Choose the size that fits your usual cups. A larger chamber can encourage unnecessary boiling, while a smaller one may suit a solo morning ritual.
Check the spout. A gooseneck design supports a slower, controlled pour for manual brewing. A wider spout may suit a teapot or French press better.
Keep the water and kettle clean
Mineral deposits can affect flavour and heating performance. Descale according to the manufacturer's directions, particularly if your local water leaves visible residue, then rinse thoroughly so the next cup does not taste of cleaner.
Use a stable, heat-resistant surface, keep the cord away from the bench edge, and avoid overfilling or running the kettle dry. Empty stale water rather than leaving it inside for long periods.
Regular care keeps fresh water, accurate heat and your tea in clean contact.
Elevating Your Daily Tea Ritual
A variable temperature kettle changes the role of water in your routine. Instead of treating every tea as if it needs the same treatment, you can respond to the drink in front of you. Green tea can have a gentler setting, oolong can receive more heat and black tea can still be prepared close to boiling.
That small act of selection encourages a more mindful approach. You notice aroma before drinking, taste the difference between astringency and bitterness, and learn which settings suit your preferred matcha or tea. The kettle becomes useful because it helps you build a repeatable habit, not because it promises to fix every brewing mistake.
Match the tool to the ingredient
Premium tea deserves careful preparation, but equipment can't compensate for stale ingredients, poor storage or an unsuitable recipe. Start with fresh water, use the amount of tea you need and change one variable at a time. If the first cup tastes too sharp, lower the temperature. If it tastes weak, adjust the tea quantity or steeping approach before assuming you need a new appliance.
The same mindset works across a wellness-focused beverage routine. A carefully prepared matcha can be part of a calm morning ritual, while an organic kombucha can offer a low-sugar alternative when you want something refreshing. Neither drink needs exaggerated promises. Their value starts with quality ingredients, thoughtful preparation and choosing a beverage that fits your day.
For Australian households, the best variable temperature kettle is the one that makes those choices simple. It should be safe, easy to clean and accurate enough to help you repeat the cups you enjoy. If you mostly drink one tea, a standard kettle may be all you need. If you move between matcha, green tea, oolong and other infusions, selectable heat can make the difference between guessing and brewing with intention.
Explore organic Japanese matcha and Australian-brewed sugar-free kombucha from Pep Tea, with options suited to home routines, cafés and wellness-focused menus. Visit the range, try your preferred brew at a gentler temperature and discover how better control can bring out more character in every cup.
Matcha Milk Powder Guide: How to Use It Well
You've probably seen matcha milk powder on a café menu, in a supermarket sachet, or beside the oat milk at home and wondered what you are truly buying. Is it matcha with milk powder, or is it a sweetened latte mix with only a little tea? The answer matters because the ingredient list affects colour, flavour, texture, caffeine, sweetness, and how consistently the drink performs.
Australia's matcha market generated more than A$54 million in revenue in 2024 and is projected to exceed A$81 million by 2030, with powder holding a 55.08% share of revenue in 2024, according to Australian matcha latte powder market reporting. Matcha milk powder is already suited to cafés, retail shelves, home lattes, smoothies, and baking. The practical question is how to choose and use it without sacrificing the character of the tea.
What Matcha Milk Powder Actually Is
Matcha milk powder is a pre-blended drink mix. It usually combines finely ground Japanese green tea with dairy or plant-based milk solids, a sweetener, and functional ingredients that help the powder dissolve, remain stable, or produce foam.
That makes it different from pure matcha. Ceremonial-grade and culinary-grade matcha are generally sold as tea powder, so you add the milk, water, and sweetener separately. A traditional café matcha latte also starts with matcha whisked with water, followed by steamed milk. It isn't the same product as a pre-mixed latte powder.
| Format | Main Ingredients | Prep Method | Typical Use |
|---|---|---|---|
| Matcha milk powder | Matcha, milk solids, sweetener, stabilisers or creamer | Mix with hot or cold liquid, then froth | Fast home drinks, cafés, takeaway menus |
| Pure matcha | Stone-ground tea leaves | Sift and whisk with water, then add milk separately | Traditional tea, controlled lattes, baking |
| Café latte | Pure matcha, water, fresh dairy or plant milk | Whisk matcha, steam or froth milk | Made-to-order café service |
Read the ingredient list before the front label
Australian matcha milk powders commonly contain sugar, dextrose, maltodextrin, skim milk powder, non-dairy creamer, vegetable oil, emulsifiers, and stabilisers. These ingredients aren't automatically a problem. Manufacturers use them to improve shelf stability, reduce clumping, create body, and help the drink froth.
The trade-off is that every added ingredient changes the tea. Sugar can soften bitterness but may dominate delicate umami. Creamer can create a fuller mouthfeel, while dextrin and milk solids may make the drink appear paler or feel chalky if the powder is over-diluted. Excess heat can also affect colour and texture.
Use the guide to what matcha powder is to refresh the distinction between pure matcha and blended products. For a broader look at powdered green tea products, the VitzAi.com green tea powder review offers useful comparison context, although you should still judge any product by its own ingredient panel.
Start with three checks:
- Matcha position: Ingredients are listed from greatest to least amount. Matcha appearing near the beginning generally gives you more confidence that tea is central to the blend.
- Sweetener level: Decide whether you want a ready-sweetened latte or a product that leaves room for your own honey, sugar, or syrup.
- Milk source: Check whether the blend contains skim milk, lactose, plant milk, coconut ingredients, or a non-dairy creamer.
How to Prepare a Matcha Latte With Powder
A reliable drink starts with a repeatable dose. An Australian retail benchmark uses 4 g of powder with 200 mL of water for a latte-style preparation, as described in Australian matcha powder market coverage. For café testing, a practical starting point is 8 to 10 g of matcha milk powder per 180 to 200 mL of milk or water, then adjust for the brand's strength, sweetness, and cup size.
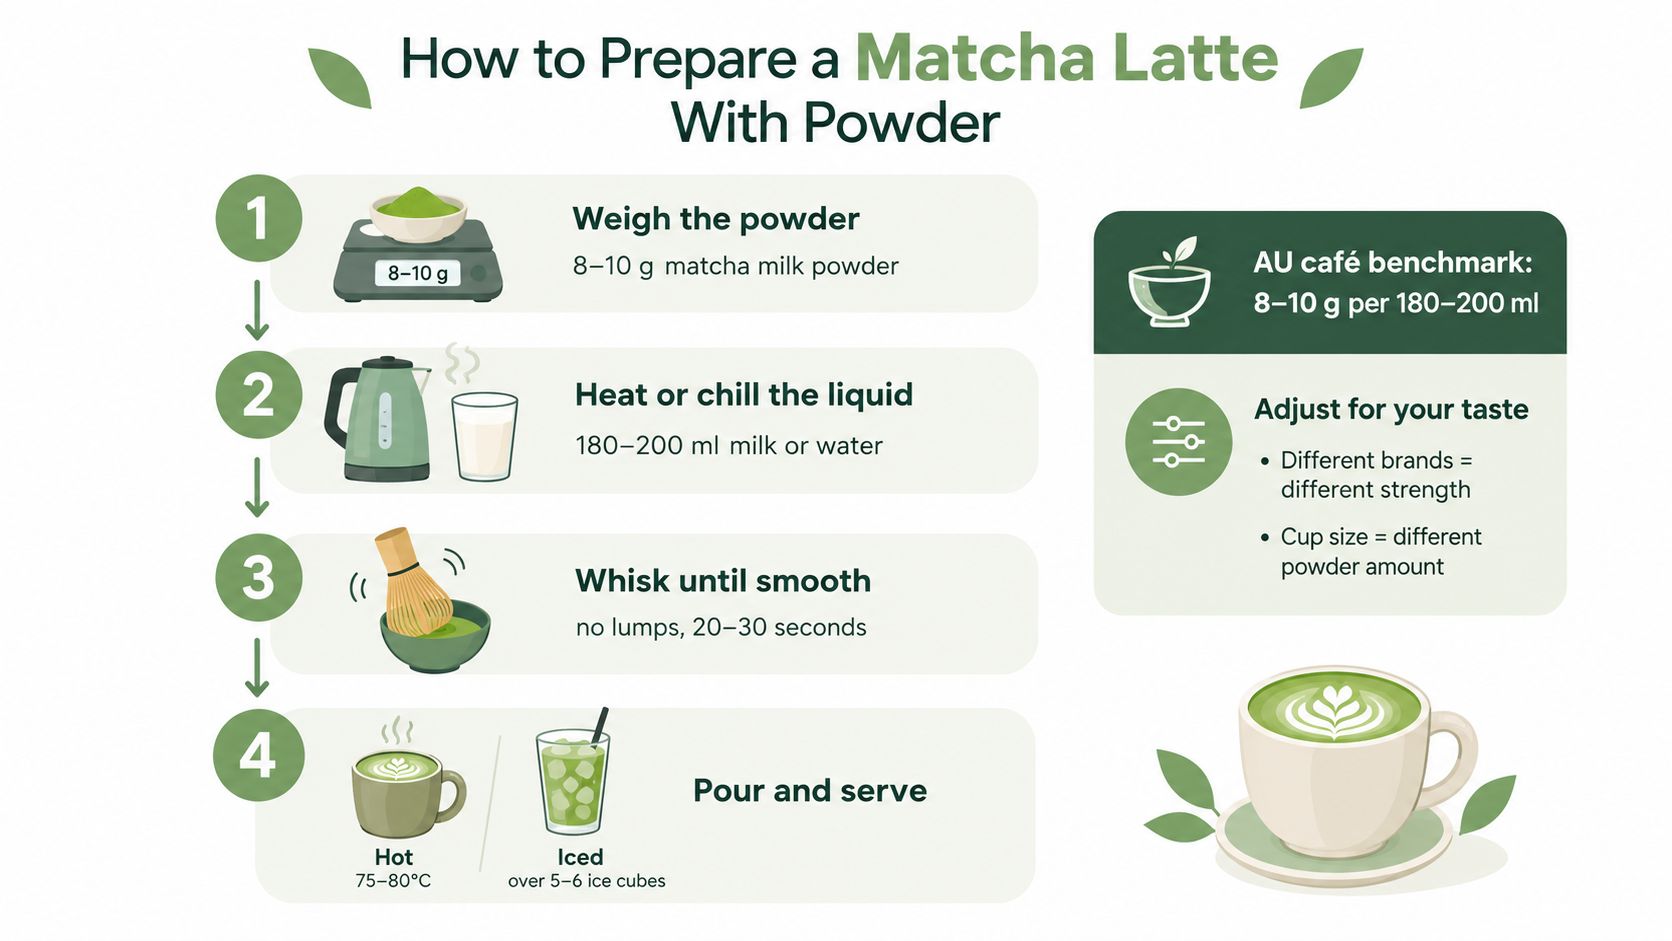
Hot preparation
- Measure the powder. Weigh it rather than relying on a heaped spoon. Consistent dosing matters behind a bar and makes home recipes easier to repeat.
- Add a small amount of liquid. Use warm water or milk first and stir it into a smooth paste. This prevents dry pockets from surviving beneath the surface.
- Add the remaining liquid gradually. Water around 75 to 80°C is a useful working range for a hot latte. Very hot liquid can scorch milk solids and make the tea taste harsh.
- Froth until glossy. A steam wand gives the smoothest microfoam, while a handheld frother works well at home. Stop once the drink looks even and lightly aerated.
A sealed jar can replace a whisk for the dissolving stage. Add the powder and liquid, leave enough room for movement, and shake firmly before pouring into a cup. If you're interested in beverage formulation beyond tea, this comparison of high-protein coffee for athletes is a useful reminder that powders need thorough mixing to avoid sediment and uneven texture.
Iced preparation
For an iced matcha latte, dissolve the powder in a small amount of warm water first. Pour that concentrate over cold milk, stir or shake until smooth, and then build the drink over ice. Adding powder directly to cold milk often produces floating specks and stubborn clumps.
Service rule: Taste the liquid before adding ice. If the drink already seems weak, ice will make the problem more obvious.
A quick calibration method is to make one sample at your intended dose and compare its intensity with a single espresso-strength drink. You're not trying to make matcha taste like coffee. You're checking whether the tea still carries through the milk.
For more traditional whisking guidance, see how to make matcha tea from powder.
Choosing the Right Milk for Hot and Iced Drinks
The right milk depends on the drink you want, the equipment available, and the customer you're serving. No single milk performs perfectly in every matcha milk powder recipe.
Full-cream dairy gives a rounded texture and carries sweetness well. It's a dependable choice for a classic hot latte, although low-fat dairy can produce a thinner drink and may make the powder's texture more noticeable.
Oat milk is popular in café service because its mild flavour allows matcha to remain present while its texture usually stretches well under steam. Different brands behave differently, so test the exact product you plan to serve rather than assuming every oat milk will foam identically.
Soy milk can provide substantial body and a stable foam, especially for customers seeking a more protein-rich plant option. Its distinctive flavour can either complement or compete with grassy matcha.
Almond milk produces a lighter drink with a nutty note, but its foam can be less durable. Coconut milk brings a clear tropical character and works especially well with vanilla, mango, lime, or ginger. A coconut-based matcha can be explored through Pep Tea's matcha coconut milk recipe.
| Milk Type | Texture & Body | Froth Stability | Flavour Carry | AU Cost Note |
|---|---|---|---|---|
| Full-cream dairy | Rich and rounded | Reliable when steamed correctly | Carries sweetness and umami | Often a practical café baseline |
| Oat | Creamy and smooth | Generally strong with barista-style products | Mild, allowing matcha to lead | Compare brands before costing a menu |
| Soy | Full and protein-driven | Can produce good foam | More distinctive than oat | Useful for a protein-conscious audience |
| Almond | Light and clean | Usually less durable | Nutty and delicate | Suits lighter drinks and iced formats |
| Coconut | Thick or silky, depending on product | Variable | Tropical and noticeable | Best positioned as a flavoured variation |
Cold drinks need more control
Cold milk dissolves powder more slowly than warm liquid. Make a smooth concentrate first, then add the chilled milk and ice. Avoid filling a glass with ice before mixing, because the drink becomes harder to stir and the extra dilution can flatten the colour.
Customers comparing dairy options may also find this practical guide to calories in one percent milk useful. For cafés, the important point is to list the milk clearly and cost each version separately. Milk choice affects flavour, foam, portion size, and ingredient cost.
Recipe Variations Beyond the Standard Latte
Matcha milk powder works beyond the familiar hot takeaway cup. Because the blend already contains milk solids and sweetener, it can be convenient in recipes where you want tea flavour and body in one scoop.
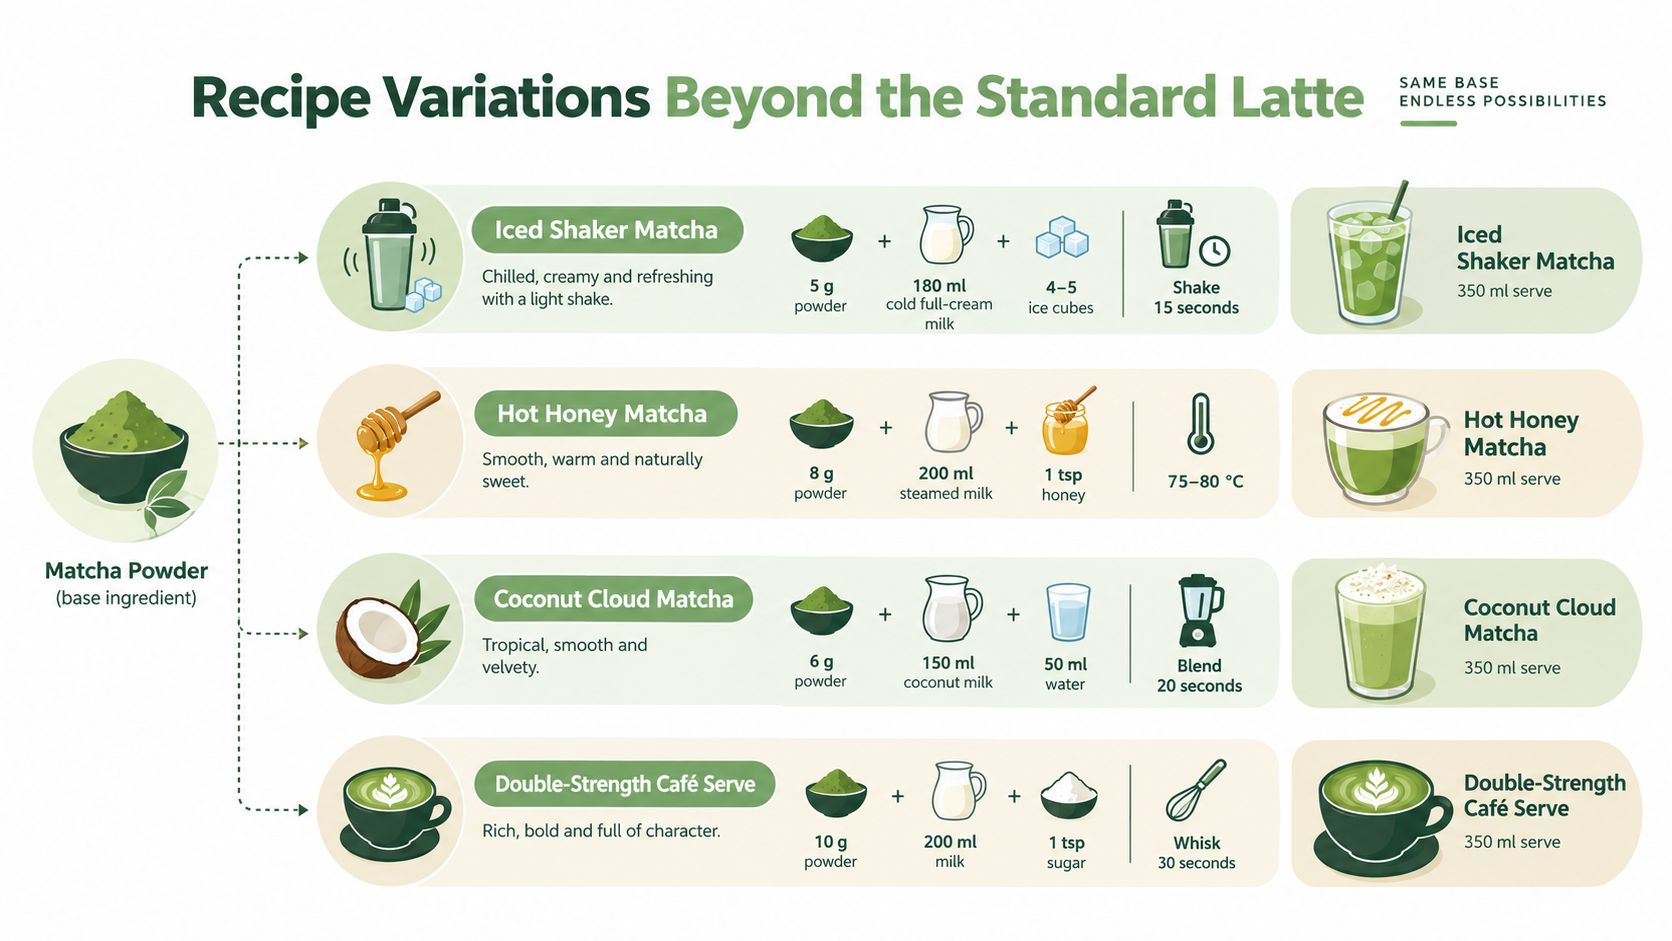
Iced shaker matcha
For a 350 mL serve, combine 5 g matcha milk powder, 180 mL cold full-cream or oat milk, and 60 mL chilled water in a sealed shaker. Add ice and shake hard for 15 seconds. The movement creates a light foam without a steam wand.
Use oat milk for a softer café-style texture, or full-cream dairy for a sweeter, fuller result. If your blend is already sweetened, taste before adding syrup.
Breakfast smoothie
Blend 6 g powder, 150 mL oat milk, one frozen banana, and a spoon of cashew butter. The banana masks some of the grassy character that can appear in a less refined blend, while cashew butter adds richness.
This is a good place for culinary-grade matcha or a latte blend that you wouldn't necessarily drink with water. Keep the mixture cold so the colour stays fresh and the banana remains the dominant texture.
Matcha baking mix
For cookies or a single-serve mug cake, combine 8 g matcha milk powder with 15 g sugar as part of the dry ingredients. Replace a small portion of the flour with the powder and add 20 mL extra milk to protect the crumb from drying.
Check the blend before adding sugar. A pre-sweetened powder may need little or none, particularly in a café recipe where toppings or icing add sweetness later.
Honey and ginger matcha
Warm 200 mL full-cream milk with a slice of bruised ginger. Mix 4 g powder with a small amount of warm water, then add the infused milk and 10 mL honey. Keep the milk warm rather than boiling so the drink stays smooth.
For a plant-based version, oat milk provides gentle sweetness, while coconut milk gives the drink a more obvious tropical direction. Ginger, honey, and coconut can each become strong flavours, so use them as accents rather than allowing them to hide the matcha completely.
Substitutions, Storage, and Shelf Life
A café can run out of a blend without removing matcha from the menu, but the substitute needs to be written down and tested. For one serve, replace 8 g matcha milk powder with 4 g culinary-grade pure matcha, 150 mL milk, 2 g skim milk powder, and 4 g sugar. This recreates some of the body and sweetness, although it won't reproduce the original blend exactly.
At home, a screw-top jar is a practical alternative to a steam wand. Shake the liquid and powder for 20 seconds, open the lid carefully, and pour immediately. Don't use a jar with a damaged seal or fill it completely, because the mixture needs room to move.
| Scenario | Storage Time | Container | Emergency Substitute per Serve |
|---|---|---|---|
| Unopened tin | Up to 12 months from production | Sealed tin, below 25°C, away from light | Use a tested pure-matcha blend if required |
| Opened pouch | 4 to 6 weeks once sealed | Airtight container with desiccant | Pure matcha, milk powder, and sugar formula |
| Café service jar | Rotate using FIFO | Labelled 500 g jar with tight lid | Pre-weighed substitute recipe |
| Home working supply | Use promptly after opening | Original pouch inside an airtight container | Pure matcha prepared separately |
Manage stock before it becomes a menu problem
Australia's Japanese green tea imports reached 195,319 kilograms between January and August 2025, a 131% year-on-year increase, according to reporting on Australia's matcha supply and import growth. That growing demand sits alongside shortages that began in 2024 and worsened through 2025, with tighter supply and record import costs affecting cafés, as reported by the ABC's coverage of matcha shortages and prices.
For a café, sensible controls include:
- Hold a safety stock: Keep roughly four weeks of cover where the product is central to the menu.
- Qualify another supplier: Test a second blend before the first supplier becomes unavailable.
- Avoid single-lane dependence: A product that relies on one import route creates more exposure during shortages.
- Use FIFO: Label the open date and move older stock forward.
- Record the recipe: Staff need the dose, milk volume, temperature, and substitution formula in one place.
Mixed tea products can also fall under different Australian biosecurity conditions. The Australian Government's plant product import guidance explains that tea made purely from Camellia sinensis is considered minimal biosecurity risk, while mixed products may require different conditions. The government also advises that plant-origin tea materials must be thoroughly dried before entry, which matters for blends containing other ingredients.
Why Some Matcha Milk Powders Disappoint
A sweeter powder isn't automatically a better shortcut. Many mass-market sachets are designed to taste immediately pleasant, so sugar, maltodextrin, dextrin, vegetable fat creamer, or other milk-style ingredients can dominate the blend before the tea has a chance to show its colour and savoury character.
The ingredient panel tells you more than the packaging. Some products list sugar or maltodextrin first, followed by creamer and only a small amount of matcha, sometimes below 10%. That can produce a muted olive-green colour, a powdery finish, and a latte that tastes more like sweetened milk than tea.
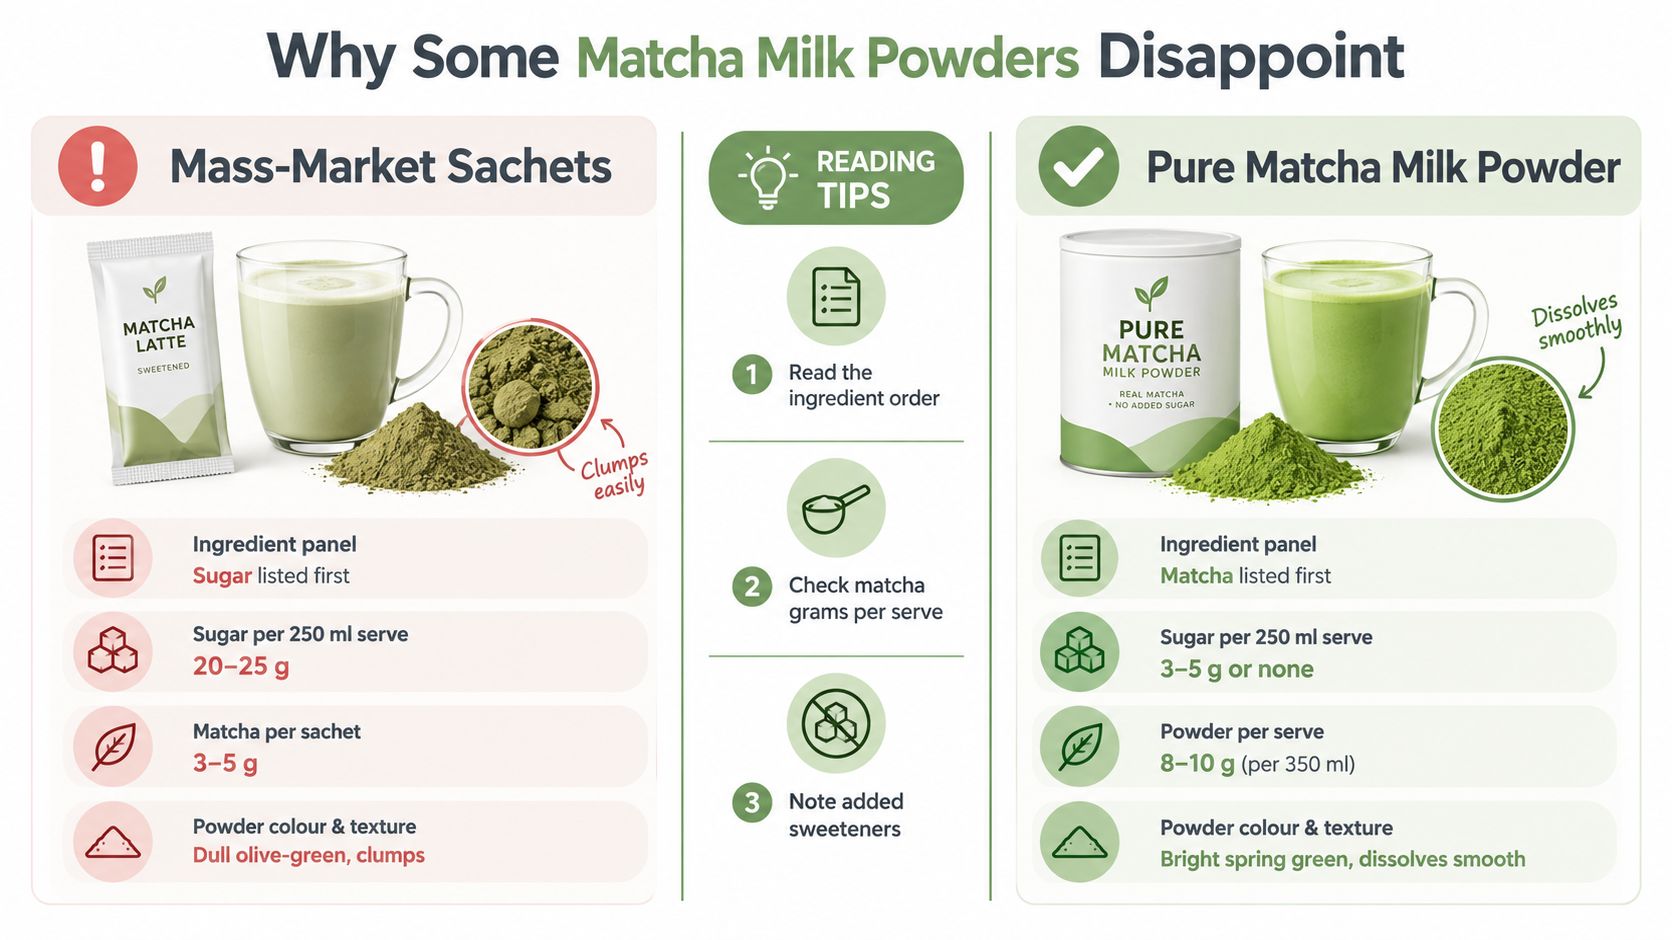
What the extras change
Sugar reduces perceived bitterness but can make it difficult to control sweetness across hot, iced, and blended drinks. Dextrin can improve powder handling, yet too much may leave a chalky texture. Creaming agents add body, but they can leave a film on cups and make commercial frothers harder to clean.
The tea itself may also feel flat when milk solids coat the palate. You get thickness without much umami, and the bright green colour expected from matcha becomes less convincing.
Label test: Look for matcha high in the ingredient order, check the grams of tea per serve, and identify every added sweetener before you judge value.
Unflavoured blends built around a higher proportion of matcha can give a more defensible café drink, while pure ceremonial-grade matcha gives you maximum control over dosing and sweetness. The trade-off is extra preparation. You'll need to weigh, sift, whisk, and add the milk separately, but you can adjust the drink for each customer and recipe.
For a café, also watch the cleaning burden. A powder that clumps or leaves residue may slow service even when its purchase price appears attractive. A product that dissolves cleanly, tastes balanced, and has a written recipe can cost less operationally than a cheaper blend that needs repeated reworking.
Practical Takeaways and Where to Go Next
The best matcha milk powder is the one that suits the drink you're making. A sweetened blend may be convenient for a quick iced latte, while pure matcha is better when you want control over tea intensity, milk choice, and sugar. Cafés need to judge both sensory quality and service performance.
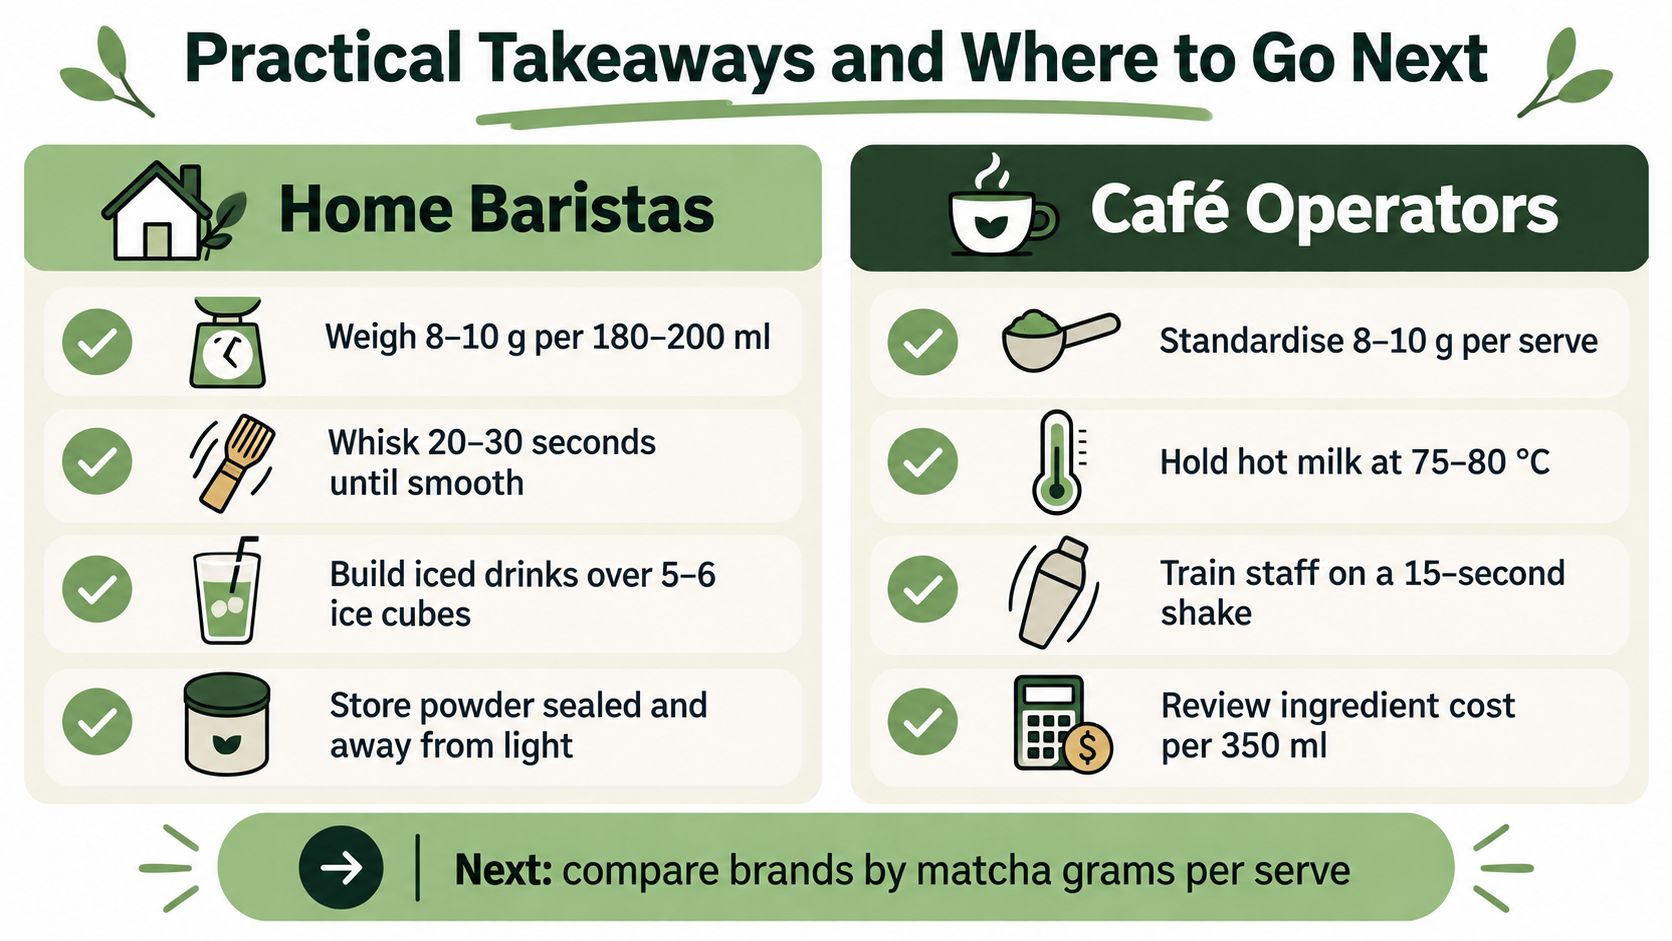
For home baristas
- Weigh the powder: Start with the product's recommended serve, then adjust by taste rather than adding sweetness automatically.
- Use filtered water below 80°C: This helps protect the texture and reduces the harshness associated with overheated liquid.
- Sift before mixing: Sifting breaks up compacted powder and makes a smoother paste.
- Build iced drinks carefully: Mix the concentrate before adding milk and ice.
- Taste it plain first: Assess bitterness, sweetness, and tea strength before adding honey or syrup.
- Store it well: Keep the powder sealed, dry, and away from light.
For café operators
Standardise the recipe by cup size and train staff to use the same dose, liquid volume, and frothing method. Record the cost of the powder, chosen milk, sweetener, and any toppings before setting the menu price.
Keep stock organised with FIFO rotation and a supply buffer. Review the ingredient panel whenever you change supplier, because a substitution can alter sweetness, colour, foam, and customer expectations even when the name on the menu stays the same.
Australia's matcha audience includes traditional tea drinkers, latte customers, home cooks, and people looking for alternatives to heavily sweetened drinks. A clear ingredient list and a consistent recipe help you serve all of them honestly.
If you're ready to compare organic, single-origin, and sugar-free matcha options for home or café use, explore the range from Pep Tea and choose a format that gives you the level of sweetness and control you want.
Pep Tea offers organic Japanese matcha in ceremonial and culinary grades, along with guidance for hot lattes, iced drinks, and baking. Visit Pep Tea to compare matcha options and find a practical fit for your pantry or café menu.
Matcha Tea Bags Benefits: The Ultimate Guide

Monday morning hits fast. The kettle's on, your inbox is already noisy, and you still want the calm, steady lift that matcha promises without turning the kitchen into a ritual bench. That's where matcha tea bags benefits start to matter in real life, because convenience only counts if the cup still feels worth drinking.
A good tea bag can bridge the gap between premium matcha and an actual human schedule. A bad one tastes thin, bitter, or dusty, and you feel like you've compromised for nothing. The difference isn't just format, it's extraction, bag design, and how much of the tea's natural character survives the brew.
The Modern Morning Ritual
The kettle is boiling while the school run is approaching, a meeting is about to start, and the café queue is already too long. A tea bag earns its place in that morning because it removes the whisk, bowl, and extra preparation that can turn matcha into a weekend ritual. The useful question is whether the quicker format still gives you a cup you want to drink.

Convenience can support quality
A poorly designed bag produces thin, bitter tea that tastes like compromise. A well-made one can deliver a cleaner, more repeatable brew, although it will not offer the same control, texture, or intensity as ceremonial-grade powder whisked in a bowl.
In Australia, matcha has moved from a niche product into the mainstream. The category generated more than $54 million in revenue in 2024 and is projected to exceed $81 million by 2030, with 7.1% annual growth, according to SBS. That market growth reflects a practical shift: people are making matcha part of ordinary wellness routines, not reserving it for cafés or elaborate preparation.
Practical rule: if the format makes you skip the drink, it is the wrong format for daily use.
Tea bags suit people who want matcha's flavour and functional lift without treating every cup like a ceremony. They also give cafés a consistent method across staff, shifts, and busy service periods.
What the format actually changes
A well-designed bag shortens the route from kettle to cup, reduces mess, and removes the need to measure powder or clean a frother. The result is less control over strength and mouthfeel, but greater repeatability. That trade-off matters on rushed mornings, particularly for anyone building a habit rather than pursuing a perfectly whisked serving.
Whisked powder wins for control and intensity. Tea bags win when preparation time determines whether the drink happens at all. In practice, the more convenient format may provide greater day-to-day value because it gets used consistently.
Understanding EGCg and L-theanine
Matcha's effect comes from compounds in the leaf, not its colour alone. EGCg is the catechin most associated with green tea research, while L-theanine contributes to matcha's calmer style of alertness. For a practical explanation, see what EGCg does in green tea. Harvard Health notes that matcha contains abundant antioxidants, including catechins, and that L-theanine has been associated with concentration and alertness (Harvard Health).
Why the pairing feels different from coffee
Coffee often arrives with a sharper sensory hit. Matcha can feel smoother because caffeine is accompanied by L-theanine. In the Australian context, one health source reports that matcha commonly provides about 30 to 40 mg caffeine per 1 g serve and 20 to 45 mg L-theanine per 1 g serve, depending on grade (Alchemist Wellness). That combination helps explain why drinkers describe matcha as supporting sustained alertness rather than a sudden spike followed by a drop.
The same source associates one to two 1 g serves with roughly 100 to 275 mg of EGCG. Use those figures as a reference, not a guarantee. A tea bag's actual result depends on the leaf, the amount it contains, water temperature, steeping time, and how freely the leaves can expand.
A bag also changes the extraction experience. A well-made bag can deliver a clean, steady cup, while a cramped bag or weak portion may taste thin and provide less of the character associated with whisked powder.
What I notice in the cup: when the brew is balanced, it tastes rounder, less grassy, and less aggressive on the finish.
What the compounds do in practice
EGCg provides the antioxidant profile people seek from green tea. L-theanine helps explain the calmer feel of matcha alongside caffeine. Together, they suit drinkers who want focus without feeling overstimulated.
A well-made tea bag will not create the same intensity as ceremonial-grade powder, but it can preserve enough of matcha's functional profile to become a reliable part of a morning routine. If the cup helps you begin work clearly and stay steady through the morning, the convenient format has earned its place.
Tea Bags Versus Loose Powder
This is the comparison that decides whether matcha becomes an occasional treat or a daily staple. Loose powder offers more ceremony, more control, and that vivid green colour people love. Tea bags offer less drama and more repeatability, which is often the better trade for weekday life.
Matcha Format Comparison
| Feature | Tea Bags | Loose Powder |
|---|---|---|
| Prep time | Fast, low-fuss | Slower, needs more steps |
| Consistency | More repeatable portioning | Depends on measuring and whisking |
| Cleanup | Simple | More equipment to wash |
| Texture | Usually lighter body | Fuller, more direct mouthfeel |
| Best use | Daily convenience | Ritual, cafés, special moments |
Loose powder still has prestige. It gives you the most hands-on control and, when whisked well, a more layered flavour. But it asks for a bowl, a whisk, and a little skill to avoid clumps.
Tea bags work differently. They're the practical option when you want a reliable cup without fuss, and high-quality pyramid bags give the leaf more room than flat paper bags. If you want to browse a broader range of tea formats while comparing styles, tea selection is a useful place to look at how different teas are organised for different routines.
What matters more than the romance of the format
A tea bag is not “less serious” just because it's easier. It's serious in a different way. It's built for consistency, portion control, and speed.
Rule of thumb: choose loose powder when you want the ritual, choose a well-made tea bag when you want the habit.
That's the actual decision. If your weekly reality includes early starts, shared kitchens, or café service, the tea bag often delivers better day-to-day value. If you only reach for matcha on slower mornings, loose powder still has a strong case.
Brewing the Perfect Cup
Even a good tea bag can brew badly if the water is wrong. Boiling water can scorch the tea and pull out more bitterness than flavour, which is why temperature matters so much. The sweet spot is around 80 degrees Celsius, a detail that shows up consistently in matcha brewing guidance, including PepTea's own matcha brewing temperature guide.
A simple brewing method that works
- Heat the water, then let it settle. Don't pour straight from a rolling boil. Let it come down to about 80 degrees Celsius so the flavour stays smoother.
- Steep briefly. Start with a short steep, then taste. Tea bags can over-extract if left too long, and that's usually where the bitterness creeps in.
- Press gently, don't squeeze hard. Aggressive squeezing can force out more astringency.
- Use the tea bag once, well. Matcha bags are designed for one clean extraction, not repeated weak steeps.
The quality of the bag matters too. Independent Australian tea research notes that bag construction and steeping time materially affect polyphenol yield, and that solubility can vary enough to act as a quality-control marker for filter-paper permeability (Australian tea quality study). In plain terms, a better bag can improve what ends up in the cup.
Hot, iced, or latte style
A hot cup is the easiest starting point. An iced version works well on warm days, especially if you brew it a little stronger before chilling. For a latte, brew the tea bag in a small amount of hot water first, then add your milk of choice.
That gives you a cleaner base than dropping a tea bag straight into milk. It also keeps the flavour balanced instead of muddy. The goal is not to hide the matcha, it's to let it carry the drink.
Sustainability and Taste Evolution
People want convenience, but they also want less waste. That tension has pushed tea brands to rethink packaging, bag shape, and freshness, and it's changed the way matcha tea bags are perceived. A well-made bag now has to do two jobs, brew well and fit a more responsible product story.
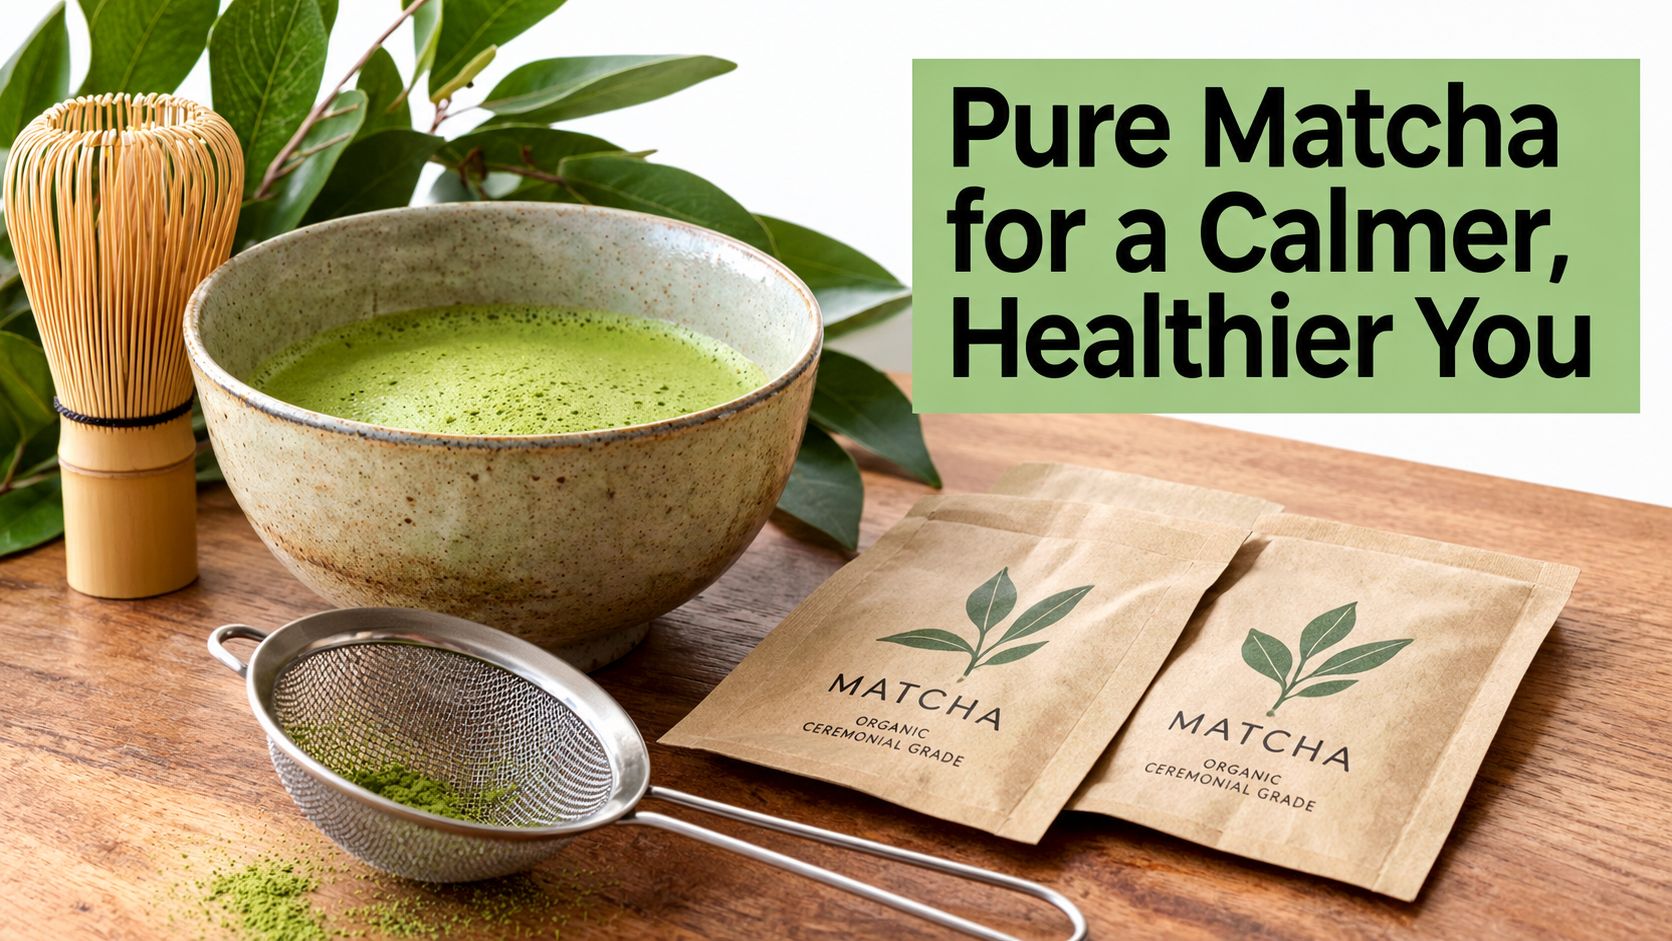
Better bags can mean better cups
Tea bags have improved a lot. Modern formats are often made to hold their shape better, give the leaves more room, and preserve freshness more effectively than older bulk-storage habits. That matters because flavour fades when tea sits exposed to light and air, and matcha is especially sensitive to poor handling.
The best part is that convenience no longer has to mean stale flavour. A quality tea bag can protect the tea well enough for daily use while still giving you the bright, fresh character you want from matcha. That's the evolution worth paying attention to.
Why sourcing still matters
The brewing format can only do so much if the tea itself is weak. PepTea's own how matcha tea is made page is a useful reminder that source material and processing shape the final cup. That applies whether the tea ends up in a bowl, a sachet, or a café menu item.
If you care about organic, functional tea, look at both the leaf and the pack. A neat bag with poor tea inside won't impress anyone. A good bag with well-selected tea can make daily matcha feel surprisingly close to a whisked cup, especially for casual drinkers who value freshness over ceremony.
Sustainability only matters if the cup is still enjoyable. When the tea tastes flat, people stop buying it, and the habit disappears.
That's why taste and responsibility need to move together. The smarter product is the one people want to drink tomorrow.
Who Should Switch to Matcha Bags
A tea bag earns its place when the alternative is skipping matcha altogether. It suits people who want a repeatable cup without specialist equipment, while still caring about flavour and function. Busy professionals, parents, café teams, and anyone building a low-friction wellness routine can all benefit from the format, provided they accept that a bag will not offer the same control as whisked powder.
The people who usually get the most value
- Office workers: A tea bag provides a predictable mid-morning drink when back-to-back calls leave little time for preparation.
- Parents and carers: One clean cup is easier to manage before the school rush than a bowl, whisk, and separate cleanup.
- Hospitality teams: Consistent preparation helps when service speed, shared workspaces, or staff changes make specialist brewing impractical.
- New matcha drinkers: The simpler method reduces the learning curve and gives beginners a better chance of enjoying their first cup.
- Home users who dislike mess: A bag removes the powder, whisk, and bowl cleanup that can make regular brewing feel like work.
The format also suits buyers who need clear product information. Australia's food regulator treats caffeine as a safety issue in concentrated products and requires added caffeine to appear in the ingredients statement when it is added to food for sale (Food Standards Australia New Zealand). Check the label, serving guidance, and preparation instructions before choosing a functional drink.
When the tea bag beats the bowl
Choose a tea bag when routine matters more than ceremony, or when a café and workplace need a clean, repeatable service method. Choose loose powder when you want to control dose, texture, strength, and whisking. The right option depends on whether convenience helps you drink matcha consistently without making the quality trade-off unacceptable.
If the format makes healthy habits easier, it's doing useful work.
Matcha's growing presence in Australia has shifted attention from ceremony alone to everyday use, including how easily people can prepare it (SBS). Tea bags fit that practical demand. They can turn occasional interest into a regular habit, as long as the tea tastes fresh enough to earn the next cup.
Conclusion and Your Next Steps
The strongest case for matcha tea bags is simple. They let you keep the functional appeal of matcha, including the caffeine and L-theanine profile people want, without turning every cup into a production. When the bag is well made and the brew is handled properly, the result can be genuinely satisfying, not just convenient.
The trade-off is still real. Loose powder gives you more ceremony and control, while tea bags give you speed, consistency, and a much easier daily habit. For most busy Australians, especially those trying to build a calm, reliable morning routine, that trade makes sense.
If you're buying for home, café service, or a workplace pantry, look for tea that's clearly sourced, properly packaged, and easy to prepare well. That's where quality shows up, not in marketing language, but in the cup itself.
PepTea offers Australian-focused organic matcha and sugar-free kombucha for people who want functional drinks without the fuss. If you're ready to make matcha part of a realistic daily routine, visit Pep Tea and explore the range for home, café, or wholesale use.