
Tag: fermentation guide
Kombucha Starter Liquid: What It Is and Why It Matters

You've brewed the tea, dissolved the sugar and waited for it to cool. The SCOBY is ready beside the jar, but one small detail can decide whether the batch starts cleanly or sits vulnerable for too long: kombucha starter liquid.
At a Hunter Valley café, this is the part of the process that's easy to overlook because it doesn't look dramatic. It's mature, tangy kombucha. Yet that liquid carries the established culture and acidity that help guide fresh sweet tea towards a safer fermentation. Treating it as leftover drink misses its most important job.
The Hidden Foundation of Every Successful Brew
A new brewer often spends plenty of time choosing black or green tea, measuring sugar and planning flavours such as ginger or mango. Then the tea cools, the SCOBY goes in, and the jar is covered. If the batch develops an odd smell or takes too long to turn tart, the starter liquid may have been the missing piece.
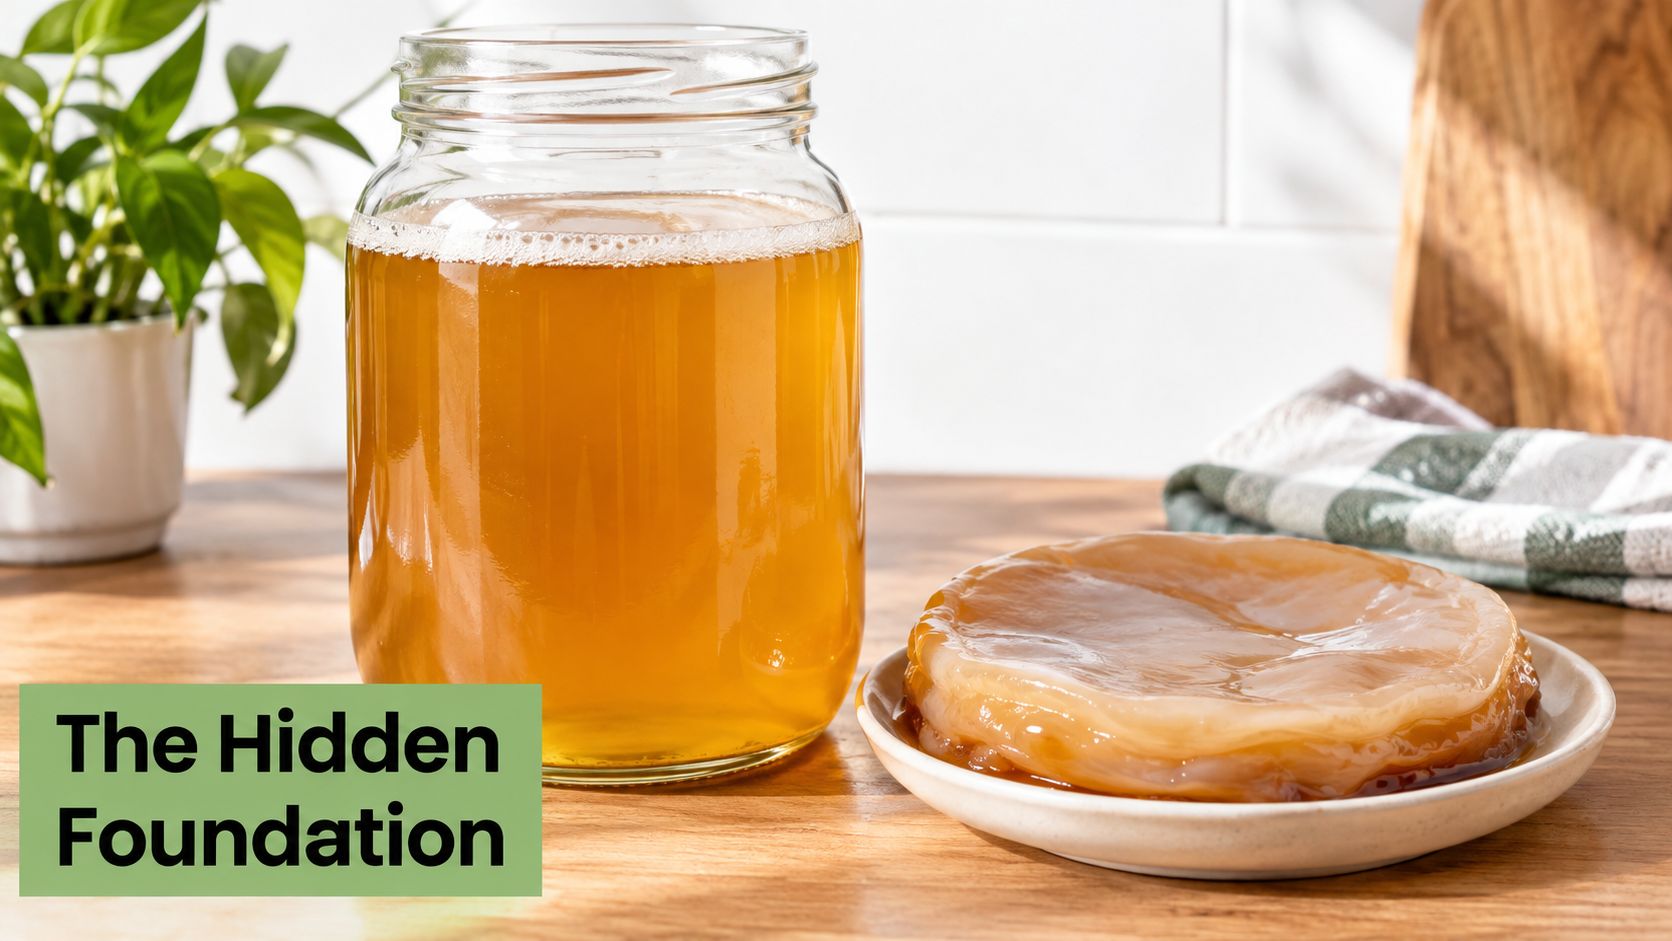
Starter liquid is the mature kombucha reserved from an active, successful batch. It brings an established community of yeasts and bacteria into the new tea, while its existing acidity changes the starting conditions straight away. The SCOBY matters too, but the liquid surrounding it is an active part of the fermentation system, not just a carrying medium.
Picture planting a garden bed. Fresh sweet tea is the prepared soil, the SCOBY is part of the living garden, and starter liquid brings an established population that can begin working immediately. Without that head start, the new batch has to develop its balance while the sweet tea remains in a condition where unwanted microorganisms may gain an opportunity.
Practical rule: A healthy-looking SCOBY without sufficiently active, acidic liquid isn't a complete fermentation plan.
This matters at home, but it matters even more in cafés and small production spaces. A hospitality team needs repeatable batches, predictable flavour and responsible control of a living drink after it leaves the brew vessel. The first pour of starter liquid influences all three.
Starter liquid also changes how you judge a recipe. Rather than measuring only by volume, you need to consider its acidity, smell, activity and history. A small amount of reliable mature kombucha can help a fresh batch move in the right direction, while weak, contaminated or poorly stored liquid can create uncertainty from the beginning.
What Kombucha Starter Liquid Actually Is
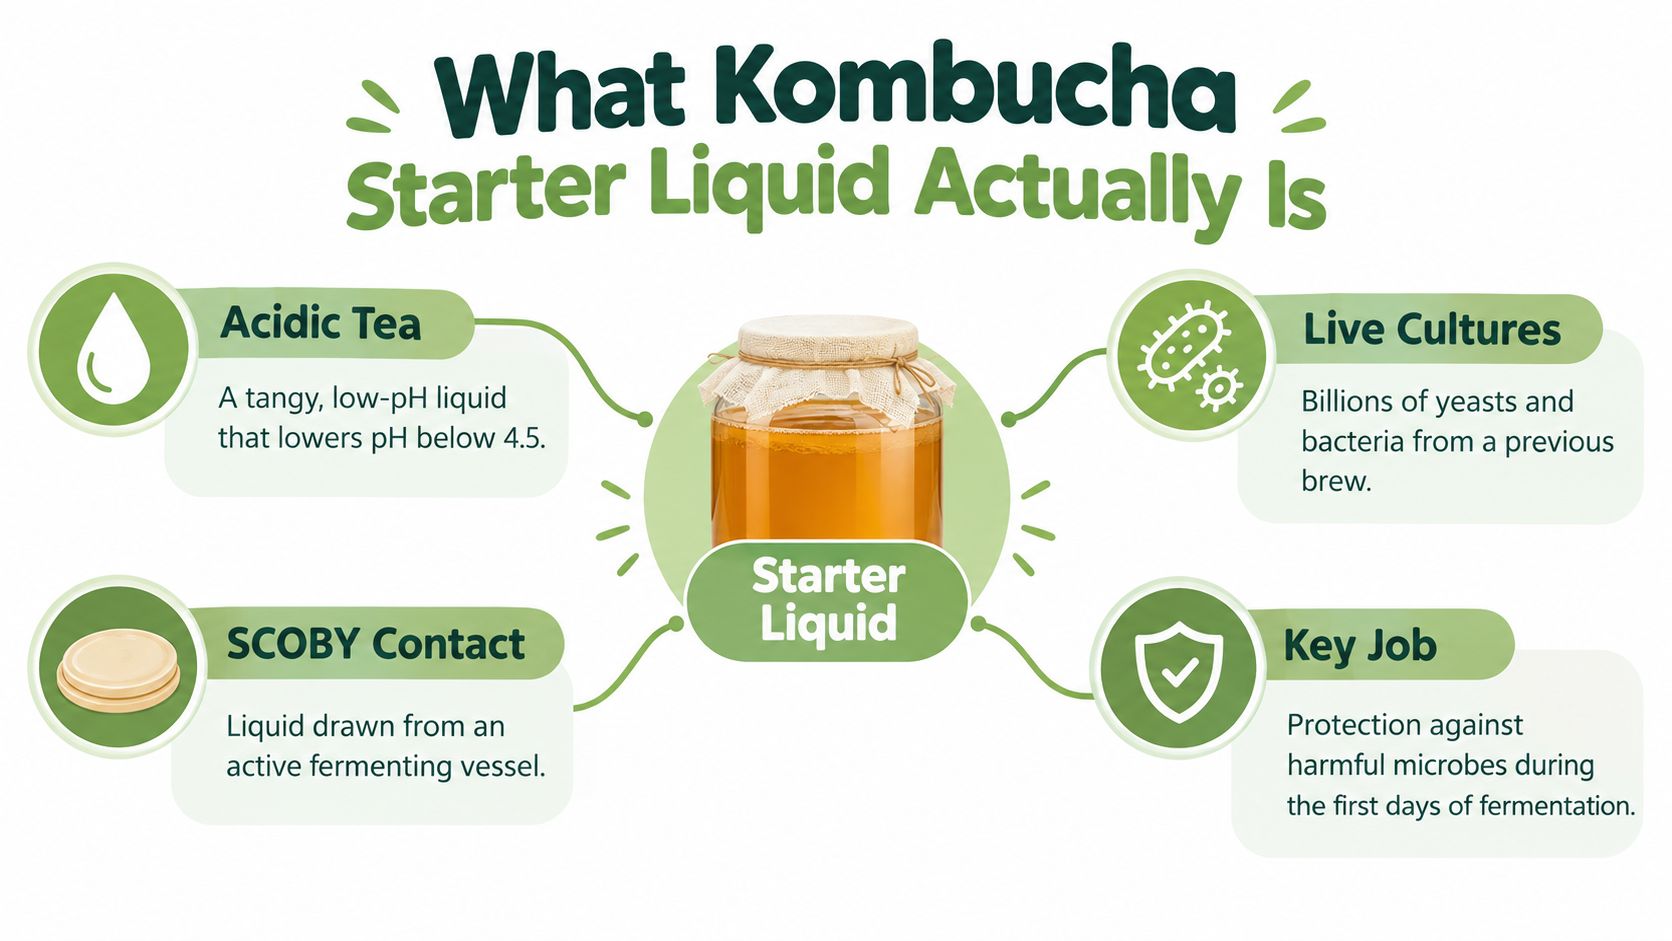
Kombucha starter liquid is finished, acidic kombucha from an active fermentation, usually taken from the vessel before flavouring or bottling. It contains the yeasts and acetic-acid bacteria that have already adapted to the tea environment. When added to fresh sweet tea, these organisms continue the sequence that creates kombucha's characteristic tartness.
The roles are complementary:
- Yeasts use available sugar and produce ethanol and carbon dioxide as part of fermentation.
- Acetic-acid bacteria use oxygen and convert yeast-produced ethanol into organic acids, including acetic acid.
- The liquid itself carries acidity and living culture into the next batch.
- The SCOBY is the visible cellulose-rich layer formed by the culture. It can support fermentation, but it isn't the only place where the active organisms live.
The simplest comparison is a sourdough starter. You wouldn't expect a dry piece of crust to ferment a fresh dough reliably. The living mixture around it carries much of the activity. Kombucha starter liquid plays a similar practical role, although the organisms and process are different.
Starter liquid and a SCOBY are not interchangeable
Adding a SCOBY alone can leave the new tea without enough acidity at the beginning. The liquid helps lower the starting pH and introduces organisms throughout the batch, rather than relying only on contact with a floating or sinking disc.
The liquid should come from a batch that smells pleasantly sour or tea-like, without fuzzy growth, rotten odours or unexplained discolouration. A SCOBY can naturally sink, float or sit at an angle, so its position isn't a reliable test of culture health. The condition of the liquid and the way the brew progresses matter more.
Why mature liquid is carried forward
Each successful batch leaves behind a portion of mature kombucha that can seed the next one. This creates continuity. You're not starting with a blank jar each time, but carrying forward a working culture that has already converted sweet tea into an acidic ferment.
That's why starter liquid deserves to be measured and protected. It is both an inoculum, meaning a source of living culture, and an early acidification control.
How pH Control Makes Starter Liquid a Safety Tool
Freshly brewed sweet tea begins at approximately pH 5, a range in which potential contaminants can grow. Food Standards Australia New Zealand advises cooling tea rapidly from 60°C to 20°C within 2 hours, then adding a proven, uncontaminated starter culture as soon as possible. You can review the broader fermentation context in Yuve's gut health guide, but kombucha brewing needs its own careful controls.
Starter liquid helps the culture begin producing acid sooner. The yeasts and acetic-acid bacteria work in sequence, and oxygen supports the bacteria as they oxidise yeast-produced ethanol into acetic acid. That gradual acidification lowers pH and changes the environment in favour of the intended culture.
The useful pH milestones
Australian guidance identifies pH 4.2 or below as the point at which kombucha becomes a non-potentially hazardous food that doesn't support pathogen growth or toxin production. The practical lesson is simple: the batch needs to reach that milestone promptly, not merely taste sour after a long wait.
A final pH of approximately 2.5 or higher is described as typical. Excessive acidification can produce an aggressively sharp drink and may create additional safety concerns, so lower isn't automatically better.
| Brewing question | Practical answer |
|---|---|
| Is taste enough? | No. Taste can help judge flavour, but it doesn't replace measurement. |
| Does oxygen matter? | Yes. Aerobic fermentation supports acetic-acid production. |
| What should be measured? | Track pH during fermentation with a calibrated meter. |
| Is the starting liquid important? | Yes. Its acidity and culture activity influence how quickly the new batch changes. |
A calibrated digital pH meter for kombucha brewing gives you a clearer view than elapsed time alone. Two jars brewed in different kitchens can move at different speeds because of temperature, tea, culture condition and handling. Recording pH gives a café team or home brewer evidence to work with.
Taste tells you what the drink is becoming. A pH meter tells you whether the process is moving into the intended safety range.
Use clean equipment, cool the tea before adding culture and keep the ferment exposed to suitable air circulation. If the pH doesn't move as expected, don't solve the problem by waiting indefinitely. Review the starter's condition, the temperature, the equipment and the possibility of contamination.
Where to Source or Make Your Starter Liquid
There are two sensible routes. You can obtain starter liquid from an established kombucha producer, or reserve it from your own healthy batch. The right choice depends on whether you're learning at home, restarting after a break or trying to keep café production consistent.
Buying from a reliable producer
A supplied starter should have a clear origin and handling information. Ask how it was brewed, whether it has been kept clean and whether the supplier can explain how to use it with your tea. A reputable source should be able to describe the culture rather than treating the liquid as a generic flavour additive.
For a first batch, a packaged option such as PepTea's starter tea kombucha product can be useful because it is presented specifically for establishing fermentation alongside a SCOBY. The important point isn't the packaging itself. It's knowing what the liquid is, where it came from and how it has been handled.
Reserving liquid from your own batch
Before flavouring or bottling a successful brew, decant clean mature kombucha into a sanitised container. Choose liquid from a batch with a pleasant acidic aroma and no visible mould. If the brew has an unusual smell, fuzzy growth or signs of spoilage, don't preserve it as your next starter.
A small café should label the container with the batch identity and date, then store it under the same controlled conditions used for the rest of the production process. Home brewers can use a simpler note on the jar, but the principle is identical: know which batch you're carrying forward.
How much is enough
PepTea's product guidance describes mature acidic kombucha at approximately 10% of a new batch as a way to lower initial pH and establish fermentation. The exact suitability depends on the acidity and activity of the liquid, so volume alone shouldn't be your only check.
If the starter is unusually mild, old, diluted or uncertain, adding more by guesswork won't guarantee a safe result. Measure pH, use a known culture and keep your process consistent. A starter liquid with strong acidity and healthy activity gives the new tea a more dependable beginning.
Storing and Maintaining Starter Liquid Correctly
Starter liquid is alive, so storage is about slowing change without treating it as a lifeless ingredient. A clean container, stable refrigeration and careful handling help preserve its useful acidity and culture activity between brews.

Use a clean glass container with enough room for safe handling. Keep the lid secure, but avoid repeatedly opening the jar just to smell it. Every opening creates another opportunity for dust, insects or accidental contact to enter.
A simple storage routine
- Label the jar: Record the batch source and storage date so nobody has to guess what it contains.
- Keep it cold: Refrigeration slows fermentation and helps maintain a more stable flavour and activity profile.
- Protect the liquid: If a SCOBY is stored with it, keep the culture covered so it doesn't dry out.
- Use clean utensils: Never dip a used spoon or tasting glass into the container.
- Inspect before use: Look for mould, unpleasant odours or a change that doesn't resemble normal acidic fermentation.
A refrigerated starter can become more sour over time, and its activity may change. “It still smells acidic” is useful information, but it isn't proof that the liquid is suitable for every new batch. Measure and observe rather than assuming that starter liquid never expires.
Freezing can also alter texture and culture activity, so it isn't automatically the best preservation method. For a short brewing pause, stable refrigeration is the more straightforward routine. If you're unsure about a stored culture, discard it rather than trying to rescue a questionable ferment.
The following video can help visualise practical SCOBY storage habits:
For a longer pause between batches, keep the culture submerged in mature kombucha and avoid repeated transfers. PepTea's guide to storing a SCOBY between brews offers a useful reference for maintaining the culture without letting it dry out.
Spotting Contamination and Managing Alcohol Risk
A healthy kombucha culture can look different from batch to batch. The SCOBY may float, sink or form an uneven new layer, and strands or sediment can appear as yeast activity continues. Those changes aren't automatically contamination.
Mould is different. Fuzzy or dry growth, especially with suspicious colours, is a reason to discard the affected batch and starter rather than skim the surface. A rotten, solvent-like or otherwise offensive smell also deserves caution. If the liquid has been exposed to dirty equipment, insects or questionable water, don't use it to seed another brew. For general background on checking water quality, how to test well water for E. coli is a useful resource, although a home water test doesn't replace good brewing hygiene.
Alcohol can change after bottling
Acidity is only half the control problem. Yeasts can remain active after the SCOBY is removed, particularly when residual sugar, warm storage, sealed bottles or a second fermentation give them favourable conditions.
A national survey of 239 fermented soft drink samples found that only 35.2 per cent of kombucha tested below 0.5 per cent alcohol by volume, while some products increased in alcohol during shelf life. The findings are reported in the Australian fermented-beverages issues paper.
In the same survey, 41.9 per cent of all sampled fermented drinks measured above 0.5 per cent and below 1.15 per cent ABV, while 22.9 per cent exceeded 1.15 per cent ABV. Kombucha represented 132 samples, or 55.2 per cent, of the total fermented-drink sample. These figures show why a bottle that tastes fine at filling can't automatically be treated as stable throughout its shelf life.
Practical controls for cafés and home brewers
- Reduce uncontrolled sugar: Residual fermentable sugar gives yeast more material to convert.
- Control warmth: Cold storage slows, but doesn't magically erase, ongoing fermentation.
- Treat sealed bottles carefully: Carbonation stages can trap gas and support continued yeast activity.
- Check the finished product: Commercial operators should validate alcohol at bottling and during shelf-life studies.
- Avoid blanket claims: Don't describe a living fermented drink as alcohol-free without appropriate testing and awareness of applicable Australian requirements.
In New South Wales, guidance states that kombucha sold as a non-alcoholic beverage must contain less than 0.5% ABV, as outlined by the NSW Food Authority. Requirements and classification can vary between states, so a café serving or selling kombucha should document its controls rather than rely on assumptions.
Best Practices for Home Brewers and Hospitality Use
The best process is the one you can repeat. Home brewers need a clean jar, reliable starter liquid and a way to check progress. Cafés need those same foundations, plus batch records, staff consistency and a clear approach to storage and product claims.
Keep the framework practical:
- Start with known liquid. Use mature starter from a healthy ferment or a traceable supplier.
- Cool before inoculating. Hot tea can damage the living culture.
- Measure pH. Don't rely on taste, smell or the calendar alone.
- Keep equipment hygienic. Clean jars, utensils, bottles and meter probes after use.
- Provide oxygen during primary fermentation. The acetic-acid bacteria need it for their work.
- Control the post-bottling stage. Residual sugar, active yeast and warm storage can keep fermentation moving.
- Record what happened. Note the starter source, pH observations, storage conditions and any alcohol testing.
A café doesn't need a laboratory bench beside the espresso machine, but commercial production does benefit from organised testing and suitable food-grade workspaces. Businesses planning more formal analysis can browse food testing lab benches for context on laboratory furniture and workflow design.
Home brewers can keep their notes in a notebook. Hospitality teams should make the process easy for every staff member to follow. In both settings, starter liquid should be treated as a safety control and fermentation tool, not an optional flavouring.
Pep Tea offers Australian-brewed, sugar-free organic kombucha from the Hunter Valley, along with organic Japanese matcha and practical guidance for mindful beverage routines. Visit Pep Tea to explore the range, learn more about kombucha culture care and enquire about options for home, café or wholesale use.
Kombucha First Fermentation: A Practical Aussie Guide

You've got a jar of sweet tea cooling on the bench, a SCOBY ready to go, and a vague instruction that says “leave it for ten days”. In Australia, that isn't enough to produce a reliable kombucha first fermentation. Room temperature changes, starter strength, acidity, oxygen exposure and alcohol formation all affect what happens inside the vessel.
After running first ferments in the Hunter Valley, I treat this stage as a food-safety control exercise first and a flavour exercise second. The taste matters, but pH, temperature and time decide whether the batch has developed the acidic barrier you need before flavouring, bottling or serving it.
Why First Fermentation Matters Most
In a Hunter Valley kitchen, the first ferment can look uneventful while the safety controls are already being decided. Sweet tea, a SCOBY and a covered vessel may produce a clean, tart drink, or leave a batch overly sweet, sharply acidic or unsuitable to keep. Temperature, starter strength, oxygen and time all affect that result.
Treat first fermentation as a food-safety control exercise first and a flavour exercise second. The culture must establish itself in the tea, lower acidity and convert sugars before flavouring, bottling or serving. Yeasts use available sugars and produce compounds including alcohol. Bacteria use those products and oxygen to develop organic acids. The SCOBY is a living community, not merely the rubbery pellicle on the surface, so the starter liquid and brewing conditions matter.
Australian guidance describes first fermentation as an aerobic process, generally conducted in an open vessel. Add the SCOBY when the tea is between 22°C and 30°C, then allow roughly 7 to 10 days for fermentation to reach its intended endpoint, as outlined in Australian kombucha fermentation guidance.
What the first ferment builds
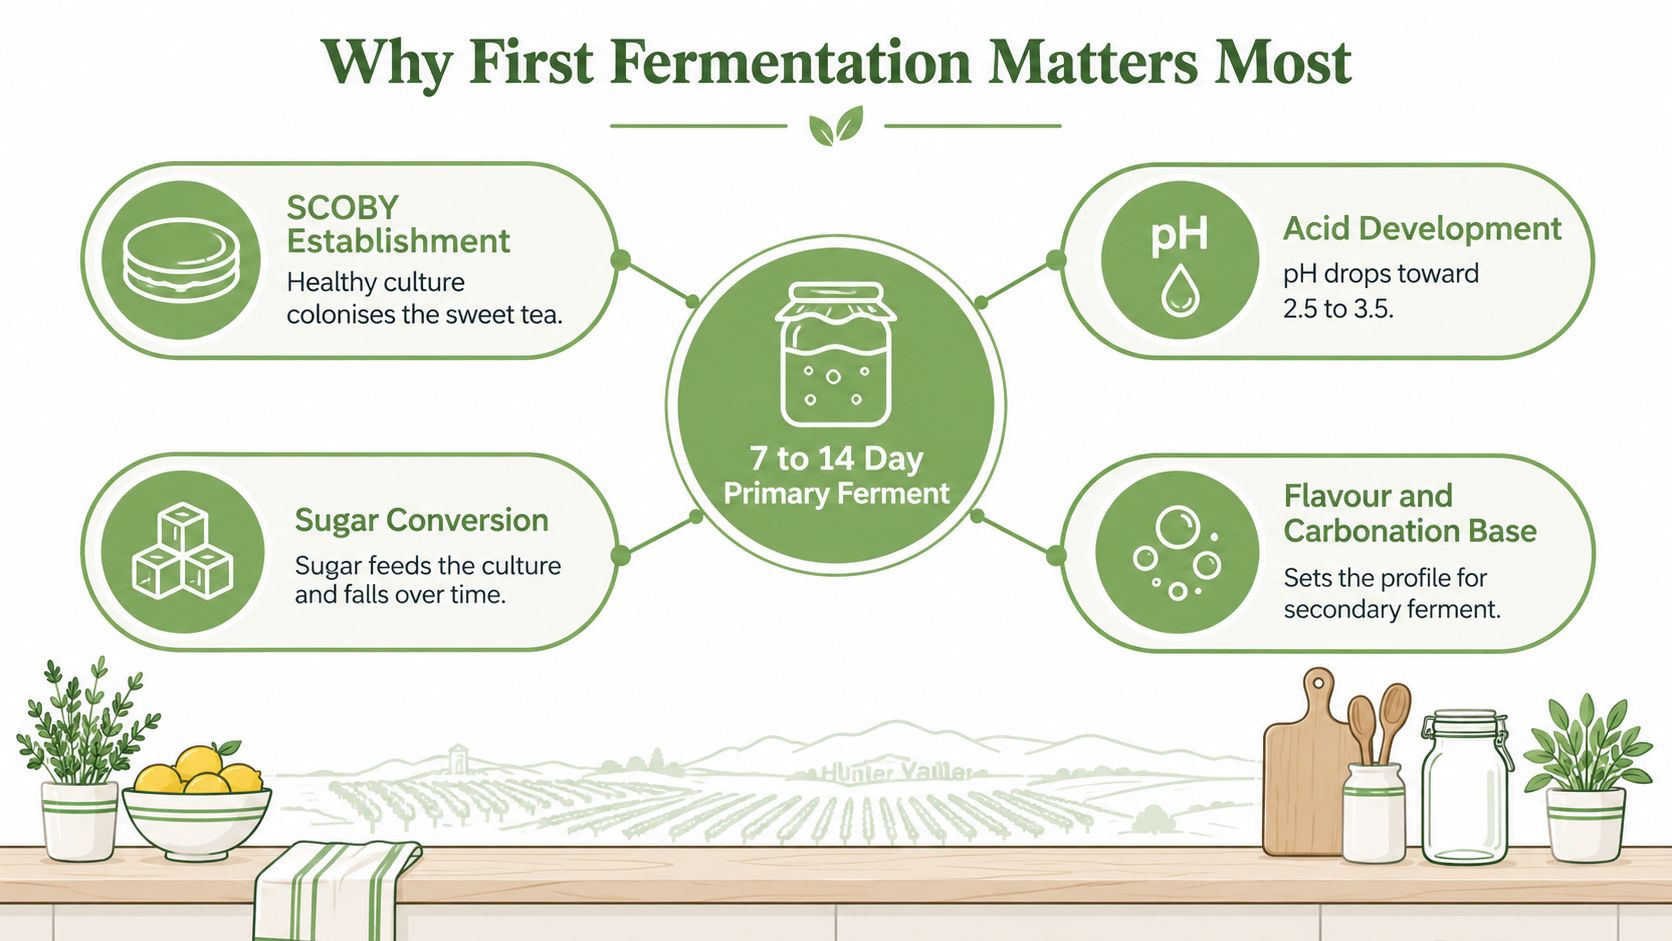
Four outcomes depend on this stage:
- Culture establishment: Yeast and bacteria colonise the sweet tea and compete with unwanted organisms.
- Acid development: The brew needs to reach pH below 4.2, identified in Australian fermented-beverage guidance as a key safety milestone.
- Sugar conversion: As the culture consumes sugar, the liquid moves from sweet tea towards a tart fermented drink.
- Flavour foundation: Tea tannin, acidity, residual sweetness and fermentation aroma set the base for later flavouring.
The calendar cannot confirm that the batch is ready. Australian food-safety material advises reaching pH below 3.0 by day 7, with batches discarded if they have not reached that level by day 10, as reported in the Australian fermented beverages issues paper.
Practical rule: A bottle cannot repair a weak or poorly acidified first ferment. Measure the base brew before adding fruit, herbs or carbonation.
Room temperature changes the risk. A warm Hunter Valley room can accelerate fermentation, while a cold garage can leave the culture sluggish. Rushing creates a sweet, less protected base. Leaving it unchecked can produce vinegar-like sharpness and increase alcohol risk. Time, temperature and measurement should guide flavour decisions, not the calendar alone.
Preparing Sweet Tea and Adding the SCOBY
Start with clean, low-chlorine water if possible. Strong chlorine can interfere with the culture, so filtered water is a sensible choice when your tap water has a noticeable swimming-pool smell. Use a tea that can support fermentation, such as a plain black or green tea, rather than a blend containing oils or strongly aromatic additives.
For a practical Australian home batch, dissolve about 200 grams of sugar per 4 litres of tea. This ratio appears in the Australian kombucha brewing guidance, and the sugar isn't there only to sweeten the finished drink. It gives the yeast and bacteria the food they need to develop acidity and the flavour backbone of kombucha.
Cool the tea before inoculation
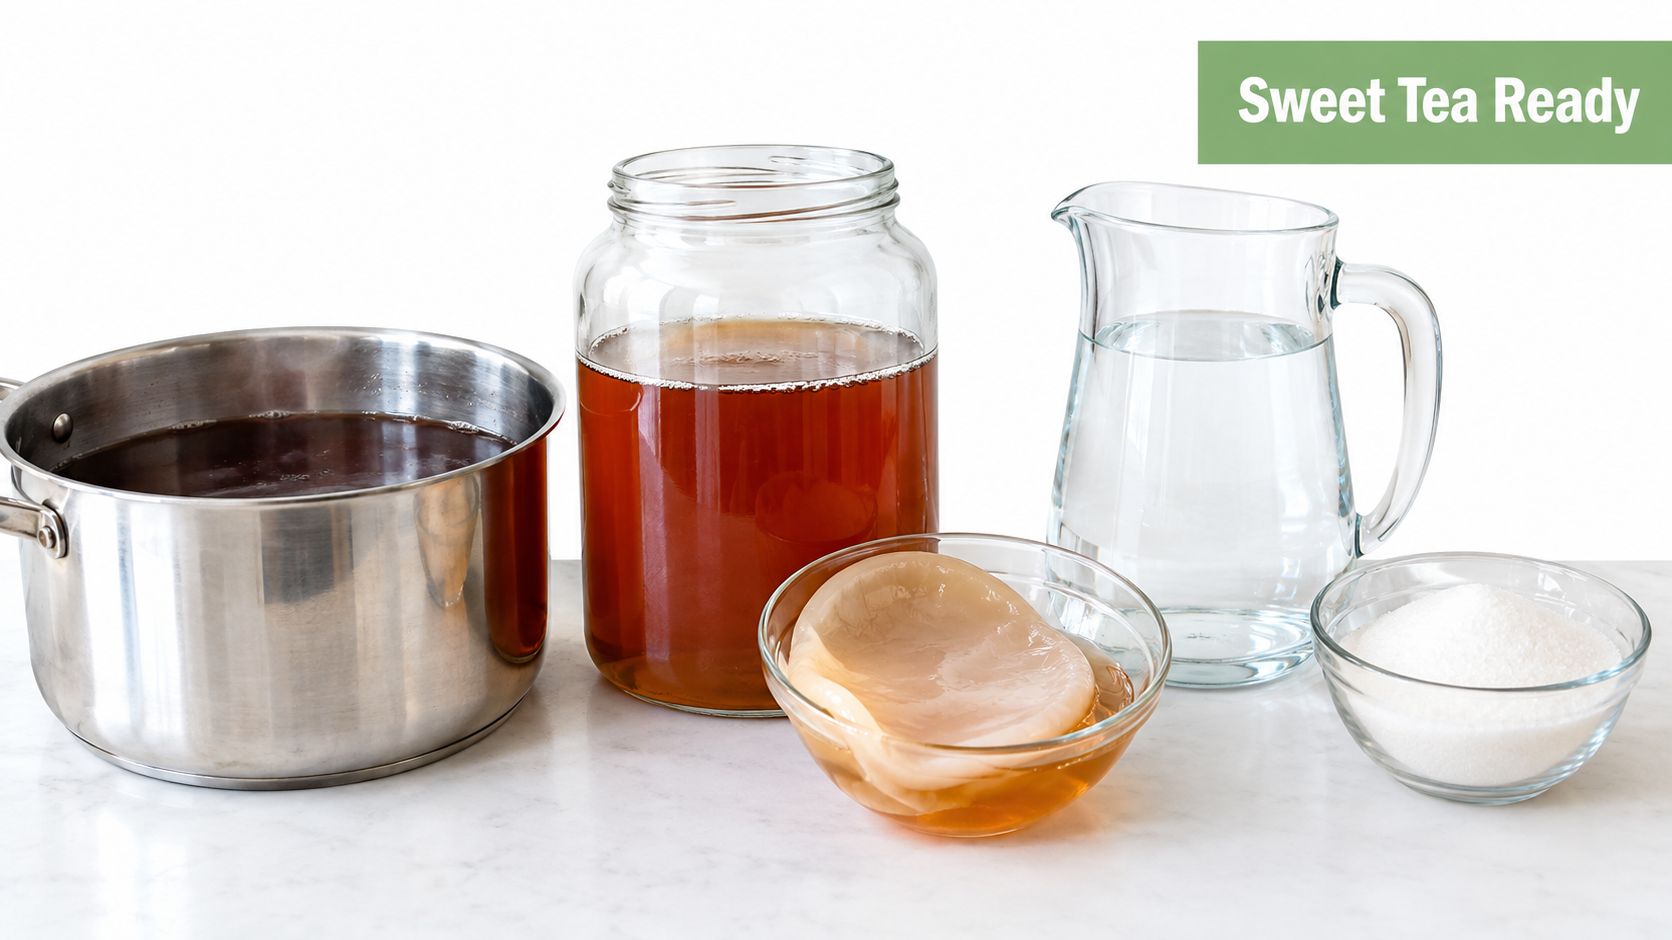
Brew the tea, dissolve the sugar completely and remove the tea leaves before transferring the liquid to the fermentation vessel. Don't add the SCOBY or starter liquid while the tea is hot. Australian guidance says the tea should cool from about 60°C to 20°C within 2 hours, with the SCOBY added immediately once the temperature is suitable, as described in official Australian fermentation controls.
For home brewing, the practical checkpoint is room temperature, below 30°C before the culture goes in. A clean thermometer is more dependable than placing a finger against the pot. If you're brewing a large volume, divide the tea into shallow food-safe containers so it cools promptly, then combine it once the temperature is right.
Choose a wide-mouth food-grade glass jar, stainless-steel vessel or suitable food-safe plastic container. Avoid reactive metals and damaged ceramics. The wide opening gives the aerobic culture useful access to air and makes it easier to inspect the surface without disturbing the brew.
Add a healthy SCOBY with plenty of mature, unflavoured starter liquid. The pellicle may be pale, brown, uneven or stringy, and those appearances alone don't tell you whether the culture is active. What matters is a clean fermented aroma, sound starter liquid and early acidification. Pour gently, then let the culture float, sink or sit at an angle without trying to force it into position.
For equipment and starter supplies, the Pep Tea kombucha tea kit is one Australian option to consider. Cover the jar with a tightly secured breathable cotton cloth. It needs airflow, but the cover must keep out dust and the fruit flies that become a real nuisance during warm Australian weather.
The first ferment needs protection from contamination, not an airtight seal. Keep the vessel clean, labelled and easy to monitor.
Running the Ferment at the Right Temperature
In a Hunter Valley summer, a jar can move from balanced to sharply sour before you expect it. In winter, the same recipe may acidify slowly. Temperature controls the culture's pace, so treat the first ferment as a food-safety control exercise before adjusting it for flavour. I find 22°C to 28°C practical for a balanced brew, while broader room-temperature conditions and a SCOBY addition around 22°C to 30°C are also described in Australian fermentation research.
Keep the jar away from direct sun, ovens, hot-water systems and cold draughts. A stable shelf is safer than a windowsill, where daily temperature swings can be considerable. Gentle environmental warming may help in a cool room, but never place the vessel directly on a hot surface or push the brew beyond its workable range. The practical relationship between heat and microbial activity is explained in this overview of how temperature affects bacterial growth.
A warm batch can acidify quickly. A cool batch may take longer, so record room temperature rather than extending fermentation blindly.
What you should see and smell
Early changes can look untidy. Brown yeast strands may form, sediment may collect, and a thin surface film or uneven pellicle may develop. These observations help you follow the batch, but only pH testing confirms whether acidification is progressing safely.
| Day | Visual cues | Aroma and taste | Target pH |
|---|---|---|---|
| 2 | Yeast strands or sediment may appear | Sweet tea with a light fermented aroma | Confirm an early downward trend |
| 4 | Surface film or pellicle may begin developing | A mild acidic edge starts to appear | Check that acidification is progressing |
| 7 | Culture looks more established | Sweetness has receded and tartness is clearer | Australian guidance uses pH ≤4.2 as a key control point, with some advice aiming below 3.0 |
| 10 | Pellicle may be thicker and uneven | More pronounced acidity, possibly vinegar-like | Discard if the stricter day-10 pH endpoint hasn't been reached |
| 12 to 14 | Mature, settled surface | Stronger sourness and reduced sweetness | Judge with pH, aroma and taste together |
Taste a small sample with a clean utensil. Repeated dipping introduces contamination and makes the jar harder to manage. Once tartness is clear, check more often and stop the first ferment before the flavour overshoots your preference.
A cold winter batch should not be left indefinitely. Log the room temperature, inspect the vessel and confirm that pH is moving in the right direction. If acidification stalls, assess the batch against your discard criteria rather than assuming extra time will correct it.
Reading Acidity, pH and Carbonation Cues
A finished first ferment has a different character from the sweet tea you started with. The sweetness softens, acidity becomes obvious, and the aroma moves from brewed tea towards a clean tart fermentation note. A gentle hiss can indicate dissolved carbon dioxide, but carbonation is not the completion test.
Use a calibrated digital pH meter and take a small sample from the liquid, not from the pellicle. Rinse the probe between batches and calibrate it according to the instrument manufacturer's directions. Cheap strips can be difficult to read in a dark, strongly coloured tea, so they're better treated as a rough warning tool than as your only control.
The Pep Tea digital pH meter is one example of the kind of instrument a home brewer or café can use to make the endpoint less subjective. The useful habit is to log readings alongside temperature, aroma and taste rather than relying on a single number taken at the end.
What Australian samples tell you
Australian scientific testing gives a useful reality check. A study of six Australian-origin kombucha samples recorded pH values from 3.21 ± 0.01 to 3.90 ± 0.01, including two products at 3.54 ± 0.01 and 3.40 ± 0.01, with every sample below the widely used safety threshold of 4.6 (Australian kombucha sample data).
Those figures aren't a universal recipe or a permission to ignore your own batch. They show that properly fermented products are strongly acidic, while Australian guidance still uses its own process controls and endpoints. A reading below 4.2 is a critical milestone in official guidance, and some Australian advice sets a stricter target below 3.0 by day 7, as noted earlier.
The following table is a practical planning tool, not a substitute for measuring. The exact days and carbonation will vary with culture health, sugar availability, vessel shape and handling.
| Temperature range | Typical days to pH 3.3 | Taste profile | CO₂ level at day 7 |
|---|---|---|---|
| Below 18°C | May be delayed or stalled | Sweet, tea-forward and under-acidified | Usually low |
| 18°C to 22°C | Longer first ferment | Mild tartness with noticeable tea character | Developing |
| 22°C to 28°C | Often the most active working range | Balanced tartness and reduced sweetness | Noticeable but variable |
| 28°C to 30°C | Can move quickly | Sharper acidity and faster flavour change | More active but unpredictable |
Don't use a hypothetical temperature-to-day calculation as a release decision. A warm brew can acidify faster, but the same speed can make the flavour run past your target before you notice.
If you have no meter, acidity can be assessed more crudely with titration-style testing using sodium hydroxide drops, but that approach requires the correct food-testing materials, concentration and method. It shouldn't replace a calibrated meter in a café or commercial setting.
Alcohol also complicates the picture. Once the culture has consumed much of the available sugar, falling sweetness doesn't guarantee that alcohol formation has stopped. That is why a tart taste and a low pH are useful but incomplete indicators of compliance.
Food Safety, Alcohol Risk and Common Failures
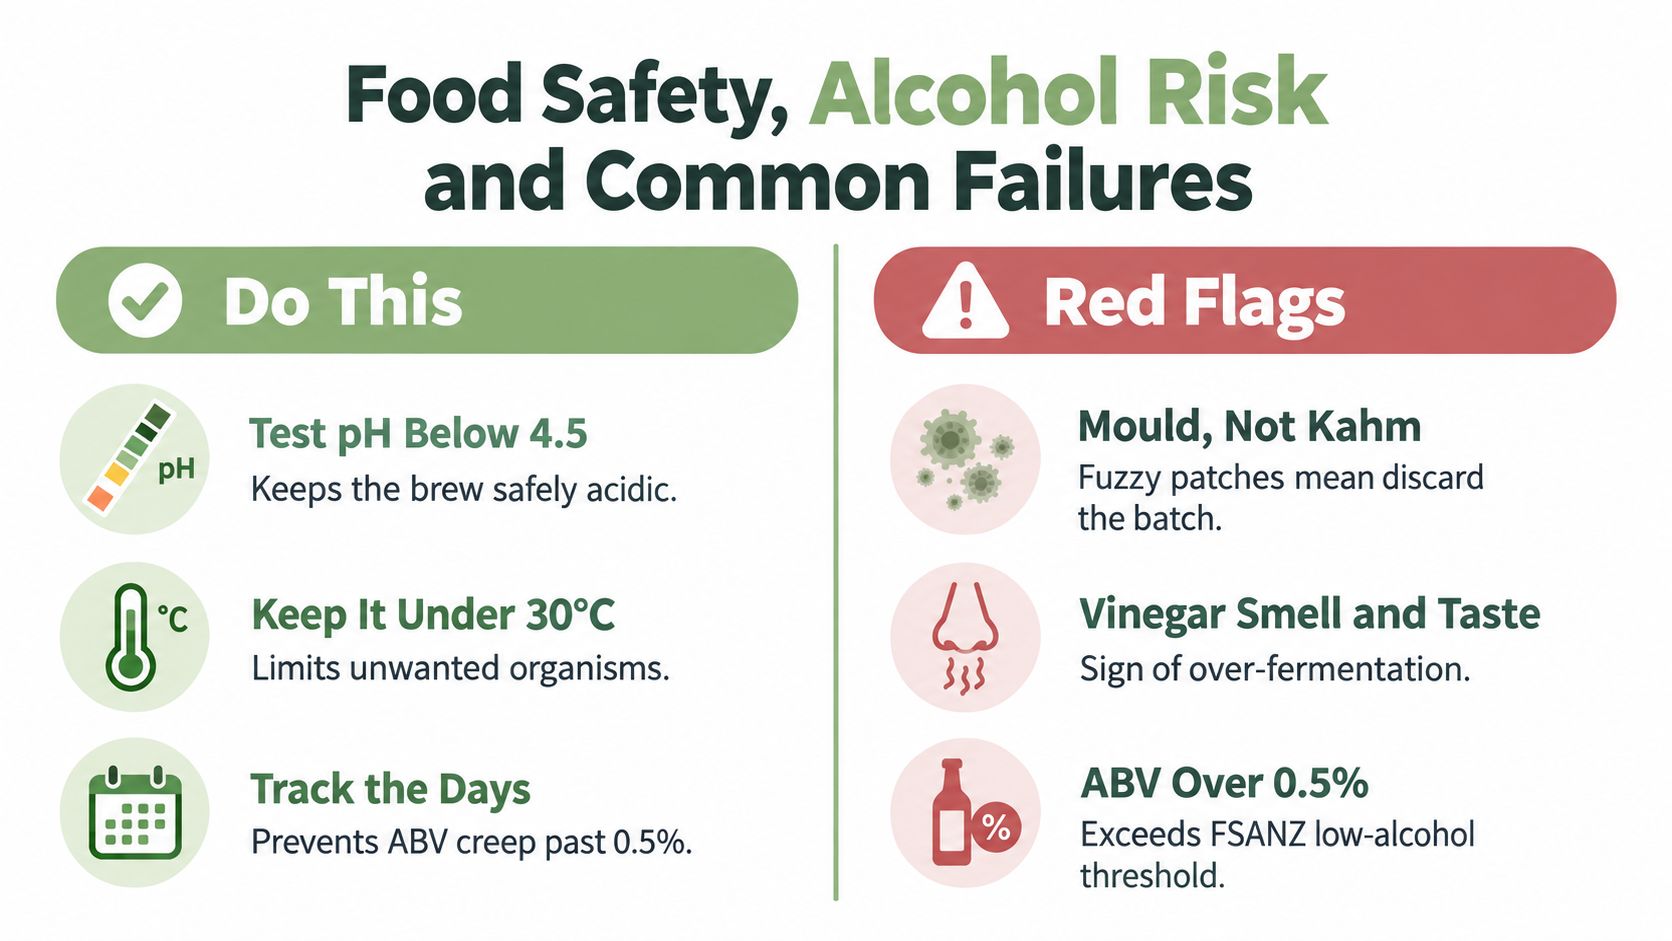
“Leave it for ten days and taste it” is not a food-safety plan. Australian guidance treats kombucha as a time- and temperature-sensitive aerobic process, with pH monitoring as the critical control point and pH ≤4.2 used as a key safety threshold (Australian food-safety guidance).
Australia also has an alcohol issue that casual home-brewing advice often skips. Testing reported in Australian retail fermented soft drinks found that, among 132 kombucha samples, almost 65% contained more than 0.5% alcohol, and more than 22% were above 1.15% ABV (Australian reporting on kombucha alcohol).
Queensland guidance says beverages containing 0.5% alcohol by volume or more require an alcohol-content declaration under Standard 2.7.1 of the Food Standards Code (Queensland fermented-food guidance). For cafés and retailers, “non-alcoholic” positioning can't rely on intention. Fermentation time, temperature, storage and secondary bottle fermentation can all affect the result.
Red flags mean discard
Discard the entire batch if you see fuzzy mould, especially coloured or raised patches, or smell something putrid, rotten or distinctly unlike clean fermentation. A smooth pellicle, yeast sediment and harmless surface variation can look odd, but fuzzy growth isn't a sign to skim and continue.
Other common failure patterns include:
- Stalled acidification: Chlorinated water, a weak starter or a cold room can leave the culture slow. Check the pH trend, temperature and starter quality rather than adding random ingredients.
- Over-fermented vinegar character: Excessive time or warmth can push the flavour towards harsh vinegar. Stop earlier next time, but don't dilute a questionable batch and present it as safe.
- Poor culture performance: Non-standard starters and “back-slopping” can reduce consistency and increase contamination risk. Australian food-safety sources recommend clean glass or food-grade plastic and warn against relying on unverified starter material.
- Alcohol creep: Longer fermentation and warmer conditions can raise alcohol formation. Keep a written batch record and arrange appropriate alcohol testing if you sell or serve the drink.
The first fermentation is also different from secondary bottle fermentation. Once the brew is sealed with flavouring, carbon dioxide and alcohol can continue changing during processing and storage. That makes careful first-ferment control necessary, but it doesn't make the first-ferment reading a guaranteed final ABV result.
For a cautious starting point, use the Pep Tea home-brew kombucha guide alongside your own pH and temperature records. If a batch doesn't meet the relevant endpoint, smells wrong or shows mould, don't taste-test your way to reassurance.
Your Australian First Ferment Checklist and Next Steps
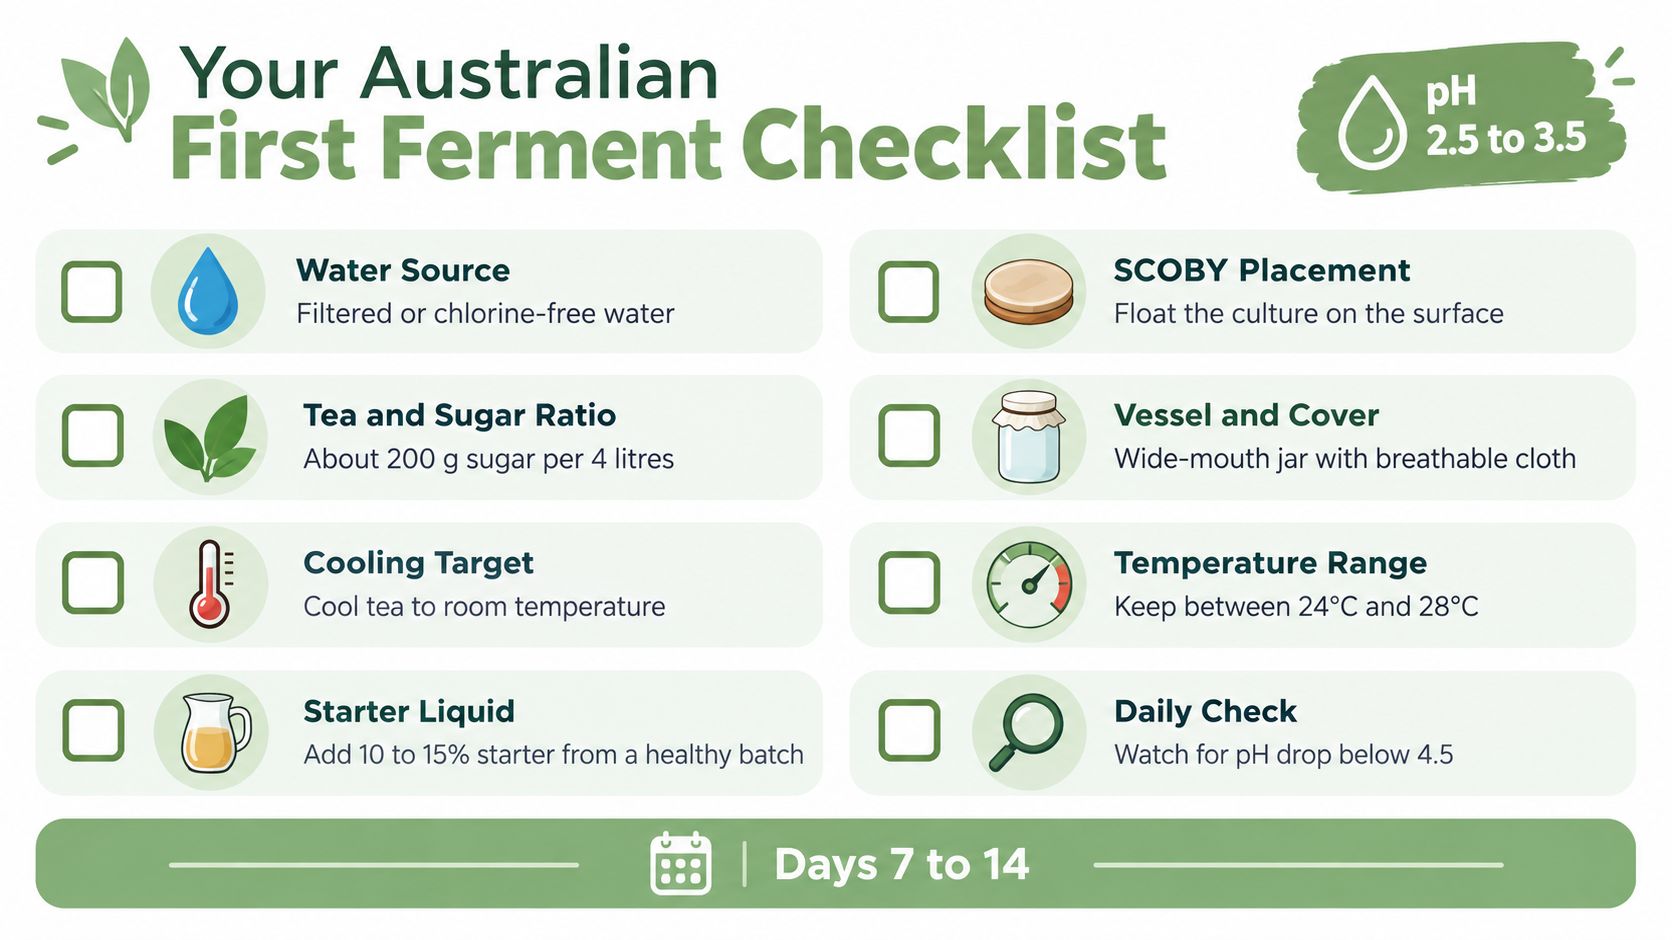
Print this checklist, photograph it and keep it above the brew bench. It turns kombucha first fermentation from a loose kitchen routine into a repeatable process that a household or café team can follow.
Setup
- Water source: Use filtered or chlorine-free water where practical.
- Tea and sugar: Work from about 200 grams of sugar per 4 litres, using a suitable plain tea.
- Cooling target: Cool the tea to room temperature, and add the culture below 30°C.
- Vessel: Choose clean glass, stainless steel or food-safe plastic. Avoid reactive metals and damaged ceramics.
- Starter liquid: Use a healthy, unflavoured starter from a reliable batch.
- SCOBY handling: Add the culture gently and allow it to remain exposed to air.
- Cover: Secure breathable cotton over a wide-mouth vessel so air can enter while insects stay out.
Active ferment
- Temperature: Keep the vessel stable, preferably within the practical 22°C to 28°C working range.
- Position: Store it away from sunlight, heaters, ovens and cold draughts.
- Daily log: Record room temperature, appearance, aroma and taste.
- pH checks: Monitor early acidification rather than waiting until the final day.
- Day window: Treat 7 to 10 days as an Australian process benchmark, not an automatic finish time.
- Discard rule: Follow the applicable Australian endpoint, including stricter guidance that calls for pH below 3.0 by day 7 and discarding a batch that hasn't reached that level by day 10.
Pre-bottling gate
Before you flavour or seal the brew, confirm that the pH is safely acidic, the aroma is clean, no mould is present and the taste suits your intended product. Remember that carbonation and alcohol can continue changing after bottling, so cafés and retailers need a broader verification process than a home brewer serving a small batch immediately.
Choose a batch system if you want clear start and finish dates and easier comparisons between recipes. A continuous-brew setup can reduce handling between batches, but it still needs disciplined cleaning, pH records and a reliable culture. For the next brew, record the starting tea, sugar, starter, room temperature and endpoint so you can adjust one variable at a time.
Pep Tea offers Australian-brewed sugar-free organic kombucha from the Hunter Valley, NSW, as well as organic tea products for people who want a professionally controlled option while learning what a sound first fermentation should deliver. Visit Pep Tea to explore the kombucha range, brewing resources and wholesale options for cafés and hospitality venues.
How to Restart a Stuck Fermentation at Home
You lift the lid expecting movement and find a quiet surface. The airlock has stopped, the kombucha culture is sitting still, or the hydrometer has delivered the same reading for days. That silence doesn't automatically mean the batch is lost, but it does mean you should stop guessing.
The practical approach to how to restart a stuck fermentation begins with diagnosis, not another handful of yeast. Australian wine-industry guidance places particular emphasis on prompt action, controlled temperature, oxygen management and gradual re-inoculation, while kombucha makers need an added safety check because a stalled, low-acid beverage can become a food-safety concern. The methods below connect those principles for home brewers, with clear limits on when rescue is sensible and when discarding is the better decision.
When Your Ferment Goes Quiet
The first reaction is usually hopeful denial. You move the fermenter, check the airlock seal, or wait for the SCOBY to shift. In wine, you take another hydrometer reading. In kombucha, you look for a new pellicle and wonder whether the culture is merely taking a rest.
Sometimes it is. A loose lid or imperfect airlock can hide active fermentation, and a surface culture can work without dramatic movement. The decisive clue is a flat gravity reading, supported by temperature, aroma and pH observations. A quiet airlock alone isn't proof of a stuck ferment.
The cost of waiting
A stalled batch still contains fermentable material. Residual sugar in a warm vessel can support unwanted microbial activity, particularly when the culture has weakened and protective acidity or alcohol hasn't developed as intended. That doesn't mean every quiet batch is spoiled, but it does mean the vessel shouldn't be left unattended while you hope for a recovery.
Australian guidance from the Australian Wine Research Institute advises that problematic ferments shouldn't be left to resolve by themselves. Its rescue approach keeps the ferment under controlled conditions and uses a staged culture acclimatisation process rather than shocking fresh yeast with the entire difficult environment at once.
Practical rule: Diagnose promptly, then make one controlled change at a time. Random warming, aeration and repeated yeast additions make the original problem harder to identify.
For wine, the payoff of quick action is a cleaner restart with less oxidation and less time for spoilage organisms to establish themselves. For kombucha, the payoff is different. You may decide that the batch isn't suitable for rescue, especially if the pH hasn't reached a sufficiently acidic level or the aroma has moved beyond a clean tart profile.
A stuck fermentation is an inflection point, not a verdict. The brewers who rescue the most batches don't rely on bubbling as their only signal. They measure, smell carefully, protect the liquid from unnecessary oxygen and choose an intervention that matches the cause.
Reading the Signs of a Stuck Fermentation
Before adding nutrient or pitching a rescue culture, establish whether fermentation has stopped. Use three checks in order: sensory condition, gravity movement and acidity.
Start with the sensory read
Open the vessel only as much as necessary. A healthy ferment may smell fruity, yeasty, tart or grain-like, depending on the beverage. A sharp vinegar character, solvent-like aroma, persistent sulphur, rotten-egg notes or a harsh chemical smell points towards stress or contamination rather than a simple temperature-related pause.
Look at the surface and sediment. A settled SCOBY with no fresh pellicle development can support the suspicion of inactivity, but it doesn't prove failure. Ropey or stringy texture, visible mould, unusual colours or a surface that looks dry and contaminated should move the batch towards discard rather than experimentation.
Measure movement, not bubbles
Take a hydrometer reading using a sanitised sample, record the temperature, and repeat the reading after enough time has passed to show whether the liquid is moving. A flat line across 48 to 72 hours is the useful warning interval described in fermentation troubleshooting guidance from Precision Fermentation. Bubbling can stop because of a seal problem, but gravity tells you whether sugar conversion is continuing.
A refractometer can help with quick checks, though alcohol affects its reading. Use a hydrometer for the clearest home decision when alcohol is already present.
Check pH before you intervene
The supplied home-brewing ranges commonly used for diagnosis are:
- Kombucha: approximately 2.5 to 3.5
- Wine: approximately 3.0 to 3.8
- Beer: approximately 4.0 to 4.5
Treat these as practical comparison ranges, not universal guarantees. The key Australian food-safety point is that fermented beverages need to reach pH ≤ 4.2 to meet the cited safety requirement discussed by Food Regulation Australia New Zealand. A batch above that level after stalling deserves caution, not an automatic warm restart.
| Ferment Type | Healthy Gravity Drop | Stuck Threshold | Safe pH Window | Warning Signs |
|---|---|---|---|---|
| Kombucha | A downward trend with active acidity development | No meaningful gravity movement over the monitoring period | Approximately 2.5 to 3.5, with pH ≤ 4.2 a key safety requirement | Mould, ropey texture, vinegar, solvent or rotten aromas |
| Wine | A continuing downward hydrometer trend | A flat reading across 48 to 72 hours | Approximately 3.0 to 3.8 | Sulphur, solvent, vinegar, oxidation or unusual surface growth |
| Beer | A continuing gravity decline during active fermentation | A flat reading across 48 to 72 hours | Approximately 4.0 to 4.5 | Harsh acidity, solvent character, contamination or stalled krausen |
Why Fermentations Stall in the First Place
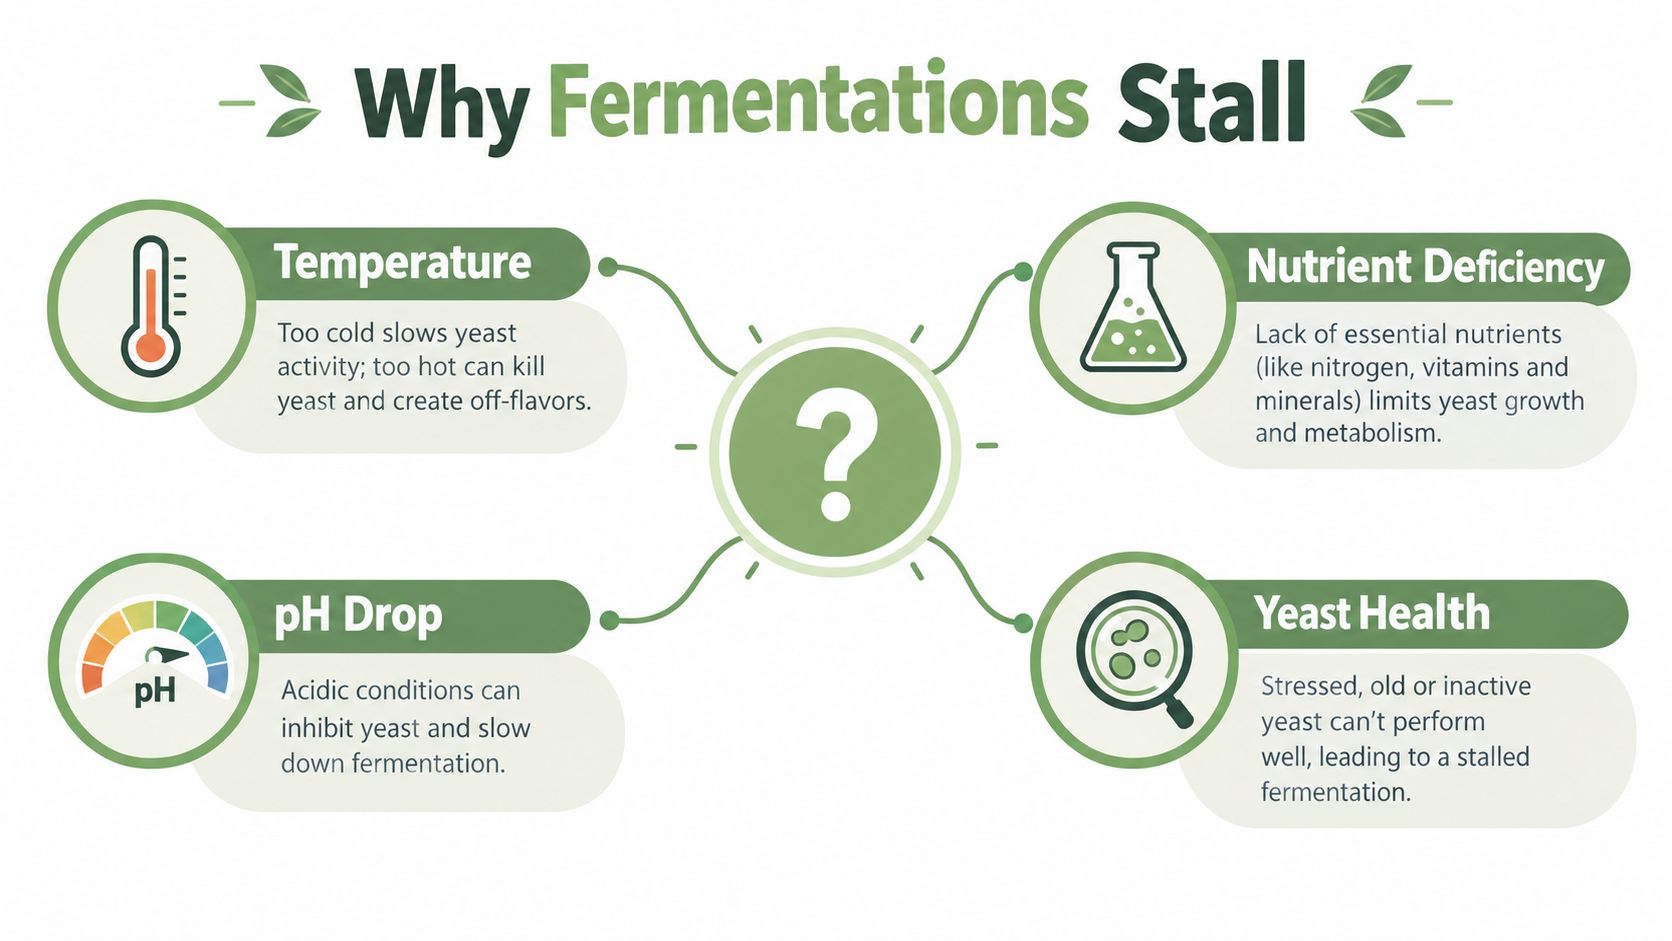
Every stalled ferment leaves a fingerprint. Temperature problems look different from nutrient exhaustion, and a weak culture behaves differently from bacterial competition. Identify that fingerprint before choosing the fix.
Temperature stress
Yeast work within a tolerance range. A sudden cold spell can make cells dormant, while excessive heat can damage viability or drive harsh flavours. In a cool, clean-smelling ferment with low turbidity and no obvious contamination, gentle warming may be enough to bring the existing population back into suspension.
Australian wine rescue guidance is more specific than the usual “warm it up” advice. It recommends bringing a stuck or sluggish bulk ferment to about 18 to 22°C, keeping it off ullage and protecting it with inert gas to reduce oxidation risk. For problematic ferments, the AWRI wine fermentation resources emphasise rapid management and controlled conditions rather than passive waiting.
Nutrient limitation
Yeast need more than sugar. A nutrient-poor must, wort or tea base can support an energetic start and then fail to sustain the culture. The pattern often includes strong early activity followed by a sharp slowdown, with the aroma remaining relatively clean while gravity stays high.
Nutrient additions aren't a universal cure. Adding more nutrient to a contaminated or excessively acidic batch can feed competing organisms as readily as it supports yeast. Use your measurements and the beverage's stage to decide whether nutrition is the limiting factor.
Yeast health and pitch strength
Old wine yeast, poorly rehydrated dried yeast, an under-pitched culture or a tired kombucha SCOBY may not contain enough healthy cells to finish. Rapid flocculation can also remove yeast from suspension before the available sugar has been consumed.
For kombucha, the culture's age and handling history matter, but don't assume a SCOBY is automatically a rescue culture. If the liquid around it smells wrong or hasn't acidified safely, transferring the culture into a fresh batch can spread the problem.
Oxygen and microbial competition
Alcoholic fermentation needs careful oxygen management. Once fermentation is established, unnecessary splashing can encourage oxidation and expose the liquid to organisms that produce unwanted acidity. Kombucha is a mixed culture, so oxygen management differs from wine, but contamination and pH imbalance can still redirect the process.
Brewers working with living cultures can also benefit from general colonisation troubleshooting principles, particularly around environment, contamination control and culture vitality. The Colorado Cultures colonization tips are written for a different fermentation context, but the diagnostic habit is useful: inspect the conditions before blaming the culture.
For basic kombucha culture preparation and handling, follow the practical steps in this kombucha SCOBY guide. The central lesson is simple. Temperature, nutrition, acidity, oxygen and culture health interact, so a single symptom rarely identifies the cause on its own.
A Stepwise Restart That Respects the Yeast
A rescue culture enters a hostile environment. The stuck liquid may contain alcohol, depleted nutrients, high osmotic pressure or an unfriendly pH. Dumping a small amount of fresh yeast straight into that liquid often fails because the new cells experience the full stress immediately.
Australian AWRI-linked procedures use stepwise acclimatisation. The starter begins in a friendlier medium, then receives portions of the stuck wine only after its sugar has dropped by half. That gradual exposure lets yeast adapt to alcohol stress instead of facing a sudden full-volume repitch.
Prepare before pitching
Rouse gently. Mix the vessel carefully to lift settled yeast without aggressive splashing. In an alcoholic ferment, protect against oxidation rather than treating aeration as a default remedy.
Record baseline conditions. Measure gravity, pH and temperature. Work out how far the batch is from its intended finish, but don't use a gravity figure alone to justify a restart.
Set the temperature. AWRI guidance places rescue conditions around 20 to 22°C, while an Australian restart protocol specifies 20 to 24°C during the restart phase. A separate Lallemand procedure uses a starter mixture at 25 to 30°C, then requires tighter control as the culture is introduced to the wine.
Prepare a healthy starter. Use a selected, alcohol-tolerant rescue yeast. The detailed Lallemand restart procedure specifies hydration in 40 to 43°C water with GoFerm Protect Evolution at 30 g/hL, followed by 50 g/hL Uvaferm 43 Restart. Follow the product label and winery protocol rather than improvising equivalent quantities.
Acclimatise in stages. Add a small portion of stuck wine to the active starter. Wait until the starter's sugar has dropped by half, then add another portion. Repeat until the culture can handle the full batch. The AWRI-linked Australian guidance also specifies 25 g/hL of Nutrient Vit END before each restart batch, with only the final batch allowed to finish to dryness.
Keep the transition gentle
Don't create a sharp temperature shock. The Lallemand procedure advises that the wine temperature shouldn't change by more than 10°C during inoculation and recommends maintaining free SO2 near 7 to 8 ppm before restarting. Those details matter because a vigorous-looking starter can still collapse when it enters a chemically stressful wine.
For small home batches, the important principle is the sequence rather than pretending that a winery protocol can be copied without adjustment. Work with clean equipment, use measured additions, keep the starter active and add the difficult liquid progressively. Avoid adding extra fermentable sugar to force activity unless your recipe and nutrient plan specifically require it.
Monitor the restart
Check the starter and main vessel at regular intervals for:
- Temperature: Is it staying inside the chosen restart range?
- Gravity: Has the reading begun to move?
- Aroma: Is the clean ferment character returning, or is volatile acidity increasing?
- Surface activity: Are you seeing renewed foam, bubbles or culture development appropriate to the beverage?
- pH: Is acidity moving in a safe and expected direction?
- Oxidation: Has unnecessary headspace exposure or splashing changed colour or aroma?
The Carbon 6 Brewing fermentation blog provides useful background on observing fermentation as a process rather than relying on a single visual sign. If the starter never becomes active, stop escalating. Repeatedly pitching into an unsuitable batch doesn't make the environment more hospitable.
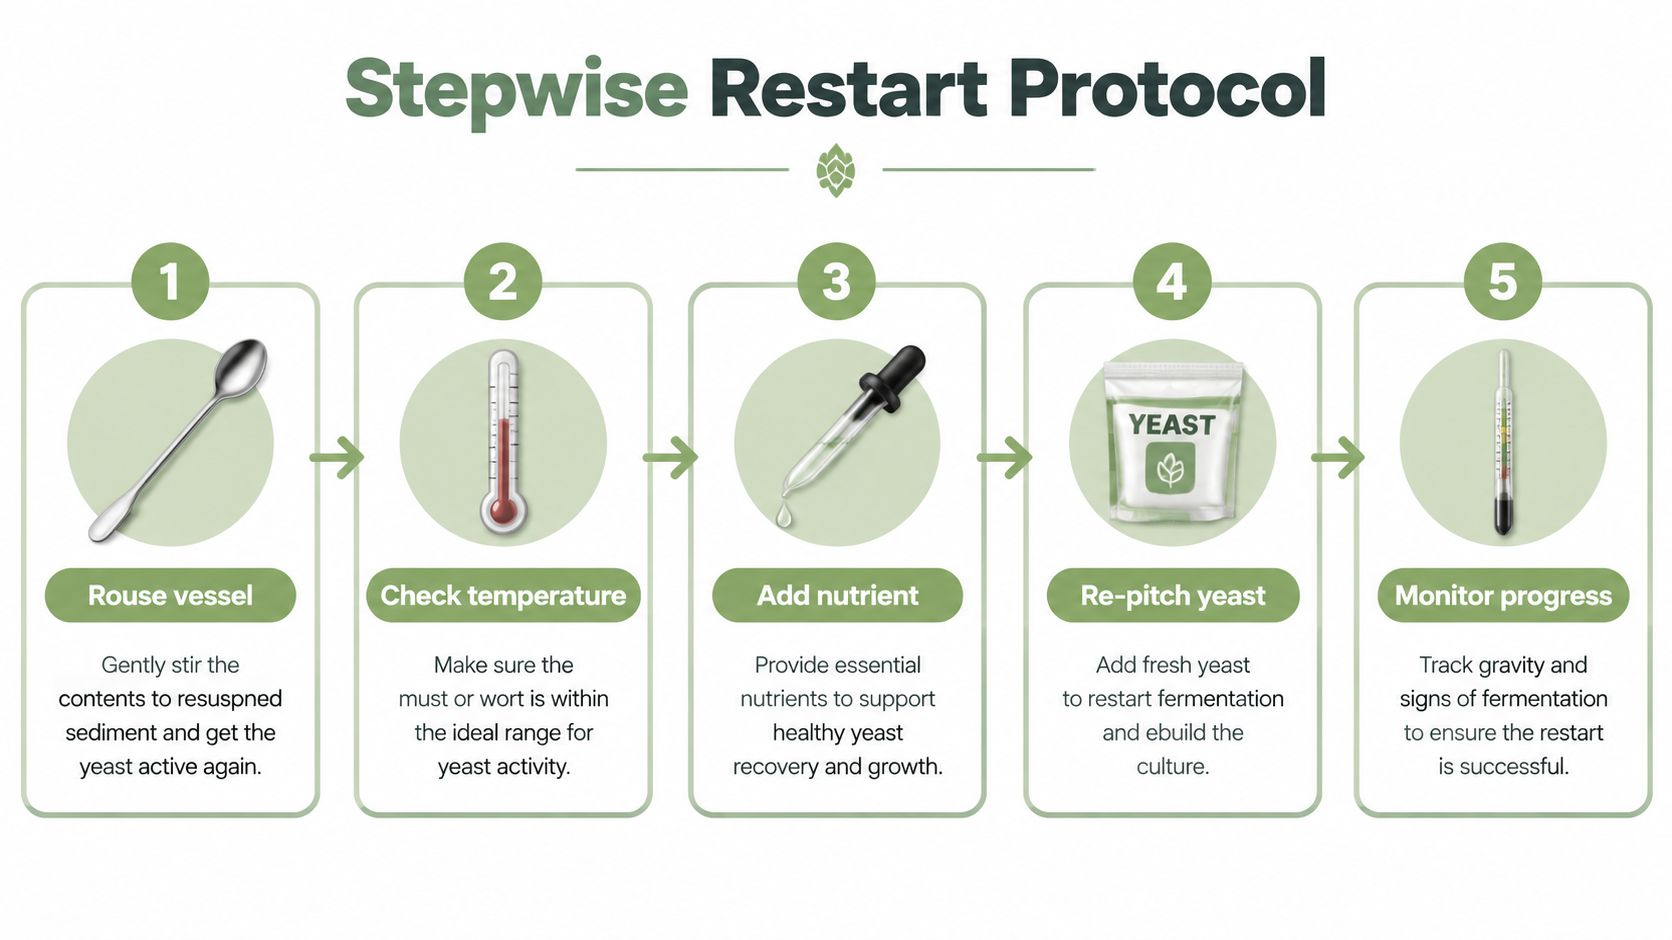
The following video provides a visual companion to the restart sequence.
Matching the Fix to the Cause
The best intervention is usually the least disruptive one that addresses the measured cause. A clean ferment that became quiet after a cold change doesn't need the same treatment as an acidic kombucha batch with bacterial competition.
Use the signal to choose the first move
| Likely Cause | Diagnostic Signal | Best Fix |
|---|---|---|
| Cold temperature | Clean aroma, low activity and a temperature below the culture's working range | Warm gradually and rouse gently |
| Nutrient deficiency | Strong early activity, then a stall with a relatively clean aroma and remaining fermentable material | Add a suitable complete nutrient only after checking pH and contamination |
| Oxygen starvation or poor yeast suspension | Yeast has settled, gravity is flat and the ferment looks unusually clear | Gentle rousing, with oxygen exposure kept appropriate to the beverage |
| Unhealthy yeast | Fresh temperature and nutrient conditions produce no renewed activity | Prepare and acclimatise a fresh rescue culture |
| Bacterial dominance or pH imbalance | Vinegar, solvent, harsh acidity, ropey texture or abnormal surface growth | Don't treat as a routine yeast restart. Assess safety and discard when indicated |
Temperature is the easiest fix to overuse. A sluggish ferment at a low temperature can respond well to controlled warming, but warming a high-pH batch with a suspicious aroma may just make bacterial activity more vigorous.
Nutrient addition also requires restraint. Australian restart guidance recommends a dedicated rescue process when the simple starter option isn't appropriate. Its technical thresholds distinguish a ferment with less than 10 g/L residual sugar and alcohol below 12% v/v, where active yeast or fresh yeast lees may be a first option, from a more difficult case requiring racking and a staged rescue culture. See the AWRI technical guidance for that severity-based logic.
Layer interventions in a sensible order
For a clean, cold batch, adjust temperature first and observe. If the reading remains flat, assess nutrition and yeast health before preparing a starter. If you need to repitch, use acclimatisation rather than a cold, full-volume dump.
Kombucha and sour beer require extra caution because mixed microbial communities can be affected by acidity and competing bacteria. Adding sugar may increase activity without improving the balance, while backsweetening only hides residual fermentables and can create renewed pressure in a sealed bottle. Dilution can lower intensity, but it doesn't make a contaminated batch safe.
The order matters. Measure, correct the environment, then introduce a compatible culture gradually. Combining every possible fix at once removes your ability to tell which variable helped and can worsen oxidation, contamination or over-pressurisation.
Safety Thresholds and When to Discard the Batch
“Just warm it up” is not a safety plan. It assumes the only problem is dormant yeast, but a stalled beverage can also have an unsuitable pH, microbial contamination or aromas that indicate chemical spoilage.
For fermented beverages, pH ≤ 4.2 is a key Australian safety requirement cited in the FSANZ fermented beverages outcomes paper. If kombucha remains above that level after several days of stalling, don't treat it as a normal restart candidate. Measure with a calibrated meter, consider the entire fermentation history and discard if the batch doesn't meet a safe, controlled process.
Discard rather than rescue when
- pH remains above 4.2 after the batch has stalled and the beverage has been held under conditions that could support unwanted growth.
- Mould is visible on the kombucha pellicle or liquid surface. Don't scoop it off and keep the remainder.
- Aromas stay strongly solvent-like, nail-polish-like, rotten, putrid or sharply volatile. These aren't signals to wait longer.
- The liquid shows ropey or stringy contamination, unexplained colours or an abnormal surface film.
- A high-gravity wine or mead remains nutrient-rich and suspect. A batch above 1.040 with signs of contamination shouldn't receive a warm repitch just because yeast can still ferment its sugar.
The last point involves trade-off. A clean, high-gravity ferment may be technically recoverable, but an unsafe or contaminated ferment becomes a better environment for spoilage when warmed. Re-inoculating a warm, high-pH, low-acid must can increase volatile acidity rather than restore a clean alcoholic ferment.
Discard rule: If the gravity is high, the pH is unsafe or the aroma is wrong, don't let the possibility of rescue override food safety.
Fermented beverages can also accumulate excess ethanol, which is one reason the Australian guidance treats safety and suitability as separate from a pleasing flavour. Kombucha makers shouldn't assume that “natural” or “live” means risk-free. When the evidence points to contamination, tipping out the batch protects the next one.
A reliable digital pH meter is more useful than judging acidity by taste. Calibrate and clean it according to the manufacturer's directions, and record readings alongside gravity and temperature.
Preventing the Next Stuck Fermentation
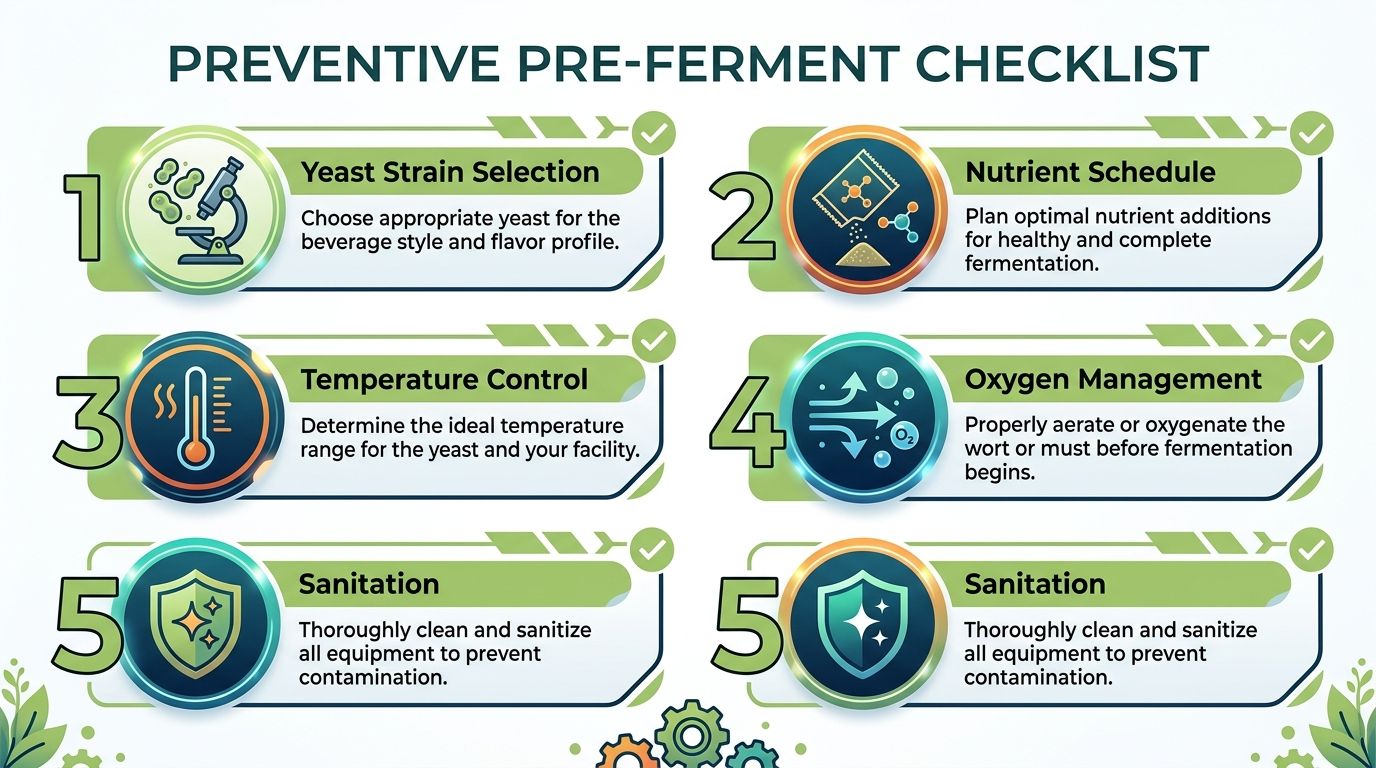
Prevention starts before the culture touches the liquid. Choose yeast suited to the expected alcohol level and temperature, prepare nutrients as part of the recipe rather than as an emergency measure, and sanitise every surface that contacts the ferment.
The Australian restart protocols make the value of planning clear. They use controlled temperatures around 20 to 24°C during restart, gradual acclimatisation and staged nutrient additions because yeast performance depends on its environment. Your normal fermentation plan should apply the same thinking before the batch stalls.
Build a repeatable log
Record the following for every batch:
- Culture choice: Note the yeast or SCOBY condition and the environment it will face.
- Starting measurements: Record gravity, pH and temperature before pitching.
- Nutrient schedule: Write down what you add and when, instead of relying on memory.
- Oxygen handling: Decide whether oxygen is appropriate at the beginning, then limit unnecessary exposure later.
- Early progress: During the first 48 hours, log temperature at two intervals, record gravity movement and inspect the cap, foam or pellicle.
The supplied prevention plan also identifies FAN above 100 ppm and dissolved oxygen at 8 to 10 ppm before pitching as useful control targets where the brewer has the equipment and process knowledge to measure them. These are not numbers to guess at with kitchen tools. If you can't measure them reliably, focus on consistent ingredients, sound sanitation and a documented nutrient plan.
Make the routine visible
Keep a one-page checklist inside the fermentation cabinet. Include sanitation, temperature windows, gravity checkpoints, pH checks and the point at which you stop attempting rescue. A written boundary prevents the common mistake of adding another intervention because the previous one didn't produce an immediate visual change.
For living cultures, the general discipline described in revitalising your living culture is transferable. Observe activity, feed with purpose and judge culture strength by performance rather than appearance alone.
For kombucha, use a clean vessel with enough headspace for the process, and keep your culture handling organised. A suitable fermenting glass jar makes it easier to inspect the surface, protect the batch from avoidable contamination and record what happens without repeatedly disturbing the ferment.
The durable lesson is simple: measure early, maintain stable conditions and treat a stall as a diagnostic event. A calm, staged response gives healthy yeast a chance. A questionable aroma, unsafe pH or visible mould deserves the bin, not another experiment.
Pep Tea offers Australian-brewed, sugar-free organic kombucha from the Hunter Valley, NSW, alongside premium organic Japanese Matcha for clean, everyday beverage routines. Visit Pep Tea to explore properly fermented kombucha, organic Matcha and practical products for brewing with confidence.
Home Brew Kombucha the Right Way

You're standing in the kitchen, watching a SCOBY drift through a glass jar and wondering whether that sharp, vinegary smell means the batch is working or heading for the sink. With home brew kombucha, both outcomes are possible. The difference usually comes down to sanitation, temperature, acidity, time and careful observation, not luck.
A SCOBY is a living culture, not a magic ingredient. Treat it like a small fermentation system, and you can produce a bright, tart drink with controlled sweetness and flavour. Treat it casually, and you can end up with mould, excessive pressure or alcohol content that isn't obvious from taste alone. This guide focuses on what works in Australian homes, including the safety details that many beginner recipes leave out.
Why Home Brew Kombucha Is Worth the Effort
The first successful batch often changes how you see fermentation. You begin with sweet tea, starter liquid and a rubbery culture. A week later, the tea has developed acidity, aroma and a completely different texture on the palate. The SCOBY hasn't performed a miracle. Yeasts and bacteria have transformed the liquid because you gave them a suitable environment.
That makes kombucha closer to bread baking or beer brewing than to a simple wellness ritual. You control the ingredients, provide the right conditions and make decisions based on the result. A two-litre batch can cost far less than buying individual boutique bottles, while the same process lets you adjust sugar, acidity, fizz and flavour to suit your household.
A healthy SCOBY can continue producing batches for a long time when you keep it supplied with suitable sweet tea and mature starter liquid. The practical trade-off is that fermentation needs space, stable room conditions and patience. Depending on your method, a batch may take seven to fourteen days before primary fermentation is ready for bottling, with additional time required for carbonation.
What you can control
Home brewing gives you useful levers:
- Sweetness: Stop primary fermentation earlier for a softer drink, or continue it for a drier, sharper profile.
- Carbonation: Use secondary fermentation, fruit or a measured sugar addition to build fizz.
- Flavour: Keep the base clean and add ginger, citrus, herbs or fruit after primary fermentation.
- Batch size: Start with a manageable jar before moving to continuous brewing.
The process also fits neatly into broader healthy-living routines. Kombucha isn't a substitute for a varied diet, and gut health depends on more than one drink, but readers looking at fermentation alongside fibre, hydration and daily food choices may find these fibre intake and gut health strategies useful.
Practical rule: Fermentation is observation plus adjustment. The calendar can guide you, but the jar, pH reading and taste tell you what to do.
Before buying a SCOBY, compare the practical differences between a homemade batch and a reliable packaged product in store-bought kombucha versus homemade. The comparison helps clarify whether home brewing suits your kitchen, schedule and tolerance for variable results.
Equipment and Ingredients You Actually Need
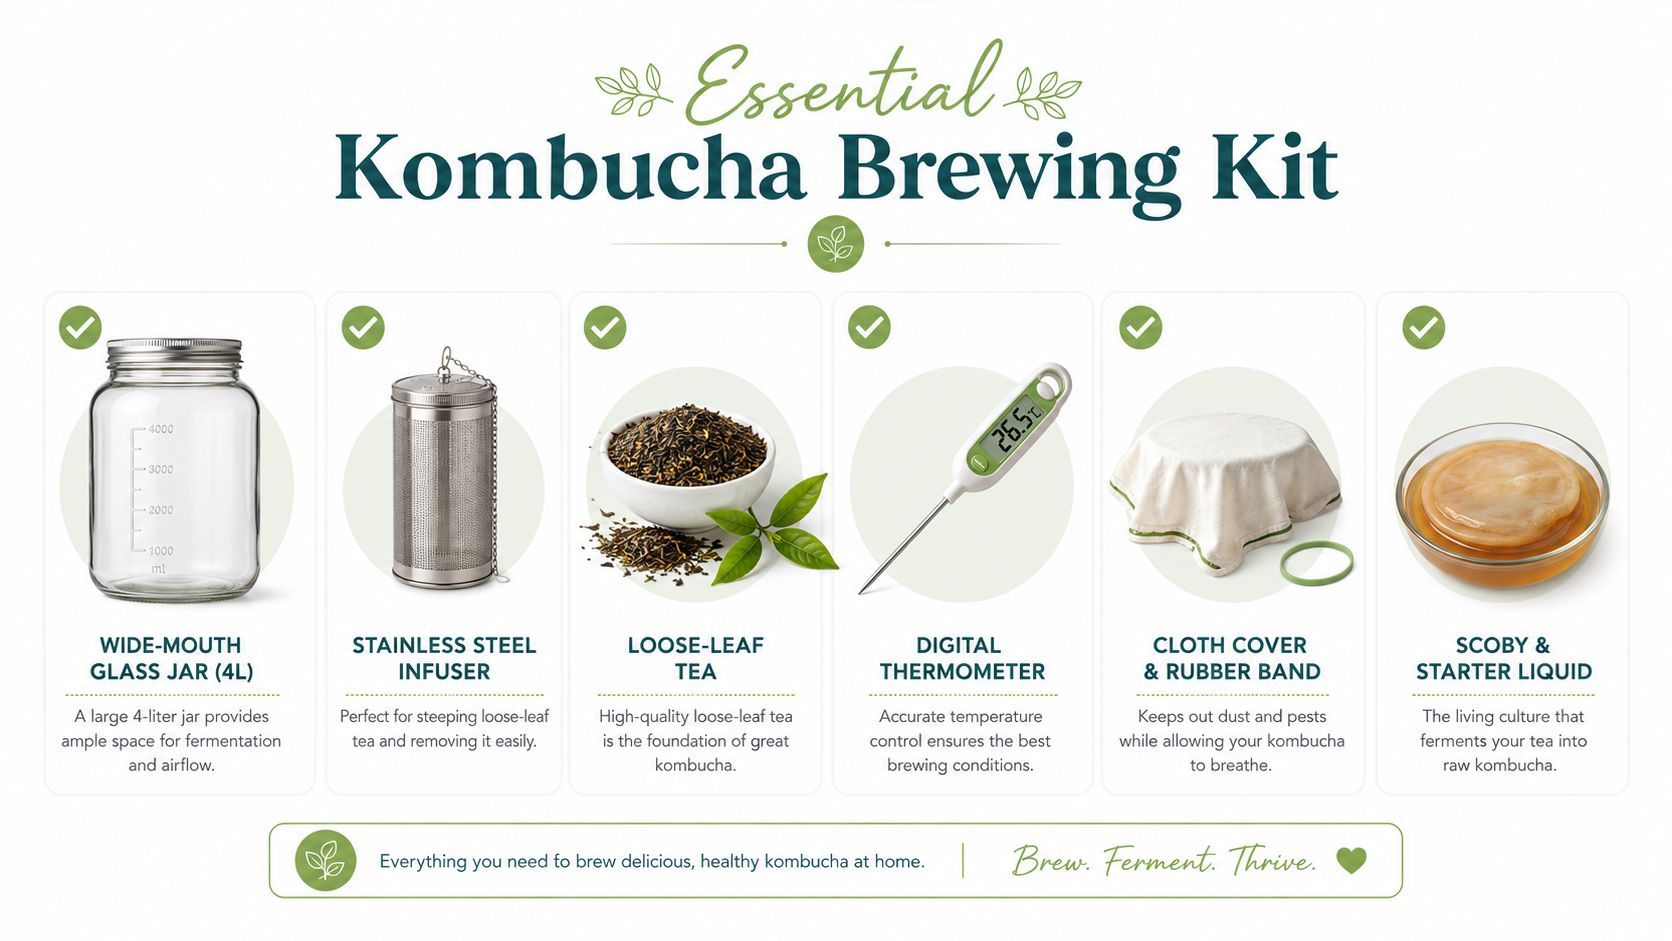
A successful home brew kombucha setup doesn't require a specialist laboratory, but the items you choose matter. Start with a wide-mouth glass brewing jar, ideally around four litres, because glass is non-reactive and the opening makes it easier to clean the walls and handle the culture. Food-grade stainless steel is also suitable. Avoid aluminium and other reactive metals, which can interact with acidic kombucha and affect the brew.
Australian food-safety guidance recommends food-grade glass or stainless steel, a covered vessel that allows gas to escape, and tea cooled to about 20 to 25°C within two hours before culture is added. The Food Safety Information Council's kombucha guidance is a useful reference to keep beside your brewing notes.
Build the kit around control
Use a tight-weave cloth, paper coffee filter or purpose-made fermenting lid secured with a rubber band. A loose kitchen towel can admit fruit flies and airborne debris, while a sealed lid during primary fermentation can trap gas. Keep a thermometer nearby, because guessing whether tea has cooled enough is an avoidable error.
A digital pH meter gives more precise readings when calibrated and maintained correctly. pH strips are cheaper and convenient, but their colour blocks can be difficult to read against dark tea. Add a long-handled stainless steel spoon, a fine mesh strainer, clean swing-top bottles or thick PET bottles, and a kitchen scale for repeatable sugar and flavour additions.
For tea, plain loose-leaf black tea is the dependable starting point. Tea bags work well too. Green tea can ferment successfully, but it tends to need gentler brewing temperatures and may produce a lighter, more delicate base. Avoid strongly perfumed teas and blends containing added oils until you understand how your culture responds.
Use ordinary cane sugar as the culture's food. Most sugar substitutes won't provide the same fermentable material, so a sugar-free final drink still begins with sugar in the brewing tea. Filtered water is preferable where tap water is heavily chlorinated, since chlorine can interfere with a living culture.
A SCOBY and starter liquid are not the same thing. The rubbery pellicle provides structure and microbial activity, while mature acidic kombucha helps lower the starting pH and establish the new batch. Source both from a brewer who can explain how the culture has been maintained, rather than accepting a dry pellicle with little or no starter liquid. Pep Tea's kombucha tea kit is one packaged option for people who want the core supplies together.
Making the Sweet Tea and Starting the Brew
The sweet tea and starter liquid should be treated as one connected sequence. Every stage affects the next one, so prepare the tea, dissolve the sugar, cool it properly and add the culture without leaving the mixture exposed unnecessarily.
Prepare the base
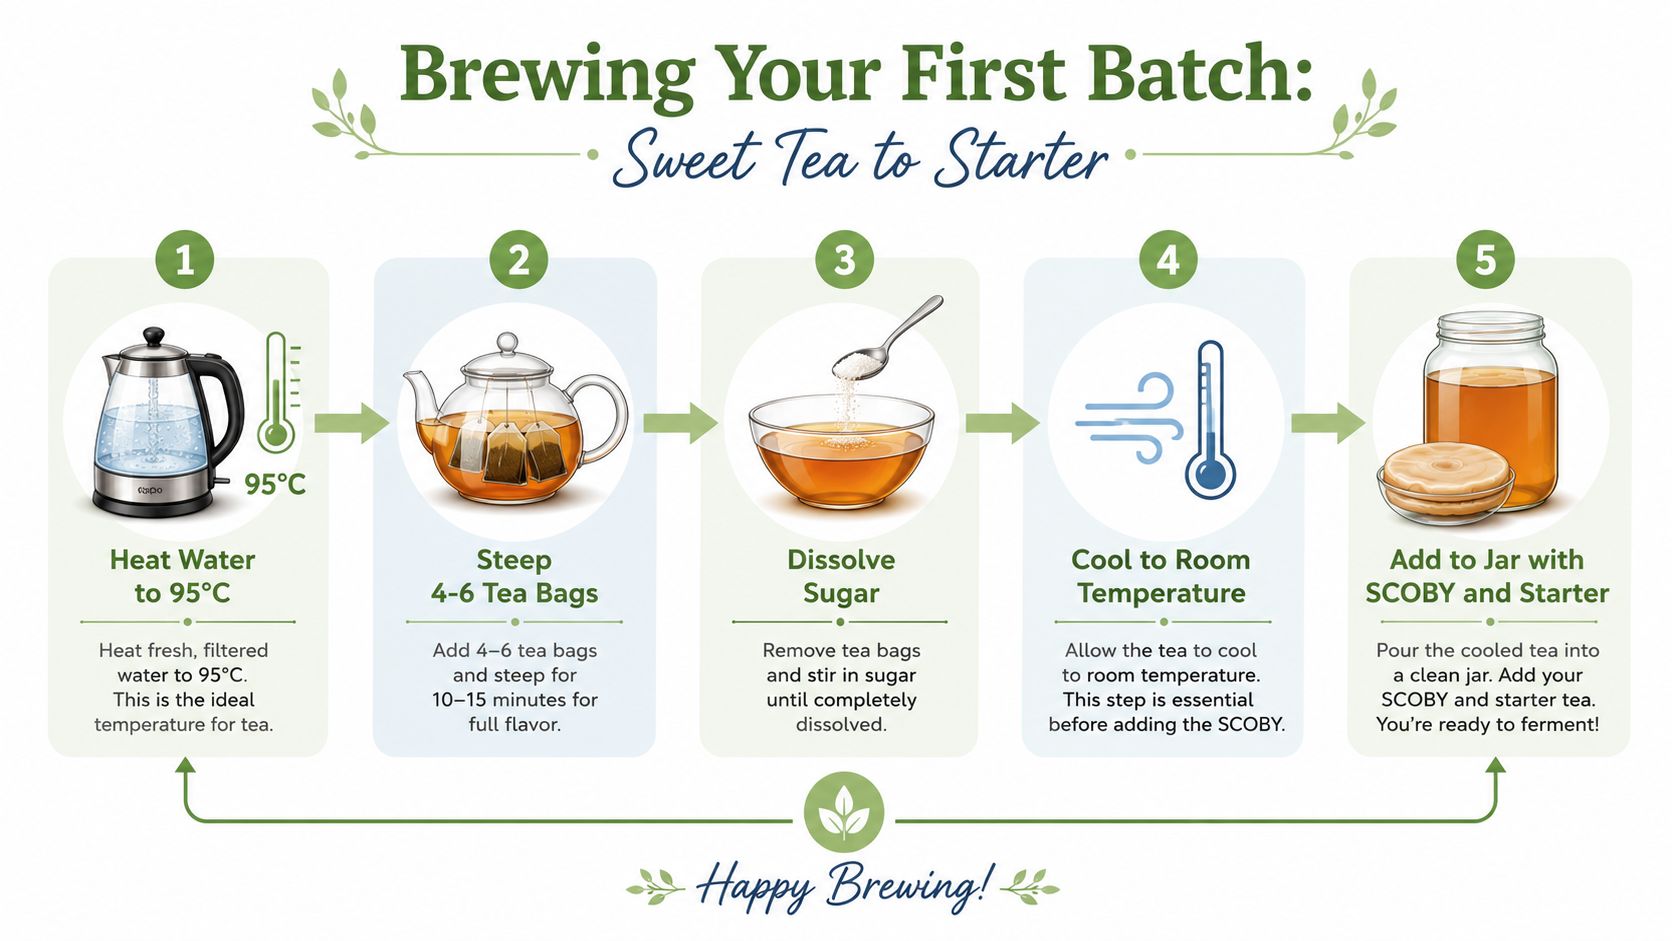
Heat filtered water to about 95°C, then steep four to six tea bags per litre for ten to fifteen minutes. Remove the tea bags or strain the loose leaves before the brew becomes harsh. While the tea is still hot, dissolve roughly 70 to 90 grams of cane sugar per four litres. Stir until no crystals remain on the base of the vessel.
Cool the sweet tea below 30°C before adding starter liquid or the SCOBY. Temperatures above 40°C can damage or kill the culture, so don't rely on a warm-to-the-touch test. An ice bath around the saucepan or brewing pot speeds cooling, but keep unboiled water out of the tea.
Pour the cooled tea into a sanitised brewing jar. Add starter liquid at roughly 10% of the batch volume, which is typically 400 ml for a four-litre brew, then place the SCOBY on top. It may float, sink or sit at an angle. Its position isn't a reliable measure of health.
Within the first day, a healthy culture may bring the brew to around pH 4.0 to 4.5. The useful temperature window for starting is approximately 22 to 28°C. If the tea remains warm, sweet and unchanged, check the thermometer, starter quality, sanitation and pH rather than adding more sugar at random.
Keep the jar away from direct sunlight, strong kitchen odours and high-traffic areas. Cover it with the breathable material described above, label the batch with the date and tea blend, and record the initial temperature and pH. That small record makes later troubleshooting far easier.
This video can help visual learners see the broad sequence, but use the Australian safety milestones in this guide when deciding whether your own batch is ready.
Primary and Secondary Fermentation Explained
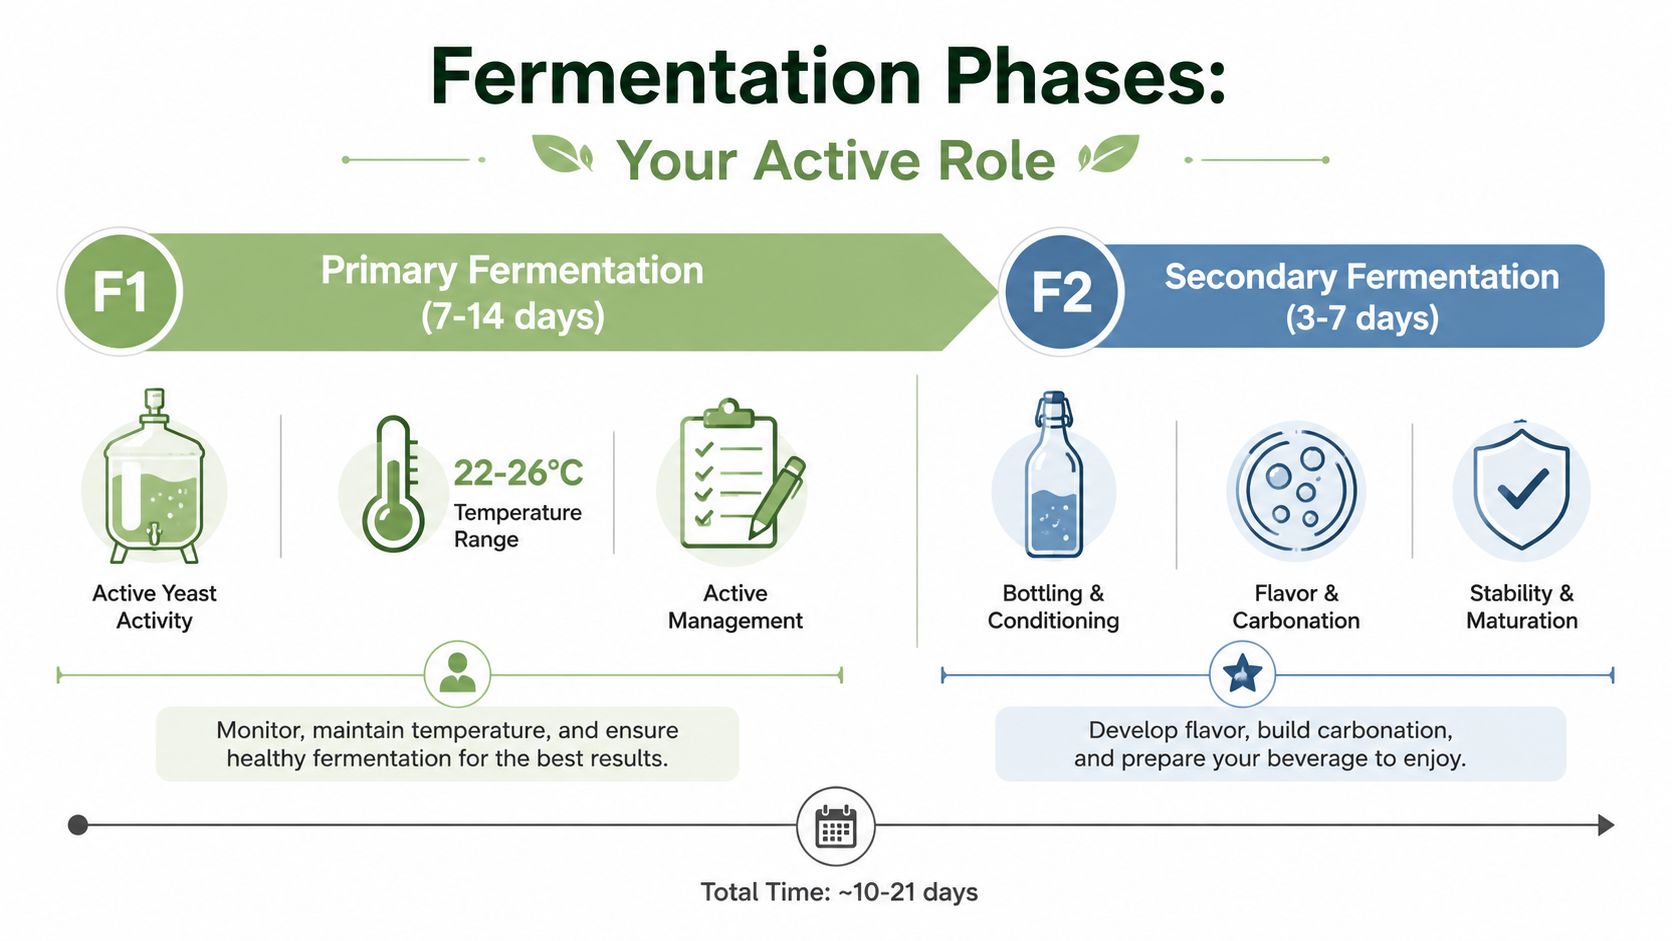
Primary fermentation, often called F1, is where the culture converts sweet tea into kombucha. Secondary fermentation, or F2, happens after you remove the SCOBY and bottle the liquid for flavour development and carbonation. Treating them as separate checkpoints prevents a common mistake, adding fruit or sealing the jar before the base has developed enough acidity.
F1 is an active phase
A practical Australian home-brewing window is seven to fourteen days at 22 to 26°C. Below 20°C, the culture can slow substantially, while a warmer room can accelerate fermentation and change the balance between sweetness, acidity and alcohol production.
Taste the liquid as it develops. A ready base is usually less sweet, lightly tart and sometimes slightly vinegary, with tea still present. Cheap pH strips may show approximately 3.2 to 3.8 at this stage, but don't use taste or the calendar alone to make a safety decision.
Fruit flies are a serious contamination risk. Secure a fine cloth with a rubber band, and inspect the cover regularly. A solid lid may seem cleaner, but it can trap carbon dioxide during an active ferment and create pressure in a vessel not designed to manage it.
F2 builds flavour and pressure
When F1 tastes balanced, remove the SCOBY and reserve mature starter liquid for the next batch. Strain the kombucha if needed, then decant it into clean swing-top bottles or thick PET bottles, leaving three to four centimetres of headspace.
Add fruit, juice, ginger, herbs or a carefully measured sugar addition. Seal the bottles and leave them at room temperature for two to five days, checking pressure as the liquid carbonates. Then refrigerate for a 24 to 48 hour cold crash. Cold storage slows yeast activity and makes opening less dramatic.
For glass bottles, use a cautious burp test. Open slightly over a sink, listen for pressure and close the cap if the release is aggressive. A leaking seal, bulging PET bottle, unusually hard glass bottle or forceful spray indicates over-pressurisation. Don't shake the bottle or open it near your face.
For a more detailed explanation of flavour development and bottle conditioning, use Pep Tea's guide to kombucha second fermentation. The important principle is simple: F1 develops the base, while F2 adds variables, so don't combine both phases when you're still learning to read your culture.
The Australian Alcohol Question Most Guides Skip
Kombucha can contain alcohol because yeast produces alcohol during fermentation. The amount varies with the culture, sugar availability, temperature, fermentation time and storage conditions. Australian regulatory material makes clear that this variation isn't theoretical.
A nationally coordinated Australian survey of fermented soft drinks found 35.2% were under 0.5% ABV, 41.9% were between 0.5% and 1.15% ABV, and 22.9% were above 1.15% ABV. These figures come from the Food Standards Australia New Zealand survey summary, and they show why a recipe alone can't guarantee a no-alcohol result.
In Australia, fermented soft drinks containing more than 0.5% ABV must carry an alcohol-content statement, while NSW Health says products above 1.15% ABV are treated as alcoholic drinks under NSW rules. NSW Health also warns that fermented drinks can contain varying alcohol levels and advises vulnerable consumers, including pregnant women, drivers and machine operators, to check labels before drinking. Read the NSW Health guidance on fermented drinks and alcohol before serving home brew to anyone who needs to avoid alcohol.
Factors That Increase ABV in Home Brewed Kombucha
| Factor | Effect on ABV | Practical control |
|---|---|---|
| Longer F1 fermentation | Gives yeast more time to ferment available sugar | Taste regularly and use pH records |
| Warmer room conditions | Can accelerate microbial activity | Keep the jar in a stable, moderate location |
| Extra sugar in F2 | Provides more fermentable material in a sealed bottle | Keep additions measured and conservative |
| Extended storage | Fermentation can continue if the drink stays warm | Refrigerate finished bottles promptly |
| Unpredictable culture balance | Yeast and bacteria may behave differently between batches | Keep batch notes and test when certainty matters |
Home controls can improve consistency, but they can't prove a batch is alcohol-free. Keep primary fermentation within a shorter, closely observed window, avoid excessive F2 sugar and refrigerate promptly. If you're serving pregnant guests, drivers, people taking medication or anyone avoiding alcohol for religious reasons, a laboratory test is more dependable than taste, a recipe or a home assumption.
People choosing mindful alternatives can also explore non-alcoholic beer options for 2026, while recognising that home brew kombucha needs its own fermentation controls.
Flavouring, Bottling, and Storing Your Batch
Flavouring is where a plain tea base becomes your house kombucha. A clean F1 gives you a better canvas than an over-fermented base, so taste the liquid before adding anything. If it already tastes sharply vinegary, fruit won't hide the imbalance. It will usually make the drink busier and harder to correct.
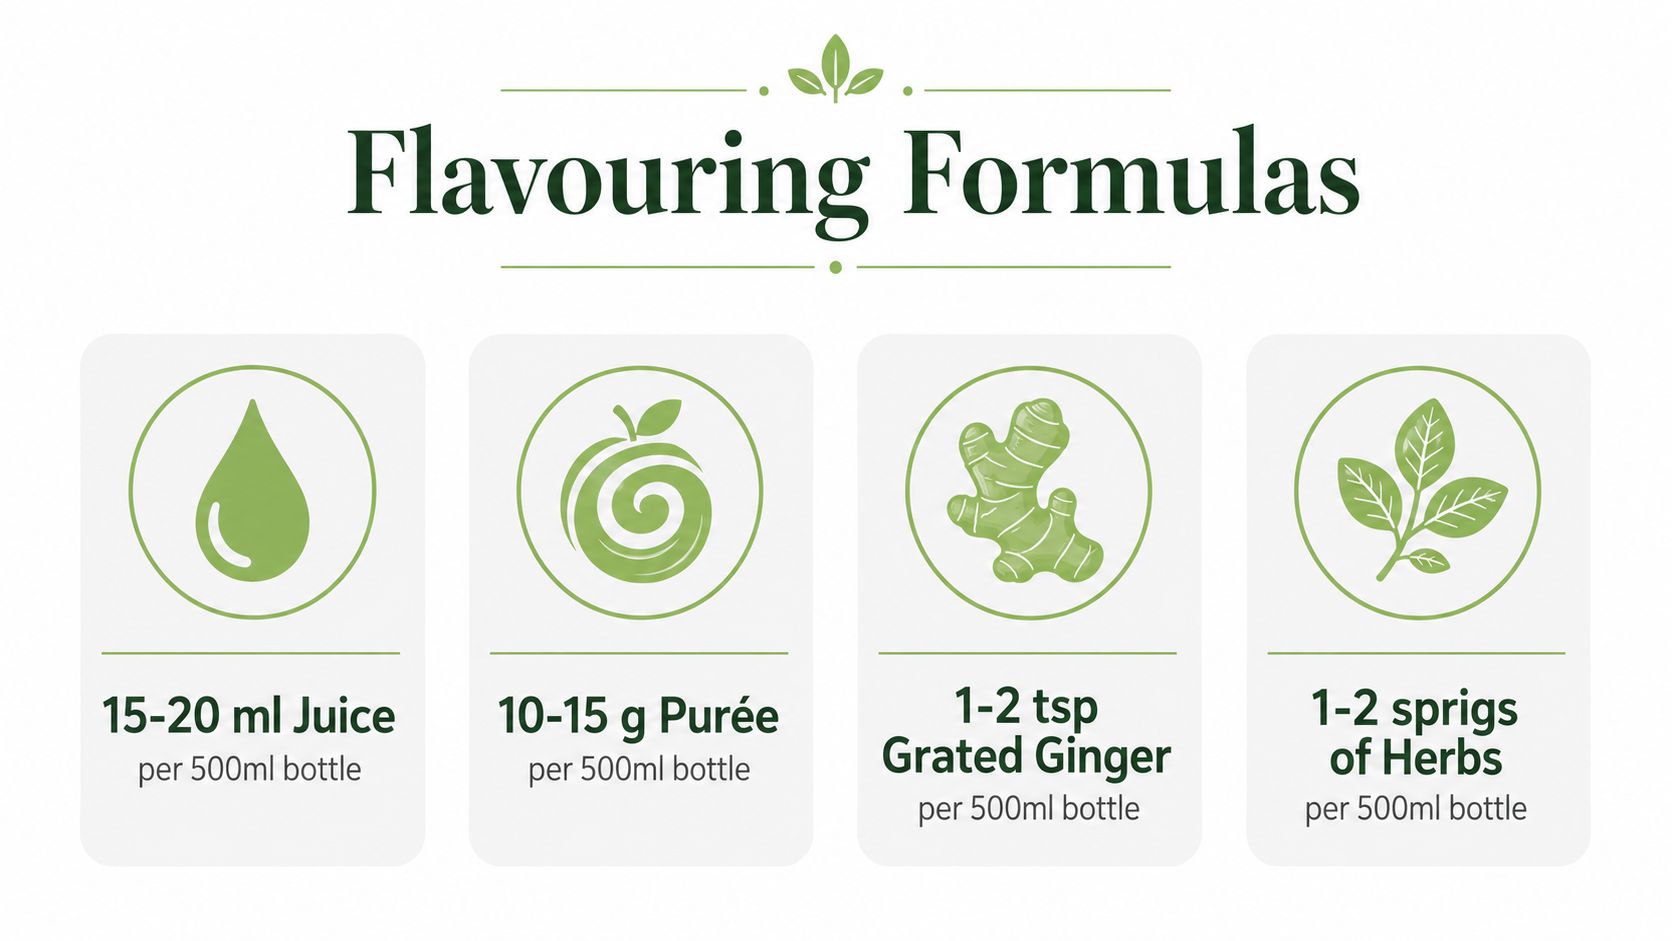
For a 500 ml bottle, start with one of these measured formulas:
- Juice: Add 15 to 20 ml for a clear fruit note.
- Purée: Use 10 to 15 grams for a fuller fruit texture.
- Dried botanicals: Try one to two teaspoons of ginger or hibiscus.
- Extra carbonation: Add five to ten grams of sugar only when you understand how quickly your bottles build pressure.
The most useful habit is a flavour log. Write down the tea, F1 taste, pH, fruit amount, room conditions, bottling date and carbonation result. A bottle that works beautifully with lime and ginger becomes a repeatable recipe instead of a one-off accident.
Choose bottles for the pressure you create
Swing-top glass looks good and works well when you monitor pressure, but it demands care. Thick PET bottles let you squeeze the sides and feel carbonation building, making them useful while learning. Repurposed commercial bottles are less predictable, especially if they weren't designed for secondary fermentation, so they shouldn't be your default.
Once the flavour is right, refrigerate finished bottles at 4°C. Cold slows yeast activity and helps preserve carbonation. An unopened bottle can remain at peak carbonation for three to six months, while an opened bottle should be consumed within three days.
A mature F1 vessel can also support continuous brewing. Remove a portion of finished kombucha and replace it with fresh sweet tea every seven to ten days, while keeping the vessel clean and monitoring acidity. Continuous brewing saves handling time, but it also makes contamination and drift harder to notice, so it suits organised brewers rather than anyone seeking a completely hands-off setup.
Troubleshooting Common Fermentation Problems
Fermentation faults are detective work. A new shape on the SCOBY doesn't automatically mean failure, and a pleasant smell doesn't automatically prove safety. Look at when the problem appeared, check pH, smell the liquid carefully and compare the batch with your records.
What happens early
During the first days, the surface may remain quiet. The SCOBY can sink, float, tilt or develop a thin new layer, and those changes don't by themselves diagnose a problem. A brown, stringy material is often yeast sediment or culture growth, especially when it appears without fuzzy patches or an unpleasant smell.
A sharp vinegar aroma usually means the acid-producing organisms are active. A lack of visible pellicle formation may reflect a culture adapting to a new tea, temperature or vessel. Check the temperature and pH before changing the recipe.
The Food Safety Information Council recommends fermentation at 18 to 26°C for about seven days, with pH falling below 3.0 by day seven. If it hasn't reached that point, the guidance says to continue fermentation with daily pH checks. Follow the Australian kombucha safety guidance rather than relying on appearance.
Recognise contamination
Mould usually appears as dry, fuzzy growth in colours such as blue, white or black. Fuzzy bubbles and spreading surface patches are not the same as smooth yeast strands or a new wet pellicle. If mould is present, discard the entire batch, including the SCOBY and starter liquid. Don't skim the surface and continue.
Kahm yeast can form a pale, wrinkled film and may smell yeasty. It isn't the same visual pattern as mould, but a questionable culture isn't worth rescuing when you're unsure. Strong cheesy odours, rotten aromas or bread-like smells that have gone wrong are discard signals.
Don't use a batch that remains above pH 4.6 after seven days. The Australian guidance's lower pH milestone is a useful safety checkpoint, while a persistently high reading suggests the culture hasn't acidified the tea as expected. Clean the equipment thoroughly and restart with fresh ingredients and reliable starter liquid.
Solve end-of-cycle problems
Flat kombucha usually means F2 lacked fermentable material, the bottle seal leaked or the drink was refrigerated before carbonation developed. Over-carbonation points to too much fermentable sugar, excessive time at room temperature or an active culture in a tightly sealed bottle. Open pressure-heavy bottles slowly over a sink, and don't keep them warm while hoping for more fizz.
A sour beer-like flavour can reflect an imbalanced or overextended ferment. A slimy texture may signal culture stress, excessive polysaccharide production or contamination. If the texture is accompanied by an off smell, unusual colour or uncertain pH, discard rather than trying to filter the batch.
Don't rescue a batch because you dislike wasting ingredients. Rescue it only when the evidence says the batch is sound and the fault is clearly flavour or carbonation.
Maintain a SCOBY hotel
A SCOBY hotel is a separate jar containing spare pellicles submerged in mature kombucha. It gives you backup cultures and a place to store layers you aren't using, but it still needs a breathable cover, clean handling and regular pH checks. Remove old layers when the vessel becomes crowded or the culture looks neglected.
A hotel isn't a substitute for fresh starter liquid. The liquid itself provides the acidic inoculation needed for a new batch, so reserve mature kombucha each time you brew. If the hotel smells foul, develops mould or fails to maintain suitable acidity, discard it and restart rather than treating it as an emergency supply.
Scale only when the process is repeatable
Moving from a home jar to a continuous-brew vessel changes the operational risk. Moving from there to café or retail volumes adds food-safety registration, documented sanitation, pH logging, ABV testing, batch traceability and consistent starter ratios. A larger vessel doesn't forgive inconsistent habits. It magnifies them.
Cafés should also plan for refrigeration, bottle pressure, staff handling and customer questions about alcohol. Commercial supplier support can help with SCOBY cultures and ongoing technical backup, including the type of support Pep Tea provides to cafés, but the venue still needs its own documented procedures and compliance checks.
Reliable brewers tend to share a few habits:
- Record every batch: Note ingredients, temperature, pH, taste and dates.
- Trust measurements over the calendar: A scheduled day isn't proof that fermentation is ready.
- Keep the culture fed: A hungry or repeatedly stressed SCOBY produces less predictable results.
- Inspect before tasting: Appearance, aroma and vessel condition come first.
- Refrigerate deliberately: Cold storage slows ongoing fermentation but doesn't erase alcohol already produced.
Pep Tea offers Australian-brewed sugar-free organic kombucha from the Hunter Valley, NSW, alongside organic Japanese matcha and kombucha-focused resources for home users and cafés. Visit Pep Tea to explore the range, learn more about dependable fermentation and choose a practical option for your next mindful drink.