
Tag: flip-top bottles
Home Brew Bottles: A Practical Buying and Safety Guide
You've probably got a few bottles sitting in the garage right now, and you're trying to decide which ones are worth keeping for kombucha or cider. Some look sturdy enough, some came with a drink you liked, and a few are cheap enough that you're tempted to reuse them no matter what. That's where people get into trouble, because home brew bottles have to survive carbonation first, and only then do they need to play nice with Australian recycling rules later.
Pick the bottle for the pressure job, not for sentiment. A bottle that looks tidy on the bench can still fail if the glass is weak, the seal is worn, or the closure was never meant for pressure in the first place.
The Four Bottle Families Worth Knowing
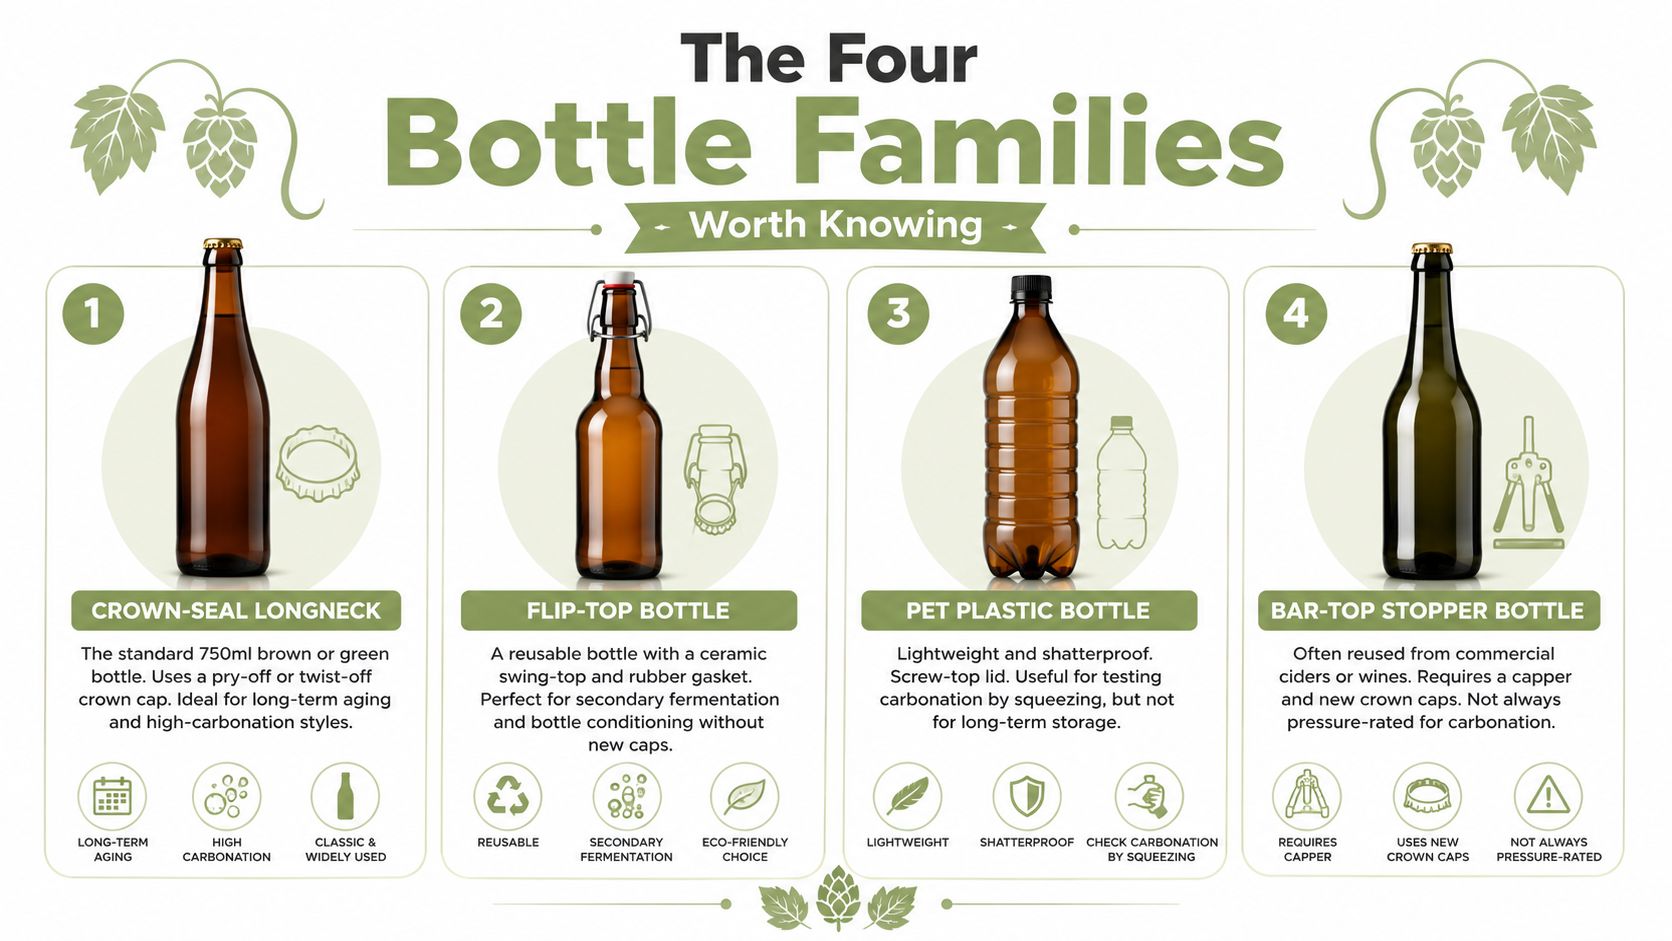
The Australian shelves mostly give you four families of bottles, and they're not interchangeable. If you buy the wrong type, you don't just get poor carbonation, you get leaks, flat drink, or a cleanup job you didn't want.
Crown-seal longnecks and why they still matter
A crown-seal longneck is the plain workhorse. The standard 330 ml crown-seal glass bottle is so common in microbreweries and home-brew setups that Australian retailers treat it as a default size, not a niche pick (The Brew Shop). It suits small pours, sample bottles, and any brew you want to hand out without committing to a big serving.
Use them when you want a tidy, consistent format and you're happy to cap with fresh crowns. Don't use twisted old beer bottles that were never designed to seal properly, because they're a lousy bet once carbonation starts building.
Amber flip-tops are the practical middle ground
A 500 ml amber flip-top is the bottle I'd reach for most often in a kombucha or cider bottling line. Australian suppliers market them as a premium option for beer, cider, kombucha, seltzer, and sparkling drinks, and the amber glass is doing real work here by protecting light-sensitive drinks (The Brew Shop).
They're ideal when you want reusable closures without hunting for caps every time. The weak point is simple, if the gasket, wire bail, or ceramic stopper is tired, the whole system starts leaking.
Grolsch-style swing-tops belong in pressure jobs
A Grolsch-style swing-top is built for bottle conditioning, not for wishful thinking. In the Australian market, pressure-capable reusable flip-top bottles are sold for fermented and carbonated drinks, including 750 ml models for kombucha, kvass, kefir, ginger beer, and lager (Aussie Brewmakers).
These are the bottles you buy when pressure is part of the plan. If the wire bail is corroded or the porcelain stopper is chipped, retire it without drama.
PET and reused commercial bottles have a narrow job
PET plastic bottles and reused commercial bottles can be useful, but only for low-pressure work. PET is handy when you want to see carbonation by squeeze, but it isn't the bottle I'd trust for long ageing or secondary fermentation. Reused commercial glass can work for still or lightly fermented liquids, but if it wasn't built for pressure, don't pretend it was.
Practical rule: if the drink is going to keep making gas in the bottle, use a bottle that was built for gas.
Matching Bottle Size to the Brew You Actually Make
Size matters, but not in the lazy way often assumed. A bigger bottle doesn't automatically mean a better bottle, and a smaller bottle isn't always safer. Headspace, serve size, and pressure margin matter more than the number printed on the label.
Smaller bottles suit shared samples and controlled carbonation
A 330 ml crown-seal bottle is the neat choice for small-batch kombucha samples and cider pours you want to share cold. It gives you less liquid per unit, which makes it easier to split a batch and compare outcomes without opening a big bottle and losing the lot.
A 500 ml amber flip-top is the everyday sweet spot for many home brewers. It's easy to pour, easy to store, and practical when you're bottling a batch you expect to drink across the week.
A 750 ml flip-top is a better fit when the bottle itself is part of the presentation, especially for sharing pours and bottle-conditioned styles. It looks proper on a table, but it asks more from the glass and the seal, so don't fill it with something that's still wildly active.
| Bottle Size vs Brew Use | Size & Type | Capacity | Headspace | Pressure Margin | Best Brew Use |
|---|---|---|---|---|---|
| Small sample bottle | 330 ml crown-seal | Small | Tight but manageable | Good when capped correctly | Small-batch kombucha shares, cider sample pours |
| Everyday reusable | 500 ml amber flip-top | Medium | Sensible for most home batches | Comfortable for moderate carbonation | Kombucha, ginger beer, routine bottling |
| Presentation bottle | 750 ml flip-top | Large | Needs disciplined fill levels | Strong if the bottle and gasket are sound | Bottle-conditioned saisons, farmhouse ales, cider sharing pours |
Headspace beats raw capacity
Too much air slows conditioning, because there's more space for the gas to spread out before you feel any firmness. Too little headspace leaves no room for thermal expansion, which is exactly the kind of mistake that gets ugly in a hot Aussie garage.
So choose the bottle around your actual brewing habit. If your fridge shelf is shallow, your batch is small, or you want easy cold storage, that matters more than whatever looks impressive on the rack.
Sanitising Bottles the Way Commercial Brewers Do
Clean bottles don't just look better, they protect the batch. If you leave residue in there, you're giving wild microbes a place to hang on, and no-rinse sanitiser alone won't save you.
Start with rinse, scrub, and real cleaning
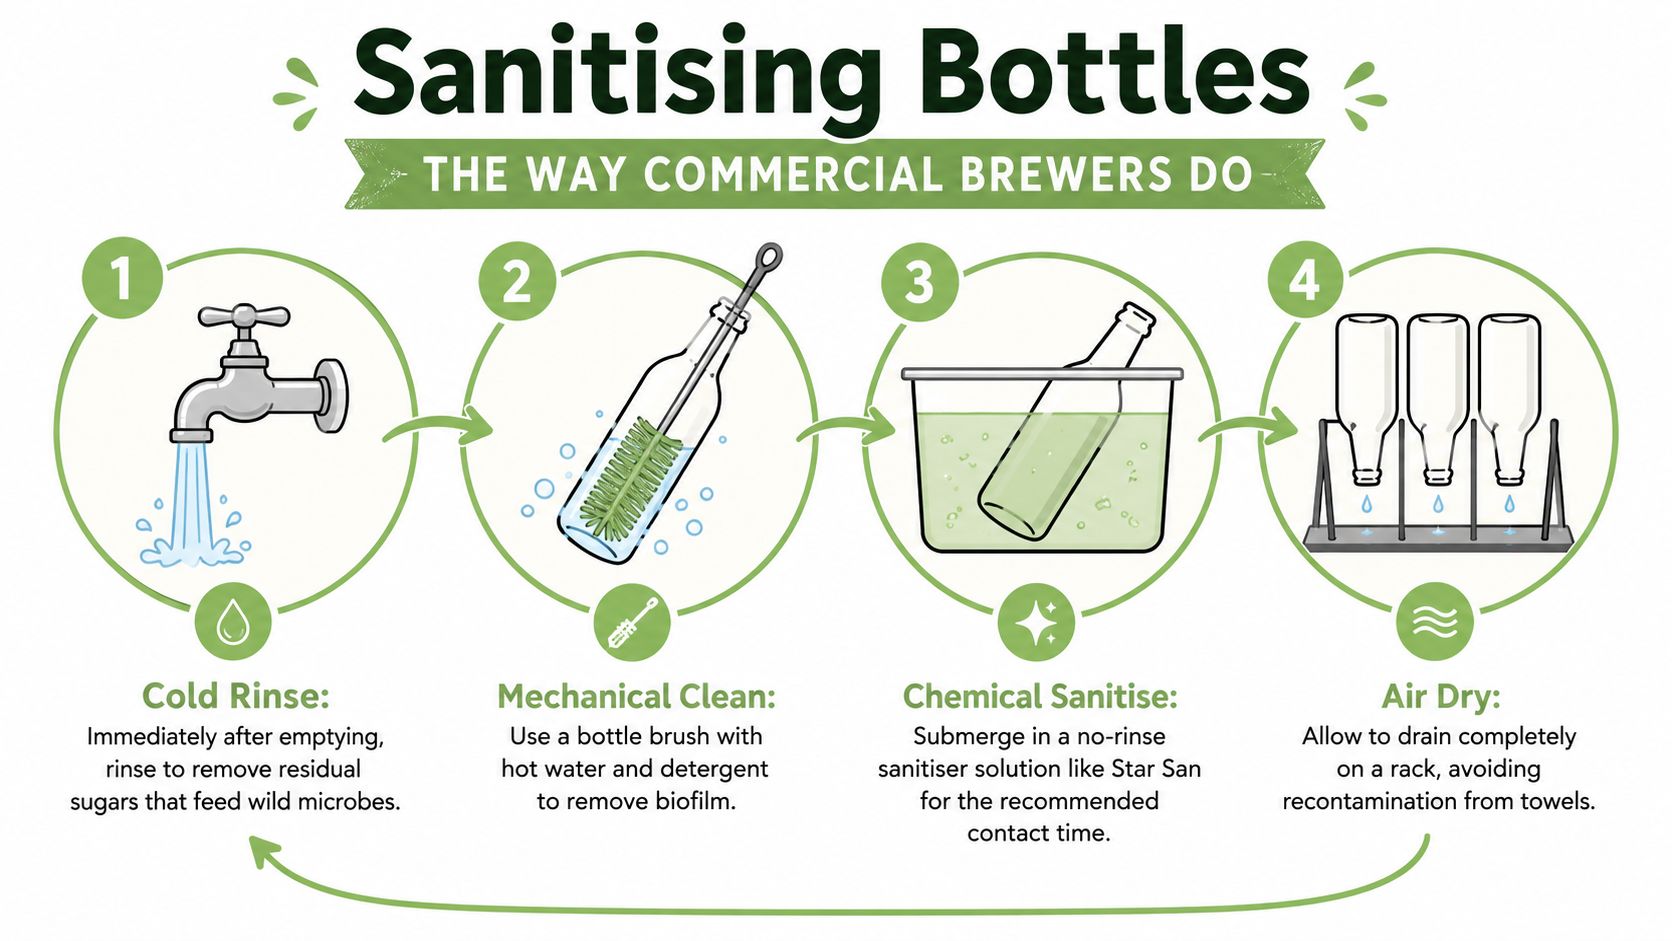
Cold rinse first, because leftover sugars feed the wrong microbes. Then give the bottle a proper hot caustic or PBW soak to strip the brewing soils off the glass walls, not just the visible bits.
After that, rinse thoroughly with tap water so the cleaner doesn't sit there and interfere with fermentation. If you skip the caustic or detergent soak, you're leaving biofilm behind, and sanitiser won't penetrate that on its own.
Finish with a no-rinse sanitiser and clean drying
Use a no-rinse sanitiser such as Star San or iodophor right before filling, and make sure it touches every internal surface. That final step matters because it knocks back the organisms that survive handling and air exposure.
Then dry bottles upside down on a sanitised rack so you don't drag lint, towel fibres, or sink grime back inside. If you're bottling into a bucket, do that instead of tube-filling when you want lower oxidation risk and a more even fill.
Skip the towel. Towels reintroduce dirt faster than most brewers realise.
A practical bottle-cleaning option sits in this fermenting glass jar guide, which is worth a look if you're setting up a tidy kitchen workflow around fermentation gear.
Carbonation Safety and Pressure Limits
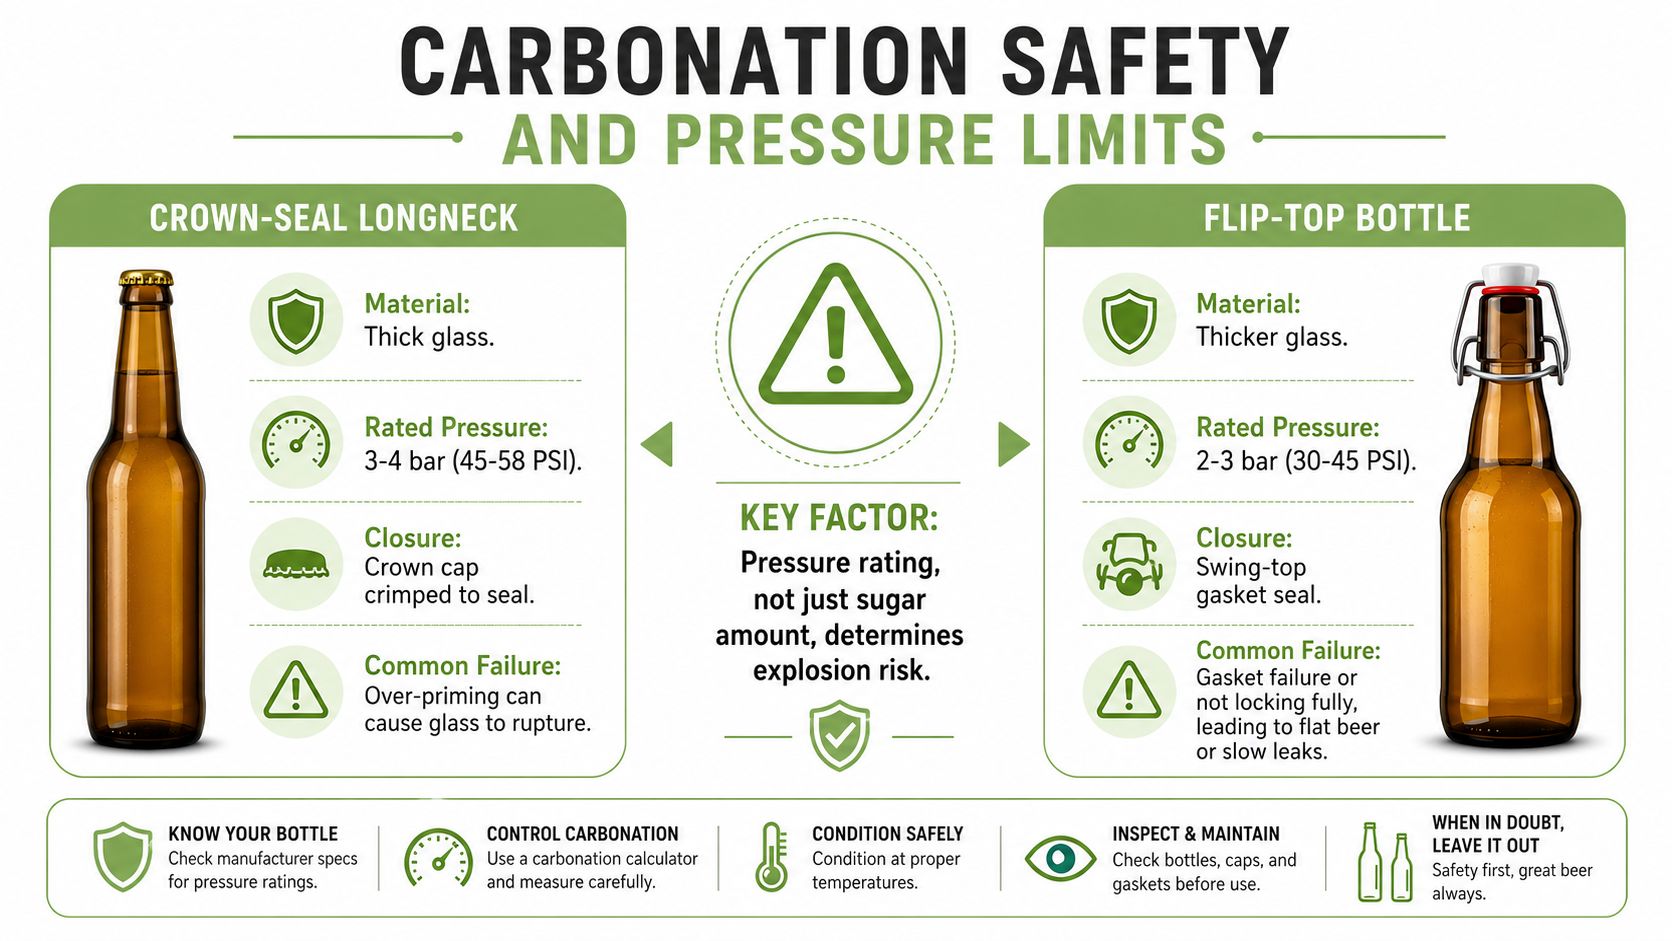
A bottle can look spotless and still fail under carbonation. The risk comes from pressure building inside a container or closure that was never designed to hold it, even when you measured the priming sugar carefully.
Read the bottle like a pressure vessel
Treat reusable home-brew glass as pressure-rated equipment, not ordinary kitchen storage. Standard bottles can fail at roughly 100–150 psi, according to Pitch and Pour's bottle-bomb safety guidance. That gives you no room for casual acceptance of chips, scratches, worn seals, or closures that do not seat properly.
For kombucha and lightly carbonated ferments, aim for the practical range of 1.5 to 3 volumes of CO2. That pressure level points you towards purpose-built flip-tops or beer bottles, rather than random reused glass. Measure priming sugar with a calculator instead of guessing. A small error can create far more pressure than the bottle or closure can safely contain.
Inspect the weak points before filling
Check the shoulders, base, and closure before every fill. Reject chipped shoulders, hairline cracks at the base, weakened porcelain stoppers, and corroded wire bails. A defect that is barely visible can still reduce the bottle's safety margin.
For an unfamiliar flip-top, test the seal with warm water before bottling. During conditioning, treat a bottle that feels rock-hard as a warning. Chill it to slow yeast activity, then keep it contained in a sturdy box or tub. Wear eye protection and gloves while handling it.
Choose the right bottle for kombucha
PET and ordinary crown-seal bottles are poor choices for kombucha unless the bottle is pressure-rated and its closure remains sound. Actively fermenting drinks need a seal built to contain gas, not a cap that merely keeps the top covered.
Follow a reliable kombucha second fermentation guide when setting up the process. The key rule is straightforward: the seal and pressure rating matter more than the bottle's label or appearance. Select the container for the carbonation it must survive, then plan how you will safely retire it when it no longer meets that standard.
When Reused Bottles Are and Aren't Worth the Risk
Reusing commercial bottles feels thrifty, but thrift stops being smart once pressure enters the picture. A bottle that was fine for oil, sauce, or still storage isn't automatically fine for carbonation, and sentiment won't hold a crown cap shut.
What reused glass is good for
Reused sauce, passata, and olive-oil bottles can work for still ferments or short-term storage. They're fine when the liquid isn't building gas and you're not asking the bottle to hold pressure for days or weeks.
The trouble is that these bottles often have thin walls, single-use seals, and no verified pressure rating. Once a bottle has held hot liquids, been dropped, or developed a cloudy interior that won't scrub clean, I'd retire it without arguing with myself.
Retire bottles by evidence, not hope
If the thread won't seat a crown cap properly, bin it. If you can see a stress mark, bin it. If the seal is visibly tired, bin it. That's the standard I use, because a cheap replacement is better than a broken bottle and a sticky kitchen.
| Reused vs Purpose-Built Bottles | Bottle Type | Typical Pressure Rating | Best Use | Retire When |
|---|---|---|---|---|
| Reused commercial glass | Sauce, passata, olive oil bottles | Not verified for carbonation | Still ferments, vinegar, short-term storage | Any chip, crack, cloudiness, hot-liquid history, or poor closure fit |
| Purpose-built crown-seal | Beer-style crown bottles | Pressure-rated for the job when sound | Carbonated beer, kombucha with crown caps | Visible damage, rusty finish, repeated seal failures |
| Purpose-built flip-top | Amber or clear swing-top bottles | Designed for carbonation when rated | Secondary fermentation, cider, kombucha, ginger beer | Worn gasket, bent bail, damaged stopper, or leaks |
Purpose-built bottles can run many cycles if you inspect them properly. Reused commercial bottles usually don't earn that same trust, and in a pressure line, trust has to be earned every single time.
End of Life, Recycling, and Container Deposit Rules
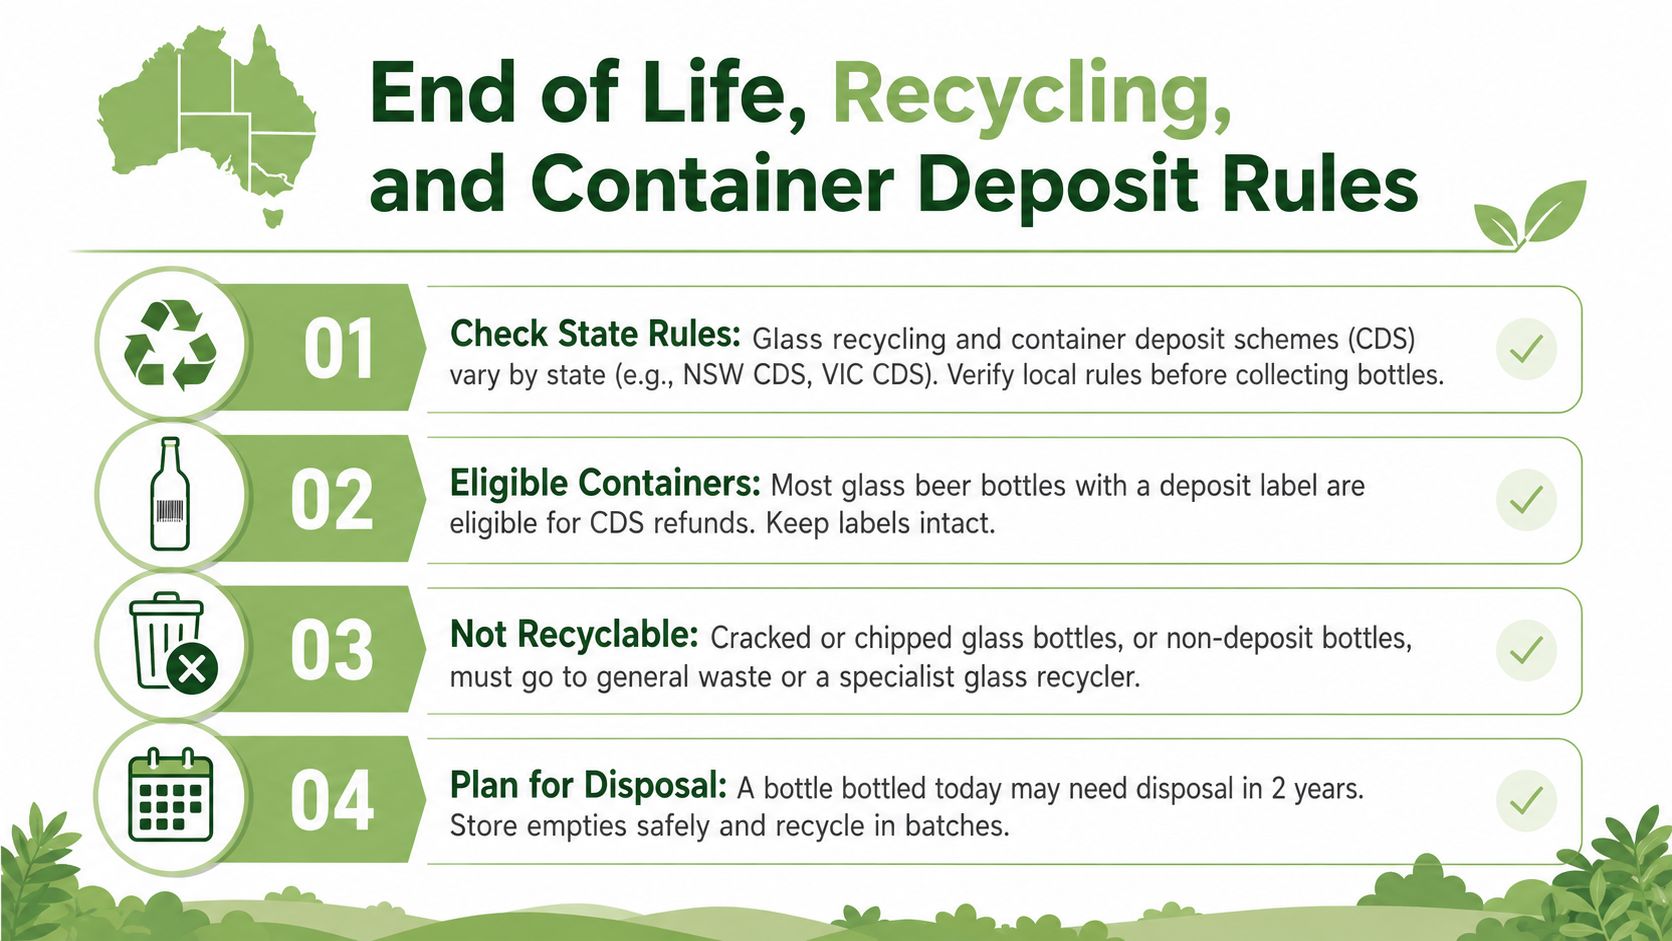
A bottle shouldn't disappear into the wrong bin just because it's empty. In Australia, the end-of-life path depends on the state, the container type, and whether the bottle is whole or broken.
Know the state rules before you stockpile empties
NSW and the ACT run Return and Earn with a 10-cent refund per eligible container, and many glass bottles qualify if the barcode is registered and the size sits in the 150 ml to 3 L range, according to the scheme guidance (Return and Earn). Victoria also runs a container deposit system, while Queensland, Western Australia, South Australia, Tasmania, and the Northern Territory mostly lean on kerbside recycling for whole glass bottles.
That's where the confusion starts. A bottle can be reusable for brewing, recyclable in kerbside glass, or eligible for a refund depending on where you live and what it originally held.
Broken glass needs a different exit
Broken ferment bottles should never go in kerbside bins. If a bottle is chipped, cracked, or shattered, take it to a community recycling station, a glass-crush facility, or a dedicated drop-off point used by metro councils instead.
Drain and rinse bottles before disposal, and remove flip-top seals so the metal, rubber, and glass don't complicate sorting. In the states with deposit systems, check whether the container is still eligible before you lug a crate around for nothing.
Build a retirement routine that keeps you organised
The simple habit is this, drain, remove seals, segregate chipped stock, and bag glass for drop-off rather than binning it. That keeps your bottling area safer and makes it easier to decide what's worth washing again and what's finished.
If you bottle a drink today, it may sit around for ages before you retire the container. Store empties safely in the meantime, because the disposal choice is part of the bottling decision, not an afterthought.
A Practical Buying and Bottling Framework
Start with the drink. Kombucha, water kefir, and low-alcohol ferments push you toward 500 ml amber flip-tops, because they give you a sensible balance of handling, carbonation control, and reuse. Hard cider and heavily primed ginger beer call for 750 ml pressure-rated bottles only when the bottle and closure are up to the job.
Run the same check every time
Before you bottle, confirm the seals and gaskets are sound. Sanitise properly, prime accurately rather than guessing, and then bottle-bucket when you want a cleaner transfer and lower oxygen exposure.
Then manage the finish like a brewer, not a gambler. Chill bottles once they've reached the carbonation you want, and don't let them keep warming up in a shed while you hope for the best.
One option in this space is Pep Tea's home brew kombucha guide, which fits neatly if you're building a kitchen-friendly fermentation routine around reusable bottles and low-sugar drinks.
Buy with disposal in mind
Check whether the bottle type is accepted in your state's recycling or deposit scheme before you buy a crate of them. Storage space matters too, because a great bottle is useless if you can't stack, wash, and return it without cluttering the place.
Choose by pressure first, size second, colour third, and aesthetics last. If the bottle won't hold the gas safely, nothing else about it matters.
Pep Tea makes organic matcha and sugar-free kombucha in Australia, and both fit neatly into a bottle-conscious kitchen or café setup. If you're sorting out your bottling gear and want drinks that align with a cleaner routine, visit Pep Tea and explore what we brew, blend, and supply.