
Tag: kombucha carbonation troubleshooting
Kombucha Second Fermentation Not Fizzy How to Fix It

You open a bottle, lean in for that little hiss, and get nothing. No sparkle, no lively bubbles, just a flat pour that tastes fine but feels disappointing. If your kombucha second fermentation is not fizzy, you're not alone. Nearly every home brewer lands here at some point, especially in a kitchen where room temperature shifts, bottle seals vary, and one batch behaves differently from the last.
The good news is that flat second ferment kombucha usually isn't a mystery. It's a pressure problem inside a closed bottle. Once you understand that, the fixes get much simpler. In a home setup, fizz only appears when yeast has something to eat, the bottle stays properly sealed, and the kombucha sits warm enough for long enough to make and hold carbon dioxide.
That closed-bottle idea matters in Australia too. Food Regulation notes that during kombucha's second fermentation, the bottle acts as a closed system, so carbon dioxide produced by yeast can't escape the way it does during first fermentation. That trapped gas is what creates carbonation, and the same process can also produce small amounts of alcohol, which is why control matters so much in practice (Australian Food Regulation issues paper).
I've bottled plenty of batches that looked perfect and still came out flat. Most of them came down to one of three things. Not enough sugar, a lazy seal, or a cold bench in winter. Once you know how to test those, you stop guessing and start fixing.
Why Your Kombucha Second Fermentation Stays Flat
You crack the bottle, pour a glass, and get almost no hiss. The flavour is fine, maybe even lovely, but it drinks more like iced tea than kombucha. That usually means the second ferment did not build or hold enough pressure inside the bottle.
The easiest way to understand flat second fermentation is to stop treating the bottle like storage and start treating it like a small pressure chamber. In first fermentation, gas can drift off into the air. In second fermentation, yeast makes carbon dioxide in a sealed space. If that gas is not produced fast enough, or the seal lets it slip out, the liquid stays flat.
A capped bottle works a bit like a bicycle pump with a loose valve. You can do the pumping, but if air escapes, pressure never builds. Kombucha behaves the same way. Sugar is the fuel, yeast is the worker, and the bottle has to keep the result contained long enough for the liquid to absorb that gas.
That closed-system idea matters outside the home kitchen too. Australian food regulators note that secondary fermentation happens in a sealed container where carbon dioxide is retained rather than vented, and that the same bottle-conditioning process can also keep fermentation going if it is not well controlled (Australian Food Regulation issues paper). For home brewers, that is the useful lesson. Fizz is not just about adding fruit and hoping for bubbles. It is about pressure management.
Commercial producers often sidestep this by force-carbonating, because it gives them tighter control than bottle-conditioning. At home, we are usually relying on live yeast to create fizz naturally. That can work beautifully, but only if three basic conditions line up.
- Enough fermentable sugar for the yeast to keep working after bottling
- A reliable seal that holds pressure instead of leaking it
- Warm enough conditions for yeast activity to continue
If one of those is off, the kombucha can taste perfectly decent and still pour flat. That is why second fermentation confuses so many brewers. Your tongue says the batch is done. The bottle says pressure never got a chance to build.
After a few hundred bottles, I have found that flat kombucha is rarely random. It usually leaves clues. A bottle with no hiss at all often points to sealing. A winter batch that barely changes after days on the bench usually points to temperature. A very dry, tart brew with no juice or sugar added at bottling often points to lack of fuel.
So if your kombucha second fermentation stays flat, read it as a closed-bottle pressure problem first. That frame makes the fixes much clearer.
The Most Common Reasons for No Fizz
You crack a bottle after a few days on the bench, pour it out, and get plenty of flavour but almost no sparkle. In a home kitchen, that usually comes back to one simple thing. The bottle never built or held enough pressure to push carbon dioxide into the liquid.
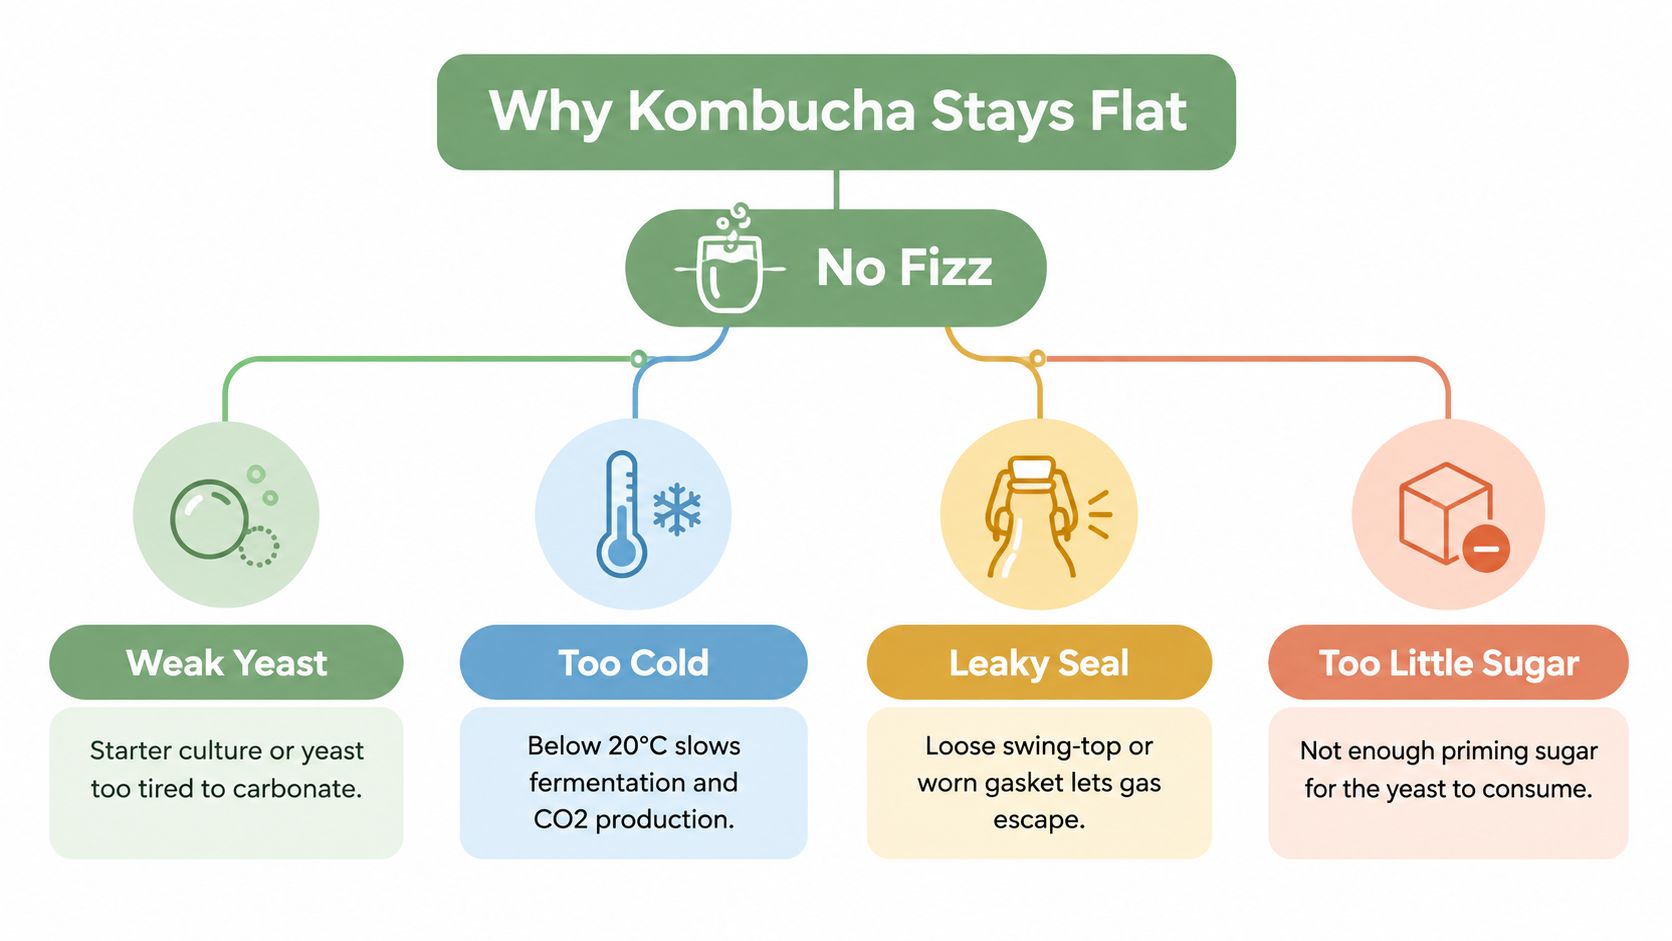
Four problems cause that pressure failure most often. They can look similar once the bottle is open, which is why flat second ferments can be so frustrating, but each one leaves slightly different clues.
Weak yeast in the bottle
Second fermentation depends on live yeast still being present at bottling. If you bottle only the very clear liquid from the top, or your brew has been sitting cold and quiet for a while, there may not be enough active yeast to produce much gas.
A little sediment is often helpful here. In home brewing, that cloudiness works a bit like having enough bakers in the kitchen. If too few turn up, the dough does not rise much.
If your kombucha tastes pleasant but seems dormant, our guide on how to restart a stuck fermentation can help you work out whether the culture needs waking up before you blame the bottle.
Too little fermentable sugar
Yeast cannot create pressure from thin air. It needs an easy food source after bottling. If first fermentation ran quite long, the brew may taste dry and tart because the yeast and bacteria have already used most of the simple sugars. Then, if you add no juice, fruit, or sugar at bottling, the second ferment has very little fuel left.
This catches plenty of brewers out because the kombucha can taste finished. Carbonation is a separate job. In a closed bottle, the yeast still needs something to convert into gas.
Leaky seals or bottles that do not hold pressure
This is one of the biggest troublemakers in home batches. The yeast can be working perfectly well, but the pressure leaks out faster than it builds. The result is a brew that seems flat even though fermentation did continue.
Old swing-top gaskets, screw caps that do not bite down properly, chipped rims, and decorative bottles not made for pressure are common causes. Commercial producers often avoid this variable by force-carbonating in controlled packaging, while home brewers are relying on the bottle itself to do part of the job. If the seal is poor, the whole pressure system fails.
One bottle fizzy and one flat from the same batch usually points here first.
Too cool for steady carbonation
Temperature changes how quickly yeast works. On a warm kitchen counter, bottles usually build pressure much faster than they do in a cold pantry, laundry, or draughty windowsill. In winter, a batch can sit there looking unchanged even though the culture is still alive.
That is why second fermentation often feels inconsistent in Australian homes. The recipe may be fine. The room is the variable.
If you chill bottles before pressure has had time to build, the yeast slows right down and the drink tends to stay flat. Refrigeration is great for stopping carbonation where you want it. It is not much help for starting carbonation in the first place.
Quick Diagnostic Checks Before You Rebrew
You crack a bottle after a few days on the bench, hear almost nothing, pour it out, and it tastes fine but lifeless. That usually means the brew itself is not ruined. More often, the bottle never built or held enough pressure.
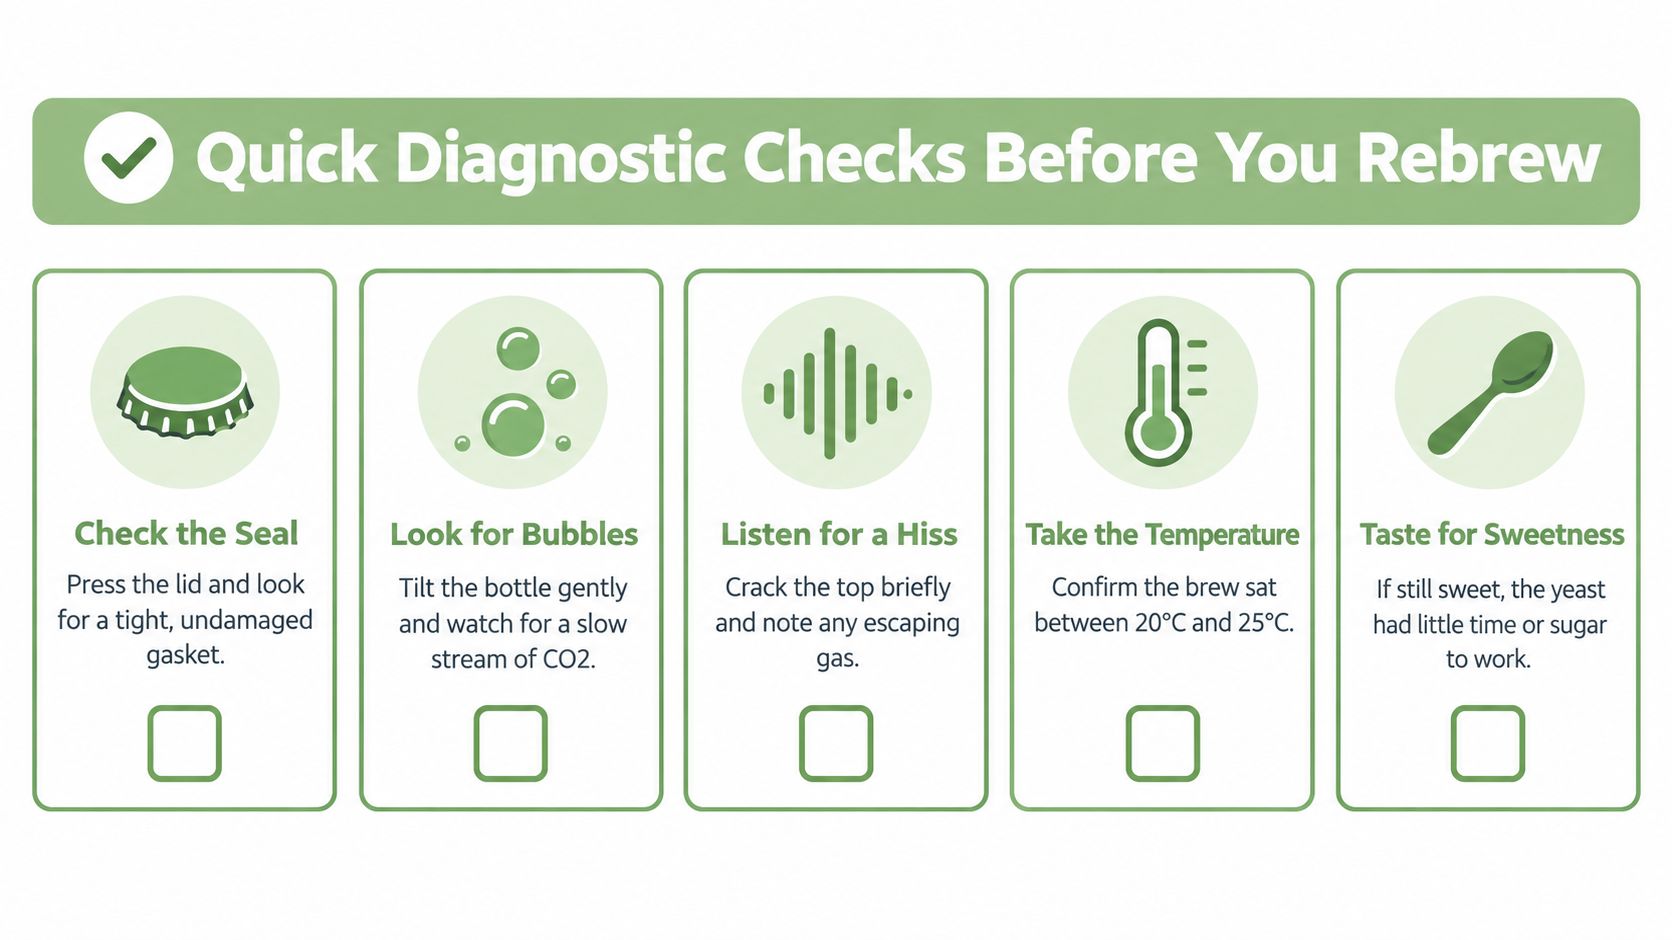
Before you start another full batch, treat the bottles you have like a simple closed-system test. Commercial Australian producers separate carbonation control from bottle-conditioning because pressure is the hard part to manage consistently. At home, the sugar, the seal, and the room temperature all have to line up inside one bottle. A quick check can show which part of that system has gone off track.
Start with pressure, not flavour
Pick one bottle and inspect the parts that control pressure first.
- Check the gasket or cap. Cracked rubber, a loose wire bail, a worn thread, or a cap that never tightened properly can let gas slip out.
- Check the bottle rim. A tiny chip or rough spot is enough to break the seal.
- Check the fill line. If one bottle has much more headspace than the others, it often carbonates more slowly and feels flatter.
- Turn the bottle gently. A few fine bubbles on the glass or a faint hiss when moved can mean fermentation happened, but pressure was weak or escaped.
If you want more consistency from batch to batch, a digital pH meter for kombucha brewing helps you keep first fermentation steadier before bottling day.
Use taste as a clue, not a verdict
Open one bottle carefully and taste it. You are not judging whether it is good or bad. You are looking for signs of where the pressure system broke down.
| Taste clue | What it often points to |
|---|---|
| Noticeably sweet | Sugar is still there, so the bottle may have been too cool or too early to build pressure |
| Tart, dry, and flat | The bottle may have run short on easy sugar for a strong second ferment |
| Balanced flavour, almost no fizz | Pressure likely leaked, even if the yeast did some work |
A bottle works a bit like a bike tyre. You need air going in, but you also need the valve to hold it. Kombucha is similar. Yeast can make gas, yet the drink still pours flat if the bottle never traps that gas properly.
Compare bottles before changing the whole batch
One fizzy bottle and three flat ones from the same bottling session usually point to packaging, not the brew. That is a handy clue because it saves you chasing the wrong fix.
Line the bottles up and compare them side by side. Are they all the same bottle type? Do the seals feel equally tight? Did one get more fruit pulp or juice than the others? Little differences matter in second fermentation because each bottle is its own tiny pressure vessel.
Check where the bottles actually sat
A warm kitchen shelf, a shaded bench, and a cold pantry can give three different results from the same batch. In many Australian homes, that is the hidden variable.
Use your hand and your habits. If the spot feels cool in the morning and stays that way most of the day, carbonation will usually creep along. If the bottles sat somewhere warmer and still stayed flat, pressure loss or low fermentable sugar becomes more likely.
Test one rescue bottle
Work with one bottle before you touch the rest.
If it was bottled plain, add a small splash of juice or a little fruit, reseal it, and put it in a warmer spot. If it wakes up, the brew likely needed a bit more fermentable sugar in the bottle. If it stays flat, pour that same kombucha into a pressure-safe bottle with a sound seal and test again. That tells you far more than rebrewing straight away.
Sediment can be a useful sign
A light dusting of yeast at the bottom is often reassuring. It shows there was at least some active culture in the bottle.
Crystal-clear kombucha can still carbonate, but if every bottle is perfectly clear and completely still, you may have bottled very little yeast along with the liquid. In practical home brewing terms, a small amount of suspended yeast often gives bottle-conditioning a better chance to get going.
How to Get Fizz Back With Sugar Temperature and Sealing
You bottle a batch, wait a few days, crack one open, and get little more than a quiet sigh. That usually feels like a fermentation failure, but in a home kitchen it is often a pressure problem inside a closed bottle. The yeast may be doing some work. The bottle just is not trapping and building that pressure well enough for you to feel it in the glass.
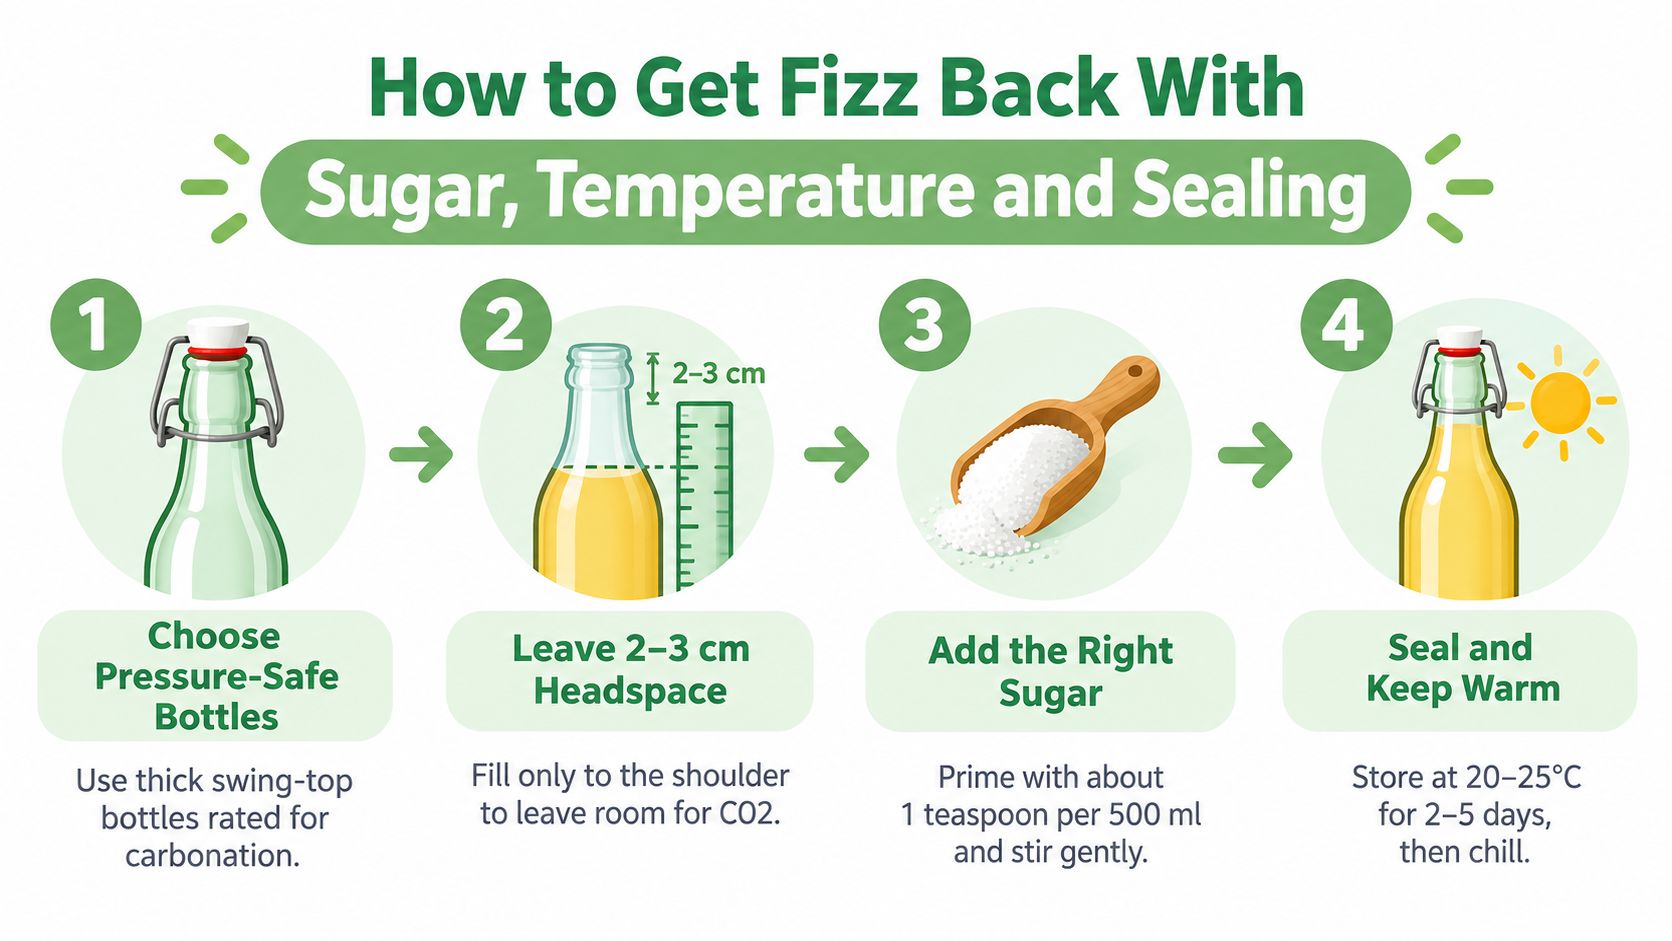
Commercial fizzy drinks solve this with tightly controlled carbonation and packaging standards. Home kombucha gets there by bottle-conditioning instead. Same destination, different method. Your job is to help the yeast make a little more gas, then make sure the bottle keeps it.
Start with the bottle, not the flavour
Use pressure-safe swing-top bottles or bottles made for carbonated drinks. A second fermentation bottle works like a tiny sealed tank. If the seal leaks, even slightly, the gas escapes bit by bit and the kombucha stays flat no matter how good the brew is.
Leave a small gap at the top rather than filling right to the brim. A little headspace gives the pressure room to build in a controlled way. Too much empty space can slow things down. Too little can make the bottle harder to manage.
Give the yeast something easy to eat
Second fermentation needs fermentable sugar in the bottle. Fruit and juice are handy because they bring flavour and sugar together, but the key part is the sugar, not the fancy flavour combo.
A practical starting point for a 500 mL bottle is:
- a small spoonful of sugar, or
- a splash of juice, or
- a modest amount of chopped fruit
If that sounds vague, that is because fruit sweetness varies wildly. A ripe mango behaves differently from lemon slices. Apple juice usually wakes up a slow bottle more reliably than low-sugar flavourings such as herbs, plain ginger pieces, or lots of citrus on their own.
Warmth controls the pace
Temperature is the throttle.
In a warm spot, the yeast works faster and pressure builds sooner. In a cool room, the same bottle can sit there looking lifeless even though the process has barely started. This catches plenty of Australian brewers out because kitchens swing so much between seasons, and even between the bench and the pantry.
Aim for a steady, comfortably warm room temperature. A cupboard that stays mild often works better than an exposed benchtop that cools overnight. Keep the bottles out of direct sun, which heats them unevenly and makes results harder to predict.
Seal, then leave it alone long enough
Once sugar, bottle, and temperature are sorted, seal the bottle firmly and give it uninterrupted time. Opening it too soon dumps pressure before it has a chance to build. It is a bit like pumping up a bike tyre while pressing the valve every few strokes. You are creating gas, then letting it straight back out.
If you are rescuing a flat batch, change one variable at a time so you can see what fixed it:
- Add a little fermentable sugar if the bottle tastes very dry
- Transfer to a bottle with a better seal if the cap looks doubtful
- Move it to a warmer, steadier spot
- Test one bottle first instead of the whole batch
That small, methodical approach saves a lot of guesswork.
Pep Tea's sugar-free organic kombucha, brewed in the Hunter Valley, NSW, is a useful example of a live fermented drink with consistent carbonation in the glass. Home batches will vary more, but the principle is the same. Fizz depends on gas being produced and held under pressure until you chill and pour.
Timing Burping and Chilling for Perfect Carbonation
You bottle a batch on Sunday, crack one open on Monday, hear almost nothing, and assume the second ferment has failed. In many cases, the yeast is working fine. The bottle just has not built enough pressure yet.
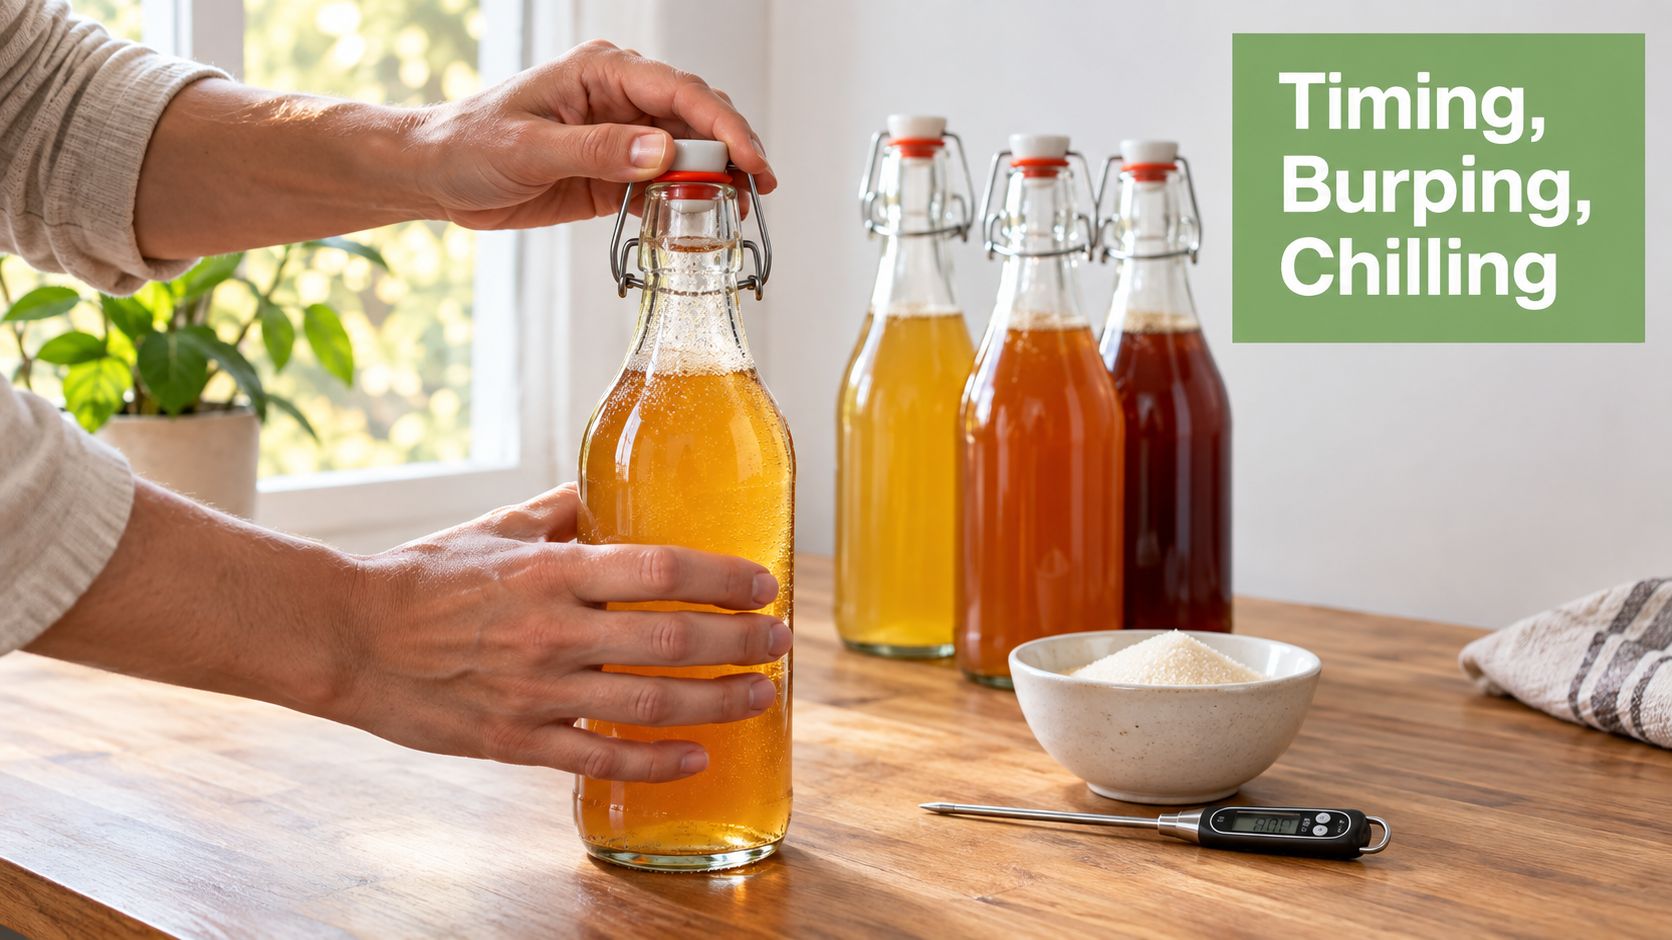
That distinction matters. Flat second fermentation is often a closed-system pressure problem, not a fermentation problem. Commercial producers in Australia have to treat carbonation and bottle pressure carefully for the same reason home brewers should. Gas only becomes fizz in the glass if the bottle holds it long enough.
Burping can help, but timing matters
“Burping” means briefly opening the bottle to release some pressure. Used sparingly, it can stop a very active bottle from turning into a gusher. Used too early, it works against you.
A second ferment bottle behaves a bit like a tyre valve. If you keep letting air out while trying to pump it up, pressure never gets where you want it. Kombucha is the same. Every early check can dump the carbon dioxide you were trying to trap.
In a cool or average kitchen, I usually leave bottles shut for the first couple of days unless I already know the batch is running hot and fast. After that, test one bottle, not the whole lot.
Follow a simple check rhythm
A steady routine works better than guessing from the calendar.
- Day 1 to 2: Leave the bottles sealed so pressure can build
- Day 3 onward: Open one tester bottle slowly
- A light hiss: Pressure is forming, give the rest more time if the flavour still seems flat
- A strong pop or fast foam rise: The batch is ready for chilling soon
- No sound at all after several days: Recheck the room temperature, then revisit earlier fixes for sugar or seal if needed
That one-bottle method saves a lot of fizz.
Your kitchen temperature changes the schedule
Across Australia, timing shifts more than many beginners expect. A warm Brisbane laundry cupboard can carbonate quickly. A cold Melbourne pantry in winter can take several extra days.
Here's the practical version:
| Your kitchen | What usually happens |
|---|---|
| Warm and steady | Pressure builds sooner, so check earlier |
| Mild with day-night swings | Carbonation comes on unevenly, so test carefully |
| Cool or draughty | Bottles often need more time before any hiss appears |
The bottle responds to its actual temperature, not the date on the label.
Chilling is how you hold the fizz where you want it
Once the tester bottle has the level of sparkle you like, move the batch to the fridge. Cold temperatures slow the yeast right down and help keep the carbon dioxide dissolved in the kombucha instead of pushing harder against the cap.
That is the part many home brewers miss. Room temperature builds pressure. Refrigeration stabilises it. If you leave a nicely carbonated bottle warm for too long, it keeps fermenting and the balance can shift from pleasantly fizzy to messy and overactive.
If you like a visual walkthrough of the bottling stage, this quick demo helps show the sealing and handling side of second ferment:
A low-stress way to track pressure
One handy trick is to fill one small plastic bottle along with your glass bottles. As pressure builds, the plastic firms up under your hand. It is not exact, but it gives you a useful pressure clue without venting every bottle.
If the plastic bottle still feels soft, wait. If it has gone firm, chill one glass bottle, open it carefully, and judge the fizz from there.
That approach works well in a home kitchen because it treats second fermentation for what it is. A pressure-building system that rewards patience, a good seal, and smart timing.
Safe Bottling Habits and Your Next Fizzy Batch
You crack a bottle over the sink, hoping for that tidy hiss, and instead you get either nothing at all or a wild foamy rush. Both outcomes come from the same place. Second fermentation is a closed bottle pressure job, and the bottle has to hold the gas at a steady rate, not lose it slowly or trap more than you expected.
The Western Australian Department of Health notes that carbon dioxide formation has been reported in fermented foods, resulting in excess pressure and bottle leakage, which is the same pressure issue home brewers are dealing with during second fermentation (WA fermented foods guideline). That lines up with what we see in the kitchen too. Good fizz depends on enough pressure building inside a sound bottle, then staying there until you chill and open it.
Bottles to avoid
Some bottles make that job harder than it needs to be.
- Thin decorative glass: Fine for serving, poor for pressure.
- Square bottles: The corners carry stress unevenly.
- Damaged swing-tops: Chips, flattened gaskets, rusting wires, or a lid that closes without firm resistance can all leak gas.
If you need a safer starting point, use proper home brew bottles for carbonated kombucha rather than repurposing whatever is in the cupboard.
A practical gasket check helps here. If the rubber seal looks cracked, feels stiff instead of springy, or stays flattened after you press it with a fingernail, replace it before the next batch. On heavily used swing-top bottles, checking gaskets every 6 to 12 months is a sensible routine in a home setup.
Habits that make pressure easier to control
These are the habits that save the most grief:
- Store bottles upright: The cap or gasket seals better, and sediment stays down.
- Keep them out of direct sun and away from hot spots: A shelf that creeps above about 28°C can push fermentation faster than you expect.
- Avoid cold rooms for active second ferment: Below roughly 18°C, yeast can slow enough that carbonation crawls along or stalls.
- Open new flavour batches over a sink with a towel over the top: It gives you control if one bottle has built more pressure than the others.
- Label the bottling date and flavouring used: That makes it much easier to spot patterns, especially if one fruit puree always runs faster than juice.
That last one matters more than it seems. Once you start treating fizz as pressure management instead of luck, your notes get much more useful. You can see whether the problem came from sugar load, a weak seal, or a bottle sitting too warm on the bench.
If it is still flat after fixing the basics
A flat batch is still drinkable. Use it in mocktails, salad dressings, or with sparkling water if you want a quick rescue.
Then change one variable on the next round. Swap the bottle type, or replace old gaskets, or shift the bottles to a steadier room temperature. One change at a time tells you what fixed the pressure problem and what did not.
Flat kombucha is useful feedback. It shows where the closed system stopped doing its job.
That is the habit that builds reliable fizz. Use bottles made for pressure, keep seals in good nick, avoid temperature swings, and treat bottle-conditioning with the same respect commercial producers give carbonation control. Your next batch has a much better shot at opening with the clean, lively sparkle you wanted.